

When I think of comfort food, Argentinian cuisine always comes to mind. Each recipe tells a story, evoking memories of family gatherings and cozy evenings. From the flaky empanadas to the rich locro stew, these dishes warm the heart and soul. I’m excited to share some of my favorites with you, each one a delicious reminder of home. Let’s explore these comforting flavors together and discover what makes them so special.
Empanadas: A Delicious Handheld Treat

Empanadas are a quintessential dish in Argentinian cuisine, beloved for their versatility and delightful flavors. These savory pastries are made by folding dough around a variety of fillings and then baking or frying them to perfection. Traditionally enjoyed as a snack or appetizer, empanadas can be filled with everything from seasoned meats to cheeses and vegetables, making them a favorite among locals and visitors alike.
Whether you’re hosting a gathering or simply craving a comforting treat, empanadas are certain to impress with their flaky crust and delicious fillings. Making empanadas at home isn’t only simple but also a fun culinary adventure. With some practice, you can create restaurant-quality empanadas that showcase your unique flavor combinations.
This recipe will guide you through the process of making classic beef empanadas, filled with a savory mixture of ground meat, spices, and onions. Once you master the basic technique, feel free to experiment with other fillings such as chicken, cheese, or vegetables to suit your taste.
Ingredients (Serves 4-6 people)
- 3 cups all-purpose flour
- 1/2 cup unsalted butter, chilled and diced
- 1/2 teaspoon salt
- 1/2 cup cold water
- 1 pound ground beef
- 1 onion, finely chopped
- 2 cloves garlic, minced
- 1 teaspoon cumin
- 1 teaspoon paprika
- Salt and pepper, to taste
- 1 hard-boiled egg, chopped
- 1/4 cup black olives, chopped (optional)
- 1 egg, beaten (for egg wash)
Cooking Instructions
- Prepare the Dough: In a large mixing bowl, combine the flour and salt. Add the diced butter and mix with your fingers or a pastry cutter until the mixture resembles coarse crumbs. Gradually add the cold water, mixing until the dough comes together. Knead briefly until smooth, then wrap in plastic wrap and refrigerate for at least 30 minutes.
- Cook the Filling: In a large skillet over medium heat, add a splash of oil and sauté the chopped onion until translucent, about 5 minutes. Then add the minced garlic and cook for an additional minute. Add the ground beef, cumin, paprika, salt, and pepper. Cook until the meat is browned and fully cooked, breaking it apart with a spoon. Stir in the chopped hard-boiled egg and olives, if using. Remove from heat and let the filling cool.
- Roll Out the Dough: Once the dough has chilled, dust a clean surface with flour. Divide the dough into small balls (about the size of a golf ball) and roll each ball out into a thin circle, approximately 6 inches in diameter.
- Fill the Empanadas: Place a generous tablespoon of the beef filling in the center of each dough circle. Fold the dough over to create a half-moon shape, making sure the edges align. Press the edges together to seal, then crimp the edges with a fork or your fingers for a decorative touch.
- Bake or Fry: Preheat your oven to 375°F (190°C) if baking. If frying, heat oil in a deep skillet over medium heat. For baking, place the empanadas on a parchment-lined baking sheet, brush the tops with the beaten egg, and bake for 20-25 minutes or until golden brown. For frying, cook the empanadas in batches until golden and crispy, about 3-4 minutes per side.
- Serve: Remove from the oven or skillet and let cool slightly before serving. Enjoy your delicious empanadas warm, with a side of chimichurri sauce or salsa for dipping.
Extra Tips
When making empanadas, it’s important to guarantee that the dough isn’t too thick; otherwise, the pastry can become chewy. If you find the dough is difficult to work with, try adding a little more water or letting it rest longer.
Additionally, feel free to customize your fillings based on your preferences or what you have on hand—empanadas are incredibly versatile! For an extra touch, serve them with a variety of dipping sauces to enhance the flavor experience.
Locro: Hearty Argentine Stew
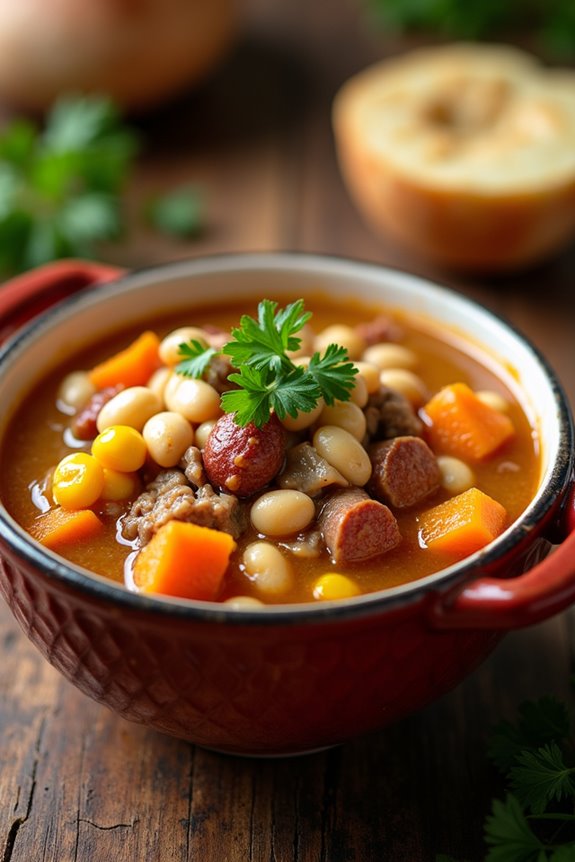
Locro is a traditional Argentine stew that embodies the rich culinary heritage of the country. Often enjoyed on national holidays, particularly during Argentina’s Independence Day, this dish is a comforting blend of fresh ingredients and robust flavors. Locro is a hearty meal, typically made with a variety of meats, beans, vegetables, and spices that come together to create a satisfying and nourishing dish. The recipe varies by region and family tradition, but its essence remains the same: a warm, flavorful stew that brings people together.
Cooking Locro may require a bit of time, but the effort is well worth it. The slow cooking process allows the flavors to meld beautifully, resulting in a deeply satisfying dish that warms the soul. Whether served with a side of crusty bread or enjoyed on its own, Locro is a delightful representation of Argentine cuisine, perfect for family gatherings or festive occasions.
Ingredients (serving size: 4-6 people)
- 1 cup dried white beans
- 1 cup corn kernels (fresh or frozen)
- 1/2 cup diced potatoes
- 1/2 cup diced carrots
- 1/2 cup diced pumpkin or butternut squash
- 1/2 cup chorizo sausage, sliced
- 1/2 cup beef, cut into small cubes
- 1/2 cup pork belly, diced
- 1 onion, chopped
- 2 cloves garlic, minced
- 1 teaspoon smoked paprika
- 1 teaspoon cumin
- 4 cups beef broth
- Salt and pepper to taste
- Fresh parsley, chopped (for garnish)
Cooking Instructions
- Soak the Beans: Begin by soaking the dried white beans in water overnight. This will help soften the beans and reduce cooking time. Drain and rinse them before adding them to the stew.
- Cook the Meats: In a large pot, heat a tablespoon of oil over medium heat. Add the diced beef and pork belly, cooking until browned on all sides. This step adds depth of flavor to the stew. Once browned, remove the meat from the pot and set aside.
- Sauté Vegetables: In the same pot, add the chopped onion and minced garlic. Sauté until the onion becomes translucent. This will enhance the overall flavor of the stew.
- Combine Ingredients: Return the browned meats to the pot, and add the soaked beans, corn, potatoes, carrots, and pumpkin. Stir to combine all the ingredients.
- Season the Stew: Sprinkle in the smoked paprika, cumin, salt, and pepper. Stir well to make sure that all the spices are evenly distributed among the ingredients.
- Add Broth: Pour in the beef broth, making certain that all the ingredients are submerged. If needed, add additional water. Bring the mixture to a boil.
- Simmer: Once boiling, reduce the heat to low and cover the pot. Allow the stew to simmer for about 1.5 to 2 hours, or until the beans are tender and the flavors have melded beautifully. Stir occasionally, and add more liquid if necessary.
- Final Adjustments: After the cooking time, taste the Locro and adjust the seasoning if needed. If you prefer a thicker stew, you can mash some of the beans against the side of the pot to thicken the broth.
- Serve: Ladle the Locro into bowls, garnish with fresh parsley, and serve hot. Enjoy with crusty bread or a side salad for a complete meal.
Extra Tips
For an authentic taste, consider adding other regional ingredients, such as different types of sausages or smoked meats. Additionally, you can customize the vegetables based on what’s in season or available to you. If you want to save time, using canned beans can speed up the cooking process. Remember that Locro tastes even better the next day, so making it ahead of time is a great option!
Alfajores: Sweet Treats to Satisfy Your Cravings

Alfajores are delightful Argentinian cookies that consist of two crumbly, buttery layers filled with a rich layer of dulce de leche, and often rolled in coconut or dusted with powdered sugar. These sweet treats have a rich history and are enjoyed throughout Latin America, especially in Argentina. The combination of textures and flavors makes alfajores an irresistible dessert or snack, perfect for any occasion, whether you’re celebrating a special event or simply treating yourself.
Creating alfajores at home is an enjoyable process that yields delicious results. The key to a great alfajor is achieving the right balance of tenderness in the cookie and sweetness in the filling. This recipe will guide you through making alfajores for a serving size of 4-6 people, guaranteeing that you can share these delightful treats with family and friends.
Ingredients
- 1 cup unsalted butter, softened
- 1 cup granulated sugar
- 2 large egg yolks
- 1 teaspoon vanilla extract
- 2 cups all-purpose flour
- 1 cup cornstarch
- 1 teaspoon baking powder
- 1 cup dulce de leche
- Shredded coconut or powdered sugar for dusting
Cooking Instructions
- Preheat the Oven: Begin by preheating your oven to 350°F (175°C). This guarantees the cookies bake evenly and become perfectly golden.
- Cream the Butter and Sugar: In a large mixing bowl, combine the softened butter and granulated sugar. Beat them together with an electric mixer on medium speed until the mixture is light and fluffy. This usually takes about 3-4 minutes. The goal is to incorporate air into the mixture for a light texture.
- Add Egg Yolks and Vanilla: Next, add the egg yolks and vanilla extract to the butter-sugar mixture. Continue to mix until fully incorporated, which should take about 1-2 minutes.
- Combine Dry Ingredients: In another bowl, whisk together the all-purpose flour, cornstarch, and baking powder. Gradually add this dry mixture to the wet ingredients. Mix on low speed until just combined, being careful not to overmix, as this can lead to tough cookies.
- Chill the Dough: Once the dough is formed, wrap it in plastic wrap and refrigerate for about 30 minutes. Chilling helps the dough firm up, making it easier to roll out.
- Roll and Cut Cookies: After chilling, remove the dough from the refrigerator. On a lightly floured surface, roll out the dough to about 1/4 inch thickness. Use a round cookie cutter to cut out circles. Place the circles on a baking sheet lined with parchment paper.
- Bake the Cookies: Bake the cookies in the preheated oven for 10-12 minutes, or until they’re just starting to turn golden. Keep an eye on them to avoid overbaking. Once done, let them cool on a wire rack.
- Assemble the Alfajores: Once the cookies have cooled completely, take one cookie and spread a generous layer of dulce de leche on the flat side. Top with another cookie to create a sandwich. Repeat this process with the remaining cookies.
- Finish with Coconut or Powdered Sugar: Finally, roll the edges of the alfajores in shredded coconut or dust with powdered sugar for an extra touch of sweetness and decoration.
Extra Tips
When making alfajores, it’s essential to use high-quality dulce de leche for the best flavor. If you prefer a different filling, you can also experiment with chocolate ganache or fruit preserves.
For a unique twist, try adding a hint of lemon zest to the dough for added freshness. Additionally, storing the assembled alfajores in an airtight container in the refrigerator will help them stay fresh longer, and they often taste even better the next day as the flavors meld together.
Enjoy your homemade alfajores!
Asado: The Ultimate Barbecue Experience

Asado isn’t just a dish; it’s a cultural experience that brings families and friends together around a grill. Originating from Argentina, this traditional barbecue style involves a variety of meats, often cooked slowly over open flames or hot coals, allowing the flavors to develop and the tenderness of the meat to shine.
The centerpiece of any asado is the selection of meats, which can include beef ribs, steak, and sausages, all seasoned simply with salt to let the natural flavors dominate. The gathering around the grill is as much a part of the experience as the food itself, where stories are shared, and laughter fills the air.
To prepare a true asado, you’ll need to gather the right ingredients and follow some straightforward steps. While it may seem intimidating at first, the key to a successful asado is patience and a good understanding of your grill. Whether you’re using a traditional parrilla (grill) or a modern barbecue, the principles remain the same: low heat, quality ingredients, and a genuine passion for the art of grilling.
So, gather your friends and family, and get ready to enjoy a delicious asado!
Ingredients (serving size: 4-6 people)
- 2 kg beef ribs
- 1 kg flank steak
- 500 g chorizo sausages
- 500 g morcilla (blood sausage)
- Coarse sea salt
- Freshly ground black pepper
- Chimichurri sauce (for serving)
- 1 loaf of crusty bread (for serving)
Cooking Instructions
1. Prepare the Grill: Start by preparing your grill. If using charcoal, light it and let it burn until the coals are covered in ash and glowing hot. For gas grills, preheat to a medium-high heat. The key is to create a two-zone fire: one side for direct heat and the other for indirect cooking.
2. Season the Meats: While the grill is heating, generously season the beef ribs, flank steak, chorizo, and morcilla with coarse sea salt. The salt will enhance the meat’s natural flavors. Avoid over-seasoning, as the goal is to allow the taste of the meat to shine through.
3. Cook the Meats: Place the beef ribs and flank steak on the hotter side of the grill. Sear them for about 5-7 minutes on each side to develop a nice crust. Once seared, move them to the cooler side of the grill to cook more slowly, allowing the meat to tenderize.
The sausages and morcilla can be added to the grill once the beef is seared, cooking them for about 15-20 minutes, turning occasionally.
4. Monitor Cooking Temperatures****: Use a meat thermometer to check the internal temperature of the beef. The ideal temperature for medium-rare is around 55-60°C (130-140°F). For the sausages, confirm they’re cooked through but still juicy, which should take about 10-15 minutes.
5. Rest the Meat: Once cooked to your desired doneness, remove the meats from the grill and let them rest on a cutting board for about 10 minutes. This resting period allows the juices to redistribute, resulting in more flavorful and tender meat.
6. Slice and Serve****: After resting, slice the meats against the grain and arrange them on a large serving platter. Serve with chimichurri sauce on the side for added flavor and crusty bread to accompany the meal.
Extra Tips
When hosting an asado, remember that it’s not just about the food but the entire experience. Encourage your guests to participate in the cooking process, sharing stories and laughter.
If you can, opt for high-quality, local cuts of meat, as this will elevate the dish considerably. Additionally, feel free to experiment with different types of meats or even vegetables for grilling, such as bell peppers and corn, to add variety to your asado feast.
Don’t forget to enjoy a glass of Malbec while you grill, as it pairs perfectly with the rich flavors of the meat!
Milanesa: A Comforting Breaded Cutlet

Milanesa is a beloved dish in Argentinian cuisine, celebrated for its comforting and satisfying qualities. Originating from the Italian “cotoletta,” this recipe has been adapted over generations, resulting in a crispy, golden-brown cutlet that can be made with beef, chicken, or pork.
Milanesa is typically served with a side of mashed potatoes, salad, or even in a sandwich, making it a versatile choice for any meal. Whether you’re looking for a hearty dinner or a delicious lunch option, this comforting breaded cutlet is sure to please.
This dish isn’t only simple to prepare, but it also allows for personal touches and variations. You can elevate your Milanesa by incorporating spices into the breadcrumbs or serving it with a squeeze of lemon for a revitalizing twist.
With its crunchy exterior and tender interior, Milanesa is a dish that will satisfy the whole family and bring the warmth of Argentinian flavors to your table.
Ingredients (Serves 4-6):
- 4-6 boneless beef, chicken, or pork cutlets (about 1/2 inch thick)
- 1 cup all-purpose flour
- 2 large eggs
- 2 cups breadcrumbs (preferably Italian-style)
- 1 teaspoon garlic powder
- 1 teaspoon onion powder
- 1 teaspoon paprika
- Salt and pepper to taste
- Vegetable oil (for frying)
- Lemon wedges (for serving)
Cooking Instructions:
- Prepare the Cutlets: Begin by flattening the meat cutlets to an even thickness of about 1/2 inch. You can do this by placing the cutlets between two sheets of plastic wrap and gently pounding them with a meat mallet or rolling pin. This step guarantees that the meat cooks evenly and remains tender.
- Set Up Breading Station: In three separate shallow dishes, set up your breading station. Place the flour in the first dish. In the second dish, whisk the eggs until well combined. In the third dish, combine the breadcrumbs with garlic powder, onion powder, paprika, salt, and pepper. This setup allows for an efficient coating process.
- Bread the Cutlets: Take one cutlet at a time and first dredge it in the flour, shaking off any excess. Next, dip it into the beaten eggs, making sure it’s completely coated. Finally, press it into the breadcrumb mixture, covering the cutlet thoroughly. Repeat this process for all cutlets and set them aside on a plate.
- Heat the Oil: In a large skillet or frying pan, heat about 1/4 inch of vegetable oil over medium-high heat. The oil is hot enough when a breadcrumb dropped into it sizzles immediately. This step is vital for achieving that desired crispy texture.
- Fry the Cutlets: Carefully add the breaded cutlets to the hot oil, making sure not to overcrowd the pan. Fry for about 3-4 minutes on each side or until golden brown and cooked through. Use tongs to flip them gently. Once cooked, transfer the cutlets to a paper towel-lined plate to drain any excess oil.
- Serve: Serve the Milanesa hot with a side of lemon wedges for squeezing over the top. You can pair it with mashed potatoes, a fresh salad, or even use it in a sandwich with your favorite toppings.
Extra Tips: When making Milanesa, it’s important to confirm your oil is at the right temperature; too low will lead to soggy cutlets, while too hot can burn the breading before the meat is cooked.
Feel free to experiment with different seasonings in the breadcrumb mixture to suit your taste. For a healthier option, you can also bake the breaded cutlets in the oven at 400°F (200°C) for about 20 minutes, flipping halfway through, until crispy. Enjoy your homemade Milanesa!
Provoleta: Grilled Cheese With a Twist
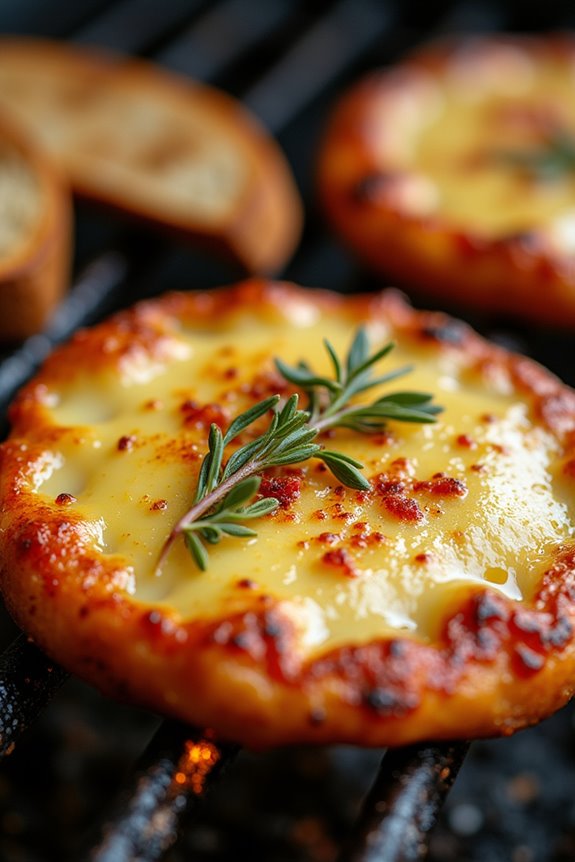
Provoleta is a beloved Argentinian dish that takes the classic concept of grilled cheese to a whole new level. This delicious appetizer features a thick slice of provolone cheese, grilled until it becomes gooey and bubbly, then topped with a sprinkle of herbs and spices. It’s commonly enjoyed as a starter during asados (Argentinian barbecues) and pairs beautifully with crusty bread for dipping. The dish’s simplicity and rich flavor make it a favorite among cheese lovers.
The key to a perfect provoleta lies in the quality of the cheese and the right cooking technique. Using high-quality provolone cheese enhances the dish’s flavor, while grilling it over an open flame adds a smoky depth that’s utterly irresistible. Prepare to impress your friends and family with this delightful treat that’s sure to transport them straight to the heart of Argentina.
Ingredients (Serving Size: 4-6 People)
- 1 large wheel of provolone cheese (about 1 pound)
- 1 tablespoon olive oil
- 1 teaspoon dried oregano
- 1 teaspoon crushed red pepper flakes (optional)
- Freshly ground black pepper, to taste
- Crusty bread, for serving
Cooking Instructions
- Prepare the Cheese: Start by selecting a high-quality provolone cheese. If the cheese is in a round shape, it’s perfect for grilling. If it’s in a block, slice it into a thick round piece, about 1 inch thick. This thickness helps prevent it from melting too fast and falling apart on the grill.
- Preheat the Grill: Preheat your grill to medium heat. If using a charcoal grill, allow the coals to burn down until they’re covered with white ash. For a gas grill, simply turn on the burners to the desired heat. A well-prepared grill will give the provoleta a nice char and enhance its flavor.
- Season the Cheese: Brush both sides of the provolone cheese with olive oil. This not only adds flavor but also helps to prevent the cheese from sticking to the grill. Next, sprinkle the top with dried oregano, crushed red pepper flakes (if using), and freshly ground black pepper.
- Grill the Cheese: Place the provolone cheese on the grill grate. Close the lid and let it cook for about 5-7 minutes, or until the cheese is bubbly and golden brown on top. Keep an eye on it to avoid burning; you want it to be beautifully melted without losing its shape.
- Serve: Carefully remove the grilled provoleta from the grill using a spatula. It will be very hot and gooey, so handle with care. Transfer it to a serving platter and serve immediately with crusty bread for dipping.
Extra Tips
When preparing provoleta, don’t hesitate to experiment with additional toppings such as fresh herbs or a drizzle of balsamic glaze for added flavor. You can also try different types of cheese, such as aged provolone or even mozzarella, but remember that the texture and flavor will vary.
For an even more authentic experience, serve it alongside chimichurri sauce for a zesty kick. Enjoy your provoleta with friends, and don’t forget to savor each cheesy bite!
Chocotorta: No-Bake Chocolate Cake
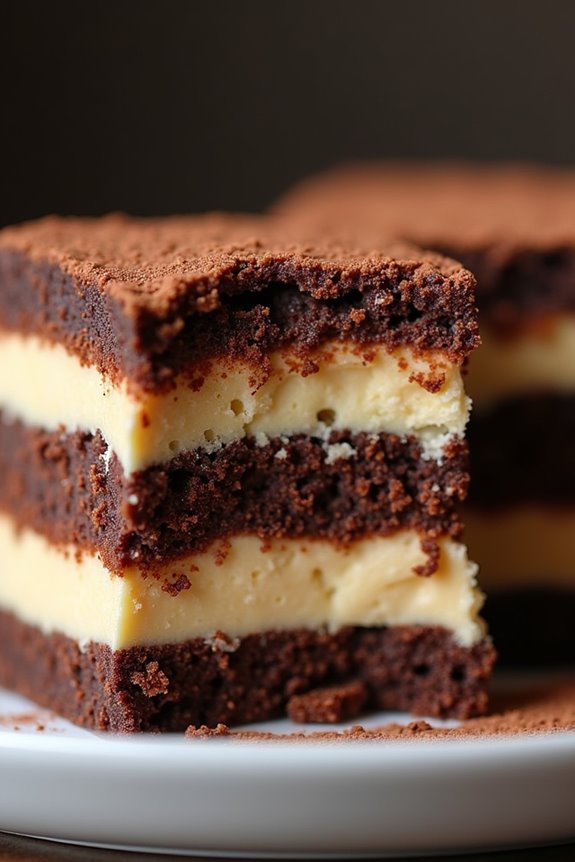
Chocotorta is a beloved Argentinian dessert that perfectly captures the essence of indulgence without the need for baking. This no-bake chocolate cake is made primarily with chocolate cookies, a rich cream cheese filling, and a touch of coffee, making it an easy yet impressive treat for any occasion.
Its layers create a delicious contrast between the crispy cookies and the smooth, creamy filling, making every bite a delightful experience. This dessert is perfect for gatherings, parties, or simply as a sweet treat to enjoy at home.
The beauty of Chocotorta lies in its simplicity and the fact that it can be prepared in advance, allowing the flavors to meld beautifully. With minimal ingredients and effort, you can create a stunning dessert that will leave your guests asking for seconds.
Ingredients (serves 4-6):
- 400g chocolate cookies (such as Chocolinas or any similar brand)
- 500g cream cheese
- 400g dulce de leche
- 1 cup strong brewed coffee (cooled)
- 1 teaspoon vanilla extract
- Cocoa powder (for dusting, optional)
Cooking Instructions:
- Prepare the Coffee Mixture: Brew a strong cup of coffee and let it cool to room temperature. This coffee will be used to soak the cookies, adding flavor and moisture to the cake.
- Mix Cream Cheese and Dulce de Leche: In a large mixing bowl, combine the cream cheese and dulce de leche. Use an electric mixer or a whisk to blend them together until the mixture is smooth and well-combined. This creamy filling will form the heart of the Chocotorta.
- Soak the Cookies: Take each chocolate cookie and quickly dip it into the cooled coffee, allowing it to soak for just a second on each side. Be careful not to let them get too soggy, as you want them to hold their shape in the layers.
- Layer the Cake: In a rectangular or square baking dish, start layering the soaked cookies at the bottom. Spread a layer of the cream cheese and dulce de leche mixture over the cookies. Repeat this process, alternating layers of soaked cookies and cream mixture until you reach the top of the dish. The final layer should be the cream mixture.
- Chill the Chocotorta: Cover the dish with plastic wrap and refrigerate the Chocotorta for at least 4 hours, or preferably overnight. This resting time allows the flavors to meld together and the cake to set properly.
- Serve: Once chilled, remove the Chocotorta from the fridge. Dust the top with cocoa powder if desired, then cut into squares or slices to serve. Enjoy this delightful no-bake dessert!
Extra Tips:
To enhance the flavor of your Chocotorta, consider adding a splash of rum or coffee liqueur to the coffee mixture for an adult twist. You can also experiment with different cookie varieties or add a layer of fruit, such as banana slices, for added texture and flavor.
Remember to let it chill long enough for the flavors to develop fully; the longer it sits, the better it tastes!
Humita En Chala: Steamed Corn Pudding
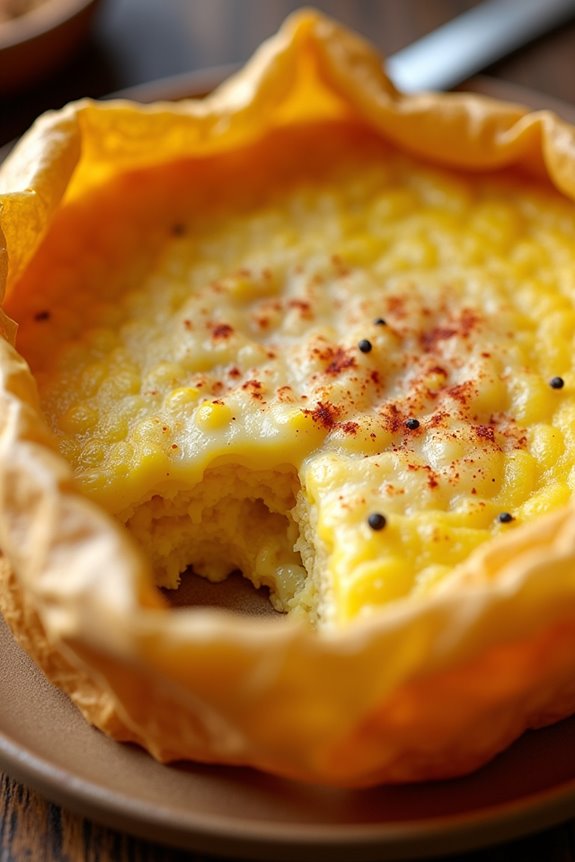
Humita en Chala is a traditional Argentinian dish that beautifully showcases the rich flavors of fresh corn. This dish consists of a savory corn pudding wrapped in corn husks and then steamed, which helps to infuse the flavors while keeping the pudding moist and tender. It’s a delightful combination of sweet and savory, often enjoyed as a snack or a side dish. The preparation of Humita en Chala can be a bit labor-intensive, but the delicious results are well worth the effort.
The base of this recipe is made from fresh corn, which is the star ingredient. When combined with onions, cheese, and spices, it creates a creamy and flavorful filling that’s wrapped in the natural casing of corn husks. This method of cooking not only enhances the taste but also adds an authentic touch to this beloved dish. Whether you’re sharing it with family or serving it at a gathering, Humita en Chala is sure to impress your guests and bring a taste of Argentina into your kitchen.
Ingredients (Serves 4-6)
- 4 cups of fresh corn kernels (about 6-8 ears of corn)
- 1 medium onion, finely chopped
- 2 tablespoons of butter
- 1 cup of crumbled queso fresco (or any mild cheese)
- 1/2 cup of milk
- 1 teaspoon of baking powder
- 1 teaspoon of salt
- 1/2 teaspoon of black pepper
- 1/4 teaspoon of paprika (optional)
- 12-15 corn husks, soaked in warm water for 30 minutes
Cooking Instructions
- Prepare the Corn Husks: Start by soaking the corn husks in warm water for about 30 minutes. This softens them and makes them pliable for wrapping. After soaking, drain them and set aside.
- Cook the Onions: In a skillet over medium heat, melt the butter. Add the finely chopped onions and sauté until they’re translucent and fragrant, about 5-7 minutes. Remove from heat and set aside to cool slightly.
- Blend the Corn: In a large bowl or food processor, combine the fresh corn kernels and milk. Blend until you achieve a smooth and creamy consistency, leaving some texture for added bite.
- Mix the Filling: In a large mixing bowl, combine the blended corn mixture with the sautéed onions, crumbled queso fresco, baking powder, salt, black pepper, and paprika (if using). Stir well until all the ingredients are thoroughly combined.
- Assemble the Humitas: Take a soaked corn husk and lay it flat. Spoon about 1/4 cup of the corn mixture into the center of the husk. Fold the sides over the filling and then fold the bottom up to enclose it securely. Repeat this process with the remaining husks and filling.
- Steam the Humitas: Arrange the wrapped humitas upright in a large steamer basket, ensuring they’re tightly packed. Fill the bottom of the pot with water and bring it to a gentle boil. Cover and steam for about 40-50 minutes, or until the humitas are firm and cooked through.
- Serve: Once cooked, carefully remove the humitas from the steamer and allow them to cool for a few minutes. Serve warm, either on their own or with a drizzle of cream or salsa.
Extra Tips
When preparing Humita en Chala, using fresh corn is ideal for the best flavor and texture. If fresh corn isn’t available, you can use frozen corn, but make sure to thaw and drain it well before blending.
Additionally, you can customize your filling by adding herbs or spices according to your taste preferences. For a sweeter version, consider adding a pinch of sugar or using a sweeter cheese.
Always remember to keep the water level in the steamer pot adequate to prevent it from drying out during cooking; check it occasionally and add more water as necessary. Enjoy your cooking experience!
Matambre: Flank Steak Roll
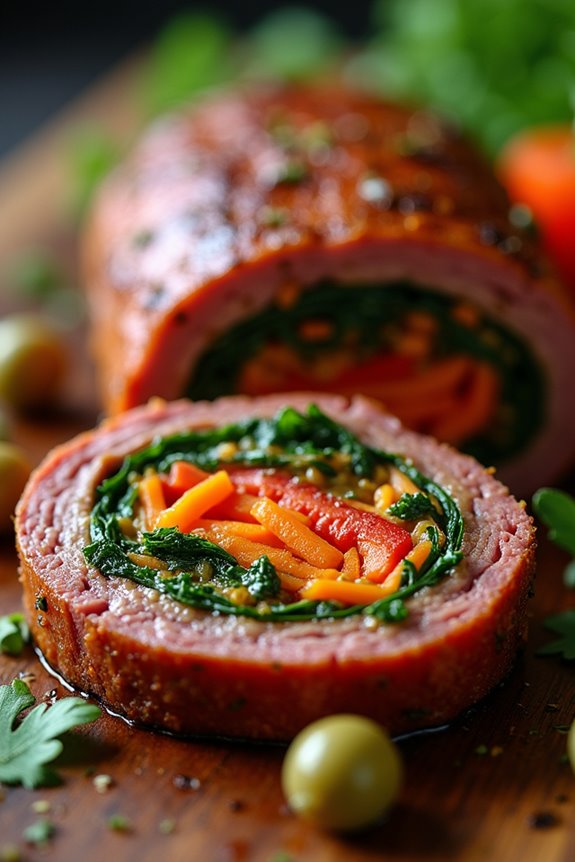
Matambre is a traditional Argentinian dish that showcases the country’s love for grilling and flavorful meats. This delicious flank steak roll is filled with a variety of ingredients, including vegetables, herbs, and spices, which create a mouthwatering combination of flavors. Not only is matambre a feast for the senses, but it also reflects the rich culinary heritage of Argentina, where grilling is an essential part of the culture.
Perfect for gatherings or family meals, matambre is sure to impress your guests and satisfy your taste buds.
To make matambre, the flank steak is butterflied and then rolled around a flavorful filling before being grilled or baked to perfection. The result is a succulent and juicy dish that can be served warm or at room temperature. Pair it with your favorite side dishes, such as roasted potatoes or a fresh salad, to create a well-rounded meal that everyone will love. This recipe serves 4-6 people, making it ideal for sharing with friends and family.
Ingredients
- 2 pounds flank steak
- 1 cup spinach leaves
- 1 cup roasted red bell peppers, sliced
- 1 cup carrots, grated
- 1/2 cup green olives, pitted and chopped
- 1/2 cup parsley, chopped
- 3 cloves garlic, minced
- 1 teaspoon oregano
- 1 teaspoon paprika
- Salt and pepper to taste
- Olive oil for brushing
- Butcher’s twine or toothpicks for securing the roll
Cooking Instructions
- Prepare the Flank Steak: Start by laying the flank steak on a clean cutting surface. Use a sharp knife to butterfly the steak by slicing it horizontally, making sure not to cut all the way through. Open it up like a book to create a larger surface area for the filling.
- Season the Meat: Sprinkle salt, pepper, oregano, and paprika evenly over both sides of the flank steak to enhance the flavor. Make sure to rub the seasonings into the meat for a more impactful taste.
- Prepare the Filling: In a mixing bowl, combine the spinach leaves, roasted red bell peppers, grated carrots, chopped green olives, chopped parsley, and minced garlic. Mix well until all ingredients are evenly distributed.
- Assemble the Roll: Spread the filling mixture evenly over the butterflied flank steak, leaving a small border around the edges. Carefully roll the steak tightly from one end to the other, ensuring the filling remains inside.
- Secure the Roll: Use butcher’s twine or toothpicks to secure the rolled flank steak. If using twine, tie it at intervals along the length of the roll to maintain its shape during cooking.
- Cook the Matambre: Preheat your grill or oven to medium-high heat. Brush the outside of the rolled flank steak with olive oil to prevent sticking. Place the matambre on the grill or in a baking dish and cook for about 20-30 minutes, turning occasionally, until the meat is cooked to your desired doneness.
- Rest and Slice: Once cooked, remove the matambre from the grill or oven and let it rest for about 10 minutes to allow the juices to redistribute. Carefully remove the twine or toothpicks, then slice the roll into thick pieces for serving.
Extra Tips
When preparing matambre, feel free to customize the filling to suit your taste preferences. You can add other vegetables like zucchini or mushrooms, or even incorporate cheeses for a creamier texture.
Additionally, if you prefer a smoky flavor, consider marinating the flank steak in a mixture of olive oil, vinegar, and your favorite spices for a few hours before cooking. This dish can also be made ahead of time and served cold, making it a versatile option for picnics or potlucks.
Enjoy your delicious matambre with a glass of Argentinian Malbec for the ultimate culinary experience!
Dulce De Leche: Creamy Caramel Spread
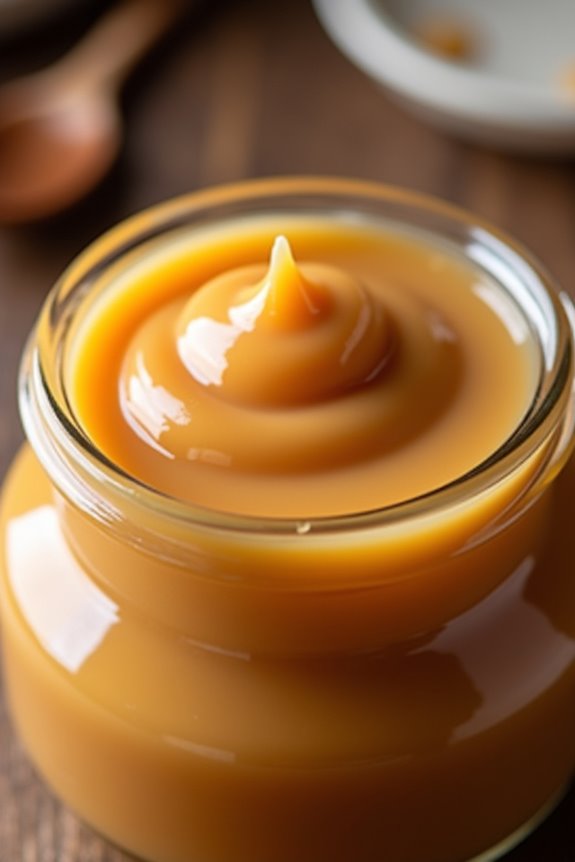
Dulce de Leche is a quintessential Argentinian treat that has captured the hearts and taste buds of many around the world. This creamy caramel spread, made from simple ingredients, is perfect for drizzling over desserts, spreading on toast, or even eating straight from the jar.
The process of making dulce de leche involves slowly cooking milk and sugar together until they transform into a rich, velvety delight that’s both sweet and nostalgic, evoking the essence of Argentinian culture and comfort food.
This dessert isn’t only easy to make but can also be enjoyed in various ways. Whether you’re using it as a filling in pastries, a topping for ice cream, or a dip for fruits, dulce de leche is an indulgent addition to any dish.
With just a few ingredients and some patience, you can create this delicious caramel spread at home that will impress your family and friends.
Ingredients (Serves 4-6):
- 4 cups whole milk
- 1 cup granulated sugar
- 1/2 teaspoon baking soda
- 1 teaspoon vanilla extract
- A pinch of salt
Cooking Instructions:
- Combine Ingredients: In a large, heavy-bottomed saucepan, combine the whole milk, granulated sugar, baking soda, and a pinch of salt. The baking soda helps enhance the color and texture of the dulce de leche as it cooks.
- Heat the Mixture: Place the saucepan over medium heat and stir continuously until the sugar dissolves completely. This step is essential to guarantee that the sugar doesn’t burn at the bottom of the pan.
- Simmer: Once the mixture is hot and the sugar has dissolved, reduce the heat to low. Allow it to simmer gently, stirring occasionally. You want to keep the mixture at a low simmer to prevent any scorching and to guarantee even cooking.
- Cook Until Thickened: Continue to cook the mixture for about 1 to 1.5 hours, stirring frequently. As it cooks, the mixture will gradually thicken and turn a rich caramel color. Be patient, as this slow cooking is what develops the depth of flavor in the dulce de leche.
- Add Vanilla: When the mixture has thickened to your desired consistency, remove it from the heat and stir in the vanilla extract. The vanilla adds an extra layer of flavor that complements the caramel beautifully.
- Cool and Store: Allow the dulce de leche to cool in the saucepan for a few minutes before transferring it to a clean jar or container. It will continue to thicken as it cools. Store it in the refrigerator for up to two weeks.
Extra Tips:
To achieve the best results, use a heavy-bottomed saucepan to prevent scorching, and don’t rush the cooking process—slow and steady wins the race with dulce de leche.
Stir frequently, especially towards the end of cooking, to avoid any sticking or burning. If you prefer a darker and richer flavor, simply cook the mixture a little longer until it reaches the desired color.
Enjoy your homemade dulce de leche as a delightful treat or gift!