

Discovering the world of Argentinian baking is like finding a warm hug in the form of bread. The rustic charm of these recipes, from the crusty Pan Casero to the sweet Pan De Leche, is truly heartwarming. Each loaf tells its own comforting story and brings a touch of homemade goodness to the table. Perfect for adding a cozy vibe to any meal, these breads are a delicious way to connect with tradition. Let’s explore these delightful Argentinian bread recipes together.
Pan Casero: Traditional Homemade Bread
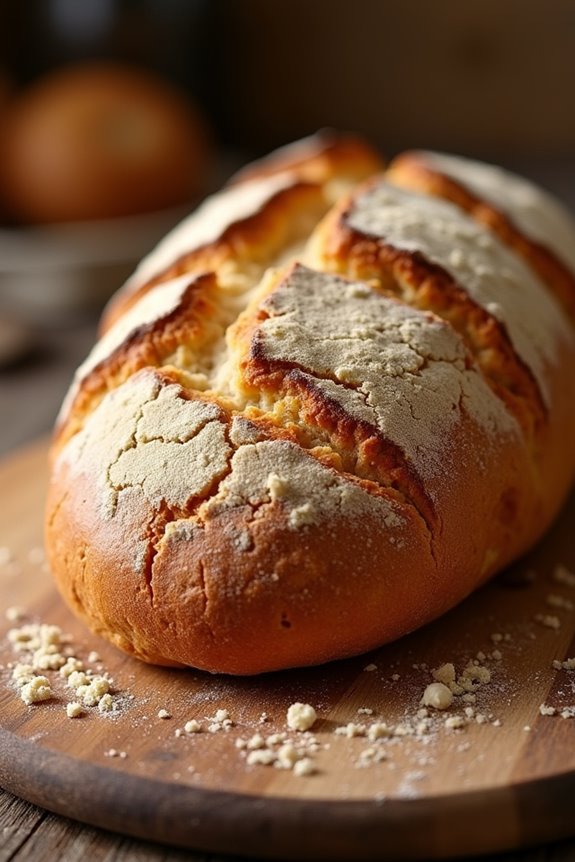
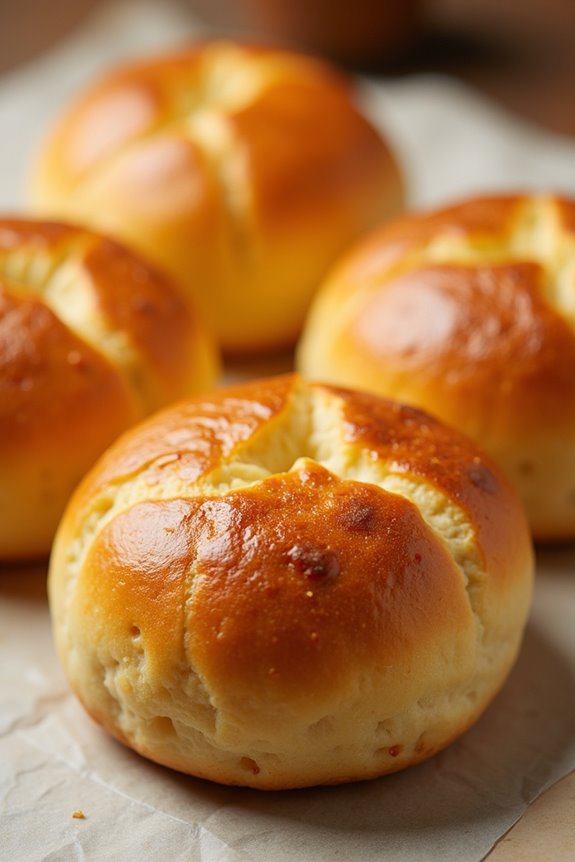
Pan Casero, or traditional homemade bread, is a staple in Argentinian cuisine, known for its rustic charm and satisfying taste. This bread is typically made with a few simple ingredients, yet it delivers a delightful flavor that pairs beautifully with a variety of dishes or can be enjoyed on its own.
The process of making Pan Casero isn’t only rewarding but also a great way to bring the warmth of a traditional Argentinian kitchen into your home. Its crusty exterior and soft, airy interior make it perfect for sandwiches, toasting, or serving alongside hearty soups.
Making Pan Casero is a wonderful way to connect with the culinary traditions of Argentina. The recipe is straightforward, requiring basic baking skills, and is ideal for both novice and experienced bakers.
The secret to achieving that perfect crust lies in the baking method, which often includes creating steam in the oven for a few minutes. This technique guarantees that the bread rises beautifully and develops that crunchy outer layer that everyone loves. Gather your ingredients and get ready to indulge in the deliciousness of homemade Pan Casero!
Ingredients (serves 4-6 people):
- 4 cups all-purpose flour
- 1 ½ teaspoons salt
- 2 teaspoons sugar
- 2 ¼ teaspoons (1 packet) active dry yeast
- 1 ½ cups warm water (about 110°F or 43°C)
- 2 tablespoons olive oil (optional, for added flavor)
Cooking Instructions:
1. Activate the Yeast:
In a small bowl, combine the warm water, sugar, and active dry yeast. Stir gently and let it sit for about 5-10 minutes until it becomes frothy. This indicates that the yeast is active and ready to use.
2. Mix the Dry Ingredients:
In a large mixing bowl, combine the all-purpose flour and salt. Stir with a wooden spoon or spatula to guarantee that the salt is evenly distributed throughout the flour.
3. Combine Wet and Dry Ingredients:
Once the yeast mixture is frothy, pour it into the bowl with the dry ingredients. If using, add the olive oil at this stage. Mix until a shaggy dough forms, guaranteeing that all flour is incorporated.
4. Knead the Dough:
Transfer the dough to a lightly floured surface and knead for about 10 minutes. The dough should become smooth and elastic. If it feels too sticky, sprinkle a little more flour as needed, but avoid adding too much.
5. First Rise:
Place the kneaded dough in a lightly oiled bowl, cover it with a clean kitchen towel or plastic wrap, and let it rise in a warm place for about 1-2 hours, or until it has doubled in size.
6. Shape the Bread:
Once the dough has risen, gently punch it down to release the air. Turn it out onto a floured surface and shape it into a round or oval loaf, depending on your preference.
7. Second Rise:
Place the shaped dough onto a baking sheet lined with parchment paper. Cover it again and let it rise for another 30-45 minutes, until it has puffed up again.
8. Preheat the Oven:
While the dough is rising, preheat your oven to 425°F (220°C). To create steam, place a shallow pan filled with hot water at the bottom of the oven.
9. Bake the Bread:
Once the dough has finished rising, make a few shallow slashes on the top with a sharp knife. This helps the bread expand during baking. Place the baking sheet in the oven and bake for 25-30 minutes, or until the bread is golden brown and sounds hollow when tapped on the bottom.
10. Cool and Serve:
Remove the Pan Casero from the oven and let it cool on a wire rack for at least 15 minutes before slicing. This helps to set the crumb and enhances the flavor.
Extra Tips:
When making Pan Casero, it’s important to be patient during the rising times; this is what helps develop the flavor and texture of the bread.
Additionally, for an even crustier loaf, you can spray water into the oven a few times during the first 10 minutes of baking to create more steam. Experiment with adding herbs or spices to the dough for a unique twist, or try using whole wheat flour for a heartier bread.
Enjoy your homemade Pan Casero fresh out of the oven for the best experience!
Focaccia Argentina: A Local Twist on an Italian Classic
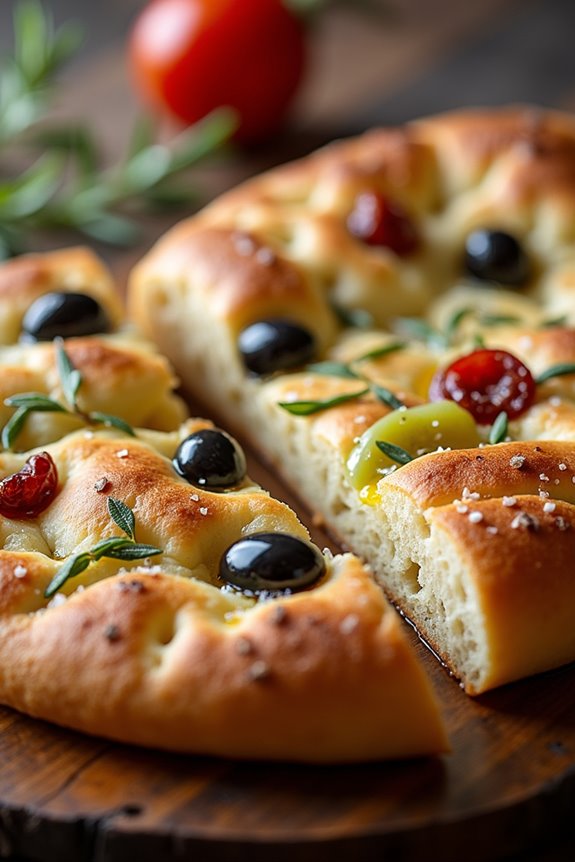
Focaccia Argentina is a delightful blend of traditional Italian focaccia with unique Argentinian flavors. This bread is characterized by its soft, airy texture and a crispy crust, making it a perfect accompaniment to hearty meals or a delicious snack on its own. The addition of local herbs and toppings such as olives and sun-dried tomatoes elevates this classic Italian dish, giving it a distinct South American flair.
Whether served with a drizzle of olive oil or as part of a charcuterie board, Focaccia Argentina is certain to impress your guests and family alike.
Making Focaccia Argentina is a straightforward process that requires minimal ingredients and time. This recipe is designed to serve 4-6 people, making it an excellent choice for gatherings or family dinners. With the right techniques and a little patience, you’ll soon have a golden, fragrant loaf that embodies the spirit of both Argentina and Italy.
Ingredients
- 4 cups all-purpose flour
- 1 ½ teaspoons salt
- 1 packet (2 ¼ teaspoons) active dry yeast
- 1 ¾ cups warm water
- 3 tablespoons olive oil (plus extra for drizzling)
- 1 tablespoon sugar
- 1 tablespoon fresh rosemary, chopped
- ½ cup olives, pitted and sliced
- ½ cup sun-dried tomatoes, chopped
- Coarse sea salt, for sprinkling
Cooking Instructions
- Activate the Yeast: In a small bowl, combine the warm water (about 110°F or 43°C), sugar, and yeast. Stir gently and let it sit for about 5-10 minutes until it becomes foamy. This indicates that the yeast is active and ready to use.
- Mix the Dry Ingredients: In a large mixing bowl, combine the flour and salt. Mix them well to confirm that the salt is evenly distributed through the flour.
- Combine Wet and Dry Ingredients: Once the yeast is activated, pour it into the bowl with the flour mixture along with 3 tablespoons of olive oil. Stir the mixture with a wooden spoon until a sticky dough forms.
- Knead the Dough: Transfer the dough onto a floured surface. Knead it for about 8-10 minutes, adding a little more flour if necessary, until the dough is smooth and elastic.
- First Rise: Place the kneaded dough into a lightly oiled bowl, cover it with a damp cloth or plastic wrap, and let it rise in a warm place for about 1-2 hours or until it has doubled in size.
- Prepare the Baking Pan: Grease a baking sheet or pan with olive oil. Once the dough has risen, gently punch it down to release air bubbles, then transfer it to the prepared pan.
- Shape the Dough: Using your fingers, gently stretch and press the dough into the pan, confirming it covers the bottom evenly. Create dimples all over the surface of the dough using your fingertips.
- Add Toppings: Sprinkle the chopped rosemary, sliced olives, and sun-dried tomatoes evenly over the top of the dough. Drizzle with olive oil and sprinkle coarse sea salt for flavor.
- Second Rise: Cover the prepared focaccia with a cloth and let it rise again for about 30-45 minutes until it has puffed up.
- Preheat the Oven: While the dough is rising, preheat your oven to 425°F (220°C).
- Bake the Focaccia: Once the dough has risen, place the pan in the preheated oven and bake for about 20-25 minutes or until the top is golden brown.
- Cool and Serve: Remove the focaccia from the oven and let it cool slightly before transferring it to a wire rack. Slice it into squares or rectangles and serve warm.
Extra Tips
When making Focaccia Argentina, feel free to experiment with different toppings to suit your taste. You can add other ingredients like caramelized onions, roasted garlic, or assorted cheeses.
To enhance the flavor, consider brushing the focaccia with garlic-infused olive oil before baking. Also, the dough can be prepared a day in advance; simply refrigerate it after the first rise and bring it back to room temperature before shaping and baking. Enjoy your delicious creation!
Pan De Miga: Delicate Sandwich Bread
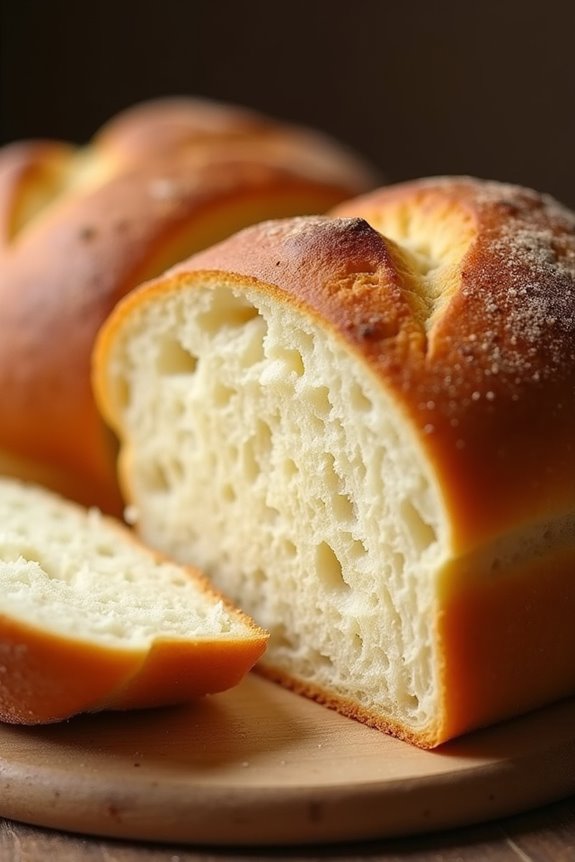
Pan de Miga, or delicate sandwich bread, is a staple in Argentinian cuisine that showcases the country’s love for fresh, homemade bread. This soft, fluffy bread is often used for making sandwiches, especially the popular “sándwiches de miga,” which are layered sandwiches filled with various fillings like ham, cheese, and vegetables. The bread’s texture is light and airy, making it perfect for soaking up flavors without becoming soggy.
Making Pan de Miga at home is a rewarding process that fills your kitchen with the delightful aroma of freshly baked bread. With just a few simple ingredients, you can create a loaf that elevates any sandwich. This recipe yields enough bread for 4-6 people, perfect for a family gathering or a small party.
Ingredients
- 500g all-purpose flour
- 10g salt
- 10g sugar
- 7g instant yeast
- 250ml warm milk
- 50g unsalted butter, melted
- 1 large egg
- Extra flour for dusting
Instructions
- Prepare the Dough: In a large mixing bowl, combine the all-purpose flour, salt, sugar, and instant yeast. Mix these dry ingredients well to guarantee even distribution. Create a well in the center, then add the warm milk, melted butter, and egg. Using a wooden spoon or your hands, mix until a sticky dough forms.
- Knead the Dough: Transfer the dough to a floured surface and knead it for about 10 minutes until it becomes smooth and elastic. This step is essential for developing the gluten structure, which gives the bread its airy texture. If the dough is too sticky, sprinkle a little extra flour as needed.
- First Rise: Form the dough into a ball and place it in a lightly greased bowl, covering it with a clean kitchen towel or plastic wrap. Allow it to rise in a warm place for about 1-2 hours, or until it has doubled in size.
- Shape the Loaf: After the first rise, punch down the dough to release air bubbles. Transfer it back to the floured surface and shape it into a loaf by flattening it into a rectangle, then rolling it tightly from one end to the other. Pinch the seams to seal and place it seam-side down in a greased loaf pan.
- Second Rise: Cover the loaf with a kitchen towel and let it rise again for about 30-45 minutes, or until it has risen slightly above the rim of the pan. This second rise helps create a light texture.
- Bake the Bread: Preheat your oven to 180°C (350°F). Once the dough has risen, bake it in the preheated oven for 25-30 minutes or until the top is golden brown and sounds hollow when tapped.
- Cool the Bread: Remove the loaf from the oven and let it cool in the pan for about 10 minutes before transferring it to a wire rack to cool completely. This step helps to firm up the bread’s structure.
Extra Tips
To achieve the best results with your Pan de Miga, make sure your ingredients are at room temperature, especially the milk and egg, as this helps with yeast activation.
Additionally, avoid over-kneading the dough, as this can make the bread tough. If you want to add flavor, consider incorporating herbs or spices into the dough.
Finally, for an ultra-soft crust, brush the loaf with melted butter immediately after baking. Enjoy your homemade Pan de Miga with your favorite sandwich fillings!
Tortilla Criolla: Rustic Argentinian Flatbread
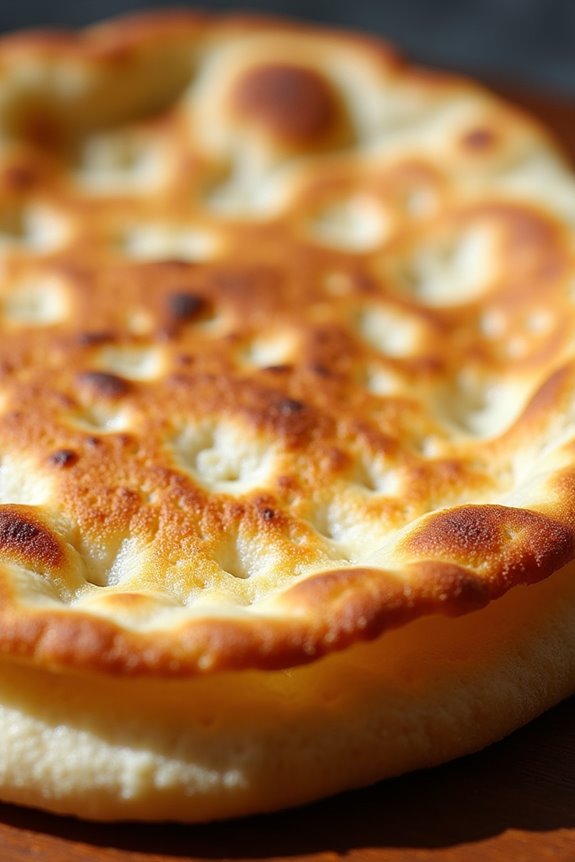
Tortilla Criolla is a beloved staple in Argentinian cuisine, celebrated for its simplicity and versatility. This rustic flatbread is a perfect accompaniment to various dishes, from grilled meats to soups and salads. Its texture is slightly crisp on the outside while remaining soft and chewy on the inside, making it a delightful addition to any meal.
The ingredients are simple, often found in most kitchens, and the preparation is straightforward, making it an ideal recipe for both novice and experienced cooks.
To create the perfect Tortilla Criolla, the key is in the balance of the ingredients and the cooking technique. Traditionally, this bread is cooked on a hot griddle or skillet, allowing it to develop a beautiful golden crust. It’s often enjoyed fresh, but leftovers can be reheated or used creatively in other dishes. Whether you’re hosting a gathering or preparing a cozy family dinner, this flatbread will surely impress and satisfy everyone at the table.
Ingredients (Serves 4-6):
- 2 cups all-purpose flour
- 1 teaspoon baking powder
- 1 teaspoon salt
- 2 tablespoons olive oil
- 3/4 cup warm water
- Additional flour for dusting
Cooking Instructions:
- Mix Dry Ingredients: In a large mixing bowl, combine the all-purpose flour, baking powder, and salt. Use a whisk or fork to guarantee that the dry ingredients are well blended, which helps the bread rise evenly when cooked.
- Add Wet Ingredients: Create a well in the center of the dry mixture. Pour in the olive oil and warm water. Using a wooden spoon or your hands, mix the ingredients together until they form a rough dough. The warmth of the water is essential as it helps activate the baking powder.
- Knead the Dough: Transfer the dough onto a lightly floured surface. Knead for about 5-7 minutes until the dough becomes smooth and elastic. If the dough is too sticky, sprinkle a bit more flour as needed. Proper kneading develops gluten, which gives the bread its texture.
- Rest the Dough: Shape the kneaded dough into a ball and cover it with a clean kitchen towel or plastic wrap. Let it rest for at least 30 minutes. This resting period allows the gluten to relax, making it easier to roll out later.
- Shape the Flatbreads: After resting, divide the dough into 4-6 equal portions, depending on the desired size of your flatbreads. Roll each portion into a ball, then flatten it with your hands or a rolling pin to about 1/4 inch thick. Aim for a round shape, but don’t worry about perfection; rustic is the goal!
- Cook the Flatbreads: Heat a griddle or skillet over medium-high heat. Place one flatbread on the hot surface and cook for about 2-3 minutes on each side, or until golden brown spots appear and the bread puffs up slightly. Repeat for the remaining flatbreads, adjusting the heat as necessary to prevent burning.
- Serve Warm: Once cooked, stack the flatbreads on a plate and cover them with a kitchen towel to keep them warm and soft. Serve immediately with your favorite dips, meats, or salads.
Extra Tips:
For added flavor, consider incorporating herbs or spices into the dough, such as rosemary or garlic powder. You can also experiment with different types of flour, like whole wheat, for a heartier version.
Additionally, if you want to make the Tortilla Criolla ahead of time, you can store them in an airtight container at room temperature for a day or two. Reheat them briefly on the griddle before serving to restore their delightful texture.
Pan De Maíz: Corn Bread Delight

Pan de Maíz, or corn bread, is a cherished staple in Argentinian cuisine. This rustic bread is made primarily from cornmeal, which gives it a unique texture and flavor that sets it apart from traditional wheat bread. With its slightly sweet taste and golden crust, Pan de Maíz is perfect for serving alongside hearty stews, grilled meats, or simply enjoyed warm with a pat of butter.
This dish not only represents the agricultural heritage of Argentina but also brings a taste of the countryside to your dining table.
Making Pan de Maíz is a straightforward process that results in a delightful bread that can be enjoyed at any meal. The key to its success lies in using high-quality cornmeal, which imparts a rich corn flavor and a lovely crumb. You can opt for blending in some cheese or herbs for additional flavor, making it a versatile addition to any gathering.
This recipe yields enough bread to serve 4-6 people, making it an ideal choice for family dinners or sharing with friends.
Ingredients:
- 2 cups cornmeal
- 1 cup milk
- 1/2 cup sugar
- 1/4 cup melted butter
- 2 large eggs
- 1 tablespoon baking powder
- 1 teaspoon salt
- 1 cup grated cheese (optional)
- 1/4 cup fresh herbs (optional)
Cooking Instructions:
- Preheat the Oven: Begin by preheating your oven to 375°F (190°C). This guarantees that the bread will bake evenly and achieve a lovely golden crust.
- Mix Dry Ingredients: In a large mixing bowl, combine the cornmeal, sugar, baking powder, and salt. Whisk these dry ingredients together until they’re evenly mixed, guaranteeing that the baking powder is well distributed throughout the cornmeal.
- Combine Wet Ingredients: In a separate bowl, whisk together the milk, melted butter, and eggs until smooth. This will help to create a rich and moist batter for the bread.
- Combine Mixtures: Gradually add the wet mixture to the dry ingredients, stirring gently until just combined. Be careful not to overmix, as this can result in a dense bread.
- Add Cheese and Herbs: If you’re using cheese or herbs, fold them into the batter at this point. This step adds extra flavor and texture to the bread.
- Prepare the Baking Dish: Grease a baking dish (an 8-inch square or round cake pan works well) with butter or line it with parchment paper. This will prevent the bread from sticking and make for easy removal.
- Pour and Spread: Pour the batter into the prepared baking dish, using a spatula to spread it evenly. This helps to guarantee that the bread bakes uniformly.
- Bake: Place the dish in the preheated oven and bake for 25-30 minutes, or until the top is golden brown and a toothpick inserted into the center comes out clean.
- Cool and Serve: Once baked, remove the Pan de Maíz from the oven and allow it to cool in the dish for about 10 minutes. Then, transfer it to a wire rack to cool further before slicing and serving.
Extra Tips:
For the best flavor, consider using freshly ground cornmeal if available. Additionally, you can experiment with different types of cheese, such as feta or cheddar, to enhance the bread’s taste.
If you prefer a slightly sweeter version, add a touch more sugar or a drizzle of honey on top before serving. Remember that Pan de Maíz is best enjoyed warm, so serve it right out of the oven for a delightful experience!
Bizcochos: Sweet and Savory Pastries
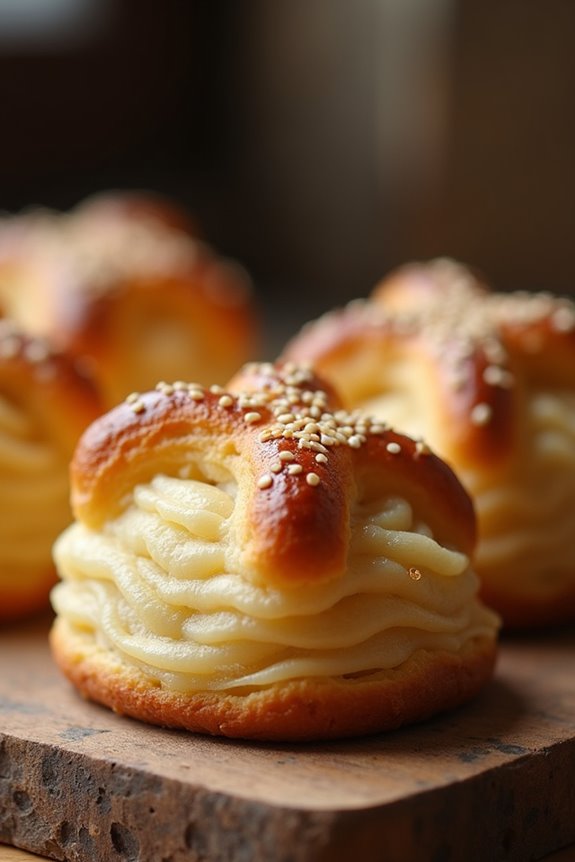
Bizcochos, a beloved staple in Argentinian bakeries, are delightful pastries that can be enjoyed both sweet and savory. These flaky treats are often served alongside mate, making them a perfect companion to the traditional Argentine tea.
The beauty of bizcochos lies in their versatility; they can be flavored with cheese, sugar, or even herbs, allowing you to create a variety of tastes that cater to your preferences. Making bizcochos from scratch requires a bit of patience and technique, but the results are well worth the effort.
To make bizcochos, you’ll need to create a rich, buttery dough that’s rolled out, folded, and cut into shapes before baking. This process results in a light and airy pastry with a crispy texture that’s simply irresistible. Whether you choose to fill them with cheese for a savory option or sprinkle sugar on top for a sweet treat, these pastries are sure to impress your family and friends.
Let’s plunge into the recipe!
Ingredients (Serves 4-6)
- 3 cups all-purpose flour
- 1 teaspoon salt
- 1 tablespoon baking powder
- 1/2 cup unsalted butter, cold and cubed
- 1/2 cup warm water
- 1 egg (for egg wash)
- 1 tablespoon sugar (for sweet bizcochos, optional)
- 1/2 cup grated cheese (for savory bizcochos, optional)
- Sesame seeds (for topping, optional)
Cooking Instructions
1. Prepare the Dough: In a large mixing bowl, combine the all-purpose flour, salt, and baking powder. Whisk these dry ingredients together until well blended.
Next, add the cold, cubed butter into the flour mixture. Use a pastry cutter or your fingers to incorporate the butter until the mixture resembles coarse crumbs.
2. Add Liquid Ingredients: Gradually pour in the warm water, mixing with a fork until the dough begins to come together. Be careful not to overmix; you want the dough to remain slightly crumbly.
If you prefer sweet bizcochos, add the sugar at this point.
3. Knead the Dough: Turn the dough out onto a lightly floured surface. Gently knead it a few times until it forms a cohesive ball.
Wrap the dough in plastic wrap and let it rest in the refrigerator for about 30 minutes. This resting period allows the gluten to relax, making it easier to roll out later.
4. Roll Out and Shape the Dough: After resting, remove the dough from the refrigerator and roll it out to about 1/4 inch thickness. Use a sharp knife or a pizza cutter to cut the dough into squares or circles, depending on your preference.
If making savory bizcochos, sprinkle some grated cheese on top of each piece before folding over.
5. Prepare for Baking: Preheat your oven to 375°F (190°C). Line a baking sheet with parchment paper.
Arrange the cut-out bizcochos on the sheet, leaving some space between them. In a small bowl, beat the egg and brush it over the tops of the pastries for a golden finish. If desired, sprinkle sesame seeds over the top as well.
6. Bake the Bizcochos: Place the baking sheet in the preheated oven and bake for 20-25 minutes, or until the bizcochos are golden brown and puffed up.
Keep an eye on them to confirm they don’t overbake.
7. Cool and Serve: Once baked, remove the bizcochos from the oven and let them cool slightly on a wire rack.
Serve warm or at room temperature with your favorite beverage.
Extra Tips
When preparing bizcochos, it’s crucial to keep your ingredients cold, especially the butter. This will help achieve that flaky texture that’s characteristic of these pastries.
If you’re using cheese for a savory twist, opt for a cheese that melts well, like mozzarella or a sharp cheddar. For sweet variations, consider adding spices like cinnamon or vanilla to the dough for extra flavor.
Feel free to experiment with different toppings or fillings to make them your own!
Pan Sourdough: Captivatingly Tangy and Rustic
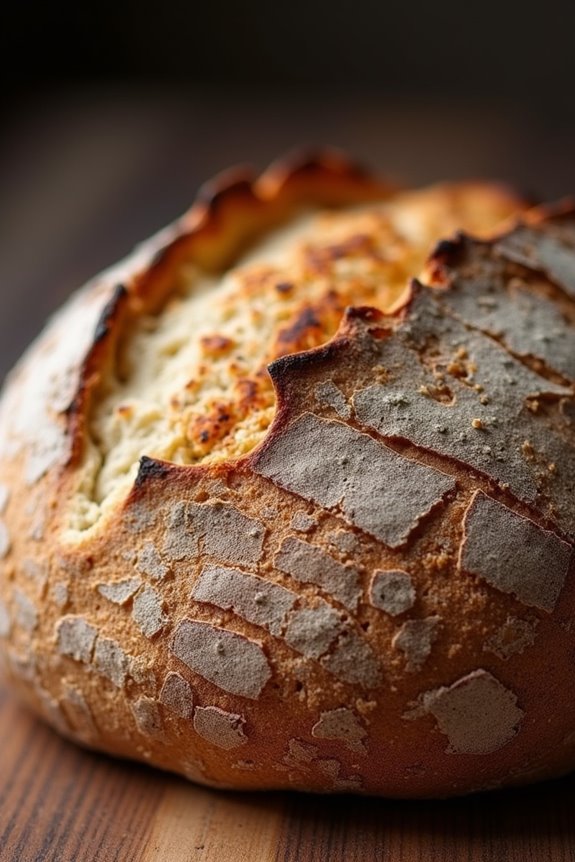
Pan Sourdough is a beloved staple in Argentinian cuisine, known for its enthralling tang and rustic texture. This traditional bread is made using a sourdough starter, which lends it a distinct flavor profile that sets it apart from other types of bread. The combination of a crispy crust and a chewy interior makes it the perfect accompaniment to a variety of meals or simply enjoyed with butter and jam.
Making Pan Sourdough requires some patience and a bit of love, but the rewarding aroma that wafts through your kitchen as it bakes is well worth the effort. To achieve the perfect loaf, the key is in the fermentation process, allowing the dough to rise slowly and develop its characteristic sour flavor.
While it may seem intimidating at first, once you master the technique, you’ll find that baking Pan Sourdough can be a gratifying experience. Gather your ingredients, prepare your starter in advance, and get ready to immerse yourself in the world of rustic Argentinian bread-making.
Ingredients (Serves 4-6 people)
- 500g all-purpose flour
- 350ml lukewarm water
- 100g active sourdough starter
- 10g salt
- 1 tablespoon honey (optional)
Cooking Instructions
- Prepare the Dough: In a large mixing bowl, combine the all-purpose flour and salt. Mix well to guarantee the salt is evenly distributed throughout the flour. In a separate bowl, mix the active sourdough starter with lukewarm water and honey (if using) until fully dissolved. Gradually pour the wet mixture into the flour, stirring with a wooden spoon until a shaggy dough forms.
- Knead the Dough: Transfer the dough onto a lightly floured surface. Knead the dough for about 10-15 minutes until it becomes smooth and elastic. If the dough is too sticky, sprinkle a little more flour as needed. This step is vital, as it develops the gluten that will give your bread structure.
- First Rise: Place the kneaded dough into a lightly greased bowl, cover it with a damp cloth or plastic wrap, and let it rise in a warm place for 4-6 hours, or until it has doubled in size. This fermentation process is what gives the bread its tangy flavor.
- Shape the Dough: Once the dough has risen, lightly punch it down to release the gases. Turn it out onto a floured surface and gently shape it into a round loaf or a batard (oval). Place it seam side down in a well-floured proofing basket or bowl lined with a floured kitchen towel.
- Second Rise: Cover the shaped dough with a cloth and allow it to rise again for 1-2 hours, or until it has puffed up noticeably. During this time, preheat your oven to 450°F (230°C) and place a Dutch oven or baking stone inside to heat.
- Score and Bake: Once the dough has risen, carefully remove the hot Dutch oven from the oven (if using) and gently invert the dough into it. Using a sharp knife or a lame, score the top of the loaf to allow for expansion during baking. Cover with the lid and bake for 30 minutes. Then, remove the lid and bake for an additional 15-20 minutes, or until the crust is golden brown and the internal temperature reaches around 200°F (93°C).
- Cool: Remove the bread from the oven and let it cool on a wire rack for at least 30 minutes before slicing. This resting period allows the interior to set properly, guaranteeing a perfect crumb.
Extra Tips
When baking Pan Sourdough, the quality of your sourdough starter is essential. Make sure it’s active and bubbly before using it in the recipe. If you’re not familiar with maintaining a starter, consider starting one a few days in advance or getting a portion from a friend.
Additionally, the ambient temperature can affect the rising times, so be flexible and adjust based on your environment. Finally, experiment with adding herbs, cheese, or seeds to the dough for unique flavor variations!
Provoleta Bread: Perfect Pairing for Grilled Cheese
Provoleta bread is a delightful twist on traditional bread that enhances any grilled cheese experience. Originating from Argentina, this rustic bread is infused with the rich flavors of provolone cheese and aromatic herbs, making it an ideal accompaniment for your favorite melty cheese sandwiches. The combination of the crispy crust and soft, cheesy interior offers a perfect balance that will elevate your grilled cheese to new heights.
This versatile bread isn’t only great for grilled cheese but can also be enjoyed on its own, dipped in olive oil, or paired with a charcuterie board. Its unique texture and flavor profile make it a favorite for gatherings and family meals. Whether you’re hosting a casual get-together or enjoying a cozy night in, Provoleta bread is sure to impress your guests and family alike.
Ingredients (serving size: 4-6 people):
- 2 cups all-purpose flour
- 1 cup whole wheat flour
- 1 packet (2¼ teaspoons) active dry yeast
- 1 teaspoon salt
- 1 teaspoon sugar
- 1 cup warm water (about 110°F)
- ¼ cup olive oil
- 1 cup provolone cheese, shredded
- 1 tablespoon fresh oregano, chopped
- 1 tablespoon fresh parsley, chopped
- Extra flour for dusting
Cooking Instructions:
- Activate the Yeast: In a small bowl, combine the warm water, sugar, and active dry yeast. Stir gently and let it sit for about 5-10 minutes until it becomes frothy. This step is essential as it activates the yeast, which will help the dough rise.
- Mix the Dry Ingredients: In a large mixing bowl, combine the all-purpose flour, whole wheat flour, and salt. Make a well in the center of the flour mixture.
- Combine Ingredients: Pour the activated yeast mixture and olive oil into the well you created in the flour. Begin mixing with a spoon or your hands until the dough starts to come together.
- Knead the Dough: Transfer the dough onto a lightly floured surface. Knead the dough for about 8-10 minutes until it’s smooth and elastic. You may need to add extra flour if the dough is too sticky.
- Incorporate Cheese and Herbs: Gently fold in the shredded provolone cheese, chopped oregano, and parsley into the dough until evenly distributed.
- First Rising: Place the kneaded dough into a greased bowl, cover it with a damp cloth, and let it rise in a warm area for about 1 hour or until it has doubled in size.
- Shape the Dough: After the dough has risen, punch it down to release the air. Shape it into a round loaf and place it on a baking sheet lined with parchment paper.
- Second Rising: Cover the shaped loaf with a cloth and allow it to rise again for about 30 minutes.
- Preheat the Oven: While the dough is rising, preheat your oven to 375°F (190°C).
- Bake the Bread: Once the second rise is complete, bake the bread in the preheated oven for 25-30 minutes, or until the crust is golden brown and the bread sounds hollow when tapped on the bottom.
- Cool and Serve: Remove the bread from the oven and let it cool on a wire rack. Once slightly cooled, slice and serve warm, ideally alongside your favorite grilled cheese.
Extra Tips:
For an even more flavorful Provoleta bread, consider adding spices like crushed red pepper flakes or garlic powder into the dough. You can also experiment with different types of cheese such as mozzarella or gouda for a unique twist.
If you want a crustier bread, place a shallow pan of water in the oven while baking to create steam. This will help achieve that perfect golden crust while keeping the inside soft and cheesy. Enjoy your baking adventure!
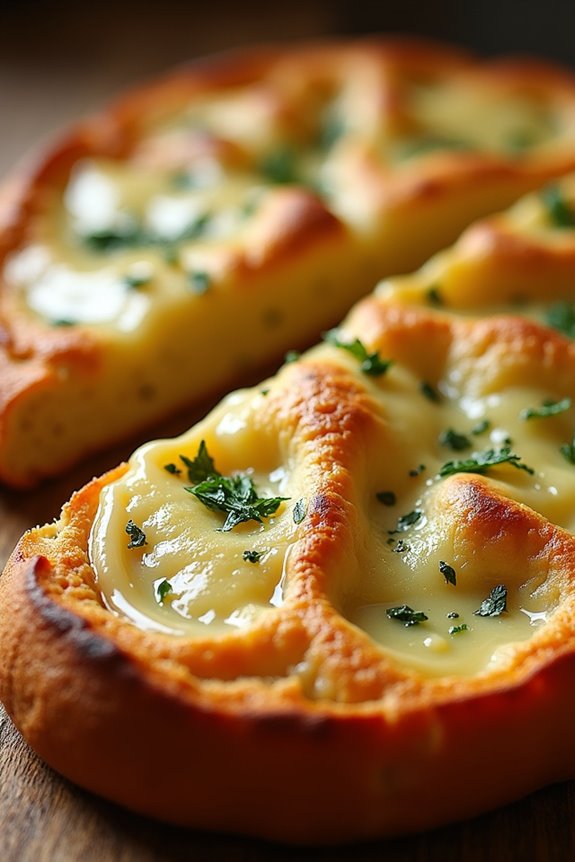
Pan De Queso: Cheese Bread That Melts in Your Mouth
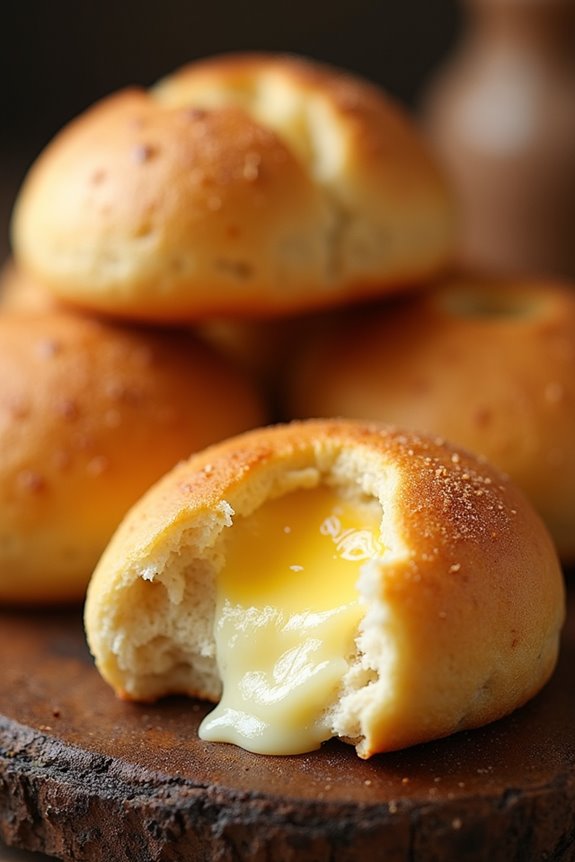
Pan de Queso is a delightful Argentinian cheese bread that’s known for its soft, chewy texture and rich flavor. This bread is a perfect combination of gooey cheese and a slightly crispy crust, making it an irresistible treat for cheese lovers.
Often enjoyed as a snack or a side dish, Pan de Queso is popular in many households and gatherings across Argentina. The recipe is simple yet yields impressive results, making it an excellent addition to any rustic meal.
To make the perfect Pan de Queso, you’ll need a few key ingredients that come together to create a deliciously cheesy experience. This bread is typically made using tapioca flour, which gives it a unique texture that sets it apart from regular bread.
Cheddar or mozzarella cheese is mixed into the dough, creating pockets of melted goodness that will have everyone coming back for more. Serve it warm, and you’ll find that it pairs beautifully with soups, salads, or simply on its own.
Ingredients (Serves 4-6)
- 2 cups tapioca flour
- 1 cup milk
- ½ cup vegetable oil
- 2 large eggs
- 1 cup shredded cheese (cheddar or mozzarella)
- 1 teaspoon salt
- 1 teaspoon baking powder
Cooking Instructions
- Preheat the Oven: Begin by preheating your oven to 375°F (190°C). This guarantees that the bread will bake evenly and develop a nice golden crust.
- Prepare the Dough: In a large mixing bowl, combine the tapioca flour and baking powder. In a separate bowl, whisk together the milk, vegetable oil, and eggs until well blended. Gradually pour the wet mixture into the dry ingredients, stirring continuously until a dough forms.
- Add the Cheese: Once the dough is well combined, fold in the shredded cheese and salt. Confirm that the cheese is evenly distributed throughout the dough for maximum flavor in every bite. The dough should be sticky and slightly elastic.
- Shape the Bread: Lightly flour your hands and divide the dough into small balls, about the size of a golf ball. Place the dough balls on a baking sheet lined with parchment paper, leaving some space between them to allow for rising.
- Bake the Bread: Place the baking sheet in the preheated oven and bake for 20-25 minutes, or until the tops are lightly golden and the bread has puffed up. Keep an eye on them to prevent over-baking.
- Cool and Serve: Once baked, remove the Pan de Queso from the oven and let it cool for a few minutes. Serve warm to enjoy the gooey cheese texture and fantastic flavor.
Extra Tips
To enhance the flavor of your Pan de Queso, consider experimenting with different types of cheese, such as pepper jack or a mix of cheeses for a more complex taste.
Additionally, if you prefer a bit of spice, you can add chopped jalapeños or crushed red pepper flakes into the dough. This bread is best enjoyed fresh out of the oven, but you can also reheat it in the oven to restore its delightful texture.
Chipa: Cheesy Cassava Breads
Chipa is a delightful and traditional bread that hails from the regions of Paraguay and Argentina. These cheesy cassava breads are a staple in many households, renowned for their chewy texture and rich flavor. Made primarily with cassava flour (also known as manioc flour or yuca flour), they’re gluten-free and perfect for those with dietary restrictions. The dough is enriched with cheese, giving each bite a savory, cheesy punch that pairs beautifully with soups, stews, or can be enjoyed on their own as a snack.
The preparation of Chipa is quite straightforward, making it an excellent option for both novice and experienced bakers. The dough comes together quickly, and once shaped, the breads only need a short time in the oven to achieve that golden exterior. Whether you’re serving them fresh from the oven at breakfast or as an appetizer at a gathering, Chipa is sure to impress with its unique flavor and rustic charm.
Ingredients (Serves 4-6):
- 2 cups cassava flour
- 1 cup shredded cheese (Paraguayan cheese, mozzarella, or a mix)
- 1/2 cup milk
- 1/4 cup vegetable oil or melted butter
- 2 large eggs
- 1 teaspoon baking powder
- 1 teaspoon salt
- Optional: 1/2 teaspoon garlic powder or herbs for added flavor
Cooking Instructions:
- Preheat the Oven: Begin by preheating your oven to 375°F (190°C). This guarantees that the Chipa will start cooking evenly as soon as they’re placed in the oven.
- Mix Dry Ingredients: In a large mixing bowl, combine the cassava flour, baking powder, and salt. If you’re using garlic powder or herbs for extra flavor, add them in this step. Whisk these ingredients together until well blended.
- Combine Wet Ingredients: In a separate bowl, whisk together the milk, vegetable oil (or melted butter), and eggs until smooth. Make sure the eggs are fully incorporated to guarantee a consistent texture in the dough.
- Form the Dough: Gradually pour the wet mixture into the dry ingredients, stirring continuously until a dough forms. It should be moist but not overly sticky. If it feels too dry, you can add a little more milk.
- Incorporate Cheese: Gently fold in the shredded cheese until evenly distributed throughout the dough. This will add that delicious cheesy flavor characteristic of Chipa.
- Shape the Chipa: With your hands, take small portions of the dough (about the size of a golf ball) and roll them into balls. Place them on a baking sheet lined with parchment paper, ensuring they’re spaced about an inch apart to allow for expansion.
- Bake: Once all the dough balls are shaped and placed on the baking sheet, transfer them to the oven. Bake for 15-20 minutes, or until the tops are golden brown and slightly cracked.
- Cool and Serve: Remove the Chipa from the oven and let them cool for a few minutes on a wire rack. They’re best served warm, but can also be enjoyed at room temperature.
Extra Tips:
When making Chipa, feel free to experiment with different types of cheese to find your perfect flavor combination. If you want a spicier kick, consider adding some diced jalapeños or chili flakes to the dough.
To keep the Chipa fresh, store any leftovers in an airtight container at room temperature for a couple of days. You can also reheat them briefly in the oven to regain their delightful texture. Enjoy your homemade Chipa as a tasty treat any time of the day!
Pan De Leche: Sweet Milk Bread
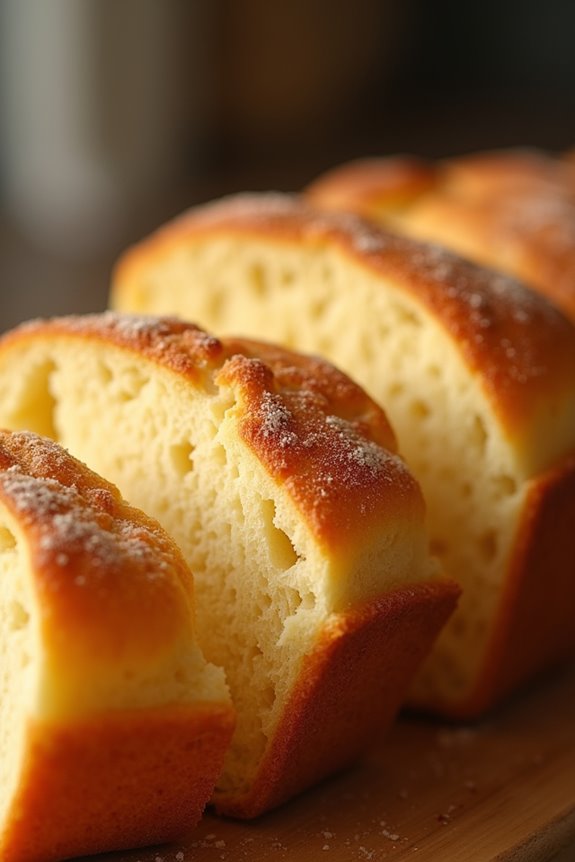
Pan De Leche, or Sweet Milk Bread, is a beloved staple in Argentinian households, often enjoyed during breakfast or as an afternoon snack. This soft, slightly sweet bread is perfect for slathering with butter or jam, making it a delightful treat for both children and adults.
The recipe is simple yet rewarding, allowing you to experience the rich tradition of Argentinian baking right in your own kitchen. The key to a perfect Pan De Leche lies in its ingredients and the gentle handling of the dough. With a combination of milk, sugar, and butter, this bread achieves a tender crumb and a slightly sweet flavor profile.
Whether you’re making it for a special occasion or just to enjoy a taste of Argentina, this recipe will surely become a favorite in your home.
Ingredients (Serves 4-6):
- 3 cups all-purpose flour
- 1/4 cup granulated sugar
- 1 packet (2 1/4 teaspoons) active dry yeast
- 1/2 teaspoon salt
- 1 cup warm milk (about 110°F/43°C)
- 1/4 cup unsalted butter, melted
- 1 large egg
- 1 teaspoon vanilla extract
- Additional flour for dusting
- Optional: egg wash (1 egg beaten with 1 tablespoon water) for brushing
Cooking Instructions:
- Prepare the Yeast Mixture: In a small bowl, combine the warm milk and sugar. Sprinkle the active dry yeast over the top and let it sit for about 5-10 minutes until foamy. This step activates the yeast and guarantees your bread will rise properly.
- Mix the Dry Ingredients: In a large mixing bowl, whisk together the all-purpose flour and salt. This helps to evenly distribute the salt and makes sure that it doesn’t come into direct contact with the yeast, which could inhibit its growth.
- Combine the Ingredients: Once the yeast mixture is foamy, add it to the flour mixture along with the melted butter, egg, and vanilla extract. Stir until a shaggy dough forms. This is where the ingredients come together to create the base of your bread.
- Knead the Dough: Transfer the dough onto a lightly floured surface and knead for about 8-10 minutes until it becomes smooth and elastic. Kneading develops the gluten, which gives the bread structure.
- First Rise: Place the kneaded dough in a greased bowl, cover it with a clean kitchen towel or plastic wrap, and let it rise in a warm place for about 1-1.5 hours or until it doubles in size. This step is essential for achieving a light and airy texture.
- Shape the Dough: Once the dough has risen, punch it down to release the air. Turn it out onto a floured surface and divide it into two equal portions. Shape each portion into a loaf, tucking the ends under to create a smooth top.
- Second Rise: Place the shaped loaves into greased loaf pans, cover them again, and allow them to rise for another 30-45 minutes until they puff up nicely.
- Preheat the Oven: While the dough is rising, preheat your oven to 350°F (175°C). This guarantees that your bread will bake evenly.
- Egg Wash (Optional): If you like a shiny crust, brush the tops of the loaves with the egg wash before baking. This step enhances the appearance and adds a beautiful golden color to your bread.
- Bake: Place the loaves in the preheated oven and bake for 25-30 minutes or until the tops are golden brown and the bread sounds hollow when tapped on the bottom.
- Cool: Once baked, remove the loaves from the oven and let them cool in the pans for about 10 minutes. Then, transfer them to a wire rack to cool completely before slicing.
Extra Tips:
For an even richer flavor, consider adding a pinch of nutmeg or cinnamon to the flour mixture.
Additionally, if you want to experiment with different shapes, you can create dinner rolls instead of loaves by dividing the dough into smaller pieces and shaping them into balls.
Don’t forget to store any leftover bread in an airtight container at room temperature to keep it fresh for longer. Enjoy your freshly baked Pan De Leche with your favorite spreads or simply on its own!
Alfajores With Bread Layers: a Unique Dessert
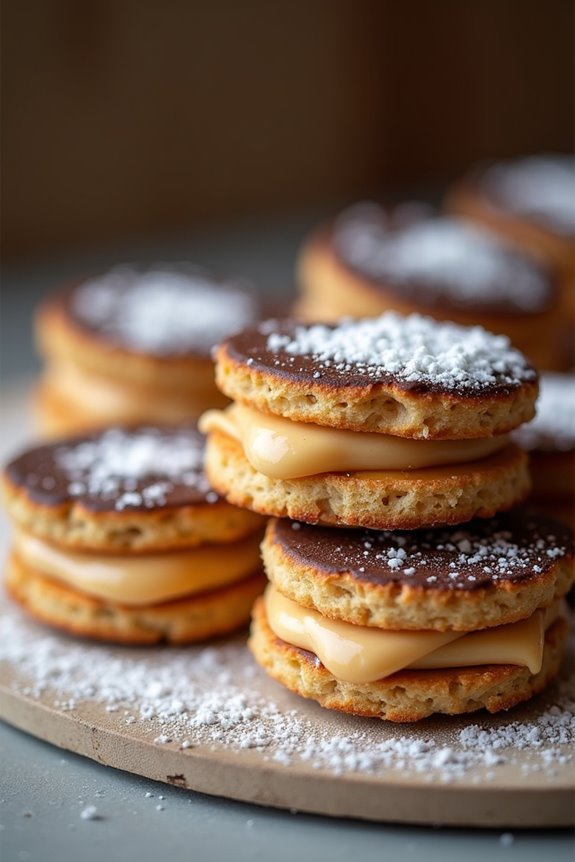
Alfajores, traditionally known as a sweet treat made with two cookies filled with dulce de leche, have taken an interesting twist in this recipe by incorporating layers of soft, rustic bread. This unique take on the classic Argentinian dessert not only adds texture but also introduces a delightful breadiness that harmonizes beautifully with the rich, creamy filling.
Perfect for gatherings or as an indulgent treat, these alfajores with bread layers will surely impress your friends and family with their unexpected and delicious combination.
The process of creating these alfajores is straightforward, yet it requires a bit of patience to assemble the layers. You’ll want to ascertain your bread is fresh and slightly toasted for that perfect bite. The combination of the bread’s fluffiness and the gooey sweetness of dulce de leche will create a memorable dessert experience.
Serve them dusted with powdered sugar for a touch of elegance, and enjoy this delightful fusion of flavors.
Ingredients (Serves 4-6):
- 6 slices of rustic white bread
- 1 cup dulce de leche
- 1/2 cup unsweetened cocoa powder
- 1/2 cup powdered sugar (for dusting)
- 1 teaspoon vanilla extract
- 1/4 cup unsalted butter, softened
- 1/4 cup milk (for dipping)
- Pinch of salt
Cooking Instructions:
- Prepare the Bread: Start by trimming the crusts off each slice of rustic white bread to create clean edges. This will help the layers stick together better and give a more polished look to your alfajores.
- Create the Bread Layers: Lay three slices of bread on a flat surface. Spread a generous layer of dulce de leche over each slice. Stack them on top of each other to form a three-layer stack. Repeat the process with the remaining three slices of bread to create a second stack.
- Dip and Coat: In a shallow bowl, combine the milk and vanilla extract. Quickly dip the edges of each stacked bread layer into the milk mixture, making sure not to soak them. This will add moisture and flavor.
- Dust with Cocoa Powder: In a separate bowl, mix the cocoa powder and a pinch of salt. Roll the edges of the dipped bread layers in the cocoa mixture until well-coated. This adds a rich chocolate flavor that complements the dulce de leche.
- Chill and Set: Place the alfajores in the refrigerator for about 30 minutes. This will help the layers firm up and hold their shape better, making them easier to slice and serve.
- Slice and Serve: Once chilled, remove the alfajores from the refrigerator and slice them into squares or triangles, depending on your preference. Dust the tops with powdered sugar before serving for an elegant finish.
Extra Tips:
When making alfajores with bread layers, using slightly stale bread can enhance the texture and flavor, as it will absorb the dulce de leche without becoming overly soggy.
Additionally, feel free to experiment with different fillings, such as chocolate ganache or fruit preserves, to add a personal touch to your dessert. Enjoy these treats fresh, but they can also be stored in an airtight container in the refrigerator for a couple of days to allow the flavors to meld even further.
Pan De Algas: Seaweed Bread for Adventurous Palates
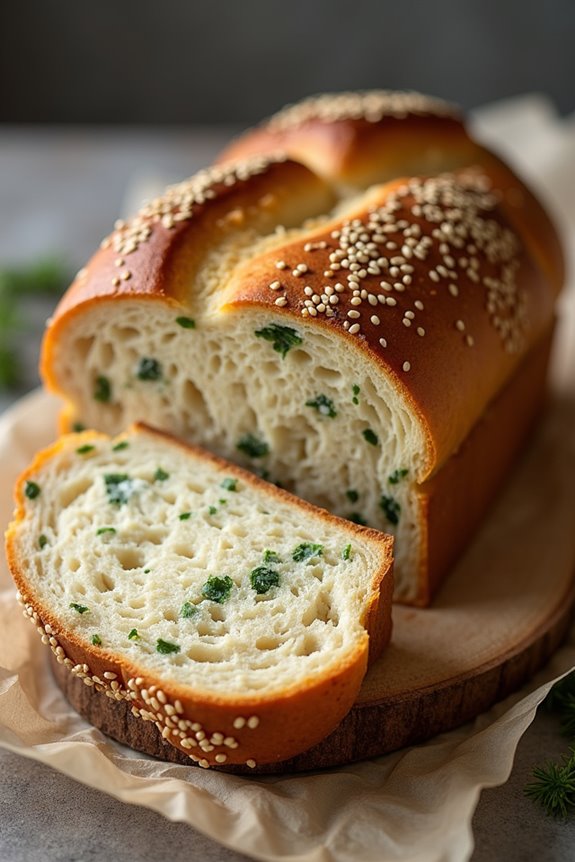
Pan de Algas, or seaweed bread, is a unique and flavorful addition to the rustic Argentinian bread repertoire. Combining the earthy flavors of seaweed with traditional bread-making techniques, this recipe offers a delightful twist for those looking to expand their culinary horizons. The use of seaweed not only enhances the taste but also adds a nutritious element, making this bread a wholesome choice for adventurous palates.
This bread pairs wonderfully with a variety of dishes, from soups to salads, or can simply be enjoyed fresh with a touch of butter.
Making Pan de Algas requires some preparation, particularly in sourcing the right type of seaweed, such as dulse or nori, which are both rich in umami flavors. The recipe is straightforward, allowing you to infuse your dough with the distinct taste of the sea while maintaining the integrity of classic bread.
With a little patience and technique, you can create a loaf that isn’t just a side dish but a conversation starter at your dining table.
Ingredients (serving size of 4-6 people):
- 2 cups all-purpose flour
- 1 cup whole wheat flour
- 1 tablespoon active dry yeast
- 1 teaspoon salt
- 1 tablespoon sugar
- 1 ½ cups warm water (about 110°F)
- ½ cup dried seaweed (dulse or nori), finely chopped
- 2 tablespoons olive oil
- Optional: sesame seeds for topping
Cooking Instructions:
- Activate the Yeast: In a small bowl, combine the warm water, sugar, and yeast. Stir gently and let it sit for about 5-10 minutes until frothy. This step guarantees that the yeast is active and ready to help the dough rise.
- Mix Dry Ingredients: In a large mixing bowl, whisk together the all-purpose flour, whole wheat flour, and salt. Make sure the salt and flour are well combined, as salt can inhibit the yeast’s growth if added directly.
- Combine Ingredients: Once the yeast mixture is frothy, pour it into the bowl with the dry ingredients along with the olive oil and chopped seaweed. Stir with a wooden spoon or spatula until a shaggy dough forms.
- Knead the Dough: Transfer the dough onto a lightly floured surface. Knead the dough for about 8-10 minutes until it becomes smooth and elastic. If the dough is too sticky, add a little more flour as needed.
- First Rise: Place the kneaded dough in a lightly greased bowl, cover it with a damp cloth, and let it rise in a warm area for about 1 hour or until it has doubled in size.
- Shape the Loaf: Once risen, punch down the dough to release air. Shape it into a round or oval loaf, depending on your preference. Place it on a baking sheet lined with parchment paper.
- Second Rise: Cover the shaped loaf with a cloth again and let it rise for an additional 30 minutes. This second rise is important for developing the bread’s texture.
- Preheat the Oven: While the dough is rising, preheat your oven to 375°F (190°C).
- Bake the Bread: If desired, sprinkle sesame seeds on top of the loaf before baking. Bake the bread in the preheated oven for 25-30 minutes, or until the crust is golden brown and the loaf sounds hollow when tapped on the bottom.
- Cool and Serve: Once baked, remove the bread from the oven and let it cool on a wire rack. Allow it to cool for at least 15 minutes before slicing to maintain its structure.
Extra Tips: When using dried seaweed, make sure to chop it finely to guarantee an even distribution throughout the dough. You can also experiment with different types of seaweed to find your preferred flavor profile.
For added moisture, consider adding ingredients like grated zucchini or carrots, which will complement the seaweed and enhance the bread’s texture. Enjoy your Pan de Algas fresh or toasted, and don’t be afraid to pair it with unique toppings like avocado or smoked salmon for a truly adventurous experience!
Pan De Frutas: Fruit-Infused Bread to Satisfy Your Sweet Tooth
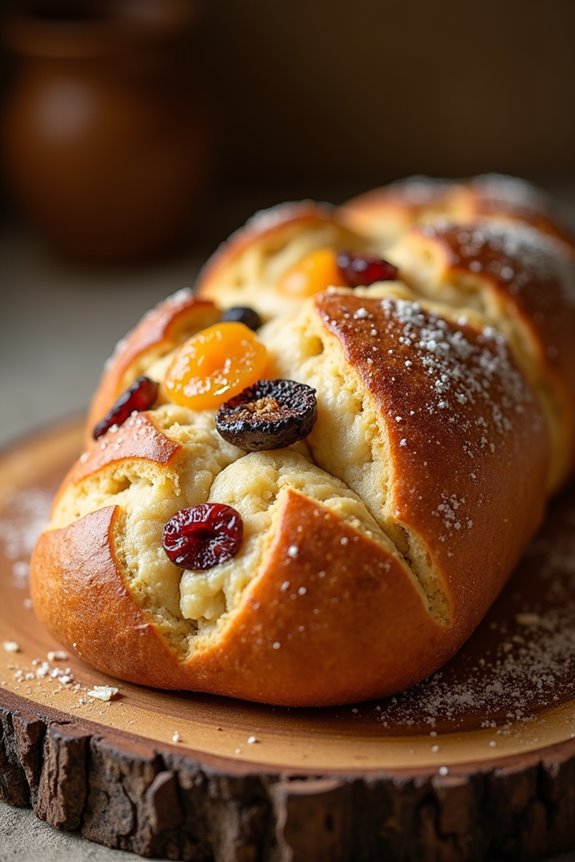
Pan De Frutas is a delightful Argentinian bread that brings together the rustic charm of traditional baking with a sweet twist. This fruit-infused bread is perfect for breakfast, an afternoon snack, or even as a dessert.
With a medley of dried fruits and a hint of citrus zest, Pan De Frutas is certain to satisfy your sweet tooth while providing a comforting, homemade experience. The combination of soft, fluffy bread and sweet, chewy fruits makes it a truly irresistible treat that can be enjoyed any time of the day.
Making this bread isn’t only straightforward but also rewarding. The aroma of baking bread will fill your kitchen, inviting everyone to gather around and enjoy a slice fresh from the oven.
Whether you pair it with butter, cheese, or simply enjoy it on its own, this Pan De Frutas is certain to become a family favorite. Gather your ingredients and get ready to create a delicious loaf that embodies the spirit of Argentinian baking.
Ingredients (Serves 4-6):
- 3 cups all-purpose flour
- 1 cup warm milk
- 1/4 cup sugar
- 2 1/4 teaspoons active dry yeast
- 1/2 teaspoon salt
- 1/4 cup unsalted butter, melted
- 1 large egg
- 1 cup mixed dried fruits (such as apricots, raisins, and figs)
- Zest of 1 orange
- Zest of 1 lemon
- 1 teaspoon cinnamon (optional)
Cooking Instructions:
- Activate the Yeast: In a small bowl, combine the warm milk and sugar. Sprinkle the yeast over the milk mixture and let it sit for about 5-10 minutes until it becomes frothy. This step guarantees that the yeast is active and ready to help the bread rise.
- Combine Dry Ingredients: In a large mixing bowl, whisk together the flour, salt, and cinnamon (if using). Make a well in the center of the flour mixture.
- Mix Wet Ingredients: In a separate bowl, mix the melted butter, egg, orange zest, and lemon zest. Pour this mixture into the well in the dry ingredients, followed by the activated yeast mixture.
- Knead the Dough: Use a wooden spoon or your hands to combine the ingredients until a sticky dough forms. Transfer the dough onto a floured surface and knead for about 8-10 minutes until it becomes smooth and elastic. If the dough is too sticky, sprinkle in a little more flour as needed.
- Incorporate Dried Fruits: Once the dough is kneaded, gently fold in the mixed dried fruits until evenly distributed throughout the dough.
- First Rise: Place the dough in a greased bowl, cover it with a clean kitchen towel, and let it rise in a warm area for about 1-1.5 hours, or until it has doubled in size.
- Shape the Loaf: After the dough has risen, punch it down to release the air. Shape the dough into a loaf by flattening it slightly, then rolling it tightly. Pinch the seams to seal.
- Second Rise: Place the shaped loaf into a greased loaf pan. Cover it again with the kitchen towel and let it rise for another 30-45 minutes until it has risen to the top of the pan.
- Preheat the Oven: While the dough is rising for the second time, preheat your oven to 350°F (175°C).
- Bake: Once the loaf has risen, bake it in the preheated oven for 30-35 minutes, or until the top is golden brown and it sounds hollow when tapped on the bottom.
- Cool and Serve: Remove the bread from the oven and let it cool in the pan for about 10 minutes. Then transfer it to a wire rack to cool completely before slicing.
Extra Tips:
For an added burst of flavor, consider soaking the dried fruits in warm water or rum for an hour before incorporating them into the dough. This not only plumps up the fruits but also adds an extra depth of flavor to your Pan De Frutas.
Additionally, feel free to experiment with different combinations of dried fruits or even add nuts for a delightful crunch. Enjoy your homemade bread fresh, or store it in an airtight container for up to three days to savor its deliciousness for longer!