

As we embrace the essence of Colombian Easter traditions, the vibrant flavors come to life in our kitchens. Each recipe, from the comforting Ajiaco Santafereño to the sweet Natilla, carries a rich heritage and a sense of celebration. These dishes are more than just food; they’re a way to connect with loved ones and create lasting memories. Let’s explore these delightful recipes that not only nourish our bodies but also warm our hearts.
Ajiaco Santafereño
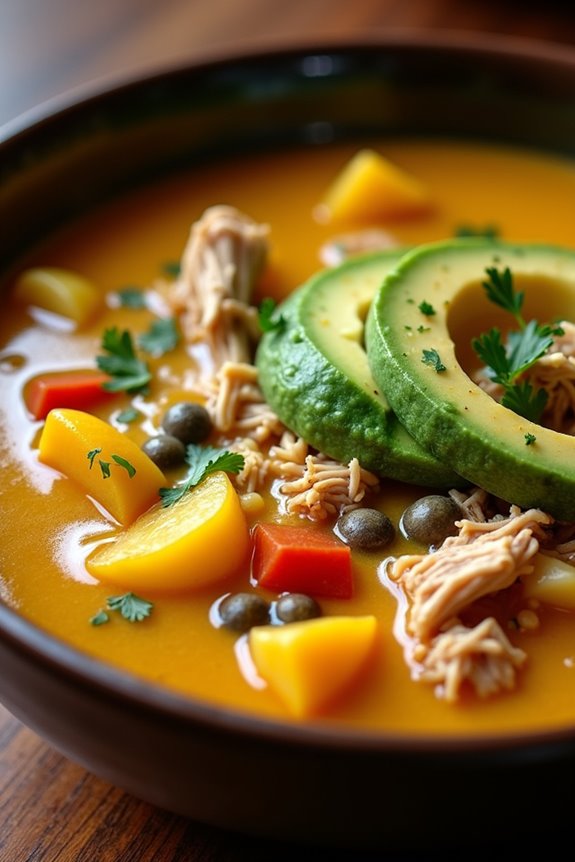
Ajiaco Santafereño is a traditional Colombian soup that hails from the capital city of Bogotá. This hearty dish is a perfect representation of Colombian comfort food, combining the flavors of chicken, potatoes, corn, and herbs. It’s particularly popular during the Easter season, making it a staple in many Colombian households.
The dish’s unique flavor profile is achieved through the use of three types of potatoes and the addition of guascas, a herb native to Colombia. The result is a rich, creamy, and satisfying soup that warms both body and soul.
Preparing Ajiaco Santafereño is an engaging experience, as it involves layering flavors and textures. The slow-cooked chicken creates a flavorful broth, while the potatoes break down to thicken the soup. The dish is typically served with avocado, capers, and cream on the side, allowing each person to customize their bowl to their liking.
This recipe is perfect for a family gathering or a cozy dinner, bringing everyone together to enjoy a bowl of this delightful Colombian classic.
Ingredients (Serves 4-6)
- 1 whole chicken (about 3-4 lbs), cleaned and cut into pieces
- 12 cups of water
- 2 medium yellow potatoes, peeled and diced
- 2 medium red potatoes, peeled and diced
- 2 medium white potatoes, peeled and diced
- 2 ears of corn, cut into halves or thirds
- 1 medium onion, chopped
- 2 cloves of garlic, minced
- 1 teaspoon of guascas (dried herb)
- Salt to taste
- Pepper to taste
- 1 cup of heavy cream
- 1 avocado, sliced
- Capers for garnish
- Fresh cilantro for garnish
Cooking Instructions
1. Prepare the Chicken and Broth: In a large pot, combine the whole chicken pieces with 12 cups of water. Bring the water to a boil over medium-high heat, skimming off any foam that forms on the surface. This will create a clear broth.
Once boiling, reduce the heat to low and allow the chicken to simmer for about 30-40 minutes until fully cooked.
2. Add the Vegetables: Once the chicken is cooked, remove it from the pot and set it aside to cool slightly. Add the chopped onion, minced garlic, and diced yellow, red, and white potatoes to the pot.
Also, add the corn pieces. Stir well, cover, and let the vegetables cook in the broth for about 20 minutes, or until the potatoes are tender.
3. Shred the Chicken: While the vegetables are cooking, shred the cooled chicken into bite-sized pieces. Discard the skin and bones. Set the shredded chicken aside, as it will be added back into the soup later.
4. Combine and Season: Once the potatoes are tender, return the shredded chicken to the pot. Add the guascas, and season with salt and pepper to taste.
Allow the soup to simmer for an additional 10 minutes, letting all the flavors meld together.
5. Serve: Ladle the Ajiaco Santafereño into bowls. Provide heavy cream, sliced avocado, capers, and fresh cilantro on the side for guests to add to their soup according to their preference.
Extra Tips
When preparing Ajiaco Santafereño, it’s crucial to use the right types of potatoes for the best texture and flavor. The combination of yellow, red, and white potatoes not only provides a variety of tastes but also guarantees a creamy consistency when cooked.
If guascas is difficult to find, you may substitute it with a mix of oregano and cilantro, though the flavor will differ slightly. Additionally, allowing the soup to rest for a few minutes after cooking can enhance the flavors even more, making each bowl of Ajiaco Santafereño a delightful experience.
Sancocho De Pescado
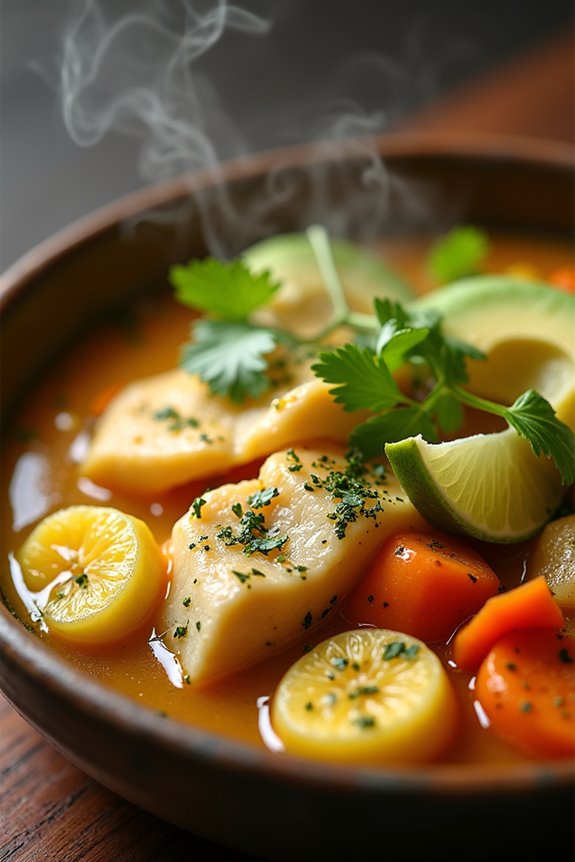
Sancocho De Pescado is a traditional Colombian fish stew that beautifully combines the flavors of fresh fish, tropical vegetables, and aromatic herbs. This dish is especially popular during Easter celebrations in Colombia, where families gather to share hearty meals.
The stew isn’t only rich in flavor but also offers a comforting and warm experience, making it perfect for family gatherings or festive occasions. The combination of fish, yuca, plantains, and cilantro makes this a nutritious and satisfying dish that highlights the bounty of the Colombian coastline.
To make Sancocho De Pescado, you’ll need to source fresh fish, ideally a firm white fish like tilapia or snapper, which holds up well during cooking. The key to a successful sancocho lies in allowing the broth to develop a deep flavor from the simmered ingredients. This dish is a wonderful representation of Colombian culinary traditions and is often served with avocado and rice on the side.
Let’s explore the recipe, perfect for serving 4-6 people.
Ingredients:
- 2 lbs of fresh fish (tilapia, snapper, or similar)
- 1 large onion, chopped
- 2 cloves of garlic, minced
- 1 large tomato, chopped
- 1 green bell pepper, chopped
- 1 large carrot, sliced
- 1 large yuca (cassava), peeled and cut into chunks
- 2 ripe plantains, peeled and sliced
- 8 cups of fish stock or water
- 1 bunch of cilantro, chopped
- 2-3 tablespoons of olive oil
- Salt and pepper to taste
- Lime wedges, for serving
- Avocado, sliced, for serving
- Cooked white rice, for serving
Cooking Instructions:
- Prepare the Fish: Clean the fish thoroughly and cut it into large pieces. Season with salt and pepper, then set it aside to marinate while you prepare the broth.
- Sauté Aromatics: In a large pot, heat the olive oil over medium heat. Add the chopped onions, garlic, and green bell pepper. Sauté for about 5-7 minutes until the onions are translucent and fragrant.
- Add Vegetables: Stir in the chopped tomato and sliced carrot, cooking for another 3-4 minutes. This will help to develop the flavors before adding the liquids.
- Build the Broth: Pour in the fish stock or water, and bring the mixture to a gentle boil. Once boiling, add the yuca and cook for about 10 minutes, allowing the flavors to meld.
- Introduce Plantains: After the yuca has softened slightly, add the sliced plantains to the pot. Continue to simmer for an additional 5-7 minutes until the plantains are tender.
- Cook the Fish: Gently add the seasoned fish pieces to the pot, ensuring they’re submerged in the broth. Cook for another 10-12 minutes, or until the fish is cooked through and flaky.
- Finish with Cilantro: Stir in the chopped cilantro just before serving, and adjust the seasoning with salt and pepper to taste.
- Serve: Ladle the sancocho into bowls and garnish with lime wedges and slices of avocado. Serve with a side of cooked white rice for a complete meal.
Extra Tips:
When preparing Sancocho De Pescado, it’s important to use fresh ingredients to enhance the flavor of the dish. If fresh fish isn’t available, frozen fish can be a good substitute, but try to avoid overcooking it.
You can also experiment with different vegetables based on what you have on hand, such as potatoes or corn. For added depth, consider incorporating some spices like cumin or a touch of chili for heat.
Cazuela De Mariscos
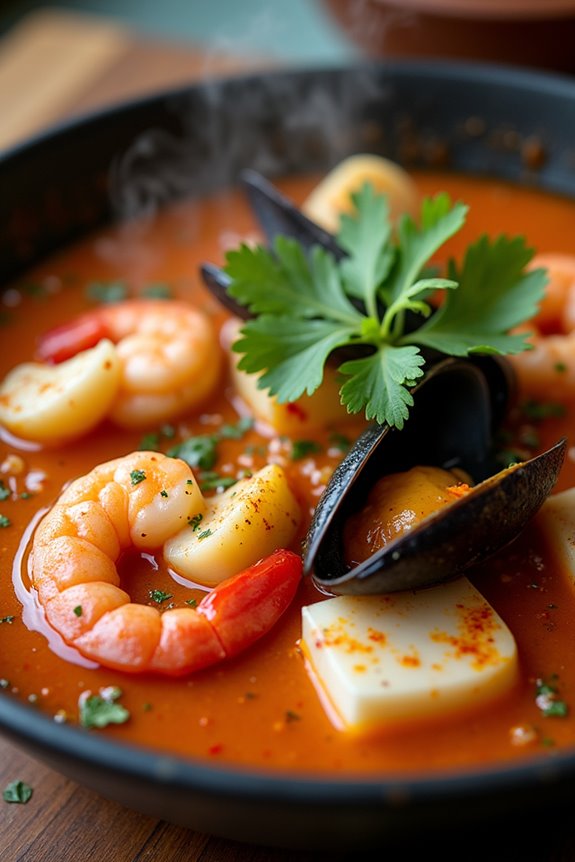
Cazuela de Mariscos is a traditional Colombian seafood stew that brings the bounties of the ocean straight to your table. Celebrated for its rich, flavorful broth and a medley of fresh seafood, this dish is often enjoyed during the Holy Week, making it a perfect choice for Easter gatherings. The combination of coconut milk, spices, and various types of fish and shellfish creates a delightful experience that’s both comforting and exotic.
This dish isn’t only a feast for the senses, but it also embodies the coastal culinary heritage of Colombia. Each region may have its own take on the cazuela, incorporating local ingredients and personal touches. Whether you’re planning a family meal or a festive gathering, Cazuela de Mariscos is sure to impress your guests with its vibrant flavors and aromatic appeal.
Ingredients (Serves 4-6)
- 500g shrimp, peeled and deveined
- 500g mussels, cleaned and debearded
- 500g fish fillets (such as tilapia or snapper), cut into chunks
- 1 cup coconut milk
- 4 cups fish stock or water
- 1 medium onion, finely chopped
- 2 cloves garlic, minced
- 1 red bell pepper, diced
- 2 medium tomatoes, chopped
- 1 teaspoon ground cumin
- 1 teaspoon paprika
- 1 teaspoon dried oregano
- Salt and pepper to taste
- 2 tablespoons olive oil
- Fresh cilantro, chopped (for garnish)
- Lime wedges (for serving)
Cooking Instructions
- Prepare the Ingredients: Start by cleaning and prepping all your seafood. Peel and devein the shrimp, clean the mussels, and cut the fish into chunks. This will save you time during cooking and guarantee that everything is ready to go when you need it.
- Sauté the Aromatics: In a large pot or Dutch oven, heat the olive oil over medium heat. Add the chopped onion and garlic, sautéing until the onion becomes translucent (about 5 minutes). This will create a flavorful base for your stew.
- Add Vegetables and Spices: Stir in the diced red bell pepper and chopped tomatoes, cooking for an additional 3-4 minutes until the vegetables soften. Then, add the ground cumin, paprika, and dried oregano, stirring to combine. The spices will infuse the dish with delightful warmth and depth.
- Pour in the Liquids: Carefully add the fish stock (or water) to the pot, followed by the coconut milk. Stir the mixture well and bring it to a gentle simmer. Allow it to cook for about 10 minutes so the flavors meld together.
- Add the Seafood: Once the broth is simmering, add the fish chunks and mussels first. Cook for about 5 minutes, then add the shrimp. Continue to simmer for an additional 5-7 minutes, or until the shrimp are pink and the mussels have opened. Discard any mussels that don’t open.
- Season and Serve: Taste the cazuela and adjust the seasoning with salt and pepper as needed. Once done, ladle the stew into bowls, garnish with fresh cilantro, and serve with lime wedges on the side for an extra burst of flavor.
Extra Tips
When preparing Cazuela de Mariscos, freshness is key; try to source the highest quality seafood available for the best results.
Feel free to customize the seafood mix based on your preferences or what’s in season. If you enjoy a little heat, consider adding some chopped jalapeño or a dash of hot sauce to the broth.
Finally, this dish pairs beautifully with crusty bread or rice to soak up the delicious sauce. Enjoy your culinary journey to the Colombian coast!
Caldo De Costilla

Caldo De Costilla is a traditional Colombian beef rib soup that’s perfect for any occasion, but especially during Easter celebrations. This hearty dish is renowned for its comforting flavors and nourishing qualities, making it a favorite among families.
The combination of tender beef ribs, aromatic herbs, and fresh vegetables creates a warm and inviting meal that brings everyone to the table. Cooking Caldo De Costilla is a delightful experience that fills your kitchen with enticing aromas. The beef is simmered to perfection, allowing the flavors to meld beautifully.
Typically served with rice and avocado on the side, this dish isn’t only satisfying but also a wonderful way to celebrate Colombian culinary traditions.
Ingredients (Serves 4-6):
- 2 pounds of beef short ribs
- 2 liters of water
- 1 large onion, chopped
- 2 medium potatoes, peeled and diced
- 2 medium carrots, sliced
- 1 cup of corn on the cob, cut into pieces
- 2 cloves of garlic, minced
- 1 bunch of fresh cilantro, chopped
- 1 tablespoon of salt
- ½ teaspoon of black pepper
- 1 teaspoon of ground cumin
- Juice of 1 lime
Cooking Instructions:
- Prepare the Ingredients: Begin by washing the beef ribs under cold water to remove any impurities. Chop the onion, peel and dice the potatoes, slice the carrots, and cut the corn into smaller pieces. Mince the garlic and chop the cilantro. Having all your ingredients prepped will make the cooking process smoother.
- Cook the Beef Ribs: In a large pot, add the beef ribs and pour in the water. Bring it to a boil over medium-high heat. Once boiling, reduce the heat to low and skim off any foam that rises to the surface. This step is important for achieving a clear broth.
- Add Aromatics and Vegetables: Once the foam has been removed, add the chopped onion, minced garlic, and season with salt, black pepper, and cumin. Stir the mixture well, then add the diced potatoes, sliced carrots, and corn pieces to the pot. Allow it to return to a gentle simmer.
- Simmer the Soup: Cover the pot and let the soup simmer for about 1.5 to 2 hours, or until the beef is tender and falling off the bone. Check occasionally to verify the soup isn’t boiling too vigorously, and adjust the heat as necessary.
- Finish with Cilantro and Lime: Once the beef is tender, stir in the chopped cilantro and lime juice. Taste the soup and adjust the seasoning if needed. Allow it to simmer for an additional 5-10 minutes to incorporate the fresh flavors.
- Serve: Ladle the hot soup into bowls, confirming each serving has a good mix of beef, vegetables, and broth. Serve with a side of rice and avocado for a complete meal.
Extra Tips: To enhance the flavor of your Caldo De Costilla, consider adding a dash of red pepper flakes for a bit of heat or a couple of bay leaves during the simmering process. Additionally, letting the soup sit for a few hours or overnight in the refrigerator can intensify the flavors, making it even more delicious when reheated. Enjoy this heartwarming dish with family and friends!
Arepas De Huevo

Arepas de Huevo is a beloved Colombian dish that combines the delightful flavors of corn dough with a deliciously cooked egg tucked inside. Originating from the Caribbean coast of Colombia, this dish is often enjoyed as a breakfast or snack. The crispy exterior, paired with the soft, runny yolk, creates a perfect bite that’s both satisfying and comforting.
Making Arepas de Huevo is a fun and rewarding experience, and they can be served with a variety of sauces or toppings, such as hogao or avocado.
To create the perfect Arepas de Huevo, you’ll need to master the art of creating a dough that’s both pliable and flavorful. The dough is made from precooked corn flour, which gives the arepas their distinct texture. The key to a successful Arepa de Huevo lies in the frying technique, which guarantees that the outside is crispy while the inside remains soft and filled with a delicious egg. Once you get the hang of it, you can easily impress your family and friends with this traditional Colombian delicacy.
Ingredients (Serves 4-6 people):
- 2 cups precooked corn flour (arepa flour)
- 1 ½ cups warm water
- 1 teaspoon salt
- 4-6 large eggs
- Vegetable oil (for frying)
- Optional: hogao (Colombian tomato and onion sauce) or avocado for serving
Cooking Instructions:
- Prepare the Dough: In a large mixing bowl, combine the precooked corn flour, warm water, and salt. Mix with your hands until a smooth and pliable dough forms. If the dough is too dry, gradually add more water; if too wet, sprinkle in a bit more flour. Cover the dough with a damp cloth and let it rest for about 10-15 minutes.
- Form the Arepas: Divide the dough into equal portions (about the size of a golf ball). Flatten each ball into a disc, approximately ½ inch thick. Use your thumb to create a small indentation in the center of each disc, which will hold the egg later.
- Fry the Arepas: In a deep skillet or a frying pan, heat about 2 inches of vegetable oil over medium heat. Once the oil is hot, carefully add the arepas one at a time, cooking them for about 3-4 minutes on each side, or until they’re golden brown and crispy. Use a slotted spoon to remove them from the oil and place them on a paper towel to drain excess oil.
- Add the Eggs: Once the arepas are fried, reduce the heat to low. Using a sharp knife, carefully cut a slit into the side of each arepa to create a pocket. Crack an egg into the pocket of each arepa. Return the arepas to the hot oil, cooking for an additional 2-3 minutes, or until the egg is cooked to your desired doneness.
- Serve and Enjoy: Carefully remove the arepas from the oil and place them on a paper towel to absorb any excess oil. Serve hot with hogao or sliced avocado on the side for added flavor.
Extra Tips:
When making Arepas de Huevo, it’s crucial to control the temperature of the oil carefully. If the oil is too hot, the arepas will brown too quickly and not cook through; if it’s too cool, they’ll absorb too much oil and become greasy.
To test the oil’s readiness, drop a small piece of dough into the oil—if it sizzles and rises to the top, it’s ready for frying. Additionally, feel free to experiment with different fillings, such as cheese or herbs, to customize your Arepas de Huevo to your liking!
Empanadas De Pollo

Empanadas De Pollo, or chicken empanadas, are a beloved Colombian dish that showcases the country’s rich culinary tradition. These delicious pastries are filled with a savory mixture of shredded chicken, spices, and vegetables, all encased in a golden, flaky dough. They’re perfect for any occasion, whether it’s a festive gathering, a family meal, or simply a delicious snack.
The combination of textures and flavors in these empanadas makes them a delightful treat that’s sure to please everyone at the table.
Preparing Empanadas De Pollo might seem intimidating at first, but with the right ingredients and a bit of practice, you can master this recipe in no time. The dough is easy to work with, and the filling can be customized to your taste. Serve them with a side of avocado sauce or aji for an authentic Colombian experience.
This dish typically serves 4-6 people, making it perfect for sharing with family and friends.
Ingredients (Serves 4-6)
- 2 cups all-purpose flour
- 1/2 cup unsalted butter, softened
- 1/2 teaspoon salt
- 1/4 cup cold water
- 2 cups cooked and shredded chicken
- 1/2 cup onion, finely chopped
- 1/2 cup bell pepper, finely chopped
- 2 cloves garlic, minced
- 1 teaspoon ground cumin
- 1 teaspoon paprika
- 1/2 teaspoon black pepper
- 1/4 cup cilantro, chopped
- 1 egg, beaten (for egg wash)
- Oil for frying
Cooking Instructions
1. Prepare the Dough: In a large mixing bowl, combine the all-purpose flour and salt. Add the softened butter and mix until the mixture resembles coarse crumbs. Gradually add the cold water, mixing until a smooth dough forms.
Wrap the dough in plastic wrap and let it rest in the refrigerator for at least 30 minutes.
2. Make the Filling: In a skillet over medium heat, add a splash of oil and sauté the chopped onion, bell pepper, and garlic until they’re softened and fragrant, about 3-5 minutes.
Stir in the shredded chicken, cumin, paprika, black pepper, and cilantro. Cook for an additional 5 minutes, allowing the flavors to meld. Remove from heat and let the filling cool slightly.
3. Roll Out the Dough: Once the dough has rested, divide it into small balls, about the size of a golf ball. On a lightly floured surface, roll each ball out into a circle, approximately 6 inches in diameter.
Try to make the edges slightly thinner than the center to guarantee even cooking.
4. Fill the Empanadas: Place a spoonful of the chicken filling in the center of each dough circle. Be careful not to overfill, as this can make sealing the empanadas difficult.
Fold the dough over the filling to create a half-moon shape, and pinch the edges together to seal. You can crimp the edges with a fork for an extra seal and decorative touch.
5. Fry the Empanadas: Heat oil in a deep skillet or fryer over medium-high heat. Once the oil is hot (around 350°F), carefully add the empanadas in batches, being sure not to overcrowd the pan.
Fry them for about 3-4 minutes on each side or until they’re golden brown. Remove them with a slotted spoon and drain on paper towels.
6. Serve and Enjoy: Allow the empanadas to cool slightly before serving. You can serve them warm with a side of avocado sauce or aji for dipping.
Extra Tips
When making Empanadas De Pollo, it’s important to verify the filling isn’t too hot before placing it in the dough, as this can cause the dough to become soggy.
Additionally, if you prefer a healthier option, you can bake the empanadas instead of frying them. Simply brush them with the beaten egg and place them on a baking tray lined with parchment paper, then bake at 375°F for about 20-25 minutes, or until golden brown.
Experimenting with different fillings, such as beef, cheese, or vegetables, can also add variety to this classic dish!
Buñuelos

Buñuelos are a beloved Colombian treat, especially popular during the Easter season. These delightful deep-fried dough balls are made from a mixture of cheese and dough, resulting in a crispy exterior and a soft, savory center.
Traditionally enjoyed during festive occasions, buñuelos are often served with a hot drink, making them a comforting and indulgent snack. The secret to perfect buñuelos lies in the balance of ingredients and the frying technique. When made correctly, they should puff up beautifully and have a golden-brown color.
Whether you’re celebrating Easter or simply craving a delicious snack, these buñuelos will surely impress your family and friends.
Ingredients (Serves 4-6)
- 2 cups of arepa flour
- 1 cup of queso fresco (fresh cheese), crumbled
- 1 teaspoon of baking powder
- 1/2 teaspoon of salt
- 1/4 cup of sugar
- 1/2 cup of warm water
- 1 egg
- Oil for frying
Cooking Instructions
- Prepare the Dough Mixture: In a large mixing bowl, combine the arepa flour, crumbled queso fresco, baking powder, salt, and sugar. Mix these dry ingredients thoroughly to guarantee that the cheese is evenly distributed throughout the flour.
- Add Wet Ingredients: In a separate bowl, whisk together the warm water and egg. Gradually pour this mixture into the dry ingredients, stirring with a wooden spoon or your hands until a soft dough forms. The dough should be moist but not sticky; adjust with a little more water or flour if needed.
- Shape the Buñuelos: Once the dough is well combined, divide it into equal portions (about the size of a golf ball). Roll each portion into a smooth ball, making sure there are no cracks on the surface. This step is vital for achieving evenly fried buñuelos.
- Heat the Oil: In a deep frying pan or pot, heat oil over medium-high heat until it reaches around 350°F (175°C). You can test if the oil is hot enough by dropping a small piece of dough into it; it should sizzle and rise to the surface.
- Fry the Buñuelos: Carefully place the buñuelos into the hot oil, making sure not to overcrowd the pan. Fry them for about 5-7 minutes, turning occasionally, until they’re golden brown and puffed up. Remove them with a slotted spoon and let them drain on paper towels.
- Serve: Serve the buñuelos warm, optionally dusted with powdered sugar or accompanied by a hot beverage like hot chocolate or coffee for a perfect combination.
Extra Tips
When making buñuelos, guarantee your cheese is fresh and not overly salty, as this can affect the flavor of the final product.
Frying in small batches will help maintain the oil temperature and guarantee that each buñuelo cooks evenly. For an extra touch, you can experiment with adding spices like cinnamon or nutmeg to the dough for a unique flavor twist.
Enjoy your buñuelos fresh for the best taste!
Natilla
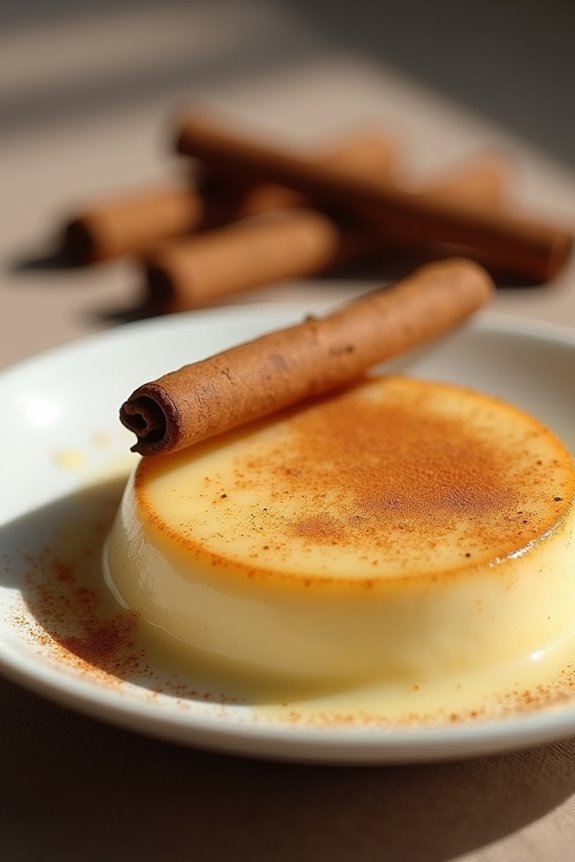
Natilla is a beloved Colombian dessert traditionally enjoyed during the Christmas season and Easter celebrations. This creamy, custard-like dish is rich in flavor and has a delightful texture that melts in your mouth. With its base of milk and cornstarch, natilla is often flavored with cinnamon and sometimes includes coconut or raisins, giving it a unique twist that reflects the diverse culinary heritage of Colombia.
This recipe will guide you through creating a classic natilla that will impress your family and friends during festive gatherings. Making natilla is a simple process that requires minimal ingredients and effort. It’s typically served chilled, making it a rejuvenating end to any meal.
As you prepare this dessert, the fragrant aroma of cinnamon will fill your kitchen, beckoning everyone to gather around the table. With the following ingredients and steps, you’ll be able to create this delightful dish that embodies the spirit of Colombian celebrations.
Ingredients (Serves 4-6):
- 4 cups of whole milk
- 1 cup of sugar
- 1 cup of cornstarch
- 1 tablespoon of vanilla extract
- 1 teaspoon of ground cinnamon
- 1 pinch of salt
- 1/2 cup of grated coconut (optional)
- Cinnamon sticks for garnish (optional)
Cooking Instructions:
- Prepare the Milk Mixture: In a large saucepan, pour in the 4 cups of whole milk. Add the sugar, ground cinnamon, and a pinch of salt. Stir the mixture well to combine all the ingredients, verifying that the sugar dissolves completely.
- Heat the Mixture: Place the saucepan over medium heat, continuously stirring to prevent the milk from scorching at the bottom. Heat the mixture until it’s warm but not boiling. This step is vital as it helps to infuse the flavors of cinnamon into the milk.
- Mix the Cornstarch: In a separate bowl, combine the 1 cup of cornstarch with 1 cup of cold water, whisking until smooth. This will create a slurry that will help thicken the natilla as it cooks.
- Add the Cornstarch to the Milk: Once the milk mixture is warm, slowly pour in the cornstarch slurry while continuously stirring. This will help to avoid lumps forming in the natilla. Keep stirring until the mixture thickens and reaches a pudding-like consistency, which should take about 5 to 7 minutes.
- Add Flavorings: When the mixture has thickened, remove it from heat and stir in the vanilla extract and grated coconut (if using). Mix well until all ingredients are fully incorporated.
- Set the Natilla: Pour the natilla into a mold or individual serving cups. Smooth the top with a spatula and let it cool at room temperature for about 15 minutes before transferring it to the refrigerator to chill for at least 2 hours.
- Serve and Garnish: Once chilled, serve the natilla in the mold or cups. Optionally, garnish with cinnamon sticks or a sprinkle of ground cinnamon on top for an added touch of elegance.
Extra Tips:
When making natilla, verify that you stir continuously during the cooking process to achieve a smooth and creamy texture. If you prefer a richer flavor, you can substitute some of the whole milk for coconut milk or add a few tablespoons of sweetened condensed milk.
Additionally, feel free to experiment with other flavorings like nutmeg or cardamom to give your natilla a personal twist. Remember that the key to a perfect natilla is patience and careful attention to the heat – rush the process and you might end up with a lumpy dessert! Enjoy your delightful creation!
Arroz Con Leche
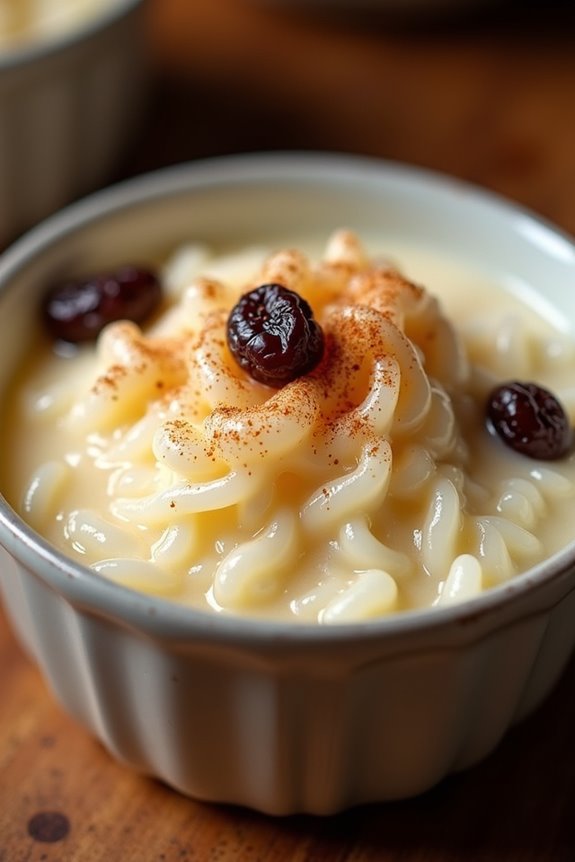
Arroz Con Leche, or Rice with Milk, is a beloved dessert in Colombian culture, especially during festive occasions like Easter. This creamy, sweet rice pudding is made with simple ingredients and is sure to delight the taste buds of anyone who tries it. The dish embodies the essence of comfort food; its rich and creamy texture combined with the sweet hints of cinnamon and vanilla creates a warm, inviting dessert that’s perfect for sharing with family and friends.
Making Arroz Con Leche is a straightforward process that involves cooking rice in milk and sugar, followed by seasoning it with spices. This traditional recipe isn’t only easy to prepare but also offers room for creativity, allowing you to adjust the sweetness or add additional flavors according to your preference. Serve it warm or chilled, and enjoy this delightful treat as part of your Easter celebrations or any time of the year.
Ingredients (Serves 4-6):
- 1 cup long-grain rice
- 4 cups whole milk
- 1 cup water
- 1 cup sugar (adjust to taste)
- 1 cinnamon stick
- 1 teaspoon vanilla extract
- 1/4 teaspoon salt
- Ground cinnamon for garnish (optional)
- Raisins (optional)
Cooking Instructions:
- Rinse the Rice: Start by rinsing the rice under cold water in a fine-mesh strainer. This step is essential as it removes excess starch, which can make the dish gummy. Rinse until the water runs clear.
- Cook the Rice: In a medium-sized pot, combine the rinsed rice and water. Bring the mixture to a boil over medium-high heat, then reduce the heat to low, cover, and simmer for about 15 minutes or until the water has been absorbed. This will help the rice become tender before adding the milk.
- Add Milk and Sugar: Once the water is absorbed, pour in the whole milk and add the sugar, cinnamon stick, and salt. Stir to combine. The addition of milk is what creates the creamy texture of the pudding.
- Simmer and Stir: Increase the heat to medium and bring the mixture to a gentle simmer. Stir frequently to prevent the rice from sticking to the bottom of the pot. Allow it to cook for about 20-25 minutes until the rice is tender and the mixture has thickened to a creamy consistency.
- Add Flavorings: Once the rice is cooked, remove the pot from the heat and stir in the vanilla extract. This adds a lovely fragrance and flavor to the dish. If desired, you can also fold in some raisins at this stage for added sweetness and texture.
- Serve and Garnish: Spoon the Arroz Con Leche into individual serving bowls. If you like, you can sprinkle a little ground cinnamon on top for garnish. Serve warm or allow to cool and refrigerate for a chilled dessert.
Extra Tips:
When making Arroz Con Leche, feel free to experiment with flavors! You can infuse the milk with citrus zest, such as lemon or orange, or even coconut milk for a tropical twist.
If you prefer a thicker pudding, cook it a bit longer, stirring frequently. Also, be mindful of the sweetness; you can always add more sugar, but it’s harder to take it out.
Enjoy this comforting dessert with your loved ones, and don’t hesitate to make it your own by adjusting the ingredients to suit your taste!
Obleas Con Arequipe

Obleas con arequipe is a traditional Colombian dessert that beautifully combines a crispy wafer with a rich, caramel-like filling known as arequipe. This sweet treat is often enjoyed during Easter and other festive occasions, making it a cherished part of Colombian culinary traditions.
The delicate texture of the obleas complements the smooth, sweet arequipe, creating a delightful contrast that’s sure to satisfy your sweet tooth.
Making obleas con arequipe at home is a simple yet rewarding process. With just a handful of ingredients, you can recreate this beloved snack and share it with family and friends.
Whether you’re preparing it for a holiday celebration or simply indulging in a personal treat, these obleas will bring a taste of Colombia right to your kitchen.
Ingredients (Serves 4-6 people)
- 12 obleas (wafer sheets)
- 1 cup arequipe (dulce de leche)
- 1 tablespoon grated coconut (optional)
- 1 tablespoon crushed nuts (optional)
- 1 teaspoon cinnamon (optional)
Cooking Instructions
1. Gather Your Ingredients: Start by arranging all the ingredients on your counter. Make certain that the obleas are intact and not broken, as they’ll serve as the base for your dessert.
Have the arequipe ready to spread, and prepare any optional toppings you wish to add.
2. Assemble the Obleas: Take one oblea and place it on a clean plate or flat surface. Using a knife or a spatula, spread a generous layer of arequipe over the oblea, covering it evenly.
Be careful not to use too much arequipe, as it might ooze out when you place the second wafer on top.
3. Create the Sandwich: Gently place a second oblea on top of the first one, pressing down slightly to help the arequipe adhere.
Repeat this process until you have made 6 sandwiches or have used all the obleas and arequipe.
4. Add Toppings (Optional): If you’re using grated coconut, crushed nuts, or cinnamon, sprinkle these toppings on the exposed arequipe of each oblea sandwich.
This step is optional but adds extra flavor and texture to the dish.
5. Chill (Optional): For a firmer texture, you can place the assembled obleas in the refrigerator for about 30 minutes.
This will allow the arequipe to set a little, making the obleas easier to handle when serving.
6. Serve: Once ready, cut the obleas into quarters or serve them whole, depending on your preference.
Arrange them on a serving platter and enjoy!
Extra Tips
When making obleas con arequipe, feel free to experiment with different toppings to customize the flavor.
Some people enjoy adding a drizzle of chocolate sauce or a sprinkle of sea salt for a unique twist.
Also, if you prefer a homemade version, you can make your own arequipe by simmering sweetened condensed milk until it thickens and turns a caramel color.
Always make certain that the obleas are fresh and not stale for the best texture and flavor experience.
Enjoy your culinary adventure!
Postre De Natas

Postre De Natas is a traditional Colombian dessert often enjoyed during Holy Week. This creamy delicacy is made from milk, sugar, and a few other simple ingredients, resulting in a rich and comforting dish that embodies the flavors of Colombian cuisine.
With its sweet and slightly caramelized taste, Postre De Natas is a perfect way to celebrate the Easter season with family and friends.
The origins of this dessert date back to colonial times, where it was made using fresh milk and ingredients that were readily available. The dish is characterized by its smooth texture and delicious flavor, making it a beloved treat throughout Colombia.
It’s often served chilled, allowing the flavors to meld together beautifully while providing a revitalizing end to any meal.
Ingredients (Serves 4-6):
- 4 cups of whole milk
- 1 cup of sugar
- 1/2 cup of cornstarch
- 1/4 teaspoon of salt
- 1 tablespoon of vanilla extract
- 1/2 cup of grated coconut (optional)
- 1/2 teaspoon of cinnamon (optional)
Cooking Instructions:
- Prepare the Ingredients: Start by measuring out all the ingredients. This will guarantee a smooth cooking process. Gather your milk, sugar, cornstarch, salt, vanilla extract, coconut, and cinnamon if you choose to use them.
- Mix Dry Ingredients: In a bowl, combine the cornstarch, sugar, and salt. Whisk these dry ingredients together until well blended. This will help prevent lumps when you add them to the milk later.
- Heat the Milk: In a large saucepan, pour in the whole milk and heat it over medium heat. Stir occasionally to prevent it from scorching. The goal is to warm the milk until it starts to steam, but don’t let it boil.
- Incorporate Dry Mixture: Once the milk is heated, gradually add the dry mixture to the saucepan while continuously whisking. This will confirm that the cornstarch dissolves completely and avoids clumping.
- Thicken the Mixture: Continue to cook the mixture over medium heat, stirring constantly, until it thickens considerably. This may take about 5-10 minutes. You’ll know it’s ready when it coats the back of a spoon.
- Add Flavorings: Remove the saucepan from the heat and stir in the vanilla extract. If using, add the grated coconut and cinnamon at this stage. Mix well to distribute the flavors evenly.
- Cool and Set: Pour the mixture into a serving dish or individual cups. Allow the Postre De Natas to cool to room temperature before refrigerating. Chill for at least 2 hours or until fully set.
- Serve: Once set, you can serve the Postre De Natas as is, or garnish with additional coconut or a sprinkle of cinnamon for added flavor and presentation.
Extra Tips:
When making Postre De Natas, it’s important to keep stirring the mixture while it thickens to prevent it from sticking to the bottom of the saucepan.
If you prefer a creamier texture, you can substitute some of the whole milk with cream. Additionally, feel free to experiment with flavors by adding a splash of rum or a hint of citrus zest for a unique twist.
Enjoy this delightful dessert chilled, and it’s sure to be a hit during your Easter celebrations!
Chocoramo

Chocoramo is a beloved Colombian treat that combines the richness of chocolate with the delightful texture of a marshmallow-filled cookie. This iconic snack isn’t only popular among children but also evokes nostalgia for many adults who grew up enjoying it.
The treat consists of a soft cake-like cookie base, filled with a fluffy marshmallow center, and is coated in a smooth layer of chocolate. Making Chocoramo at home can be a fun and rewarding experience, especially during the Easter season when families come together to share traditional recipes.
Creating your own Chocoramo allows you to personalize the flavors and ingredients while providing an opportunity for a bonding experience in the kitchen. This recipe is perfect for serving 4-6 people, making it an excellent choice for family gatherings or festive occasions.
So roll up your sleeves and get ready to indulge in a delicious homemade version of this Colombian favorite!
Ingredients (Serves 4-6):
- 1 cup all-purpose flour
- 1/2 cup sugar
- 1/2 cup unsweetened cocoa powder
- 1/2 teaspoon baking powder
- 1/4 teaspoon baking soda
- 1/4 teaspoon salt
- 1/2 cup unsalted butter, softened
- 2 large eggs
- 1 teaspoon vanilla extract
- 1 cup marshmallow fluff
- 1 cup dark chocolate chips
- 1 tablespoon vegetable oil
Cooking Instructions:
- Preheat the Oven: Begin by preheating your oven to 350°F (175°C). This step is essential as it guarantees that your cookies bake evenly and achieve the perfect texture.
- Mix Dry Ingredients: In a mixing bowl, whisk together the all-purpose flour, sugar, cocoa powder, baking powder, baking soda, and salt. This blend of dry ingredients will create a rich chocolate base for your cookies.
- Cream Butter and Eggs: In a separate bowl, cream the softened butter until light and fluffy. Add the eggs one at a time, mixing well after each addition, followed by the vanilla extract. This will create a smooth, creamy mixture that will help bind the cookie dough.
- Combine Mixtures: Gradually add the dry ingredients to the wet mixture, stirring until just combined. Avoid overmixing to guarantee your cookies remain tender and soft.
- Shape the Cookies: Using a cookie scoop or a tablespoon, drop spoonfuls of dough onto a lined baking sheet, spacing them about 2 inches apart. This spacing allows the cookies to spread evenly while baking.
- Bake the Cookies: Place the baking sheet in the preheated oven and bake for 10-12 minutes or until the cookies have puffed up and the edges are set. The centers may look slightly underbaked, which is fine as they’ll firm up as they cool.
- Cool the Cookies: Once baked, remove the cookies from the oven and let them cool on the baking sheet for about 5 minutes before transferring them to a wire rack to cool completely.
- Fill with Marshmallow Fluff: Once the cookies are completely cool, take half of the cookies and spread a generous layer of marshmallow fluff on the flat side. Top with the remaining cookies to create sandwiches.
- Melt the Chocolate: In a microwave-safe bowl, combine the dark chocolate chips and vegetable oil. Microwave in 30-second intervals, stirring in between, until the chocolate is fully melted and smooth.
- Coat the Cookies: Dip each cookie sandwich into the melted chocolate, making sure they’re fully coated. Place the coated cookies on a lined baking sheet and let them set at room temperature or in the refrigerator until the chocolate hardens.
Extra Tips:
For the best results, make sure to use high-quality chocolate for coating your Chocoramos, as this greatly influences the final flavor of the treat.
Additionally, if you want to add a personal touch, feel free to experiment with flavored marshmallow fluff or incorporate a hint of espresso powder into the cookie dough for a mocha twist.
Finally, these treats can be stored in an airtight container at room temperature for several days, making them perfect for sharing or enjoying throughout the Easter festivities!
Ensalada De Frutas

Ensalada De Frutas, or Fruit Salad, is a vibrant and invigorating dish that’s particularly popular during the Easter season in Colombia. This delightful salad not only showcases the country’s diverse and tropical fruits but also serves as a light and healthy option for gatherings and celebrations.
Combining different textures and flavors, the salad is often enjoyed as a stand-alone dessert or a side dish to complement a hearty meal. This colorful dish can be customized to your liking, allowing you to incorporate seasonal fruits available in your area.
The sweetness of the fruits is often enhanced with a squeeze of lime juice and a sprinkle of sugar, creating a deliciously simple yet satisfying treat. Perfect for sharing, Ensalada De Frutas is sure to please everyone at your table during the festive Easter celebrations.
Ingredients (Serves 4-6):
- 2 ripe bananas
- 1 cup strawberries, hulled and halved
- 1 cup pineapple, diced
- 1 cup mango, diced
- 1 cup papaya, diced
- 1 orange, segmented
- 1 lime, juiced
- 2 tablespoons sugar (optional)
- Fresh mint leaves for garnish
Cooking Instructions:
- Prepare the Fruits: Start by washing all the fruits thoroughly. Hull the strawberries, peel the bananas, mango, papaya, and orange. Dice the pineapple, mango, and papaya into bite-sized pieces. Cut the bananas into slices and segment the orange. Make sure to remove any seeds from the fruits.
- Combine the Fruits: In a large mixing bowl, gently combine all the prepared fruits. Start with the heavier fruits like pineapple and papaya at the bottom, then layer the lighter fruits like strawberries and bananas on top to avoid crushing them.
- Add Lime Juice and Sugar: Squeeze the juice of one lime over the mixed fruits. If you prefer a sweeter salad, sprinkle the sugar over the top. Gently toss the fruits with a spatula to make sure they’re evenly coated in lime juice and sugar. Be careful not to mash the fruits.
- Chill the Salad: Cover the bowl with plastic wrap or a lid and place it in the refrigerator for about 30 minutes. This allows the flavors to meld together and makes the salad invigorating when served.
- Serve and Garnish: Once chilled, give the salad a gentle toss before serving. Transfer to a serving bowl or individual cups and garnish with fresh mint leaves for an aromatic touch.
Extra Tips:
When making Ensalada De Frutas, feel free to experiment with different fruits based on what’s in season or your personal preferences. Fruits like kiwi, guava, and grapes can add variety and color to the dish.
If you want to enhance the flavor profile, consider adding a dash of coconut milk or yogurt for creaminess. Remember that the key to a great fruit salad is to use ripe, fresh fruits for the best taste and texture. Enjoy your delicious and invigorating Ensalada De Frutas!
Torta De Tres Leches

Torta De Tres Leches, or Three Milk Cake, is a beloved Colombian dessert that embodies the essence of indulgence and celebration. This moist and rich cake is soaked in a mixture of three different types of milk, giving it a unique texture and flavor that’s irresistible.
Traditionally served during Easter and special occasions, this decadent dessert is sure to impress your family and friends.
To make Torta De Tres Leches, the process begins with a light sponge cake that absorbs the creamy milk mixture. This dessert can be topped with whipped cream and fruit for added flavor and presentation. With its sweet and creamy profile, Torta De Tres Leches isn’t just a treat for the taste buds but also a feast for the eyes.
Ingredients (Servings: 4-6)
- 1 cup all-purpose flour
- 1 ½ tsp baking powder
- ¼ tsp salt
- 4 large eggs
- 1 cup granulated sugar
- ½ cup whole milk
- 1 tsp vanilla extract
- 1 can (14 oz) sweetened condensed milk
- 1 can (12 oz) evaporated milk
- 1 cup heavy cream
- 1 cup whipped cream (for topping)
- Fresh fruit or maraschino cherries (for garnish, optional)
Cooking Instructions
- Preheat the Oven: Begin by preheating your oven to 350°F (175°C). This step is essential as it guarantees that your cake bakes evenly and achieves a perfect rise.
- Prepare the Cake Batter: In a medium bowl, sift together the all-purpose flour, baking powder, and salt. In a separate large mixing bowl, beat the eggs and sugar together until the mixture is pale and fluffy. Gradually add the dry ingredients to the egg mixture, alternating with the whole milk and vanilla extract. Mix until just combined, being careful not to overmix.
- Bake the Cake: Pour the batter into a greased 9×13 inch baking dish or cake pan. Bake in the preheated oven for 25-30 minutes, or until a toothpick inserted in the center comes out clean. Once baked, remove the cake from the oven and allow it to cool in the pan for about 10-15 minutes.
- Prepare the Milk Mixture: While the cake is cooling, combine the sweetened condensed milk, evaporated milk, and heavy cream in a mixing bowl. Whisk until well combined and set aside.
- Soak the Cake: After the cake has cooled slightly, poke holes all over the surface using a fork or skewer. Slowly pour the milk mixture evenly over the cake, allowing it to soak into the holes. Let the cake absorb the milk for at least 1 hour, or preferably overnight in the refrigerator.
- Finish and Serve: Once the cake has fully soaked, spread a layer of whipped cream on top. You can decorate the cake with fresh fruit or maraschino cherries for an appealing presentation. Slice the cake into squares and serve chilled.
Extra Tips
When preparing Torta De Tres Leches, verify that your cake is completely cooled before soaking it in the milk mixture; this helps prevent it from becoming too soggy.
For added flavor, consider infusing the milk mixture with a splash of rum or a sprinkle of cinnamon. If you’re short on time, you can use a store-bought sponge cake, but the homemade version is highly recommended for best results.
Finally, allow the cake to soak overnight for maximum flavor and moisture, making it even more delicious when served.