

I’ve always felt that vegetables can be both fun and flavorful, especially in Chilean cuisine. With dishes full of vibrant colors and tastes, transforming greens into enjoyable meals is a breeze. From tangy salads to comforting stews, each recipe showcases the freshness of local produce. If you think eating your greens is a hassle, you might find yourself pleasantly surprised with what’s in store.
Pebre: A Flavorful Chilean Salsa
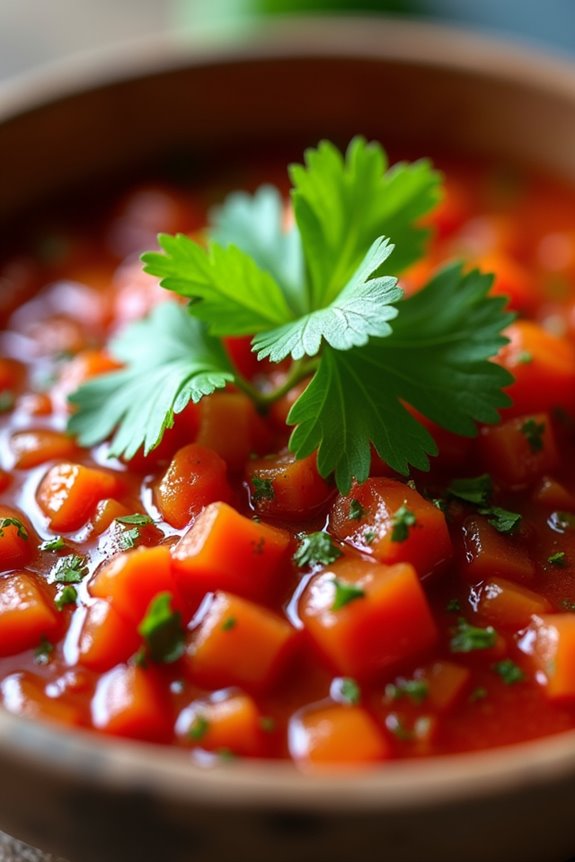
Pebre is a traditional Chilean salsa that embodies the vibrant flavors of fresh herbs, garlic, and spices, making it an essential condiment in Chilean cuisine. Often served alongside grilled meats, bread, or even as a topping for avocados, this zesty salsa isn’t only simple to prepare but also adds a delightful burst of flavor to any meal. The combination of fresh ingredients creates a revitalizing accompaniment that perfectly balances the richness of meat dishes or enhances the taste of simple bread.
The origins of pebre date back to the colonial period in Chile, where it was commonly made using whatever fresh ingredients were available. Today, it has become a staple in households across the country, with variations that reflect regional tastes and personal preferences. Whether you prefer your pebre spicy or mild, this recipe will provide you with a delicious version that captures the essence of Chilean culinary tradition.
Ingredients (Serves 4-6 people):
- 1 cup fresh cilantro, finely chopped
- 1 medium onion, finely chopped
- 2 medium tomatoes, diced
- 1-2 green chilies, finely chopped (adjust to taste)
- 2 cloves garlic, minced
- 1/4 cup olive oil
- 2 tablespoons red wine vinegar
- Salt, to taste
- Black pepper, to taste
Cooking Instructions:
- Prepare the Vegetables: Start by washing and chopping your vegetables. Finely chop the fresh cilantro and onion, dice the tomatoes, and mince the garlic. If you prefer a spicier salsa, remove the seeds from the green chilies and chop them finely. Make sure all vegetables are uniform in size to guarantee even mixing.
- Combine Ingredients: In a medium mixing bowl, combine the chopped cilantro, onion, tomatoes, green chilies, and minced garlic. Stir gently to combine all the ingredients evenly, ensuring that the flavors will meld together well.
- Add Liquids: Drizzle the olive oil and red wine vinegar over the vegetable mixture. This will provide the necessary moisture and flavor depth to the salsa. Stir again to combine, making sure the oil and vinegar coat all the ingredients thoroughly.
- Season: Taste your pebre and season with salt and black pepper according to your preference. Remember that the seasoning can enhance the flavors, so adjust it gradually. Mix well to incorporate the seasonings into the salsa.
- Let It Rest: For the best flavor, let the pebre sit for at least 15-30 minutes before serving. This resting time allows the ingredients to marinate and the flavors to develop, resulting in a more robust salsa.
- Serve: Once rested, give the pebre a final stir and serve it in a bowl alongside your favorite dishes. It pairs wonderfully with grilled meats, crusty bread, or as a topping for avocado toast.
Extra Tips:
For an added layer of flavor, consider roasting the tomatoes and garlic before adding them to the mix. This can bring out a smoky sweetness that complements the freshness of the cilantro and onions.
Additionally, you can customize the heat level by adjusting the number of green chilies or substituting them with jalapeños for a different flavor profile. Store any leftovers in an airtight container in the refrigerator for up to three days, and give it a good stir before serving again to revive the flavors.
Chilean Salad With Avocado and Corn
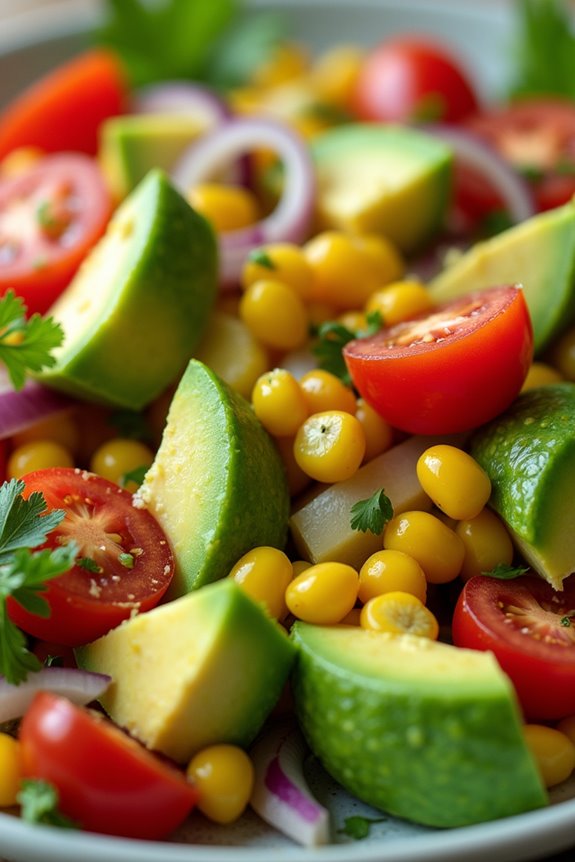
Chilean Salad With Avocado and Corn is a vibrant and invigorating dish that perfectly embodies the flavors of Chile. This salad combines the creamy texture of ripe avocados with the sweetness of corn, making it a delightful accompaniment to any meal or a light stand-alone dish. The addition of fresh herbs and a zesty dressing elevates the flavors, creating a colorful and nutritious option that’s both satisfying and healthy.
Whether served at a summer barbecue or a casual lunch, this salad is sure to impress with its simplicity and taste. In Chile, this salad is often enjoyed as a side dish alongside grilled meats or as part of a larger spread of traditional Chilean foods. It isn’t only easy to prepare but also allows for some creativity—feel free to adjust the ingredients based on personal preferences or seasonal availability.
With its straightforward preparation, you’ll find that this salad is a quick and delightful way to bring a taste of Chile to your table.
Ingredients (Serves 4-6):
- 2 ripe avocados, diced
- 1 cup fresh corn kernels (or 1 can of corn, drained)
- 1 cup cherry tomatoes, halved
- 1 small red onion, finely chopped
- 1/4 cup fresh cilantro, chopped
- 1 lime, juiced
- 2 tablespoons olive oil
- Salt and pepper to taste
Cooking Instructions:
- Prepare the Ingredients: Start by washing and preparing all the fresh ingredients. Cut the avocados in half, remove the pit, and scoop the flesh into a bowl. Dice the avocados into bite-sized pieces. If using fresh corn, shuck the corn and remove the kernels from the cob. Wash the cherry tomatoes and slice them in half. Finely chop the red onion and cilantro.
- Combine the Base Ingredients: In a large mixing bowl, combine the diced avocados, corn kernels, halved cherry tomatoes, and chopped red onion. Gently toss the ingredients together to avoid mashing the avocado.
- Make the Dressing: In a small bowl, whisk together the lime juice, olive oil, salt, and pepper. This dressing will add brightness and flavor to the salad. Adjust the seasoning according to your taste preference.
- Dress the Salad: Pour the dressing over the combined ingredients in the mixing bowl. Gently fold the dressing into the salad to guarantee everything is well-coated without breaking apart the avocado too much.
- Add Fresh Herbs: Finally, add the chopped cilantro to the salad. Give the salad one last gentle toss to mix in the herbs, which will add freshness and an aromatic touch.
- Serve: Enjoy the salad immediately or let it sit for a few minutes to allow the flavors to meld together. It can be served at room temperature or chilled.
Extra Tips:
When preparing Chilean Salad With Avocado and Corn, it’s best to use ripe avocados to achieve the desired creaminess. If you need to prepare the salad in advance, consider adding the avocado just before serving to prevent browning.
You can also experiment with additional ingredients, such as diced bell peppers or cucumber, to add more crunch and flavor. This salad pairs beautifully with grilled meats, making it a versatile addition to any meal.
Charquicán: Hearty Chilean Vegetable Stew
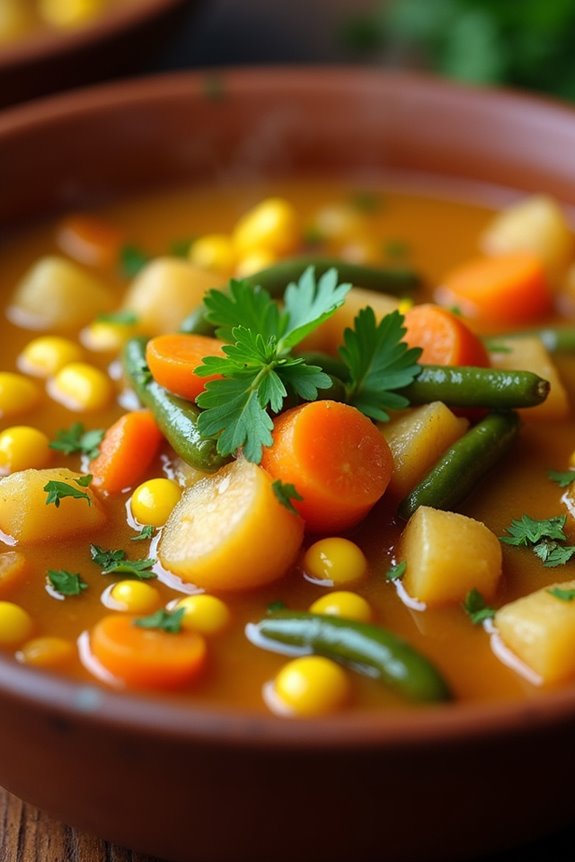
Charquicán is a traditional Chilean dish that embodies comfort and nourishment. This hearty stew is a delightful blend of vegetables, often combined with meat or left vegetarian, making it versatile and suitable for various dietary preferences. The name “charquicán” comes from “charqui,” which refers to sun-dried meat that was commonly used in the dish’s history. However, today’s recipes often focus on fresh produce, making it a perfect option for a healthy meal.
This flavorful stew isn’t only packed with nutrients but also easy to prepare, bringing warmth and satisfaction to your dinner table. The use of seasonal vegetables, such as squash, potatoes, and carrots, provides vibrant colors and textures, while spices elevate the taste, creating a dish that’s both filling and comforting. Perfect for a family gathering or a cozy night in, Charquicán is sure to become a favorite in your culinary repertoire.
Ingredients (Serves 4-6):
- 2 tablespoons of olive oil
- 1 onion, diced
- 2 cloves of garlic, minced
- 2 medium potatoes, peeled and diced
- 1 medium carrot, diced
- 1 cup of pumpkin or butternut squash, peeled and diced
- 1 cup of green beans, trimmed and cut into pieces
- 1 cup of corn kernels (fresh or frozen)
- 1 teaspoon of cumin
- 1 teaspoon of paprika
- Salt and pepper to taste
- 4 cups of vegetable broth or water
- Fresh parsley, chopped (for garnish)
Cooking Instructions:
- Sauté the Aromatics: In a large pot, heat the olive oil over medium heat. Add the diced onion and sauté until translucent, about 5 minutes. Then, add the minced garlic and cook for an additional minute until fragrant. This step is vital as it builds a flavor base for the stew.
- Add the Vegetables: Stir in the diced potatoes, carrots, pumpkin, and green beans. Sauté the vegetables for about 5-7 minutes, stirring occasionally. This helps to soften the vegetables slightly and allows them to absorb the flavors from the onion and garlic.
- Incorporate the Seasonings: Sprinkle in the cumin, paprika, salt, and pepper. Mix well to coat the vegetables evenly with the spices. The spices will enhance the overall flavor profile of the stew, giving it a warm and aromatic quality.
- Pour in the Liquid: Add the vegetable broth or water to the pot, ensuring that the vegetables are fully submerged. Bring the mixture to a boil, then reduce the heat and let it simmer for about 20-25 minutes, or until the vegetables are tender. This step allows the flavors to meld together.
- Add the Corn: Once the vegetables are tender, stir in the corn kernels and simmer for an additional 5 minutes. This will add sweetness and texture to the stew, rounding out the dish perfectly.
- Serve and Garnish: Once done, taste and adjust seasoning if necessary. Serve the Charquicán hot, garnished with chopped fresh parsley for a touch of color and freshness. Enjoy this hearty stew with crusty bread or rice for a complete meal.
Extra Tips: When preparing Charquicán, feel free to experiment with different vegetables based on what you have available or in season. Other great additions can include bell peppers, peas, or even lentils for added protein. For a heartier version, consider adding cooked ground meat or shredded chicken.
Also, let the stew sit for a few minutes after cooking; it will thicken slightly and the flavors will deepen, creating an even more satisfying dish.
Cazuela: A Colorful Chilean Soup
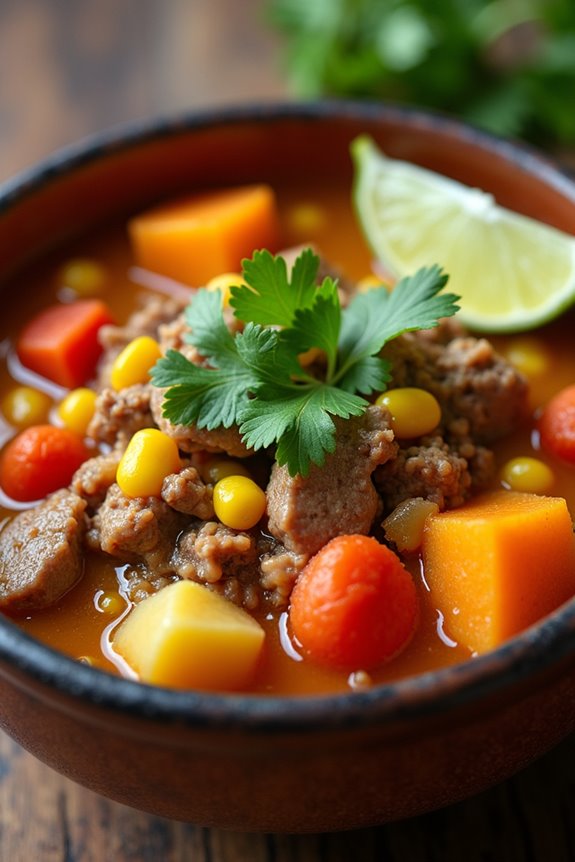
Cazuela is a traditional Chilean soup that reflects the country’s rich agricultural heritage and vibrant culinary culture. It’s a hearty dish typically made with a variety of vegetables, meats, and spices that come together to create a comforting and nourishing meal.
With its bright colors and enticing aromas, cazuela is perfect for family gatherings or chilly evenings when you need a warm bowl of goodness. Each region in Chile has its own variation, allowing for endless creativity with seasonal ingredients.
To make a classic cazuela, you’ll want to focus on fresh, local produce which is key to achieving the dish’s authentic flavor. The combination of vegetables like potatoes, corn, and pumpkin, along with tender cuts of meat, results in a well-rounded meal that’s both satisfying and delicious.
This colorful soup is typically served with a side of crusty bread, making it a perfect centerpiece for a cozy dinner.
Ingredients (Serves 4-6 people)
- 1 lb beef or chicken (cut into chunks)
- 4 cups beef or chicken broth
- 2 medium potatoes (peeled and diced)
- 2 medium carrots (sliced)
- 1 medium onion (chopped)
- 1 cup corn kernels (fresh or frozen)
- 1 cup pumpkin or butternut squash (peeled and diced)
- 1 red bell pepper (chopped)
- 2 cloves garlic (minced)
- 1 teaspoon dried oregano
- Salt and pepper to taste
- Fresh cilantro (for garnish)
- Lime wedges (for serving)
Cooking Instructions
- Prepare the Meat: In a large pot, heat a tablespoon of oil over medium heat. Add the beef or chicken chunks and brown them on all sides. This step enhances the flavor of the meat and adds depth to the soup.
- Sauté the Vegetables: Once the meat is browned, add the chopped onion and minced garlic to the pot. Sauté for about 3-4 minutes until the onion is translucent. This step develops the base flavor of the cazuela.
- Add Broth and Seasonings: Pour in the beef or chicken broth and bring the mixture to a boil. Stir in the dried oregano, salt, and pepper. Let it simmer for about 10 minutes, allowing the flavors to meld together.
- Incorporate the Vegetables: Add the diced potatoes, sliced carrots, corn, pumpkin, and red bell pepper to the pot. Stir well to combine all the ingredients. Cover the pot and let it simmer for another 20-25 minutes, or until the vegetables are tender.
- Adjust Seasoning: Taste the cazuela and adjust the seasoning with more salt and pepper if needed. This is an important step to guarantee the flavors are just right.
- Serve: Ladle the cazuela into bowls and garnish with fresh cilantro. Serve with lime wedges on the side to squeeze over the soup for an added burst of flavor.
Extra Tips
When preparing cazuela, feel free to get creative with the vegetables based on what’s in season or available to you. Common additions include peas, green beans, or even leafy greens.
If you prefer a vegetarian version, you can substitute the meat with mushrooms or extra vegetables and use vegetable broth instead. Remember to let the soup simmer gently to develop the best flavors, and don’t rush through the cooking process.
Enjoy your cazuela with a side of crusty bread for a complete meal!
Ensalada Chilena: Fresh Tomato and Onion Salad
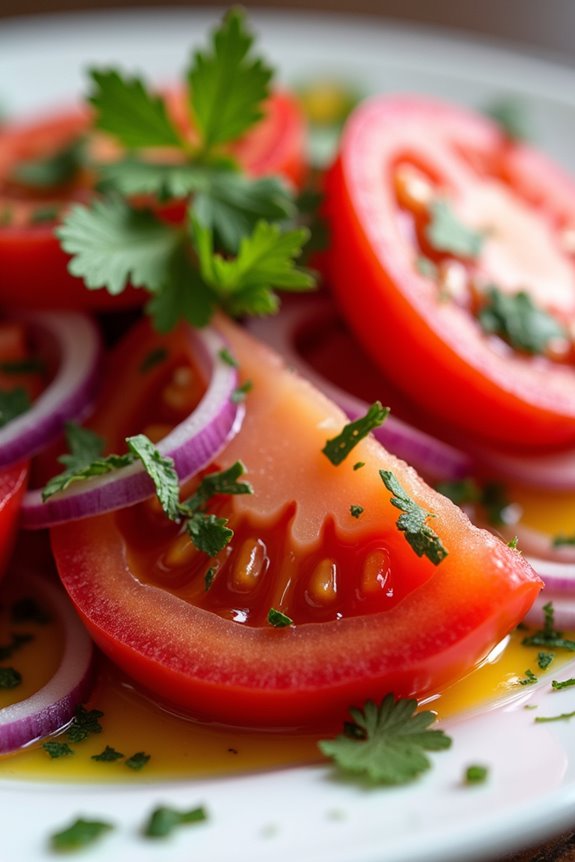
Ensalada Chilena is a staple in Chilean cuisine, celebrated for its simplicity and invigorating flavors. This vibrant salad features ripe, juicy tomatoes paired with crisp onions, making it a perfect accompaniment to a variety of dishes, from grilled meats to seafood. The combination of fresh ingredients and a light dressing allows the natural flavors to shine through, creating a delightful dish that’s both nutritious and appetizing.
This salad isn’t just a side dish but a representation of the fresh produce available in Chile. The vibrant colors and textures make it visually appealing, while the zesty flavor profile elevates any meal. Whether you’re enjoying a summer barbecue or a cozy family dinner, Ensalada Chilena is sure to impress your guests and satisfy your taste buds.
Ingredients (serving size: 4-6 people)
- 4 large ripe tomatoes
- 1 medium red onion
- 1/4 cup fresh cilantro, chopped
- 2 tablespoons olive oil
- 1 tablespoon red wine vinegar
- Salt, to taste
- Black pepper, to taste
Cooking Instructions
- Prepare the Vegetables: Start by washing the tomatoes thoroughly under cold water. Next, slice the tomatoes into wedges or bite-sized pieces, depending on your preference. For the onion, peel off the outer layers and slice it thinly. You can soak the sliced onions in cold water for about 10 minutes to reduce their sharpness, if desired.
- Combine Ingredients: In a large mixing bowl, add the sliced tomatoes and onions. Sprinkle the chopped cilantro over the top. This herb adds a fresh, aromatic flavor that complements the sweetness of the tomatoes and the sharpness of the onions.
- Make the Dressing: In a small bowl, whisk together the olive oil, red wine vinegar, salt, and black pepper. Adjust the seasoning according to your taste preferences. This dressing will enhance the flavors of the salad without overpowering the freshness of the ingredients.
- Dress the Salad: Pour the dressing over the tomato and onion mixture. Gently toss the salad with your hands or a large spoon until all the ingredients are well coated in the dressing. Be careful not to mash the tomatoes as you mix.
- Chill and Serve: Allow the salad to sit for about 10-15 minutes at room temperature or refrigerate it for a short while to let the flavors meld together. Serve the Ensalada Chilena on a large platter or in individual bowls as an invigorating side dish.
Extra Tips
For the best flavor, use the freshest tomatoes available, preferably in season. Heirloom varieties or vine-ripened tomatoes will provide the most sweetness and juiciness.
If you want to add a bit more depth to the salad, consider adding avocado slices or a sprinkle of feta cheese. Additionally, this salad can be made ahead of time; just wait to add the dressing until you’re ready to serve to keep the tomatoes from getting soggy.
Enjoy your Ensalada Chilena with a slice of crusty bread for a complete culinary experience!
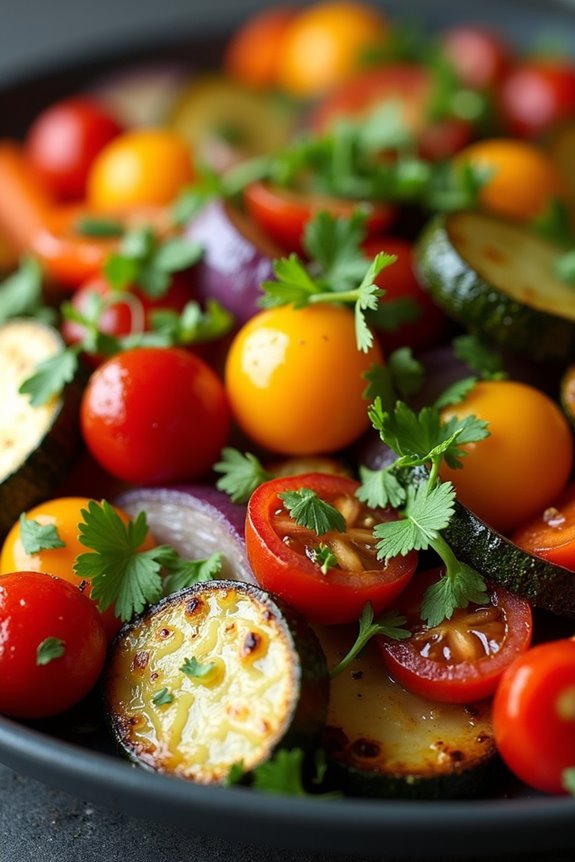
Ratatouille a La Chilena
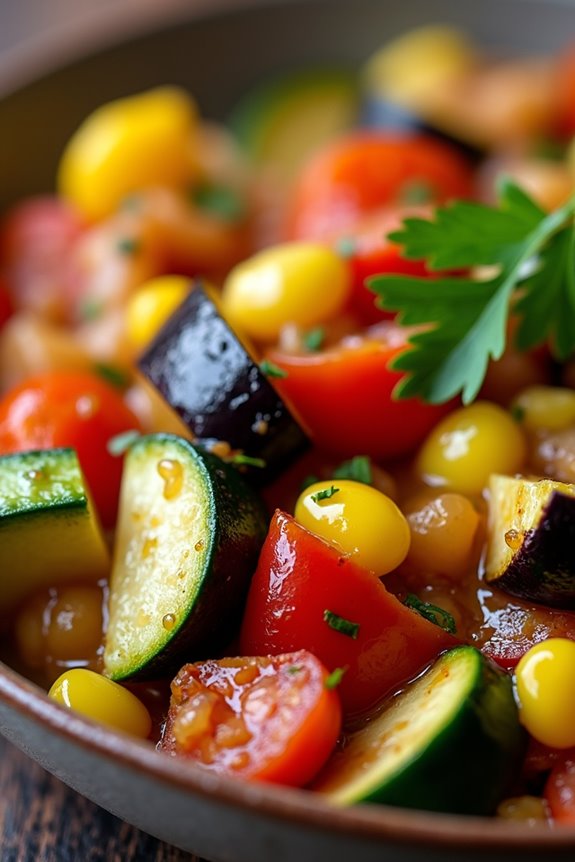
Ratatouille a La Chilena is a delightful twist on the classic French dish, blending traditional Chilean ingredients and flavors to create a vibrant vegetable medley. This dish isn’t only visually appealing but also packed with nutrients, making it a perfect addition to any meal.
Whether served as a side dish or a main vegetarian option, Ratatouille a La Chilena showcases the rich agricultural heritage of Chile, utilizing fresh, local produce that bursts with flavor.
The beauty of Ratatouille a La Chilena lies in its versatility; you can easily customize it based on seasonal vegetables or personal preferences. The aromatic herbs and spices enhance the natural sweetness of the vegetables, while the olive oil adds a silky richness.
This dish is perfect for gatherings, as it can be prepared in advance and served warm or at room temperature, allowing you to enjoy the company of your guests.
Ingredients (Serves 4-6)
- 1 medium eggplant, diced
- 2 medium zucchinis, sliced
- 1 red bell pepper, chopped
- 1 yellow bell pepper, chopped
- 1 medium onion, chopped
- 3 cloves garlic, minced
- 4 medium tomatoes, chopped
- 1 cup corn kernels (fresh or frozen)
- 1 teaspoon dried oregano
- 1 teaspoon dried basil
- 1/4 cup olive oil
- Salt and pepper to taste
- Fresh parsley for garnish
Cooking Instructions
- Prepare the Vegetables: Begin by washing and chopping all the vegetables into bite-sized pieces. This will guarantee even cooking and a pleasant presentation. Make sure to dice the eggplant, slice the zucchinis, and chop the bell peppers and onions finely.
- Sauté the Onion and Garlic: In a large skillet or pot, heat the olive oil over medium heat. Add the chopped onion and sauté for about 3-4 minutes until it becomes translucent. Then, add the minced garlic and continue to sauté for an additional minute, being careful not to burn the garlic as it can turn bitter.
- Add the Eggplant and Bell Peppers: Next, introduce the diced eggplant and chopped bell peppers into the skillet. Cook for about 5-7 minutes, stirring occasionally, until the eggplant starts to soften. This step helps to develop a rich base for the ratatouille.
- Incorporate Zucchini and Tomatoes: Stir in the sliced zucchinis and chopped tomatoes. Season with salt, pepper, oregano, and basil. Allow the vegetables to cook together for another 10 minutes, stirring occasionally, until they’re tender and well combined.
- Mix in the Corn: Once the vegetables have softened, add the corn kernels to the mixture. Cook for an additional 5 minutes, allowing the flavors to meld together. Taste the ratatouille and adjust seasoning if necessary.
- Serve and Garnish: Once cooked, remove the skillet from the heat and let it rest for a few minutes. Transfer the ratatouille to a serving dish and garnish with freshly chopped parsley for a pop of color and flavor.
Extra Tips
When preparing Ratatouille a La Chilena, consider using seasonal vegetables for the best flavor and freshness. You can also experiment by adding other vegetables such as carrots or squash, depending on what you have on hand.
For a more pronounced flavor, consider letting the ratatouille sit for a few hours or overnight in the refrigerator before serving; this allows the flavors to deepen and enhance.
Finally, serving it with crusty bread or over a bed of quinoa or rice can make for a hearty, satisfying meal. Enjoy your culinary adventure in Chilean flavors!
Tacos De Verduras: Vegetable Tacos With a Chilean Twist
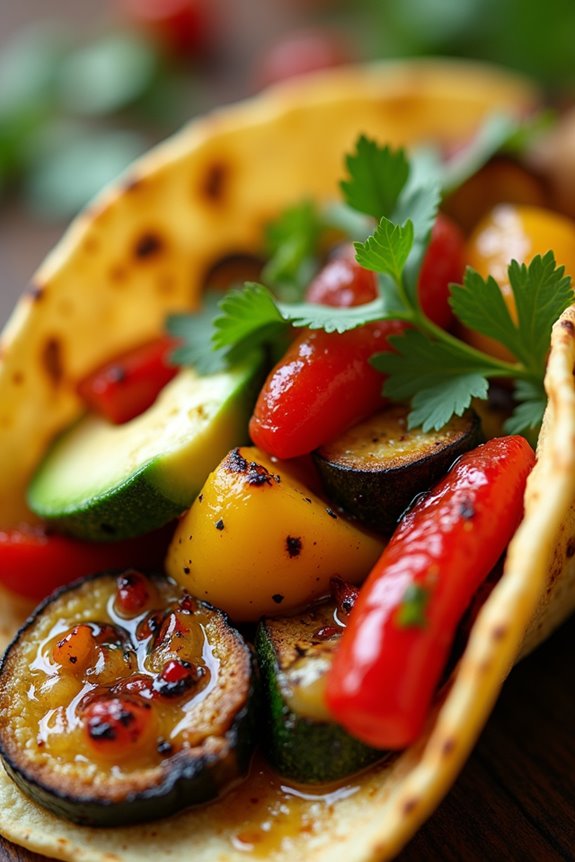
Tacos De Verduras are a delightful and vibrant twist on traditional tacos, celebrating the rich flavors and fresh produce found in Chilean cuisine. This dish features a medley of seasonal vegetables, topped with zesty sauces and wrapped in warm, soft tortillas. Perfect for a casual gathering or a satisfying weeknight meal, these tacos aren’t only delicious but also a great way to incorporate more vegetables into your diet.
The combination of textures and flavors from the grilled veggies, creamy avocados, and tangy sauces creates an unforgettable dining experience. To enhance the Chilean flair, we’ll add some local spices and ingredients, such as pebre, a Chilean salsa made with tomatoes, cilantro, and chili peppers. This adds a fresh and spicy kick, elevating the simple vegetable taco to a whole new level.
Whether you’re looking to impress your friends or just want to enjoy a flavorful vegetarian meal, these Tacos De Verduras are bound to please everyone at the table.
Ingredients (serving size: 4-6 people):
- 8 small corn tortillas
- 1 medium zucchini, sliced
- 1 bell pepper (red or yellow), sliced
- 1 cup mushrooms, sliced
- 1 medium red onion, sliced
- 1 cup corn kernels (fresh or frozen)
- 1 avocado, diced
- 1 cup fresh cilantro, chopped
- 1 lime, juiced
- 1 teaspoon cumin
- 1 teaspoon smoked paprika
- Salt and pepper to taste
- ½ cup pebre (Chilean salsa)
- Olive oil for grilling
Cooking Instructions:
- Prepare the Vegetables: Start by washing and slicing the zucchini, bell pepper, mushrooms, and red onion. The key to a great taco is to have all vegetables cut into uniform sizes to guarantee even cooking. Set them aside in a large bowl.
- Season the Vegetables: In the bowl with the sliced vegetables, add olive oil, cumin, smoked paprika, salt, and pepper. Toss everything together until the vegetables are evenly coated with the oil and seasonings. This will enhance their flavors when grilled.
- Grill the Vegetables: Preheat a grill or grill pan over medium-high heat. Once hot, add the seasoned vegetables to the grill. Grill for about 5-7 minutes, turning occasionally, until they’re tender and have nice grill marks. The smokiness from the grill will add depth to the dish.
- Warm the Tortillas: While the vegetables are grilling, warm the corn tortillas on a separate skillet over low heat for about 30 seconds on each side, or until they’re pliable and warm. This step is essential as it prevents the tortillas from cracking when you fill them.
- Assemble the Tacos: Once the vegetables are done grilling, remove them from the heat. To assemble the tacos, place a generous amount of the grilled vegetable mixture on each tortilla. Top with diced avocado, fresh cilantro, and a squeeze of lime juice. Drizzle with pebre for an extra burst of flavor.
- Serve and Enjoy: Arrange the filled tacos on a serving platter and serve immediately. Encourage your guests to add more pebre or lime juice according to their taste preferences for a customized flavor experience.
Extra Tips: When making Tacos De Verduras, feel free to customize the vegetable selection based on what’s in season or what you have on hand – options like eggplant, carrots, or spinach work wonderfully too.
For added texture and flavor, consider incorporating some crumbled queso fresco or a dollop of sour cream on top. Finally, if you enjoy a bit of heat, add some sliced jalapeños or a dash of hot sauce to spice things up!
Porotos Granados: Chilean Bean and Corn Stew
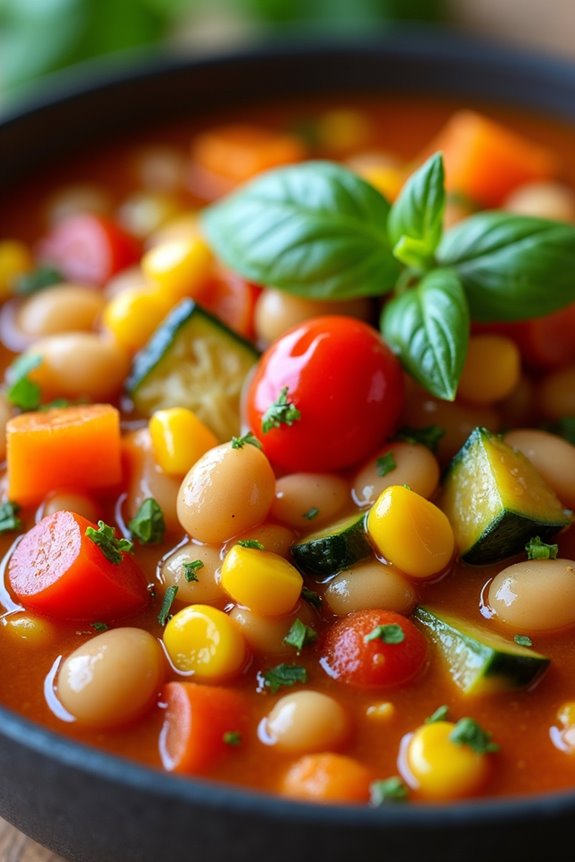
Porotos Granados is a beloved traditional dish from Chile that highlights the country’s rich agricultural offerings, particularly its beans and corn. This vibrant stew is a perfect representation of Chilean cuisine, showcasing the freshness of ingredients that are often harvested during the summer months. The dish combines the creaminess of beans with the sweetness of fresh corn, creating a comforting, hearty meal that’s both nutritious and satisfying.
The origins of Porotos Granados date back to the region of central Chile, where home cooks have perfected this recipe over generations. It’s typically made with a variety of fresh vegetables, making it a great option for vegetarians and anyone looking to incorporate more plant-based meals into their diet. Perfect for family gatherings or cozy dinners, this stew isn’t only delicious but also a wonderful way to celebrate Chilean culinary traditions.
Ingredients (Serves 4-6):
- 2 cups of fresh or frozen cranberry beans (or cannelini beans)
- 2 cups of fresh corn kernels (or 1 can of corn, drained)
- 1 medium onion, chopped
- 2 cloves of garlic, minced
- 1 medium tomato, diced
- 1 medium carrot, diced
- 1 medium zucchini, diced
- 1 red bell pepper, chopped
- 2 cups of vegetable broth
- 1 teaspoon of paprika
- 1 teaspoon of cumin
- 2 tablespoons of olive oil
- Salt and pepper to taste
- Fresh basil or cilantro for garnish
Cooking Instructions:
- Prepare the Beans: If using dried cranberry beans, soak them overnight in water. This will help soften them and reduce cooking time. If using canned beans, simply drain and rinse them before adding to the stew.
- Sauté the Aromatics: In a large pot, heat the olive oil over medium heat. Add the chopped onion and minced garlic, sautéing until the onion becomes translucent, about 5 minutes. This step builds the flavor base for the stew.
- Add Vegetables: Incorporate the diced tomato, carrot, zucchini, and red bell pepper into the pot. Cook for another 5-7 minutes, stirring occasionally, until the vegetables begin to soften.
- Combine Ingredients: Add the soaked or canned beans and corn kernels to the pot. Pour in the vegetable broth, then stir in the paprika and cumin. Season with salt and pepper to taste.
- Simmer the Stew: Bring the mixture to a boil, then reduce the heat to low. Cover and let the stew simmer for about 30-40 minutes, or until the beans are tender and the flavors meld together. Make sure to stir occasionally to prevent sticking.
- Adjust Seasoning: After the stew has simmered, taste and adjust the seasoning as necessary. You can add more salt, pepper, or spices according to your preference.
- Serve and Garnish: Once the stew is ready, ladle it into bowls and garnish with fresh basil or cilantro. Serve hot, accompanied by crusty bread or a side of rice if desired.
Extra Tips:
For an even more authentic flavor, consider using fresh herbs such as oregano or thyme while cooking. Additionally, feel free to customize the vegetables based on what’s in season or what you have on hand. You can also add potatoes or squash for extra heartiness.
Porotos Granados can be stored in the refrigerator for several days, and the flavors will continue to develop, making it an excellent make-ahead meal. Enjoy your cooking experience and the delightful taste of this classic Chilean stew!
Chilean Roasted Vegetables With Aji Verde
Chilean Roasted Vegetables With Aji Verde is a vibrant and flavorful dish that showcases the rich bounty of Chile’s agricultural landscape. This recipe brings together a medley of seasonal vegetables, roasted to perfection, and pairs them with a zesty Aji Verde sauce that adds a delightful kick. The combination of the sweet caramelization of the roasted vegetables with the fresh, herbaceous flavors of the Aji Verde creates a dish that isn’t only visually appealing but also packed with nutrients.
This dish is perfect for serving at gatherings or family dinners, as it complements a variety of main courses and can be enjoyed warm or at room temperature. The versatility of the vegetables allows you to adapt the recipe based on what you have on hand or what’s in season, making it a great option for any time of year. Whether you’re looking for a side dish or a centerpiece for a vegetarian meal, Chilean Roasted Vegetables With Aji Verde is sure to satisfy.
Ingredients (Serves 4-6):
- 2 medium zucchini, sliced
- 2 bell peppers (red and yellow), sliced
- 1 large red onion, cut into wedges
- 2 medium carrots, sliced
- 1 cup cherry tomatoes, halved
- 3 tablespoons olive oil
- Salt and pepper, to taste
- 1 teaspoon dried oregano
- 1 teaspoon smoked paprika
- 1/4 cup fresh parsley, chopped (for garnish)
For Aji Verde:
- 1 cup fresh cilantro, chopped
- 1 jalapeño pepper, seeded and chopped
- 2 cloves garlic, minced
- 1/2 cup olive oil
- 2 tablespoons white vinegar
- Salt, to taste
Cooking Instructions:
- Preheat the Oven: Preheat your oven to 425°F (220°C). This high temperature will help the vegetables roast quickly, allowing them to develop a nice caramelization and depth of flavor.
- Prepare the Vegetables: In a large mixing bowl, combine the sliced zucchini, bell peppers, red onion, carrots, and cherry tomatoes. Drizzle the vegetables with olive oil and season with salt, pepper, dried oregano, and smoked paprika. Toss everything together until the vegetables are evenly coated with the oil and seasonings.
- Roast the Vegetables: Spread the seasoned vegetables in a single layer on a large baking sheet. Make sure not to overcrowd the pan, as this can lead to steaming instead of roasting. Place the baking sheet in the preheated oven and roast for about 25-30 minutes, or until the vegetables are tender and slightly charred, stirring halfway through to ascertain even cooking.
- Make the Aji Verde: While the vegetables are roasting, prepare the Aji Verde. In a blender or food processor, combine the chopped cilantro, jalapeño, minced garlic, olive oil, white vinegar, and a pinch of salt. Blend until smooth, adjusting the seasoning to taste. If the sauce is too thick, you can add a little more olive oil or a splash of water to reach your desired consistency.
- Serve: Once the vegetables are roasted, remove them from the oven and transfer them to a serving platter. Drizzle the Aji Verde over the top or serve it on the side for dipping. Garnish with fresh parsley for a pop of color and flavor.
Extra Tips:
When preparing Chilean Roasted Vegetables With Aji Verde, feel free to customize the vegetable selection based on your preferences or what you have available. Other great options could include eggplant, asparagus, or seasonal root vegetables.
Additionally, if you prefer a milder sauce, you can reduce the amount of jalapeño or use only half of it. For a more intense flavor, let the Aji Verde sit for a little while before serving to allow the flavors to meld. Enjoy your delicious, colorful dish!
Humita: Steamed Corn Pudding

Humita, a traditional Chilean dish, is a deliciously comforting steamed corn pudding that showcases the natural sweetness of fresh corn. Often enjoyed as a side dish or a light meal, this dish isn’t only popular in Chile but also in various regions throughout South America. The main ingredient, corn, is combined with cheese, spices, and occasionally other vegetables, creating a rich and flavorful treat that’s sure to please the palate.
Making humita can seem like an intimidating task, but with the right approach, you can whip up this delightful dish in no time. The key to perfecting humita lies in using fresh corn, which gives it a distinctive sweetness and texture. Traditionally wrapped in corn husks, the pudding is steamed until it reaches a soft, pudding-like consistency. This recipe is perfect for serving 4-6 people, making it ideal for gatherings or family meals.
Ingredients:
- 4 cups fresh corn kernels (about 6-8 ears of corn)
- 1 cup milk
- 1 cup crumbled queso fresco (or any soft cheese)
- 1/4 cup butter, melted
- 1/2 cup cornmeal
- 2 tablespoons sugar
- 1 teaspoon baking powder
- 1 teaspoon salt
- 1 teaspoon ground cumin (optional)
- Corn husks for wrapping (soaked in warm water)
Instructions:
- Prepare the Corn: Start by shucking the corn and removing the kernels from the cobs. You can use a sharp knife to carefully slice down the sides of the cob to extract the kernels. Set the kernels aside, and if you like, reserve a few whole kernels for garnishing later.
- Blend the Mixture: In a blender or food processor, combine the fresh corn kernels with the milk. Blend until the mixture is smooth but still slightly chunky. This will help create a creamy texture for your humita while retaining some corn integrity.
- Combine Dry Ingredients: In a large mixing bowl, whisk together the cornmeal, sugar, baking powder, salt, and ground cumin (if using). This guarantees that the dry ingredients are evenly distributed throughout the mixture.
- Mix All Ingredients: Gradually add the blended corn mixture to the dry ingredients, stirring until well combined. Then, fold in the melted butter and crumbled queso fresco. Make sure everything is mixed thoroughly, but be careful not to overmix.
- Prepare the Corn Husks: Take the soaked corn husks and pat them dry with a towel. Lay one husk flat, and spoon about 1/4 to 1/3 cup of the humita mixture onto the center of the husk. Fold the sides over the mixture, then fold the bottom up to secure it. Repeat this process with the remaining husks and mixture.
- Steam the Humitas: Place the wrapped humitas upright in a large steamer basket or pot. If you don’t have a steamer, you can place them in a pot with a small amount of water at the bottom, making sure that the water doesn’t touch the humitas. Cover the pot and steam for about 30-40 minutes, or until the humitas are firm to the touch.
- Serve and Enjoy: Once cooked, carefully unwrap the humitas from the corn husks and serve warm. You can garnish them with a sprinkle of cheese or extra whole corn kernels for added color and flavor.
Extra Tips: When making humitas, using fresh corn is essential for achieving the best flavor and texture. If fresh corn isn’t available, canned or frozen corn can be used, but be sure to drain and rinse canned corn beforehand.
Additionally, feel free to experiment with adding herbs or spices to the mixture for a unique twist on this traditional recipe. Finally, confirm that the husks are adequately soaked to prevent them from tearing during wrapping, which helps keep the pudding moist while steaming.
Ensalada De Quinoa: Quinoa Salad With Seasonal Vegetables
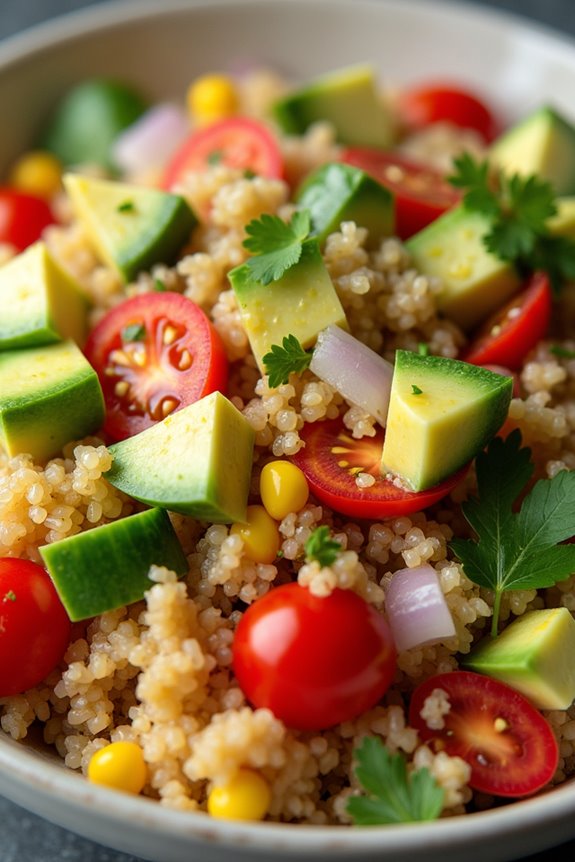
Ensalada De Quinoa is a vibrant and nutritious dish that showcases the best of Chile’s seasonal vegetables. This salad isn’t only easy to prepare but also packed with protein and essential nutrients, making it a perfect addition to any meal or a delightful stand-alone dish.
The combination of fluffy quinoa with fresh vegetables creates a colorful and invigorating experience for your taste buds, making it a favorite among health-conscious diners.
The beauty of this quinoa salad lies in its versatility; you can customize it with your favorite seasonal vegetables, herbs, and dressings. Whether served as a side dish or a main course, Ensalada De Quinoa is an excellent choice for gatherings, picnics, or even a light lunch.
With a delightful mix of textures and flavors, this salad is sure to impress both family and friends alike.
Ingredients (Serves 4-6):
- 1 cup quinoa
- 2 cups water or vegetable broth
- 1 red bell pepper, diced
- 1 cucumber, diced
- 1 cup cherry tomatoes, halved
- 1 cup corn kernels (fresh or frozen)
- 1 small red onion, finely chopped
- 1 avocado, diced
- 1/4 cup fresh cilantro, chopped
- 1/4 cup olive oil
- 2 tablespoons lime juice
- Salt and pepper to taste
Cooking Instructions:
1. Rinse the Quinoa: Start by rinsing the quinoa under cold water in a fine mesh strainer to remove its natural coating, called saponin, which can give it a bitter taste. This step is essential for achieving a pleasant flavor in your salad.
2. Cook the Quinoa: In a medium saucepan, combine the rinsed quinoa and water or vegetable broth. Bring to a boil over medium-high heat. Once boiling, reduce the heat to low, cover the pan, and let it simmer for about 15 minutes, or until the quinoa is tender and the liquid is absorbed.
Remove from heat and let it sit covered for another 5 minutes before fluffing it with a fork.
3. Prepare the Vegetables: While the quinoa is cooking, prepare the vegetables. Dice the red bell pepper, cucumber, and avocado; halve the cherry tomatoes; and finely chop the red onion and cilantro.
Make sure to cut everything into bite-sized pieces for easy mixing and eating.
4. Mix the Salad: In a large mixing bowl, combine the cooked quinoa with the prepared vegetables: red bell pepper, cucumber, cherry tomatoes, corn, red onion, and cilantro.
Gently toss the ingredients together to guarantee even distribution without mashing the avocado.
5. Dress the Salad: In a small bowl, whisk together the olive oil, lime juice, salt, and pepper. Pour this dressing over the quinoa and vegetable mixture.
Toss everything together until well coated with the dressing.
6. Serve and Enjoy: Allow the salad to sit for about 10 minutes to let the flavors meld. Serve it chilled or at room temperature, garnished with additional cilantro or lime wedges if desired.
Extra Tips:
For added flavor and nutrition, consider incorporating other seasonal vegetables such as zucchini, carrots, or bell peppers in different colors.
You can also enhance the dish with protein by adding black beans, chickpeas, or even grilled chicken. If you like a bit of heat, a pinch of chili flakes or diced jalapeños can give the salad a spicy kick.
Enjoy experimenting with different herbs or a squeeze of lemon juice for an invigorating twist!
Choclo Con Queso: Corn on the Cob With Cheese
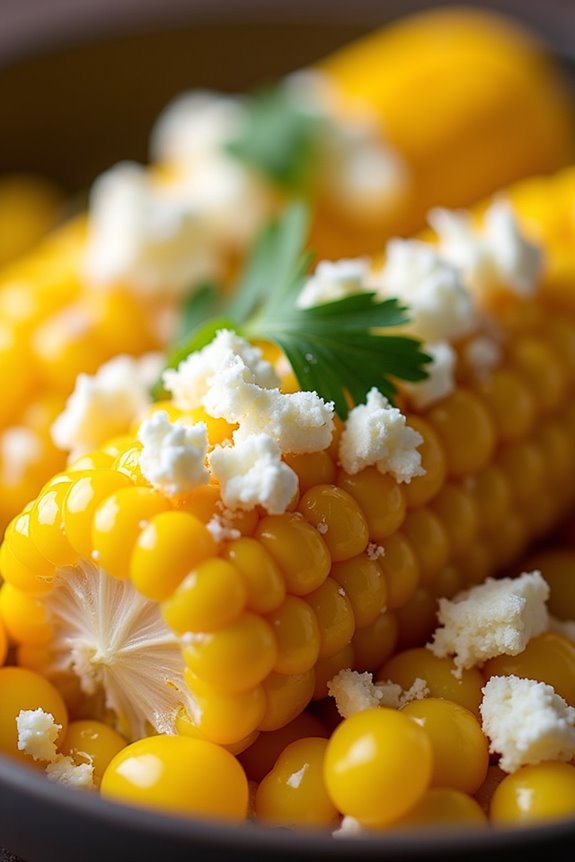
Choclo Con Queso is a delightful and traditional Chilean dish that perfectly showcases the country’s love for fresh, flavorful ingredients. This dish features sweet, tender corn on the cob topped with creamy cheese, creating a delicious blend of textures and tastes. It’s a popular street food in Chile, often enjoyed as a snack or side dish, especially during the summer months when corn is in season. The combination of sweet corn and melted cheese is irresistible, making this dish a must-try for anyone looking to explore Chilean cuisine.
Preparing Choclo Con Queso is a simple process that brings forth the natural sweetness of the corn while complementing it with rich and savory cheese. This dish isn’t only easy to make but also a crowd-pleaser, perfect for gatherings or family meals. Served warm, it can be enjoyed on its own or alongside other Chilean favorites. Let’s get started on making this delicious treat!
Ingredients (Serves 4-6)
- 4-6 ears of fresh corn on the cob
- 1 cup of crumbled queso fresco or feta cheese
- ½ cup of mayonnaise (optional)
- 1 tablespoon of butter
- Salt to taste
- Fresh cilantro or parsley for garnish (optional)
Cooking Instructions
- Prepare the Corn: Begin by husking the corn. Remove the outer leaves and silk from each ear of corn, rinsing them under cold water to guarantee they’re clean. This step is essential as it removes any dirt or debris that might be on the corn.
- Boil the Corn: Fill a large pot with water and bring it to a rolling boil. Once boiling, add the corn and let it cook for about 8-10 minutes. This cooking time allows the corn to become tender while retaining its natural sweetness. After boiling, carefully remove the corn with tongs and let it drain.
- Add Butter and Salt: While the corn is still warm, brush each ear with butter and sprinkle with salt according to your taste preferences. The butter will enhance the flavor and create a delicious base for the cheese.
- Top with Cheese: Generously sprinkle the crumbled queso fresco or feta cheese over the hot corn. If you prefer a creamier texture, you can also drizzle some mayonnaise over the cheese before serving. The heat from the corn will slightly melt the cheese, creating a rich and flavorful topping.
- Garnish and Serve: If desired, chop some fresh cilantro or parsley and sprinkle it over the corn for an added splash of color and flavor. Serve the Choclo Con Queso immediately while it’s hot, allowing everyone to enjoy the delightful combination of flavors.
Extra Tips
For an added twist, you can experiment with different types of cheese or even add spices like paprika or chili powder for a bit of heat.
If you can’t find fresh corn, frozen corn can be used as a substitute, although the texture and sweetness may differ slightly. Additionally, feel free to customize the toppings to your liking; some enjoy adding a squeeze of lime or a sprinkle of chili flakes to enhance the taste further.
Enjoy your delicious Choclo Con Queso!
Pimientos Rellenos: Stuffed Peppers
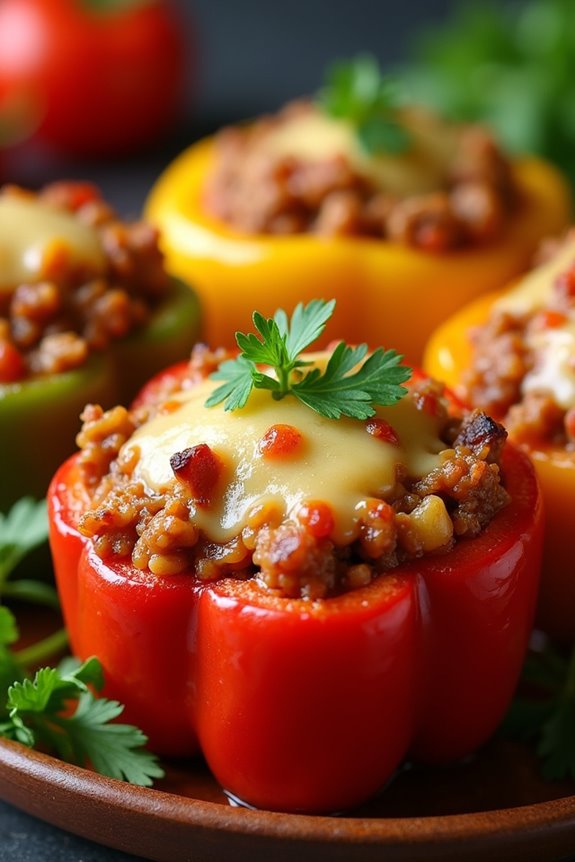
Pimientos Rellenos, or stuffed peppers, is a traditional Chilean dish that showcases the vibrant flavors and fresh ingredients found in Chilean cuisine. This delightful dish typically features bell peppers filled with a savory mixture of meats, vegetables, and spices, making it not only colorful but also nutritious. The combination of flavors creates a satisfying meal that can be enjoyed on its own or served alongside rice or a fresh salad.
The beauty of Pimientos Rellenos lies in its versatility; you can customize the stuffing to suit your tastes or dietary preferences. Whether you prefer a mixture of beef, chicken, or a vegetarian option with rice and beans, the possibilities are endless. This recipe serves 4-6 people and is perfect for family gatherings or casual dinner parties.
Ingredients
- 4 large bell peppers (red, yellow, or green)
- 1 pound ground beef or turkey
- 1 cup cooked rice
- 1 small onion, finely chopped
- 2 cloves garlic, minced
- 1 cup tomatoes, diced
- 1 teaspoon cumin
- 1 teaspoon paprika
- Salt and pepper, to taste
- 1 cup shredded cheese (cheddar or mozzarella)
- 2 tablespoons olive oil
- Fresh parsley, for garnish (optional)
Cooking Instructions
- Preheat the Oven: Begin by preheating your oven to 375°F (190°C). This guarantees that when the stuffed peppers are placed in the oven, they’ll cook evenly and thoroughly.
- Prepare the Peppers: While the oven heats, wash the bell peppers and slice the tops off. Carefully remove the seeds and membranes from the inside of each pepper, creating a hollow space for the stuffing. Set the prepared peppers aside.
- Cook the Filling: In a large skillet, heat the olive oil over medium heat. Add the chopped onion and garlic, sautéing until the onion becomes translucent. Next, add the ground beef or turkey to the skillet, cooking until browned. Drain any excess fat.
- Add Vegetables and Seasoning: Stir in the diced tomatoes, cooked rice, cumin, paprika, salt, and pepper. Mix well, allowing the flavors to combine and simmer for about 5 minutes. If you prefer a spicier filling, feel free to add some chopped jalapeños or chili powder at this stage.
- Stuff the Peppers: Remove the skillet from the heat and mix in half of the shredded cheese into the filling. Using a spoon, carefully fill each bell pepper with the meat and rice mixture, packing it down slightly to verify they’re well-filled.
- Bake the Peppers: Place the stuffed peppers upright in a baking dish. If desired, you can add a little water to the bottom of the dish to help steam the peppers. Cover the dish with aluminum foil and bake for 30 minutes. After 30 minutes, remove the foil and sprinkle the remaining cheese on top of each pepper. Return to the oven and bake for an additional 10-15 minutes, or until the cheese is melted and bubbly.
- Serve and Garnish: Once the peppers are done, remove them from the oven and let them cool for a few minutes. Garnish with fresh parsley if desired, then serve warm.
Extra Tips
When making Pimientos Rellenos, feel free to experiment with the stuffing ingredients to suit your personal taste. You can substitute ground meat with lentils or quinoa for a vegetarian option, and add other vegetables like corn or black beans for extra flavor and nutrition.
Additionally, consider using different types of cheese or spices to give your dish a unique twist. For more depth of flavor, allow the stuffed peppers to sit for a few minutes before serving, as this will help the flavors meld together beautifully. Enjoy your culinary adventure with these delicious stuffed peppers!
Vegetable Empanadas: A Chilean Classic

Vegetable empanadas are a beloved staple in Chilean cuisine, showcasing a delightful blend of fresh vegetables and spices enveloped in a golden, flaky pastry. These savory pastries can be enjoyed as a snack or a main dish, making them versatile for any meal of the day. The combination of sautéed onions, bell peppers, and spices gives these empanadas a rich flavor profile that’s both comforting and satisfying.
Making vegetable empanadas isn’t only a delicious endeavor but also a wonderful opportunity to incorporate seasonal produce into your meals. The dough can be made from scratch or purchased pre-made for convenience. Once filled and baked to perfection, these empanadas will impress both your family and guests, bringing a taste of Chile to your kitchen.
Ingredients (Serves 4-6)
- 2 cups all-purpose flour
- 1/2 cup unsalted butter, chilled and cubed
- 1/4 cup cold water
- 1 teaspoon salt
- 1 tablespoon olive oil
- 1 medium onion, finely chopped
- 1 red bell pepper, finely chopped
- 1 green bell pepper, finely chopped
- 1 zucchini, grated
- 1 cup corn kernels (fresh or frozen)
- 1 teaspoon cumin
- 1 teaspoon paprika
- Salt and pepper to taste
- 1 egg, beaten (for egg wash)
Cooking Instructions
- Prepare the Dough: In a large mixing bowl, combine the flour and salt. Add the chilled butter and mix with your fingers or a pastry cutter until the mixture resembles coarse crumbs. Gradually add the cold water, mixing until a dough forms. Knead gently for a minute, wrap in plastic wrap, and refrigerate for at least 30 minutes.
- Sauté the Vegetables: In a large skillet, heat the olive oil over medium heat. Add the chopped onion and cook until translucent, about 5 minutes. Then, add the red and green bell peppers and cook for an additional 5 minutes. Stir in the grated zucchini and corn, followed by the cumin, paprika, salt, and pepper. Cook until the vegetables are tender, about 5 more minutes. Remove from heat and let cool.
- Roll Out the Dough: Preheat your oven to 375°F (190°C). On a floured surface, roll out the chilled dough to about 1/8 inch thickness. Use a round cutter or a glass to cut out circles of dough, about 4-5 inches in diameter.
- Fill the Empanadas: Place a spoonful of the vegetable mixture in the center of each dough circle. Be careful not to overfill. Fold the dough over to create a half-moon shape and press the edges to seal. You can crimp the edges with a fork for a decorative touch.
- Prepare for Baking: Place the filled empanadas on a baking sheet lined with parchment paper. Brush the tops with the beaten egg to give them a nice golden color when baked.
- Bake the Empanadas: Bake in the preheated oven for 20-25 minutes or until the empanadas are golden brown and crisp. Remove from the oven and let them cool slightly before serving.
- Serve and Enjoy: Serve the vegetable empanadas warm, with a side of salsa or avocado dip for added flavor. Enjoy the delightful flavors and textures of this Chilean classic!
Extra Tips
When making vegetable empanadas, feel free to customize the filling based on your preference or what you have on hand. You can add ingredients like spinach, mushrooms, or even cheese for an extra layer of flavor.
For a crispier crust, make sure that your dough is rolled out evenly and not too thick. If you’re short on time, using store-bought dough can greatly speed up the process.
Finally, empanadas can be frozen before baking; just make sure to separate them with parchment paper to prevent sticking, and bake them straight from the freezer, adding a few extra minutes to the cooking time.