

Exploring the vibrant streets of Chile is like stepping into a flavor paradise. The delightful journey starts with savory Empanadas De Pino and continues with the indulgent Completo. Each dish is a story waiting to unfold, offering more than just a taste. They capture the lively spirit of Chilean street food culture. If you’re eager to bring this experience into your kitchen, I have some amazing recipes you’ll love to try.
Empanadas De Pino

Empanadas de Pino are a beloved traditional Chilean dish that showcases the country’s rich culinary heritage. These savory pastries are filled with a hearty mixture of ground beef, onions, hard-boiled eggs, olives, and spices, all encased in a flaky pastry shell. Perfect for lunch, dinner, or as a snack, empanadas de pino are often enjoyed during family gatherings and celebrations, making them a staple in Chilean cuisine. The combination of flavors is certain to satisfy any palate, and they can be baked or fried for added versatility.
Making empanadas de pino at home can be an enjoyable and rewarding experience. While it may seem intimidating at first, the process is quite straightforward, and the end result is well worth the effort. With a crispy, golden crust and a savory filling, these empanadas are perfect for sharing with friends and family. Gather your ingredients and follow these simple steps to create your own delicious empanadas de pino.
Ingredients (Servings: 4-6)
- 2 cups all-purpose flour
- 1/2 cup unsalted butter, cold and cubed
- 1/2 teaspoon salt
- 1/4 cup cold water
- 1 pound ground beef
- 1 large onion, finely chopped
- 2 hard-boiled eggs, chopped
- 1/2 cup green olives, pitted and chopped
- 1 teaspoon cumin
- 1 teaspoon paprika
- Salt and pepper to taste
- 1 egg, beaten (for egg wash)
Cooking Instructions
- Make the Dough: In a large mixing bowl, combine the flour and salt. Add the cold, cubed butter and mix with your fingers or a pastry cutter until the mixture resembles coarse crumbs. Gradually add cold water, one tablespoon at a time, mixing until a dough forms. Knead the dough gently on a floured surface until smooth. Wrap in plastic wrap and refrigerate for at least 30 minutes.
- Prepare the Filling: In a large skillet, heat a tablespoon of oil over medium heat. Add the chopped onions and sauté until they’re soft and translucent, about 5 minutes. Add the ground beef to the skillet, breaking it apart with a spoon. Cook until browned, about 7-10 minutes. Stir in the cumin, paprika, salt, and pepper. Remove from heat and let the mixture cool slightly before adding the chopped hard-boiled eggs and olives.
- Roll Out the Dough: Once the dough has chilled, take it out of the refrigerator and divide it into small balls, about the size of a golf ball. On a floured surface, roll each ball into a circle roughly 6 inches in diameter. Repeat this process until all dough is rolled out.
- Fill the Empanadas: Place a spoonful of the filling mixture in the center of each dough circle. Be careful not to overfill, as it will make sealing difficult. Fold the dough over the filling to create a half-moon shape. Press the edges together firmly to seal, then crimp the edges with a fork or pinch with your fingers to confirm they’re well sealed.
- Bake or Fry: Preheat the oven to 400°F (200°C) if baking. Place the empanadas on a baking sheet lined with parchment paper. Brush the tops with the beaten egg for a golden finish. Bake for 20-25 minutes or until golden brown. If frying, heat oil in a deep skillet and fry the empanadas in batches until golden brown, about 3-4 minutes per side. Drain on paper towels.
- Serve: Allow the empanadas to cool slightly before serving. Enjoy them warm, either on their own or with a side of pebre (Chilean salsa) for dipping.
Extra Tips
When making empanadas de pino, feel free to customize the filling according to your taste preferences. You can substitute ground beef with chicken, pork, or even a vegetarian option using lentils or mushrooms. Confirm that the filling isn’t too wet to prevent soggy empanadas.
Additionally, if you’re short on time, store-bought dough can be used as a quick alternative to making the dough from scratch. Enjoy experimenting with different flavors and spices to make the dish your own!
Completo

Completo is a quintessential Chilean street food that features a delicious combination of flavors and textures. It’s fundamentally a loaded hot dog, but what sets it apart is the variety of toppings that make it a feast for the senses. Traditionally, Completo is served on a soft, fluffy bun with a juicy sausage, and then generously topped with a medley of ingredients, including fresh avocado, sauerkraut, mayonnaise, and sometimes even tomatoes and cheese.
If you’re looking to replicate the vibrant and hearty experience of enjoying a Completo from a street vendor in Chile, this recipe will guide you through every step. Making Completo at home is a fun way to bring a taste of Chile right to your kitchen. While the preparation is straightforward, it’s the combination of fresh ingredients and the perfect sausage that will transport you to the bustling streets of Santiago.
Gather your friends and family for a delightful meal that’s perfect for a casual gathering or a weekend treat. Let’s explore the ingredients and cooking instructions to create this beloved dish.
Ingredients (Serves 4-6 people):
- 4-6 beef hot dogs (or sausage of your choice)
- 4-6 soft hot dog buns
- 2 ripe avocados
- 1 cup mayonnaise
- 1 cup sauerkraut
- 1 medium tomato, diced
- 1 cup shredded cheese (optional)
- 1 tablespoon mustard (optional)
- Salt and pepper to taste
- Fresh cilantro for garnish (optional)
Cooking Instructions:
- Prepare the Avocado: Start by cutting the ripe avocados in half, removing the pit, and scooping the flesh into a bowl. Mash the avocado with a fork until it reaches your desired level of smoothness. Season with salt and pepper to taste, and set aside.
- Cook the Hot Dogs: In a medium saucepan or grill, cook the beef hot dogs according to your preference. You can boil them for about 5-7 minutes or grill them for about 10 minutes, turning occasionally until they’re heated through and have nice grill marks.
- Toast the Buns: While the hot dogs are cooking, you can toast the hot dog buns. Lightly butter the insides and toast them on a skillet or in the oven until they’re golden brown. This step adds a nice crunch and enhances the flavor of the Completo.
- Assemble the Completo: Once the hot dogs are cooked and the buns are toasted, it’s time to assemble your Completo. Place each hot dog into a bun and layer with mashed avocado, followed by a spoonful of sauerkraut, chopped tomatoes, and shredded cheese if desired.
- Add Condiments: Drizzle mayonnaise generously over the toppings, and add mustard if you like an extra kick. Feel free to customize the toppings to suit your taste.
- Garnish and Serve: Finally, garnish your Completo with fresh cilantro for an added touch of flavor. Serve immediately while the hot dogs are warm and the buns are fresh.
Extra Tips:
When making Completo, feel free to experiment with the toppings based on your preferences. Some may enjoy adding pickled jalapeños for a spicy kick, while others may prefer a sprinkle of crispy bacon bits for added flavor.
The key is to balance the freshness of the avocado and tomato with the richness of the mayonnaise and sausage. Additionally, using high-quality sausages can elevate the dish greatly, so choose your favorite brand or type. Enjoy your homemade Completo with a side of crispy fries or a revitalizing beverage for the ultimate street food experience!
Curanto
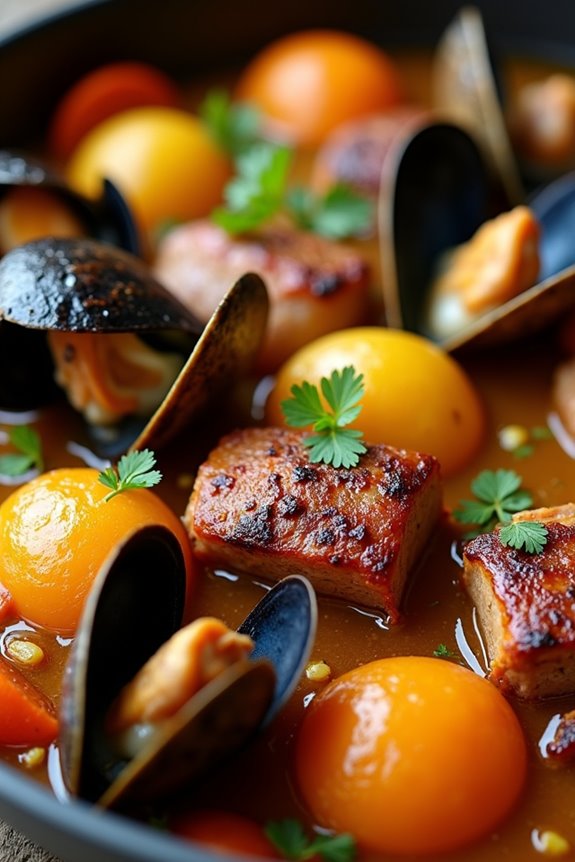
Curanto is a traditional Chilean dish with roots in the indigenous Mapuche culture, known for its communal preparation and hearty flavors. This dish is typically cooked outdoors in a pit, where various ingredients are layered and steamed together, creating a unique blend of textures and tastes.
Although curanto can be quite labor-intensive, the result is a delicious feast that brings friends and family together, making it perfect for gatherings and special occasions.
The beauty of curanto lies in its versatility; you can adjust the ingredients based on your preferences or what you have available. While the traditional preparation involves a mix of meats, seafood, and vegetables, you can customize it to be more vegetarian-friendly by focusing on seasonal produce.
Regardless of the variations, the communal spirit and hearty flavors of curanto make it a beloved dish throughout Chile.
Ingredients (Serves 4-6)
- 1 kg (2.2 lbs) chicken, cut into pieces
- 500 g (1.1 lbs) pork ribs
- 500 g (1.1 lbs) chorizo sausage
- 1 kg (2.2 lbs) mussels, cleaned
- 1 kg (2.2 lbs) potatoes, peeled and halved
- 500 g (1.1 lbs) sweet potatoes, peeled and halved
- 2 large onions, sliced
- 4 cloves garlic, minced
- 1 cup of white wine
- 4 cups of water
- 2 tablespoons of olive oil
- 2 teaspoons of paprika
- 1 teaspoon of black pepper
- Salt to taste
- Fresh parsley for garnish (optional)
Cooking Instructions
- Prepare the Cooking Site: Traditionally, curanto is cooked in a pit covered with leaves and stones. If using a pot or a large steamer, prepare it by adding a layer of stones or placing a steaming rack inside. This helps create steam while cooking the ingredients.
- Season the Meat: In a large bowl, combine the chicken pieces, pork ribs, and chorizo sausage. Add olive oil, garlic, paprika, black pepper, and salt. Mix well to guarantee all the meats are evenly coated with the seasoning. Let it marinate for about 30 minutes to enhance the flavors.
- Layer the Ingredients: Start by placing the sliced onions at the bottom of your cooking pot or pit. Then, layer the marinated meats on top of the onions, followed by the mussels. Next, add the halved potatoes and sweet potatoes, spreading them evenly over the seafood and meats.
- Add Liquid: Pour the white wine and water over the layered ingredients. This mixture will create steam and help cook the curanto. Make sure the liquid reaches about halfway up the ingredients.
- Cover and Cook: If using a pot, cover it tightly with a lid. If cooking in a pit, cover the ingredients with large leaves (like banana leaves) and then a layer of earth or stones to trap the steam. Cook for about 1.5 to 2 hours on medium heat, checking occasionally to confirm there’s enough liquid for steaming.
- Serve: Once the cooking time is up, carefully uncover the pot or pit. Using tongs, serve the curanto directly from the pot, making sure to include a variety of meats, seafood, and vegetables in each serving. Garnish with fresh parsley if desired.
Extra Tips
When preparing curanto, consider the freshness of your ingredients, particularly the seafood, as it greatly impacts the flavor of the dish. If possible, use seasonal vegetables to enhance the taste and texture.
For a more authentic experience, cooking outdoors adds to the communal atmosphere, but if you’re cooking indoors, guarantee adequate ventilation. Also, feel free to experiment with different types of meats or add beans for a vegetarian version.
Enjoy the process and the delicious results with your loved ones!
Chorrillana
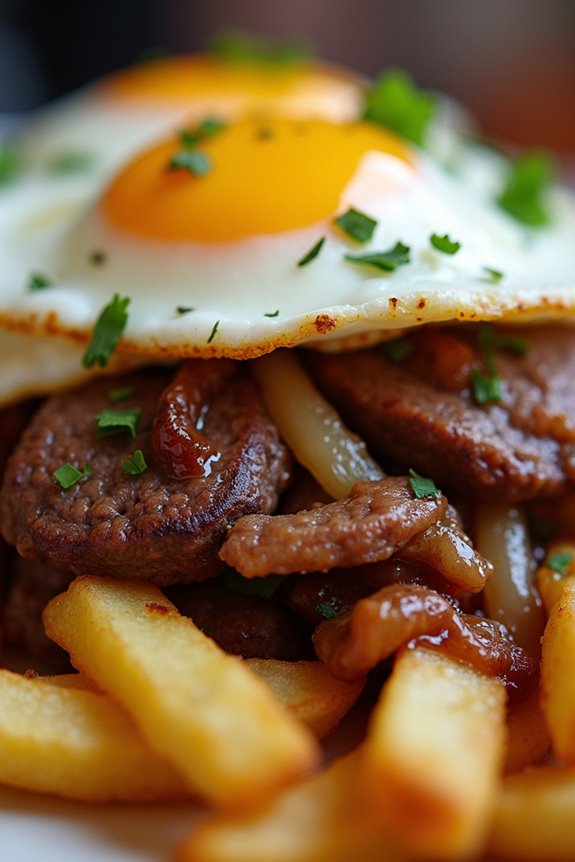
Chorrillana is a beloved Chilean street food dish that has become synonymous with late-night cravings and casual gatherings. This hearty meal features a delightful combination of crispy French fries, sautéed onions, savory beef, and often topped with a fried egg. Originating from the coastal city of Valparaíso, chorrillana has gained popularity across Chile and beyond, making it a must-try for anyone looking to experience authentic Chilean cuisine.
This dish isn’t just a feast for the stomach but also for the eyes, with its vibrant colors and layers of ingredients. The crispy fries serve as the perfect base, while the tender beef and caramelized onions add a rich depth of flavor. Whether enjoyed at a street vendor or made at home, chorrillana is sure to be a hit at your next gathering, providing a warm and filling option that everyone will love.
Ingredients (Serves 4-6 people):
- 1.5 lbs (700g) of beef sirloin, thinly sliced
- 4 large potatoes, peeled and cut into fries
- 2 large onions, sliced
- 4 large eggs
- 2 tablespoons vegetable oil (for frying)
- 2 tablespoons olive oil (for sautéing)
- 1 teaspoon paprika
- Salt and pepper to taste
- Fresh parsley, chopped (for garnish)
Cooking Instructions:
- Prepare the Fries: Start by heating vegetable oil in a deep fryer or a large pot over medium-high heat. Once the oil is hot, carefully add the cut potatoes in batches to avoid overcrowding. Fry them until they’re golden and crispy, about 5-7 minutes. Once done, remove them and place them on a plate lined with paper towels to absorb excess oil. Season with salt immediately while they’re still hot.
- Sauté the Onions: In a large skillet, heat the olive oil over medium heat. Add the sliced onions and sauté them until they’re soft and caramelized, about 8-10 minutes. Stir occasionally to prevent burning. Once they’re golden brown, remove them from the skillet and set aside.
- Cook the Beef: In the same skillet, add the thinly sliced beef sirloin. Season with paprika, salt, and pepper. Cook the beef over medium-high heat until it’s browned and cooked through, about 5-6 minutes. Make sure to stir frequently to guarantee even cooking.
- Fry the Eggs: In a separate small skillet, crack the eggs and fry them sunny-side up or to your preference. Season with a pinch of salt.
- Assemble the Dish: On a large serving platter, layer the crispy fries as the base. Top the fries with the sautéed onions and cooked beef. Finally, place the fried eggs on top, allowing the yolk to run over the dish for added flavor.
- Garnish and Serve: Finish by sprinkling chopped fresh parsley over the top for a burst of color and freshness. Serve immediately while hot, allowing everyone to dig in.
Extra Tips:
When making chorrillana, it’s crucial to focus on the quality of the ingredients, particularly the beef, which should be tender for the best texture. Feel free to get creative by adding other toppings, such as avocado or a drizzle of spicy sauce, to customize the dish to your liking.
Also, confirm your potatoes are cut evenly to achieve uniform cooking, and if you want extra crispy fries, soak them in cold water for about 30 minutes before frying to remove excess starch. Enjoy this delightful dish with friends and family, making it a memorable culinary experience!
Sopaipillas

Sopaipillas are a beloved street food in Chile, characterized by their golden, puffed-up appearance and slightly crispy exterior. Made from a simple dough of pumpkin or squash, these delightful treats are typically served warm and can be enjoyed sweet or savory. When prepared correctly, they’ve a fluffy interior that pairs well with a variety of toppings, including pebre (a fresh salsa), honey, or even dusted with powdered sugar for a dessert twist.
The origins of sopaipillas date back to the indigenous Mapuche people, who used local ingredients to create satisfying and hearty snacks. Over the years, this dish has evolved, becoming a staple in Chilean cuisine and beloved by locals and tourists alike. Whether you’re exploring the vibrant streets of Santiago or trying to replicate the experience at home, making sopaipillas is a fun and rewarding culinary adventure.
Ingredients (Serves 4-6)
- 2 cups all-purpose flour
- 1 cup cooked and mashed pumpkin or squash
- 1 teaspoon baking powder
- 1 teaspoon salt
- 2 tablespoons vegetable oil
- 1/2 teaspoon cumin (optional)
- Water (as needed)
- Oil for frying (vegetable or canola)
Cooking Instructions
- Prepare the Dough: In a mixing bowl, combine the all-purpose flour, baking powder, salt, and cumin (if using). In another bowl, mix the mashed pumpkin or squash with the vegetable oil until well blended. Gradually add the pumpkin mixture to the flour mixture, stirring to combine. If the dough is too dry, add a little water, one tablespoon at a time, until it forms a smooth, pliable dough.
- Knead the Dough: Transfer the dough onto a lightly floured surface and knead it for about 5 minutes until it becomes soft and elastic. Let the dough rest for about 15-20 minutes, covered with a kitchen towel. This resting period is essential as it allows the gluten to relax, making the dough easier to roll out.
- Roll Out the Dough: After resting, divide the dough into small pieces (about the size of a golf ball). Roll each piece out on a floured surface to about 1/4 inch thick. You can use a rolling pin for this step. The thinner you roll them, the crispier they’ll be.
- Cut into Shapes: Using a knife or a pizza cutter, cut the rolled-out dough into squares or circles, about 3-4 inches in diameter. If desired, you can also create small slits in the center of each piece to help them puff up while frying.
- Heat Oil for Frying: In a deep skillet or pot, heat enough oil to cover the sopaipillas when frying (about 2-3 inches deep). Heat the oil to around 350°F (175°C). To test if the oil is hot enough, drop a small piece of dough in; it should sizzle and rise to the surface.
- Fry the Sopaipillas: Carefully place the cut-out dough pieces into the hot oil, frying them in batches to avoid overcrowding. Fry for about 2-3 minutes on each side or until they’re golden brown and puffed up. Use a slotted spoon to remove them from the oil and drain on paper towels.
- Serve Warm: Sopaipillas are best enjoyed warm. Serve them immediately with your choice of toppings such as pebre, honey, or powdered sugar.
Extra Tips
When making sopaipillas, verify that your oil is hot enough before frying, as this will help them puff up nicely and avoid absorbing too much oil. Additionally, you can experiment with different flavorings in the dough, such as adding spices or herbs to enhance the taste.
If you want to make them ahead of time, you can keep them warm in an oven at low heat (around 200°F or 93°C) while you finish frying the rest. Enjoy your homemade sopaipillas and the delightful experience of Chilean street food!
Pastel De Choclo
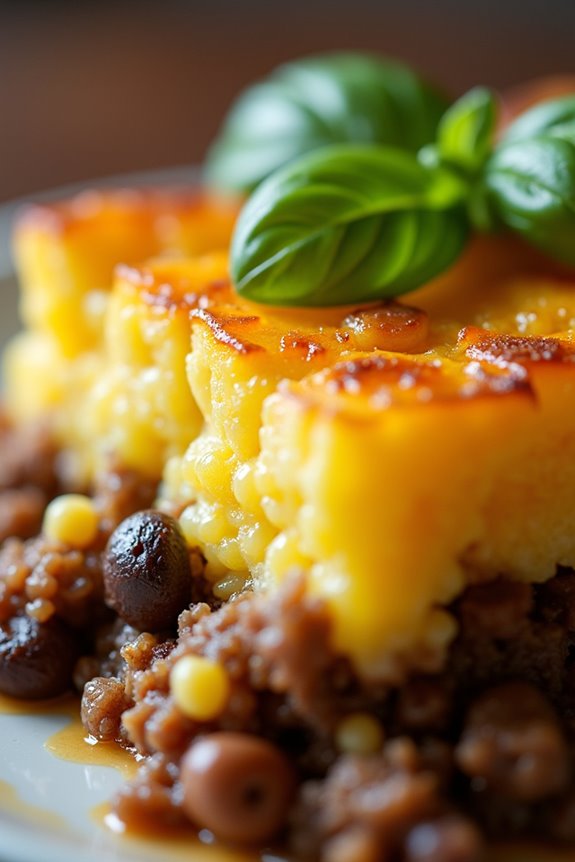
Pastel de Choclo is a beloved Chilean dish that showcases the country’s rich agricultural bounty, particularly its sweet corn. This hearty corn pie combines layers of ground meat, olives, hard-boiled eggs, and a creamy corn topping, creating a comforting and flavorful meal perfect for family gatherings or a cozy night in. The dish is often enjoyed during the summer months when corn is at its peak, but its delightful taste makes it a year-round favorite.
Traditionally, pastel de choclo is baked in a large dish, allowing for beautiful golden-brown crusts that contrast with the rich filling beneath. This dish not only brings together a variety of textures and flavors but also offers a glimpse into the Chilean culinary tradition, where fresh, local ingredients are celebrated. Whether you’re enjoying it at a family dinner or sharing it with friends, pastel de choclo is certain to impress and satisfy.
Ingredients (Serves 4-6)
- 2 cups of fresh or frozen corn kernels
- 1 cup of milk
- 2 tablespoons of butter
- 1 tablespoon of sugar
- 1 teaspoon of salt
- 1 pound of ground beef
- 1 onion, chopped
- 2 cloves of garlic, minced
- 1 teaspoon of paprika
- 1 teaspoon of cumin
- 1 cup of black olives, pitted and sliced
- 2 hard-boiled eggs, chopped
- Fresh basil leaves for garnish (optional)
Cooking Instructions
- Prepare the Corn Mixture: If using fresh corn, cut the kernels off the cobs. In a blender or food processor, combine the corn kernels, milk, butter, sugar, and salt. Blend until you achieve a smooth mixture. This will be the sweet corn topping that gives pastel de choclo its signature flavor.
- Cook the Meat Filling: In a large skillet over medium heat, add a drizzle of oil and sauté the chopped onions until they become translucent, about 5 minutes. Add the minced garlic and cook for an additional minute until fragrant. Then, add the ground beef to the skillet. Cook until browned, breaking it apart with a spoon.
- Season the Filling: Once the meat is browned, stir in the paprika and cumin. Mix well to guarantee the spices are evenly distributed. Allow the mixture to simmer for about 10 minutes, letting the flavors meld together. Remove from heat and stir in the sliced olives and chopped hard-boiled eggs.
- Assemble the Pastel: Preheat your oven to 350°F (175°C). In a baking dish, layer the meat mixture evenly at the bottom. Pour the corn mixture over the meat layer, spreading it out evenly with a spatula. Use the back of a spoon to create a smooth top.
- Bake the Dish: Place the assembled pastel de choclo in the preheated oven and bake for 30-40 minutes, or until the corn topping turns golden brown and slightly crisp. Keep an eye on it to confirm it doesn’t burn.
- Serve: Once baked, remove the dish from the oven and let it cool for a few minutes. Cut into squares and serve warm, garnished with fresh basil if desired.
Extra Tips
For an added depth of flavor, consider mixing in some diced bell peppers or a pinch of chili powder to the meat filling. You can also use a combination of meats, such as ground chicken or pork, for a different taste profile.
If you prefer a creamier corn topping, you can add an extra splash of cream or a few tablespoons of cheese into the corn mixture before blending. Enjoy your pastel de choclo with a side salad or some fresh avocado for a complete meal.
Ceviche
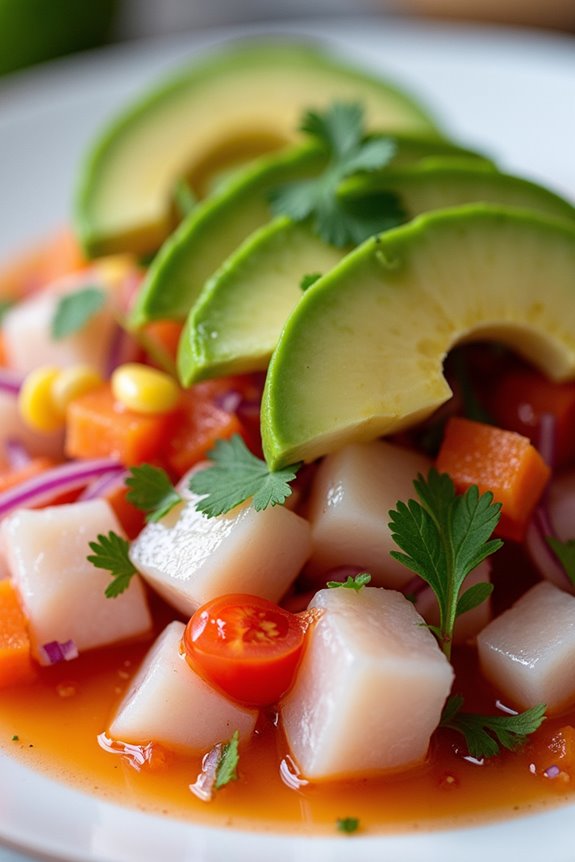
Ceviche is a beloved Chilean dish that showcases the vibrant flavors of the ocean, making it a staple in many coastal towns. This invigorating dish typically features fresh fish marinated in citrus juices, which “cooks” the fish and infuses it with zesty flavors.
Traditionally, ceviche is served cold and garnished with various ingredients, adding a delightful crunch and complexity to each bite. Whether enjoyed as an appetizer or a light main course, ceviche encapsulates the essence of Chilean street food culture, often accompanied by crispy corn or sweet potato.
Preparing ceviche at home is easier than you might think, and the result is a dish that’s not only delicious but also visually appealing. The bright colors of the ingredients make it a feast for the eyes, while the combination of flavors – from the tangy lime juice to the fresh herbs – makes it a revitalizing choice for any occasion.
The key to a perfect ceviche is using the freshest fish available, so be sure to source high-quality seafood for the best results.
Ingredients (Serves 4-6):
- 1 pound fresh white fish fillets (such as sole or tilapia)
- 1 cup freshly squeezed lime juice
- 1 medium red onion, thinly sliced
- 1 medium tomato, diced
- 1 jalapeño pepper, minced (optional)
- 1 cup fresh cilantro, chopped
- Salt and pepper to taste
- Avocado slices, for garnish
- Corn kernels, for serving (optional)
- Sweet potato, cooked and sliced (optional)
Cooking Instructions:
- Prepare the Fish: Begin by ensuring your fish fillets are fresh and free of any bones. Rinse the fillets under cold water and pat them dry with a paper towel. Cut the fish into small, bite-sized cubes and place them in a large glass or ceramic bowl. Avoid metal bowls as they can react with the acidity of the lime juice.
- Marinate the Fish: Pour the freshly squeezed lime juice over the cubed fish, ensuring that all pieces are well submerged. The acidity of the lime juice will “cook” the fish, so make sure to cover the bowl with plastic wrap and refrigerate it for at least 30 minutes, or until the fish turns opaque.
- Add Vegetables and Season: Once the fish is marinated, add the thinly sliced red onion, diced tomato, and minced jalapeño (if using) to the bowl. Gently toss the mixture to combine, ensuring that the vegetables are evenly distributed throughout the fish.
- Toss in Fresh Herbs: Add the chopped cilantro to the ceviche mixture and season with salt and pepper to taste. Mix everything together gently, being careful not to break apart the fish too much. Allow the ceviche to rest for an additional 10-15 minutes to let the flavors meld.
- Serve: To serve, spoon the ceviche into individual bowls or plates. Garnish with slices of avocado and, if desired, serve alongside corn kernels and sweet potato slices for a traditional touch. Enjoy your ceviche chilled and fresh!
Extra Tips:
When preparing ceviche, freshness is key, so be sure to buy fish from a reputable source. The marination time can vary depending on the thickness of the fish; thinner cuts may only need about 20-30 minutes, while thicker cuts may require up to an hour.
Don’t hesitate to customize your ceviche by adding other ingredients such as mango or cucumber for a twist on the classic recipe. Always taste before serving to adjust seasoning, and remember that the dish is best enjoyed the same day it’s prepared!
Pebre
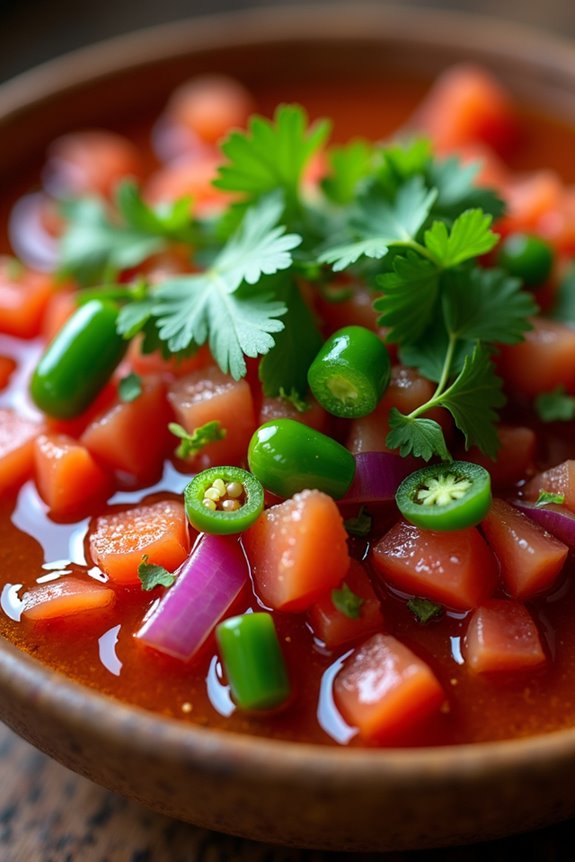
Pebre is a traditional Chilean condiment that adds a burst of flavor to any meal. This zesty mix of fresh ingredients is often served alongside bread, grilled meats, or roasted vegetables, making it a versatile accompaniment that brings the taste of Chilean cuisine to your table. With its bright colors and invigorating taste, pebre isn’t only a staple in Chilean households but also a delightful addition to any gathering.
The primary ingredients in pebre are fresh herbs, tomatoes, onion, and a touch of chili, all of which come together to create a vibrant and tangy sauce. Making pebre is straightforward and can be adapted to suit your personal tastes by adjusting the levels of heat and acidity. This recipe will serve 4-6 people, perfect for a family meal or a get-together with friends.
Ingredients
- 1 cup fresh cilantro leaves, finely chopped
- 1 medium tomato, finely diced
- 1 small red onion, finely chopped
- 1-2 fresh green chili peppers, finely chopped (adjust to taste)
- 2 tablespoons olive oil
- 1 tablespoon red wine vinegar
- Salt, to taste
- Pepper, to taste
- Juice of 1 lime (optional)
Cooking Instructions
- Prepare the Ingredients: Begin by washing the cilantro thoroughly to remove any dirt. Pat it dry with a paper towel before chopping. Dice the tomato, chop the onion, and finely mince the chili peppers. The freshness of these ingredients is key to a vibrant pebre, so make sure they’re of good quality.
- Mix the Base: In a mixing bowl, combine the chopped cilantro, diced tomato, chopped onion, and minced chili peppers. Stir gently to blend the ingredients without crushing them, maintaining the fresh texture of the vegetables.
- Add the Dressing: Pour in the olive oil and red wine vinegar over the mixed ingredients. The olive oil adds richness, while the vinegar contributes acidity, balancing the flavors. Stir again to guarantee everything is evenly coated.
- Season: Add salt and pepper to taste. It’s important to start with a small amount and adjust as needed, as the flavors will develop as the pebre sits. Optionally, squeeze in the juice of a lime for an extra layer of brightness and acidity.
- Let it Rest: Allow the pebre to sit for at least 15-30 minutes before serving. This resting time allows the flavors to meld together, resulting in a more cohesive and flavorful condiment.
- Serve: Transfer the pebre to a serving bowl and enjoy it with your favorite Chilean dishes, such as empanadas, grilled meats, or fresh bread.
Extra Tips
When making pebre, feel free to experiment with different types of chili peppers to adjust the heat level to your liking. Additionally, you can incorporate other ingredients such as bell peppers or avocado for added flavor and texture.
For the best results, use fresh, high-quality ingredients, and let the pebre sit longer to enhance the flavors even further. Store any leftovers in an airtight container in the refrigerator, where it can last for a few days, though it’s best enjoyed fresh.
Churros

Churros are a beloved treat in Chile and across Latin America, often enjoyed as a snack or dessert. These delicious, deep-fried pastries are typically coated in cinnamon-sugar and served with a rich chocolate sauce for dipping. The dough is simple to prepare, but the result is a delightful, crispy exterior with a soft, airy inside that will satisfy any sweet tooth.
Whether you’re indulging on your own or sharing with friends and family, making churros is a fun and rewarding experience. In Chile, churros may sometimes be filled with dulce de leche or chocolate, adding an extra layer of flavor to this already irresistible treat.
The preparation process involves making a choux pastry, which is then piped into long strips and fried until golden brown. Serve them warm and enjoy the delightful contrast of textures and flavors that churros offer.
Ingredients (Serves 4-6)
- 1 cup water
- 1/2 cup unsalted butter
- 1 tablespoon granulated sugar
- 1/4 teaspoon salt
- 1 cup all-purpose flour
- 3 large eggs
- Vegetable oil (for frying)
- 1/2 cup granulated sugar (for coating)
- 1 teaspoon ground cinnamon (for coating)
- Chocolate sauce (for dipping, optional)
Cooking Instructions
- Prepare the Dough: In a medium saucepan, combine the water, butter, sugar, and salt. Bring the mixture to a boil over medium heat, stirring occasionally to guarantee the butter melts completely. Once boiling, remove the saucepan from heat and add the flour all at once. Stir vigorously with a wooden spoon until the mixture forms a smooth ball and pulls away from the sides of the pan.
- Incorporate Eggs: Allow the dough to cool for about 5 minutes. Then, add the eggs one at a time, mixing well after each addition. The dough will initially appear lumpy, but continue to stir until it becomes smooth and glossy. Make sure there are no lumps and the dough is fully combined.
- Heat the Oil: In a deep frying pan or pot, pour enough vegetable oil to reach a depth of about 2 inches. Heat the oil over medium-high heat until it reaches around 350°F (175°C). You can test the oil by dropping in a small piece of dough; it should sizzle and rise to the surface.
- Pipe the Churros: Prepare a piping bag fitted with a star-shaped tip, and fill it with the churro dough. Carefully squeeze the dough out into long strips, about 5-6 inches in length, directly into the hot oil. Fry them in batches, ensuring not to overcrowd the pan.
- Fry Until Golden Brown: Cook the churros for about 2-3 minutes on each side, or until they’re golden brown and crispy. Use a slotted spoon to turn them occasionally for even frying. Once cooked, remove them from the oil and place them on a plate lined with paper towels to drain excess oil.
- Coat with Cinnamon Sugar: In a shallow dish, mix the granulated sugar with the ground cinnamon. While the churros are still warm, roll them in the cinnamon-sugar mixture until evenly coated.
- Serve and Enjoy: Serve the churros warm, with chocolate sauce on the side for dipping if desired. Enjoy the delightful crunch and sweetness with each bite!
Extra Tips
When making churros, be careful not to overmix the dough after adding the eggs, as this can lead to a dense texture. Confirm your oil is at the right temperature before frying, as oil that’s too cool will result in greasy churros, while oil that’s too hot may cause them to burn.
If you prefer filled churros, you can use a piping bag to inject dulce de leche or chocolate into the center once they’ve cooled slightly. Enjoy experimenting with different flavors and fillings!
Mote Con Huesillo
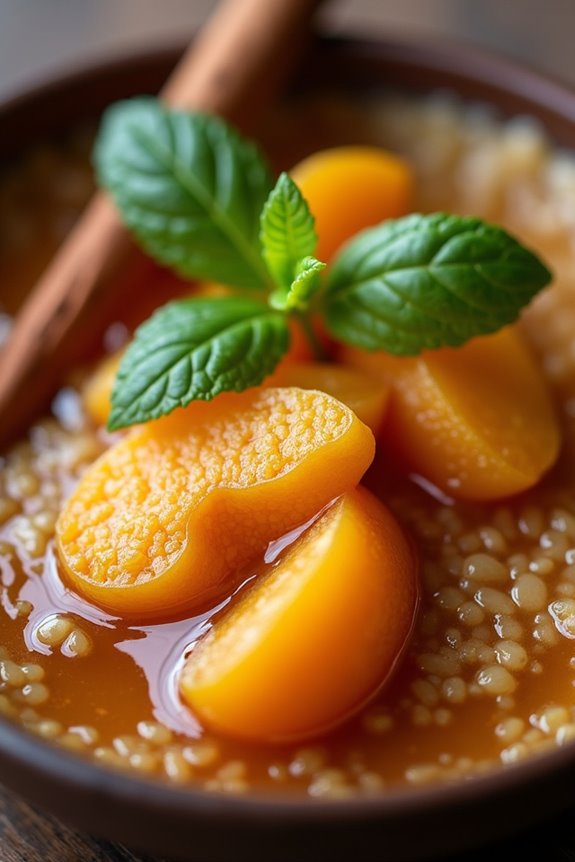
Mote Con Huesillo is a traditional Chilean street food that brings together a delightful combination of flavors and textures. This invigorating drink and dessert is made from a sweet syrup, dried peaches (huesillo), and cooked wheat (mote).
Often enjoyed during the warm summer months, it’s a beloved staple at fairs and street stalls across Chile, perfect for cooling off on a hot day. The dish not only offers a unique taste experience but also serves as a nostalgic reminder of Chilean culture for many locals.
Preparing Mote Con Huesillo at home is easier than you might think, and it’s an excellent way to share a taste of Chilean tradition with family and friends. The sweetness of the syrup complements the chewy texture of the wheat and the soft, fruity peaches, creating a balanced and satisfying treat.
Whether you’re looking to impress guests or simply enjoy an invigorating snack, this recipe will guide you through making this iconic dish.
Ingredients (Serves 4-6):
- 1 cup of wheat (mote)
- 4 dried peaches (huesillos)
- 1 cup of sugar
- 4 cups of water (for syrup)
- 1 cinnamon stick
- 1 teaspoon of vanilla extract
- 1 tablespoon of lemon juice
- 2 cups of water (for cooking wheat)
- Optional: mint leaves for garnish
Cooking Instructions:
1. Prepare the Wheat (Mote): Rinse 1 cup of wheat under cold water to remove any impurities. In a pot, combine the rinsed wheat with 2 cups of water and bring to a boil.
Once boiling, reduce the heat to low and let it simmer for about 30-40 minutes until the wheat is tender and slightly chewy. Drain any excess water and set aside.
2. Soak the Dried Peaches (Huesillos): In a separate bowl, place the 4 dried peaches and cover them with water. Let them soak for at least 2 hours, or ideally overnight, to soften.
After soaking, drain and set the peaches aside.
3. Make the Syrup: In a pot, combine 4 cups of water, 1 cup of sugar, 1 cinnamon stick, and 1 teaspoon of vanilla extract. Bring the mixture to a boil, then reduce to low heat and let it simmer for about 10 minutes, stirring occasionally until the sugar is fully dissolved.
Remove from heat and add 1 tablespoon of lemon juice for an extra zing.
4. Combine Ingredients: In a large pitcher, combine the cooked wheat (mote), soaked peaches (huesillos), and the prepared syrup. Stir gently to mix, ensuring the peaches and wheat are evenly distributed in the syrup.
5. Serve the Dish: Allow the mixture to cool in the refrigerator for at least 1 hour, or serve right away over ice if desired.
Pour into individual cups, making sure to include both the wheat and peaches in each serving. Garnish with fresh mint leaves if using.
Extra Tips:
For the best flavor, allow the Mote Con Huesillo to chill in the refrigerator for a few hours before serving, as this enhances the sweetness and allows the flavors to meld beautifully.
You can also adjust the amount of sugar in the syrup to suit your taste; some prefer a sweeter drink, while others like it a bit less sweet. Experiment with the ratios to find your perfect balance!
Additionally, consider using other dried fruits, such as apricots or plums, for a different twist on this classic dish.