

Chilean pastries offer a delightful mix of flavors and textures that are sure to please. From the rich sweetness of alfajores de dulce de leche to the airy lightness of berlines, each treat is uniquely charming. There’s something so comforting about savoring a pastel de choclo or a slice of torta de mil hojas. These tempting recipes are perfect for adding a touch of sweetness to your day. Whether you’re planning a gathering or just looking for a little indulgence, these pastries are sure to impress.
Alfajores De Dulce De Leche
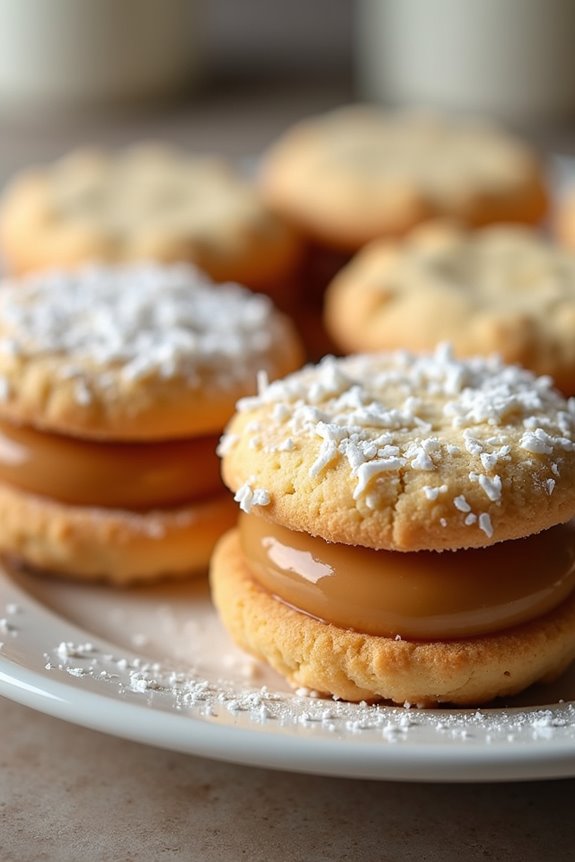
Alfajores de Dulce de Leche are a beloved traditional Chilean pastry that delights with their delicate texture and sweet filling. These cookies consist of two soft, crumbly biscuits that sandwich a generous layer of rich dulce de leche, creating a heavenly treat that melts in your mouth.
Often dusted with powdered sugar or rolled in coconut, these alfajores make for a perfect dessert or snack, ideal for sharing with friends and family.
The origin of alfajores can be traced back to Moorish influences, and they’ve become a staple in various Latin American countries, each with its unique twist. In Chile, the combination of buttery cookies and creamy dulce de leche is particularly cherished, making them a favorite at celebrations and gatherings.
With this recipe, you can create a batch of 4-6 servings that will impress your guests and satisfy your sweet tooth.
Ingredients:
- 1 cup unsalted butter, softened
- 1 cup granulated sugar
- 2 large egg yolks
- 1 teaspoon vanilla extract
- 2 cups all-purpose flour
- 1 cup cornstarch
- 1 teaspoon baking powder
- 1 cup dulce de leche
- Powdered sugar, for dusting (optional)
- Shredded coconut, for rolling (optional)
Cooking Instructions:
- Prepare the Dough: In a large mixing bowl, cream together the softened butter and granulated sugar until light and fluffy. This process should take about 3-5 minutes. Then, add the egg yolks and vanilla extract, mixing until well combined. The mixture should be smooth and creamy.
- Combine Dry Ingredients: In a separate bowl, whisk together the all-purpose flour, cornstarch, and baking powder. Gradually add this dry mixture to the wet ingredients, stirring gently until a soft dough forms. Be careful not to overmix, as this can make the cookies tough.
- Chill the Dough: Once the dough is well combined, wrap it in plastic wrap and refrigerate for at least 30 minutes. Chilling the dough helps the cookies hold their shape during baking and enhances their texture.
- Shape and Bake the Cookies: Preheat your oven to 350°F (175°C). On a lightly floured surface, roll out the chilled dough to about 1/4 inch thickness. Use a round cookie cutter to cut out shapes and place them on a lined baking sheet. Bake for 10-12 minutes, or until the edges are lightly golden. Allow the cookies to cool completely on a wire rack.
- Assemble the Alfajores: Once the cookies are cool, take one cookie and spread a generous layer of dulce de leche on the bottom side. Top with another cookie to create a sandwich. If desired, you can roll the edges in shredded coconut for added flavor and texture.
- Dust and Serve: If you prefer, dust the tops of the alfajores with powdered sugar before serving. These cookies are best enjoyed fresh but can be stored in an airtight container for a few days.
Extra Tips:
When making alfajores, verify that your butter is at room temperature for ideal creaming. You can customize your alfajores by experimenting with different fillings, such as chocolate ganache or fruit preserves.
If you want a more pronounced flavor, consider adding a hint of lemon or orange zest to the dough. Enjoying these cookies with a cup of coffee or tea enhances their delightful sweetness, making them a perfect afternoon treat.
Pastel De Choclo

Pastel de Choclo, a traditional Chilean corn pie, is a delightful dish that showcases the rich flavors of corn, meat, and spices, creating a comforting and hearty meal. This savory pie is typically made with a base of seasoned ground meat, often combined with onions, olives, hard-boiled eggs, and sometimes chicken, all topped with a luscious layer of sweet corn puree.
It’s a beloved family recipe that brings warmth and satisfaction to the table, making it perfect for gatherings or Sunday dinners.
The beauty of Pastel de Choclo lies in its versatility; while the classic version is made with beef, you can easily adapt it to include other meats or even make a vegetarian version using mushrooms and lentils. The combination of textures and flavors makes this dish irresistible, with the creamy corn topping perfectly complementing the rich filling underneath.
Whether you’re familiar with Chilean cuisine or trying it for the first time, this recipe will guide you to create a delicious and authentic Pastel de Choclo.
Ingredients (Serves 4-6)
- 500g ground beef
- 1 onion, finely chopped
- 2 cloves garlic, minced
- 1 teaspoon cumin
- 1 teaspoon paprika
- Salt and pepper to taste
- 1 cup black olives, pitted and chopped
- 2 hard-boiled eggs, sliced
- 1 cup chicken broth
- 4 cups corn kernels (fresh or frozen)
- 1 cup milk
- 2 tablespoons butter
- 1 tablespoon sugar
- 1 tablespoon cornmeal
- Fresh basil or parsley for garnish (optional)
Cooking Instructions
1. Prepare the Filling: In a large skillet over medium heat, add a tablespoon of oil and sauté the chopped onion until translucent, about 5 minutes. Add the minced garlic and cook for an additional minute until fragrant.
Then, add the ground beef, breaking it apart with a spoon. Cook until browned, about 7-10 minutes. Stir in the cumin, paprika, salt, and pepper to taste.
2. Add Olives and Eggs: Once the meat is cooked, mix in the chopped black olives and sliced hard-boiled eggs. Pour in the chicken broth to keep the filling moist and flavorful. Allow it to simmer for 5 minutes, then remove from heat.
3. Prepare the Corn Topping: In a separate pot, combine the corn kernels, milk, butter, and sugar. Cook over medium heat until the corn is tender, about 10 minutes. Use an immersion blender or a regular blender to puree the mixture until smooth.
Stir in the cornmeal to help thicken the topping.
4. Assemble the Pastel: Preheat your oven to 180°C (350°F). In a baking dish, spread the meat filling evenly. Pour the corn puree over the top, smoothing it out with a spatula to confirm it covers the meat completely.
5. Bake: Place the assembled pastel in the preheated oven and bake for 30-40 minutes, or until the top is golden and slightly crispy.
6. Serve: Once baked, remove from the oven and let it cool for a few minutes before slicing. Garnish with fresh basil or parsley if desired, and serve warm.
Extra Tips
When preparing Pastel de Choclo, consider using freshly grated corn for the topping if available, as it enhances the flavor and texture.
Additionally, feel free to experiment with the filling by adding other ingredients like diced bell peppers or spices to suit your taste. If you’re looking for a vegetarian option, substitute the meat with sautéed mushrooms and lentils for a similar hearty experience.
Ultimately, serve this dish with a simple green salad for a balanced meal that’s sure to impress!
Empanadas De Manzana
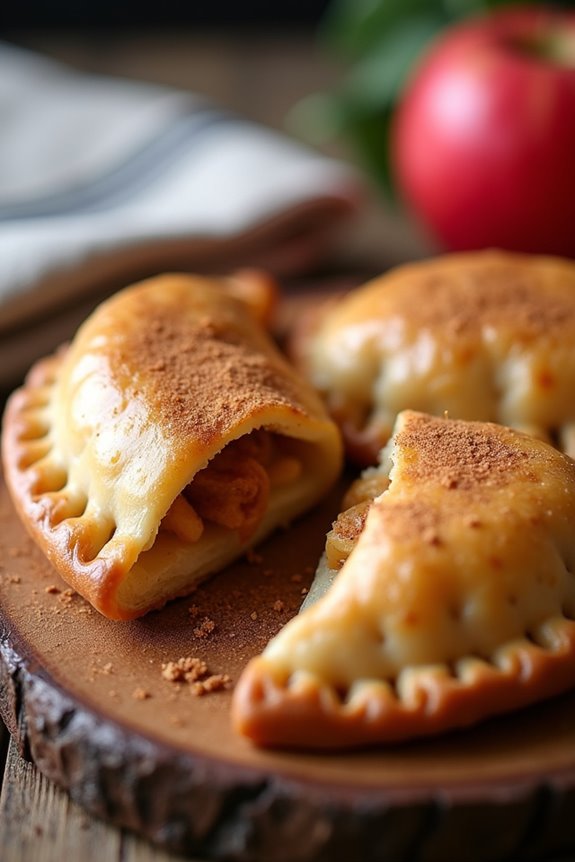
Empanadas de Manzana are a delightful Chilean pastry that beautifully combines the flaky texture of dough with the sweet, warm filling of spiced apples. These delicious hand-held pastries are perfect for dessert or a snack and are often enjoyed during family gatherings, holidays, or simply as a treat to satisfy your sweet tooth. The contrast of the golden-brown crust with the tender apple filling creates a harmony of flavors that’s sure to please everyone.
Making empanadas de manzana is a fun and rewarding process. The dough can be made from scratch or purchased pre-made for convenience. Once filled with a mixture of tender apples, sugar, cinnamon, and sometimes a touch of lemon juice, these empanadas are baked to perfection. Whether you’re a seasoned baker or a novice in the kitchen, this recipe will guide you through every step to create these mouthwatering Chilean pastries.
Ingredients (Serves 4-6 people):
- 2 cups all-purpose flour
- 1/2 cup unsalted butter, cold and cubed
- 1/4 cup sugar
- 1/4 teaspoon salt
- 1/4 cup ice water
- 3 medium apples, peeled, cored, and diced
- 1/2 cup sugar (for filling)
- 1 teaspoon ground cinnamon
- 1 tablespoon lemon juice
- 1 egg, beaten (for egg wash)
Cooking Instructions:
- Make the Dough: In a large bowl, combine the all-purpose flour, sugar, and salt. Add the cold, cubed butter and use a pastry cutter or your fingers to mix until the mixture resembles coarse crumbs. Gradually add ice water, one tablespoon at a time, mixing until the dough comes together. Form the dough into a ball, wrap it in plastic wrap, and refrigerate for at least 30 minutes.
- Prepare the Filling: In a separate bowl, combine the diced apples, sugar, ground cinnamon, and lemon juice. Toss the ingredients together until the apples are evenly coated. Let the mixture sit for about 10 minutes to allow the flavors to meld together.
- Roll Out the Dough: After chilling, remove the dough from the refrigerator. On a lightly floured surface, roll out the dough to about 1/8 inch thick. Use a round cutter or a glass to cut out circles of dough, about 4-5 inches in diameter.
- Fill the Empanadas: Place a tablespoon of the apple filling in the center of each dough circle. Be careful not to overfill, as this can cause the empanadas to burst during baking.
- Seal the Empanadas: Fold the dough over the filling to create a half-moon shape. Press the edges together to seal, and use a fork to crimp the edges for an extra secure seal. Place the sealed empanadas on a baking sheet lined with parchment paper.
- Prepare for Baking: Preheat your oven to 375°F (190°C). Brush the tops of the empanadas with the beaten egg to give them a beautiful golden color when baked.
- Bake: Bake the empanadas in the preheated oven for about 20-25 minutes, or until they’re golden brown. Remove from the oven and let them cool slightly before serving.
- Serve: Enjoy the empanadas de manzana warm, either on their own or with a scoop of vanilla ice cream for an indulgent treat.
Extra Tips:
When making empanadas de manzana, feel free to experiment with different types of apples to find your favorite flavor combination. Honeycrisp and Granny Smith apples work well for a balance of sweetness and tartness.
To enhance the filling, you can also add raisins or nuts for added texture. If you have leftover dough, you can always make mini empanadas or use it to create other fillings.
Finally, these empanadas can be frozen before baking; simply bake them straight from the freezer when you’re ready to enjoy them.
Torta De Mil Hojas

Torta De Mil Hojas, or “Thousand Layer Cake,” is a classic Chilean pastry that delights dessert lovers with its delicate layers and creamy filling. Traditionally made with thin sheets of dough and filled with a rich dulce de leche, this dessert is a showstopper at any gathering. Each bite offers a satisfying crunch followed by a sweet and creamy experience, making it a perfect end to any meal or a delightful treat at tea time.
Making Torta De Mil Hojas can be a labor of love, but the result is worth every effort. The thin layers of dough, known as “hojaldre,” are baked to perfection, and the filling can be customized to your liking. This cake is often adorned with a light dusting of powdered sugar or chocolate shavings, adding a touch of elegance. Whether you’re celebrating a special occasion or simply indulging a sweet tooth, this cake will surely impress.
Ingredients (Serves 4-6)
- 1 package of puff pastry (about 400g)
- 1 can of dulce de leche (about 400g)
- 1 cup of heavy cream
- 2 tablespoons of powdered sugar
- 1 teaspoon of vanilla extract
- Powdered sugar for dusting (optional)
- Chocolate shavings for garnish (optional)
Cooking Instructions
- Prepare the Puff Pastry: Preheat your oven to 200°C (400°F). Roll out the puff pastry on a lightly floured surface until it’s very thin. Cut the pastry into equal rectangles, about 10×15 cm (4×6 inches). You should aim for about 10-12 rectangles to create multiple layers.
- Bake the Pastry Layers: Place the pastry rectangles on a parchment-lined baking sheet. Prick each rectangle with a fork to prevent them from puffing too much. Bake in the preheated oven for about 10-15 minutes or until they’re golden brown and crispy. Remove from the oven and let them cool completely.
- Prepare the Cream Filling: In a mixing bowl, combine the heavy cream, powdered sugar, and vanilla extract. Using a hand mixer or a whisk, whip the cream until stiff peaks form. This will create a light and fluffy filling to complement the richness of the dulce de leche.
- Assemble the Cake: Start by placing one baked pastry layer on a serving plate. Spread a generous layer of dulce de leche over the pastry. Add a layer of the whipped cream over the dulce de leche. Repeat this process, alternating layers of pastry, dulce de leche, and cream until all ingredients are used, finishing with a pastry layer on top.
- Chill the Cake: Once assembled, cover the cake with plastic wrap and refrigerate for at least 2 hours, or overnight if possible. This will allow the layers to meld together and the flavors to develop.
- Serve: When ready to serve, remove the cake from the refrigerator. Dust the top with powdered sugar and garnish with chocolate shavings if desired. Slice into pieces and enjoy!
Extra Tips
When making Torta De Mil Hojas, it’s important to guarantee that the pastry layers are baked until they’re very crisp; this prevents the cake from becoming soggy as it sits.
Additionally, feel free to experiment with the filling—some people enjoy adding a layer of fresh fruit or using different flavored creams. If you’re short on time, store-bought dulce de leche works perfectly, but for a richer flavor, consider making your own.
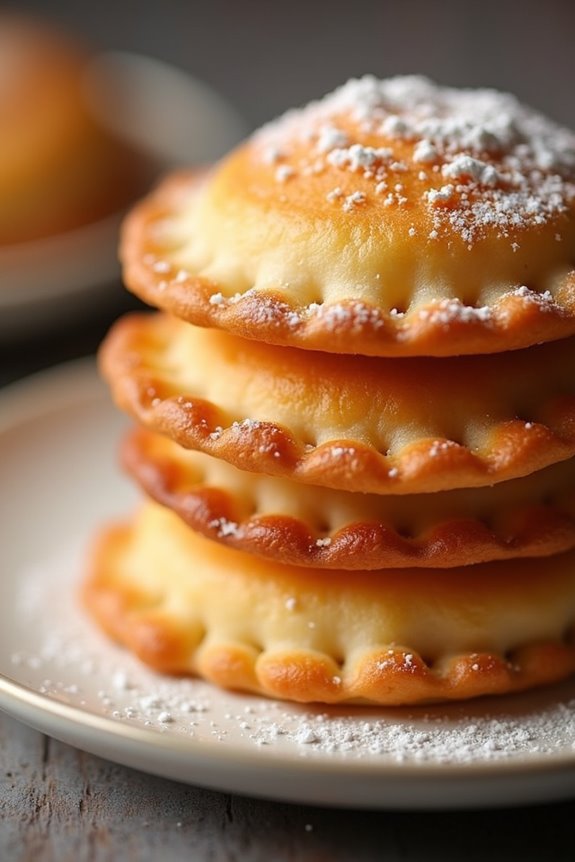
Chilenitos
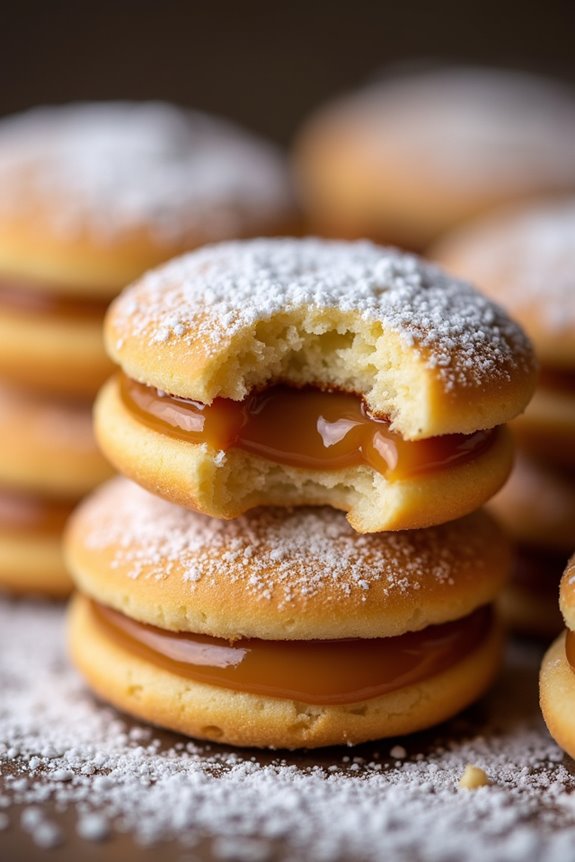
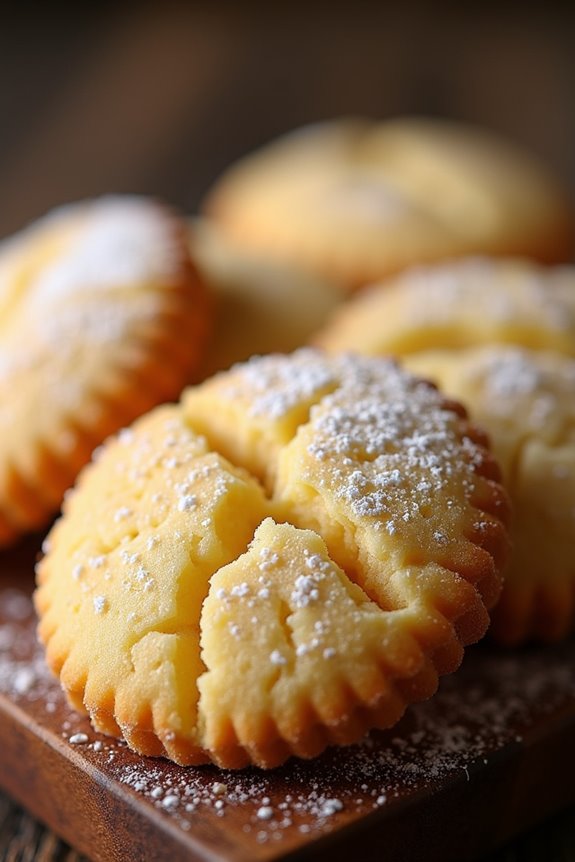
Chilenitos are a delightful Chilean pastry that’s sure to please anyone with a sweet tooth. These small, sandwich-like cookies are typically filled with a rich layer of dulce de leche and then dusted with powdered sugar, making them a beloved treat in Chile. The combination of buttery shortbread and sweet caramel creates a melt-in-your-mouth experience that’s hard to resist.
Chilenitos are often enjoyed during festive occasions but can be made any time you crave a little indulgence. Making Chilenitos is a straightforward process that requires simple ingredients and a bit of patience. While the dough needs to chill before baking, the final assembly is where the real fun happens. Once the cookies are baked and cooled, you’ll get to sandwich them together with the luscious filling, creating a beautiful and tasty treat.
Whether you’re serving them at a gathering or enjoying them with your afternoon coffee, Chilenitos are sure to impress.
Ingredients (Serves 4-6 people):
- 2 cups all-purpose flour
- 1 cup unsalted butter, softened
- ½ cup powdered sugar
- 1 egg yolk
- 1 teaspoon vanilla extract
- ¼ teaspoon salt
- 1 cup dulce de leche
- Additional powdered sugar for dusting
Cooking Instructions:
- Prepare the Dough: In a large mixing bowl, cream together the softened butter and powdered sugar until light and fluffy. This process should take about 3-5 minutes with an electric mixer. Once combined, add the egg yolk, vanilla extract, and salt, mixing until fully incorporated.
- Combine Ingredients: Gradually add the all-purpose flour to the butter mixture. Mix on low speed until a soft, cohesive dough forms. Make sure not to overmix, as this can lead to tough cookies.
- Chill the Dough: Shape the dough into a disc, wrap it in plastic wrap, and refrigerate for at least 1 hour. Chilling the dough will make it easier to roll out and cut into shapes.
- Roll and Cut: Preheat your oven to 350°F (175°C). Once chilled, remove the dough from the refrigerator and roll it out on a lightly floured surface to about ¼ inch thick. Use a round cookie cutter to cut out circles. Place them on a baking sheet lined with parchment paper, leaving some space between each cookie.
- Bake the Cookies: Bake the cookies in the preheated oven for about 12-15 minutes or until they’re lightly golden around the edges. Keep an eye on them to avoid over-baking. Once baked, remove them from the oven and let them cool on a wire rack.
- Assemble the Chilenitos: Once the cookies are completely cool, take one cookie and spread a generous layer of dulce de leche on the flat side. Top it with another cookie, pressing gently to create a sandwich. Repeat this process with the remaining cookies.
- Dust with Powdered Sugar: Finally, dust the assembled Chilenitos with powdered sugar for a beautiful finish. Serve and enjoy your delicious Chilean treats!
Extra Tips: When making Chilenitos, make sure your butter is at room temperature for easier mixing. You can also customize the filling by using different flavors of caramel or even fruit preserves if you prefer a fruity twist.
If you’re making these for a special occasion, consider adding a touch of cocoa powder to the dough for a chocolate variation. Enjoy these cookies fresh, but they can also be stored in an airtight container for a few days, maintaining their delightful texture.
Pan De Pascua
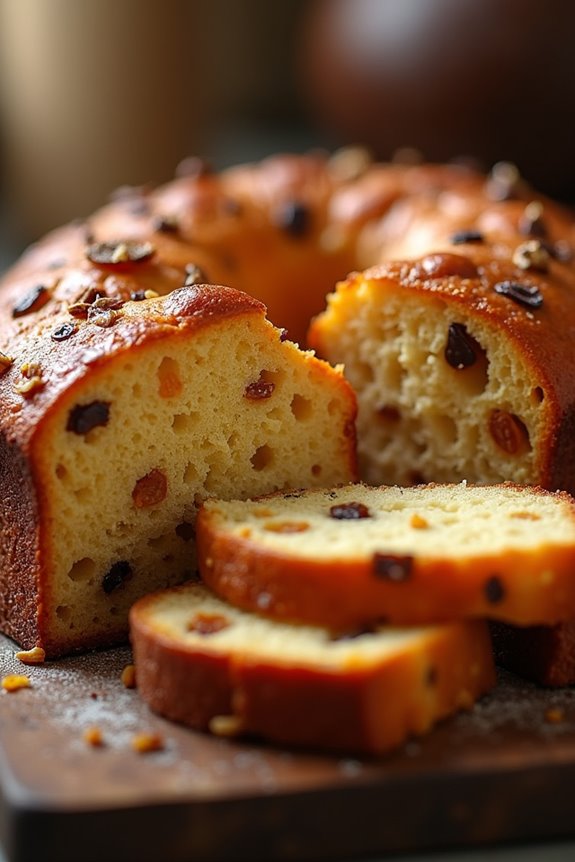
Pan de Pascua is a traditional Chilean cake that’s especially popular during the Christmas season. This delightful pastry is filled with a medley of dried fruits, nuts, and spices, creating a rich flavor and moist texture that’s perfect for festive gatherings. The cake itself is often compared to gingerbread or fruitcake, but its unique combination of ingredients and its soft, dense crumb make it a beloved holiday treat.
Making Pan de Pascua is a wonderful way to bring the spirit of Chilean culture into your home. The process may seem intimidating at first, but with a little patience and attention to detail, you can create a delicious cake that will impress family and friends alike. Whether you’re baking it for a holiday celebration or simply to enjoy with a cup of tea, this cake is sure to become a favorite in your recipe repertoire.
Ingredients (Serves 4-6):
- 2 cups all-purpose flour
- 1 cup brown sugar
- 1/2 cup honey
- 1/2 cup unsalted butter, softened
- 3 large eggs
- 1 teaspoon baking powder
- 1 teaspoon baking soda
- 1 teaspoon ground cinnamon
- 1/2 teaspoon ground nutmeg
- 1/2 teaspoon ground ginger
- 1/2 cup chopped walnuts or almonds
- 1/2 cup dried apricots, chopped
- 1/2 cup prunes, chopped
- 1/2 cup raisins
- 1/2 cup candied orange peel
- 1/4 cup white rum or brandy (optional)
Cooking Instructions:
- Preheat the Oven: Begin by preheating your oven to 350°F (175°C). This guarantees that your cake will bake evenly and rise properly. Prepare your baking pan by greasing it lightly and lining the bottom with parchment paper to prevent sticking.
- Mix Dry Ingredients: In a large mixing bowl, sift together the all-purpose flour, baking powder, baking soda, ground cinnamon, nutmeg, and ginger. This step is essential as it helps to aerate the flour and evenly distribute the leavening agents and spices throughout the mixture.
- Cream the Butter and Sugar: In another bowl, cream the softened butter and brown sugar until the mixture is light and fluffy. This should take about 3-5 minutes. The creaming process incorporates air into the butter, helping the cake to rise while baking.
- Add Honey and Eggs: Next, add the honey and eggs to the butter-sugar mixture. Beat well until fully combined. The honey adds moisture and sweetness, while the eggs contribute to the structure of the cake.
- Combine Wet and Dry Ingredients: Gradually add the dry ingredient mixture to the wet ingredients, stirring gently until just combined. Be careful not to overmix, as this could lead to a dense cake.
- Fold in Fruits and Nuts: Gently fold in the chopped walnuts or almonds, dried apricots, prunes, raisins, and candied orange peel. If you’re using rum or brandy, incorporate it at this stage. The fruits and nuts add texture and flavor, making each bite a delicious experience.
- Pour Batter into Pan: Transfer the batter into your prepared baking pan, smoothing the top with a spatula. This will help create an even top on the cake as it bakes.
- Bake the Cake: Place the pan in the preheated oven and bake for approximately 45-55 minutes, or until a toothpick inserted into the center comes out clean. Keep an eye on the cake towards the end of the baking time to avoid overbaking.
- Cool and Serve: Once baked, remove the cake from the oven and allow it to cool in the pan for about 10 minutes before transferring it to a wire rack to cool completely. Once cooled, slice and serve as desired.
Extra Tips:
When making Pan de Pascua, consider allowing the cake to sit for a day before serving; this allows the flavors to meld and develop further, resulting in an even more delicious treat. You can also experiment with different dried fruits or nuts based on your preferences. For an added festive touch, dust the top of the cake with powdered sugar or drizzle with a simple icing. Enjoy your baking adventure!
Berlines
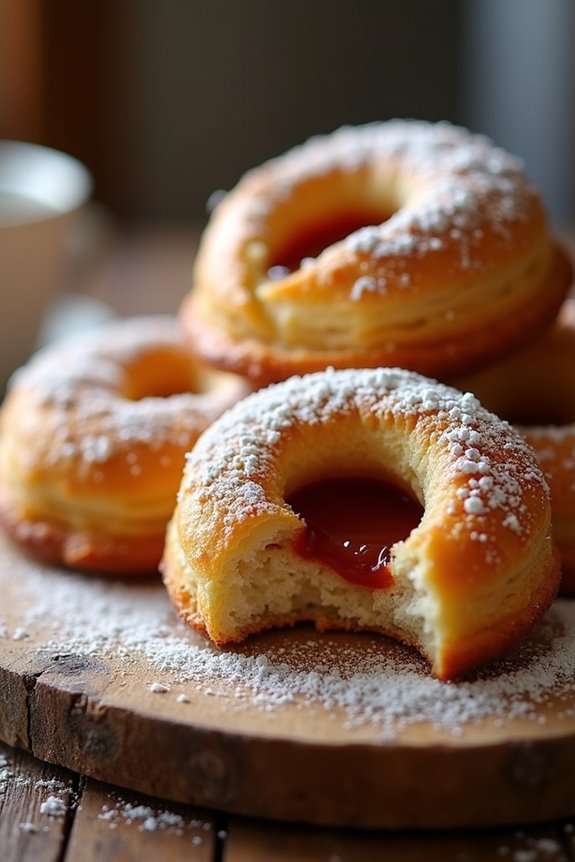
Berlines are a delightful Chilean pastry, resembling doughnuts, which are filled with sweet jams or creams and often dusted with powdered sugar. These pastries are popular during celebrations and festive occasions, making them a perfect treat to share with family and friends.
The light, fluffy texture combined with the sweet filling creates a satisfying indulgence that’s hard to resist. Whether enjoyed with a cup of coffee or as a dessert, Berlines are sure to please any crowd.
Making Berlines at home may seem intimidating, but with a little patience and the right ingredients, you can create these delicious pastries in your own kitchen. The process involves preparing a yeast dough that’s allowed to rise, shaping the pastries, and then frying them to golden perfection.
Once they’re cooked, the delicious fillings can be injected or spooned in, creating a burst of flavor in every bite.
Ingredients (Serves 4-6)
- 2 cups all-purpose flour
- 1/2 cup granulated sugar
- 1/2 cup whole milk
- 2 large eggs
- 1/4 cup unsalted butter, melted
- 2 teaspoons active dry yeast
- 1/4 teaspoon salt
- 1 teaspoon vanilla extract
- 1/2 cup fruit jam or pastry cream (for filling)
- Vegetable oil (for frying)
- Powdered sugar (for dusting)
Cooking Instructions
- Activate the Yeast: In a small bowl, combine the warm milk (about 110°F) with the active dry yeast and a tablespoon of sugar. Allow it to sit for about 5-10 minutes until it becomes frothy. This indicates that the yeast is active and ready to use.
- Mix the Dough: In a large mixing bowl, combine the flour, sugar, and salt. Create a well in the center and add the activated yeast mixture, melted butter, eggs, and vanilla extract. Mix until a dough begins to form.
- Knead the Dough: Transfer the dough to a floured surface and knead it for about 5-7 minutes until it’s smooth and elastic. If the dough is too sticky, add a little more flour as needed.
- First Rise: Place the kneaded dough in a greased bowl, cover it with a clean kitchen towel, and let it rise in a warm place for about 1-2 hours, or until it has doubled in size.
- Shape the Berlines: Once the dough has risen, punch it down to release the air. Roll it out on a lightly floured surface to about 1/2 inch thick. Use a round cookie cutter or glass to cut out circles of dough.
- Second Rise: Place the cut-out dough circles on a floured baking sheet, cover them with the kitchen towel, and let them rise again for about 30-45 minutes, until puffy.
- Fry the Berlines: In a deep skillet or pot, heat vegetable oil to 350°F. Carefully drop a few dough rounds into the hot oil, frying them for about 2-3 minutes on each side until golden brown. Use a slotted spoon to remove them and place them on paper towels to drain excess oil.
- Fill and Serve: Once the Berlines have cooled slightly, use a piping bag or a small knife to fill them with your choice of fruit jam or pastry cream. Dust with powdered sugar before serving.
Extra Tips
When making Berlines, make certain the oil is at the right temperature to prevent them from absorbing too much oil and becoming greasy. A candy thermometer can help monitor the temperature.
Additionally, experiment with different fillings such as chocolate, dulce de leche, or even flavored creams to create a variety of flavors. Finally, enjoy these pastries fresh for the best taste and texture!
Sopaipillas Dulces
Sopaipillas Dulces are delightful, sweet pastries that are popular in Chile, often enjoyed as a dessert or snack. These fluffy and crispy treats have a hint of sweetness and a unique texture that makes them a favorite among both children and adults. Traditionally, they’re made with pumpkin or squash, which gives them a beautiful orange hue and a subtle flavor.
Sopaipillas Dulces are typically served warm, dusted with sugar, and sometimes accompanied by a drizzle of honey or syrup, making them an irresistible indulgence. Making Sopaipillas Dulces at home is a rewarding experience that fills your kitchen with the warm, inviting aroma of freshly fried pastries.
The dough is simple to prepare and can be easily shaped into rounds or squares before frying. Once cooked, these pastries can be enjoyed plain or customized with toppings like powdered sugar, cinnamon, or even chocolate sauce. Whether you’re hosting a gathering or just looking for a sweet treat to enjoy with your family, Sopaipillas Dulces are sure to please.
Ingredients (Serves 4-6):
- 2 cups all-purpose flour
- 1 cup cooked and mashed pumpkin (or squash)
- 2 tablespoons sugar
- 1 teaspoon baking powder
- 1/2 teaspoon salt
- 1/2 teaspoon ground cinnamon (optional)
- 1/4 cup warm water (as needed)
- Oil for frying
- Powdered sugar for dusting (optional)
Cooking Instructions:
- Prepare the Dough: In a large mixing bowl, combine the all-purpose flour, sugar, baking powder, salt, and ground cinnamon (if using). Mix the dry ingredients until well combined. Next, add the cooked and mashed pumpkin to the dry mixture and stir until the ingredients begin to come together into a dough.
- Knead the Dough: If the dough is too crumbly, gradually add warm water a tablespoon at a time until it forms a smooth and pliable dough. Knead the dough on a floured surface for about 5 minutes until it’s soft and elastic. Cover the dough with a clean kitchen towel and let it rest for about 20-30 minutes.
- Roll and Cut the Dough: After the resting period, divide the dough into smaller portions for easier handling. Roll out each portion on a floured surface to about 1/4 inch thick. Use a round cutter or a glass to cut the dough into circles, or you can cut into squares for a more rustic look.
- Heat the Oil: In a deep frying pan or pot, heat oil over medium heat (about 350°F or 175°C). To test if the oil is ready, drop a small piece of dough into it; if it bubbles and rises to the surface, the oil is hot enough.
- Fry the Sopaipillas: Carefully drop the cut dough into the hot oil, frying a few at a time to avoid overcrowding. Fry each side for about 2-3 minutes or until they’re golden brown and puffed up. Use a slotted spoon to remove them from the oil and place them on a plate lined with paper towels to drain excess oil.
- Serve: Once the Sopaipillas Dulces are drained, dust them with powdered sugar if desired. Serve warm, and enjoy them plain or with honey or syrup drizzled on top.
Extra Tips:
When preparing Sopaipillas Dulces, you can experiment with different flavors by adding spices like nutmeg or using sweet potatoes instead of pumpkin for a unique twist.
Make sure the oil is at the right temperature for frying to prevent the pastries from absorbing too much oil. If you want to make the dough ahead of time, it can be refrigerated for a day, but allow it to come to room temperature before rolling it out. Enjoy your homemade Sopaipillas Dulces with your favorite toppings!
Kuchen De Frutilla
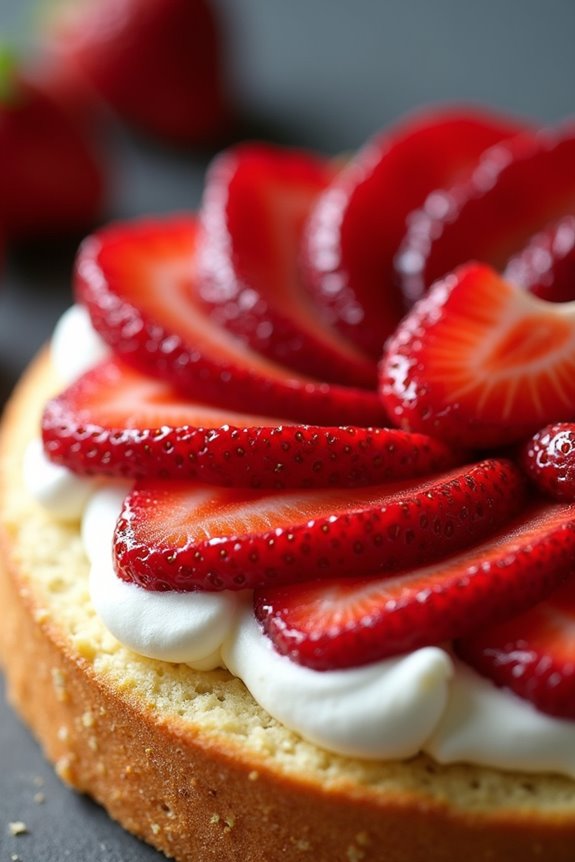
Kuchen de Frutilla, a delightful strawberry cake, is a cherished dessert in Chilean cuisine. This scrumptious pastry combines a rich, buttery crust with a creamy filling and is topped with fresh strawberries, making it a perfect treat for any occasion.
Whether served at a family gathering, a birthday party, or simply enjoyed with a cup of coffee, this cake is sure to impress both friends and family with its vibrant colors and mouthwatering flavors.
This traditional Chilean dessert isn’t only a feast for the eyes but also a celebration of fresh, seasonal fruits. The use of strawberries adds an invigorating sweetness that complements the creamy filling, while the crust provides a satisfying crunch.
While it may seem elaborate, this recipe is surprisingly simple to make, allowing you to bring a piece of Chilean culture into your kitchen with ease.
Ingredients (Serves 4-6 People):
- 1 ½ cups all-purpose flour
- ½ cup unsalted butter, softened
- ¼ cup granulated sugar
- 1 large egg
- 1 tsp baking powder
- ½ tsp salt
- 2 cups fresh strawberries, hulled and sliced
- 1 cup cream cheese, softened
- ½ cup powdered sugar
- 1 tsp vanilla extract
- 1 cup heavy whipping cream
- 1 tbsp lemon juice
Cooking Instructions:
1. Prepare the Crust: In a mixing bowl, combine the softened butter and granulated sugar. Beat until the mixture is creamy and pale. Add the egg and mix well.
In another bowl, whisk together the flour, baking powder, and salt. Gradually add the dry ingredients to the butter mixture, mixing until just combined. Press the dough into the bottom of a greased 9-inch round cake pan, creating an even layer. Preheat your oven to 350°F (175°C) while you prepare the crust.
2. Bake the Crust: Place the cake pan in the preheated oven and bake for about 20-25 minutes, or until the crust is lightly golden. Once baked, remove the pan from the oven and let it cool completely on a wire rack.
3. Prepare the Filling: In a mixing bowl, beat the softened cream cheese until smooth. Gradually add the powdered sugar and vanilla extract, mixing until well combined.
In a separate bowl, whip the heavy cream until stiff peaks form. Gently fold the whipped cream into the cream cheese mixture until fully incorporated.
4. Assemble the Kuchen: Once the crust has cooled, spread the cream cheese filling evenly over the cooled crust. Arrange the sliced strawberries decoratively on top of the filling, starting from the outer edge and working your way inward.
5. Chill and Serve: Drizzle the lemon juice over the strawberries to enhance their flavor and prevent browning. Refrigerate the Kuchen de Frutilla for at least 2 hours before serving to allow the flavors to meld and the filling to set.
Once chilled, slice and serve with additional strawberries if desired.
Extra Tips:
When making Kuchen de Frutilla, choose ripe, sweet strawberries for the best flavor. If strawberries are out of season, feel free to substitute them with other berries like blueberries or raspberries.
For a touch of elegance, consider garnishing the cake with a sprinkle of mint leaves or a dusting of powdered sugar just before serving. This won’t only enhance the presentation but also add an invigorating hint to each slice.
Rosquitas

Rosquitas are delightful Chilean pastries that are often enjoyed during festive occasions or as a sweet treat with coffee or tea. These small, doughnut-shaped cookies are known for their light, airy texture and are typically flavored with a hint of orange or anise. Their simplicity and deliciousness make them a beloved choice among Chileans, and they can be easily made at home with just a few ingredients.
Perfect for sharing with friends and family, rosquitas can be served plain or dusted with powdered sugar for an added touch of sweetness.
To prepare rosquitas, you’ll need to gather your ingredients and set aside some time for mixing, shaping, and baking the dough. The process is straightforward, making it an excellent recipe for those new to baking. Once they’re baked to a golden perfection, you’ll be greeted with the irresistible aroma of freshly baked cookies wafting through your kitchen, promising a delightful treat ahead.
Ingredients (serving size: 4-6 people):
- 2 cups all-purpose flour
- 1/2 cup granulated sugar
- 1/2 cup unsalted butter, softened
- 2 large eggs
- 1 teaspoon baking powder
- 1/2 teaspoon salt
- 1 teaspoon vanilla extract
- Zest of 1 orange (or 1 teaspoon anise extract for flavor)
- Powdered sugar for dusting (optional)
Cooking Instructions:
- Preheat the Oven: Begin by preheating your oven to 350°F (175°C). This guarantees that your rosquitas will bake evenly and develop a nice golden color.
- Mix the Dry Ingredients: In a medium bowl, combine the all-purpose flour, baking powder, and salt. Whisk the dry ingredients together until they’re well mixed, which helps to distribute the leavening agent evenly throughout the flour.
- Cream Butter and Sugar: In a large mixing bowl, cream together the softened butter and granulated sugar using an electric mixer or whisk until the mixture is light and fluffy. This step is important as it incorporates air into the batter, which contributes to the light texture of the rosquitas.
- Add Eggs and Flavoring: Beat in the eggs, one at a time, making sure each is fully incorporated before adding the next. Then mix in the vanilla extract and orange zest (or anise extract) until everything is well combined.
- Combine Mixtures: Gradually add the dry ingredient mixture to the wet ingredients, mixing until just combined. Avoid over-mixing, as this can lead to denser cookies.
- Shape the Rosquitas: Take small portions of the dough and roll them into ropes about 1/2 inch thick. Form each rope into a circle, pinching the ends to seal them together. Place the shaped rosquitas on a baking sheet lined with parchment paper, leaving some space between them.
- Bake: Place the baking sheet in the preheated oven and bake for 12-15 minutes or until the rosquitas are lightly golden. Keep an eye on them to prevent over-browning.
- Cool and Dust: Once baked, remove the rosquitas from the oven and allow them to cool on a wire rack. If desired, dust them with powdered sugar before serving for an added touch of sweetness.
Extra Tips: When making rosquitas, you can experiment with different flavorings such as lemon zest or almond extract to customize the taste to your liking. Additionally, if you want a richer flavor, consider using brown sugar instead of granulated sugar.
To ascertain uniform baking, try to keep the shapes of the rosquitas similar in size. Enjoy these tasty treats fresh out of the oven for the best texture, and store any leftovers in an airtight container.
Tarta De Mermelada
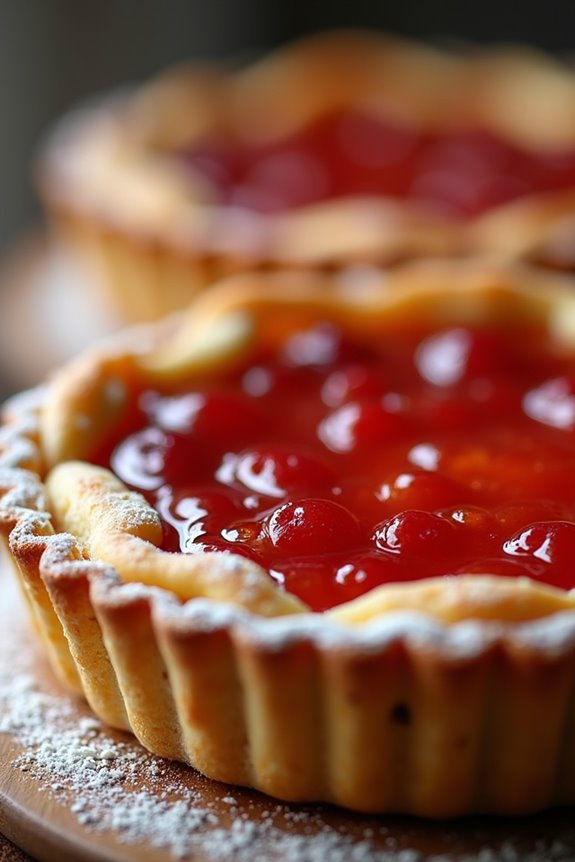
Tarta De Mermelada is a delightful Chilean pastry that showcases the rich flavors of fruit preserves encased in a buttery, flaky crust. This tart is a popular choice for dessert tables and is loved both for its simplicity and its ability to showcase the vibrant flavors of various jams.
The combination of sweet and slightly tangy jam with the tender pastry makes it a perfect treat for any occasion, whether served with coffee for an afternoon snack or as a dessert after dinner.
The beauty of Tarta De Mermelada lies in its versatility; you can use any flavor of jam that you prefer, such as raspberry, strawberry, or apricot. The tart can be easily made at home with minimal ingredients and effort, making it an ideal recipe for novice bakers as well as seasoned pastry chefs.
Once baked to golden perfection, this tart will impress your family and friends with its mouthwatering aroma and delicious taste.
Ingredients (serves 4-6):
- 2 cups all-purpose flour
- 1/2 cup unsalted butter, softened
- 1/2 cup granulated sugar
- 1 large egg
- 1/4 teaspoon salt
- 1 teaspoon vanilla extract
- 1 cup fruit jam (your choice of flavor)
- Powdered sugar (for dusting, optional)
Cooking Instructions:
1. Prepare the Dough: In a large mixing bowl, combine the all-purpose flour, softened butter, granulated sugar, salt, and vanilla extract. Using your hands or a pastry cutter, mix the ingredients until they resemble coarse crumbs.
Add the egg and continue to mix until a dough forms. If the dough is too crumbly, you can add a teaspoon of cold water until it holds together.
2. Chill the Dough: Shape the dough into a disc and wrap it in plastic wrap. Refrigerate for at least 30 minutes. Chilling the dough helps it to firm up, making it easier to roll out and preventing it from shrinking while baking.
3. Preheat the Oven: While the dough is chilling, preheat your oven to 350°F (175°C). This guarantees that the tart will bake evenly.
4. Roll Out the Dough: After chilling, remove the dough from the refrigerator. On a lightly floured surface, roll out the dough into a circle about 1/4 inch thick.
Carefully transfer the rolled dough into a 9-inch tart pan, pressing it gently into the edges. Trim any excess dough hanging over the edges.
5. Fill the Tart: Spread the fruit jam evenly over the bottom of the tart crust, making sure that it covers the entire surface. You can use a spatula or the back of a spoon to achieve a smooth layer.
6. Bake the Tart: Place the tart in the preheated oven and bake for 25-30 minutes, or until the crust is golden brown. Keep an eye on it towards the end to prevent over-baking.
7. Cool and Serve: Once baked, remove the tart from the oven and allow it to cool in the pan for about 10 minutes.
Carefully remove the tart from the pan and let it cool completely on a wire rack. Before serving, you can dust it with powdered sugar for an elegant touch.
Extra Tips: When choosing your jam, opt for high-quality fruit preserves for the best flavor. You can also experiment with mixing different flavors of jam for a more complex taste.
If you want to add a little extra flair, consider incorporating a crumb topping made from flour, butter, and sugar, or even adding a splash of lemon juice to the jam before spreading it onto the crust.
Remember to let the tart cool completely before slicing to guarantee clean cuts and a beautiful presentation. Enjoy your homemade Tarta De Mermelada!
Galletas De Mantequilla
Galletas De Mantequilla, or Butter Cookies, are a beloved treat in Chile, known for their rich flavor and delightful crumbly texture. These cookies are perfect for any occasion, whether it be a family gathering, a coffee break, or just a sweet indulgence at home.
The simplicity of the ingredients allows the buttery flavor to shine, making them irresistible. Traditionally served with a cup of tea or coffee, they can be enjoyed plain or dressed up with sprinkles, chocolate, or icing to suit your taste.
Making Galletas De Mantequilla is a straightforward process that requires minimal effort, making it a great recipe for bakers of all levels. With their melt-in-your-mouth quality and golden color, these cookies are sure to become a favorite in your household.
Follow the steps below to create these delicious treats that are bound to impress your family and friends.
Ingredients (Serves 4-6 People):
- 1 cup unsalted butter, softened
- 1 cup granulated sugar
- 1 teaspoon vanilla extract
- 2 cups all-purpose flour
- 1/4 teaspoon salt
- 1/2 teaspoon baking powder
- Optional: powdered sugar for dusting or chocolate for drizzling
Cooking Instructions:
- Preheat the Oven: Begin by preheating your oven to 350°F (175°C). This guarantees that your cookies bake evenly and achieve the perfect golden color.
- Cream Butter and Sugar: In a large mixing bowl, use an electric mixer to cream together the softened butter and granulated sugar until the mixture is light and fluffy. This process incorporates air into the batter, which helps the cookies rise and become tender.
- Add Vanilla: Mix in the vanilla extract to the butter-sugar mixture, making sure it’s well combined. The vanilla enhances the flavor of the cookies, adding a warm, aromatic touch.
- Combine Dry Ingredients: In a separate bowl, whisk together the all-purpose flour, salt, and baking powder. This step helps to evenly distribute the leavening agent and guarantees that the cookies have a consistent texture.
- Incorporate Dry Ingredients: Gradually add the dry ingredients to the creamed butter mixture, mixing on low speed until just combined. Be careful not to overmix, as this can lead to tough cookies.
- Shape the Cookies: Using your hands or a cookie scoop, form the dough into small balls (about 1 inch in diameter) and place them on a baking sheet lined with parchment paper. Leave some space between each cookie, as they’ll spread while baking.
- Bake the Cookies: Place the baking sheet in the preheated oven and bake for 10-12 minutes, or until the cookies are lightly golden around the edges. Keep an eye on them to avoid overbaking.
- Cool and Serve: Once baked, remove the cookies from the oven and let them cool on the baking sheet for a few minutes before transferring them to a wire rack to cool completely. If desired, dust with powdered sugar or drizzle with melted chocolate once cooled.
Extra Tips:
When making Galletas De Mantequilla, make sure that your butter is at room temperature for easy creaming. You can also experiment with flavors by adding lemon zest or almond extract for a twist.
If you prefer a more festive look, consider using cookie cutters to shape the cookies before baking, and decorate them with colored sprinkles or icing. Store any leftover cookies in an airtight container to maintain their freshness. Enjoy your baking!