

Looking to add some excitement to your family meals?
These kid-friendly South American recipes are a great way to introduce vibrant flavors to your little ones.
From savory chicken empanadas to sweet alfajores, these dishes are perfect for getting kids involved in the kitchen.
Prepare to make mealtime a fun and flavorful adventure.
Let’s explore some recipes that will bring joy to your kitchen!
Empanadas De Pollo (Chicken Empanadas)

Empanadas de Pollo, or chicken empanadas, are a delightful and versatile dish that can be enjoyed as a snack, appetizer, or even a main course. These savory pastries are filled with a flavorful mixture of shredded chicken, spices, and vegetables, all encased in a golden, flaky dough. Not only are they kid-friendly, but they can also be easily customized to suit the tastes of your family, making them a perfect addition to any meal.
Making empanadas is a great cooking project to share with children, as they can help with filling and folding the dough. You can also prepare the filling ahead of time, making it easy to assemble and bake when you’re ready to eat. Serve them with a side of salsa, guacamole, or a fresh salad for a complete meal that the whole family will enjoy.
Ingredients (serves 4-6):
- 2 cups all-purpose flour
- 1/2 cup unsalted butter, softened
- 1/2 teaspoon salt
- 1/4 cup cold water
- 2 cups cooked chicken, shredded
- 1 small onion, finely chopped
- 1/2 bell pepper, finely chopped
- 1 teaspoon cumin
- 1 teaspoon paprika
- 1/2 teaspoon garlic powder
- Salt and pepper to taste
- 1 egg, beaten (for egg wash)
Cooking Instructions:
1. Prepare the Dough:
In a large mixing bowl, combine the all-purpose flour and salt. Add the softened butter and mix it in with your fingertips until the mixture resembles coarse crumbs. Gradually add cold water, mixing until a dough forms. Knead the dough for a minute until smooth, then wrap it in plastic wrap and refrigerate for at least 30 minutes.
2. Make the Filling:
In a skillet over medium heat, sauté the chopped onion and bell pepper until they’re soft, about 5 minutes. Add the shredded chicken, cumin, paprika, garlic powder, salt, and pepper. Stir well to combine and cook for another 3-5 minutes. Remove from heat and let the filling cool slightly.
3. Roll Out the Dough:
Once the dough has chilled, remove it from the refrigerator. On a lightly floured surface, roll out the dough to about 1/8 inch thick. Use a round cutter, about 4-5 inches in diameter, to cut out circles from the dough.
4. Fill the Empanadas:
Take a dough circle and place about a tablespoon of the chicken filling in the center. Fold the dough over to form a half-moon shape, pinching the edges to seal. For a decorative touch, crimp the edges with a fork.
5. Prepare for Baking:
Preheat your oven to 400°F (200°C). Place the filled empanadas on a baking sheet lined with parchment paper. Brush the tops with the beaten egg to give them a nice golden color when baked.
6. Bake:
Bake in the preheated oven for 20-25 minutes or until the empanadas are golden brown. Remove from the oven and allow to cool slightly before serving.
Extra Tips:
When making empanadas, feel free to experiment with the filling! You can substitute chicken with ground beef, cheese, or even vegetables for a vegetarian option.
Additionally, you can make the dough ahead of time and store it in the refrigerator for up to two days, or even freeze it for later use. For added flavor, consider incorporating herbs like cilantro or parsley into your chicken filling.
Enjoy your empanadas with dipping sauces to make them even more fun for the kids!
Arepas With Cheese and Avocado
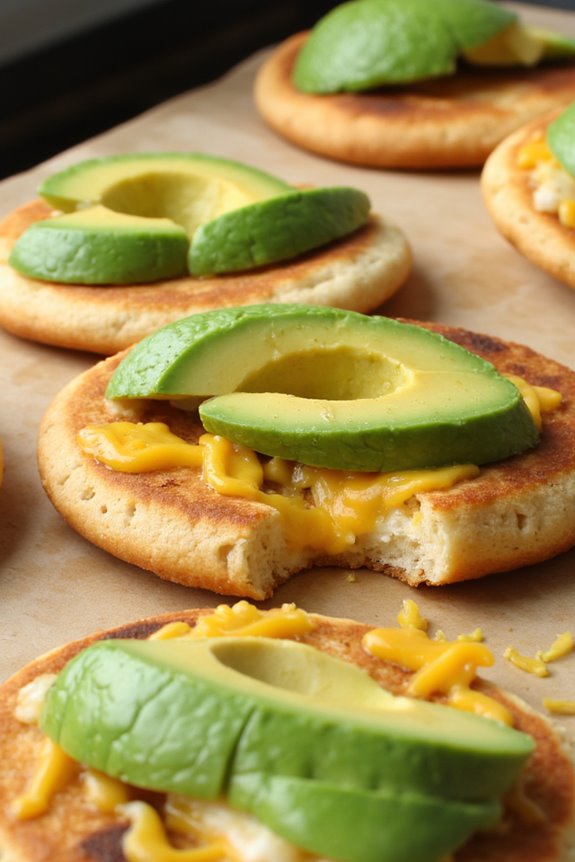
Arepas are a traditional South American dish, particularly popular in Venezuela and Colombia, known for their versatility and delicious flavor. These cornmeal cakes are naturally gluten-free and can be filled or topped with a variety of ingredients, making them a fantastic option for kids and adults alike.
In this recipe, we’ll focus on a delightful combination of cheese and avocado that’s bound to please even the pickiest eaters. Arepas aren’t only easy to make, but they also provide a fun cooking experience for the whole family.
To make Arepas With Cheese and Avocado, you’ll need a few simple ingredients and some basic cooking skills. This dish is perfect for a casual family meal or even a fun snack. The crispy exterior of the arepas combined with the creamy avocado and melted cheese creates a delicious contrast of textures and flavors. It’s a wholesome dish that can be enjoyed at any time of the day, and it’s a fantastic way to introduce kids to South American cuisine.
Ingredients (serving size: 4-6 people):
- 2 cups of pre-cooked cornmeal (masarepa)
- 2 ½ cups of warm water
- 1 teaspoon of salt
- 1 cup of shredded cheese (mozzarella or queso blanco)
- 1 ripe avocado, sliced
- 2 tablespoons of butter or oil (for cooking)
Cooking Instructions:
- Prepare the Arepa Dough: In a large mixing bowl, combine the pre-cooked cornmeal and salt. Gradually add warm water while stirring with a spoon or your hands until a dough forms. Let the dough rest for about 5-10 minutes. This allows the cornmeal to absorb the water fully and makes it easier to shape.
- Shape the Arepas: Divide the dough into 6-8 equal portions. Roll each portion into a ball and then flatten it gently between your palms to form a patty that’s about ½ inch thick. Make sure the edges are smooth and even to guarantee they cook properly.
- Cook the Arepas: Heat a non-stick skillet or griddle over medium heat and add the butter or oil. Once hot, place the arepas in the skillet without overcrowding. Cook for about 5-7 minutes on each side, or until they develop a golden-brown crust. You can also check for doneness by tapping them lightly; they should sound hollow.
- Add Cheese: Once the arepas are cooked, remove them from the skillet and slice them horizontally, creating a pocket. Fill each arepa with a generous amount of shredded cheese. The heat from the arepa will help melt the cheese slightly.
- Finish with Avocado: After filling the arepas with cheese, top them with slices of fresh avocado. You can also add a sprinkle of salt or a dash of lime juice for extra flavor if desired.
Extra Tips:
When preparing Arepas With Cheese and Avocado, it’s important to use warm water while making the dough, as this helps to achieve the right consistency.
You can experiment with different types of cheese or add other fillings like shredded chicken or beans for variety. Keep an eye on the cooking time to avoid burning the arepas; they should be crispy on the outside while remaining soft inside.
Finally, consider serving the arepas with a side of salsa or guacamole for an extra burst of flavor that kids will love!
Alfajores (Dulce De Leche Cookies)

Alfajores are a delightful South American treat that’s sure to bring smiles to the faces of kids and adults alike. These delicious cookies consist of two soft, crumbly cookies filled with creamy dulce de leche and often rolled in shredded coconut or dusted with powdered sugar.
Originating from Argentina, alfajores are perfect for special occasions, school lunches, or simply as a sweet snack to enjoy with a cup of milk or tea.
Making alfajores is a fun and engaging activity for families. Kids can help with measuring ingredients, rolling out dough, and assembling the cookies. The sweetness of the dulce de leche complemented by the buttery cookies creates a melt-in-your-mouth experience that’s hard to resist.
This recipe serves 4-6 people, making it ideal for a small gathering or a family treat.
Ingredients
- 1 cup unsalted butter, softened
- 1 cup powdered sugar
- 2 large egg yolks
- 1 teaspoon vanilla extract
- 2 cups all-purpose flour
- ½ cup cornstarch
- 1 teaspoon baking powder
- 1 cup dulce de leche
- Shredded coconut or additional powdered sugar for dusting (optional)
Cooking Instructions
1. Cream the Butter and Sugar: In a large mixing bowl, beat the softened butter and powdered sugar together using an electric mixer. Continue mixing until the mixture becomes light and fluffy, which usually takes about 3-5 minutes.
This step is essential as it incorporates air into the batter, making the cookies tender.
2. Add the Egg Yolks and Vanilla: Once the butter and sugar are well mixed, add in the egg yolks and vanilla extract. Beat the mixture again until the eggs are fully incorporated and the mixture is smooth.
This will add richness and flavor to the cookie dough.
3. Mix Dry Ingredients: In a separate bowl, sift together the all-purpose flour, cornstarch, and baking powder. Sifting helps to aerate the flour and removes any lumps, guaranteeing a smooth dough.
Gradually add this dry mixture to the butter mixture, stirring gently with a spatula or wooden spoon until just combined.
4. Chill the Dough: Divide the dough into two equal parts, shape each into a disk, and wrap them in plastic wrap. Refrigerate the dough for at least 1 hour.
Chilling the dough helps to firm it up, making it easier to roll out and cut into shapes.
5. Roll and Cut the Cookies: Preheat the oven to 350°F (175°C). On a lightly floured surface, roll out one disk of dough to about ¼ inch thick. Use a cookie cutter to cut out rounds and place them on a baking sheet lined with parchment paper.
Repeat with the second disk of dough.
6. Bake the Cookies: Bake the Cookies in the preheated oven for 10-12 minutes or until they’re lightly golden around the edges.
Be careful not to overbake them, as they should remain soft. Allow the cookies to cool on the baking sheet for a few minutes before transferring them to a wire rack.
7. Assemble the Alfajores: Once the cookies are completely cool, spread a generous layer of dulce de leche on the flat side of one cookie. Top it with another cookie to form a sandwich.
If desired, roll the edges of the assembled alfajores in shredded coconut or dust with powdered sugar.
Extra Tips
When making alfajores, make certain that your butter is at room temperature for easy creaming with sugar.
If you prefer a richer flavor, you can use dark chocolate or cocoa powder in the dough. Feel free to experiment with fillings, such as chocolate ganache or fruit preserves, to suit your family’s taste.
Also, alfajores can be stored in an airtight container for several days, making them a perfect treat to prepare in advance.
Enjoy creating these delightful cookies with your children!
Choclo Con Queso (Corn With Cheese)
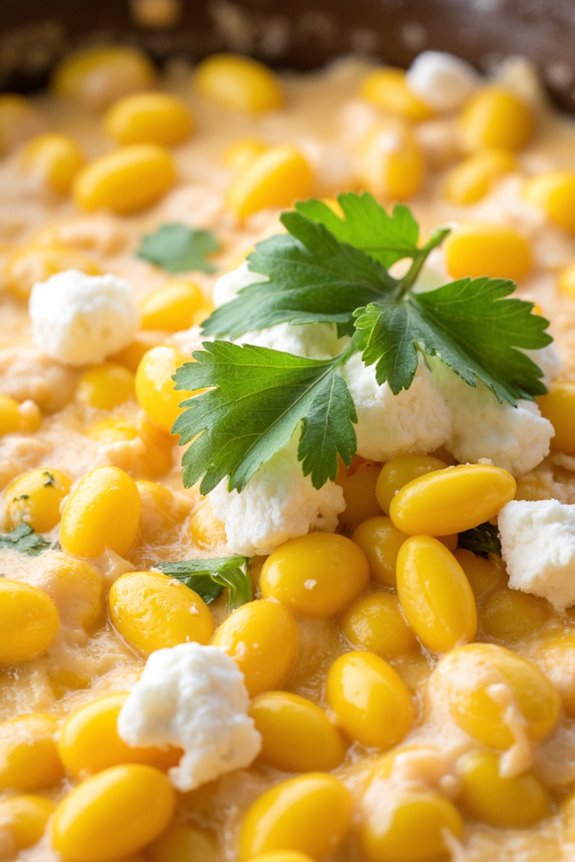
Choclo Con Queso, a delightful dish originating from South America, is a simple yet delicious combination of fresh corn and cheese that’s certain to please the whole family. This dish is particularly popular in countries like Peru and Bolivia, where street vendors often serve it as a comforting snack or side dish. The sweetness of the corn complements the creaminess of the cheese, creating a harmonious blend of flavors that kids and adults alike will enjoy.
Making Choclo Con Queso isn’t only easy but also allows for customization based on your family’s preferences. You can use different types of cheese, such as queso fresco or mozzarella, and add spices or herbs to enhance the flavor further. This dish is perfect for a summer barbecue or a cozy family dinner, bringing a taste of South America to your table.
Ingredients (for 4-6 servings):
- 4 cups of fresh corn kernels (or 4 large ears of corn)
- 1 cup of crumbled queso fresco (or mozzarella cheese)
- 2 tablespoons of butter
- 1 teaspoon of salt
- 1/2 teaspoon of black pepper
- 1/4 teaspoon of paprika (optional)
- Fresh cilantro for garnish (optional)
Cooking Instructions:
- Prepare the Corn: If using fresh corn, carefully cut the kernels off the cob. If using frozen corn, measure out 4 cups and set aside. Rinse the corn under cold water to remove any frost if using frozen.
- Cook the Corn: In a large pot, bring water to a boil. Add the corn kernels and cook for about 5-7 minutes until they’re tender but still slightly crunchy. If using frozen corn, follow the package directions for cooking. Once cooked, drain the corn and return it to the pot.
- Add the Butter and Seasoning: While the corn is still warm, add the butter, salt, black pepper, and paprika (if using) to the pot. Stir well until the butter is melted and evenly coats the corn.
- Incorporate the Cheese: Gently fold in the crumbled queso fresco (or mozzarella cheese) until it begins to melt into the warm corn mixture. Avoid overmixing to keep some cheese chunks intact for added texture.
- Serve: Transfer the Choclo Con Queso to a serving dish. If desired, garnish with fresh cilantro for an added touch of flavor and presentation. Serve warm as a side dish or enjoy it as a snack.
Extra Tips:
When making Choclo Con Queso, feel free to experiment with different types of cheese to find your family’s favorite flavor profile. You can also add a dash of hot sauce for a bit of heat or mix in diced jalapeños for an extra kick.
If fresh corn is out of season, frozen corn works just as well; just make sure you cook it adequately to achieve that sweet, tender bite. Enjoy this dish as a fun and interactive side at gatherings, where everyone can customize their serving with additional toppings.
Pão De Queijo (Cheese Bread)
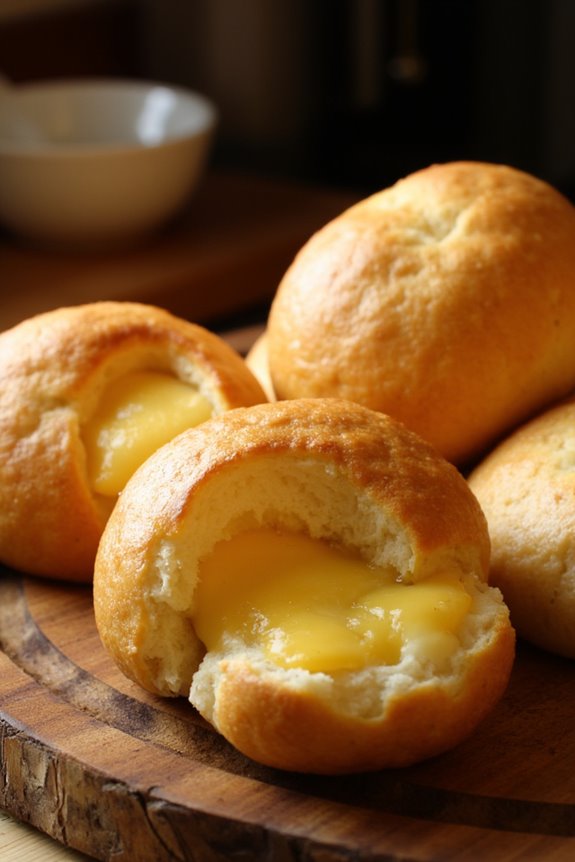
Pão de Queijo, or Brazilian cheese bread, is a delightful gluten-free treat that’s perfect for kids and adults alike. This cheesy, chewy snack is made from tapioca flour, which gives it a unique texture that’s both soft and slightly crispy on the outside. The rich flavor of cheese makes it irresistible, and it can be enjoyed warm or at room temperature.
It’s a popular addition to breakfast, snacks, or even as an appetizer at parties. Making Pão de Queijo is simple and fun, especially when involving kids in the kitchen. They’ll enjoy mixing the dough and shaping the little cheese balls.
With just a few ingredients and straightforward steps, you can whip up a batch of these delicious cheese breads that will definitely satisfy the whole family. Serve them fresh out of the oven for the best experience, and watch as they disappear in no time!
Ingredients (serving size: 4-6 people):
- 1 cup of tapioca flour
- 1/2 cup of milk
- 1/2 cup of vegetable oil
- 1 teaspoon of salt
- 1 large egg
- 1 cup of grated cheese (Parmesan or mozzarella)
- 1/4 teaspoon of baking powder
Cooking Instructions:
- Preheat the Oven: Start by preheating your oven to 375°F (190°C). This will guarantee that your Pão de Queijo cooks evenly and develops a nice golden color.
- Combine Wet Ingredients: In a medium saucepan over medium heat, combine the milk, vegetable oil, and salt. Stir the mixture gently until it begins to simmer. This step is essential as it helps to dissolve the salt and mix the fat with the liquid for a smoother dough.
- Mix with Tapioca Flour: Remove the saucepan from the heat and add the tapioca flour to the milk mixture. Stir well until fully combined. It will look like a thick paste, and this is perfectly normal. Let the mixture cool for a few minutes so that it’s safe to handle.
- Add Egg and Cheese: Once the mixture has cooled, add the egg and mix until fully incorporated. Then, fold in the grated cheese and baking powder. The cheese adds flavor and richness, while the baking powder helps the dough rise slightly.
- Shape the Dough: Using your hands (you may want to grease them lightly), take small portions of the dough and roll them into balls about the size of a golf ball. Place them on a baking sheet lined with parchment paper, leaving some space between each ball as they’ll expand during baking.
- Bake: Place the baking sheet in the preheated oven and bake for 15-20 minutes or until the Pão de Queijo are puffed and golden brown. Keep an eye on them towards the end to prevent burning.
- Cool and Serve: Once baked, remove the cheese bread from the oven and let them cool slightly before serving. They’re best enjoyed warm!
Extra Tips:
For a fun twist, you can experiment with different types of cheese or even add herbs and spices to the dough for extra flavor. If you want a more pronounced cheese taste, try using a mixture of cheeses.
Additionally, if you want to prepare them ahead of time, you can freeze the shaped dough balls before baking. Just pop them straight into the oven from the freezer, adding a couple of extra minutes to the baking time. Enjoy your Pão de Queijo!
Ceviche De Mango (Mango Ceviche)
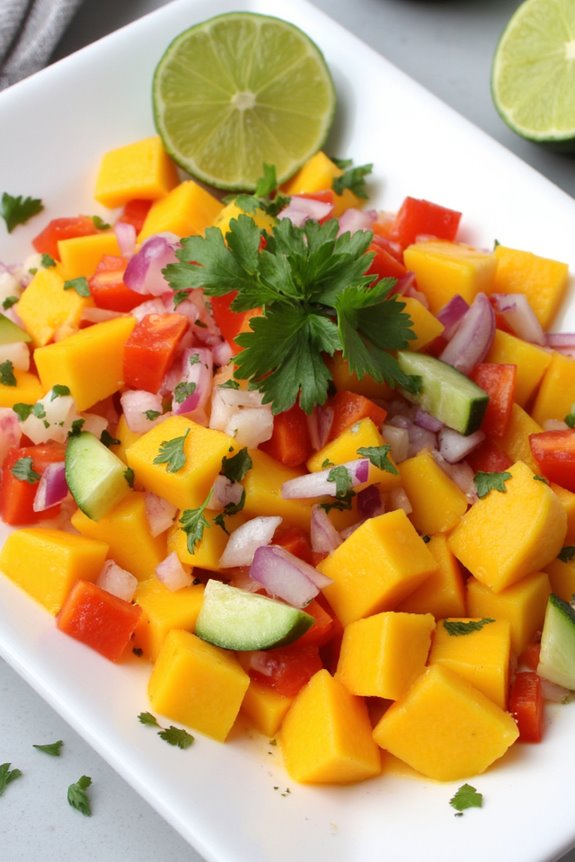
Ceviche de Mango, or Mango Ceviche, is a vibrant and invigorating dish that brings the tropical flavors of South America to your table. This dish isn’t only a feast for the eyes but also a delight for the taste buds, combining the sweetness of ripe mangoes with the tanginess of lime juice, and a medley of fresh herbs and vegetables.
It’s the perfect appetizer or light meal, especially during warmer months when you want something light yet satisfying.
What makes this ceviche particularly kid-friendly is its fruity base, which can entice even the pickiest eaters. This recipe is simple enough for kids to help with, whether it’s peeling the mango or mixing the ingredients together. Packed with nutrients and colorful ingredients, Ceviche de Mango is a healthy choice that the whole family will love.
Serve it with tortilla chips or on its own for a deliciously crisp bite.
Ingredients (Serves 4-6)
- 2 ripe mangoes, diced
- 1 medium red onion, finely chopped
- 1 red bell pepper, diced
- 1 cucumber, diced
- 1/4 cup fresh cilantro, chopped
- 2 limes, juiced
- 1/2 teaspoon salt (adjust to taste)
- 1/4 teaspoon black pepper (adjust to taste)
- Optional: 1 jalapeño, finely chopped (for a spicy kick)
Cooking Instructions
- Prepare the Mangoes: Start by peeling and dicing the ripe mangoes into small, bite-sized pieces. Make sure the mangoes are fully ripe for maximum sweetness and flavor. Set the diced mango aside in a mixing bowl.
- Chop the Vegetables: Next, finely chop the red onion, red bell pepper, and cucumber. The finer the chop, the better the flavors will meld together. Add these chopped vegetables to the mixing bowl with the mango.
- Add Fresh Herbs: Chop the fresh cilantro and add it to the bowl. This herb adds a fresh, aromatic quality to the ceviche that balances the sweetness of the mango.
- Mix the Dressing: In a small bowl, squeeze the juice of two limes and then add the salt and black pepper. Whisk these together until well combined. The lime juice will give the ceviche its signature tang.
- Combine Ingredients: Pour the lime dressing over the mango and vegetable mixture. Gently toss everything together to guarantee that all the ingredients are evenly coated with the dressing. Be careful not to mash the mango pieces.
- Chill and Marinate: Cover the mixing bowl with plastic wrap and place it in the refrigerator for at least 30 minutes. This chilling time allows the flavors to develop and the vegetables to soften slightly.
- Serve: After chilling, taste and adjust the seasoning if necessary. Serve the ceviche in small bowls or on a platter with tortilla chips on the side for dipping.
Extra Tips
When making Ceviche de Mango, choosing ripe mangoes is essential for the best flavor. Look for mangoes that yield slightly to gentle pressure and have a sweet aroma.
If your kids are sensitive to spice, feel free to omit the jalapeño altogether, or serve it on the side for those who want an extra kick. This ceviche is best enjoyed fresh, so try to serve it the same day it’s made.
You can also customize the ingredients based on your family’s preferences, adding items like avocado or diced tomatoes to enhance the dish further.
Arroz Con Pollo (Chicken and Rice)
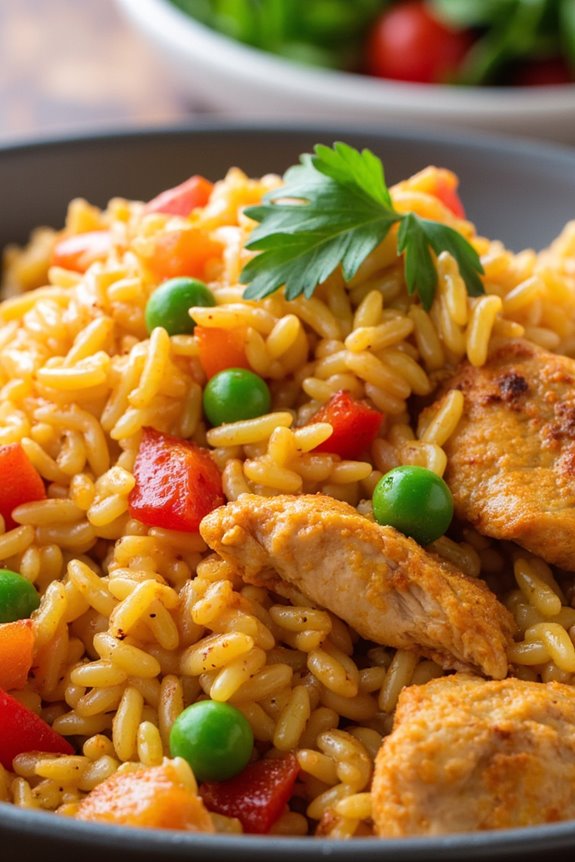
Arroz Con Pollo, a beloved dish throughout South America, is a delightful combination of tender chicken, flavorful rice, and vibrant vegetables. This dish not only brings comfort but also introduces children to a variety of tastes and colors on their plates. The name translates to “rice with chicken,” and it truly embodies the essence of family meals that are both hearty and satisfying.
Perfect for a weeknight dinner or a special gathering, this recipe is sure to become a favorite in your home.
The beauty of Arroz Con Pollo lies in its adaptability. You can easily adjust the ingredients based on your family’s preferences or what you have on hand. The dish is typically seasoned with a mix of spices, giving it a rich, aromatic flavor that will please even the pickiest eaters.
With colorful vegetables and tender chicken, this dish isn’t just visually appealing but also packed with nutrients, making it a great option for kids.
Ingredients (Serves 4-6):
- 2 cups of long-grain rice
- 1.5 lbs of chicken (thighs or drumsticks)
- 1 medium onion, chopped
- 3 cloves of garlic, minced
- 1 bell pepper, diced (any color)
- 1 cup of frozen peas
- 1 cup of diced tomatoes (canned or fresh)
- 4 cups of chicken broth
- 2 tablespoons of olive oil
- 1 teaspoon of paprika
- 1 teaspoon of cumin
- Salt and pepper to taste
- Fresh cilantro for garnish (optional)
- Lemon wedges for serving (optional)
Cooking Instructions:
- Prepare the Chicken: In a large pot or Dutch oven, heat the olive oil over medium-high heat. Season the chicken with salt, pepper, paprika, and cumin. Once the oil is hot, add the chicken pieces and brown them on all sides, about 5-7 minutes. This step adds flavor and color to the chicken.
- Sauté the Vegetables: After the chicken is browned, remove it from the pot and set it aside. In the same pot, add the chopped onion, bell pepper, and minced garlic. Sauté for about 3-4 minutes until the vegetables are softened and fragrant. This base will add depth to the overall flavor of the dish.
- Add Rice and Tomatoes: Stir in the rice and diced tomatoes, mixing everything together well. Cook for another 2-3 minutes, allowing the rice to absorb some of the flavors from the vegetables and the bottom of the pot.
- Combine Chicken and Broth: Return the browned chicken to the pot and pour in the chicken broth. Bring the mixture to a gentle boil. Once boiling, reduce the heat to low and cover the pot with a lid. Allow the dish to simmer for about 20-25 minutes, or until the rice is cooked and has absorbed most of the liquid.
- Incorporate Peas: In the final 5 minutes of cooking, add the frozen peas to the pot. Stir gently, allowing them to warm through. This will add a pop of color and sweetness to the dish.
- Rest and Serve: Once the rice is cooked, remove the pot from heat and let it sit, covered, for another 5 minutes. This resting period helps to further enhance the flavors. Fluff the rice with a fork before serving, and garnish with fresh cilantro and lemon wedges if desired.
Extra Tips: When making Arroz Con Pollo, consider marinating the chicken in the spices for a few hours or overnight for even deeper flavor. You can also customize the dish by adding other vegetables such as carrots or corn.
If your family prefers a spicier kick, consider adding jalapeños or a pinch of cayenne pepper. Finally, this dish makes great leftovers, so feel free to double the recipe for a hearty meal the next day!
Pastel De Choclo (Corn Pie)
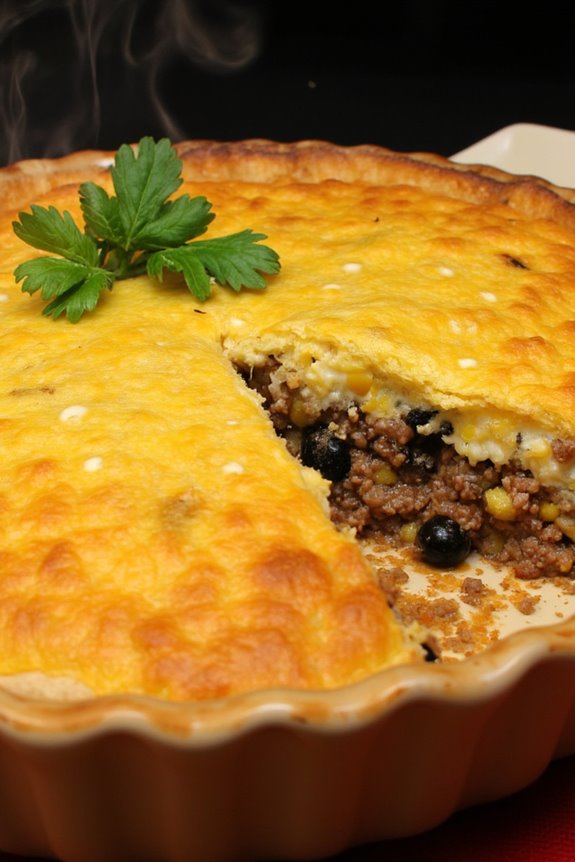
Pastel De Choclo is a delightful South American dish that combines the sweetness of corn with savory ingredients to create a comforting, hearty meal. Originating from countries like Chile and Argentina, this corn pie is a favorite among families and is perfect for introducing kids to the wonderful flavors of South American cuisine.
With its creamy filling and golden corn topping, it’s not only visually appealing but also a fantastic way to sneak in some vegetables for picky eaters.
Making Pastel De Choclo is a fun and engaging process that can be done together as a family. The dish typically features a base of ground meat, onions, and hard-boiled eggs, all topped with a luscious corn mixture. This recipe is kid-friendly and can be adapted to suit various dietary preferences, including vegetarian options.
Let’s get cooking and bring a taste of South America into your kitchen!
Ingredients (Serves 4-6):
- 2 cups of fresh or frozen corn kernels
- 1 cup of milk
- 1 tablespoon of butter
- 1 tablespoon of sugar
- 1 teaspoon of salt
- 1 pound of ground beef or chicken (or a plant-based protein for a vegetarian option)
- 1 onion, finely chopped
- 2 hard-boiled eggs, chopped
- 1 teaspoon of paprika
- 1 teaspoon of cumin
- 1 cup of olives, sliced (optional)
- Fresh basil or parsley for garnish (optional)
Cooking Instructions:
- Prepare the Corn Mixture: In a blender or food processor, combine the corn kernels, milk, butter, sugar, and salt. Blend until smooth and creamy. This will form the topping for your pastel de choclo. Set aside.
- Cook the Meat Filling: In a large skillet, heat a little oil over medium heat. Add the chopped onion and sauté until translucent, about 5 minutes. Next, add the ground meat (or plant-based protein) to the skillet. Season with paprika and cumin, and cook until the meat is browned and cooked through, around 8-10 minutes.
- Assemble the Filling: Once the meat is cooked, remove it from heat. Stir in chopped hard-boiled eggs and olives (if using). Confirm everything is well mixed and seasoned to taste.
- Layer the Pie: Preheat your oven to 375°F (190°C). In a baking dish, spread the meat filling evenly across the bottom. Pour the creamy corn mixture over the meat layer, spreading it out to cover completely.
- Bake: Place the assembled pastel de choclo in the preheated oven and bake for about 30-35 minutes, or until the top is golden and set.
- Serve: Once done, remove from the oven and let cool for a few minutes. Cut into squares and garnish with fresh basil or parsley if desired. Serve warm and enjoy!
Extra Tips:
When preparing Pastel De Choclo, feel free to get creative with the filling! You can add vegetables like bell peppers or peas for added nutrition and color.
For a milder flavor, try using less paprika and cumin. This dish also freezes well, so consider making a double batch to have a homemade meal ready for a busy day. Enjoy the cooking process and have fun involving the kids in mixing and layering the ingredients!
Brigadeiros (Brazilian Chocolate Truffles)

Brigadeiros are a beloved Brazilian treat that brings joy to both kids and adults alike. These delectable chocolate truffles are made with just a few simple ingredients and are often served at birthday parties and special celebrations. Their fudgy texture and rich chocolate flavor make them irresistible, and the best part is that they’re incredibly easy to prepare.
With a no-bake method, brigadeiros are a perfect cooking project to involve the little ones in the kitchen. Not only are brigadeiros delicious, but they also provide an opportunity for kids to learn about measuring and mixing ingredients. Once prepared, these truffles can be rolled in various toppings such as sprinkles, crushed nuts, or cocoa powder, allowing for creativity in presentation.
So gather your ingredients, roll up your sleeves, and let’s make these delightful Brazilian sweets together!
Ingredients (Serves 4-6)
- 1 can (14 ounces) sweetened condensed milk
- 2 tablespoons unsweetened cocoa powder
- 2 tablespoons unsalted butter
- A pinch of salt
- Chocolate sprinkles (for rolling)
- Additional toppings (optional: crushed nuts, coconut flakes, etc.)
Cooking Instructions
- Combine Ingredients: In a medium-sized saucepan, combine the sweetened condensed milk, unsweetened cocoa powder, unsalted butter, and a pinch of salt. Stir the ingredients together until they’re well mixed and the cocoa powder is fully incorporated into the condensed milk.
- Cook the Mixture: Place the saucepan over medium heat. Continuously stir the mixture with a wooden spoon or spatula to prevent it from sticking to the bottom of the pan. Cook for about 10-15 minutes, or until the mixture thickens and starts to pull away from the sides of the pan. You’ll know it’s ready when you can see the bottom of the pan for a moment as you stir.
- Cool the Mixture: Once the mixture reaches the desired consistency, carefully pour it onto a greased plate or in a shallow dish. Allow it to cool at room temperature for about 30 minutes or until it’s cool enough to handle.
- Shape the Brigadeiros: Grease your hands with a little butter to prevent sticking. Take small amounts of the cooled mixture and roll them into small balls, about the size of a cherry. Make sure to work quickly, as the mixture is easier to handle when it’s slightly warm.
- Coat the Brigadeiros: Once all the truffles are shaped, roll each ball in chocolate sprinkles or your preferred topping, ensuring they’re evenly coated. Place the coated brigadeiros on a serving platter.
- Chill and Serve: Allow the brigadeiros to sit at room temperature for a few minutes to set or refrigerate for about 30 minutes for a firmer texture. Serve them at room temperature and enjoy!
Extra Tips
When making brigadeiros, it’s important to keep the mixture moving while it cooks to achieve the right consistency. If you find that the mixture is too thick, you can add a small splash of milk to loosen it up slightly.
Feel free to experiment with different toppings to customize your brigadeiros. They can also be stored in an airtight container in the refrigerator for up to a week, making them a great make-ahead treat! Enjoy cooking and indulging in these delightful Brazilian chocolates!
Smoothie De Papaya (Papaya Smoothie)
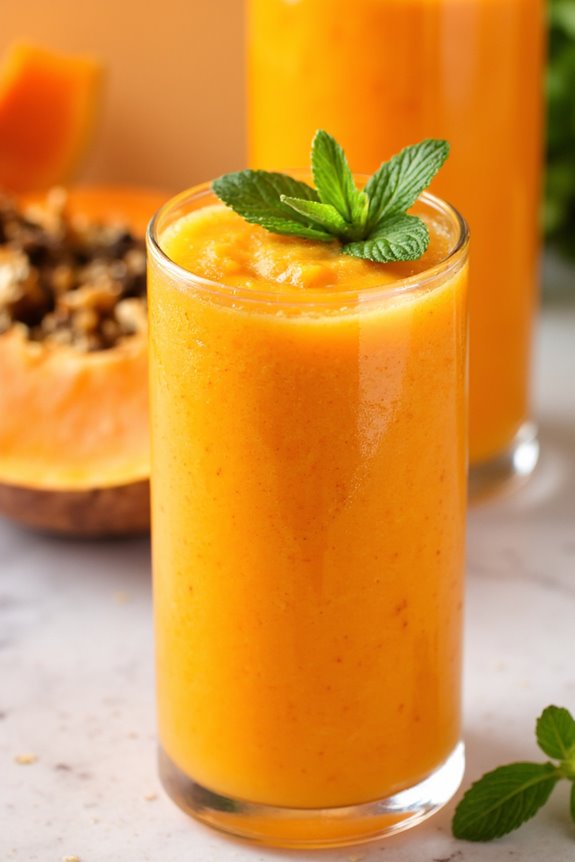
Smoothie De Papaya is a delightful and invigorating drink that brings the tropical flavors of South America right to your kitchen. This smoothie isn’t only delicious but also packed with nutrients, making it an excellent choice for a nutritious breakfast or a mid-afternoon snack for the whole family.
Papaya, known for its sweet and juicy flesh, is a great source of vitamins A and C, and when blended into a smoothie, it becomes creamy and satisfying. You can easily customize this recipe by adding other fruits or a scoop of yogurt for an extra protein boost.
Making Smoothie De Papaya is simple and fun, which makes it a perfect activity to engage your kids in the kitchen. They’ll love watching the vibrant orange color blend together, and you can teach them about the health benefits of the ingredients.
This smoothie is best enjoyed immediately after blending, but you can also keep it in the refrigerator for a short while if needed. Serve it chilled, maybe with a fun straw, and watch your kids enjoy a delicious taste of South America!
Ingredients (Serves 4-6):
- 2 ripe papayas, peeled and seeded
- 1 cup of milk (dairy or non-dairy)
- 1 tablespoon of honey or maple syrup (adjust to taste)
- 1 teaspoon of vanilla extract
- 1 cup of ice cubes (optional)
- Fresh mint leaves for garnish (optional)
Instructions:
- Prepare the Papaya: Start by peeling the papayas and cutting them in half. Use a spoon to scoop out the seeds and discard them. Then, cut the papaya into smaller chunks, which will make it easier to blend.
- Combine Ingredients in Blender: In a blender, add the papaya chunks, milk, honey or maple syrup, and vanilla extract. If you prefer a chilled smoothie, you can also add ice cubes at this stage.
- Blend Until Smooth: Secure the lid on the blender and blend the ingredients on high speed until you achieve a smooth and creamy consistency. This should take about 30 seconds to 1 minute. If the smoothie is too thick, you can add a bit more milk to reach your desired consistency.
- Taste and Adjust Sweetness: After blending, taste your smoothie. If you want it sweeter, add a little more honey or maple syrup and blend again for a few seconds.
- Serve and Garnish: Pour the smoothie into glasses and, if desired, garnish with fresh mint leaves on top for an extra touch of freshness. Serve immediately to enjoy the best flavor and texture.
Extra Tips:
For a variety of flavors, consider adding other fruits such as bananas or mangoes, which blend well with papaya. You can also enhance the nutrition by adding a scoop of Greek yogurt or protein powder if desired.
If you want a thicker smoothie, freeze the papaya chunks beforehand, and skip the ice. This smoothie can easily be made vegan by using plant-based milk and sweeteners. Enjoy experimenting with different ingredients to find your perfect blend!