

When it comes to outdoor gatherings, the flavors of South American BBQ are simply unmatched. Each recipe offers its own delightful twist, from the smoky Brazilian Churrasco to the crispy Colombian Arepas. These dishes not only please the taste buds but also bring friends and family together around the grill. If you’re looking to add a touch of excitement to your next cookout, these recipes are a must-try.
Argentine Asado: The Ultimate Grill Experience
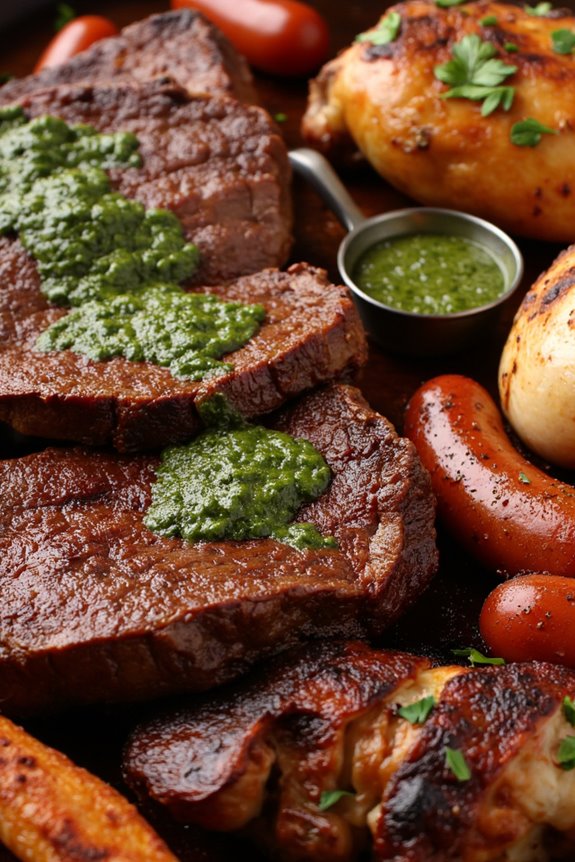
Argentine Asado is more than just a meal; it’s a culinary tradition that embodies the spirit of Argentina. This grilling technique is celebrated for its simplicity and focus on high-quality meats, often cooked over an open flame or charcoal. The centerpiece of an Asado is typically beef, but it can also include a variety of other meats such as pork, chicken, and even sausages.
The key to an authentic Asado lies in the preparation, the choice of cuts, and the use of traditional seasonings, particularly the beloved chimichurri sauce, which adds a fresh, zesty flavor that complements the rich taste of the grilled meats.
To truly experience the Argentine Asado, it’s vital to gather friends and family, as this communal meal is often enjoyed in a social setting. The cooking process is leisurely, allowing for conversations and bonding while the meat sizzles on the grill. While the Asado may seem straightforward, the flavors and the atmosphere create an unforgettable dining experience that transports you to the heart of Argentine culture.
Ingredients (Serves 4-6):
- 3 lbs beef short ribs or flank steak
- 2 lbs pork ribs
- 1 lb chicken thighs or drumsticks
- 1 lb chorizo sausages
- Sea salt (to taste)
- Black pepper (to taste)
- Fresh parsley (for garnish)
- 1 cup chimichurri sauce (store-bought or homemade)
Cooking Instructions:
- Prepare the Grill: Start by preparing your grill, whether it’s a traditional parrilla (grill) or a charcoal grill. If using charcoal, light the coals and let them burn until they’re covered with a light grey ash. This usually takes about 30-40 minutes. Confirm the grill grates are clean and lightly oiled to prevent sticking.
- Season the Meat: While the grill is heating, season your meats generously with sea salt and black pepper. For the best flavor, let the meat sit at room temperature for about 30 minutes after seasoning, allowing the salt to penetrate the meat.
- Grill the Meats: Place the beef short ribs and pork ribs on the grill first, as they take the longest to cook. Keep the heat moderate and turn the meat regularly to guarantee even cooking. Grill the ribs for about 15-20 minutes on each side, or until they develop a nice crust and are cooked to your desired doneness.
- Add the Chicken and Sausages: After the ribs have started to cook, add the chicken thighs and chorizo sausages to the grill. Cook the chicken for approximately 10-15 minutes per side, and the sausages for about 5-7 minutes, turning them frequently until they’re browned and cooked through.
- Rest the Meat: Once all the meat is cooked, remove it from the grill and let it rest for about 5-10 minutes. This helps the juices redistribute, making sure the meat is tender and flavorful.
- Serve: Slice the grilled meats into portions and arrange them on a large platter. Drizzle with chimichurri sauce and garnish with freshly chopped parsley. Serve with crusty bread and a side salad for a complete meal.
Extra Tips:
When preparing Argentine Asado, choosing the right cuts of meat is significant. Opt for high-quality, well-marbled beef for the best flavor and tenderness.
Additionally, don’t rush the cooking process; low and slow is the key to achieving that perfect char and smoky flavor. The communal aspect of Asado is just as important as the food, so encourage your guests to participate in the grilling and share stories while enjoying the delicious results together.
Brazilian Churrasco: A Flavorful Feast
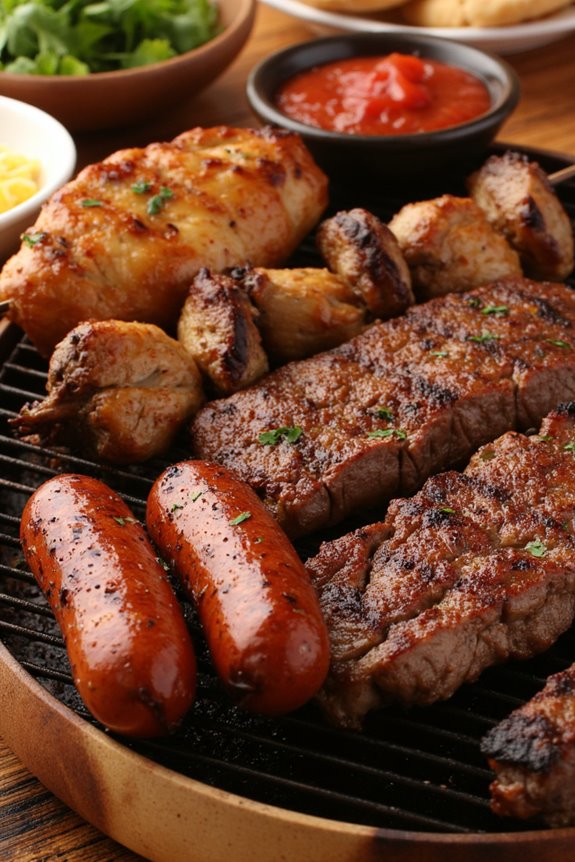
Brazilian Churrasco is a mouthwatering barbecue style that has gained popularity far beyond its homeland. This vibrant and festive tradition features an array of meats, typically seasoned simply with coarse salt, allowing the natural flavors to shine through. The meats are often cooked on skewers over open flames or charcoal, which adds a delightful smokiness to each bite.
Churrasco is more than just a meal; it’s an experience meant to be enjoyed with friends and family, often accompanied by sides such as farofa, vinagrete, and pão de queijo.
To make an authentic Brazilian Churrasco, a variety of cuts of beef, chicken, and pork can be used, as well as sausages. The key to a great Churrasco is patience and attention to detail during the grilling process. This recipe will guide you through creating a delicious Churrasco that will impress your guests and bring a taste of Brazil to your backyard.
Ingredients (Serves 4-6)
- 2 pounds of beef (sirloin, ribeye, or picanha)
- 1 pound of chicken thighs or drumsticks
- 1 pound of pork sausages
- Coarse salt (to taste)
- 2 tablespoons of olive oil
- Freshly ground black pepper (to taste)
- Optional: chopped fresh herbs (rosemary, thyme, or parsley) for marinating
Cooking Instructions
- Prepare the Marinade: In a large bowl, mix the olive oil, black pepper, and any optional fresh herbs you wish to use. This marinade will add an additional layer of flavor to your meats. If desired, marinate the beef, chicken, and pork in this mixture for at least 1 hour, or up to 24 hours in the refrigerator for deeper flavor infusion.
- Preheat the Grill: Prepare your grill for direct heat. If using charcoal, light the coals and let them burn until they’re covered with white ash. For gas grills, preheat the grill on high for about 10–15 minutes. Once hot, adjust the heat to medium-high.
- Skewer the Meats: Thread the marinated beef, chicken, and sausages onto skewers. If using wooden skewers, soak them in water for 30 minutes prior to prevent burning. Confirm that the pieces are evenly spaced out on the skewers for even cooking.
- Season with Salt: Generously sprinkle coarse salt over each skewer. This is a traditional method in Churrasco cooking that enhances the meat’s natural flavors.
- Grill the Meats: Place the skewers on the grill. Cook the beef for about 8-12 minutes, turning occasionally until it reaches your desired doneness (medium-rare to medium is recommended). The chicken will take around 15-20 minutes, and the sausages should be cooked for about 10-15 minutes, turning them until they’re browned and cooked through.
- Rest the Meat: Once the meats are cooked, remove them from the grill and let them rest for about 5-10 minutes. This allows the juices to redistribute, guaranteeing a juicy and flavorful bite.
- Serve and Enjoy: Slice the beef against the grain and serve alongside the grilled chicken and sausages. Pair your Churrasco with traditional sides like farofa, vinagrete, and Brazilian cheese bread (pão de queijo) for an authentic experience.
Extra Tips
For the best results, always use high-quality cuts of meat and maintain a consistent grill temperature throughout the cooking process.
If you’re feeling adventurous, consider adding some vegetables like bell peppers, onions, or zucchini to the skewers for a colorful addition.
Finally, don’t forget to enjoy your Churrasco with a invigorating caipirinha or a nice Brazilian beer to complete the culinary experience!
Chilean Anticuchos: Skewered Delights
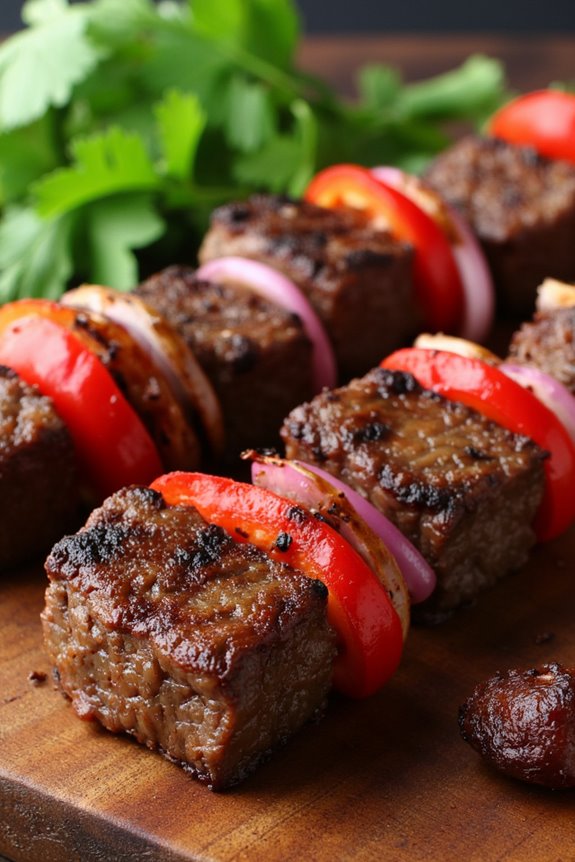
Chilean anticuchos are a delicious and savory treat that celebrates the rich culinary traditions of South America. These skewered delights are often made with marinated beef heart, but in this recipe, we’ll explore a more accessible version using tender cuts of beef, which still deliver a mouthwatering flavor. Grilled to perfection, these skewers are typically served with a side of aji sauce, adding a zesty kick that complements the meat beautifully. Perfect for a barbecue or a family gathering, these anticuchos are sure to impress your guests.
The preparation of Chilean anticuchos is relatively simple, making them a great option for both novice and experienced cooks alike. The key to achieving that authentic taste lies in the marinade, which combines garlic, cumin, and vinegar to tenderize the meat and impart bold flavors.
Once marinated, the meat is threaded onto skewers and grilled until charred and juicy. Enjoy these skewers on their own or paired with a fresh salad and crusty bread for a complete meal.
Ingredients (Serves 4-6):
- 1.5 pounds beef tenderloin or sirloin, cut into 1-inch cubes
- 4 cloves garlic, minced
- 1 tablespoon ground cumin
- 1 tablespoon paprika
- 1/4 cup red wine vinegar
- 1/4 cup olive oil
- 1 teaspoon salt
- 1 teaspoon black pepper
- 1 red bell pepper, cut into 1-inch pieces
- 1 onion, cut into 1-inch pieces
- Skewers (wooden or metal)
Cooking Instructions:
- Prepare the Marinade: In a large bowl, combine the minced garlic, ground cumin, paprika, red wine vinegar, olive oil, salt, and black pepper. Whisk the ingredients together until well blended. This marinade will infuse the beef with flavor and help tenderize it.
- Marinate the Beef: Add the beef cubes to the marinade, making sure each piece is well coated. Cover the bowl with plastic wrap and refrigerate for at least 2 hours, or overnight for best results. This step is essential for allowing the flavors to penetrate the meat.
- Prepare Skewers: If using wooden skewers, soak them in water for at least 30 minutes before grilling to prevent burning. This will guarantee that your skewers hold together on the grill without catching fire.
- Assemble the Skewers: Once the beef has marinated, thread the beef cubes onto the skewers, alternating with pieces of red bell pepper and onion. This not only adds flavor but also a pop of color to your skewers.
- Preheat the Grill: Preheat your grill to medium-high heat. If using a charcoal grill, make sure the coals are hot and ashy before placing the skewers on the grill.
- Grill the Skewers: Place the skewers on the grill and cook for about 8-10 minutes, turning occasionally to achieve even charring. Cook until the beef is browned on the outside and cooked to your desired level of doneness (medium-rare is recommended for tender beef).
- Serve: Once cooked, remove the skewers from the grill and let them rest for a few minutes. Serve the anticuchos hot, accompanied by aji sauce or your favorite dipping sauce.
Extra Tips:
For an added depth of flavor, consider adding fresh herbs like cilantro or parsley to the marinade. You can also experiment with different vegetables on the skewers such as zucchini or cherry tomatoes.
If you’d like to incorporate a smoky flavor, try grilling the anticuchos over wood chips for a few minutes before serving. Finally, don’t forget to serve a side of fresh bread to soak up any delicious juices leftover on your plate! Enjoy your Chilean anticuchos!
Peruvian Pollo a La Brasa: Roasted Chicken Perfection
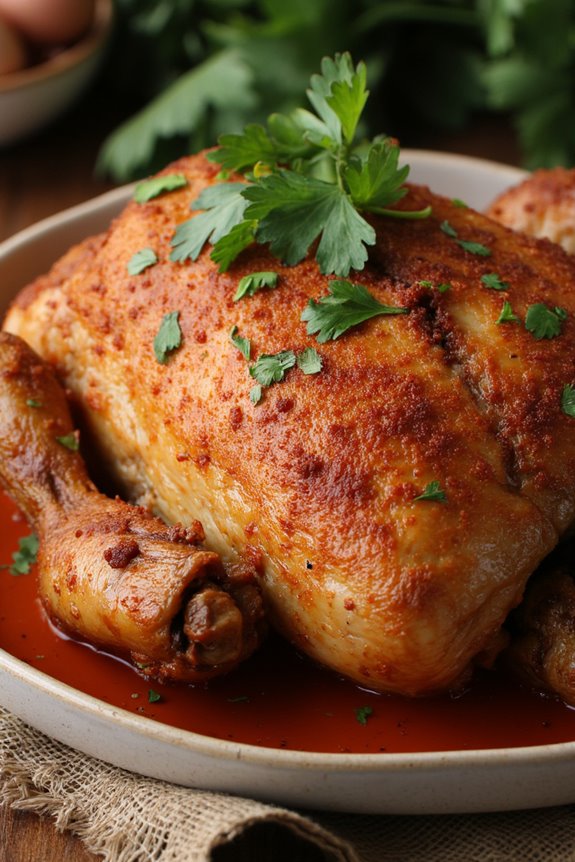
Pollo a La Brasa, or Peruvian roasted chicken, is a beloved dish that has captured the hearts and taste buds of many around the world. This succulent, marinated chicken is known for its bold flavors and crispy skin, cooked to perfection over an open flame or in a conventional oven.
Traditionally served with a zesty green sauce and accompanied by sides like fries or salad, this dish isn’t just a meal; it’s an experience that embodies the warmth and vibrancy of Peruvian culture.
The secret to achieving the signature taste of Pollo a La Brasa lies in the marinade. A blend of spices, herbs, and citrus gives the chicken its distinctive flavor profile. While you can prepare this dish using a rotisserie or grill, an oven can yield equally delicious results.
Whether you’re hosting a gathering or enjoying a cozy family dinner, this recipe promises to impress your guests and leave them craving more.
Ingredients (Serves 4-6)
- 1 whole chicken (about 4-5 pounds)
- 4 cloves garlic, minced
- 2 teaspoons paprika
- 2 teaspoons cumin
- 1 teaspoon oregano
- 1 teaspoon black pepper
- 1 teaspoon salt
- 1 tablespoon soy sauce
- 1 tablespoon red wine vinegar
- 1 tablespoon olive oil
- Juice of 2 limes
- Fresh cilantro, for garnish (optional)
Cooking Instructions
1. Prepare the Marinade: In a large mixing bowl, combine the minced garlic, paprika, cumin, oregano, black pepper, salt, soy sauce, red wine vinegar, olive oil, and lime juice. Whisk the ingredients together until well blended, creating a thick marinade.
2. Marinate the Chicken: Rinse the whole chicken under cold water and pat it dry with paper towels. Using a sharp knife, make several shallow cuts on the surface of the chicken to allow the marinade to penetrate more effectively.
Place the chicken in a large resealable plastic bag or a shallow dish and pour the marinade over it. Seal the bag or cover the dish, ensuring the chicken is evenly coated. Refrigerate for at least 4 hours, preferably overnight for maximum flavor.
3. Preheat the Oven: If you’re using an oven, preheat it to 425°F (220°C). This high temperature is essential for achieving crispy skin while keeping the meat juicy.
4. Roast the Chicken: Place the marinated chicken on a roasting pan, breast side up. If desired, tie the legs together with kitchen twine for even cooking. Roast in the preheated oven for approximately 1 hour and 15 minutes, or until the internal temperature reaches 165°F (74°C) when measured at the thickest part of the thigh.
5. Rest and Serve: Once the chicken is cooked, remove it from the oven and let it rest for 10-15 minutes. This resting period allows the juices to redistribute, ensuring a moist chicken.
Carve the chicken and serve it garnished with fresh cilantro, alongside your favorite sides.
Extra Tips
To enhance the flavors further, consider adding a dash of chili powder or a splash of beer to the marinade for an extra kick.
If you have a charcoal grill, try grilling the chicken for that authentic smoky flavor characteristic of traditional Pollo a La Brasa. Additionally, serve the chicken with a side of aji verde (green sauce) made from cilantro, jalapeños, mayonnaise, and lime juice for a revitalizing complement to the rich, roasted flavors.
Enjoy your culinary journey through Peru!
Colombian Arepas: Grilled Corn Cakes

Colombian arepas are a beloved staple across Colombia, known for their versatility and delicious flavor. These grilled corn cakes are made primarily with masa harina, a type of corn flour, which gives them a unique texture and taste. Arepas can be enjoyed plain or stuffed with various fillings such as cheese, meats, or vegetables, making them a perfect dish for any occasion, from casual family meals to festive gatherings.
Their simplicity and adaptability have made them a favorite in South American cuisine. Grilling arepas adds a delightful smokiness and creates a crispy exterior while maintaining a soft interior. The preparation is straightforward, and the cooking process is quick, making them an ideal choice for BBQ gatherings.
Whether served as a side dish or as a main component of a meal, Colombian arepas are sure to please everyone at the table. Let’s explore how to make these delicious grilled corn cakes!
Ingredients (Serves 4-6):
- 2 cups masa harina
- 1 ½ cups warm water
- 1 teaspoon salt
- 1 tablespoon vegetable oil (for grilling)
- Optional fillings: cheese, avocado, cooked meats, or beans
Cooking Instructions:
- Prepare the Dough: In a large mixing bowl, combine the masa harina and salt. Gradually add the warm water while mixing with your hands or a spoon until the dough comes together. The dough should be smooth and pliable, not sticky. If it feels too dry, add a little more water, a tablespoon at a time.
- Shape the Arepas: Divide the dough into 6 equal portions. Roll each portion into a ball, then flatten it between your palms to form a disc approximately ½ inch thick. Make sure that the edges are smooth and even to help them cook evenly.
- Preheat the Grill: Heat your grill to medium-high heat. If using a charcoal grill, make certain that the coals are evenly distributed. If using a gas grill, preheat for about 10 minutes. Brush the grill grates with vegetable oil to prevent sticking.
- Grill the Arepas: Place the shaped arepas on the preheated grill. Cook for about 5-7 minutes on one side, or until golden brown and grill marks appear. Flip the arepas and grill for another 5-7 minutes on the other side. They should be firm to the touch and have a slightly crispy exterior.
- Serve: Once grilled, remove the arepas from the grill and let them cool for a couple of minutes. You can serve them plain or slice them open and stuff with your chosen fillings. Enjoy them warm!
Extra Tips:
To enhance the flavor of your arepas, consider adding spices or herbs to the dough, such as cumin or cilantro. For a cheesy variation, mix shredded cheese directly into the dough before forming the arepas.
Additionally, if you want to save time, you can prepare the dough ahead of time and refrigerate it; just be sure to let it come to room temperature before grilling. Enjoy experimenting with different fillings for a personalized touch!
Uruguayan Chivito: A Hearty Sandwich

The Uruguayan Chivito is a beloved sandwich that embodies the rich culinary traditions of Uruguay. It’s not just a meal; it’s a celebration of flavors and textures that come together to create a hearty and satisfying dish. Traditionally, a Chivito is made with grilled steak and layered with a variety of toppings, making it a favorite among locals and visitors alike. From the juicy meat to the fresh vegetables and sauces, this sandwich is sure to impress anyone who takes a bite.
Preparing a Chivito at home is a fantastic way to bring the taste of Uruguay to your kitchen. Whether you’re hosting a barbecue or simply craving a delicious sandwich, this recipe will guide you through the process of creating your very own Chivito. With its mouth-watering combination of grilled meat, fresh toppings, and flavorful sauces, you’ll find yourself transported to the streets of Montevideo with every bite.
Ingredients (Serves 4-6 people)
- 1 lb (450g) beef steak (sirloin or ribeye)
- 4-6 slices of ham
- 4-6 slices of mozzarella cheese
- 4-6 large eggs
- 1 large tomato, sliced
- 1 large avocado, sliced
- 1 cup of lettuce, shredded
- 4-6 sandwich rolls (preferably ciabatta or bolillo)
- Olive oil
- Salt and pepper to taste
- Mayonnaise (optional)
- Mustard (optional)
Cooking Instructions
1. Prepare the Steak: Start by seasoning the beef steak with salt and pepper on both sides. Preheat your grill or a skillet over medium-high heat. Once hot, add a drizzle of olive oil and place the steak on the grill. Cook for about 4-5 minutes per side, or until it reaches your desired level of doneness (medium-rare is recommended for tenderness).
Once cooked, remove the steak from the heat and let it rest for a few minutes before slicing it thinly.
2. Cook the Eggs: In a separate skillet, heat a small amount of olive oil over medium heat. Crack the eggs into the skillet, cooking them sunny-side up or to your preferred level of doneness. Make sure the yolk remains runny for an authentic Chivito experience.
Once cooked, set the eggs aside.
3. Melt the Cheese: While the eggs are cooking, place the sliced ham on top of the cooked steak and then add the slices of mozzarella cheese. Cover the skillet or grill to help the cheese melt, which should take about 2-3 minutes.
4. Assemble the Sandwich: Slice the sandwich rolls in half and lightly toast them if desired. Begin by layering the bottom half of each roll with shredded lettuce, followed by a generous portion of the sliced steak topped with melted cheese and ham.
Add the sliced tomato and avocado on top.
5. Add the Egg: Carefully place a cooked egg on top of the vegetables. You can add mayonnaise and mustard to the top half of the roll for extra flavor.
Finally, place the top half of the roll onto the assembled sandwich.
6. Serve: Press down gently on the sandwich to help it hold together, then cut it in half if desired. Serve immediately while everything is warm and fresh.
Extra Tips
When preparing your Chivito, feel free to customize the toppings according to your preferences. Some people enjoy adding pickles, grilled peppers, or even chimichurri sauce for an extra kick.
If you’re short on time, you can also use pre-cooked steak or deli meats. Additionally, using fresh ingredients will enhance the flavors considerably, so don’t hesitate to choose the ripest tomatoes and freshest avocados.
Enjoy your homemade Uruguayan Chivito with a side of fries or a salad for a complete meal!
Ecuadorian Llapingachos: Grilled Potato Cakes
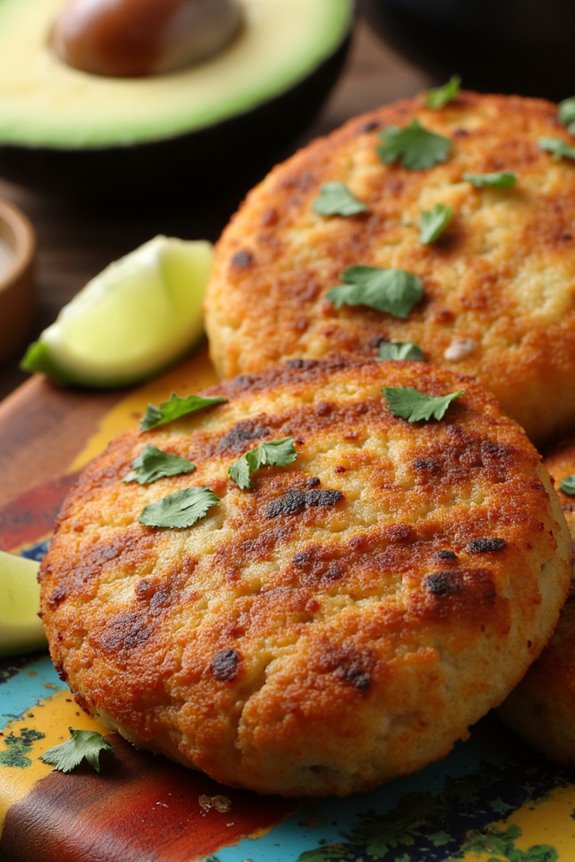
Ecuadorian llapingachos are a delicious and traditional dish that represents the country’s rich culinary heritage. These grilled potato cakes are made primarily from starchy potatoes and are often served with a variety of accompaniments, such as avocado, sausage, or a fresh salad. The name “llapingacho” comes from the Quechua language and is a staple in many Ecuadorian households, especially during family gatherings and celebrations.
The crispy exterior and soft, flavorful interior make them an irresistible treat that can be enjoyed as a side dish or a main course. Preparing llapingachos isn’t only simple but also a fun experience that allows you to explore the flavors of Ecuadorian cuisine. The key to achieving the perfect texture lies in using the right type of potatoes, typically yellow or white potatoes, which provide a creamy consistency when mashed.
These cakes are then grilled to achieve a delightful char while retaining their moistness inside. Whether you’re planning a South American BBQ or simply want to try your hand at something new, llapingachos are sure to impress your family and friends.
Ingredients (Serves 4-6)
- 2 pounds of yellow or white potatoes
- 1 cup of cheese (queso fresco or mozzarella), crumbled
- 1 medium onion, finely chopped
- 2 tablespoons of vegetable oil
- 1 teaspoon of cumin
- Salt, to taste
- Pepper, to taste
- 1/2 cup of chopped cilantro (optional)
- Additional oil for grilling
Cooking Instructions
- Prepare the Potatoes: Start by peeling the potatoes and cutting them into quarters. Place them in a large pot of salted water, then bring to a boil. Cook until the potatoes are fork-tender, which usually takes about 15-20 minutes.
- Mash the Potatoes: Once cooked, drain the potatoes and return them to the pot. Mash the potatoes until smooth, making sure there are no lumps. Allow them to cool slightly.
- Mix the Ingredients: In a skillet, heat the vegetable oil over medium heat. Add the finely chopped onion and sauté until translucent, about 3-5 minutes. Combine the sautéed onion with the mashed potatoes, crumbled cheese, cumin, salt, pepper, and chopped cilantro if using. Mix everything thoroughly until well combined.
- Form the Cakes: Divide the potato mixture into equal portions and shape each portion into a round cake, about 1/2 inch thick. You should end up with around 8-10 cakes.
- Preheat the Grill: Preheat your grill to medium-high heat. Lightly oil the grill grates to prevent sticking.
- Grill the Llapingachos: Place the potato cakes on the grill and cook for about 4-5 minutes on each side, or until they’re golden brown and crispy. Be careful while flipping them, as they can be delicate.
- Serve: Once grilled, remove the llapingachos from the grill and serve hot with your choice of toppings such as avocado, salsa, or a side of salad.
Extra Tips
When making llapingachos, verify the potatoes are well-drained after boiling to avoid excess moisture, which can make the cakes difficult to form. If you want to add some variation to the flavor, consider mixing in some herbs or spices of your choice.
Additionally, if you’re looking for a richer flavor, try using aged cheese or adding a bit of chorizo to the mixture. These cakes can also be prepared in advance and grilled just before serving for a fresh and delightful experience. Enjoy your culinary journey into Ecuadorian cuisine!
Venezuelan Pabellón Criollo: A National Dish
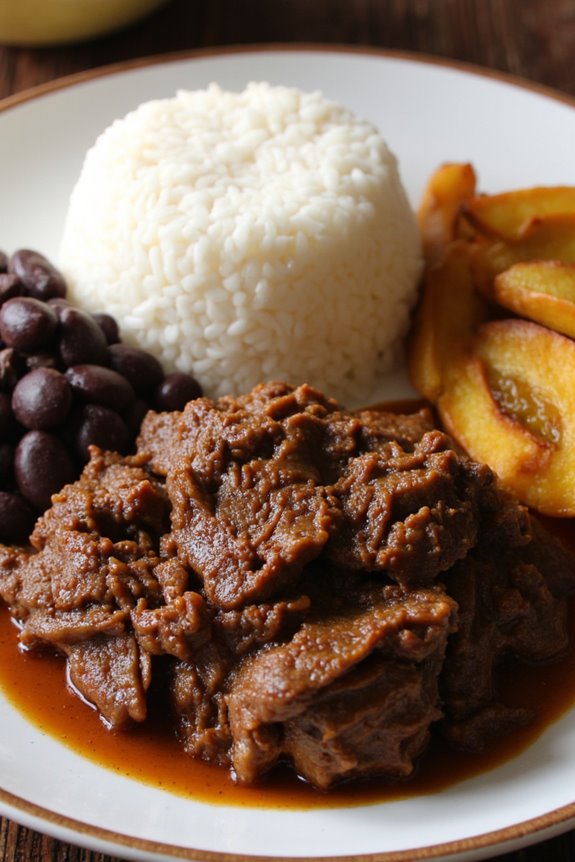
Venezuelan Pabellón Criollo is a vibrant and flavorful dish that encapsulates the heart of Venezuelan cuisine. It’s a hearty meal typically served during lunch and is considered the national dish of Venezuela. The dish consists of a combination of shredded beef, black beans, white rice, and fried plantains, representing the diverse cultural influences that have shaped the country’s culinary traditions.
The contrast of textures and flavors makes Pabellón Criollo not only a feast for the palate but also a celebration of Venezuelan heritage. Cooking Pabellón Criollo is a labor of love, as each component is prepared separately to achieve the perfect balance of flavors. The slow-cooked, seasoned beef is tender and juicy, while the black beans are rich and savory. The fluffy rice serves as a neutral base, and the fried plantains add a sweet and crispy element that ties the whole meal together.
Whether you’re sharing it with family or friends, this dish is sure to evoke the warmth and spirit of Venezuelan hospitality.
Ingredients (Serves 4-6)
- 2 lbs flank steak
- 1 large onion, chopped
- 4 cloves garlic, minced
- 1 bell pepper, chopped
- 1 tsp cumin
- 1 tsp paprika
- 1 bay leaf
- 4 cups beef broth
- Salt and pepper to taste
- 2 cups black beans (canned or cooked)
- 2 cups cooked white rice
- 2 ripe plantains
- Vegetable oil for frying
Cooking Instructions
- Prepare the Beef: In a large pot, add the flank steak, chopped onion, minced garlic, chopped bell pepper, cumin, paprika, bay leaf, and beef broth. Season with salt and pepper. Bring the mixture to a boil, then reduce the heat to low and cover. Let it simmer for about 2-3 hours, or until the meat is tender and easily shreds with a fork.
- Cook the Black Beans: If using canned black beans, simply heat them in a saucepan over medium heat. If cooking from scratch, soak the beans overnight and then cook them in fresh water until tender. Season with salt and pepper to taste. Set them aside once done.
- Prepare the Rice: Cook the white rice according to package instructions. Typically, this involves rinsing the rice, then boiling it in a pot with water (usually a 2:1 ratio of water to rice) until the water is absorbed and the rice is fluffy.
- Fry the Plantains: Peel the ripe plantains and slice them diagonally into thick pieces. In a skillet, heat vegetable oil over medium heat. Once hot, add the plantain slices and fry them until they’re golden brown on both sides. Remove them from the oil and drain on paper towels.
- Assemble the Dish: Once the beef is cooked and shredded, serve it on a plate alongside a generous portion of white rice, a scoop of black beans, and a few pieces of fried plantains. Garnish as desired.
Extra Tips
When preparing Pabellón Criollo, consider marinating the flank steak overnight with the spices and aromatics to enhance the flavor. Additionally, the dish can be made in larger quantities and stored in the refrigerator for a few days, making it perfect for meal prep.
The components can also be served separately, allowing everyone to customize their plates. Enjoy this delicious dish with a side of avocado or a simple salad for a complete meal experience!
Paraguayan Sopa Paraguaya: Savory Cornbread
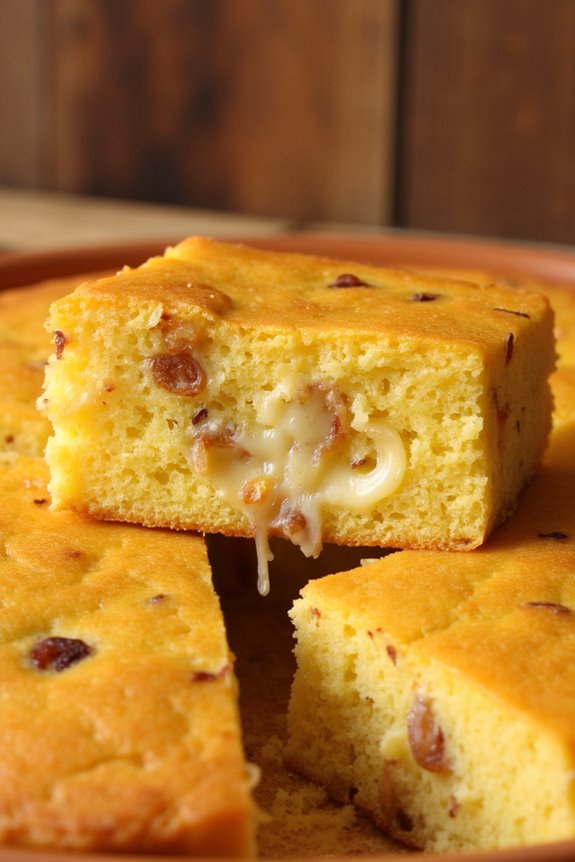
Sopa Paraguaya is a traditional dish from Paraguay that translates to “Paraguayan Soup,” although it isn’t a soup at all but rather a delightful cornbread. This dish is made primarily from cornmeal, cheese, and onions, creating a unique and savory flavor that perfectly complements any barbecue or meat dish.
Often enjoyed as a side, Sopa Paraguaya has a rich history, believed to have originated from the Guarani people and has since evolved into a staple in Paraguayan cuisine. Its texture is reminiscent of a moist cake, making it a favorite among locals and visitors alike.
Baking Sopa Paraguaya is relatively simple and requires only a few ingredients, making it an accessible dish for all levels of cooks. The combination of cornmeal and cheese results in a deliciously satisfying bread that pairs perfectly with grilled meats or can be enjoyed on its own.
The addition of sautéed onions provides a depth of flavor that takes this cornbread to another level. Whether you’re hosting a barbecue or looking to explore South American cuisine, Sopa Paraguaya is sure to impress your guests.
Ingredients (Serves 4-6):
- 2 cups cornmeal
- 1 cup milk
- 1 cup shredded cheese (preferably Paraguayan cheese or mozzarella)
- 1 cup chopped onions
- 3 large eggs
- 1 teaspoon baking powder
- 1 teaspoon salt
- ¼ cup vegetable oil or melted butter
Cooking Instructions:
- Preheat the Oven: Start by preheating your oven to 350°F (175°C). This will guarantee that the Sopa Paraguaya bakes evenly and achieves that perfect golden-brown crust.
- Sauté the Onions: In a skillet over medium heat, add a bit of oil and sauté the chopped onions until they become translucent and fragrant, about 5-7 minutes. This step enhances the sweetness of the onions and adds a wonderful flavor to the cornbread.
- Combine Dry Ingredients: In a large mixing bowl, combine the cornmeal, baking powder, and salt. Whisk these ingredients together to make sure they’re evenly distributed.
- Mix Wet Ingredients: In a separate bowl, whisk together the eggs, milk, and vegetable oil (or melted butter). Make sure to mix well until the mixture is smooth.
- Combine Mixtures: Gradually add the wet mixture to the dry mixture, stirring gently until fully combined. Be careful not to overmix, as this can affect the texture of the cornbread.
- Add Cheese and Onions: Fold in the sautéed onions and shredded cheese into the batter. This step is essential as it adds the savory essence that makes Sopa Paraguaya so special.
- Bake: Pour the mixture into a greased baking dish or cast-iron skillet. Spread it evenly and place it in the preheated oven. Bake for about 30-40 minutes, or until the top is golden brown and a toothpick inserted into the center comes out clean.
- Cool and Serve: Once baked, remove the dish from the oven and allow it to cool for a few minutes. Cut into squares and serve warm alongside your favorite grilled meats or as a standalone snack.
Extra Tips:
When making Sopa Paraguaya, feel free to experiment with the type of cheese you use, as different cheeses can impart various flavors to the dish.
If you want to enhance the flavor further, consider adding spices such as cumin or paprika to the batter. Additionally, for a creamier texture, you can mix in some sour cream or yogurt.
Finally, make certain not to overbake, as this could lead to a dry cornbread; it should be moist and tender in the center. Enjoy!
Bolivian Salteñas: Baked Empanadas

Bolivian salteñas are a beloved treat that combines a flaky, golden crust with a savory filling, often featuring meat, potatoes, and spices. These baked empanadas are typically enjoyed as a snack or light meal and are especially popular during festivities. The secret to a good salteña lies not only in the delicious filling but also in the dough, which is slightly sweet and has a unique texture that complements the savory contents.
Making salteñas from scratch may seem intimidating, but with a little patience and practice, you can create these scrumptious pastries at home. Whether you’re looking to impress guests or craving an authentic taste of Bolivia, this recipe will guide you through crafting the perfect salteñas. Serve them warm with a side of spicy salsa for an unforgettable culinary experience.
Ingredients (Serves 4-6)
- 3 cups all-purpose flour
- 1/2 cup unsalted butter, softened
- 1/4 cup sugar
- 1/2 teaspoon salt
- 1/2 cup cold water
- 1 egg, beaten (for egg wash)
- 1 lb ground beef or chicken
- 1 medium onion, finely chopped
- 1 medium potato, diced
- 1/2 cup peas (fresh or frozen)
- 1/4 cup olives, chopped
- 1 tablespoon paprika
- 1 teaspoon cumin
- 1 teaspoon salt
- 1/2 teaspoon black pepper
- 1/2 cup beef or chicken broth
- 1 tablespoon fresh parsley, chopped (optional)
Cooking Instructions
- Prepare the Dough: In a large mixing bowl, combine the flour, softened butter, sugar, and salt. Mix until it resembles a coarse meal. Gradually add the cold water and knead until a soft dough forms. Cover with plastic wrap and let it rest in the refrigerator for at least 30 minutes.
- Make the Filling: In a skillet over medium heat, cook the chopped onion until translucent. Add the ground meat and cook until browned, breaking it up as it cooks. Stir in the diced potato, peas, olives, paprika, cumin, salt, and black pepper. Add the broth and cook until the potatoes are tender, about 10-15 minutes. Remove from heat and let the mixture cool slightly.
- Roll Out the Dough: Preheat your oven to 375°F (190°C). On a lightly floured surface, take the chilled dough and roll it out to about 1/8 inch thick. Use a round cutter or a bowl to cut out circles of dough, approximately 5-6 inches in diameter.
- Fill the Salteñas: Place a generous tablespoon of the filling in the center of each dough circle. Be careful not to overfill, as this can make sealing difficult. Moisten the edges of the dough with a little water, fold the dough over the filling to create a half-moon shape, and press the edges together to seal. Crimp the edges with a fork or pinch them to create a decorative finish.
- Bake the Salteñas: Arrange the filled salteñas on a baking sheet lined with parchment paper. Brush the tops with the beaten egg for a golden finish. Bake in the preheated oven for 25-30 minutes or until they’re golden brown.
- Serve: Once baked, remove from the oven and let them cool slightly before serving. Enjoy your Bolivian salteñas warm, ideally with a spicy salsa on the side.
Extra Tips
For best results, verify your filling isn’t overly wet, as this can make the dough soggy. You can also experiment with different fillings, including vegetarian options using cheese and vegetables.
If you want an extra flavorful dough, consider adding a pinch of turmeric or saffron for color and taste. Make sure to keep any unused dough covered to prevent it from drying out while you work.
Enjoy your culinary adventure in making these delightful Bolivian baked empanadas!
Brazilian Farofa: Toasted Cassava Flour
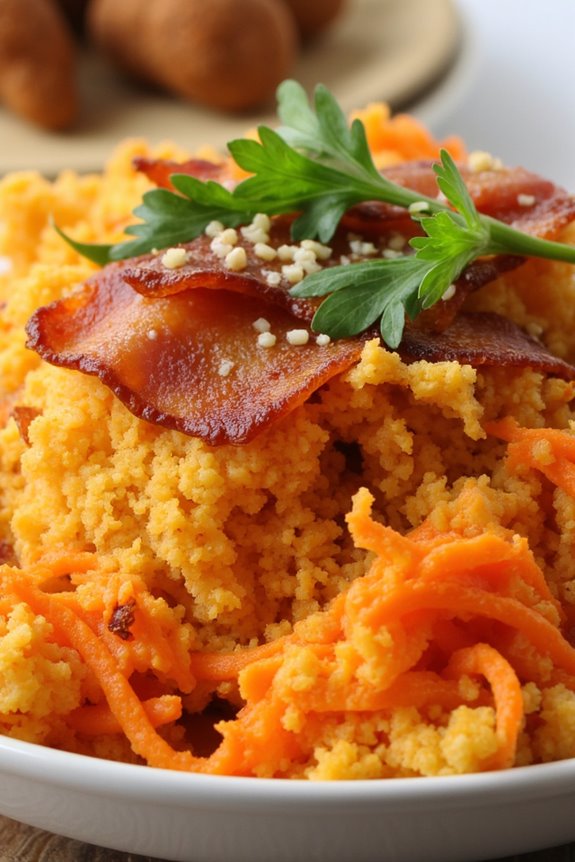
Brazilian Farofa is a traditional side dish that adds a delightful crunch and nutty flavor to any meal. Made primarily from toasted cassava flour, or manioc flour, this dish is often served alongside grilled meats, beans, and rice in Brazilian cuisine.
Farofa can be customized with various ingredients, such as onions, garlic, bacon, and herbs, making it versatile and perfect for any occasion, including festive barbecues.
Preparing Farofa is a simple yet rewarding process. The key to achieving the perfect texture is to toast the cassava flour until it reaches a golden brown color, which enhances its flavor and gives it that signature crunch.
Once you master the basic recipe, feel free to experiment with additional ingredients like vegetables, nuts, or spices to create your own unique version of this beloved Brazilian dish.
Ingredients (Serves 4-6):
- 2 cups cassava flour
- 4 tablespoons unsalted butter
- 1 medium onion, finely chopped
- 2 cloves garlic, minced
- 4 slices of bacon, chopped
- 1/2 cup green onions, chopped
- 1/2 cup grated carrots
- Salt and black pepper, to taste
- Fresh parsley, chopped (for garnish)
Cooking Instructions:
- Cook the Bacon: In a large skillet over medium heat, add the chopped bacon and cook until crispy. This should take about 5-7 minutes. Once cooked, remove the bacon with a slotted spoon and set it aside, leaving the bacon fat in the skillet. This fat will add flavor to the Farofa.
- Sauté the Vegetables: In the same skillet with the bacon fat, add the chopped onion and garlic. Sauté them for about 3-4 minutes or until the onions are translucent and fragrant. Be careful not to burn the garlic, as it can turn bitter.
- Add the Carrots: Stir in the grated carrots, allowing them to cook for another 2-3 minutes. This will add sweetness and color to the dish.
- Toast the Cassava Flour: Gradually add the cassava flour to the skillet while stirring continuously. Toast the flour for about 5-8 minutes until it turns golden brown and has a nutty aroma. Make sure to keep stirring to prevent it from burning.
- Combine Ingredients: Once the flour is toasted, return the crispy bacon to the skillet along with the chopped green onions. Stir everything together, seasoning with salt and black pepper to taste. Cook for an additional 2 minutes to confirm everything is heated through.
- Garnish and Serve: Transfer the Farofa to a serving dish and garnish with freshly chopped parsley. Serve hot as a side dish to your favorite grilled meats.
Extra Tips: When making Brazilian Farofa, feel free to get creative with additional ingredients. You can incorporate nuts like cashews or almonds for extra crunch, or add mushrooms and bell peppers for a heartier version.
If you prefer a gluten-free option, verify the cassava flour you choose is certified gluten-free. Finally, remember that Farofa can be made ahead of time and reheated, making it a convenient side for barbecues or family gatherings. Enjoy!
Argentine Provoleta: Grilled Cheese Heaven
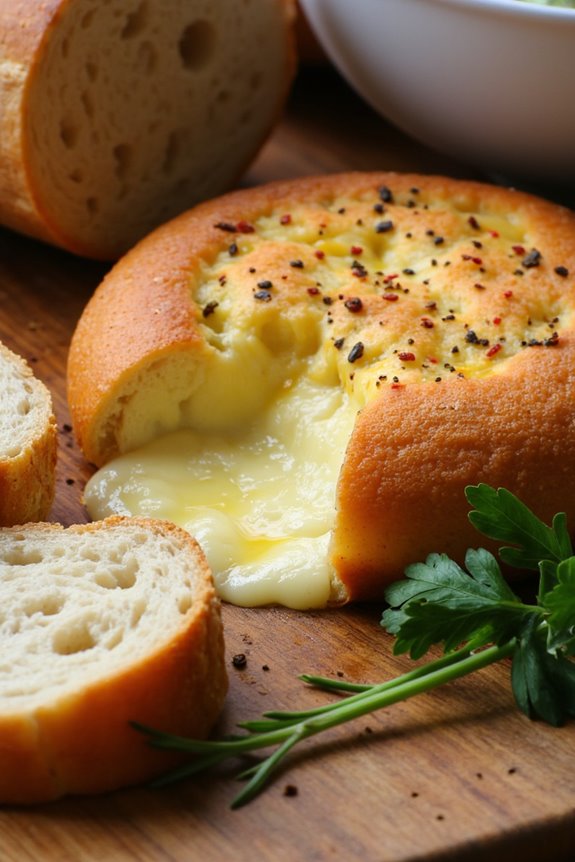
Argentine Provoleta is a deliciously gooey cheese dish that embodies the essence of Argentine asado culture. This delightful appetizer is made with provolone cheese, which is grilled to perfection, creating a crusty exterior while remaining soft and melty on the inside.
Often enjoyed as part of a larger barbecue feast, Provoleta is typically seasoned with oregano and served with crusty bread, making it a favorite among cheese lovers. It’s a dish that invites sharing and conversation, perfect for gathering around the grill with friends and family.
Making Argentine Provoleta is simple, yet it requires a few special considerations to achieve that iconic flavor and texture. The key is to use high-quality provolone cheese, preferably a semi-aged variety, which melts beautifully without losing its shape during grilling.
Additionally, using a cast-iron skillet or a specially designed grill basket can help maintain the cheese’s form while cooking over the flames. With these tips in mind, you’re ready to create an unforgettable grilled cheese experience.
Ingredients (Serves 4-6)
- 1 large round of semi-aged provolone cheese (about 1 pound)
- 1 tablespoon olive oil
- 1 teaspoon dried oregano
- 1 teaspoon crushed red pepper flakes (optional)
- Freshly ground black pepper to taste
- Crusty bread, for serving
- Fresh parsley, chopped (for garnish)
Cooking Instructions
- Prepare the Cheese: Take the provolone cheese out of the packaging and allow it to come to room temperature for about 30 minutes. This will help it melt evenly during grilling. If the cheese has a rind, you can leave it on, as it helps hold the cheese together while cooking.
- Preheat the Grill: Start your grill and preheat it to a medium-high heat (around 400°F). If using a charcoal grill, make sure the coals are evenly distributed for consistent heat. If using a gas grill, confirm all burners are lit and heated.
- Season the Cheese: Drizzle the olive oil over the top of the provolone cheese. Sprinkle with dried oregano, crushed red pepper flakes (if using), and freshly ground black pepper. The seasoning will enhance the flavor of the cheese while it grills.
- Grill the Cheese: Place the provolone cheese directly on a cast-iron skillet or in a grill basket. Close the grill lid and cook for about 5-7 minutes, or until the cheese starts to bubble and turn golden brown. Keep an eye on it to prevent burning.
- Serve: Once the cheese is beautifully melted and golden, carefully remove it from the grill. Transfer it to a serving dish, and garnish with chopped fresh parsley. Serve it immediately with slices of crusty bread for dipping.
Extra Tips
When preparing Argentine Provoleta, it’s important to choose the right type of provolone cheese, as the quality will greatly impact the final dish.
If you want to experiment, try adding other herbs or spices to customize the flavor, such as garlic powder or smoked paprika. To enhance the experience, serve the cheese with a side of chimichurri sauce for an added burst of flavor.
Finally, don’t rush the grilling process; allowing the cheese to melt slowly ensures a perfectly gooey texture that everyone will love.
South American Chimichurri: A Zesty Sauce for All Grills
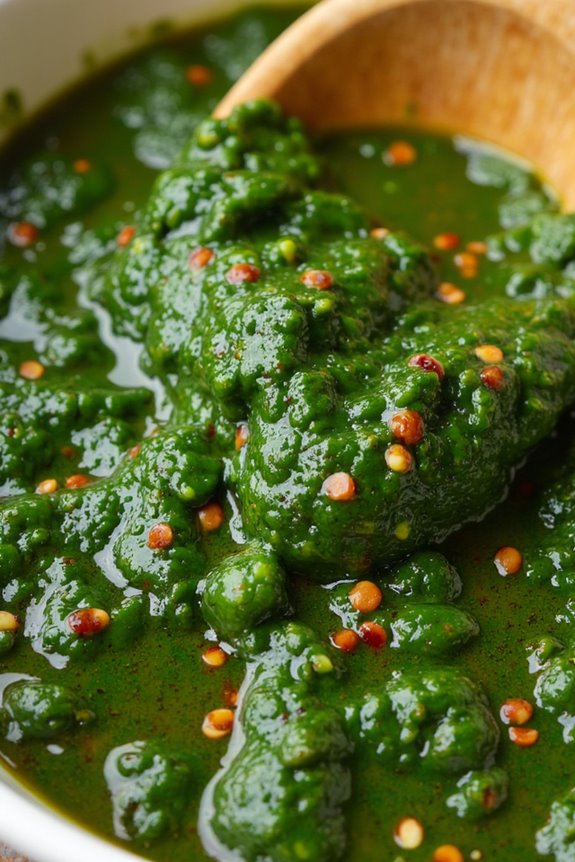
Chimichurri is a vibrant and flavorful sauce that hails from Argentina, often used as a condiment for grilled meats, vegetables, and even seafood. Its bright green color and zesty taste make it a perfect accompaniment for any barbecue or grill gathering.
This versatile sauce isn’t only a staple in South American cuisine but has gained popularity worldwide, celebrated for its fresh ingredients and bold flavors. The base of chimichurri typically consists of parsley, garlic, vinegar, and olive oil, with variations that may include spices and additional herbs.
Making chimichurri is simple and requires no cooking, just a little chopping and mixing. It’s an excellent sauce to prepare ahead of time, allowing the flavors to meld together for a more robust taste. When grilled meats are paired with this zesty sauce, it enhances the dish and adds a reviving contrast to the smoky flavors.
This recipe yields enough chimichurri for 4-6 people, making it ideal for a summer barbecue or a cozy dinner with friends.
Ingredients (Serves 4-6):
- 1 cup fresh parsley, finely chopped
- 4 cloves garlic, minced
- 1/3 cup red wine vinegar
- 1/2 cup extra-virgin olive oil
- 1 teaspoon dried oregano
- 1/2 teaspoon red pepper flakes (adjust to taste)
- Salt and pepper to taste
- Juice of 1 lemon (optional)
Cooking Instructions:
- Prepare the Herbs: Start by washing and drying the fresh parsley. Finely chop the parsley until you have about one cup. Make sure to remove any thick stems for a smoother texture. Place the chopped parsley in a medium mixing bowl.
- Mince the Garlic: Take the garlic cloves and peel them. Mince the garlic finely, or use a garlic press for a finer consistency. Add the minced garlic to the bowl with the chopped parsley.
- Combine the Vinegar and Oil: In a separate small bowl, whisk together the red wine vinegar and extra-virgin olive oil until well combined. This mixture will serve as the base for your chimichurri.
- Mix in the Spices: Add the dried oregano, red pepper flakes, and a pinch of salt and pepper to the parsley and garlic mixture. If you prefer a bit of acidity, add the juice of one lemon. Stir the ingredients together to incorporate everything evenly.
- Combine Everything: Slowly pour the vinegar and oil mixture into the parsley, garlic, and spice mixture. Stir well until all ingredients are fully combined. Taste and adjust seasoning if necessary, adding more salt, pepper, or red pepper flakes according to your preference.
- Let it Rest: For the best flavor, let the chimichurri sit at room temperature for at least 30 minutes before serving. This allows the flavors to meld beautifully.
Extra Tips:
Chimichurri can be stored in the refrigerator for up to a week, making it a great make-ahead option for barbecues or picnics. When storing, keep it in an airtight container to maintain freshness.
Additionally, feel free to experiment by adding other herbs like cilantro or mint for a unique twist! For an even richer flavor, try using roasted garlic instead of raw. Finally, drizzle chimichurri over grilled meats, veggies, or even use it as a marinade for added zest!