

I absolutely adore the creamy richness of dulce de leche in desserts. Its caramel-like flavor adds a special touch that turns simple recipes into extraordinary delights. From cheesecakes that melt in your mouth to brownies with a delightful twist, each creation celebrates this delicious ingredient. Are you ready to elevate your next dessert? Let’s explore these irresistible recipes together.
Dulce De Leche Cheesecake
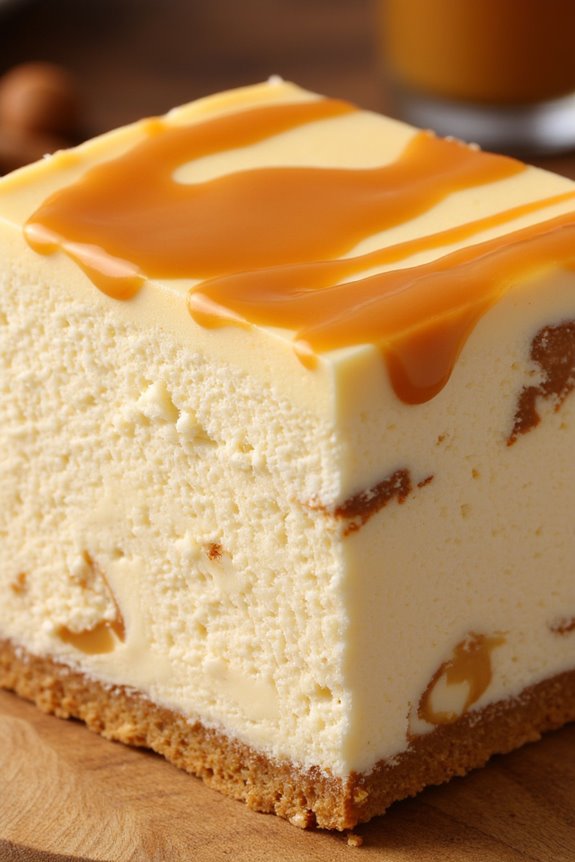
Dulce de leche cheesecake is a delightful fusion of creamy cheesecake and the rich, caramel-like flavor of dulce de leche. This luxurious dessert is perfect for any occasion, whether it’s a family gathering, a holiday celebration, or simply a treat for yourself.
The cheesecake is baked to perfection, offering a smooth and velvety texture that melts in your mouth. Topped with a drizzle of dulce de leche, this dessert is sure to impress your guests and satisfy your sweet tooth.
Making dulce de leche cheesecake is simpler than it may seem. With a buttery graham cracker crust and a luscious filling that combines cream cheese, sugar, and dulce de leche, this recipe requires minimal effort for maximum flavor.
The key to a perfect cheesecake lies in baking it gently and allowing it to cool slowly, which helps prevent cracks from forming on the surface. Follow this recipe, and you’ll create a cheesecake that isn’t only visually stunning but also a delicious treat that everyone will love.
Ingredients (Serves 4-6)
- 1 ½ cups graham cracker crumbs
- ½ cup unsalted butter, melted
- 2 cups cream cheese, softened
- 1 cup dulce de leche
- ½ cup granulated sugar
- 3 large eggs
- 1 teaspoon vanilla extract
- 1 cup sour cream
- Pinch of salt
- Extra dulce de leche for drizzling on top (optional)
Cooking Instructions
1. Preheat the Oven: Begin by preheating your oven to 325°F (163°C). This temperature is ideal for baking the cheesecake evenly without browning too much.
2. Prepare the Crust: In a medium bowl, combine the graham cracker crumbs and melted butter. Mix until the crumbs are fully coated. Press this mixture firmly into the bottom of a 9-inch springform pan to form an even crust.
Bake the crust in the preheated oven for about 10 minutes or until lightly golden. Remove from the oven and set aside to cool.
3. Make the Cheesecake Filling: In a large mixing bowl, beat the softened cream cheese until smooth and creamy. Add the dulce de leche and granulated sugar, mixing until well combined. Scrape down the sides of the bowl to verify all ingredients are incorporated.
4. Add Eggs and Flavorings: Add the eggs one at a time, mixing well after each addition. Then, add the vanilla extract and a pinch of salt. Continue to mix until the batter is smooth and free of lumps.
5. Incorporate Sour Cream: Gently fold in the sour cream into the cheesecake mixture until fully blended. The sour cream adds a nice tang and creaminess to the cheesecake.
6. Pour the Filling into the Crust: Pour the cheesecake filling over the cooled graham cracker crust in the springform pan. Spread it out evenly using a spatula.
7. Bake the Cheesecake: Place the springform pan in the oven and bake for 50-60 minutes. The edges should be set, but the center should still be slightly jiggly. This will guarantee a creamy texture.
8. Cool the Cheesecake: Turn off the oven and crack the door open, letting the cheesecake cool in the oven for about an hour. This gradual cooling helps prevent cracking.
Afterward, remove the cheesecake from the oven and let it cool to room temperature.
9. Chill in the Fridge: Once cooled, cover the cheesecake with plastic wrap and refrigerate for at least 4 hours, preferably overnight. This allows the flavors to meld and the cheesecake to firm up.
10. Serve: Before serving, drizzle extra dulce de leche on top of the chilled cheesecake for added flavor and visual appeal. Slice and enjoy!
Extra Tips
For the best results, confirm your cream cheese is at room temperature before mixing; this helps achieve a lump-free batter. Additionally, consider using a water bath while baking the cheesecake for an even creamier texture and to further prevent cracking.
If you want to add a little crunch, you can top the cheesecake with crushed nuts or chocolate shavings. Finally, don’t rush the chilling process—allowing the cheesecake to set overnight will yield the best flavor and texture. Enjoy your delightful dulce de leche cheesecake!
Chocolate Dulce De Leche Brownies
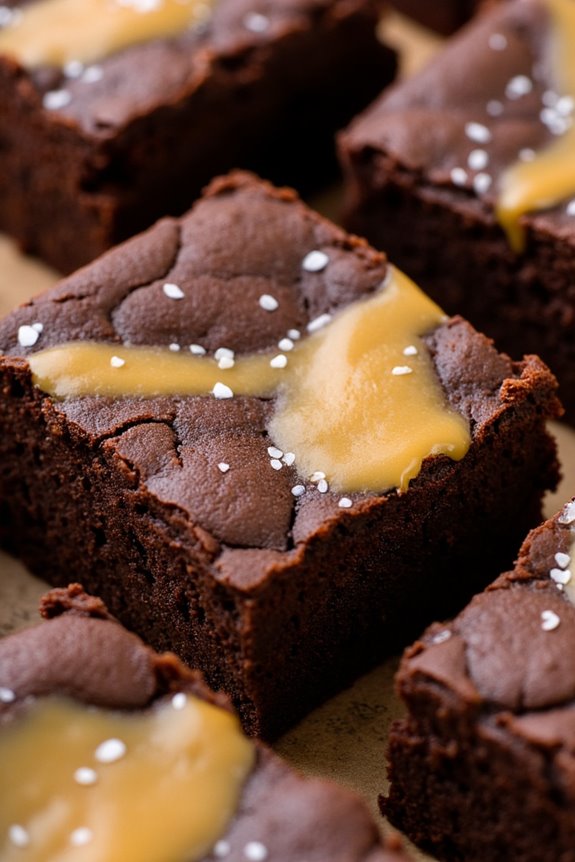
Chocolate Dulce De Leche Brownies are a decadent treat that combines the rich flavors of chocolate with the creamy, caramel-like sweetness of dulce de leche. These brownies are perfect for any occasion, whether you’re celebrating a special event or simply indulging in a sweet craving.
With their fudgy texture and delightful contrast of flavors, these brownies are sure to impress family and friends alike.
Making Chocolate Dulce De Leche Brownies is simpler than you might think. The recipe requires basic baking ingredients and a few key components to achieve that signature dulce de leche flavor. By following this step-by-step guide, you’ll create a batch of brownies that aren’t only delicious but also visually appealing with swirls of dulce de leche on top. Let’s get started!
Ingredients (serving size: 4-6 people)
- 1 cup unsalted butter (2 sticks)
- 8 ounces semi-sweet chocolate, chopped
- 1 cup granulated sugar
- 1 cup packed brown sugar
- 4 large eggs
- 1 teaspoon vanilla extract
- 1 cup all-purpose flour
- 1/2 teaspoon salt
- 1/2 cup dulce de leche (store-bought or homemade)
- Optional: 1/2 cup chopped nuts (walnuts or pecans)
Cooking Instructions
- Preheat the Oven: Begin by preheating your oven to 350°F (175°C). This guarantees that the brownies bake evenly and achieve the right texture.
- Prepare the Baking Pan: Grease a 9×13-inch baking pan with butter or line it with parchment paper, allowing some overhang for easy removal of the brownies once baked. This step is essential to prevent sticking and to make cleanup easier.
- Melt Butter and Chocolate: In a medium saucepan over low heat, combine the unsalted butter and chopped semi-sweet chocolate. Stir continuously until both are completely melted and smooth. Remove from heat and let it cool slightly.
- Mix Sugars and Eggs: In a large mixing bowl, whisk together the granulated sugar, brown sugar, and eggs until well combined. Add in the vanilla extract and mix again until smooth. This mixture will provide the brownies with sweetness and a rich flavor.
- Combine Chocolate Mixture: Pour the cooled chocolate and butter mixture into the bowl with the egg and sugar mixture. Stir until everything is well blended and uniform in color.
- Add Flour and Salt: Gently fold in the all-purpose flour and salt using a spatula or wooden spoon. Be careful not to overmix, as this can make the brownies tough. The batter should be thick and fudgy.
- Swirl in Dulce De Leche: Pour half of the brownie batter into the prepared baking pan. Then, drizzle half of the dulce de leche over the batter. Use a knife or toothpick to create swirls. Pour the remaining brownie batter on top and repeat the process with the remaining dulce de leche.
- Bake the Brownies: Place the pan in the preheated oven and bake for 25-30 minutes, or until a toothpick inserted into the center comes out with a few moist crumbs. Be careful not to overbake, as this will result in dry brownies.
- Cool and Serve: Once baked, remove the brownies from the oven and allow them to cool in the pan for at least 15 minutes. If using parchment paper, lift the brownies out of the pan using the overhang. Allow to cool completely before cutting into squares and serving.
Extra Tips
For an even richer flavor, consider adding a pinch of espresso powder to the brownie batter, as it enhances the chocolate taste.
If you prefer a more pronounced dulce de leche flavor, feel free to increase the amount used in the swirls. You can also top the brownies with a sprinkle of sea salt before baking for a delightful sweet and salty contrast.
Enjoy your Chocolate Dulce De Leche Brownies with a scoop of vanilla ice cream for an indulgent dessert experience!
Dulce De Leche Flan
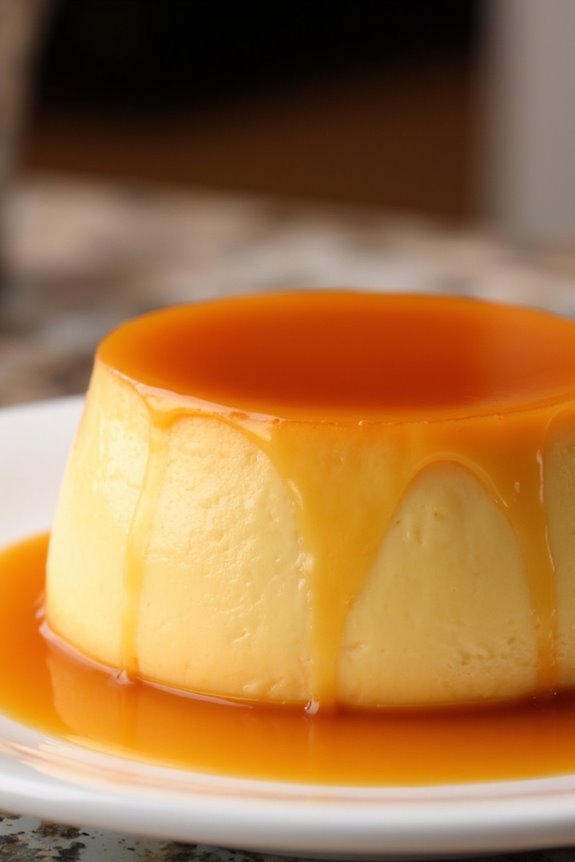
Dulce De Leche Flan is an exquisite dessert that combines the creamy, caramel-like flavor of dulce de leche with the smooth texture of traditional flan. This delightful Mexican treat is perfect for special occasions or a sweet ending to any meal.
The rich flavor of dulce de leche adds a unique twist to the classic flan, making it a favorite among dessert lovers. With its beautiful caramel glaze and silky custard, this dish not only tastes heavenly but also presents beautifully on any table.
Making Dulce De Leche Flan is a straightforward process that requires a few ingredients and some patience. The key to achieving that perfect texture lies in the careful preparation of the flan mixture and the baking process.
While it may seem intimidating at first, following the steps will yield a stunning dessert that will impress your family and friends.
Ingredients (Serves 4-6)
- 1 cup dulce de leche
- 1 cup sweetened condensed milk
- 1 cup whole milk
- 4 large eggs
- 1 teaspoon vanilla extract
- 1/2 cup granulated sugar (for the caramel)
- 1/4 cup water (for the caramel)
Cooking Instructions
1. Prepare the caramel: In a small saucepan, combine the granulated sugar and water over medium heat. Stir gently until the sugar dissolves, then stop stirring and allow it to boil until it turns a golden amber color. This should take about 5-7 minutes.
Once ready, quickly pour the caramel into a round flan mold or individual ramekins, swirling to coat the bottom evenly. Set aside to cool and harden.
2. Mix the flan ingredients: In a large mixing bowl, whisk together the dulce de leche, sweetened condensed milk, whole milk, eggs, and vanilla extract until smooth and well combined.
Make sure there are no lumps, as a smooth mixture will yield a creamy flan.
3. Pour the mixture into the mold: Carefully pour the flan mixture over the hardened caramel in the mold, taking care not to disturb the caramel layer at the bottom.
If using individual ramekins, do this gently to maintain the caramel layer.
4. Prepare the water bath****: Preheat your oven to 350°F (175°C). Place the flan mold or ramekins in a larger baking dish and fill the outer dish with hot water until it reaches halfway up the sides of the flan mold.
This water bath will help cook the flan evenly and prevent it from cracking.
5. Bake the flan: Carefully place the baking dish in the preheated oven and bake for about 50-60 minutes, or until the flan is set and a knife inserted in the center comes out clean.
6. Cool and serve: Once baked, remove the flan from the oven and let it cool in the water bath for about 30 minutes.
Then, refrigerate for at least 4 hours or overnight. To serve, invert the flan onto a serving plate, allowing the caramel to drizzle over the top. Slice and enjoy!
Extra Tips
When making Dulce De Leche Flan, it’s crucial to verify that the caramel doesn’t burn; keep a close eye on it as it cooks.
Additionally, for a more pronounced flavor, you can add a pinch of salt to the dulce de leche mixture or incorporate a few tablespoons of freshly brewed coffee.
If you find the flan mixture too thick, you can add a bit more milk to achieve your desired consistency. Enjoy your flan chilled, as it enhances the flavors and texture beautifully!
Caramel Swirl Dulce De Leche Ice Cream
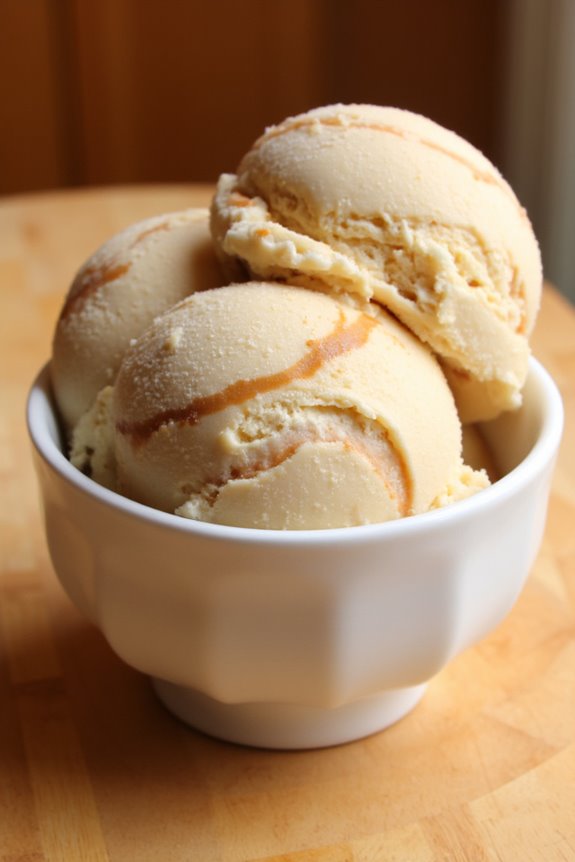
Indulge in the rich, creamy goodness of Caramel Swirl Dulce De Leche Ice Cream, a delightful dessert that combines the luscious flavors of dulce de leche with a smooth, homemade ice cream base. This recipe is perfect for warm summer days or as a sweet ending to any meal.
The combination of caramel and the deep, caramelized flavor of dulce de leche elevates the ice cream to a level of decadence that will leave your taste buds wanting more.
Making this ice cream at home allows you to control the ingredients and tailor the sweetness to your preference. With just a few simple steps, you can create a luxurious treat that’s sure to impress family and friends.
The key to achieving the perfect texture is to guarantee the mixture is well-chilled before churning and to fold in the dulce de leche gently to create those beautiful swirls.
Ingredients (Servings: 4-6)
- 2 cups heavy cream
- 1 cup whole milk
- 3/4 cup granulated sugar
- 1 teaspoon vanilla extract
- 1/4 teaspoon salt
- 1/2 cup dulce de leche
- 1/4 cup caramel sauce (for swirling)
Cooking Instructions
- Prepare the Ice Cream Base: In a large mixing bowl, combine the heavy cream, whole milk, granulated sugar, vanilla extract, and salt. Whisk together until the sugar has dissolved completely. This mixture will create a rich and creamy base for your ice cream.
- Chill the Mixture: Cover the bowl with plastic wrap and place it in the refrigerator for at least 2 hours, or until it’s thoroughly chilled. This step is essential as a cold mixture churns better in the ice cream maker, leading to a smoother texture.
- Churn the Ice Cream: Once chilled, pour the mixture into your ice cream maker and churn according to the manufacturer’s instructions. This usually takes about 20-25 minutes. The ice cream will thicken and become creamy during this process.
- Add the Dulce de Leche: When the ice cream reaches a soft-serve consistency, take a spoonful of the dulce de leche and gently fold it into the ice cream. Be careful not to overmix; you want to create beautiful swirls rather than fully incorporate the dulce de leche.
- Swirl in Caramel: Drizzle the caramel sauce over the top of the ice cream and use a spatula to swirl it through the mixture. Again, aim for a marbled effect rather than mixing completely.
- Freeze the Ice Cream: Transfer the ice cream to an airtight container and smooth the top with a spatula. Place it in the freezer for at least 4 hours or until completely firm. This final step allows the ice cream to set to a scoopable consistency.
- Serve and Enjoy: Once frozen, scoop out the Caramel Swirl Dulce De Leche Ice Cream into bowls or cones, and enjoy the delightful blend of flavors!
Extra Tips
For an extra touch of flavor, consider adding a pinch of sea salt to the dulce de leche before folding it into the ice cream. This enhances the sweetness and adds a delightful contrast.
If you don’t have an ice cream maker, you can pour the mixture into a shallow dish and stir it every 30 minutes for about 3-4 hours until it reaches the desired consistency. Remember, the more you churn or stir, the creamier your ice cream will be!
Dulce De Leche Stuffed Cookies
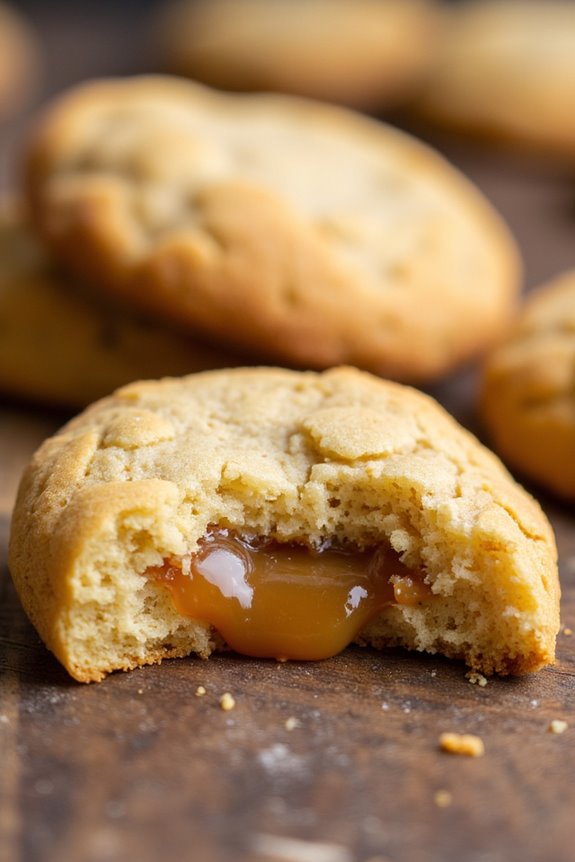
Dulce de leche stuffed cookies are a delightful treat that combines the rich, creamy flavor of dulce de leche with the comforting chewiness of freshly baked cookies. This indulgent dessert is perfect for any occasion, whether you’re hosting a gathering or simply craving something sweet.
The contrast of the soft cookie with the gooey, caramel-like filling makes every bite a heavenly experience. These cookies are surprisingly simple to make, and with a little patience, you’ll have a batch that will impress your family and friends.
The key to achieving the perfect texture is balancing the dough and guaranteeing the dulce de leche is warm enough to create a luscious filling. With this recipe, you’ll be well on your way to creating your new favorite cookie!
Ingredients (Serves 4-6)
- 1 cup unsalted butter, softened
- 1 cup brown sugar, packed
- 1/2 cup granulated sugar
- 1 large egg
- 1 teaspoon vanilla extract
- 2 1/2 cups all-purpose flour
- 1 teaspoon baking soda
- 1/2 teaspoon salt
- 1 cup dulce de leche
Cooking Instructions
- Prepare the Dough: In a large mixing bowl, cream together the softened butter, brown sugar, and granulated sugar until light and fluffy. This should take about 3-5 minutes. Add in the egg and vanilla extract, mixing until fully incorporated.
- Mix the Dry Ingredients: In a separate bowl, whisk together the all-purpose flour, baking soda, and salt. Gradually add the dry mixture to the butter mixture, stirring until just combined. Be careful not to overmix, as this can lead to tough cookies.
- Chill the Dough: Cover the dough with plastic wrap or transfer it into an airtight container. Chill in the refrigerator for at least 30 minutes. Chilling the dough helps to firm it up, making it easier to handle and preventing the cookies from spreading too much during baking.
- Preheat the Oven: Preheat your oven to 350°F (175°C) and line a baking sheet with parchment paper.
- Form the Cookies: Once the dough is chilled, scoop out about 1 tablespoon of dough and flatten it in your palm. Place about 1 teaspoon of dulce de leche in the center, then fold the edges of the dough over the filling, sealing it inside. Roll it into a ball and place it on the prepared baking sheet. Repeat this process with the remaining dough.
- Bake: Bake the cookies in the preheated oven for 10-12 minutes, or until the edges are lightly golden. The centers may look a bit soft, but they’ll continue to cook as they cool.
- Cool and Serve: Allow the cookies to cool on the baking sheet for about 5 minutes before transferring them to a wire rack to cool completely. Serve warm for a gooey treat or at room temperature.
Extra Tips
For an added flavor twist, consider incorporating chocolate chips or nuts into the cookie dough before chilling.
Also, if you want to make the cookies even more decadent, drizzle some extra dulce de leche on top just before serving. Guarantee you store any leftovers in an airtight container to maintain their freshness, and warm them slightly in the microwave for that fresh-baked taste when you’re ready to enjoy them again!
Dulce De Leche Bread Pudding
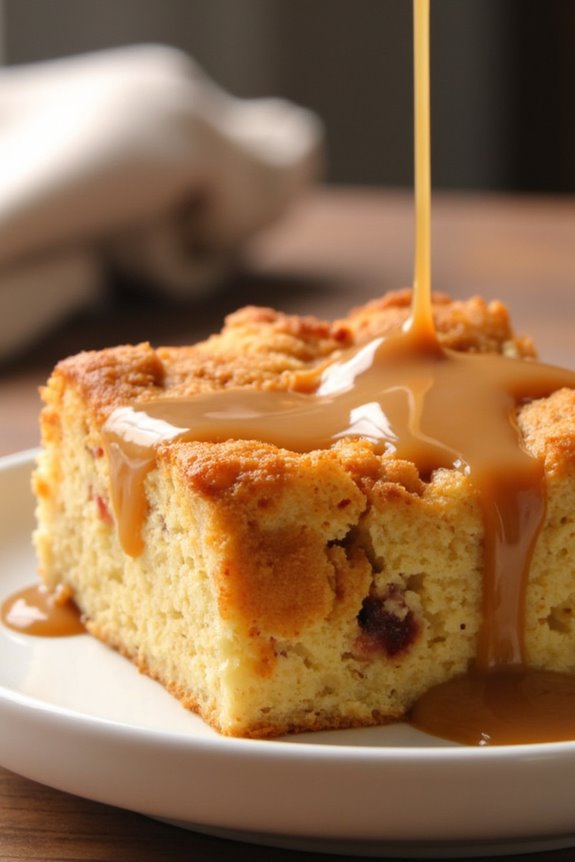
Dulce De Leche Bread Pudding is a delightful twist on the classic dessert that combines rich, creamy caramel flavors with the comforting texture of bread pudding. This dish is perfect for family gatherings or special occasions, providing a warm and indulgent treat that’s certain to please everyone.
The sweetness of the dulce de leche, combined with the softness of the bread, creates a harmonious balance that will leave your taste buds dancing with joy.
This dessert isn’t only delicious but also quite simple to prepare. With a few basic ingredients and minimal effort, you can whip up a delightful dish that will impress your guests.
Whether served warm with a scoop of ice cream or at room temperature, Dulce De Leche Bread Pudding is a perfect ending to any meal.
Ingredients (Serves 4-6)
- 6 cups of day-old bread, cubed (such as brioche or challah)
- 2 cups of milk
- 1 cup of heavy cream
- 1 cup of dulce de leche
- 4 large eggs
- 1/2 cup of granulated sugar
- 1 teaspoon of vanilla extract
- 1/2 teaspoon of ground cinnamon
- A pinch of salt
- Additional dulce de leche for drizzling (optional)
Cooking Instructions
- Preheat the Oven: Start by preheating your oven to 350°F (175°C). This guarantees that your bread pudding will bake evenly and achieve a nice golden color.
- Prepare the Bread: In a large mixing bowl, combine the cubed day-old bread with the milk and heavy cream. Let it sit for about 10-15 minutes, allowing the bread to absorb the liquid and soften.
- Make the Custard Mixture: In another bowl, whisk together the dulce de leche, eggs, granulated sugar, vanilla extract, ground cinnamon, and a pinch of salt until smooth and well combined. This custard mixture will add richness and flavor to your bread pudding.
- Combine Mixtures: Once the bread has soaked, gently fold in the custard mixture, making sure all the bread pieces are thoroughly coated. Be careful not to overmix, as you want to maintain some texture in the bread.
- Transfer to Baking Dish: Grease a 9×13-inch baking dish with butter or cooking spray. Pour the bread mixture into the prepared dish, spreading it out evenly.
- Bake: Place the baking dish in the preheated oven and bake for 45-50 minutes, or until the top is golden brown and the center is set. You can check for doneness by inserting a knife into the center; it should come out clean.
- Cool and Serve: Once baked, remove the bread pudding from the oven and let it cool for about 10 minutes. Serve warm, drizzling additional dulce de leche on top if desired.
Extra Tips
To enhance the flavor of your Dulce De Leche Bread Pudding, consider adding mix-ins such as raisins, chocolate chips, or chopped nuts. These not only add texture but also create a more complex flavor profile.
Additionally, for a richer taste, you can substitute some of the milk with flavored coffee or even bourbon if you’d like a hint of warmth. Enjoy your creation with a scoop of vanilla ice cream for a truly indulgent experience!
Dulce De Leche Cupcakes
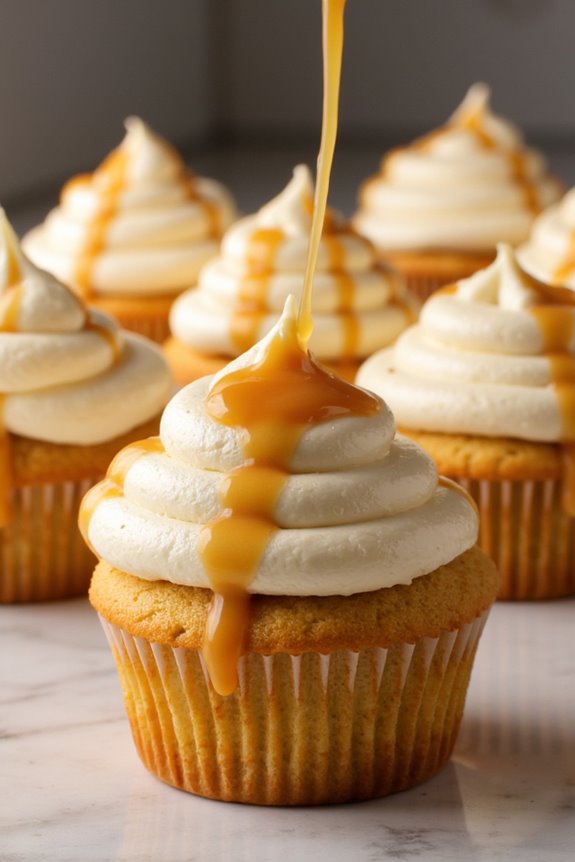
Dulce de leche cupcakes are the perfect combination of rich flavors and delightful textures, making them a favorite for any occasion. These moist and fluffy cupcakes are infused with the creamy sweetness of dulce de leche, creating a decadent treat that will impress your family and friends.
Topped with a luscious dulce de leche frosting, every bite offers a taste of heaven that’s both indulgent and satisfying.
Baking these cupcakes is straightforward and fun, whether you’re an experienced baker or a beginner. The combination of simple ingredients and easy-to-follow steps guarantees that anyone can whip up a batch of these delightful desserts. Once you try these dulce de leche cupcakes, they’re sure to become a staple in your dessert repertoire.
Ingredients (Serves 4-6)
- 1 ½ cups all-purpose flour
- 1 tsp baking powder
- ½ tsp baking soda
- ¼ tsp salt
- ½ cup unsalted butter, softened
- 1 cup granulated sugar
- 2 large eggs
- 1 tsp vanilla extract
- ½ cup buttermilk
- ¾ cup dulce de leche (plus extra for drizzling)
- 1 cup heavy whipping cream
- 2 tbsp powdered sugar
Instructions
1. Preheat the Oven: Begin by preheating your oven to 350°F (175°C). This step is essential as it guarantees that your cupcakes bake evenly and rise properly.
2. Prepare the Muffin Tin****: Line a muffin tin with cupcake liners. This will prevent the cupcakes from sticking and make them easy to remove once they’re baked.
3. Mix Dry Ingredients: In a medium-sized bowl, whisk together the all-purpose flour, baking powder, baking soda, and salt. This helps to evenly distribute the leavening agents and prevents any lumps from forming in your cupcake batter.
4. Cream Butter and Sugar: In a large mixing bowl, beat the softened butter and granulated sugar together until the mixture is light and fluffy. This typically takes about 3-5 minutes with an electric mixer.
Creaming incorporates air into the mixture, which helps the cupcakes rise.
5. Add Eggs and Vanilla: Add the eggs one at a time, mixing well after each addition. Then, stir in the vanilla extract. This step adds moisture and flavor to your batter.
6. Combine Wet and Dry Ingredients: Gradually add the dry ingredient mixture to the creamed butter mixture, alternating with the buttermilk. Start and end with the dry ingredients, mixing just until combined.
Be careful not to overmix, as this can lead to dense cupcakes.
7. Incorporate Dulce de Leche: Fold in the dulce de leche gently until just combined. This will give your cupcakes that signature rich flavor.
8. Fill Cupcake Liners: Divide the batter evenly among the cupcake liners, filling each about two-thirds full. This guarantees they’ve room to rise without overflowing.
9. Bake: Place the muffin tin in the preheated oven and bake for 18-20 minutes, or until a toothpick inserted into the center comes out clean. Keep an eye on them to avoid overbaking.
10. Cool Down: Once baked, remove the cupcakes from the oven and let them cool in the tin for about 5 minutes before transferring them to a wire rack to cool completely.
This prevents them from becoming soggy.
11. Whip the Cream: In a separate bowl, beat the heavy whipping cream with powdered sugar until it forms stiff peaks. This will create a light and airy frosting that complements the cupcakes perfectly.
12. Frost the Cupcakes: Once the cupcakes are completely cooled, pipe or spread the whipped cream frosting on top. Drizzle extra dulce de leche over the frosting for an added touch of sweetness.
Extra Tips
For an extra burst of flavor, consider adding a pinch of sea salt to your frosting or incorporating chopped nuts on top for a bit of crunch.
If you prefer a stronger dulce de leche flavor, you can replace some of the buttermilk in the recipe with more dulce de leche. Always verify that your butter is softened properly for the best texture in your cupcakes, and don’t rush the cooling process; allowing them to cool completely will prevent the frosting from melting off.
Enjoy your delightful dulce de leche cupcakes!
No-Bake Dulce De Leche Tart
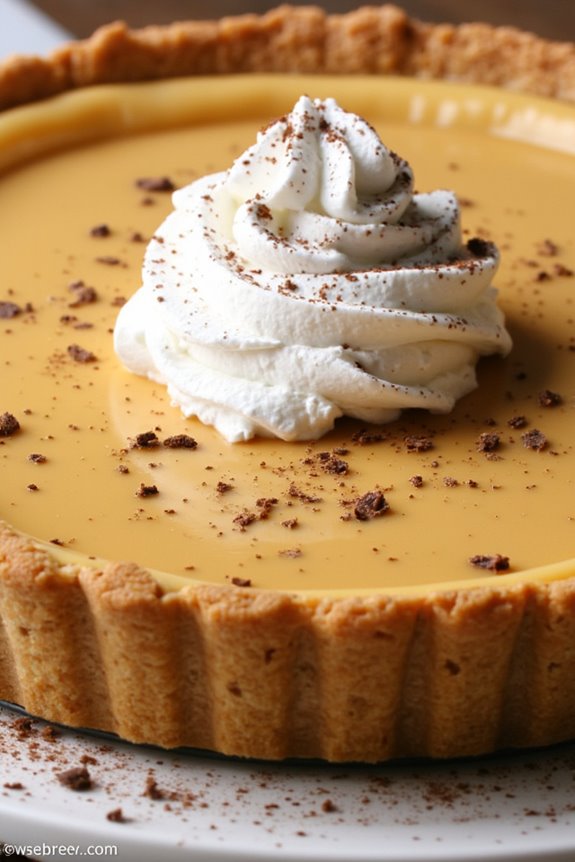
Indulging in a No-Bake Dulce De Leche Tart is a delightful way to bring a taste of Latin American dessert culture into your home without the hassle of baking. This creamy, rich tart is perfect for warm days when you want a sweet treat without turning on the oven. The combination of buttery crust, luscious dulce de leche filling, and a hint of whipped cream creates a heavenly dessert experience that will satisfy any sweet tooth.
This recipe isn’t only simple to prepare, but it also allows for plenty of creativity, making it a great option for gatherings and special occasions.
The beauty of this No-Bake Dulce De Leche Tart lies in its versatility. You can easily customize the toppings with fresh fruits, nuts, or chocolate shavings, depending on your preference. Pair it with a cup of coffee or a scoop of vanilla ice cream for an unforgettable dessert. With just a few ingredients and minimal effort, you’ll have a stunning tart that impresses both family and friends, making it a must-try recipe for your next dessert spread.
Ingredients (serving size: 4-6 people)
- 1 ½ cups graham cracker crumbs
- ½ cup unsalted butter, melted
- 1 can (14 oz) sweetened condensed milk
- 1 cup dulce de leche
- 1 cup heavy whipping cream
- 2 tablespoons powdered sugar
- 1 teaspoon vanilla extract
- Pinch of salt
- Optional toppings: chopped nuts, chocolate shavings, or fresh fruit
Instructions
- Prepare the Crust: In a mixing bowl, combine the graham cracker crumbs and melted butter. Mix until the crumbs are fully coated and the mixture resembles wet sand. Press the mixture firmly into the bottom and up the sides of a 9-inch tart pan to form an even layer. Use the back of a measuring cup or your fingers to guarantee it’s compact. Chill the crust in the refrigerator for at least 30 minutes to set.
- Make the Filling: In a separate bowl, combine the dulce de leche and sweetened condensed milk. Whisk together until smooth and fully combined. This mixture will create the rich filling for your tart.
- Whip the Cream: In a large mixing bowl, using an electric mixer, beat the heavy whipping cream on medium speed until it begins to thicken. Gradually add the powdered sugar, vanilla extract, and a pinch of salt. Continue to whip until soft peaks form, being careful not to over-whip.
- Combine the Mixtures: Gently fold the whipped cream into the dulce de leche mixture using a spatula. Be careful to maintain the volume of the whipped cream as you combine the two mixtures, guaranteeing a light and airy filling for the tart.
- Assemble the Tart: Once the crust is set, pour the dulce de leche filling into the chilled crust. Use a spatula to spread it evenly. Smooth the top, and cover the tart with plastic wrap. Refrigerate for at least 4 hours, or overnight for best results, allowing the filling to set completely.
- Serve: Before serving, add your desired toppings such as chopped nuts, chocolate shavings, or fresh fruit. Slice the tart and serve chilled. Enjoy the creamy, decadent flavors of your homemade No-Bake Dulce De Leche Tart!
Extra Tips
When preparing your No-Bake Dulce De Leche Tart, consider the quality of the dulce de leche you use; homemade versions or high-quality store-bought options can elevate the flavor.
Additionally, if you’re short on time, opt for a pre-made graham cracker crust instead of making your own. For added depth of flavor, consider a drizzle of dark chocolate over the top before serving.
Finally, if you want to make the tart ahead of time, it can be stored in the refrigerator for several days, making it a convenient dessert option for busy schedules.
Dulce De Leche Pudding Parfaits
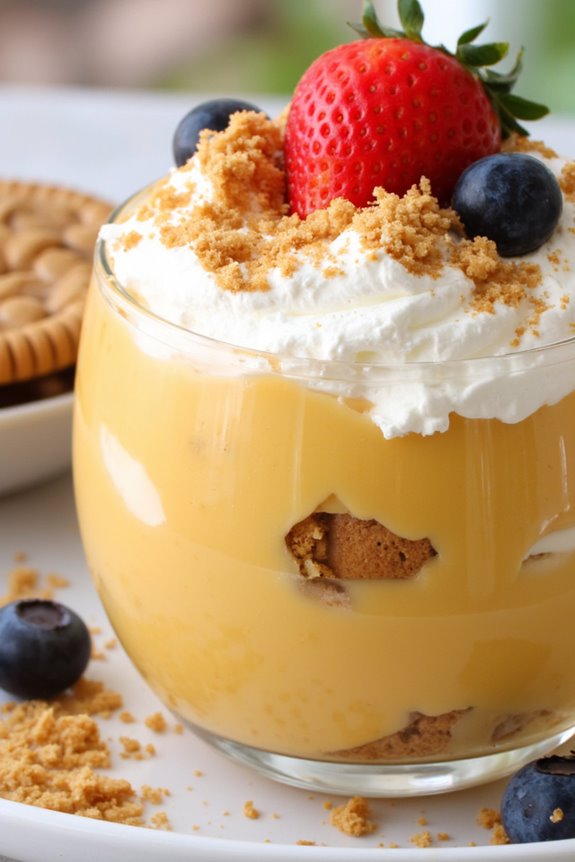
Dulce de leche pudding parfaits are a heavenly dessert that combines the rich flavors of caramelized milk with the smoothness of pudding, layered with crunchy toppings and fresh fruits. This delightful treat not only pleases the palate but also presents beautifully, making it perfect for gatherings or a sweet ending to any meal.
With its creamy texture and luscious taste, it’s sure to become a favorite among family and friends.
Making dulce de leche pudding parfaits is simple and requires a few key ingredients that come together to create an indulgent dessert. This recipe allows you to customize your parfaits with your favorite toppings, whether that be whipped cream, nuts, or fresh fruit. The layers of flavor and texture will make every bite a memorable experience.
Ingredients (serves 4-6 people)
- 1 cup dulce de leche
- 2 cups whole milk
- 1/4 cup sugar
- 1/4 cup cornstarch
- 1/4 teaspoon salt
- 1 teaspoon vanilla extract
- 1 cup heavy whipping cream (for topping)
- 2 tablespoons powdered sugar (for topping)
- 1/2 cup crushed cookies (for layering)
- Fresh fruit (e.g., bananas or berries for layering)
Cooking Instructions
- Prepare the Pudding Base: In a medium saucepan, whisk together the sugar, cornstarch, and salt. Gradually add the whole milk while stirring to combine all the dry ingredients. Make sure there are no lumps.
- Cook the Mixture: Place the saucepan over medium heat and cook the mixture, stirring constantly. As it heats, the mixture will thicken. Once it reaches a gentle boil, continue to cook for an additional 2 minutes until it’s thick and creamy.
- Add Dulce De Leche and Vanilla: Remove the saucepan from heat and stir in the dulce de leche and vanilla extract until fully combined. The dulce de leche will melt into the warm pudding, resulting in a rich caramel flavor.
- Chill the Pudding: Pour the pudding into a bowl and cover it with plastic wrap, ensuring the wrap is directly touching the surface of the pudding to prevent a skin from forming. Place it in the refrigerator to chill for at least 2 hours or until set.
- Prepare the Whipped Cream: In a mixing bowl, combine the heavy whipping cream and powdered sugar. Using an electric mixer, beat the cream on high speed until stiff peaks form. This will create a light and airy topping for your parfaits.
- Assemble the Parfaits: Once the pudding has chilled and thickened, start layering your parfaits. In serving glasses, add a layer of pudding followed by a layer of crushed cookies, then a layer of whipped cream, and finally some fresh fruit. Repeat these layers until the glasses are filled, finishing with whipped cream on top.
- Garnish and Serve: You can add extra crushed cookies, a drizzle of dulce de leche, or additional fresh fruit on top for garnish. Serve immediately or chill for an additional 30 minutes to let the flavors meld together.
Extra Tips
For the best results, make sure to use high-quality dulce de leche, which will greatly enhance the flavor of your pudding.
You can also experiment with different toppings based on your preferences or what’s in season. If you want a lighter version, consider using low-fat milk and whipped topping instead of heavy cream.
These parfaits can be made in advance and stored in the refrigerator for a couple of days, making them a convenient dessert option for busy weeks.
Dulce De Leche Apple Pie

Dulce de leche apple pie is a delightful twist on the classic dessert that combines the sweet, creamy richness of dulce de leche with the tartness of fresh apples. This dessert is perfect for family gatherings or holiday celebrations, offering a unique flavor that will impress your guests. The caramel-like sweetness of the dulce de leche pairs beautifully with the warm spices of cinnamon and nutmeg, creating a comforting and indulgent treat that’s certain to be a hit.
In this recipe, you’ll learn how to create a delicious apple pie from scratch, filled with tender spiced apples and a generous swirl of dulce de leche. The flaky pie crust complements the filling perfectly, providing a satisfying crunch with every bite. Whether you serve it warm with a scoop of vanilla ice cream or at room temperature, this dulce de leche apple pie will leave everyone asking for seconds.
Ingredients (Serves 4-6)
- 1 prepared pie crust (store-bought or homemade)
- 4 medium-sized apples (Granny Smith or Honeycrisp), peeled, cored, and sliced
- 1/2 cup dulce de leche
- 1/3 cup granulated sugar
- 1 teaspoon ground cinnamon
- 1/4 teaspoon ground nutmeg
- 2 tablespoons all-purpose flour
- 1 tablespoon lemon juice
- 1 tablespoon unsalted butter, cut into small pieces
- 1 egg (for egg wash)
- 1 tablespoon milk (for egg wash)
Cooking Instructions
- Prepare the Filling: In a large mixing bowl, combine the sliced apples, granulated sugar, cinnamon, nutmeg, flour, and lemon juice. Toss the ingredients together until the apple slices are evenly coated. The flour helps to thicken the filling, while the lemon juice adds brightness and balances the sweetness.
- Preheat the Oven: Preheat your oven to 425°F (220°C). This high temperature will help create a beautifully golden and flaky crust.
- Assemble the Pie: Roll out the prepared pie crust and fit it into a 9-inch pie dish. Pour the apple mixture into the crust, making sure to distribute the apples evenly. Drizzle the dulce de leche over the top of the apples, allowing it to seep into the filling. Dot the filling with small pieces of butter to enhance the richness.
- Cover the Pie: If you have a second pie crust, roll it out and place it over the filling. If not, you can create a lattice top for a decorative effect. Make sure to cut slits in the top crust to allow steam to escape. Crimp the edges to seal the pie.
- Apply Egg Wash: In a small bowl, whisk together the egg and milk to create an egg wash. Brush the mixture over the crust to give it a glossy finish when baked.
- Bake the Pie: Place the pie in the preheated oven and bake for 15 minutes. Then, reduce the temperature to 350°F (175°C) and continue baking for an additional 30-35 minutes, or until the crust is golden and the apples are tender.
- Cool and Serve: Once baked, remove the pie from the oven and let it cool on a wire rack for at least 30 minutes before slicing. This cooling time allows the filling to set up a bit more, making it easier to serve.
Extra Tips
For an added touch, consider serving your dulce de leche apple pie with a scoop of vanilla ice cream or a dollop of whipped cream. If you like, you can sprinkle some chopped nuts, such as pecans or walnuts, into the apple filling for added texture.
To guarantee an even baking process, place the pie on a baking sheet to catch any drips. Finally, feel free to experiment with different types of apples to find your favorite flavor combination!
Dulce De Leche Rice Krispie Treats

Dulce De Leche Rice Krispie Treats combine the classic nostalgia of Rice Krispie treats with the rich, creamy sweetness of dulce de leche. This delightful twist on a traditional favorite adds a luxurious layer of flavor that elevates the simple marshmallow and cereal dessert into something truly special.
Perfect for gatherings, these treats aren’t only easy to make but also an incredible way to impress your friends and family with minimal effort.
These treats are a wonderful addition to any dessert table, offering a chewy texture with a delightful caramel flavor. They’re perfect for birthdays, holidays, or any occasion where you want to indulge your sweet tooth.
With just a few simple ingredients, you can whip up a batch of these delicious Dulce De Leche Rice Krispie Treats in no time, making them a go-to recipe for busy bakers.
Ingredients (serving size: 4-6 people)
- 3 tablespoons unsalted butter
- 1 package (10 oz) mini marshmallows
- 1 cup dulce de leche
- 6 cups Rice Krispies cereal
- 1/2 teaspoon vanilla extract
- Pinch of salt
- Optional: additional dulce de leche for drizzling on top
Cooking Instructions
- Prepare the Pan: Start by greasing a 9×13 inch baking dish with butter or cooking spray. This will prevent the Rice Krispie treats from sticking to the pan, making them easier to cut once set.
- Melt Butter and Marshmallows: In a large saucepan over low heat, melt the unsalted butter. Once melted, add the mini marshmallows and stir continuously until they’re fully melted and smooth. This process should take about 5-7 minutes.
- Incorporate Dulce de Leche: Once the marshmallows are melted, remove the saucepan from heat. Stir in the dulce de leche until well combined, ensuring that the mixture becomes creamy and uniformly caramel-colored.
- Add Cereal: Gradually fold in the Rice Krispies cereal, ensuring that every piece is coated with the dulce de leche and marshmallow mixture. It’s important to mix gently to avoid crushing the cereal.
- Flavor and Salt: Add the vanilla extract and a pinch of salt to the mixture, stirring until combined. The salt will enhance the sweetness and flavor of the treats.
- Transfer to the Pan: Pour the mixture into the prepared baking dish. Using a buttered spatula or wax paper, press the mixture down evenly into the pan. Make sure it’s firmly packed for a better texture.
- Cool and Serve: Allow the treats to cool at room temperature for about 30 minutes, or until set. Once cooled, cut them into squares or rectangles. If desired, drizzle additional dulce de leche on top before serving for an extra touch of sweetness.
Extra Tips
For the best results, make sure to work quickly when mixing in the Rice Krispies, as the marshmallow mixture cools rapidly.
You can also experiment by adding chocolate chips, nuts, or sprinkles for added texture and flavor variations.
Store any leftovers in an airtight container to keep them fresh, but be aware that they may get slightly softer over time. Enjoy your deliciously sweet Dulce De Leche Rice Krispie Treats!
Dulce De Leche Chocolate Mousse
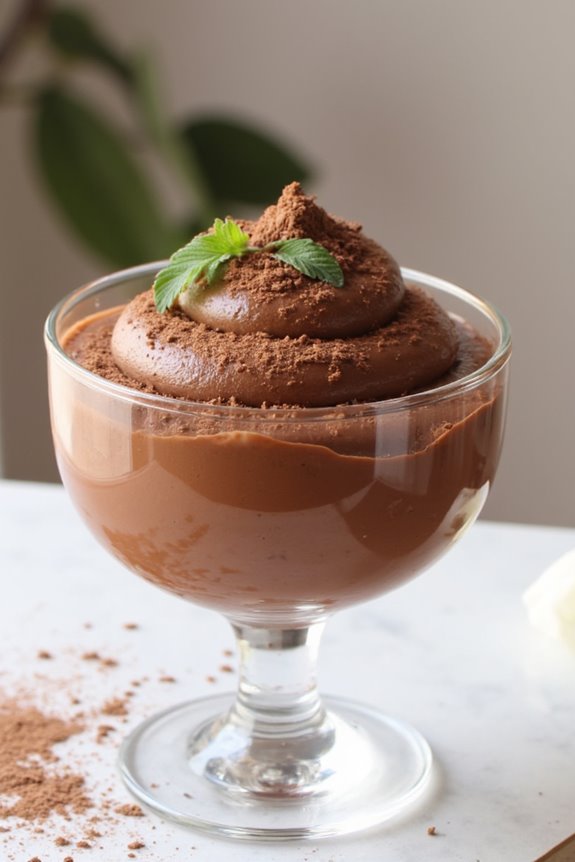
Dulce de leche chocolate mousse is a decadent dessert that marries the rich, caramel-like flavor of dulce de leche with the smooth, airy texture of chocolate mousse. This indulgent treat is perfect for special occasions or a sweet ending to a cozy dinner. Its creamy consistency and delightful sweetness will surely impress anyone who takes a bite.
Plus, it’s surprisingly easy to prepare, making it a great option for both novice and experienced cooks alike. This recipe yields 4-6 servings, making it an ideal dessert for family gatherings or small dinner parties. You can customize the mousse by garnishing it with whipped cream, chocolate shavings, or a sprinkle of sea salt for an added touch.
The combination of flavors and textures will leave your guests asking for seconds, so be prepared to share the recipe!
Ingredients
- 1 cup dulce de leche
- 1 cup heavy cream, divided
- 4 ounces bittersweet chocolate, chopped
- 3 large eggs, separated
- 2 tablespoons sugar
- 1 teaspoon vanilla extract
- A pinch of salt
Instructions
- Melt the Chocolate: Begin by placing the chopped bittersweet chocolate in a heatproof bowl. Set the bowl over a pot of simmering water (double boiler method) and allow the chocolate to melt gently, stirring occasionally. Once melted, remove from heat and let it cool slightly.
- Whip the Cream: In a separate mixing bowl, pour in 3/4 cup of heavy cream. Using an electric mixer, whip the cream until soft peaks form. Be careful not to overwhip, as you want the cream to remain light and airy. Once whipped, set the bowl aside in the fridge to keep it cool.
- Prepare the Egg Yolks: In another mixing bowl, whisk together the egg yolks, sugar, and vanilla extract until the mixture is pale and slightly thickened. Then, gently fold the melted chocolate into the egg yolk mixture until combined.
- Combine Dulce de Leche and Chocolate: Fold the dulce de leche into the chocolate and egg yolk mixture until smooth. This will create a rich, creamy base for your mousse.
- Whip the Egg Whites: In a clean bowl, use the remaining 1/4 cup of heavy cream and whisk the egg whites with a pinch of salt until they form stiff peaks. Gently fold the whipped egg whites into the chocolate mixture in three parts. Start by incorporating a small amount to lighten the mixture, then carefully fold in the rest, being cautious not to deflate the mousse.
- Add Whipped Cream: Next, gently fold the whipped cream into the chocolate mixture until fully incorporated. The mousse should be light and airy.
- Chill and Serve: Divide the mousse into serving dishes or glasses. Cover with plastic wrap and refrigerate for at least 2 hours, or until set. Serve chilled, garnished with additional whipped cream or chocolate shavings if desired.
Extra Tips
When preparing dulce de leche chocolate mousse, verify all your ingredients are at room temperature for better incorporation, especially the eggs. You can also make your own dulce de leche by simmering sweetened condensed milk, but for convenience, store-bought is perfectly fine.
For an alternative flavor profile, consider adding a splash of espresso or coffee liqueur to enhance the chocolate flavor. Remember to taste as you go! Enjoy your delightful creation!
Dulce De Leche Pancakes

Dulce De Leche Pancakes are an indulgent twist on a classic breakfast favorite. These fluffy pancakes are infused with the rich, caramel-like flavor of dulce de leche, making them a perfect treat for weekend brunch or a special occasion. Topped with whipped cream, fresh fruit, or additional dulce de leche, these pancakes are bound to delight anyone who tries them.
The process of making Dulce De Leche Pancakes is simple and straightforward. With just a few ingredients, you can whip up a batch of these delicious pancakes that aren’t only easy to make but also visually appealing. Whether you’re a seasoned pancake maker or a beginner, this recipe will guide you through each step to guarantee your pancakes turn out perfectly every time.
Ingredients (Serves 4-6)
- 1 cup all-purpose flour
- 2 tablespoons sugar
- 1 tablespoon baking powder
- 1/2 teaspoon salt
- 1 cup milk
- 2 large eggs
- 1/4 cup melted butter
- 1/2 cup dulce de leche (plus extra for serving)
- 1 teaspoon vanilla extract
- Cooking spray or additional butter for the skillet
Cooking Instructions
- Prepare the Dry Ingredients: In a large mixing bowl, combine the all-purpose flour, sugar, baking powder, and salt. Whisk the dry ingredients together until they’re well blended. This step is important to guarantee that the baking powder is evenly distributed, which will help the pancakes rise properly.
- Mix the Wet Ingredients: In a separate bowl, whisk together the milk, eggs, melted butter, dulce de leche, and vanilla extract. Make sure the dulce de leche is well incorporated into the wet mixture for a consistent flavor throughout the pancakes.
- Combine Wet and Dry Ingredients: Pour the wet mixture into the bowl with the dry ingredients. Gently stir the ingredients together using a spatula or wooden spoon until just combined. Be careful not to overmix; it’s okay if there are a few lumps in the batter.
- Heat the Skillet: Preheat a non-stick skillet or griddle over medium heat. Lightly grease the surface with cooking spray or a small amount of butter to prevent sticking. Make sure the skillet is hot enough by adding a few drops of water; they should sizzle and evaporate quickly.
- Cook the Pancakes: Pour about 1/4 cup of the pancake batter onto the skillet for each pancake. Cook until bubbles form on the surface, and the edges look set, about 2-3 minutes. Flip the pancakes and cook for an additional 1-2 minutes on the other side until golden brown. Repeat with the remaining batter, adjusting the heat as necessary.
- Serve: Stack the pancakes on a plate and drizzle with additional dulce de leche. You can also top them with whipped cream, fresh fruit, or nuts for added flavor and texture. Serve warm and enjoy!
Extra Tips
For the best results, make sure your ingredients are at room temperature before starting the recipe, as this helps achieve the perfect pancake texture.
If you don’t have dulce de leche on hand, you can make your own by simmering sweetened condensed milk until it thickens and turns a caramel color.
For a fun twist, consider adding chocolate chips or nuts to the batter, or experimenting with flavored extracts like almond or cinnamon for a unique variation. Enjoy your pancakes fresh off the skillet for the best taste!
Dulce De Leche Macarons
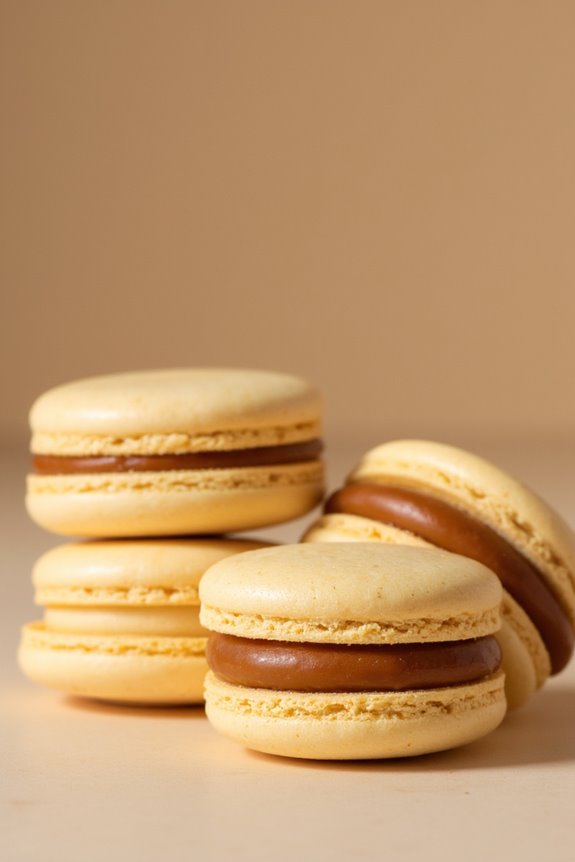
Dulce De Leche Macarons are a delightful fusion of French pastry and Latin American sweetness. These delicate almond meringue cookies are filled with a rich, creamy dulce de leche filling that melts in your mouth. The contrast between the crisp shell and the smooth, luscious filling creates a heavenly treat that’s perfect for special occasions or simply to satisfy your sweet tooth.
With a bit of patience and practice, you can master the art of macaron-making and impress your friends and family with these beautiful confections.
To make these macarons, you’ll need to gather your ingredients and tools. It’s important to use room temperature egg whites for the meringue to achieve the right texture. Additionally, a kitchen scale is recommended for precise measurements, as macaron-making is a delicate process. Once you have everything ready, you’ll be on your way to creating these scrumptious Dulce De Leche Macarons that are bound to be a hit!
Ingredients (Serves 4-6 People)
- 1 cup (100g) almond flour
- 1 ¾ cups (200g) powdered sugar
- 3 large egg whites (room temperature)
- ¼ cup (50g) granulated sugar
- 1 teaspoon vanilla extract
- A pinch of salt
- ½ cup (150g) dulce de leche (store-bought or homemade)
Cooking Instructions
- Prepare Baking Sheets: Preheat your oven to 300°F (150°C). Line two baking sheets with parchment paper or silicone baking mats. This will prevent the macarons from sticking and help them cook evenly.
- Sift Dry Ingredients: In a medium bowl, sift together the almond flour and powdered sugar. This step is vital as it helps to remove any lumps and guarantees a smooth macaron shell. Set aside.
- Whip Egg Whites: In a clean, dry mixing bowl, add the room temperature egg whites and a pinch of salt. Using a stand mixer or handheld mixer, beat the egg whites on medium speed until foamy. Gradually add the granulated sugar and increase the speed to high. Continue beating until stiff peaks form and the mixture is glossy, which should take about 5-7 minutes.
- Combine Mixtures: Once the meringue is ready, gently fold in the sifted almond flour and powdered sugar mixture using a spatula. Be careful not to deflate the meringue too much; you want to achieve a smooth and shiny batter that flows like lava.
- Pipe the Macarons: Transfer the macaron batter to a piping bag fitted with a round tip. Pipe small circles (about 1.5 inches in diameter) onto the prepared baking sheets, leaving space between each one. Tap the baking sheets on the counter a few times to release any air bubbles.
- Rest the Macarons: Let the piped macarons sit at room temperature for 30-60 minutes, or until a skin forms on the surface. This step is essential for achieving the characteristic “foot” of the macaron.
- Bake: Bake the macarons in the preheated oven for 15-18 minutes, or until they’ve risen and formed a solid shell. Keep an eye on them to avoid overbaking. Once done, allow them to cool completely on the baking sheets.
- Fill the Macarons: Once the macaron shells are completely cool, take half of the shells and pipe a small amount of dulce de leche in the center. Place the other half of the shells on top to create sandwiches.
- Mature the Macarons: For the best flavor and texture, place the filled macarons in an airtight container and refrigerate them for at least 24 hours. This allows the flavors to meld together beautifully.
Extra Tips
When making Dulce De Leche Macarons, precision is key. Use a kitchen scale for accurate measurements, as even slight variations can impact the final product.
Additionally, verify that your mixing bowls and equipment are completely grease-free to achieve the perfect meringue. If you can, let the macarons mature in the fridge for a couple of days before serving; this enhances their flavor and texture considerably.
Enjoy experimenting with different flavors and colors for the shells, or try using homemade dulce de leche for a special touch!
Dulce De Leche Lava Cake
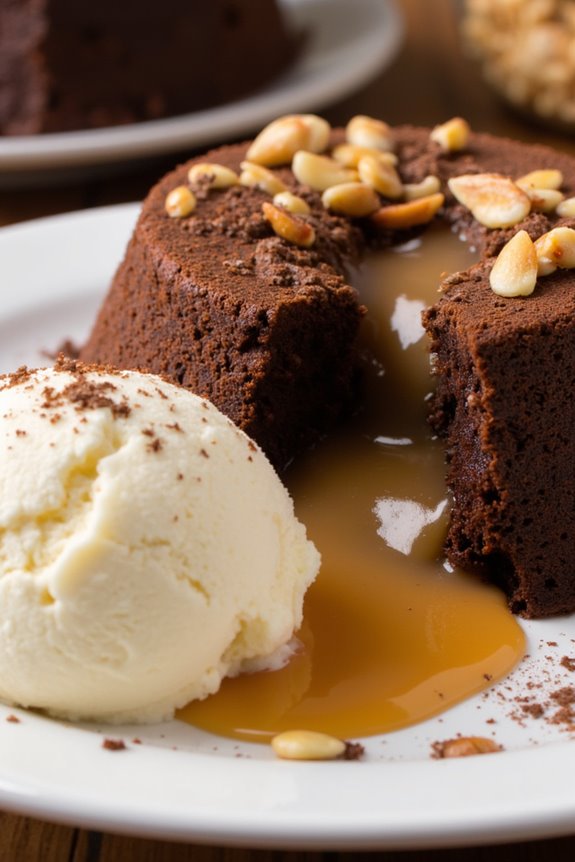
Indulging in a decadent dessert is a delightful experience, and the Dulce De Leche Lava Cake is no exception. This rich and gooey cake is filled with warm dulce de leche that flows out like molten lava when you cut into it. Perfect for impressing guests or simply treating yourself after a long day, this dessert combines the delightful sweetness of caramelized milk with the sophisticated texture of a chocolate cake. The combination of chocolate and dulce de leche creates a symphony of flavors that will leave your taste buds dancing.
Making Dulce De Leche Lava Cake is surprisingly simple, yet it yields a stunning dessert that looks as good as it tastes. With just a few key ingredients and a short baking time, you can create a restaurant-worthy dish right in your own kitchen. Serve it warm with a scoop of vanilla ice cream or a dollop of whipped cream, and watch as everyone falls in love with this irresistible treat.
Ingredients (Serves 4-6)
- 1 cup dulce de leche (plus extra for serving)
- ½ cup unsalted butter
- 1 cup semi-sweet chocolate chips
- 2 large eggs
- 2 large egg yolks
- ½ cup granulated sugar
- 1 teaspoon vanilla extract
- ¼ cup all-purpose flour
- Pinch of salt
- Butter and cocoa powder (for greasing ramekins)
Instructions
- Preheat the Oven: Begin by preheating your oven to 425°F (220°C). This high temperature is crucial for baking the cakes quickly, creating that perfect molten center.
- Prepare the Ramekins: Generously grease four to six ramekins with butter, then dust them with cocoa powder to guarantee the cakes can be easily removed after baking. Set the prepared ramekins aside.
- Melt the Chocolate and Butter: In a medium microwave-safe bowl, combine the unsalted butter and semi-sweet chocolate chips. Microwave in 30-second intervals, stirring after each, until the mixture is completely melted and smooth. Be careful not to overheat it.
- Mix the Wet Ingredients: In a separate bowl, whisk together the eggs, egg yolks, granulated sugar, and vanilla extract until the mixture is light and frothy. This will help incorporate air into the batter, which is essential for a fluffy texture.
- Combine Ingredients: Slowly pour the melted chocolate mixture into the egg mixture, stirring constantly to prevent the eggs from cooking. Once combined, gently fold in the all-purpose flour and a pinch of salt until just incorporated.
- Add Dulce De Leche: Divide half of the cake batter among the prepared ramekins. Next, place a tablespoon of dulce de leche in the center of each ramekin and cover with the remaining batter. Make sure the dulce de leche is completely enclosed by the batter.
- Bake the Cakes: Place the ramekins on a baking sheet and bake in the preheated oven for 12-14 minutes. You want the edges to be set while the center remains soft and gooey. Keep a close eye on them to avoid overbaking.
- Let Them Rest: Once removed from the oven, allow the cakes to cool for 1 minute. This cooling time helps the cakes set slightly and makes them easier to release from the ramekins.
- Serve: Carefully invert each ramekin onto a plate and gently lift it off. Drizzle with extra dulce de leche and serve immediately with your choice of ice cream or whipped cream for a decadent finish.
Extra Tips
For an even richer experience, consider adding a pinch of espresso powder to the chocolate mixture to enhance the flavor profile. Additionally, you can prepare the batter ahead of time and refrigerate it in the ramekins until you’re ready to bake—just remember to increase the baking time slightly if baking from cold.
Finally, if you want to add more texture, sprinkle some crushed nuts or chocolate shavings on top before serving for a delightful crunch. Enjoy your culinary creation!