

As the holiday season nears, my mind fills with the vibrant flavors and traditions that grace South American tables. From the crispy delight of Lechón Asado to the sweet indulgence of Pastel De Tres Leches, each dish has a story to tell. These recipes not only celebrate the season but also bring loved ones together. Curious about the delightful dishes that can brighten your festivities? Let’s explore some culinary treasures that will surely ignite your holiday spirit.
Lechón Asado: A Flavorful Roast Pork

Lechón Asado is a beloved dish in many South American countries, especially during festive occasions like Christmas. This succulent roast pork is characterized by its crispy skin and tender, flavorful meat, often marinated with a blend of spices that reflect the vibrant culinary traditions of the region. The preparation may take some time, but the result is a centerpiece that will impress your family and friends, filling your home with delightful aromas and offering a taste of celebration.
Cooking Lechón Asado involves selecting a good cut of pork, typically a whole suckling pig or pork shoulder, and marinating it overnight to allow the flavors to penetrate deeply. The dish is traditionally cooked slowly, allowing the meat to become tender while achieving a crispy, golden-brown exterior. Pair it with sides such as rice, beans, or plantains, and you have a festive meal that embodies the spirit of South American gatherings.
Ingredients (Serves 4-6):
- 4-5 pounds of pork shoulder or whole suckling pig
- 6 cloves of garlic, minced
- 1 tablespoon of salt
- 1 tablespoon of black pepper
- 1 tablespoon of oregano
- 1 tablespoon of cumin
- 1 cup of sour orange juice (or a mix of orange and lime juice)
- 1/2 cup of olive oil
- 1 onion, chopped
- 2 bay leaves
- 1/2 cup of chopped fresh cilantro (optional, for garnish)
Cooking Instructions:
- Prepare the Marinade: In a large bowl, combine minced garlic, salt, black pepper, oregano, cumin, sour orange juice, and olive oil. Mix well to create a marinade. This blend of spices will infuse the pork with robust flavors.
- Marinate the Pork: Place the pork shoulder in a large, resealable plastic bag or a dish. Pour the marinade over the pork, making sure it’s well coated. Add the chopped onion and bay leaves. Seal the bag or cover the dish and refrigerate for at least 12 hours, preferably overnight, to allow the flavors to fully develop.
- Preheat the Oven: When ready to cook, preheat your oven to 300°F (150°C). Slow cooking at a lower temperature will help tenderize the meat while producing the desired crispy skin.
- Prepare for Roasting: Remove the pork from the marinade, reserving the marinade and aromatics. Place the pork in a roasting pan, skin side up. If using a whole suckling pig, make sure it’s positioned properly in the pan.
- Roast the Pork: Pour the reserved marinade and aromatics over the pork. Cover the roasting pan with aluminum foil and place it in the preheated oven. Roast for about 3-4 hours, basting occasionally with the juices to keep the meat moist.
- Crisp the Skin: After the initial roasting time, remove the foil to allow the skin to crisp up. Increase the oven temperature to 425°F (220°C) and roast for an additional 30-45 minutes, or until the skin is golden brown and crispy. Keep a close eye to avoid burning.
- Rest and Serve: Once the pork is cooked and the skin is crispy, remove it from the oven and let it rest for 15-20 minutes. This resting period allows the juices to redistribute. Slice the pork and serve with your favorite sides, garnished with fresh cilantro if desired.
Extra Tips:
For an even more flavorful Lechón Asado, consider injecting the marinade directly into the meat using a meat injector, making sure that every bite is seasoned perfectly.
Additionally, if you have access to a grill, cooking the pork over indirect heat can impart a smoky flavor that enhances the dish. Always monitor the internal temperature; the pork should reach at least 190°F (88°C) for peak tenderness. Enjoy your festive feast!
Panettone: the Italian Christmas Bread With a South American Twist
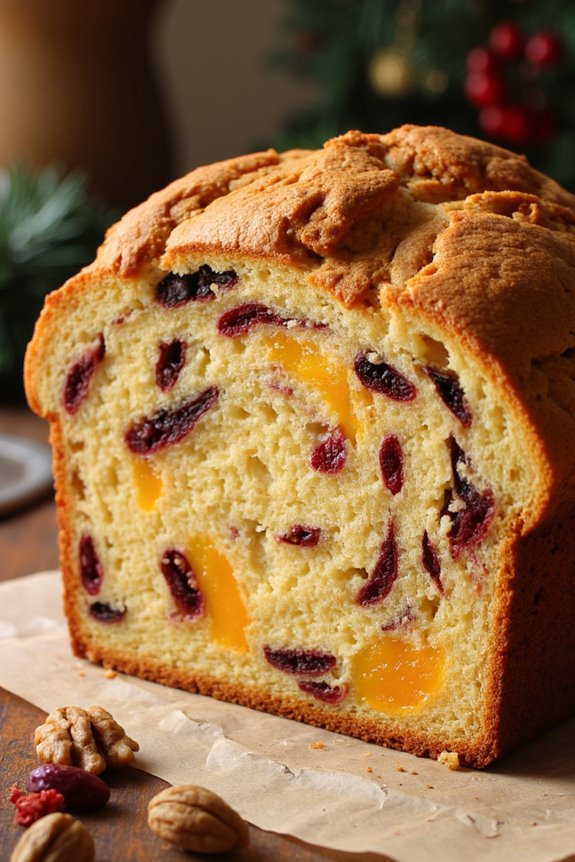
Panettone is a beloved Italian Christmas bread that has captured hearts around the world, and its presence is particularly cherished in South America. This sweet, fluffy bread is traditionally filled with candied fruits and raisins, but in South America, it receives a delightful twist with the addition of local flavors and ingredients. The result is a unique holiday treat that blends the rich Italian heritage with the vibrant tastes of South America, making it a perfect centerpiece for festive gatherings.
Making panettone at home can seem intimidating, but with a little patience and love, you can create a delicious loaf that embodies the spirit of the holiday season. This recipe will guide you through each step, ensuring that your panettone is light, airy, and bursting with flavors that reflect a blend of Italian and South American traditions.
Ingredients (Serves 4-6):
- 4 cups all-purpose flour
- 1 cup granulated sugar
- 1 teaspoon salt
- 1 packet (2 ¼ teaspoons) active dry yeast
- ½ cup warm milk (110°F/43°C)
- ½ cup unsalted butter, softened
- 3 large eggs
- 1 teaspoon vanilla extract
- 1 teaspoon orange zest
- ½ cup dried cranberries
- ½ cup chopped dried mango
- ½ cup candied orange peel
- ½ cup chopped walnuts
- 1 egg (for egg wash)
Cooking Instructions:
- Activate the Yeast: In a small bowl, combine the warm milk and active dry yeast. Let it sit for about 5-10 minutes until it becomes frothy. This indicates that the yeast is active and ready to help your bread rise.
- Mix the Dry Ingredients: In a large mixing bowl, whisk together the flour, sugar, and salt. Make a well in the center of the mixture to prepare for the wet ingredients.
- Combine Wet Ingredients: In a separate bowl, whisk the eggs, softened butter, vanilla extract, and orange zest until well combined. Pour this mixture into the well of the dry ingredients along with the activated yeast.
- Knead the Dough: Mix the ingredients together until they form a dough. Transfer the dough onto a lightly floured surface and knead for about 10 minutes, until it’s smooth and elastic. If the dough is too sticky, add a small amount of flour as needed.
- First Rise: Place the kneaded dough in a lightly greased bowl, cover it with a damp cloth, and let it rise in a warm place for about 1-2 hours, or until it has doubled in size.
- Add Fruits and Nuts: Once the dough has risen, gently punch it down to release air. Fold in the dried cranberries, chopped dried mango, candied orange peel, and walnuts evenly throughout the dough.
- Shape the Dough: Shape the dough into a ball and place it into a greased panettone mold or a high-sided cake pan. Cover it again with the damp cloth and let it rise for another hour.
- Preheat the Oven: During the final rise, preheat your oven to 350°F (175°C).
- Egg Wash and Bake: Brush the top of the dough with the beaten egg for a golden finish. Bake in the preheated oven for about 40-50 minutes, or until the top is golden brown and a toothpick inserted into the center comes out clean.
- Cool and Serve: Once baked, remove the panettone from the oven and let it cool in the mold for about 15 minutes before transferring it to a wire rack to cool completely. Slice and serve, enjoying the festive flavors.
Extra Tips:
When making panettone, patience is key. Allowing the dough to rise adequately will result in a light and airy texture.
If you want to add a South American flair, consider incorporating spices like cinnamon or nutmeg, or even a splash of rum to enhance the flavor.
Store any leftover panettone in an airtight container to keep it fresh, and it can also be enjoyed toasted with a spread of butter or jam the next day. Happy baking!
Ajiaco: Hearty Chicken and Potato Soup
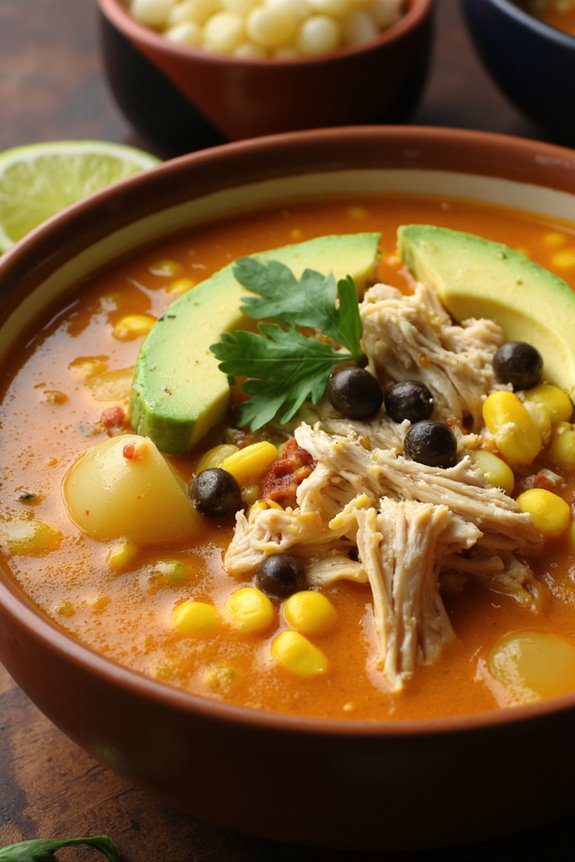
Ajiaco is a beloved dish originating from Colombia, celebrated for its comforting and hearty qualities, making it a perfect addition to any festive gathering. This flavorful chicken and potato soup isn’t just a meal; it’s an experience that brings families together, with its warm aroma and rich taste filling the air.
Traditionally, Ajiaco is prepared with a variety of potatoes and garnished with fresh herbs, creating a delightful combination that’s both satisfying and nourishing.
The beauty of Ajiaco lies in its simplicity and the quality of its ingredients. As you simmer the chicken with potatoes and corn, the flavors meld together, resulting in a creamy, savory broth that warms the soul. This dish can be customized with various toppings like avocado, capers, and cream, allowing each diner to personalize their bowl.
Perfect for holiday celebrations or cozy family dinners, Ajiaco is sure to impress your guests with its rich heritage and delicious taste.
Ingredients (Serves 4-6):
- 1 pound of chicken breast (boneless and skinless)
- 1 pound of chicken thighs (boneless and skinless)
- 6 cups of water
- 4 medium potatoes (preferably a mix of russet and yellow potatoes)
- 2 ears of corn (cut into thirds)
- 1 medium onion (chopped)
- 2 garlic cloves (minced)
- 1 cup of fresh cilantro (chopped)
- 1 teaspoon of salt (to taste)
- 1 teaspoon of black pepper (to taste)
- 1 cup of heavy cream (optional)
- 1 cup of capers (optional for garnish)
- 1 avocado (sliced, for garnish)
- 2 limes (cut into wedges for serving)
Cooking Instructions:
- Prepare the Chicken: In a large pot, combine the chicken breasts and thighs with 6 cups of water. Bring to a boil over medium-high heat, then reduce the heat to a simmer. Cook for about 25-30 minutes or until the chicken is cooked through. Once done, remove the chicken from the pot and set aside to cool. Reserve the broth.
- Cook the Vegetables: In the same pot with the reserved broth, add the chopped onion and minced garlic. Simmer for 5 minutes until the onion becomes translucent. Then, peel and chop the potatoes into bite-sized pieces and add them to the pot along with the corn. Continue to simmer for another 20 minutes, or until the potatoes are tender.
- Shred the Chicken: While the potatoes are cooking, shred the cooled chicken into bite-sized pieces using two forks. Once the potatoes are tender, return the shredded chicken to the pot.
- Season the Soup: Stir in the chopped cilantro, salt, and black pepper. Allow the soup to simmer for an additional 10 minutes, letting the flavors meld together.
- Serve: Ladle the Ajiaco into bowls and garnish with slices of avocado, a dollop of heavy cream, and capers if desired. Serve with lime wedges on the side for an extra burst of flavor.
Extra Tips:
For an authentic taste, consider using different varieties of potatoes, such as papa criolla, which gives the soup a unique texture and flavor.
Additionally, the garnishes are key to elevating your Ajiaco; don’t skip the avocado and cream, as they add a wonderful richness to the dish. If you prefer a spicier kick, feel free to add some diced jalapeños or a sprinkle of chili flakes.
Finally, Ajiaco can be made ahead of time and reheats beautifully, making it a convenient option for holiday gatherings.
Pastel De Tres Leches: a Moist Milk Cake
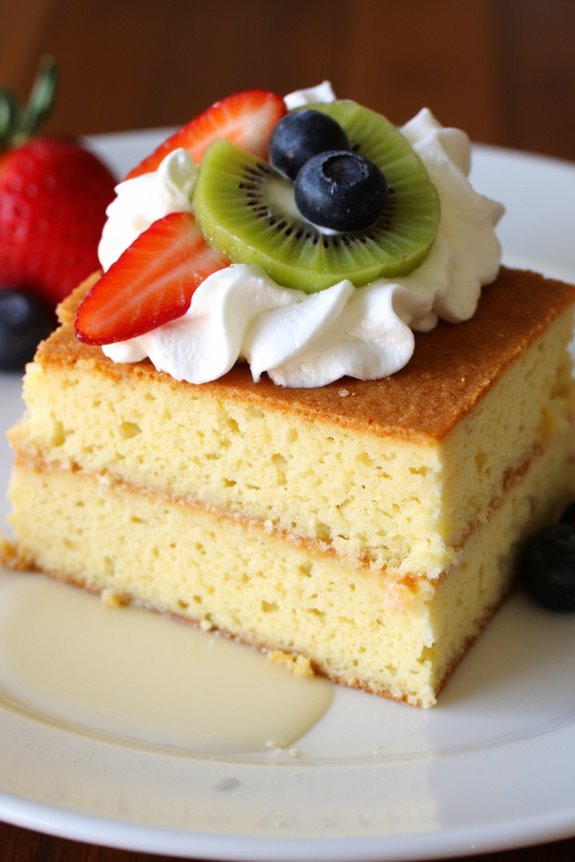
Pastel De Tres Leches, or Three Milk Cake, is a beloved dessert in many South American countries, particularly in Mexico and Venezuela. This indulgent cake is known for its ultra-moist texture, achieved by soaking the sponge cake in a mixture of three types of milk: evaporated milk, condensed milk, and heavy cream. The result is a sweet, creamy dessert that’s perfect for festive occasions, including Christmas celebrations.
The cake is often topped with whipped cream and fresh fruits, making it a delightful centerpiece for any holiday table.
Making Pastel De Tres Leches is a rewarding experience, as it requires a few simple ingredients and techniques. The key to a successful tres leches cake lies in the soaking process, which allows the cake to absorb the milks and become incredibly moist. With a few hours of prep and chilling time, you can create a stunning dessert that will impress your family and friends.
Ingredients (serving size: 4-6 people)
- 1 cup all-purpose flour
- 1 ½ teaspoons baking powder
- ¼ teaspoon salt
- 5 large eggs, separated
- 1 cup granulated sugar, divided
- 1 teaspoon vanilla extract
- ½ cup whole milk
- 1 can (12 oz) evaporated milk
- 1 can (14 oz) sweetened condensed milk
- 1 cup heavy cream
- Fresh fruit (for topping, optional)
- Whipped cream (for topping, optional)
Cooking Instructions
- Prepare the Cake Batter: Preheat your oven to 350°F (175°C). In a medium bowl, whisk together the all-purpose flour, baking powder, and salt. In a separate large bowl, beat the egg yolks with ¾ cup of the granulated sugar until the mixture is pale and fluffy. Stir in the vanilla extract and whole milk until combined.
- Combine Wet and Dry Ingredients: Gently fold the flour mixture into the egg yolk mixture until just combined. Be careful not to overmix, as this can lead to a dense cake. In another bowl, beat the egg whites until soft peaks form. Gradually add the remaining ¼ cup of granulated sugar and continue to beat until stiff peaks form.
- Fold in Egg Whites: Carefully fold the egg whites into the batter in three additions, ensuring that you maintain the airiness of the mixture. Pour the batter into a greased 9×13-inch baking dish, smoothing the top with a spatula.
- Bake the Cake: Bake in the preheated oven for 25-30 minutes or until a toothpick inserted in the center comes out clean. Allow the cake to cool in the pan for about 10 minutes, then transfer it to a wire rack to cool completely.
- Prepare the Milk Mixture: In a mixing bowl, combine the evaporated milk, sweetened condensed milk, and heavy cream. Whisk until well blended.
- Soak the Cake: Once the cake has cooled, use a fork or skewer to poke holes all over the surface. Slowly pour the milk mixture over the cake, ensuring it’s evenly soaked. Allow the cake to absorb the milks in the refrigerator for at least 2 hours, or overnight for best results.
- Top and Serve: Before serving, whip the heavy cream until soft peaks form. Spread the whipped cream over the top of the soaked cake. Garnish with fresh fruit if desired. Cut into squares and enjoy!
Extra Tips
When making Pastel De Tres Leches, patience is key. Allowing the cake to soak in the milk mixture for a longer period will elevate its moistness and flavor.
If you want to add a hint of sophistication, consider infusing the milk mixture with flavors like cinnamon or vanilla bean. Additionally, feel free to experiment with different toppings, such as toasted coconut or chocolate shavings, to customize your cake for your festive table.
Enjoy the delightful flavors and textures that this traditional dessert brings to your holiday celebrations!
Tamales: Traditional Corn Dough Treats
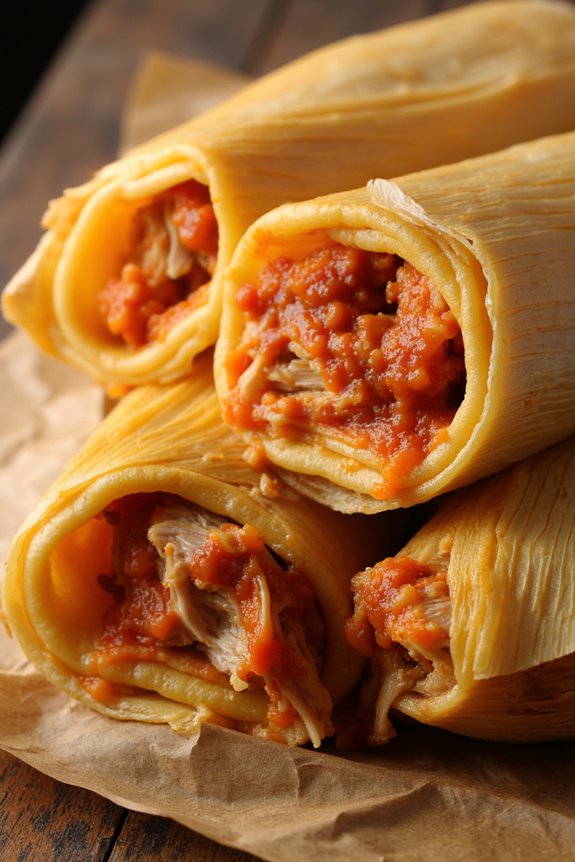
Tamales are a cherished traditional dish in many South American countries, particularly during festive seasons like Christmas. These delicious treats consist of masa (corn dough) filled with a variety of ingredients, wrapped in corn husks, and steamed to perfection. The process of making tamales is often a communal activity, where family and friends come together to prepare and enjoy the festive spirit.
Each bite of a tamale delivers a burst of flavors, making it a beloved holiday staple that embodies the warmth and joy of celebrations. The beauty of tamales lies in their versatility; you can fill them with meats, cheeses, vegetables, or even sweet ingredients.
While the preparation can be a bit labor-intensive, the result is well worth the effort. Whether you choose to make them savory or sweet, tamales are sure to be a hit at your holiday gatherings. This recipe will guide you through creating a traditional tamale filling with a delicious red chili sauce, providing a hearty and flavorful dish that serves 4-6 people.
Ingredients (Serves 4-6 People)
- 2 cups masa harina (corn flour)
- 1 cup chicken broth (or vegetable broth for vegetarian option)
- 1/2 cup lard or vegetable shortening
- 1 teaspoon baking powder
- 1/2 teaspoon salt
- 2 cups cooked and shredded chicken (or filling of choice)
- 1 cup red chili sauce (homemade or store-bought)
- 12-15 dried corn husks (soaked in warm water for 30 minutes)
Cooking Instructions
- Prepare the Corn Husks: Start by soaking the dried corn husks in warm water for about 30 minutes until they become pliable. This will prevent them from cracking when you wrap the tamales. After soaking, drain and lay them flat.
- Make the Masa Dough: In a large mixing bowl, combine the masa harina, baking powder, and salt. In another bowl, beat the lard (or vegetable shortening) until fluffy. Gradually add the dry mixture to the lard, alternating with chicken broth, until you have a smooth and spreadable dough.
- Prepare the Filling: In a separate bowl, mix the shredded chicken with the red chili sauce. You can adjust the amount of sauce according to your taste preference. Make sure the filling is well-combined and flavorful.
- Assemble the Tamales: Take a soaked corn husk and spread about 2 tablespoons of masa dough onto the wide end of the husk, leaving a border on the sides and bottom. Place about 1-2 tablespoons of the chicken filling in the center of the masa. Fold the sides of the husk over the filling, then fold up the bottom to secure the tamale. Repeat this process with the remaining husks, masa, and filling.
- Steam the Tamales: Set up a steamer pot filled with water and bring it to a simmer. Arrange the tamales upright in the steamer basket, with the open end facing up. Cover the tamales with a damp cloth and steam for about 1 to 1.5 hours, or until the masa easily pulls away from the husk.
- Serve: Once cooked, remove the tamales from the steamer and let them cool slightly. Serve warm with additional red chili sauce or your favorite salsa.
Extra Tips
When making tamales, it’s essential to ascertain that your masa is well-aerated, as this will contribute to a light and fluffy texture. If you find that the masa is too dry, add a little more broth or water until you reach the desired consistency.
Additionally, experimenting with different fillings can elevate your tamale game; consider using cheese with jalapeños, sweet corn, or even dessert fillings like chocolate or fruit for a unique twist. Enjoy the process and the delicious results!
Pavo Relleno: Stuffed Thanksgiving Turkey

Pavo Relleno, or stuffed turkey, is a cherished dish in many South American countries during festive occasions like Christmas and Thanksgiving. This succulent turkey isn’t only a centerpiece for the dinner table but also a symbol of family gatherings and celebrations.
The turkey is typically filled with a delightful mixture of seasoned bread, vegetables, and sometimes even fruits or nuts, merging flavors that are both rich and comforting. Each family may have its unique twist on the stuffing, making it a versatile dish that reflects personal tastes and regional ingredients.
Cooking a Pavo Relleno can seem intimidating, but with proper preparation and the right ingredients, it can be a gratifying experience. The key to a successful turkey is making sure it’s seasoned well and cooked to perfection so that it remains juicy and flavorful.
Pair it with traditional sides like mashed potatoes or a fresh salad, and you’ll have a festive feast that brings everyone together. So let’s jump into this delightful recipe that will make your holiday meal unforgettable.
Ingredients (Serves 4-6):
- 1 whole turkey (about 10-12 lbs)
- 2 cups bread crumbs
- 1 cup cooked rice
- 1 onion, finely chopped
- 2 cloves garlic, minced
- 1/2 cup green bell pepper, finely chopped
- 1/2 cup carrots, finely chopped
- 1/2 cup raisins or dried apricots, chopped
- 1/2 cup almonds or walnuts, chopped
- 1/4 cup fresh parsley, chopped
- 1 teaspoon ground cumin
- 1 teaspoon paprika
- Salt and pepper to taste
- 1 cup chicken broth
- 1/4 cup olive oil
- 1 tablespoon butter
- 2 tablespoons soy sauce
- Fresh herbs (rosemary, thyme) for garnish
Cooking Instructions:
1. Preheat the Oven: Begin by preheating your oven to 350°F (175°C). This guarantees that your turkey will cook evenly and thoroughly once it’s placed inside.
2. Prepare the Stuffing: In a large skillet, heat the olive oil over medium heat. Add the chopped onions, garlic, green bell pepper, and carrots, sautéing until softened (about 5-7 minutes).
Stir in the bread crumbs, cooked rice, raisins or apricots, nuts, parsley, cumin, paprika, salt, and pepper. Pour in the chicken broth, mixing until the ingredients are well combined. Remove from heat and allow to cool slightly.
3. Stuff the Turkey: Rinse the turkey inside and out under cold water, then pat dry with paper towels. Season the cavity with salt and pepper.
Gently fill the cavity with the prepared stuffing, being careful not to overstuff, as the stuffing will expand during cooking.
4. Prepare the Turkey for Roasting: Tie the legs together with kitchen twine and tuck the wings under the body. Rub the outside of the turkey with softened butter and drizzle with soy sauce.
This will help create a golden, crispy skin while adding flavor.
5. Roast the Turkey: Place the turkey breast side up in a roasting pan. Cover it loosely with aluminum foil to prevent it from browning too quickly.
Roast in the preheated oven for about 2.5 to 3 hours, or until the internal temperature reaches 165°F (75°C). Remove the foil during the last 30 minutes to allow the skin to brown.
6. Rest and Serve: Once cooked, remove the turkey from the oven and let it rest for 20-30 minutes before carving.
This allows the juices to redistribute throughout the meat, making sure for a moist turkey. Serve with your favorite sides and enjoy!
Extra Tips:
When making Pavo Relleno, it’s important to make sure the turkey is completely thawed if frozen, as this affects cooking times and safety.
For added moisture and flavor, consider brining the turkey overnight before cooking. Additionally, feel free to customize the stuffing with your favorite ingredients, such as different nuts or spices, to make it your own.
Empanadas: Savory Pastry Pockets

Empanadas are a beloved dish across South America, known for their flaky pastry and delightful fillings. These savory pockets can be prepared with a variety of ingredients, making them a versatile choice for any festive occasion, especially during Christmas celebrations.
Whether you prefer a filling of seasoned beef, chicken, or vegetables, empanadas are sure to be a hit at your holiday gatherings. Their delicious flavor and convenient hand-held form make them perfect for sharing with family and friends.
Making empanadas may seem intimidating at first, but with a little practice, you’ll be whipping up these tasty treats in no time. The dough is easy to prepare and can be filled with your choice of ingredients. Once baked or fried to golden perfection, these empanadas will become a cherished part of your holiday traditions.
Follow this recipe for a delightful batch that will serve 4-6 people.
Ingredients:
- 2 cups all-purpose flour
- 1/2 cup unsalted butter, chilled and diced
- 1/2 teaspoon salt
- 1/4 cup cold water
- 1 pound ground beef (or chicken)
- 1 small onion, finely chopped
- 1/2 bell pepper, finely chopped
- 2 cloves garlic, minced
- 1 teaspoon cumin
- 1 teaspoon paprika
- Salt and pepper to taste
- 1 egg, beaten (for egg wash)
- Oil for frying (if frying)
Cooking Instructions:
- Prepare the Dough: In a large mixing bowl, combine the flour and salt. Add the chilled, diced butter and mix until the mixture resembles coarse crumbs. Gradually add the cold water, mixing until the dough comes together. Knead for a few minutes until smooth, then wrap in plastic wrap and refrigerate for at least 30 minutes.
- Cook the Filling: In a skillet over medium heat, add a drizzle of oil and sauté the onion and bell pepper until softened, about 5 minutes. Add the minced garlic and cook for an additional minute. Stir in the ground beef (or chicken), cumin, paprika, salt, and pepper. Cook until the meat is browned and fully cooked through. Remove from heat and let cool.
- Roll Out the Dough: Once the dough has chilled, remove it from the refrigerator and divide it into smaller portions. Roll out each portion on a floured surface until it’s about 1/8 inch thick. Use a round cutter (or a glass) to cut out circles of dough, approximately 4-6 inches in diameter.
- Fill the Empanadas: Place a tablespoon of the meat filling in the center of each dough circle. Be careful not to overfill. Fold the dough over to create a half-moon shape and press the edges together to seal. You can crimp the edges with a fork for a decorative touch.
- Cook the Empanadas: If baking, preheat the oven to 375°F (190°C) and place the empanadas on a baking sheet lined with parchment paper. Brush the tops with the beaten egg to give them a golden color. Bake for 25-30 minutes or until golden brown. If frying, heat oil in a deep skillet and fry the empanadas in batches until golden brown on both sides, about 3-4 minutes per side. Drain on paper towels.
- Serve and Enjoy: Let the empanadas cool slightly before serving. They can be enjoyed warm or at room temperature, making them perfect for parties and gatherings.
Extra Tips:
When making empanadas, feel free to experiment with different fillings such as cheese, spinach, or lentils for a vegetarian option. If you’re short on time, you can also use store-bought dough for a quicker preparation.
For added flavor, consider incorporating herbs like oregano or cilantro into your filling. Finally, serve your empanadas with a side of chimichurri sauce or salsa for an extra kick!
Arroz Con Pollo: Chicken and Rice Delight

Arroz Con Pollo, translating to “Rice with Chicken,” is a traditional South American dish that brings warmth and comfort to any festive gathering, especially during Christmas celebrations. This colorful and flavorful meal combines tender chicken with rice, vibrant vegetables, and a medley of spices, creating a dish that’s both satisfying and visually appealing.
The marriage of saffron or achiote gives the rice a delightful golden hue, while the addition of peas and bell peppers adds a pop of color and flavor.
Cooking Arroz Con Pollo isn’t only about the wonderful ingredients but also about the technique. The key is to allow the chicken to marinate for a while, ensuring it absorbs all the delicious flavors before cooking. This dish is typically served with a side of avocado or a fresh salad, making it a complete meal perfect for any festive occasion. Gather your loved ones around the table and enjoy this traditional dish that boasts both heritage and heart.
Ingredients (Serves 4-6):
- 4 chicken thighs, bone-in and skin-on
- 2 cups of long-grain rice
- 1 medium onion, finely chopped
- 1 red bell pepper, diced
- 1 green bell pepper, diced
- 4 garlic cloves, minced
- 1 cup peas (fresh or frozen)
- 4 cups chicken broth
- 1 teaspoon saffron or achiote powder
- 2 tablespoons olive oil
- 1 teaspoon cumin
- 1 teaspoon paprika
- Salt and pepper to taste
- Fresh cilantro for garnish
- Lemon wedges for serving
Cooking Instructions:
- Marinate the Chicken: In a large bowl, season the chicken thighs with salt, pepper, cumin, and paprika. Allow them to marinate for at least 30 minutes at room temperature (or refrigerate for a few hours if you have time). This process helps infuse the chicken with flavor.
- Sear the Chicken: In a large, deep skillet or Dutch oven, heat the olive oil over medium-high heat. Add the marinated chicken thighs, skin-side down, and sear until golden brown, about 5-7 minutes on each side. This step locks in the juices and adds a delicious crust to the chicken.
- Sauté the Vegetables: Remove the chicken from the skillet and set aside. In the same skillet, add the chopped onion, diced red and green bell peppers, and minced garlic. Sauté for about 5 minutes until the vegetables are softened and fragrant.
- Add Rice and Spices: Stir in the rice, saffron (or achiote), and salt. Cook for 1-2 minutes, allowing the rice to toast slightly and absorb the flavors from the vegetables.
- Combine Chicken and Broth: Return the seared chicken to the skillet, and pour in the chicken broth. Bring the mixture to a boil, then reduce the heat to low. Cover the skillet and let it simmer for about 20-25 minutes, or until the rice is cooked and has absorbed most of the liquid.
- Add Peas: In the last 5 minutes of cooking, sprinkle the peas over the top of the rice and chicken. Cover again and allow the residual heat to cook the peas without making them mushy.
- Fluff and Serve: Once cooked, remove the skillet from heat and let it sit covered for an additional 5 minutes. Fluff the rice gently with a fork and garnish with fresh cilantro. Serve with lemon wedges on the side for an extra burst of flavor.
Extra Tips:
For an added depth of flavor, consider adding some chopped olives or capers to the dish during the sautéing of the vegetables. If you prefer a bit of heat, add some diced jalapeños or a pinch of cayenne pepper.
Always taste the broth before adding additional salt, as store-bought chicken broth can vary in saltiness. Leftovers can be stored in the refrigerator and taste even better the next day, as the flavors continue to develop. Enjoy your festive feast!
Buñuelos: Sweet Fried Dough Balls

Buñuelos are a delightful South American treat often enjoyed during the Christmas season. These sweet fried dough balls are crispy on the outside and soft on the inside, making them a perfect dessert to share with family and friends during festive gatherings. Their light and airy texture, combined with a sprinkle of sugar or drizzle of syrup, makes them an irresistible addition to any holiday table.
Traditionally, buñuelos can be flavored with various ingredients, including cinnamon, orange zest, or anise, depending on the region. They’re typically served warm and can be accompanied by a sweet syrup or a dusting of powdered sugar. Making buñuelos is a fun and engaging activity that brings people together, perfect for celebrating the spirit of the season.
Ingredients (serving size: 4-6 people):
- 2 cups all-purpose flour
- 1 tablespoon baking powder
- 1/2 teaspoon salt
- 2 tablespoons sugar
- 1/2 teaspoon ground cinnamon (optional)
- 1/2 cup milk
- 2 large eggs
- 1 tablespoon butter, melted
- Oil for frying
- Powdered sugar for dusting (optional)
Cooking Instructions:
- Prepare the Dough: In a large mixing bowl, combine the all-purpose flour, baking powder, salt, sugar, and ground cinnamon (if using). Whisk the dry ingredients together until well combined.
- Mix Wet Ingredients: In another bowl, whisk together the milk, eggs, and melted butter until smooth. This mixture will provide moisture to the dough and help bind the ingredients together.
- Combine Mixtures: Gradually add the wet mixture to the dry ingredients, stirring until a soft dough forms. If the dough is too sticky, add a bit more flour; if it’s too dry, add a little more milk.
- Knead the Dough: Lightly flour a clean surface and turn the dough out onto it. Knead the dough gently for about 2-3 minutes until it becomes smooth and elastic. Let it rest for about 10-15 minutes, covered with a clean cloth to prevent it from drying out.
- Shape the Buñuelos: Divide the dough into small balls, about the size of a golf ball. Flatten each ball slightly with your hands to form discs.
- Heat Oil: In a deep frying pan or pot, heat about 2 inches of oil over medium heat. To test if the oil is hot enough, drop a small piece of dough into it; if it sizzles and rises to the surface, the oil is ready.
- Fry the Buñuelos: Carefully place a few discs of dough into the hot oil, being careful not to overcrowd the pan. Fry them for about 2-3 minutes on each side, or until they turn golden brown. Use a slotted spoon to remove them from the oil and drain on paper towels.
- Serve: Once all the buñuelos are fried, dust them with powdered sugar or drizzle with syrup if desired. Serve warm for the best experience.
Extra Tips: To enhance the flavor of your buñuelos, consider adding a splash of vanilla extract to the wet ingredients. You can also experiment with different spices such as nutmeg or cardamom for a unique twist. For a fun presentation, serve them with a side of chocolate or caramel sauce for dipping. Enjoy your buñuelos fresh for the best texture, but they can be stored in an airtight container for a day or two if needed.
Chocotorta: No-Bake Chocolate Cake

Chocotorta is a beloved dessert from Argentina that has become a staple at festive gatherings, particularly during Christmas. This no-bake chocolate cake is incredibly easy to prepare and consists of just a few simple ingredients, making it perfect for busy holiday schedules.
The combination of chocolate cookies and creamy filling creates a delightful treat that’s sure to impress your guests. Its rich and indulgent flavors make it a favorite among both children and adults.
The beauty of Chocotorta lies in its versatility. You can personalize it with various toppings or layers, allowing you to make it your own. Traditionally, it’s made with “Chocolinas,” a type of chocolate cookie, but you can use any chocolate wafer or biscuit that you prefer.
The cake is chilled to set, which enhances the flavors and gives it a lovely texture. Serve it cold, and watch as everyone goes back for seconds!
Ingredients (Serves 4-6):
- 2 packages of chocolate cookies (about 400g)
- 2 cups of cream cheese
- 1 cup of dulce de leche
- 1 cup of milk (for dipping cookies)
- 1 teaspoon of vanilla extract
- Cocoa powder (for dusting)
Cooking Instructions:
1. Prepare the Filling: In a mixing bowl, combine the cream cheese and dulce de leche. Use a hand mixer or a whisk to blend them together until smooth and creamy. Make sure there are no lumps, and the mixture is well combined.
Add the vanilla extract and mix once more to incorporate it evenly.
2. Dip the Cookies: Pour the milk into a shallow dish. Take each chocolate cookie and quickly dip it into the milk, ensuring that it’s moistened but not overly soggy.
This step is essential, as it will help soften the cookies and create a cohesive texture in the final cake.
3. Layer the Cake: In a rectangular or square serving dish, start layering the ingredients. Begin with a layer of dipped cookies at the bottom.
Follow this with a generous layer of the cream cheese and dulce de leche mixture. Use a spatula to spread it evenly.
Repeat this process, alternating between layers of dipped cookies and the filling, until you have used all the cookies and filling, finishing with a layer of the cream mixture on top.
4. Chill the Cake: Once all layers are assembled, cover the dish with plastic wrap or aluminum foil. Place the Chocotorta in the refrigerator and let it chill for at least 4 hours, or overnight if possible.
Chilling allows the flavors to meld and the cake to set properly.
5. Serve and Garnish: After chilling, remove the Chocotorta from the refrigerator. Dust the top lightly with cocoa powder for a decorative touch.
Slice into squares or rectangles and serve cold. Enjoy the rich, creamy goodness with family and friends!
Extra Tips:
For added flavor, consider including a layer of crushed nuts or grated chocolate between the layers of the Chocotorta.
You can also experiment with different flavored creams, such as adding a hint of coffee or orange zest to the filling.
If you prefer a less rich dessert, you can substitute half of the cream cheese with Greek yogurt for a lighter version.
Always remember to keep the Chocotorta refrigerated until serving to maintain its perfect texture!
Vino Caliente: Warm Spiced Wine

Vino Caliente, or Warm Spiced Wine, is a beloved festive drink across South America, especially during the holiday season. This comforting beverage combines red wine with a medley of warm spices and citrus, making it a popular choice for gatherings and celebrations. The delightful aroma of cloves, cinnamon, and orange fills the air, creating a cozy atmosphere perfect for winter evenings.
This drink not only warms you up but also brings a sense of togetherness as friends and family share in its enjoyment.
Preparing Vino Caliente is a simple process that allows for customization according to taste. You can adjust the sweetness by adding more sugar or honey, or you can enhance the spiciness by increasing the amount of cinnamon or nutmeg. Serve this delightful concoction in heatproof glasses or mugs, garnished with a slice of orange or a cinnamon stick for an extra festive touch.
Whether you’re enjoying it by the fireplace or at a holiday party, Vino Caliente is sure to be a hit among your guests.
Ingredients (Serves 4-6):
- 1 bottle (750 ml) of red wine (preferably Cabernet Sauvignon or Merlot)
- 1/2 cup of sugar (or to taste)
- 1 orange, sliced
- 1 lemon, sliced
- 2-3 whole cinnamon sticks
- 5-6 whole cloves
- 1-2 star anise (optional)
- 1/4 cup of brandy (optional)
- Fresh cranberries or additional orange slices for garnish (optional)
Cooking Instructions:
- Prepare the Wine Base: In a large saucepan or pot, pour the entire bottle of red wine. Choose a pot that can hold all the ingredients comfortably without overflowing as it heats.
- Add Sweetness and Citrus: Stir in the sugar to the wine, allowing it to dissolve as you gently heat the mixture. Add the sliced orange and lemon to infuse their flavors into the wine.
- Incorporate Spices: Add the whole cinnamon sticks, cloves, and star anise if using, to the pot. These spices will lend their warm, aromatic flavors to the wine, enhancing the holiday spirit.
- Heat Gently: Place the pot over medium heat and warm the mixture slowly. Avoid boiling, as high heat can evaporate the alcohol and alter the flavors. Stir occasionally to help dissolve the sugar and distribute the spices.
- Add Brandy (optional): If you choose to include brandy, add it to the mixture once the wine is warmed through. This adds an extra depth of flavor and can elevate the drink even further.
- Taste and Adjust: After about 10-15 minutes of gentle heating, taste the Vino Caliente. Adjust the sweetness by adding more sugar if desired, and let it simmer for a few more minutes if you want a stronger infusion of spices.
- Serve: Once the wine is warmed to your liking and the flavors have melded beautifully, remove it from the heat. Strain out the spices and citrus slices if preferred, or serve it directly with the additions for a rustic touch. Ladle the warm wine into heatproof glasses or mugs.
- Garnish and Enjoy: Garnish with fresh cranberries or an additional slice of orange for a festive presentation. Serve immediately and enjoy the warming flavors of this traditional South American holiday drink.
Extra Tips:
When preparing Vino Caliente, feel free to experiment with different spices according to your preferences. Some people enjoy adding ginger or nutmeg for an extra kick.
If you’re serving a larger crowd, simply scale up the ingredients proportionately. Additionally, this drink can be made ahead of time and gently reheated before serving; just be cautious not to bring it to a boil again to preserve the flavors.
Enjoy your festive gatherings with this delightful addition!
Alfajores: Sweet Sandwich Cookies

Alfajores are a delightful treat that hails from South America, particularly popular in countries like Argentina, Peru, and Uruguay. These sweet sandwich cookies consist of two tender, crumbly cookies filled with a luscious layer of dulce de leche, often rolled in coconut or sprinkled with powdered sugar. The combination of flavors and textures makes alfajores a festive addition to any holiday celebration, offering a taste of South American tradition that’s bound to impress your guests.
Making alfajores at home is a rewarding process that fills your kitchen with the sweet aroma of vanilla and butter. While they might seem intricate, the steps are quite straightforward, and once you’ve mastered the technique, you’ll find yourself making these delectable cookies for every occasion.
Perfect for gifting or serving at holiday gatherings, alfajores aren’t just a dessert; they’re a piece of culture that captures the spirit of celebration in every bite.
Ingredients (Serves 4-6 people):
- 1 cup unsalted butter, softened
- 1 cup granulated sugar
- 2 large egg yolks
- 1 teaspoon vanilla extract
- 2 cups all-purpose flour
- 1 cup cornstarch
- 1 teaspoon baking powder
- 1 cup dulce de leche
- ½ cup shredded coconut (for rolling, optional)
- Powdered sugar (for dusting, optional)
Cooking Instructions:
- Cream the Butter and Sugar: In a large mixing bowl, beat the softened butter and granulated sugar together until light and fluffy. This process usually takes about 3-5 minutes with an electric mixer. The air incorporated into the butter will help create a tender texture in the cookies.
- Add Egg Yolks and Vanilla: Once the butter and sugar mixture is fluffy, add the egg yolks and vanilla extract. Mix until well combined. The egg yolks will enrich the dough and give it a beautiful yellow hue.
- Combine Dry Ingredients: In a separate bowl, sift together the all-purpose flour, cornstarch, and baking powder. Sifting guarantees that there are no lumps and helps to aerate the flour, which is important for the cookie’s lightness.
- Create the Dough: Gradually add the dry mixture to the butter mixture, stirring until just combined. Be careful not to overmix; stop as soon as there are no visible dry ingredients. The dough should be soft and slightly sticky.
- Chill the Dough: Divide the dough into two portions and wrap each in plastic wrap. Refrigerate for at least 1 hour. Chilling helps the dough firm up, making it easier to roll out and cut into shapes.
- Roll and Cut the Cookies: Preheat the oven to 350°F (175°C) and line baking sheets with parchment paper. Roll out one portion of dough on a lightly floured surface to about ¼ inch thickness. Use a round cookie cutter (about 2 inches in diameter) to cut out circles. Place the circles on the prepared baking sheets.
- Bake the Cookies: Bake the cookies for 10-12 minutes, or until the edges are lightly golden. Keep an eye on them to avoid overbaking as they can become dry. Once baked, remove from the oven and let them cool on the baking sheet for a few minutes before transferring to a wire rack to cool completely.
- Assemble the Alfajores: Once the cookies are completely cool, spread a generous layer of dulce de leche on the underside of one cookie and sandwich it with another cookie. Repeat until all cookies are filled.
- Finish and Serve: If desired, roll the edges of the assembled alfajores in shredded coconut or dust with powdered sugar for a festive touch. Serve and enjoy your delicious South American treat!
Extra Tips:
When making alfajores, it’s crucial to verify your cookies are fully cooled before adding the dulce de leche to avoid melting the filling. You can also experiment with different flavors of filling, such as chocolate ganache or fruit jams, to create unique variations.
If you want to prepare them ahead of time, the cookies can be made in advance and stored in an airtight container. Just assemble them on the day you plan to serve for the best texture and flavor. Enjoy your alfajores with a cup of coffee or tea for a truly delightful experience!