

If you’re on the hunt for vibrant and colorful meal ideas, you’ve come to the right place. Peruvian cuisine offers a stunning variety of vegetable dishes that are as beautiful as they are delicious. Think quinoa salad with creamy avocado and roasted peppers or a cozy vegetable stew rich with traditional spices. Each recipe highlights Peru’s incredible agricultural bounty. Let’s explore these delightful culinary creations together.
Quinoa Salad With Avocado and Roasted Vegetables
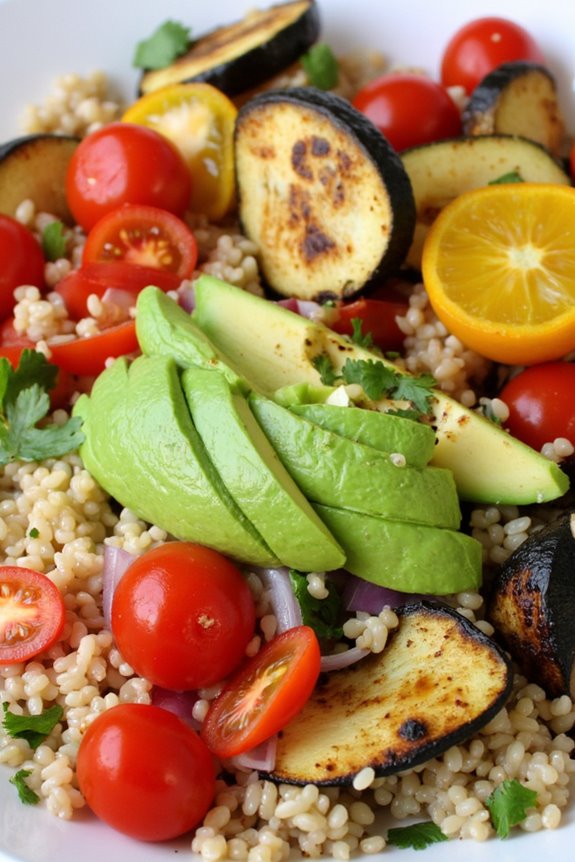
Quinoa Salad with Avocado and Roasted Vegetables is a delightful and nutritious dish that perfectly captures the essence of Peruvian cuisine. This vibrant salad combines the nutty flavor of quinoa with the creaminess of avocado and the natural sweetness of roasted vegetables.
It’s not only packed with essential nutrients but also offers a beautiful array of colors that make it visually appealing. This salad is great as a side dish or can be enjoyed as a light meal on its own.
Roasting the vegetables enhances their flavors and adds a lovely caramelization that pairs wonderfully with the fluffy quinoa and creamy avocado. This dish is versatile and allows for the use of seasonal vegetables, making it a perfect option year-round.
Whether you’re preparing it for a family gathering or a casual weeknight dinner, this quinoa salad is sure to impress.
Ingredients (Serves 4-6):
- 1 cup quinoa
- 2 cups vegetable broth or water
- 1 red bell pepper, diced
- 1 zucchini, diced
- 1 red onion, diced
- 1 cup cherry tomatoes, halved
- 2 tablespoons olive oil
- Salt and pepper to taste
- 1 ripe avocado, diced
- 1/4 cup fresh cilantro, chopped
- Juice of 1 lime
Cooking Instructions:
1. Preheat the Oven: Begin by preheating your oven to 400°F (200°C). This temperature is ideal for roasting vegetables and will help achieve a nice caramelization.
2. Prepare the Quinoa: Rinse the quinoa under cold water in a fine-mesh strainer to remove any bitterness. In a medium saucepan, combine the rinsed quinoa and vegetable broth (or water). Bring to a boil, then reduce the heat to low, cover, and simmer for about 15 minutes or until the quinoa is fluffy and the liquid has been absorbed.
Remove from heat and let it sit covered for an additional 5 minutes.
3. Roast the Vegetables: While the quinoa is cooking, prepare the vegetables for roasting. In a large bowl, toss the diced red bell pepper, zucchini, red onion, and cherry tomatoes with olive oil, salt, and pepper until well coated.
Spread the vegetables evenly on a baking sheet lined with parchment paper. Roast in the preheated oven for about 20-25 minutes, or until they’re tender and slightly caramelized, stirring halfway through.
4. Combine Ingredients: Once the quinoa and roasted vegetables are ready, fluff the quinoa with a fork and transfer it to a large mixing bowl. Add the roasted vegetables, diced avocado, chopped cilantro, and lime juice.
Gently mix everything together until well combined, being careful not to mash the avocado.
5. Serve and Enjoy: Taste the salad and adjust the seasoning with additional salt, pepper, or lime juice if desired. Serve the quinoa salad warm or at room temperature as a standalone dish or a side.
Extra Tips:
For added texture and flavor, consider incorporating nuts or seeds like toasted pumpkin seeds or slivered almonds.
You can also experiment with different vegetables based on what you have available or in season. If you want to make the dish even heartier, adding black beans or chickpeas can provide extra protein.
Finally, this salad can be stored in the refrigerator for up to three days, making it a perfect make-ahead option for meal prep!
Aji De Gallina With Vegetables
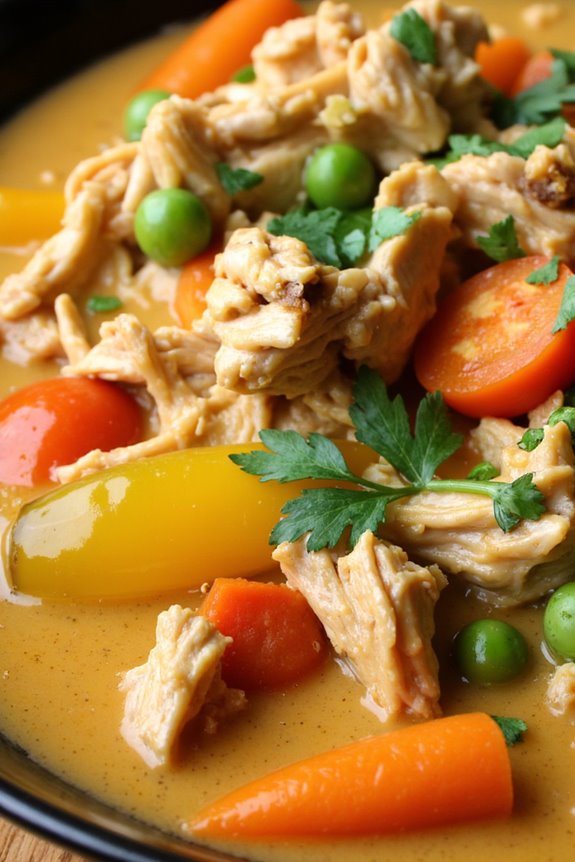
Aji De Gallina is a classic Peruvian dish that combines shredded chicken in a creamy, spicy sauce made from aji amarillo peppers, nuts, and cheese. However, to enhance its nutritional value and cater to vegetarian preferences, this recipe incorporates various vegetables, making it a delightful and colorful variation. The combination of creamy sauce with nutritious vegetables not only adds flavor but also creates a satisfying meal, making it perfect for family gatherings or a cozy dinner night.
This dish celebrates the rich culinary heritage of Peru while allowing for flexibility in ingredients. You can customize the vegetables based on what’s in season or what you have available in your pantry. The creamy sauce is the star of the dish, enveloping the vegetables and creating a comforting and indulgent experience. Serve it with a side of steamed rice or boiled potatoes to complete this delicious meal.
Ingredients (serving size: 4-6 people):
- 1 lb boneless chicken breast, cooked and shredded
- 2 cups mixed vegetables (carrots, peas, and bell peppers)
- 1 medium onion, finely chopped
- 3 cloves garlic, minced
- 2-3 aji amarillo peppers, seeds removed and chopped
- 1 cup chicken broth
- 1 cup evaporated milk
- 1/2 cup grated Parmesan cheese
- 1/4 cup walnuts, finely chopped
- 2 tablespoons olive oil
- Salt and pepper to taste
- 1 tablespoon fresh parsley, chopped (for garnish)
- Boiled potatoes or rice (for serving)
Cooking Instructions:
- Prepare the Vegetables: In a pot of boiling water, blanch the mixed vegetables (carrots, peas, and bell peppers) for about 3-4 minutes until they’re tender but still vibrant in color. Drain and set aside.
- Cook the Base: In a large skillet, heat the olive oil over medium heat. Add the chopped onion and sauté for about 5 minutes until the onion becomes translucent. Then, add the minced garlic and chopped aji amarillo peppers, stirring for another 2-3 minutes until fragrant.
- Combine Ingredients: Once the base is aromatic, add the cooked and shredded chicken to the skillet, followed by the blanched vegetables. Stir everything together well to guarantee the chicken and vegetables are coated with the onion, garlic, and aji mixture.
- Make the Sauce: Pour the chicken broth into the skillet and bring the mixture to a gentle simmer. After a couple of minutes, add the evaporated milk and grated Parmesan cheese, stirring until the cheese has melted and the sauce is creamy. If the mixture appears too thick, you can add a bit more chicken broth to reach your desired consistency.
- Add Nuts: Stir in the chopped walnuts for added texture and flavor. Season the mixture with salt and pepper to taste. Let it simmer for another 5-10 minutes, allowing the flavors to meld together.
- Serve: Once ready, remove the skillet from heat. Serve the Aji De Gallina With Vegetables hot, garnished with freshly chopped parsley, along with boiled potatoes or rice on the side.
Extra Tips: When preparing Aji De Gallina With Vegetables, feel free to experiment with different vegetables like zucchini or corn, depending on your taste preferences. For a spicier kick, you can add more aji amarillo or even a sprinkle of chili flakes.
Make sure to taste and adjust the seasoning throughout the cooking process to achieve balanced flavors. This dish can also be made ahead of time and reheated, allowing the flavors to deepen even further. Enjoy your culinary adventure into Peruvian cuisine!
Peruvian Causa Rellena

Causa Rellena is a traditional Peruvian dish that beautifully combines the vibrant flavors of yellow potatoes, fresh lime, and a variety of fillings. This dish boasts a delightful creamy texture and is often served cold, making it perfect for warm weather or as a revitalizing appetizer.
Typically, the base of causa is made from mashed yellow potatoes, seasoned with lime juice, aji amarillo (yellow chili pepper), and salt, then layered with a delicious filling of your choice. The filling can vary widely, including tuna, chicken, or avocado, and is often garnished with olives and hard-boiled eggs.
To make this dish truly special, it’s crucial to use high-quality ingredients and to balance the flavors. The creamy potato mixture should complement the filling, and the acidity of the lime juice adds a rejuvenating kick. Causa Rellena isn’t just a meal; it’s a celebration of Peruvian culinary traditions, and it’s often enjoyed during special occasions or family gatherings.
With its colorful presentation and delicious taste, this dish is sure to impress your family and friends.
Ingredients (serving size: 4-6 people)
- 2 lbs yellow potatoes
- 3 tablespoons aji amarillo paste
- 1/4 cup fresh lime juice
- 1 teaspoon salt
- 1/2 cup mayonnaise
- 1 can (12 oz) tuna in oil, drained (or 2 cups cooked shredded chicken)
- 1/2 red onion, finely chopped
- 1/4 cup fresh cilantro, chopped
- 2 avocados, sliced
- 4 hard-boiled eggs, sliced
- Black olives for garnish
- Lettuce leaves for serving (optional)
Cooking Instructions
- Prepare the Potatoes: Begin by boiling the yellow potatoes in salted water until they’re fork-tender, which usually takes about 20-25 minutes. Once cooked, drain the potatoes and let them cool slightly before peeling them.
- Mash the Potatoes: In a large mixing bowl, combine the peeled potatoes with the aji amarillo paste, lime juice, and salt. Mash the mixture until smooth and well incorporated. You want the consistency to be creamy but firm enough to hold its shape when layered.
- Prepare the Filling: In a separate bowl, mix the drained tuna (or shredded chicken) with mayonnaise, chopped red onion, and fresh cilantro. Adjust seasoning to taste, adding more lime juice or salt if needed. This creamy filling adds richness and flavor to the dish.
- Layer the Causa: To assemble the causa, take a round mold or a baking dish and spread half of the mashed potato mixture evenly at the bottom. Press down gently to create a firm base.
- Add the Filling: Layer the tuna filling evenly on top of the mashed potatoes. If using avocado, you can layer the slices on top of the filling or mix them into the tuna for added creaminess.
- Top with Potatoes: Spread the remaining mashed potato mixture over the filling, smoothing it out to create an even layer. You can use a spatula to make sure it’s nicely packed.
- Chill and Serve: Refrigerate the assembled causa for at least 1-2 hours to allow the flavors to meld and the dish to firm up. When ready to serve, carefully unmold the causa onto a platter or serve directly from the baking dish. Garnish with sliced hard-boiled eggs and black olives, and serve on a bed of lettuce if desired.
Extra Tips
When preparing Causa Rellena, it’s important to let the dish chill adequately; this allows the flavors to meld beautifully and makes slicing easier.
For a vegetarian option, consider replacing the tuna or chicken with a mixture of diced vegetables like bell peppers, corn, and carrots. Additionally, feel free to experiment with different fillings to suit your taste, but always verify they complement the creamy potato base.
Finally, remember that presentation matters; a beautiful garnish can elevate this dish from simple to spectacular!
Choclo Con Queso

Choclo Con Queso is a traditional Peruvian dish that showcases the country’s unique and delicious ingredients. This dish features choclo, which is a variety of sweet corn native to the Andes, paired with creamy cheese. The combination of the sweet, tender corn and the salty, melty cheese creates a mouthwatering experience that’s both comforting and satisfying.
Often enjoyed as a snack or appetizer, Choclo Con Queso is a staple at local fairs and markets, and it’s a dish that any lover of corn will surely appreciate.
Preparing Choclo Con Queso is quite simple and requires only a handful of ingredients. The key to making this dish is to use fresh choclo, which can be found in many Latin American grocery stores, or you can substitute it with regular sweet corn if needed. The dish is typically served warm, allowing the cheese to melt beautifully over the corn, making it a delightful treat for any occasion.
Whether enjoyed at a family gathering or as a side dish to your meal, Choclo Con Queso is bound to please everyone at the table.
Ingredients (Serves 4-6):
- 4-6 ears of fresh choclo (or 2-3 cups of sweet corn kernels)
- 200 grams of queso fresco or any cheese that melts well (e.g., mozzarella or queso blanco)
- 1 cup of water (for boiling)
- Salt to taste
- Butter (optional, for extra flavor)
Cooking Instructions:
- Prepare the Choclo: If using fresh choclo, carefully peel back the husks and remove the silk from each ear of corn. If using frozen or canned corn, verify it’s thawed and drained.
- Boil the Corn: In a large pot, bring 1 cup of water to a boil. Add the prepared choclo or sweet corn kernels to the pot. If desired, add a pinch of salt to enhance the flavor. Let the corn boil for about 10-15 minutes or until it’s tender. If using frozen corn, boiling for about 5-7 minutes should suffice.
- Drain the Corn: Once the corn is cooked, carefully drain it in a colander to remove excess water.
- Melt the Cheese: While the corn is draining, cut the queso fresco or your chosen cheese into slices or small pieces. If you prefer a meltier texture, you can grate the cheese instead.
- Combine and Serve: In a serving dish, evenly distribute the boiled choclo. Top with the cheese slices or shreds. For added flavor, you can melt a bit of butter and drizzle it over the top, although this step is optional. Serve the dish warm to enjoy the gooey cheese.
Extra Tips: When making Choclo Con Queso, fresh choclo is preferred for its sweet flavor and texture, but if that’s not available, frozen or canned corn can be used as a substitute. You can also add toppings like a sprinkle of chili powder or fresh herbs such as cilantro for a twist on flavor.
It’s a versatile dish that can be customized to your liking, so feel free to experiment with different types of cheese or additional spices!
Vegetable Anticuchos

Vegetable Anticuchos are a delightful twist on the traditional Peruvian skewered meat dish, perfect for vegetarians and vegetable lovers alike. This vibrant recipe showcases a colorful array of vegetables marinated in a flavorful sauce, then grilled to perfection. The smoky char from the grill, combined with the zesty marinade, creates a dish that’s as delicious as it’s visually appealing.
Serve these skewers at a summer barbecue or as a flavorful appetizer at your next gathering, and watch your guests be amazed by the taste and presentation.
The heart of this dish lies in the marinade, which typically includes ingredients like garlic, spices, and aji amarillo (yellow chili pepper), offering a unique Peruvian flair. You can customize the vegetables according to the season or your preferences, using favorites like bell peppers, zucchini, mushrooms, and red onions. The result is a satisfying and healthy dish that celebrates the vibrant flavors of Peruvian cuisine.
Ingredients (serving size: 4-6 people)
- 2 large bell peppers (red, yellow, or green), cut into chunks
- 1 medium zucchini, sliced into rounds
- 1 medium red onion, cut into wedges
- 1 cup cherry tomatoes
- 1 cup mushrooms (button or portobello), cleaned and halved
- 4 tablespoons olive oil
- 2 tablespoons aji amarillo paste (or any preferred chili paste)
- 3 cloves garlic, minced
- 2 tablespoons vinegar (white or red)
- 1 teaspoon cumin
- 1 teaspoon paprika
- Salt and pepper, to taste
- Bamboo skewers (soaked in water for 30 minutes)
Cooking Instructions
- Prepare the Marinade: In a mixing bowl, combine the olive oil, aji amarillo paste, minced garlic, vinegar, cumin, paprika, salt, and pepper. Whisk the ingredients together until well blended to create a smooth marinade.
- Marinate the Vegetables: Add the prepared vegetables (bell peppers, zucchini, red onion, cherry tomatoes, and mushrooms) to the marinade. Toss the vegetables gently to make sure they’re evenly coated with the marinade. Cover the bowl and let it marinate in the refrigerator for at least 30 minutes, allowing the flavors to infuse.
- Skewer the Vegetables: After marinating, take the bamboo skewers and thread the marinated vegetables onto them, alternating between different types of vegetables for a colorful presentation. Leave some space between the pieces to make sure of even cooking.
- Preheat the Grill: Preheat your grill to medium-high heat. If using an indoor grill pan, heat it over medium-high heat until it’s hot.
- Grill the Skewers: Place the skewers on the grill and cook for about 10-15 minutes, turning occasionally to make sure of even grilling. The vegetables should be tender and have a nice char on them. Keep an eye on them to prevent burning.
- Serve: Once grilled to perfection, remove the skewers from the grill. Let them cool slightly before serving. You can garnish them with fresh herbs like cilantro or serve with a side of dipping sauce, if desired.
Extra Tips
For a more intense flavor, consider adding a splash of lemon or lime juice to the marinade just before grilling. This will enhance the freshness of the vegetables.
You can also experiment with different vegetables, such as eggplant or asparagus, depending on what’s in season or your personal preferences. For a smoky flavor, try adding a pinch of smoked paprika to the marinade.
When grilling, make sure your grill is well-oiled to prevent the vegetables from sticking. Enjoy your Vegetable Anticuchos with a side of Peruvian salsa or a simple green salad for a complete meal!
Spicy Peruvian Roasted Corn
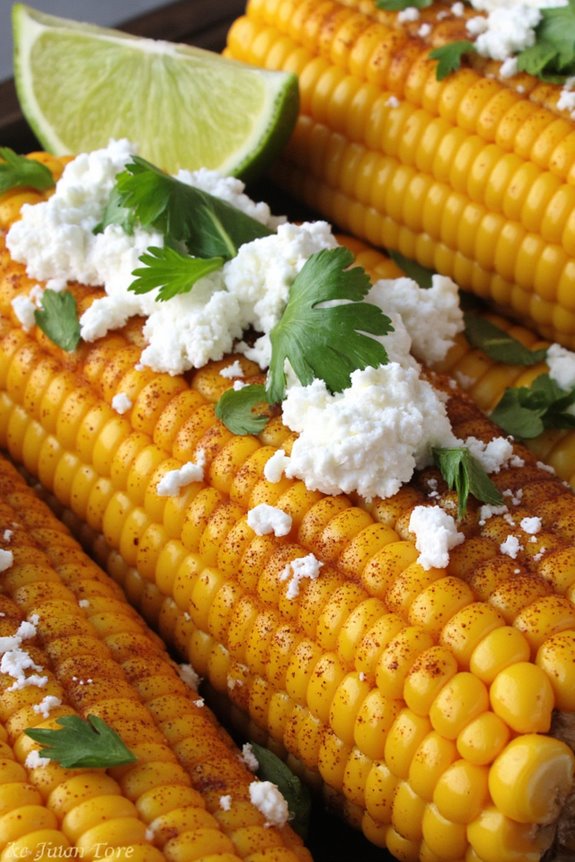
Spicy Peruvian Roasted Corn, known as “Choclo con Queso” in Peru, is a delightful dish that highlights the rich flavors of Andean corn, often served as a snack or appetizer. The corn used in this recipe is larger and plumper than the typical sweet corn, but you can substitute it with regular corn if needed.
The corn is roasted to perfection and then seasoned with a blend of spices that bring out its natural sweetness, creating a savory and spicy profile that’s certain to please any palate. This dish isn’t only easy to prepare but also offers a burst of flavors that represent the vibrant culinary scene of Peru.
The roasted corn can be enjoyed on its own or paired with cheese for a more filling treat. Perfect for gatherings or simply as a flavorful snack, Spicy Peruvian Roasted Corn is certain to impress your family and friends.
Ingredients (Serves 4-6)
- 4-6 ears of fresh corn (or 4-6 cups of corn kernels)
- 2 tablespoons olive oil
- 1 teaspoon paprika
- 1 teaspoon chili powder
- 1 teaspoon garlic powder
- ½ teaspoon cayenne pepper (adjust to taste)
- Salt, to taste
- 1 cup crumbled queso fresco or feta cheese
- Fresh cilantro, chopped (for garnish)
- Lime wedges (for serving)
Cooking Instructions
1. Preheat the Oven: Start by preheating your oven to 400°F (200°C). This temperature will guarantee that the corn gets a nice, crispy exterior while remaining tender on the inside.
2. Prepare the Corn: If using fresh corn on the cob, shuck the corn and remove the silk. Rinse the ears under cold water and pat them dry with a towel. If using frozen corn kernels, thaw them completely and drain any excess water.
3. Season the Corn: In a large mixing bowl, combine the olive oil, paprika, chili powder, garlic powder, cayenne pepper, and salt. Mix well until all the spices are evenly distributed in the oil.
Add the corn (either the whole ears or the kernels) to the bowl and toss until they’re well coated with the spice mixture.
4. Roast the Corn: Place the seasoned corn in a single layer on a baking sheet lined with parchment paper. Roast in the preheated oven for about 20-25 minutes, turning the corn halfway through to guarantee even cooking. The corn should be golden brown and slightly charred when done.
5. Add Cheese and Garnish: Once roasted, remove the corn from the oven and immediately sprinkle the crumbled queso fresco or feta cheese over the hot corn. The heat will slightly melt the cheese and enhance the flavors. Garnish with fresh cilantro.
6. Serve with Lime: Serve the spicy roasted corn hot, alongside lime wedges for squeezing over the top. The acidity of the lime will balance the spices beautifully.
Extra Tips
For an extra kick, feel free to experiment with additional spices such as cumin or smoked paprika. If you prefer a richer flavor, you can brush the corn with melted butter before adding the spice mixture.
Additionally, try serving the roasted corn with a dipping sauce made from sour cream and lime juice for a creamy contrast to the spice! Enjoy this dish as a flavorful side or as part of a larger Peruvian-inspired meal.
Huancaina Sauce With Fresh Vegetables
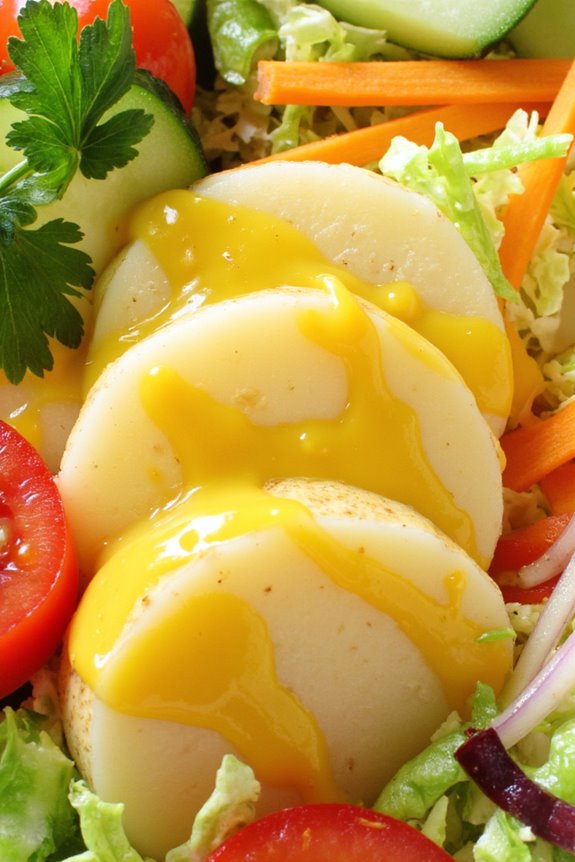
Huancaina sauce, originating from Peru, is a creamy, spicy sauce made from fresh ingredients that brings a unique flavor to any dish. Traditionally served over boiled potatoes and salad, this sauce is both versatile and delightful, making it a perfect complement to a variety of fresh vegetables.
The combination of cheese, yellow peppers, and spices creates a rich, tangy flavor that can elevate simple dishes into something extraordinary. Pairing this sauce with fresh vegetables not only enhances the taste but also adds a colorful and nutritious element to your meal.
This recipe for Huancaina Sauce with Fresh Vegetables is designed to serve 4-6 people, making it ideal for a family gathering or a casual dinner with friends. The fresh vegetables provide a rejuvenating crunch that pairs beautifully with the creamy sauce, making it a well-balanced dish.
Whether you’re hosting a dinner party or simply want to enjoy a delicious Peruvian-inspired meal, this recipe is sure to impress.
Ingredients:
- 1 cup queso fresco (or feta cheese)
- 2 medium yellow ají amarillo peppers (or substitute with yellow bell peppers)
- 1/2 cup evaporated milk
- 1/2 cup vegetable oil
- 1 tablespoon lime juice
- 1 clove garlic
- Salt to taste
- 4-6 medium-sized potatoes, boiled and sliced
- 1 cup of fresh lettuce, shredded
- 1 cup of fresh carrots, julienned
- 1 cup of fresh cucumber, sliced
- 1/2 cup of cherry tomatoes, halved
- Fresh cilantro for garnish
Cooking Instructions:
- Prepare the Huancaina Sauce: Start by removing the seeds from the yellow ají amarillo peppers and chop them into smaller pieces. In a blender, combine the queso fresco, chopped peppers, evaporated milk, vegetable oil, lime juice, garlic, and a pinch of salt. Blend until the mixture is smooth and creamy. Adjust seasoning to taste, adding more salt if needed. Set the sauce aside.
- Boil the Potatoes: Place the medium-sized potatoes in a large pot filled with salted water. Bring to a boil over medium-high heat and cook for about 20-25 minutes, or until the potatoes are tender when pierced with a fork. Drain the potatoes and let them cool slightly before slicing them into rounds.
- Prepare the Fresh Vegetables: While the potatoes are boiling, wash and prepare the fresh vegetables. Shred the lettuce, julienne the carrots, slice the cucumber, and halve the cherry tomatoes. Arrange the vegetables on a large serving platter or individual plates.
- Assemble the Dish: Once the potatoes are sliced, place them on top of the fresh vegetables on the platter. Drizzle the Huancaina sauce generously over the potatoes and vegetables, ensuring an even coating.
- Garnish and Serve: Finally, garnish the dish with fresh cilantro for an added touch of flavor and color. Serve immediately and enjoy the delightful combination of flavors.
Extra Tips:
When making Huancaina sauce, the key is to balance the creaminess with the spice of the ají amarillo peppers. If you prefer a milder sauce, use fewer peppers or substitute with yellow bell peppers.
Additionally, you can prepare the sauce ahead of time and store it in the refrigerator for up to two days. Just give it a good stir before serving. This dish can also be served as an appetizer or as part of a larger meal, making it versatile for various occasions.
Enjoy your culinary adventure with this vibrant Peruvian dish!
Stir-Fried Asparagus With Aji Amarillo
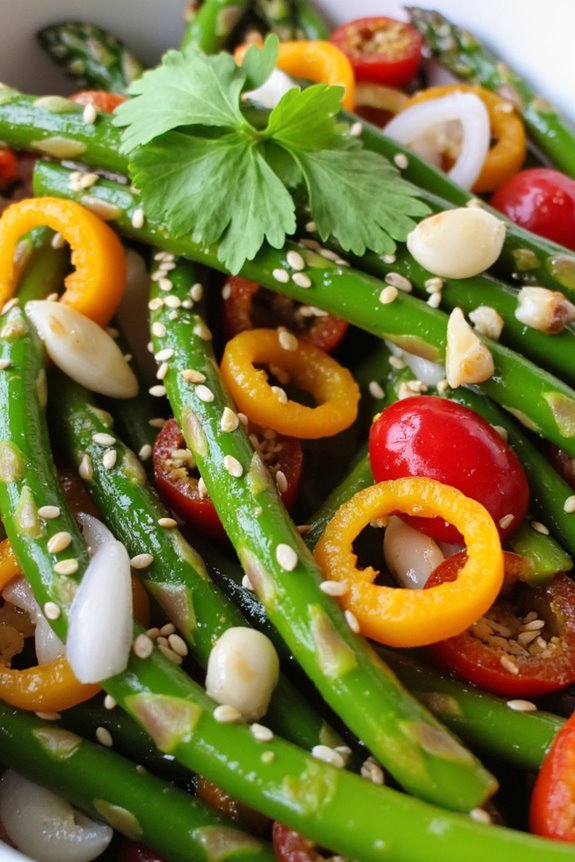
Stir-Fried Asparagus With Aji Amarillo is a vibrant and flavorful dish that showcases the unique taste of Peruvian cuisine. The tender asparagus is complemented by the spicy and fruity aji amarillo pepper, which adds a delightful kick and beautiful color to the dish. This recipe is perfect for a quick weeknight dinner or as a side dish for gatherings, showcasing the freshness of vegetables while still being simple to prepare.
With its bright flavors and health benefits, this dish isn’t only delicious but also packed with nutrients. Asparagus is low in calories and high in vitamins, making it an excellent choice for those looking to maintain a healthy diet. The aji amarillo, a staple in Peruvian cooking, brings warmth and depth to the stir-fry, creating a harmonious balance that will leave your guests asking for seconds.
Ingredients (Serves 4-6)
- 1 pound fresh asparagus, trimmed and cut into 2-inch pieces
- 2 tablespoons vegetable oil
- 1 medium onion, sliced
- 2 cloves garlic, minced
- 1-2 aji amarillo peppers, thinly sliced (adjust to taste)
- 1 tablespoon soy sauce
- 1 tablespoon oyster sauce (optional)
- Salt and pepper to taste
- 1 tablespoon sesame seeds (for garnish)
- Fresh cilantro, chopped (for garnish)
Cooking Instructions
- Prepare the Asparagus: Begin by washing the asparagus thoroughly and trimming the ends to remove any tough parts. Cut the asparagus into 2-inch pieces to guarantee they cook evenly. This preparation will help the asparagus remain tender yet crisp during the stir-frying process.
- Heat the Oil: In a large skillet or wok, heat the vegetable oil over medium-high heat. Make sure the oil is hot enough before adding other ingredients; this will help achieve a nice stir-fry without steaming the vegetables.
- Sauté the Aromatics: Once the oil is hot, add the sliced onion and minced garlic to the skillet. Stir-fry for about 2-3 minutes until the onion becomes translucent and fragrant. This step infuses the oil with flavor, which will enhance the overall taste of the dish.
- Add the Aji Amarillo: Next, incorporate the sliced aji amarillo peppers into the skillet. Sauté for another 2 minutes, allowing the heat to release the pepper’s flavor and aroma. Adjust the quantity based on your spice preference, as aji amarillo can vary in heat.
- Cook the Asparagus: Add the asparagus pieces to the skillet and continue to stir-fry for about 4-5 minutes. You want the asparagus to be bright green and tender-crisp. Make sure to keep stirring to guarantee even cooking and to prevent any sticking.
- Season the Stir-Fry: Pour in the soy sauce and oyster sauce (if using), and season with salt and pepper to taste. Stir well to evenly coat the asparagus and allow the sauces to blend with the vegetables. Cook for an additional minute for the flavors to combine.
- Garnish and Serve: Remove the skillet from heat and transfer the stir-fried asparagus to a serving dish. Sprinkle with sesame seeds and freshly chopped cilantro for an added touch of flavor and presentation. Serve hot as a side dish or atop a bed of rice.
Extra Tips
When cooking Stir-Fried Asparagus With Aji Amarillo, it’s crucial to keep the cooking time short to preserve the asparagus’s vibrant color and crisp texture.
If aji amarillo peppers aren’t available, you can substitute them with other types of chili peppers for a different flavor profile. Additionally, feel free to experiment by adding other vegetables, such as bell peppers or baby corn, to enhance the dish further.
Always taste as you go, adjusting the seasoning to suit your preferences!
Peruvian Vegetable Stir-Fry

Peruvian Vegetable Stir-Fry is a vibrant and nutritious dish that showcases the rich flavors of Peru through a variety of fresh vegetables. This colorful stir-fry isn’t only a fantastic way to enjoy a medley of seasonal produce but also a quick and easy option for busy weeknights.
With its roots deeply embedded in Peruvian cuisine, this dish can be enjoyed on its own or served alongside rice or quinoa for a complete meal.
The beauty of this Peruvian Vegetable Stir-Fry lies in its versatility; you can easily customize it by adding your favorite vegetables or proteins. The key to achieving the perfect stir-fry is to use high heat and cook the vegetables quickly, allowing them to retain their crispness and vibrant colors.
In this recipe, we’ll incorporate classic Peruvian ingredients like aji amarillo (yellow chili pepper) and fresh herbs to enhance the flavor profile, making it a delightful experience for your taste buds.
Ingredients (Serves 4-6)
- 2 tablespoons vegetable oil
- 1 medium onion, thinly sliced
- 2 cloves garlic, minced
- 1 red bell pepper, sliced
- 1 yellow bell pepper, sliced
- 1 zucchini, sliced into half-moons
- 1 cup broccoli florets
- 1 cup snap peas, trimmed
- 1 medium carrot, julienned
- 1 tablespoon aji amarillo paste (or more to taste)
- 2 tablespoons soy sauce
- Salt and pepper to taste
- Fresh cilantro, chopped (for garnish)
- Lime wedges (for serving)
Cooking Instructions
- Prepare the Vegetables: Wash and cut all the vegetables as described in the ingredients list. Make sure to slice them uniformly to guarantee even cooking. Place them in separate bowls for easy access during the stir-frying process.
- Heat the Oil: In a large skillet or wok, heat the vegetable oil over medium-high heat. Allow the oil to become hot but not smoking, which is vital for a proper stir-fry.
- Sauté the Aromatics: Add the sliced onion and minced garlic to the hot oil. Stir-fry for about 1-2 minutes until the onion is translucent and fragrant. This step builds the base flavor for your stir-fry.
- Add the Vegetables: Begin adding the vegetables to the pan, starting with the broccoli and carrots, as they take longer to cook. Stir well and cook for about 3-4 minutes.
- Incorporate the Bell Peppers and Zucchini: Next, add the sliced red and yellow bell peppers along with the zucchini. Continue to stir-fry for an additional 3 minutes until the vegetables are tender yet crisp.
- Add Snap Peas and Seasoning: Toss in the snap peas and aji amarillo paste, stirring to combine. Pour in the soy sauce and season with salt and pepper to taste. Stir-fry for another 2 minutes to allow the flavors to meld together.
- Serve: Remove the stir-fry from the heat and transfer it to a serving platter. Garnish with freshly chopped cilantro and serve with lime wedges on the side for an added burst of flavor.
Extra Tips
When preparing Peruvian Vegetable Stir-Fry, it’s helpful to have all your ingredients prepped and ready to go before you start cooking, as the process moves quickly.
Feel free to mix and match vegetables according to what you have on hand or what’s in season; asparagus, mushrooms, or even baby corn make excellent additions.
To enhance the dish further, consider adding tofu or chicken for extra protein. Finally, adjusting the level of aji amarillo paste can help customize the dish to suit your heat preference—start with a small amount and add more until you reach your desired spiciness!
Tacu Tacu With Mixed Vegetables
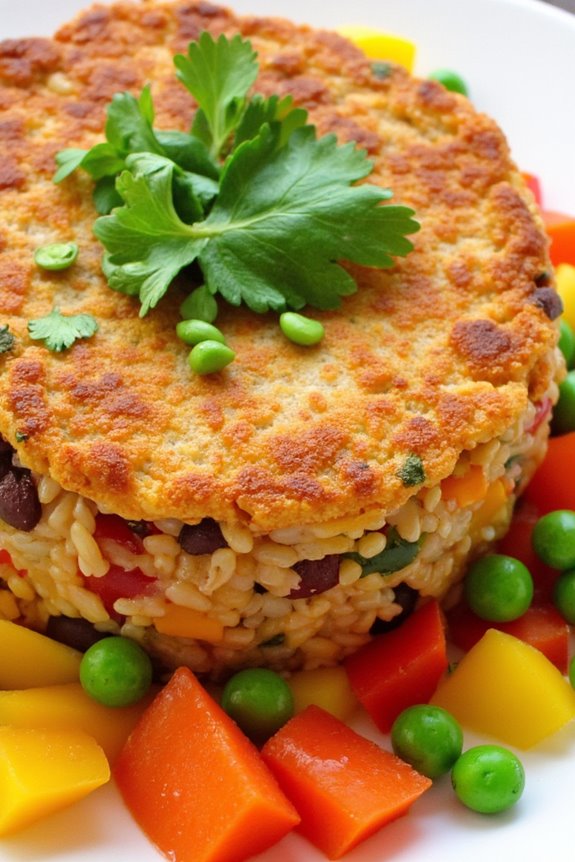
Tacu Tacu is a traditional Peruvian dish that beautifully showcases the country’s rich culinary heritage. It’s primarily made from leftover rice and beans, which are combined and pan-fried to create a crispy and flavorful base. When enhanced with mixed vegetables, Tacu Tacu transforms into a hearty and nutritious meal that isn’t only filling but also bursting with vibrant colors and textures.
This dish can be enjoyed on its own or paired with a variety of sauces, making it a versatile option for any occasion. The combination of rice and beans offers a complete protein, making Tacu Tacu a fantastic option for vegetarians and meat-lovers alike. The addition of mixed vegetables adds vitality and flavor, while also increasing the nutritional value of the dish.
Whether served as a main course or a side, Tacu Tacu With Mixed Vegetables is sure to impress your family and friends with its delightful taste and presentation.
Ingredients (Serves 4-6):
- 2 cups cooked rice
- 1 cup cooked beans (pinto or black beans)
- 1 medium onion, finely chopped
- 2 cloves garlic, minced
- 1 bell pepper, diced (any color)
- 1 medium carrot, diced
- 1 cup green peas (fresh or frozen)
- 2 tablespoons vegetable oil
- 1 teaspoon cumin
- Salt and pepper to taste
- Fresh cilantro, chopped (for garnish)
Cooking Instructions:
- Prepare the Bean and Rice Mixture: In a large mixing bowl, combine the cooked rice and beans. Use a fork or potato masher to mix them together until they’re well combined but still slightly chunky. Season with salt, pepper, and cumin, then set aside.
- Sauté the Vegetables: In a large skillet or frying pan, heat 2 tablespoons of vegetable oil over medium heat. Add the chopped onion and garlic, and sauté for about 2-3 minutes until they’re fragrant and the onion is translucent.
- Add Remaining Vegetables: Once the onions and garlic are ready, add the diced bell pepper, carrot, and green peas to the skillet. Cook for another 5-7 minutes, stirring occasionally, until the vegetables are tender but still crisp.
- Combine Vegetables with Rice and Beans: Once the vegetables are cooked, reduce the heat to low and add the rice and bean mixture to the skillet. Stir everything together until the vegetables are evenly distributed throughout the rice and beans. Cook for an additional 3-5 minutes, allowing the mixture to heat through completely.
- Form and Cook the Tacu Tacu: Increase the heat to medium-high. Use a spatula to press the mixture into an even layer in the skillet. Cook for about 5-7 minutes until the bottom is golden brown and crispy. Carefully flip the Tacu Tacu over (you may want to do this in sections) and cook for another 5-7 minutes on the other side until golden brown.
- Serve: Once both sides are crispy and golden, remove the Tacu Tacu from the skillet and let it rest for a couple of minutes. Cut into wedges and serve warm, garnished with freshly chopped cilantro.
Extra Tips:
For an added layer of flavor, consider incorporating spices like paprika or chili powder into the bean and rice mixture. Additionally, you can personalize the mixed vegetables based on your preference or what you have on hand—zucchini, corn, or spinach could also work well.
If you want a bit of heat, feel free to add some diced jalapeños or a splash of hot sauce to the vegetable mixture. Enjoy your Tacu Tacu as a standalone dish, or pair it with a revitalizing salad or a zesty sauce for dipping!
Sautéed Spinach With Garlic and Tomatoes
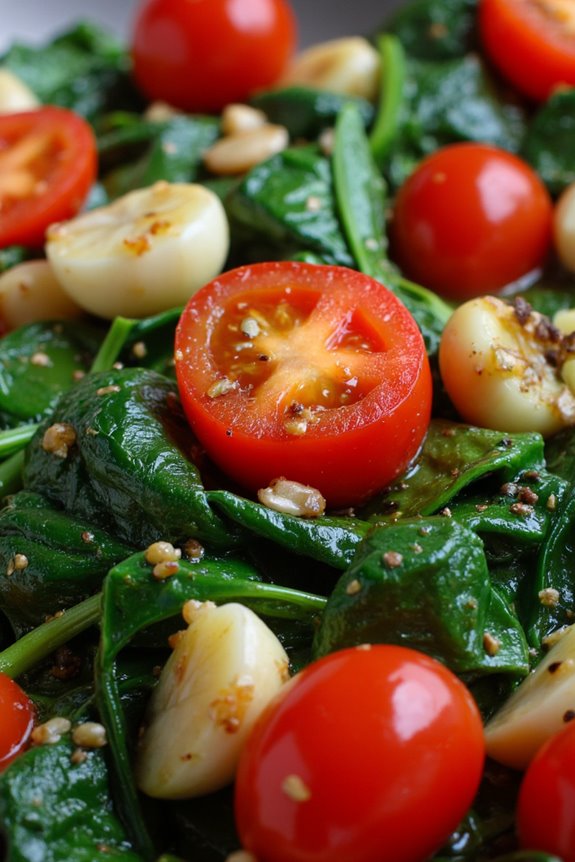
Sautéed Spinach with Garlic and Tomatoes is a delightful and nutritious dish that celebrates the vibrant flavors of Peruvian cuisine. This simple yet delicious recipe highlights the natural sweetness of fresh tomatoes paired with the earthy tones of spinach, all enhanced by the aromatic essence of garlic.
It’s an ideal side dish that complements a variety of main courses, or it can be enjoyed on its own as a light meal. This dish isn’t only quick to prepare but also packed with vitamins and minerals, making it a fantastic choice for health-conscious eaters.
The combination of sautéed spinach, juicy tomatoes, and fragrant garlic creates a mouthwatering medley that’s sure to please anyone at the table. Whether you’re a seasoned cook or a culinary novice, this recipe will guide you through the steps to create a flavorful and colorful dish that embodies the essence of Peruvian vegetables.
Ingredients (Serves 4-6)
- 1 pound fresh spinach, thoroughly washed and stems removed
- 2 tablespoons olive oil
- 4 cloves garlic, minced
- 2 medium tomatoes, diced
- Salt and pepper to taste
- 1 tablespoon lemon juice (optional)
- Red pepper flakes (optional, for a little heat)
Cooking Instructions
1. Prepare the Spinach: Begin by washing the fresh spinach thoroughly under cold water. Make sure to remove any dirt or grit from the leaves. Once clean, shake off the excess water and set the spinach aside.
It’s important to have the spinach dry to avoid excess moisture when sautéing.
2. Heat the Olive Oil: In a large skillet, heat 2 tablespoons of olive oil over medium heat. Allow the oil to warm up for about a minute until it shimmers. The right temperature is vital for sautéing, as it helps to quickly cook the garlic without burning it.
3. Sauté the Garlic: Add the minced garlic to the skillet and sauté for about 30 seconds, stirring frequently. You want the garlic to become fragrant and slightly golden but not brown, as burnt garlic can impart a bitter taste to the dish.
4. Add the Tomatoes: Once the garlic is fragrant, add the diced tomatoes to the skillet. Stir well to combine with the garlic and allow the mixture to cook for about 3-4 minutes. The tomatoes will release their juices, creating a flavorful base for the spinach.
5. Incorporate the Spinach: Gradually add the prepared spinach to the skillet, tossing it gently with the garlic and tomatoes. Cook for about 3-5 minutes, or until the spinach has wilted down considerably.
Stir occasionally to guarantee even cooking.
6. Season and Serve: Once the spinach is wilted and tender, season the dish with salt, pepper, and lemon juice, if desired. For those who enjoy a bit of spice, sprinkle some red pepper flakes on top.
Mix everything well and remove from heat. Serve hot as a side dish or light main course.
Extra Tips
When preparing Sautéed Spinach with Garlic and Tomatoes, it’s important to use fresh ingredients for the best flavor. If you want to enhance the dish further, consider adding a sprinkle of grated Parmesan cheese just before serving for a creamy touch.
Additionally, you can experiment by adding other vegetables like bell peppers or mushrooms to the mix. Always taste your dish before serving to adjust the seasoning according to your preference.
Enjoy this colorful and healthy meal as part of your Peruvian vegetable repertoire!
Vegetable Escabeche
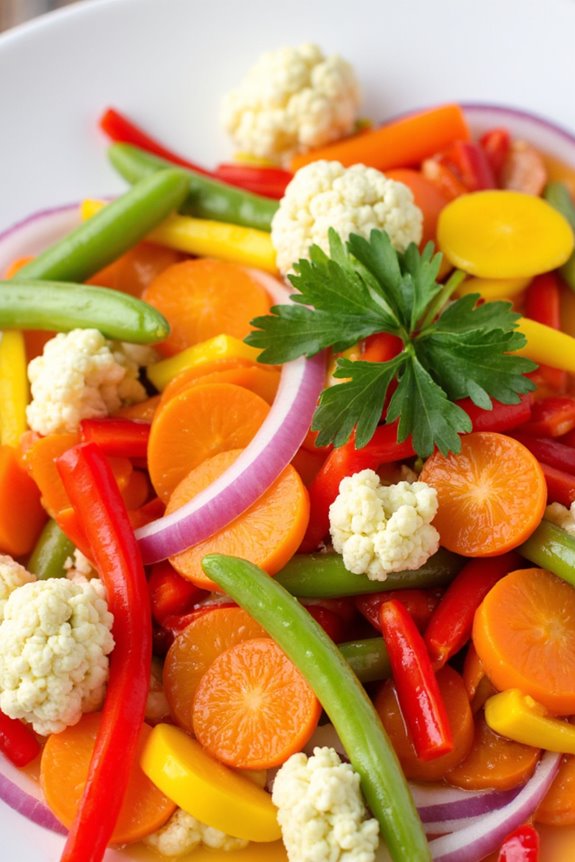
Vegetable Escabeche is a traditional Peruvian dish that brings together a medley of vibrant vegetables pickled in a tangy marinade. This dish isn’t only a delightful accompaniment to meats and fish, but it can also stand alone as a revitalizing salad. The pickling process adds a zesty flavor and a crunchy texture that makes Vegetable Escabeche a favorite in many households.
Ideal for serving during gatherings or as a side dish, it’s a versatile recipe that showcases the rich flavors of Peruvian cuisine. The key to a successful Vegetable Escabeche lies in the freshness of the ingredients and the balance of flavors in the marinade. With a combination of carrots, bell peppers, onions, and spices, this dish offers a burst of color and taste.
It’s typically enjoyed chilled and can be prepared ahead of time, making it a convenient option for meal prep or entertaining. Let’s plunge into the recipe and discover how to create this delicious Peruvian pickled vegetable dish.
Ingredients (Serves 4-6):
- 2 medium carrots, sliced into thin rounds
- 1 red bell pepper, sliced into thin strips
- 1 yellow bell pepper, sliced into thin strips
- 1 medium red onion, thinly sliced
- 1 cup cauliflower florets
- 1 cup green beans, trimmed and cut into 2-inch pieces
- 1 cup white vinegar
- 1 cup water
- 1 tablespoon salt
- 1 tablespoon sugar
- 2 cloves garlic, minced
- 1 teaspoon dried oregano
- 1/2 teaspoon black peppercorns
- 1/2 teaspoon cumin seeds
- 2 bay leaves
Cooking Instructions:
1. Prepare the Vegetables: Start by washing and cutting all the vegetables. Slice the carrots, bell peppers, and onion thinly. Cut the cauliflower into small florets and trim the green beans. This guarantees that all vegetables are uniformly sized, allowing for even pickling.
2. Blanch the Vegetables: In a large pot, bring water to a boil. Add the carrots, cauliflower, and green beans to the boiling water and blanch for about 3-4 minutes. This step helps to soften the vegetables slightly while maintaining their vibrant color.
After blanching, immediately transfer them to an ice bath to stop the cooking process. Drain well after a few minutes.
3. Make the Pickling Liquid: In a saucepan, combine the white vinegar, water, salt, sugar, minced garlic, dried oregano, black peppercorns, cumin seeds, and bay leaves. Bring this mixture to a boil over medium heat, stirring occasionally until the salt and sugar are dissolved.
Once boiling, reduce heat and let it simmer for 5 minutes to allow the flavors to meld.
4. Combine and Pour: In a large mixing bowl or a clean glass jar, layer the blanched vegetables along with the sliced red and yellow bell peppers and red onion. Pour the hot pickling liquid over the vegetables, making sure they’re fully submerged.
If necessary, press down with a spoon to pack the vegetables tightly.
5. Cool and Refrigerate: Allow the Vegetable Escabeche to cool to room temperature. Once cooled, cover the bowl or jar with a lid or plastic wrap and refrigerate for at least 4 hours, preferably overnight.
This chilling time allows the vegetables to absorb the flavors of the pickling liquid.
Extra Tips:
For the best flavor, prepare your Vegetable Escabeche a day in advance and let it sit overnight in the refrigerator. This allows the vegetables to pickle thoroughly, enhancing their taste.
Feel free to customize the vegetables based on seasonal availability or personal preference; other vegetables like zucchini or radishes can also be added. Always confirm the vegetables are submerged in the pickling liquid to prevent spoilage, and for a kick of heat, consider adding sliced jalapeños or a pinch of chili flakes to the marinade.
Enjoy your homemade Vegetable Escabeche as a side dish or a revitalizing salad!
Peruvian Potato Salad
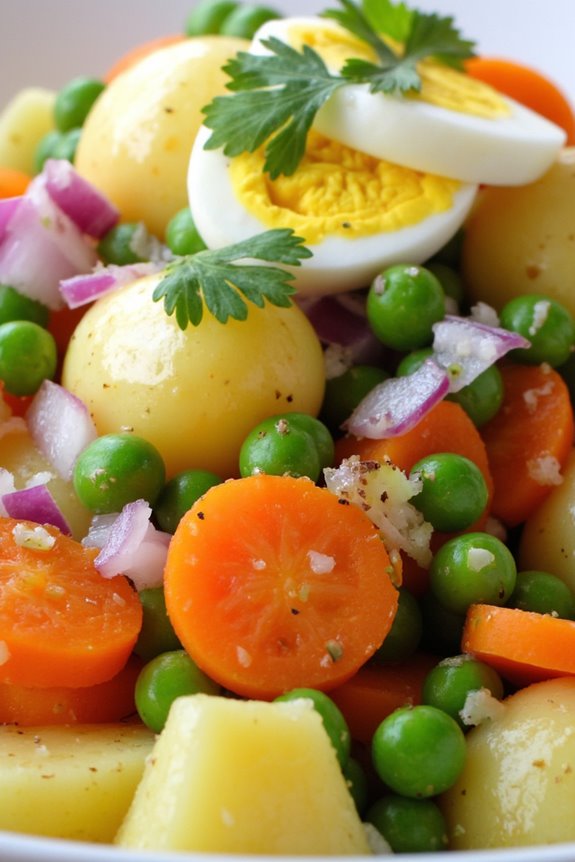
Peruvian Potato Salad, known as “Ensalada de Papa,” is a vibrant and delicious dish that showcases the country’s love for potatoes. With a variety of textures and flavors, this salad is a staple in Peruvian cuisine, often served as a side dish at family gatherings and celebrations. The key ingredients are fresh, locally sourced potatoes, which are known for their unique taste and creaminess, combined with a medley of vegetables, herbs, and a tangy dressing that brings everything together.
This dish isn’t only a delightful accompaniment to any meal but also a nutritious option for those looking to incorporate more vegetables into their diet. The balance of flavors, from the earthiness of the potatoes to the crunch of the vegetables and the brightness of the dressing, makes it a favorite among both locals and visitors. Whether served at a barbecue or a formal dinner, Peruvian Potato Salad is sure to impress.
Ingredients (Serves 4-6)
- 4 medium-sized Peruvian potatoes (or yellow potatoes)
- 1 cup green peas (fresh or frozen)
- 1 medium carrot, diced
- 1/2 cup red onion, finely chopped
- 1/4 cup fresh cilantro, chopped
- 1/4 cup mayonnaise
- 1 tablespoon lime juice
- Salt and pepper to taste
- Optional: hard-boiled eggs for garnish
Cooking Instructions
- Prepare the Potatoes: Begin by washing the potatoes thoroughly to remove any dirt. Place the potatoes in a large pot and cover them with water. Bring the pot to a boil over medium-high heat. Cook the potatoes for about 20-25 minutes or until they’re fork-tender, but not mushy. Once cooked, drain the water and let the potatoes cool before peeling and dicing them into bite-sized pieces.
- Cook the Vegetables: While the potatoes are cooling, bring a small pot of water to a boil. Add the diced carrots and cook for about 3-4 minutes until they’re tender but still crisp. If using fresh peas, add them to the boiling water for the last minute of cooking. If using frozen peas, simply thaw them. Drain the vegetables and set them aside to cool.
- Mix the Ingredients: In a large mixing bowl, combine the diced potatoes, cooked carrots, green peas, and finely chopped red onion. Gently fold the ingredients together to guarantee they’re well mixed without mashing the potatoes.
- Prepare the Dressing: In a separate small bowl, whisk together the mayonnaise, lime juice, salt, and pepper until smooth. Adjust the seasoning based on your taste preference. If you like a tangier flavor, feel free to add more lime juice.
- Combine Everything: Pour the dressing over the potato and vegetable mixture. Add the chopped cilantro and gently fold everything together until the potatoes and vegetables are evenly coated with the dressing. Be careful not to break the potatoes too much.
- Serve: Once everything is well combined, transfer the salad to a serving dish. If desired, garnish with slices of hard-boiled eggs on top for an added touch. Serve immediately or refrigerate for about 30 minutes to allow the flavors to meld.
Extra Tips
For the best flavor, use fresh ingredients and try to source Peruvian potatoes, as they’ve a unique taste and texture that enhances the dish.
Feel free to customize the salad by adding other vegetables such as bell peppers or corn. If you prefer a lighter version, you can substitute Greek yogurt for mayonnaise.
Finally, this salad can be made ahead of time and stored in the refrigerator, making it a convenient option for meal prep or entertaining guests.
Ratatouille-style Peruvian Vegetables

Ratatouille-style Peruvian Vegetables is a vibrant and flavorful dish that marries the traditional French ratatouille with the rich agricultural bounty of Peru. This recipe showcases the unique flavors of Peruvian vegetables such as aji peppers, purple potatoes, and zucchini, combined with classic ratatouille ingredients like eggplant and tomatoes. It’s a colorful medley that can be served as a main course or a hearty side dish, perfect for family gatherings or special occasions.
This dish not only highlights the versatility of vegetables but also allows you to enjoy the health benefits associated with a plant-based meal. The slow-cooked vegetables meld together beautifully, enhancing their natural flavors and creating a delightful harmony in each bite. This Ratatouille-style Peruvian Vegetables recipe serves 4-6 people, making it an ideal choice for a family dinner or a gathering of friends.
Ingredients:
- 1 medium eggplant, diced
- 2 medium zucchini, sliced
- 1 medium yellow squash, sliced
- 1 red aji pepper, diced
- 1 green aji pepper, diced
- 1 medium onion, chopped
- 3 cloves garlic, minced
- 4 medium tomatoes, diced
- 1 cup purple potatoes, peeled and cubed
- 1 teaspoon dried oregano
- 1 teaspoon smoked paprika
- Salt and pepper to taste
- 3 tablespoons olive oil
- Fresh basil leaves for garnish
Cooking Instructions:
- Prepare the Vegetables: Begin by washing and chopping all your vegetables. Dice the eggplant, zucchini, yellow squash, aji peppers, and onion, and mince the garlic. This preparation guarantees that all your ingredients are ready for cooking, making the process smoother and more efficient.
- Sauté the Aromatics: In a large, deep skillet or pot, heat the olive oil over medium heat. Add the chopped onion and minced garlic, sautéing them for about 3-4 minutes until the onion becomes translucent and fragrant. This step builds the foundation of flavor for your dish.
- Cook the Eggplant: Add the diced eggplant to the skillet, stirring to combine with the onions and garlic. Cook for another 5 minutes, allowing the eggplant to soften. Eggplant absorbs flavors well and will become tender, contributing to the dish’s overall texture.
- Incorporate Remaining Vegetables: Add the zucchini, yellow squash, aji peppers, and purple potatoes to the pot. Stir everything together, making certain the vegetables are evenly mixed. Cook for an additional 5-7 minutes, letting the vegetables soften slightly while retaining some bite.
- Add Tomatoes and Seasoning: Stir in the diced tomatoes, dried oregano, smoked paprika, salt, and pepper. Mix everything well, then reduce the heat to low. Cover the skillet and let the mixture simmer for 20-25 minutes, stirring occasionally. This step allows the flavors to meld together and the vegetables to cook down into a beautiful ratatouille consistency.
- Final Touches and Serve: Once the vegetables are tender and the mixture is thickened, taste and adjust seasoning if needed. Remove from heat, and garnish with fresh basil leaves. Serve warm, either on its own or alongside crusty bread or rice for a complete meal.
Extra Tips:
For an added dimension of flavor, consider roasting some of the vegetables before adding them to the skillet. This can enhance their natural sweetness and provide a deeper flavor profile.
Additionally, feel free to customize the vegetable mix based on seasonal availability or personal preference. A splash of balsamic vinegar at the end can also elevate the dish, adding a nice tang that complements the sweetness of the vegetables. Enjoy your Ratatouille-style Peruvian Vegetables!
Fresh Vegetable Ceviche
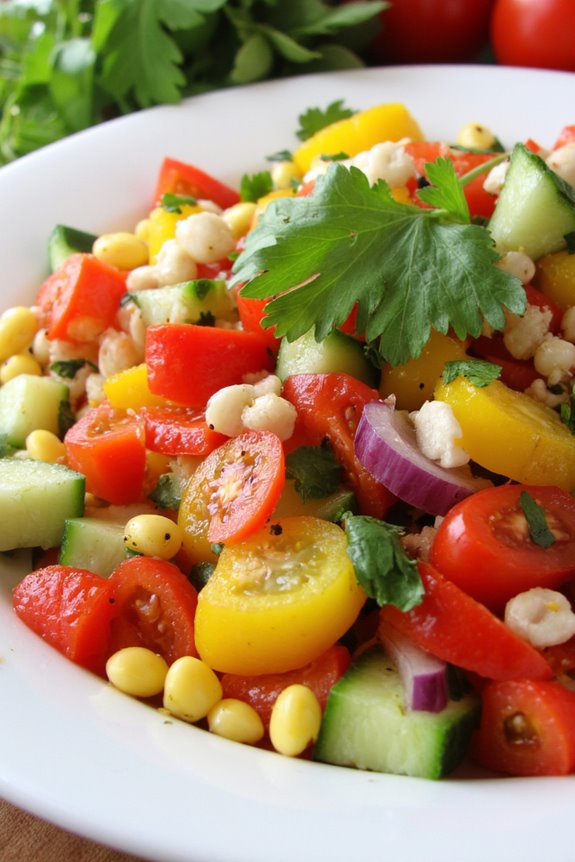
Fresh Vegetable Ceviche is a vibrant and invigorating dish that showcases the rich flavors of Peru’s bountiful produce. Unlike traditional ceviche that features fish, this vegetarian version makes use of an array of colorful vegetables, making it a perfect option for those who prefer plant-based dishes or are looking to enjoy a lighter, invigorating meal.
The combination of fresh ingredients, zesty lime juice, and aromatic herbs creates a delightful symphony of flavors that can be enjoyed as an appetizer or a light main course. This recipe isn’t only simple to prepare but also allows for flexibility with seasonal vegetables, so feel free to experiment with whichever fresh produce you have on hand.
The crunchiness of the vegetables combined with the tangy marinade makes this dish a crowd-pleaser, perfect for summer gatherings, picnics, or any occasion where a fresh burst of flavor is desired.
Ingredients (Serves 4-6):
- 1 cup diced cucumber
- 1 cup diced bell pepper (red, yellow, or orange)
- 1 cup diced cherry tomatoes
- 1/2 cup finely chopped red onion
- 1/2 cup corn kernels (fresh or frozen)
- 1/4 cup chopped fresh cilantro
- 1/4 cup freshly squeezed lime juice
- 1 tablespoon olive oil
- 1 teaspoon salt
- 1/2 teaspoon black pepper
- 1 jalapeño, finely chopped (optional, for heat)
Cooking Instructions:
1. Prepare the Vegetables: Start by washing all your vegetables thoroughly. Dice the cucumber, bell pepper, and cherry tomatoes into small, uniform pieces for even flavor distribution.
Finely chop the red onion and the cilantro. If you choose to add jalapeño, finely chop it as well. This step is vital as the size of the vegetable pieces will affect the texture of the ceviche.
2. Mix the Vegetables: In a large mixing bowl, combine the diced cucumber, bell pepper, cherry tomatoes, red onion, corn, and jalapeño (if using). Gently toss the ingredients together to guarantee they’re evenly distributed.
This will be the base of your ceviche.
3. Add the Dressing: In a small bowl, whisk together the lime juice, olive oil, salt, and black pepper. Once well combined, pour this dressing over the mixed vegetables.
The acidity of the lime juice is fundamental as it will help to “cook” the vegetables slightly and infuse them with flavor.
4. Marinate: Allow the vegetable mixture to Marinate in the refrigerator for at least 30 minutes. This step is important as it lets the vegetables absorb the dressing and enhances the overall flavor of the ceviche.
You can let it marinate for longer if desired, but be mindful that the vegetables may soften over time.
5. Serve: After marinating, give the ceviche a gentle stir to redistribute the dressing. Taste and adjust seasoning if necessary.
Serve the Fresh Vegetable Ceviche cold, either in small bowls or as a topping for tortilla chips, and garnish with additional cilantro if desired.
Extra Tips:
For the best flavor, use fresh, high-quality vegetables and herbs. Feel free to customize the recipe by adding other seasonal vegetables like avocado or radishes.
If you want to add more depth to the flavor, consider incorporating a splash of vinegar or a dash of hot sauce for an extra kick. Remember that ceviche is best enjoyed on the same day it’s made, as the vegetables can lose their crunch if left to sit too long in the marinade.
Enjoy your fresh and colorful dish!