

Are you ready to discover some refreshing Peruvian delights?
These vibrant drinks are perfect for brightening up your afternoons.
From the rich, fruity notes of Chicha Morada to the tangy zest of a Pisco Sour, there’s something for everyone.
Each sip is like a mini journey into Peru’s lively culture.
Let’s explore these tasty recipes that are sure to become your new favorites.
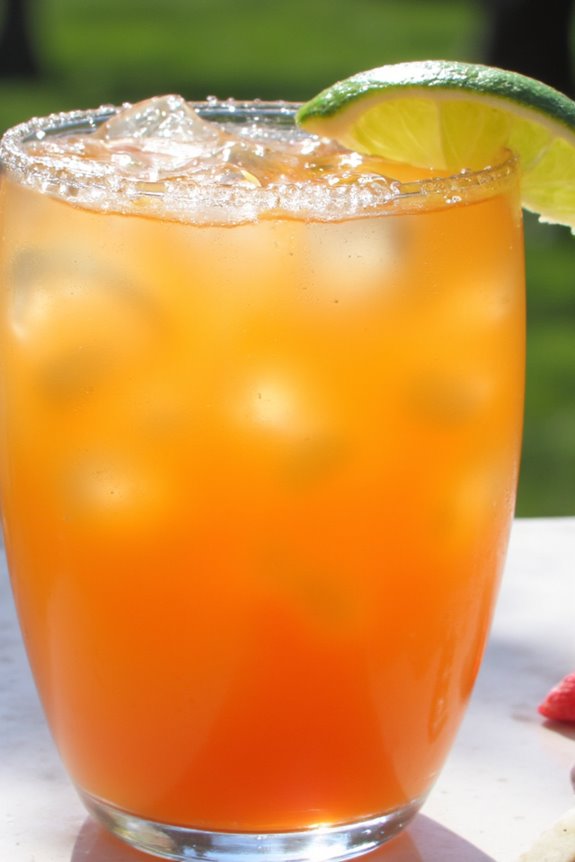
Chicha Morada
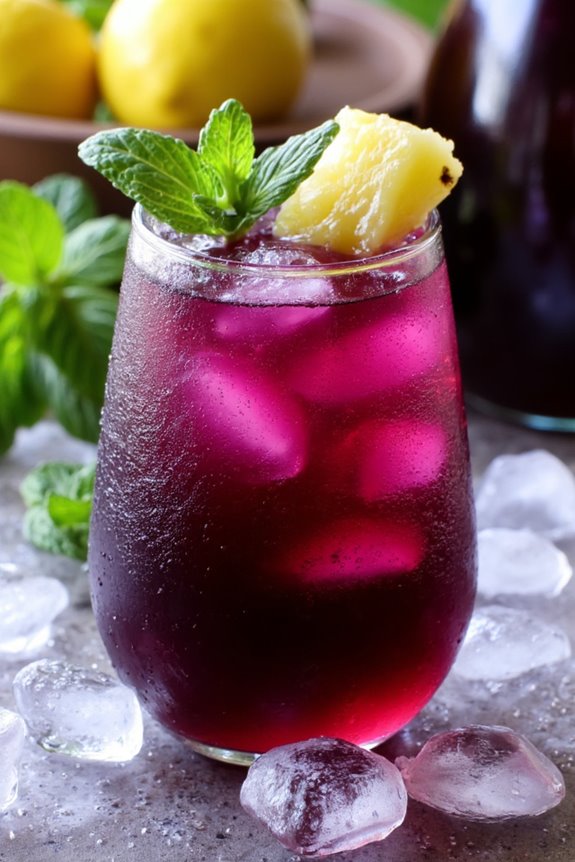
Chicha Morada is a traditional Peruvian beverage made from purple corn, known for its rich flavor and vibrant color. This rejuvenating drink isn’t only delicious but also packed with antioxidants due to the anthocyanins present in the corn.
Originating from the Andean region, Chicha Morada is often served at family gatherings, celebrations, and festivals, making it a staple in Peruvian cuisine. Its sweet, fruity flavor profile combined with the hint of spices creates a delightful drink that complements various dishes.
Making Chicha Morada at home is simple and requires minimal ingredients. The recipe involves boiling purple corn with fruits and spices, which release their flavors into the liquid, followed by a sweetening process that enhances the overall taste.
Whether you’re looking to quench your thirst on a hot day or impress guests with a unique beverage, Chicha Morada is an excellent choice. Here’s how to prepare this delightful drink for a serving size of 4-6 people.
Ingredients
- 2 cups of purple corn kernels
- 8 cups of water
- 1 medium pineapple, peeled and chopped (reserve some for garnish)
- 1 apple, cored and chopped
- 1 cinnamon stick
- 5-6 cloves
- 1 cup of sugar (adjust to taste)
- 1/2 cup of fresh lime juice
- Ice cubes (for serving)
- Mint leaves (optional, for garnish)
Cooking Instructions
- Boil the Purple Corn: In a large pot, combine the purple corn kernels and 8 cups of water. Bring to a boil over medium-high heat. Once boiling, reduce the heat to low and let it simmer for about 30 minutes. This process allows the corn to release its vibrant color and flavor into the water.
- Add Fruits and Spices: After simmering the corn, add the chopped pineapple, apple, cinnamon stick, and cloves to the pot. Continue to simmer for an additional 20-30 minutes. The fruits and spices will infuse the drink with a natural sweetness and aromatic depth.
- Strain the Mixture: Once the mixture is ready, remove the pot from heat and let it cool slightly. Use a fine mesh strainer or cheesecloth to strain the liquid into a large pitcher, discarding the solid ingredients. This step guarantees a smooth drink texture.
- Sweeten and Flavor the Drink: Add the sugar to the strained liquid while it’s still warm, stirring until completely dissolved. Then mix in the fresh lime juice for a tangy contrast. Taste the Chicha Morada and adjust the sweetness if necessary.
- Chill and Serve: Refrigerate the Chicha Morada for at least 2 hours, or until well chilled. When ready to serve, pour the drink over ice cubes in glasses and garnish with reserved pineapple pieces and mint leaves if desired.
Extra Tips
For an authentic touch, consider using fresh fruits and spices that are locally sourced. If you want to experiment with flavors, you can also add other fruits like berries or mangoes.
Additionally, adjusting the sugar based on your personal preference can make the drink more or less sweet. Chicha Morada can be stored in the refrigerator for up to a week, but it’s best enjoyed fresh.
This rejuvenating beverage is perfect for parties, barbecues, or simply as a delicious hydration option during warm weather.
Pisco Sour
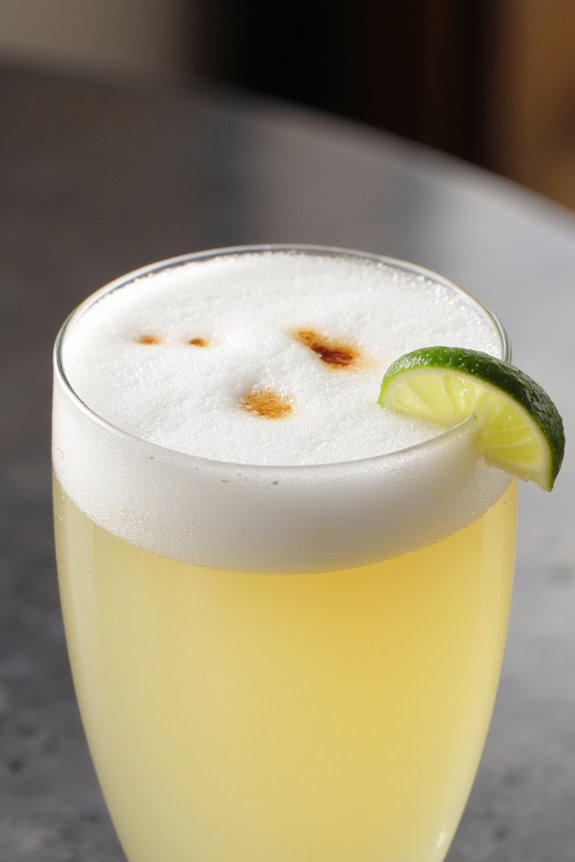
Pisco Sour is a classic Peruvian cocktail that embodies the spirit and culture of Peru. Made with pisco, a type of brandy produced in Peru and Chile, this drink combines the smoothness of pisco with the tartness of fresh lime juice. The addition of simple syrup adds a hint of sweetness, while egg white gives the drink a frothy texture that’s signature to the Pisco Sour.
This delightful cocktail isn’t only a staple in Peruvian bars but also serves as a rejuvenating accompaniment to a variety of dishes, making it perfect for gatherings and celebrations.
To prepare the Pisco Sour, you’ll need to shake the ingredients vigorously to achieve that signature foam on top of the cocktail. The balance of flavors is key: the acidity of lime juice cuts through the sweetness of the syrup, allowing the unique flavors of the pisco to shine.
Whether you enjoy it as an aperitif or a nightcap, the Pisco Sour is sure to impress your guests with its vibrant taste and elegant presentation.
Ingredients (Serves 4-6)
- 12 ounces of pisco
- 8 ounces of fresh lime juice
- 4 ounces of simple syrup
- 2 egg whites
- Angostura bitters (for garnish)
- Ice cubes
- Lime slices (for garnish)
Instructions
- Prepare the Simple Syrup: In a small saucepan, combine equal parts water and sugar (for example, 1 cup of water and 1 cup of sugar). Heat over medium heat, stirring until the sugar is completely dissolved. Allow to cool before using.
- Juice the Limes: Fresh lime juice is essential for the best flavor. Cut the limes in half and use a juicer to extract 8 ounces of juice. Strain the juice to remove any pulp or seeds for a smooth cocktail.
- Combine Ingredients: In a cocktail shaker, add the pisco, freshly squeezed lime juice, simple syrup, and egg whites. The egg whites will help create a frothy texture when shaken.
- Dry Shake: Before adding ice, shake the mixture vigorously for about 15 seconds without ice. This process, known as a “dry shake,” emulsifies the egg whites, which is vital for achieving a fluffy foam.
- Shake with Ice: After the dry shake, add ice cubes to the shaker and shake again for another 10-15 seconds. This will chill the mixture and dilute it slightly, enhancing the drink’s overall balance.
- Strain and Serve: Using a fine mesh strainer, pour the cocktail into chilled glasses. This will help catch any small ice shards or unmixed egg whites.
- Garnish: Add a few drops of Angostura bitters on top of the froth for a subtle aromatic touch and garnish with a lime slice on the rim of each glass.
Extra Tips
For the best results, use high-quality pisco and fresh lime juice, as these ingredients greatly influence the cocktail’s flavor.
Additionally, if you’re concerned about using raw egg whites, you can opt for pasteurized egg whites or egg white substitutes available in stores.
Experiment with the sweetness by adjusting the amount of simple syrup based on your preference, and don’t forget to chill your glasses beforehand for an even more rejuvenating drink.
Enjoy your Pisco Sour responsibly!
Emoliente

Emoliente is a traditional Peruvian herbal drink known for its soothing properties, often enjoyed for its health benefits and unique flavor. This warm beverage is especially popular during the cooler months and is commonly sold by street vendors throughout Peru.
Emoliente combines a variety of herbs, seeds, and other ingredients, resulting in a delightful concoction that’s both invigorating and nourishing. It isn’t only a comforting drink but also a natural remedy for ailments such as colds and digestive issues.
Making Emoliente is a simple process, but it requires gathering a variety of ingredients that contribute to its rich taste and health benefits. The drink is typically enjoyed hot and can be customized according to personal preference.
With its aromatic blend of herbs and spices, Emoliente is perfect for warming up on a chilly evening or as a rejuvenating tonic during the day.
Ingredients (Serves 4-6)
- 8 cups of water
- 2 tablespoons of dried emoliente herbs (a blend of alfalfa, barley, and other herbs)
- 2 tablespoons of flaxseeds
- 1 tablespoon of dried chamomile flowers
- 1 tablespoon of dried lemon balm
- 1 tablespoon of dried eucalyptus leaves
- 1 cinnamon stick
- Honey or sugar to taste
- Lemon slices for garnish (optional)
Cooking Instructions
- Boil the Water: Start by bringing 8 cups of water to a rolling boil in a large pot. The boiling water serves as the base for the herbal infusion, guaranteeing all flavors are extracted effectively.
- Add the Herbs and Seeds: Once the water is boiling, add the dried emoliente herbs, flaxseeds, chamomile, lemon balm, eucalyptus leaves, and the cinnamon stick. Stir the mixture gently to guarantee the herbs and seeds are well-distributed in the water.
- Simmer the Mixture: Lower the heat and let the mixture simmer for about 15-20 minutes. This step allows the flavors to meld together and the beneficial properties of the herbs to be released into the water, creating a fragrant and wholesome drink.
- Strain the Drink: After simmering, remove the pot from heat and strain the mixture into a large bowl or pitcher using a fine mesh strainer or cheesecloth. This will separate the liquid from the herbs and seeds, leaving you with a clear, flavorful emoliente.
- Sweeten to Taste: While the drink is still warm, add honey or sugar according to your taste preferences. Stir well to dissolve the sweetener completely, enhancing the flavor profile of the drink.
- Serve and Garnish: Pour the emoliente into cups and garnish with lemon slices if desired. Serve hot, and enjoy the comforting warmth and health benefits of this traditional Peruvian drink.
Extra Tips
When preparing Emoliente, feel free to experiment with the herb combinations to suit your taste or health needs. Some variations include adding ginger for an extra kick or using different seeds like sesame.
Additionally, you can adjust the sweetness level based on personal preference and consider serving it with a slice of lemon for an invigorating touch. Always remember to let the herbs steep long enough to extract their flavors but avoid boiling them for too long to prevent bitterness.
Enjoy your homemade Emoliente!
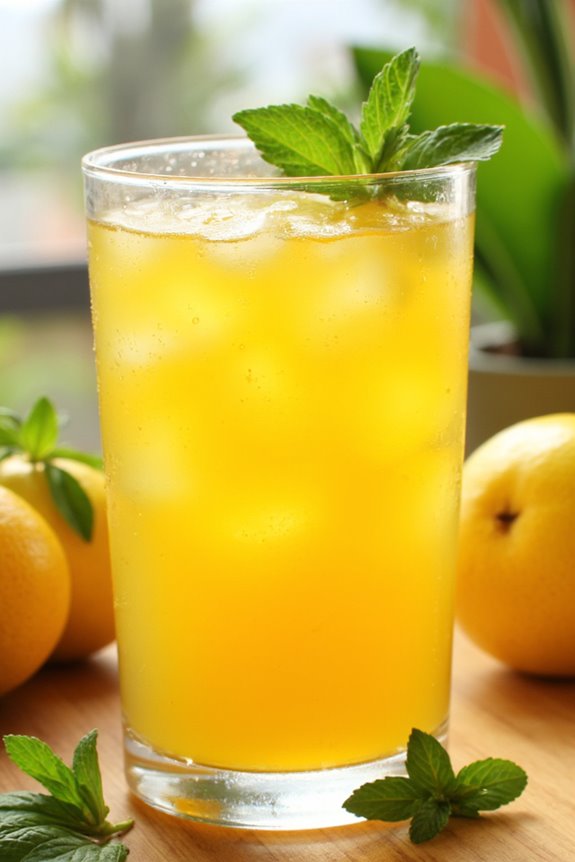
Inca Kola
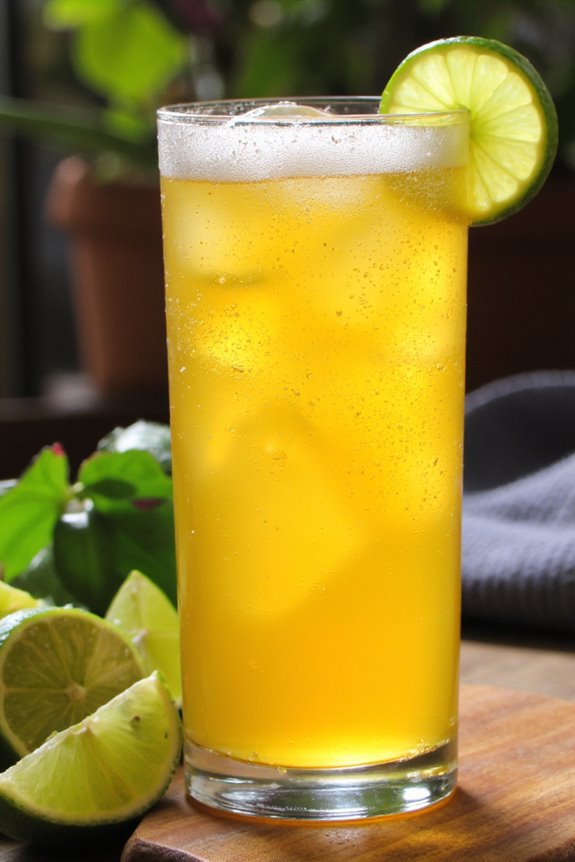
Inca Kola is a beloved Peruvian soft drink known for its vibrant yellow color and unique flavor, which is often described as a blend of bubblegum and cream soda. It was created in 1935 and has become a cultural icon in Peru, often referred to as “the golden cola.”
This fizzy beverage isn’t only a revitalizing drink on its own but also pairs well with traditional Peruvian meals. Making a homemade version of Inca Kola can be a fun way to experience this Peruvian delight.
To create a homemade version of Inca Kola, you’ll need a few key ingredients that capture its signature taste. While the original recipe is closely guarded, this version will give you a similar flavor profile that you can enjoy. Perfect for a gathering or simply a revitalizing drink on a hot day, this recipe serves 4-6 people.
Ingredients
- 1 cup sugar
- 1 cup water
- 1 teaspoon lemon juice
- 1/4 teaspoon vanilla extract
- 1/4 teaspoon anise extract
- 1/4 teaspoon cinnamon
- 1 cup club soda or tonic water
- Yellow food coloring (optional, to achieve the classic color)
- Ice cubes
- Lime wedges (for garnish)
Instructions
1. Prepare the Syrup: In a medium saucepan, combine the sugar and water. Heat over medium heat, stirring until the sugar has completely dissolved. This creates a simple syrup that will be the base of your Inca Kola.
Once dissolved, bring the mixture to a gentle boil and let it simmer for about 5 minutes.
2. Add Flavoring: Remove the saucepan from heat and allow the syrup to cool slightly. After cooling, stir in the lemon juice, vanilla extract, anise extract, and cinnamon.
These ingredients will give your drink its distinctive flavor profile. Allow the syrup to cool to room temperature.
3. Mix the Drink: In a large pitcher, combine the cooled syrup with the club soda or tonic water. If you desire the signature yellow color of Inca Kola, add a few drops of yellow food coloring until you achieve your preferred hue.
Gently stir to combine, being careful not to lose too much carbonation.
4. Serve: Fill glasses with ice cubes and pour the homemade Inca Kola over the ice. Garnish each glass with a lime wedge for an extra touch of freshness.
Serve immediately to enjoy the fizzy, revitalizing drink at its best.
5. Enjoy: Taste your homemade Inca Kola and adjust sweetness or flavor by adding more syrup or club soda according to your preference.
Extra Tips
When making Inca Kola, feel free to experiment with the flavorings to suit your taste. Some people enjoy adding a bit more lemon juice for acidity or adjusting the amount of sugar for sweetness.
Keep in mind that the drink tastes best when served chilled and fresh, so prepare it shortly before serving. If you want to save time, you can make the syrup in advance and store it in the refrigerator for up to a week before mixing it with the club soda.
Enjoy this delightful Peruvian beverage with friends and family!
Limonada
Limonada is a revitalizing Peruvian drink that embodies the bright, zesty flavors of fresh limes, making it a perfect thirst-quencher for hot days. This traditional beverage isn’t only easy to prepare but also offers a delightful blend of sweetness and tartness that appeals to both children and adults.
It’s commonly enjoyed during gatherings, celebrations, or simply as a way to cool off on a sunny afternoon.
To make a classic Peruvian Limonada, you’ll need fresh limes, water, sugar, and ice. The balance of sweetness and acidity can be adjusted according to personal taste, allowing everyone to customize their perfect glass. Serve it chilled, and garnish with lime slices or mint leaves for an added touch of elegance.
Ingredients (Serves 4-6):
- 6 large limes
- 4 cups of cold water
- 1 cup of granulated sugar (adjust to taste)
- Ice cubes
- Fresh mint leaves for garnish (optional)
- Lime slices for garnish (optional)
Cooking Instructions:
1. Juice the Limes: Start by cutting the limes in half and using a juicer or a reamer to extract the juice. You should aim to collect around 1 cup of fresh lime juice. Make sure to strain the juice to remove any seeds or pulp, guaranteeing a smooth drink.
2. Dissolve the Sugar: In a medium-sized bowl or pitcher, combine the freshly squeezed lime juice with the granulated sugar. Stir the mixture well until the sugar is completely dissolved. If you prefer a sweeter drink, feel free to add more sugar little by little until the desired sweetness is achieved.
3. Combine with Water: Gradually add the cold water to the lime juice and sugar mixture while stirring continuously. This will help integrate all the flavors and confirm that the drink is well-balanced.
Taste the limonada and adjust the sweetness or acidity by adding more sugar or lime juice as needed.
4. Chill and Serve: Place the limonada in the refrigerator for about 30 minutes to chill, or you can serve it immediately over ice. Pour the limonada into glasses and add ice cubes for an extra revitalizing touch.
5. Garnish and Enjoy: For an appealing presentation, garnish each glass with a slice of lime and a sprig of fresh mint. This not only enhances the drink’s aesthetic but also adds a hint of fresh aroma.
Extra Tips:
When making limonada, using fresh limes will greatly elevate the flavor of your drink compared to bottled lime juice.
Additionally, experiment with different sweeteners like agave syrup or honey for a unique twist. For a fun variation, you can infuse your limonada with fruits such as strawberries or berries, blending them in before serving to add a fruity burst of flavor.
Enjoy your revitalizing Peruvian limonada!
Aguajina
Aguajina is a revitalizing Peruvian drink made primarily from the aguaje fruit, known for its vibrant color and rich nutritional properties. This tropical fruit, also called “buriti” in some regions, isn’t only delicious but also packed with vitamins A and C, making it a nutritious addition to your beverage repertoire.
Aguajina is an excellent thirst quencher, especially on warm days, and is often enjoyed by locals as a staple refresher.
To prepare Aguajina, the aguaje fruit is typically blended with water and sweetened to taste, resulting in a creamy and flavorful drink. This recipe is perfect for gatherings, serving 4 to 6 people, and can be easily customized with additional ingredients like sugar, honey, or lime juice to suit your taste preferences.
Let’s explore the ingredients and instructions to create this delightful beverage.
Ingredients (Serves 4-6)
- 6 ripe aguaje fruits
- 4 cups of water
- 1/2 cup of sugar (adjust to taste)
- 1 teaspoon of vanilla extract (optional)
- Ice cubes (for serving)
- Lemon or lime wedges (for garnish, optional)
Cooking Instructions
- Prepare the Aguaje Fruits: Begin by washing the aguaje fruits thoroughly under running water. Once cleaned, peel off the outer skin carefully to reveal the orange flesh inside. The skin can be quite tough, so a sharp knife may be needed to cut through it effectively.
- Blend the Ingredients: Cut the peeled aguaje flesh into smaller pieces and place them in a blender. Add 4 cups of water to the blender. If you prefer a sweeter drink, add 1/2 cup of sugar at this stage. You can also include 1 teaspoon of vanilla extract for an additional flavor dimension. Blend the mixture on high speed until it becomes a smooth and creamy consistency.
- Strain the Mixture: After blending, take a fine mesh strainer or cheesecloth and strain the mixture into a large pitcher. This will help remove any fibrous bits and create a smoother drink. Use a spoon to press down on the pulp and extract as much liquid as possible.
- Chill and Serve: Once strained, taste the aguajina and adjust the sweetness if needed by adding more sugar. Refrigerate the drink for about an hour to chill it. Serve the aguajina over ice cubes in glasses, and garnish with lemon or lime wedges if desired.
Extra Tips
When making aguajina, the ripeness of the aguaje fruit is vital for achieving the best flavor. Look for fruits with a deep orange color and a slightly soft texture, as they’ll be sweeter and easier to blend.
If aguaje isn’t available, you can experiment with other tropical fruits like mango or papaya for a different twist. Additionally, feel free to adjust the sweetness based on your preference; some may enjoy a less sweet version that highlights the natural fruit flavors.
Queso Helado
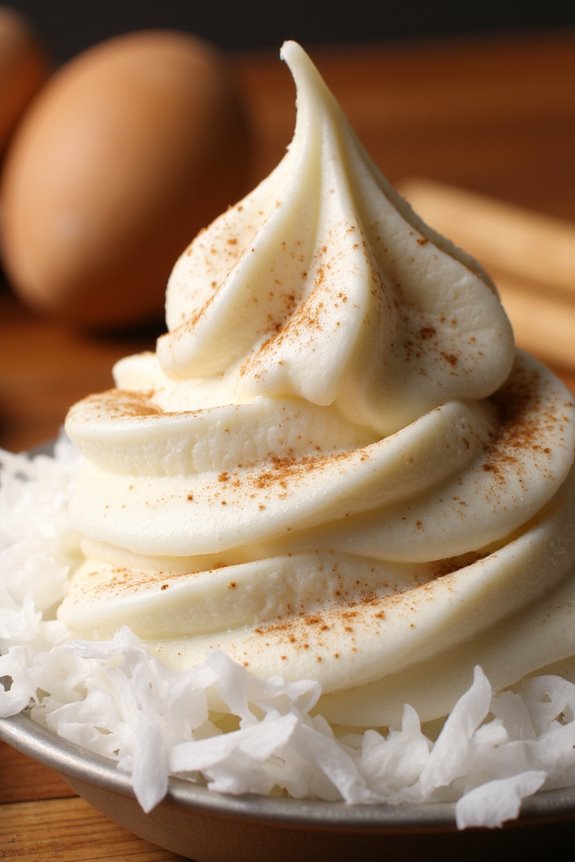
Queso Helado, which translates to “frozen cheese,” is a delightful Peruvian dessert that has captured the hearts of many. This traditional treat hails from the southern city of Arequipa, where it’s enjoyed as a revitalizing way to cool down during the warm months.
Despite its name, Queso Helado doesn’t actually contain cheese; instead, it’s a creamy and sweet dessert made primarily from evaporated milk and flavored with spices such as cinnamon and vanilla. The texture is reminiscent of ice cream, but it has its own unique character that sets it apart.
Making Queso Helado is a straightforward process that requires only a few ingredients and some patience. The key to achieving the perfect consistency lies in the freezing and mixing techniques. This dessert is typically served in cups and garnished with a sprinkle of cinnamon or chocolate shavings.
Whether served at a summer gathering or as a special treat after dinner, Queso Helado is sure to impress your family and friends with its rich flavors and creamy texture.
Ingredients (Serves 4-6):
- 2 cups evaporated milk
- 1 cup condensed milk
- 1 cup coconut milk
- 1 cup sugar
- 1 teaspoon vanilla extract
- 1 teaspoon ground cinnamon
- 1/2 cup shredded coconut (optional)
- Chocolate shavings or additional cinnamon for garnish
Cooking Instructions:
- Combine the Dairy Ingredients: In a large mixing bowl, pour in the evaporated milk, condensed milk, and coconut milk. Stir the mixture until well combined. This will be the base of your Queso Helado and will provide a rich, creamy flavor.
- Add the Sweetness and Flavor: Next, add the sugar, vanilla extract, and ground cinnamon into the dairy mixture. Stir thoroughly until the sugar has completely dissolved. This step is essential as it contributes to the overall sweetness and aromatic profile of the dessert.
- Incorporate Shredded Coconut: If you’re using shredded coconut, fold it into the mixture at this stage. This adds texture and enhances the tropical flavor, giving your Queso Helado an authentic taste of Peru.
- Freeze the Mixture: Pour the prepared mixture into a shallow container or ice cream maker. If using a container, cover it with a lid or plastic wrap. Place it in the freezer and let it freeze for about 4-6 hours, or until fully set. If you’re using an ice cream maker, follow the manufacturer’s instructions for freezing.
- Mix Halfway Through: If using a shallow container, after about 2 hours, take the container out of the freezer and stir the mixture vigorously with a fork to break up any ice crystals that may have formed. This will help achieve a smoother texture. Return it to the freezer and let it continue to freeze until firm.
- Serve and Garnish: Once the Queso Helado is fully set, scoop it into serving cups. For an elegant touch, garnish each serving with chocolate shavings or a sprinkle of cinnamon. Serve immediately and enjoy!
Extra Tips: When making Queso Helado, make sure that all your ingredients are well combined to avoid any separation during freezing. If you prefer a lighter texture, consider whisking the mixture before pouring it into the container to incorporate air.
Additionally, feel free to experiment with flavors by adding a splash of rum or other spices like nutmeg for a unique twist. Enjoy your homemade Peruvian delight!
Tacu Tacu Smoothie
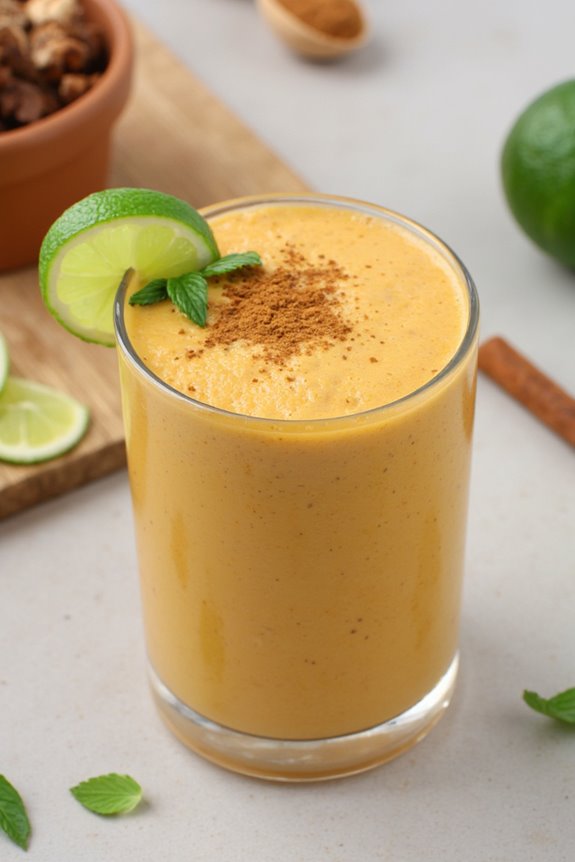
Tacu Tacu is a beloved Peruvian dish that combines leftover rice and beans, typically served fried in a delicious, crispy cake. In this creative twist, we transform the traditional flavors into a revitalizing smoothie, perfect for a nutritious breakfast or snack. The Tacu Tacu Smoothie captures the essence of the original dish while providing a unique and vibrant way to enjoy these staple ingredients.
It’s packed with protein, fiber, and an array of flavors that make it a delightful treat. This smoothie isn’t only simple to prepare but also allows for flexibility in ingredients, making it easy to adapt based on what you have on hand. The creamy texture is achieved through the use of yogurt and banana, while the addition of spices like cumin and a hint of lime juice brings a invigorating zest to the drink.
Whether you’re looking to fuel up for the day or to enjoy a quick and healthy snack, the Tacu Tacu Smoothie is a must-try!
Ingredients (serving size: 4-6 people)
- 1 cup cooked rice (preferably leftover)
- 1 cup cooked black beans (or pinto beans)
- 2 ripe bananas
- 1 cup plain yogurt (or a non-dairy alternative)
- 1 cup almond milk (or any milk of choice)
- 1 tablespoon lime juice
- 1 teaspoon ground cumin
- 1 teaspoon honey or agave syrup (optional)
- Ice cubes (optional, for a chilled smoothie)
Cooking Instructions
- Prepare the Ingredients: Begin by gathering all your ingredients. Confirm that your rice and beans are cooked and cooled down if they’re leftovers. Peel the bananas and set them aside.
- Blend the Base: In a blender, combine the cooked rice and beans. Blend on low speed to break them down into a smooth consistency. This will create the base of your smoothie, confirming that the flavors meld together seamlessly.
- Add the Creamy Elements: Next, add the bananas and yogurt to the blender. These ingredients will provide creaminess and natural sweetness to your smoothie. Blend again until the mixture is smooth and well combined.
- Incorporate the Liquids: Pour in the almond milk and lime juice. The milk will help to thin out the mixture to your desired consistency, while the lime juice adds a invigorating zing. Blend again until everything is well mixed.
- Season and Sweeten: Add the ground cumin and honey (if using) to the blender. Cumin adds a unique flavor that ties back to the traditional Tacu Tacu dish. Blend once more to confirm the spices are evenly distributed throughout the smoothie.
- Adjust the Consistency: Check the consistency of your smoothie. If it’s too thick, add more almond milk until you reach your desired texture. If you prefer a chilled smoothie, add ice cubes and blend until smooth.
- Serve and Enjoy: Pour the Tacu Tacu Smoothie into glasses and serve immediately. You can garnish with a slice of lime or a sprinkle of cinnamon for an extra touch.
Extra Tips
For an added nutritional boost, consider tossing in a handful of spinach or kale before blending; they won’t alter the taste much but will enhance the nutrient profile.
Additionally, if you want to experiment with flavors, try adding a dash of vanilla extract or a few mint leaves for a invigorating twist. This smoothie is best enjoyed fresh, but you can store any leftovers in the refrigerator for up to 24 hours. Just give it a good stir or shake before consuming, as the ingredients may separate.
Chicha De Jora
Chicha de Jora is a traditional Peruvian beverage that has been enjoyed for centuries, originating from the ancient Andean civilizations. This fermented corn drink is made using jora, which is germinated corn, and has a rich cultural significance in Peru.
It’s often consumed during festivities and social gatherings, making it a staple in both rural and urban areas. The delightful combination of flavors, alongside its invigorating qualities, makes Chicha de Jora not just a drink, but a true experience of Peruvian heritage.
Making Chicha de Jora involves a few steps, including the fermentation process that adds depth to its flavor. While it may take some time to prepare, the end result is a unique drink that’s perfect for sharing with friends and family. This recipe will guide you through creating Chicha de Jora for a serving size of 4-6 people, ensuring that you can enjoy this traditional drink in the comfort of your home.
Ingredients:
- 2 cups jora (germinated corn)
- 8 cups water
- 1 cup sugar (or to taste)
- 1 teaspoon cinnamon (optional)
- 1 teaspoon cloves (optional)
- Juice of 1 lime (optional)
- Fresh mint leaves for garnish (optional)
Cooking Instructions:
1. Prepare the Jora: Start by rinsing the jora under cold water to remove any impurities. Then, soak the jora in water for about 24-48 hours until it begins to germinate. You’ll notice small shoots emerging from the corn kernels.
Once germinated, drain the jora and rinse it again.
2. Cook the Jora: In a large pot, add the germinated jora with 8 cups of water. Bring it to a boil over medium heat. Once boiling, reduce the heat and let it simmer for about 30-45 minutes. This step helps to extract the flavors and natural sugars from the corn.
3. Mash the Jora: After simmering, remove the pot from heat and allow it to cool slightly. Using a wooden spoon or a masher, gently mash the corn mixture to release more flavors. Be careful not to pulverize it completely; you want to break it apart while keeping some texture.
4. Strain the Mixture: Place a fine sieve or cheesecloth over another pot or large bowl. Pour the mashed mixture through the sieve to separate the liquid from the solid corn residue. This will give you the base liquid for your Chicha de Jora.
5. Add Sweeteners and Spices****: To the strained liquid, add the sugar, cinnamon, and cloves, if using. Stir well until the sugar is fully dissolved. Taste the mixture and adjust the sweetness to your liking. If you prefer a citrusy twist, you can also add lime juice at this stage.
6. Ferment the Mixture: Pour the liquid into a clean glass or ceramic container. Cover it with a cloth to allow air circulation while preventing any contaminants from entering. Let it sit at room temperature for 1-3 days, depending on the desired level of fermentation. The longer it ferments, the stronger the flavor will become.
7. Serve: Once fermented, give the Chicha de Jora a good stir, and it’s ready to Serve! Pour it into glasses over ice, and garnish with fresh mint leaves if desired. Enjoy this unique and invigorating drink chilled.
Extra Tips:
When making Chicha de Jora, it’s important to monitor the fermentation process closely. Depending on the temperature and humidity of your environment, fermentation times can vary.
If you prefer a less alcoholic beverage, taste it frequently and refrigerate it as soon as it reaches your desired flavor profile. Additionally, using high-quality, fresh jora will enhance the taste of your drink considerably. Enjoy exploring this traditional Peruvian delight!
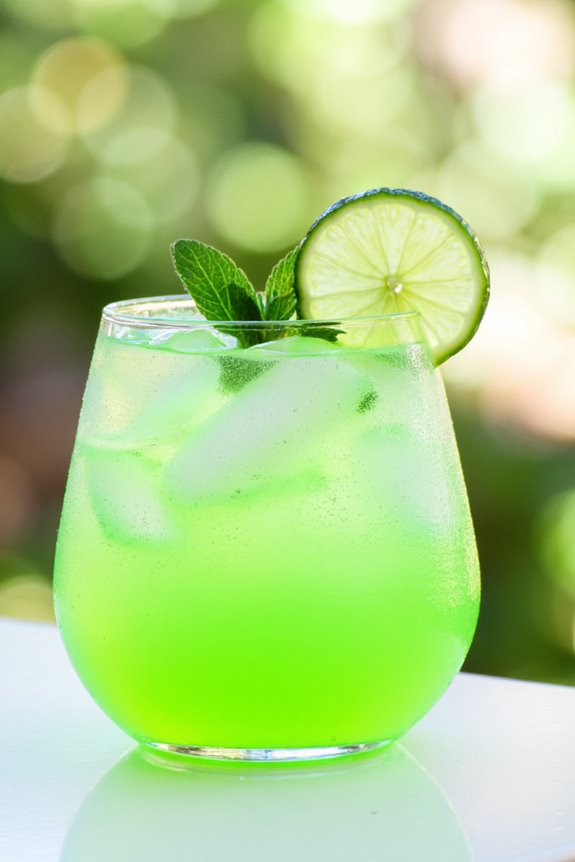
Maracuyá Juice
Maracuyá juice, also known as passion fruit juice, is a vibrant and invigorating beverage that captures the essence of tropical Peru. With its sweet and tangy flavor, maracuyá juice isn’t only delicious but also packed with nutrients, making it a favorite among locals and visitors alike.
This drink is perfect for hot days, serving as a delightful accompaniment to meals or as a standalone refreshment.
Making maracuyá juice at home is simple and requires only a few ingredients. The star of the show, the maracuyá fruit, is easily found in supermarkets or local markets, especially in regions where tropical fruits thrive.
Whether you’re enjoying it on a sunny day or serving it at a gathering, maracuyá juice is sure to impress your guests and quench your thirst.
Ingredients (Serves 4-6 people)
- 6 ripe maracuyá (passion fruits)
- 4 cups cold water
- 1/2 cup sugar (adjust to taste)
- Ice cubes (optional)
- Mint leaves for garnish (optional)
Instructions
- Prepare the Maracuyá: Start by cutting each maracuyá in half. Use a spoon to scoop out the pulp and seeds into a mixing bowl. Make sure to get all the juicy goodness from each half.
- Blend the Mixture: In a blender, combine the scooped maracuyá pulp with 4 cups of cold water. Blend on medium speed for about 30 seconds. This will help to mix the flavors and extract more juice from the seeds.
- Strain the Juice: After blending, pour the mixture through a fine mesh strainer or cheesecloth into a large pitcher. Use a spoon to press down on the pulp to extract as much juice as possible. Discard the remaining seeds and pulp.
- Sweeten the Juice: Add 1/2 cup of sugar to the strained juice, stirring well until it completely dissolves. Taste the juice, and if you prefer it sweeter, you can add more sugar according to your preference.
- Chill and Serve: If desired, refrigerate the maracuyá juice for at least 30 minutes before serving. Serve over ice cubes in glasses and garnish with fresh mint leaves for an extra touch.
Extra Tips
For a twist on the classic maracuyá juice, consider adding a splash of lime or lemon juice to enhance the citrus flavors.
You can also mix the maracuyá juice with other fruit juices, such as orange or pineapple, for a tropical blend. If you prefer a less sweet version, reduce the amount of sugar or use honey or agave syrup as alternatives.
Enjoy your homemade maracuyá juice chilled for the best experience!
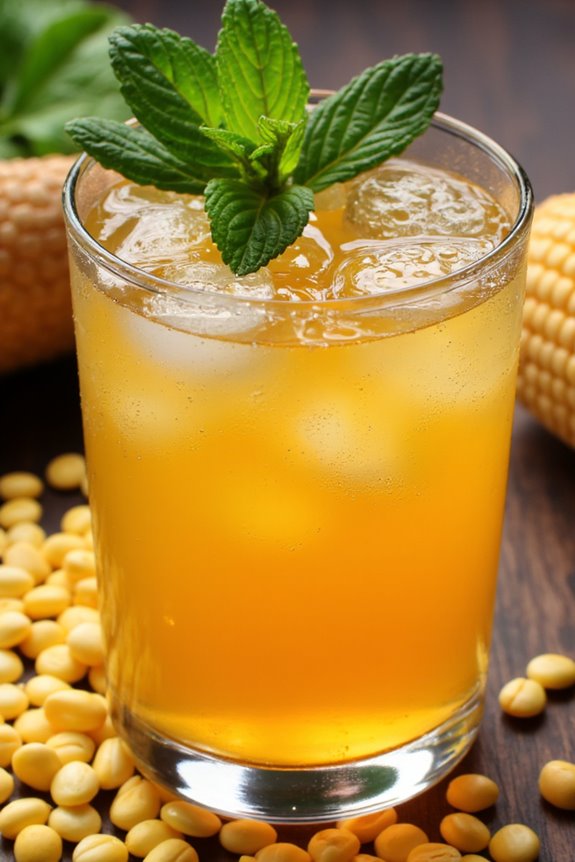
Frescolita

Frescolita is a revitalizing Peruvian drink that offers a delightful blend of sweetness and tanginess, perfect for hot summer days or as a unique beverage for gatherings. This vibrant drink features the iconic flavor of Frescolita soda, a popular beverage in Peru, combined with lime juice and other invigorating ingredients. The result is a fizzy, energizing drink that can be enjoyed by people of all ages, making it an excellent choice for parties or casual gatherings.
To prepare Frescolita, you’ll want to verify you have all your ingredients ready. This drink is simple to make, requiring just a few essential components that can be easily found at your local grocery store. With its bright color and effervescent quality, Frescolita is sure to impress anyone who tries it, and it can be customized to suit individual tastes by adjusting the sweetness or adding fresh fruit.
Ingredients (serving size: 4-6 people)
- 2 cups of Frescolita soda
- 1 cup of freshly squeezed lime juice
- 1/2 cup of simple syrup (adjust for sweetness)
- 1/4 cup of fresh mint leaves, chopped
- Lime slices for garnish
- Ice cubes
- Optional: Fresh fruit slices (such as strawberries or oranges) for extra flavor
Instructions
- Prepare the Simple Syrup: In a small saucepan, combine equal parts of water and sugar (about 1/2 cup each), and bring to a boil. Stir until the sugar is fully dissolved, then remove from heat and let it cool. This will be your simple syrup.
- Juice the Limes: While the simple syrup is cooling, juice fresh limes to get 1 cup of lime juice. Make sure to strain the juice to remove any seeds or pulp for a smooth drink.
- Mix the Ingredients: In a large pitcher, combine the freshly squeezed lime juice and the simple syrup. Stir well to verify they’re thoroughly mixed.
- Add the Frescolita: Slowly pour in the Frescolita soda to the pitcher, mixing gently to maintain the carbonation. Be careful not to stir too vigorously, as this can cause the soda to lose its fizz.
- Incorporate Mint: Add the chopped fresh mint leaves into the pitcher, allowing them to infuse their flavor into the drink. You can also lightly muddle the mint leaves at the bottom of the pitcher before adding the other ingredients for a stronger mint flavor.
- Serve and Garnish: Fill glasses with ice cubes, pour the Frescolita mixture over the ice, and garnish with lime slices and additional mint leaves if desired. Serve immediately to enjoy the revitalizing bubbles.
Extra Tips
When making Frescolita, feel free to experiment with the ingredients to tailor the drink to your taste. You can adjust the amount of simple syrup to make it sweeter or less sweet, depending on your preference.
Additionally, adding fresh fruit slices not only enhances the drink’s flavor but also adds a beautiful presentation. If you’re preparing for a crowd, consider making a larger batch and serving it in a punch bowl, allowing guests to serve themselves. Enjoy your revitalizing Frescolita!