

As I wander through the vibrant culinary landscape of Brazil, I’m truly inspired by the fresh vegetarian recipes that celebrate the flavors of the garden. Each dish, from the hearty Black Bean Stew to the refreshing Quinoa Salad, showcases the rich diversity of ingredients available. Picture the aroma of coconut and spices in a Creamy Curry or the sizzle of Grilled Vegetable Skewers. There’s so much more to explore, and I’m excited to share these delightful recipes with you.
Brazilian Black Bean Stew (Feijoada Vegetariana)
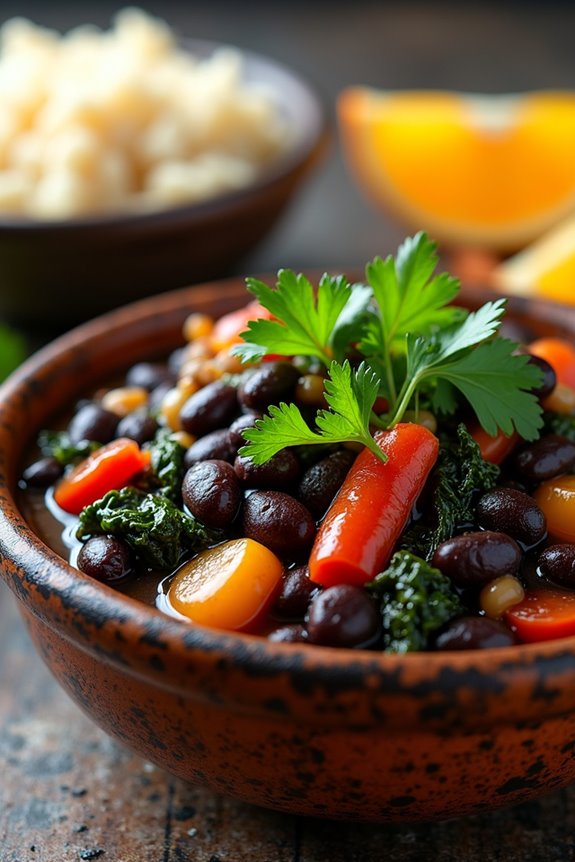
Feijoada is a traditional Brazilian dish that typically features black beans and a variety of meats. However, in this vegetarian version, we embrace the rich flavors and hearty textures while leaving out the meat. This Brazilian Black Bean Stew (Feijoada Vegetariana) is packed with nutrients and is a comforting dish that can be enjoyed by everyone, regardless of dietary preferences.
It’s perfect for family gatherings, dinner parties, or a cozy night in. Served alongside rice, sautéed greens, and orange slices, it offers a delightful balance of flavors and a colorful presentation.
To make this stew truly special, we incorporate a mix of spices, vegetables, and plant-based proteins. The result is a vibrant and hearty meal that showcases the essence of Brazilian cuisine while being completely vegetarian. This recipe serves 4-6 people and is an excellent way to introduce friends and family to the delicious world of Brazilian vegetarian cooking.
Ingredients:
- 2 cups black beans (soaked overnight and drained)
- 1 tablespoon olive oil
- 1 large onion, chopped
- 4 cloves garlic, minced
- 1 bell pepper (any color), chopped
- 1 carrot, diced
- 2 bay leaves
- 1 teaspoon cumin
- 1 teaspoon smoked paprika
- 1 teaspoon coriander
- 4 cups vegetable broth
- 1 cup diced tomatoes (canned or fresh)
- 1 cup kale or collard greens, chopped
- Salt and pepper to taste
- Fresh cilantro for garnish
- Cooked rice for serving
- Orange slices for serving
Cooking Instructions:
- Prepare the Black Beans: Start by soaking the black beans overnight in plenty of water. This helps soften the beans and reduces cooking time. Drain and set them aside.
- Sauté the Aromatics: In a large pot, heat the olive oil over medium heat. Add the chopped onion and sauté for about 5 minutes until it becomes translucent. Then, add the minced garlic and bell pepper, cooking for an additional 2-3 minutes until fragrant.
- Add Vegetables and Spices: Stir in the diced carrot, bay leaves, cumin, smoked paprika, and coriander. Continue to sauté for another 2 minutes to allow the spices to bloom and coat the vegetables.
- Combine with Beans and Broth: Add the soaked black beans to the pot along with the vegetable broth and diced tomatoes. Bring the mixture to a boil, then reduce the heat to low. Cover the pot and let it simmer for about 45 minutes to 1 hour, or until the beans are tender.
- Incorporate Greens: Once the beans are cooked, stir in the chopped kale or collard greens. Allow the stew to simmer for an additional 10 minutes, just until the greens are wilted and tender. Season with salt and pepper to taste.
- Serve: Remove the bay leaves before serving. Ladle the stew into bowls, garnish with fresh cilantro, and serve alongside cooked rice and orange slices for a revitalizing contrast.
Extra Tips:
To enhance the flavor profile of your Brazilian Black Bean Stew, consider adding a splash of lime juice just before serving for a zesty kick.
You can also customize the stew by including other vegetables like zucchini or sweet potatoes, or even adding some plant-based sausage for an extra protein boost. This dish can be made ahead of time and tastes even better the next day as the flavors meld together! Store any leftovers in an airtight container in the refrigerator for up to 3 days.
Creamy Coconut and Vegetable Curry

Brazilian cuisine is renowned for its vibrant flavors and diverse ingredients, and this Creamy Coconut and Vegetable Curry is no exception. This dish marries the creaminess of coconut milk with a medley of fresh vegetables, creating a delightful and satisfying meal that’s both healthy and comforting.
Perfectly suited for vegetarians and anyone looking to enjoy a hearty, plant-based dish, this curry is a celebration of colorful produce and aromatic spices. Cooking this Creamy Coconut and Vegetable Curry isn’t only a culinary adventure but also an opportunity to explore the rich flavors of Brazil.
The combination of fresh vegetables, coconut milk, and spices results in a dish that’s aromatic and fulfilling. Serve it with steamed rice or crusty bread to soak up the delicious sauce, making it an excellent option for family dinners or gatherings with friends.
Ingredients (Serves 4-6):
- 2 tablespoons coconut oil
- 1 medium onion, chopped
- 3 cloves garlic, minced
- 1 tablespoon fresh ginger, grated
- 1 red bell pepper, chopped
- 1 zucchini, sliced
- 1 carrot, sliced
- 1 cup green beans, trimmed and cut into pieces
- 1 can (14 oz) of coconut milk
- 1 tablespoon curry powder
- 1 teaspoon turmeric
- Salt and pepper to taste
- Fresh cilantro, for garnish
- Juice of 1 lime
Cooking Instructions:
- Heat the Coconut Oil: In a large pot or Dutch oven, heat the coconut oil over medium heat until melted. This will serve as the base for your curry and will infuse the dish with a rich, tropical flavor.
- Sauté Aromatics: Add the chopped onion to the pot and sauté for about 5 minutes until it becomes translucent. Then, add the minced garlic and grated ginger, cooking for another 1-2 minutes until fragrant. This step builds a flavorful foundation for the curry.
- Add Vegetables: Stir in the chopped red bell pepper, sliced zucchini, sliced carrot, and green beans. Cook the vegetables for about 5-7 minutes, stirring occasionally, until they begin to soften. This guarantees that the vegetables are well incorporated into the dish and enhances their natural sweetness.
- Incorporate Spices: Sprinkle in the curry powder and turmeric, mixing well to coat the vegetables evenly. Cook for another minute to toast the spices and release their flavors, deepening the overall taste of the curry.
- Add Coconut Milk: Pour in the can of coconut milk, stirring to combine. Bring the mixture to a gentle simmer, then reduce the heat to low. Let it simmer for about 15-20 minutes, allowing the flavors to meld and the vegetables to become tender.
- Season and Serve: Taste the curry and season with salt and pepper as needed. Just before serving, stir in the lime juice for a fresh burst of flavor. Garnish with fresh cilantro for a pop of color and added freshness.
Extra Tips:
For a heartier meal, consider adding cooked chickpeas or tofu to the curry for additional protein. You can also customize the vegetables based on what you have available or what’s in season.
If you prefer a spicier dish, feel free to add some red pepper flakes or a diced chili pepper during the sautéing step. Finally, this curry can be made ahead of time and reheated, as the flavors only get better after a day in the fridge!
Grilled Vegetable Skewers With Chimichurri

Grilled Vegetable Skewers with Chimichurri is a vibrant and flavorful dish that showcases the best of Brazilian vegetarian cuisine. This dish is perfect for summer barbecues or simply as a healthy meal option any time of the year. The combination of various marinated vegetables on skewers, grilled to perfection, and topped with a zesty chimichurri sauce creates an explosion of flavor that’s bound to impress both vegetarians and meat-lovers alike.
The beauty of this recipe lies not only in the aesthetic appeal of the colorful skewers but also in the versatility of the ingredients. You can use any seasonal vegetables you have on hand, making this dish adaptable to your preferences. The chimichurri sauce, a traditional Argentine condiment, adds a revitalizing herbaceous kick that elevates the entire dish. Serve these skewers as an appetizer, side dish, or even as a main course, and enjoy the delightful taste of Brazil!
Ingredients (Serves 4-6)
- 1 red bell pepper, cut into 1-inch pieces
- 1 yellow bell pepper, cut into 1-inch pieces
- 1 zucchini, sliced into rounds
- 1 red onion, cut into wedges
- 8 ounces of cherry tomatoes
- 1 cup of mushrooms, halved
- 1/4 cup of olive oil
- Salt and pepper, to taste
- 1 teaspoon of smoked paprika
For the Chimichurri:
- 1 cup of fresh parsley, chopped
- 1/4 cup of fresh oregano, chopped
- 3 cloves of garlic, minced
- 1/2 cup of olive oil
- 1/4 cup of red wine vinegar
- Salt and pepper, to taste
- 1/2 teaspoon of red pepper flakes (optional)
Cooking Instructions
- Prepare the Vegetables: Begin by washing and cutting all the vegetables into uniform sizes for even cooking. The red and yellow bell peppers should be cut into 1-inch pieces, the zucchini into rounds, and the red onion into wedges. Halve the cherry tomatoes and mushrooms. This preparation guarantees that each piece will grill evenly and looks appealing on the skewers.
- Marinate the Vegetables: In a large bowl, combine the cut vegetables. Drizzle with olive oil, and sprinkle with salt, pepper, and smoked paprika. Toss everything together gently to make sure that the vegetables are evenly coated in the marinade. Allow them to marinate for at least 30 minutes. This step enhances the flavor of the vegetables and makes them tender when grilled.
- Prepare the Chimichurri Sauce: While the vegetables are marinating, prepare the chimichurri sauce. In a medium bowl, mix together the chopped parsley, oregano, minced garlic, olive oil, red wine vinegar, salt, pepper, and red pepper flakes (if using). Stir until well combined. Let the sauce sit for at least 15 minutes to allow the flavors to meld.
- Assemble the Skewers: Preheat your grill to medium-high heat. Take skewers (either metal or soaked wooden skewers) and thread the marinated vegetables onto them, alternating between different types for a colorful presentation. Don’t overcrowd the skewers; leave a little space between the vegetables to guarantee even cooking.
- Grill the Skewers: Place the assembled skewers on the preheated grill. Cook for 10-12 minutes, turning occasionally, until the vegetables are tender and have nice grill marks. Be careful not to overcook, as you want the vegetables to retain some crunch.
- Serve: Once cooked, remove the skewers from the grill and let them rest for a minute. Serve the grilled vegetable skewers warm, drizzled with the chimichurri sauce for added flavor. Garnish with any leftover herbs if desired.
Extra Tips
When preparing Grilled Vegetable Skewers with Chimichurri, feel free to experiment with different vegetables based on seasonal availability or personal preference. For added flavor, consider marinating the vegetables for longer, even overnight, to infuse them with more depth.
Additionally, if you want to add protein, consider including halloumi cheese or tofu cubes on the skewers. Finally, make extra chimichurri sauce; it’s delicious as a dip or dressing for salads and can be stored in the refrigerator for up to a week. Enjoy your grilling!
Quinoa Salad With Mango and Avocado

Quinoa Salad with Mango and Avocado is a revitalizing and nutritious dish that showcases the vibrant flavors of Brazil. Combining the nutty taste of quinoa with the sweetness of ripe mango and the creaminess of avocado creates a delightful balance that’s both satisfying and healthy.
This salad is perfect for a light lunch or as a side dish for a summer barbecue, making it a versatile addition to any meal. With a burst of colors and textures, this dish isn’t only pleasing to the eye but also packed with essential nutrients.
This recipe is simple to prepare and can be made in advance, allowing the flavors to meld together beautifully. Quinoa, a complete protein, serves as the base, while the fresh fruits add a tropical essence that transports you straight to the beaches of Brazil.
Whether you’re a vegetarian or simply looking to incorporate more plant-based meals into your diet, this salad is sure to impress your family and friends.
Ingredients (Serves 4-6):
- 1 cup quinoa
- 2 cups water or vegetable broth
- 1 ripe mango, diced
- 1 ripe avocado, diced
- 1 red bell pepper, diced
- 1/4 cup red onion, finely chopped
- 1/4 cup fresh cilantro, chopped
- Juice of 2 limes
- 2 tablespoons olive oil
- Salt and pepper to taste
Cooking Instructions:
1. Rinse the Quinoa: Start by rinsing the quinoa under cold running water in a fine-mesh strainer. This step helps remove the natural coating called saponin, which can give the quinoa a bitter taste. Rinse until the water runs clear.
2. Cook the Quinoa: In a medium saucepan, combine the rinsed quinoa and 2 cups of water or vegetable broth. Bring it to a boil over medium-high heat. Once boiling, reduce the heat to low, cover the pot, and simmer for about 15 minutes or until all the liquid is absorbed.
Remove from heat and let it sit, covered, for an additional 5 minutes. Fluff with a fork before transferring to a large bowl to cool.
3. Prepare the Vegetables and Fruits: While the quinoa is cooling, dice the mango and avocado, and chop the red bell pepper, red onion, and cilantro. Confirm the avocado is ripe but firm to prevent it from becoming mushy.
4. Combine Ingredients: In the bowl with the cooled quinoa, add the diced mango, avocado, red bell pepper, red onion, and chopped cilantro.
5. Make the Dressing: In a small bowl, whisk together the lime juice, olive oil, salt, and pepper. Taste the dressing and adjust the seasoning if necessary.
6. Toss the Salad: Drizzle the dressing over the quinoa mixture and gently toss everything together until well combined. Be careful with the avocado to avoid mashing it.
7. Chill and Serve: For the best flavor, let the salad sit in the refrigerator for at least 30 minutes before serving to allow the ingredients to marinate. Serve chilled or at room temperature.
Extra Tips:
For added texture and flavor, consider incorporating ingredients like black beans or corn into the salad. You can also customize it further by adding other fresh herbs such as parsley or mint.
If you prefer a spicier kick, add some diced jalapeño or a sprinkle of chili powder. This salad is best enjoyed fresh but can be stored in the refrigerator for up to two days. If making ahead of time, consider adding the avocado just before serving to keep it fresh and vibrant.
Roasted Corn and Coconut Chowder

Roasted Corn and Coconut Chowder is a delightful dish that embodies the vibrant flavors of Brazilian cuisine. This creamy and comforting chowder combines sweet roasted corn with the rich, tropical taste of coconut milk, creating a harmonious blend that’s perfect for any occasion.
Whether enjoyed as a light meal or a hearty side dish, this chowder is sure to bring warmth and satisfaction to your dining table.
The preparation of this chowder is both simple and rewarding, making it accessible for cooks of all levels. By roasting the corn, you enhance its natural sweetness and add a depth of flavor that elevates the chowder to a new level. This dish isn’t only vegetarian but can also be made vegan by using plant-based ingredients.
Ingredients (Serves 4-6)
- 4 ears of fresh corn, husked
- 1 tablespoon olive oil
- 1 medium onion, diced
- 2 cloves garlic, minced
- 1 red bell pepper, diced
- 1 medium potato, peeled and diced
- 4 cups vegetable broth
- 1 (14-ounce) can coconut milk
- 1 teaspoon smoked paprika
- Salt and pepper to taste
- Fresh cilantro, for garnish
- Lime wedges, for serving
Cooking Instructions
- Roast the Corn: Preheat your oven to 400°F (200°C). Place the husked corn on a baking sheet and drizzle with olive oil. Roast for about 25-30 minutes, turning occasionally, until the corn is golden brown and slightly charred. Remove from the oven, allow to cool, and then cut the kernels off the cob. Set aside.
- Sauté Aromatics: In a large pot, heat a tablespoon of olive oil over medium heat. Add the diced onion and sauté for about 5 minutes, or until it becomes translucent. Then add the minced garlic and diced red bell pepper, cooking for another 3-4 minutes until the peppers soften.
- Add Potatoes and Broth: Stir in the diced potato, followed by the vegetable broth. Bring the mixture to a boil, then reduce the heat to a simmer. Cover and cook for about 15-20 minutes or until the potatoes are tender.
- Incorporate Coconut Milk and Spices: Once the potatoes are cooked, add the roasted corn kernels to the pot. Pour in the coconut milk and sprinkle in the smoked paprika. Stir well to combine and let the chowder simmer for an additional 5-10 minutes, allowing the flavors to meld together.
- Adjust Seasoning: Taste the chowder and season with salt and pepper as needed. If the chowder is too thick, you can add a little more vegetable broth or water to reach your desired consistency.
- Serve: Ladle the chowder into bowls and garnish with fresh cilantro. Serve with lime wedges on the side for a zesty finish.
Extra Tips
For an added layer of flavor, consider incorporating other spices such as cumin or chili powder to give the chowder a bit of a kick.
If you prefer a smoother texture, you can blend a portion of the chowder using an immersion blender, and then mix it back into the pot. This will create a creamier consistency while still retaining some chunky vegetables.
Finally, feel free to customize the toppings with avocado slices or a dollop of yogurt to enhance the dish even further. Enjoy your Roasted Corn and Coconut Chowder!
Stuffed Bell Peppers With Brazilian Spices
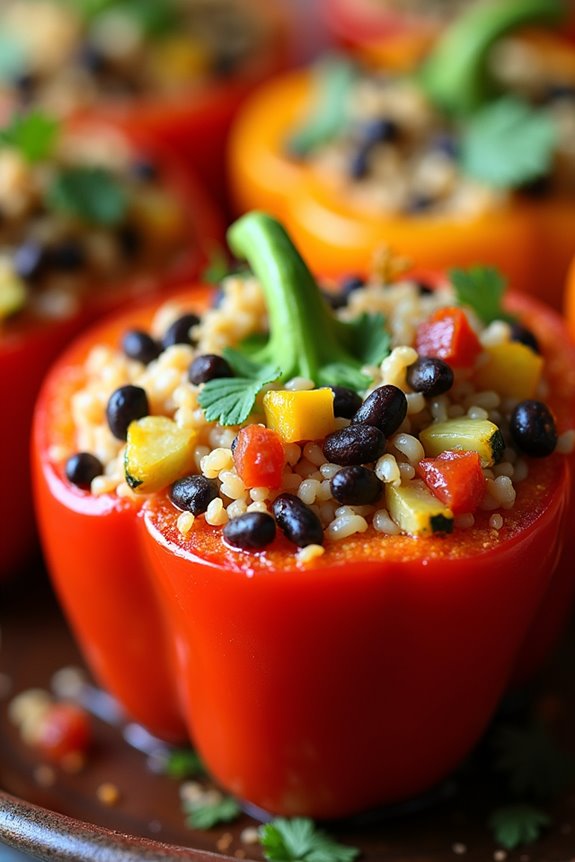
Stuffed Bell Peppers With Brazilian Spices is a vibrant and flavorful dish that embodies the essence of Brazilian cuisine. This vegetarian delight combines an array of spices and fresh ingredients, making it a wholesome meal perfect for any occasion. The sweetness of the bell peppers, complemented by the savory stuffing, creates a beautiful harmony of flavors that will impress both vegetarians and meat-lovers alike.
In this recipe, you’ll explore how to prepare these stuffed bell peppers using a rich combination of spices synonymous with Brazilian cooking, such as cumin, paprika, and cilantro. The filling features a delightful mix of rice, black beans, and vegetables, guaranteeing that each bite is satisfying and nutritious. Not only is this dish colorful and appealing, but it’s also easy to make, making it a fantastic option for family dinners or gatherings with friends.
Ingredients (Serves 4-6)
- 4 large bell peppers (any color)
- 1 cup cooked rice (white or brown)
- 1 can (15 oz) black beans, rinsed and drained
- 1 small onion, diced
- 2 cloves garlic, minced
- 1 medium zucchini, diced
- 1 medium tomato, diced
- 1 teaspoon ground cumin
- 1 teaspoon smoked paprika
- ½ teaspoon chili powder
- ½ teaspoon salt (to taste)
- ¼ teaspoon black pepper
- ¼ cup fresh cilantro, chopped
- 1 tablespoon olive oil
- ½ cup shredded cheese (optional, for topping)
Cooking Instructions
- Prepare the Bell Peppers: Preheat the oven to 375°F (190°C). While the oven is heating, wash the bell peppers thoroughly. Slice the tops off each pepper and remove the seeds and membranes. Set the hollowed peppers aside in a baking dish.
- Cook the Filling: In a large skillet, heat the olive oil over medium heat. Add the diced onion and minced garlic, sautéing until the onion becomes translucent, about 3-4 minutes. Then, incorporate the diced zucchini and cook for an additional 3 minutes until softened.
- Combine Ingredients: Stir in the cooked rice, black beans, diced tomatoes, cumin, smoked paprika, chili powder, salt, and black pepper into the skillet. Mix well to ascertain the spices are evenly distributed. Cook for another 2-3 minutes until everything is heated through.
- Add Fresh Herbs: Once the filling is ready, remove the skillet from heat and stir in the chopped cilantro. This will add a fresh and aromatic flavor to the mixture.
- Stuff the Peppers: Carefully spoon the filling into each hollowed bell pepper, pressing down gently to pack the mixture. If desired, sprinkle shredded cheese on top of each stuffed pepper.
- Bake the Peppers: Cover the baking dish with aluminum foil and bake the stuffed peppers in the preheated oven for 25-30 minutes. For a golden cheese topping, remove the foil and bake for an additional 5-10 minutes until the cheese is bubbly and slightly browned.
- Serve: Once cooked, remove the stuffed peppers from the oven and let them cool for a few minutes. Serve them warm, garnished with additional cilantro if desired.
Extra Tips
When making Stuffed Bell Peppers With Brazilian Spices, feel free to customize the filling based on your preferences or what you have on hand. You can add other vegetables like corn or carrots, or even use quinoa instead of rice for a different texture.
To enhance the dish further, consider drizzling some hot sauce or a squeeze of lime juice over the peppers before serving for an extra kick of flavor.
Pão De Queijo (Cheese Bread) With a Twist

Pão de queijo, or Brazilian cheese bread, is one of the country’s most beloved snacks. Traditionally made with tapioca flour and cheese, this delightful bread is known for its chewy texture and cheesy flavor. However, in this version, we add a twist by incorporating herbs and spices to elevate the flavor profile, making it a perfect treat for any occasion.
Whether served as an appetizer, a snack, or even paired with a meal, these cheese breads are sure to be a hit. In addition to being naturally gluten-free, pão de queijo is incredibly versatile. You can customize the cheese used or incorporate additional ingredients like sun-dried tomatoes, olives, or even jalapeños for an added kick.
This recipe will guide you through making a batch of these delicious cheese breads that serve 4-6 people, guaranteeing that everyone gets to enjoy a taste of Brazil. Let’s get started on this cheesy, herb-infused delight!
Ingredients
- 1 cup tapioca flour
- 1 cup milk
- 1/3 cup vegetable oil
- 1 teaspoon salt
- 1 teaspoon garlic powder
- 1 teaspoon dried oregano
- 1 cup grated cheese (such as mozzarella or parmesan)
- 2 large eggs
- 1/4 cup fresh parsley, chopped (optional)
Cooking Instructions
- Preheat the Oven: Start by preheating your oven to 375°F (190°C). This guarantees that your cheese breads will bake evenly and achieve a golden-brown color.
- Heat the Liquid Mixture: In a medium saucepan, combine the milk, vegetable oil, and salt. Heat the mixture over medium heat until it comes to a gentle boil. Stir occasionally to prevent sticking. Once boiling, remove it from the heat.
- Mix in the Tapioca Flour: Gradually add the tapioca flour to the hot liquid mixture while stirring continuously with a wooden spoon. This will create a thick dough. Continue mixing until all the flour is incorporated and the mixture is smooth.
- Cool the Dough: Allow the dough to cool for about 5-10 minutes. This step is essential to guarantee that the eggs don’t cook when added.
- Add the Eggs and Cheese: Once the dough has cooled slightly, add the eggs one at a time, mixing well after each addition. Then, fold in the grated cheese, garlic powder, dried oregano, and fresh parsley (if using) until fully combined.
- Shape the Dough: Using your hands or a cookie scoop, form small balls (about 1 inch in diameter) and place them on a baking sheet lined with parchment paper, leaving some space between each ball as they’ll expand while baking.
- Bake: Place the baking sheet in the preheated oven and bake for 15-20 minutes or until the cheese breads are puffed up and lightly golden on top.
- Cool and Serve: Once baked, remove the pão de queijo from the oven and let them cool for a few minutes on the baking sheet. Serve warm or at room temperature for the best flavor.
Extra Tips
When making pão de queijo, feel free to experiment with different types of cheese to discover your preferred flavor. For a more adventurous twist, try adding spices like smoked paprika or crushed red pepper flakes.
Additionally, if you notice that the dough is too sticky, you can adjust the consistency by adding a bit more tapioca flour until it’s manageable. Store any leftovers in an airtight container, and reheat them in the oven or toaster oven to regain their original texture. Enjoy your delicious Brazilian cheese breads!
Brazilian Collard Greens With Garlic

Brazilian Collard Greens, or “Couve,” is a beloved side dish that brings a burst of flavor and nutrition to any meal. This dish is particularly popular in Brazilian cuisine, often served alongside rice and beans, and offers a fantastic way to enjoy greens without compromising on taste. The key to achieving the perfect texture and flavor lies in the technique of sautéing the collard greens with garlic, which infuses the dish with a rich aroma and depth.
This recipe is simple yet rewarding, making it an ideal side for family dinners or gatherings. Collard greens are packed with vitamins and minerals, and when combined with the fragrant garlic, they become a delicious and healthy accompaniment to a variety of main dishes. Whether you’re familiar with Brazilian cuisine or trying it for the first time, this dish will surely impress your guests and family alike.
Ingredients (Serves 4-6)
- 1 pound collard greens
- 3 tablespoons olive oil
- 4 cloves garlic, minced
- Salt, to taste
- Black pepper, to taste
- Lemon wedges (for serving, optional)
Cooking Instructions
- Prepare the Collard Greens: Start by rinsing the collard greens thoroughly under cold water to remove any dirt or grit. Remove the tough stems by folding each leaf in half and slicing the stem away. Stack the leaves, roll them tightly, and slice them into thin strips, about 1/2 inch wide. This technique is known as chiffonade and will help the greens cook evenly.
- Heat the Oil: In a large skillet or frying pan, heat the olive oil over medium heat. Allow the oil to warm up for about a minute, ensuring it’s hot enough to sauté the garlic without burning it.
- Sauté the Garlic: Add the minced garlic to the hot oil, stirring constantly for about 30 seconds, or until the garlic becomes fragrant and starts to turn golden. Be careful not to let it brown too much, as burnt garlic can impart a bitter flavor to the dish.
- Add the Collard Greens: Carefully add the sliced collard greens to the skillet, stirring well to coat them with the garlic oil. Cook for about 5-7 minutes, stirring occasionally. The greens should wilt down considerably and become tender but still vibrant green.
- Season and Serve: Once the collard greens are cooked to your liking, season with salt and black pepper to taste. Give it one final stir to combine the seasoning. Serve the collard greens warm, with lemon wedges on the side for a fresh squeeze of juice if desired.
Extra Tips
For added flavor, consider incorporating a pinch of red pepper flakes for a touch of heat or a sprinkle of grated Parmesan cheese before serving.
Experiment with different types of oil, such as coconut or avocado oil, for a unique twist on the classic recipe. Remember that the key to perfect collard greens is to avoid overcooking them; they should remain vibrant in color and retain a slight crunch.
Enjoy your Brazilian Collard Greens as a delicious complement to grilled meats, rice, or beans!
Tropical Fruit Salad With Lime Dressing

Tropical Fruit Salad with Lime Dressing is a vibrant and invigorating dish that showcases the rich variety of fruits found in Brazil. This colorful salad isn’t only visually appealing but also packed with vitamins and minerals, making it a perfect choice for a light dessert or a healthy snack.
The bright flavors of the fruits are beautifully enhanced by the tangy lime dressing, offering a delightful balance of sweetness and acidity. It’s an ideal dish for summer gatherings, barbecues, or whenever you want to bring a taste of the tropics to your table.
Making this Tropical Fruit Salad is both easy and quick, requiring only a few minutes of preparation. You can mix and match your favorite tropical fruits, allowing for flexibility based on seasonal availability. This recipe serves 4-6 people, making it perfect for sharing with friends and family.
So, gather your ingredients and get ready to create a colorful and delicious fruit medley that will transport you to a sunny beach in Brazil!
Ingredients (Serves 4-6):
- 1 cup diced pineapple
- 1 cup diced mango
- 1 cup diced papaya
- 1 cup diced kiwi
- 1 cup diced strawberries
- 1 banana, sliced
- 1 lime, juiced
- 1 tablespoon honey (optional)
- Fresh mint leaves for garnish
Cooking Instructions:
- Prepare the Fruits: Start by washing all the fruits thoroughly. Dice the pineapple, mango, papaya, and kiwi into bite-sized pieces. Slice the strawberries and banana. Verify all pieces are roughly the same size for uniformity in the salad.
- Combine the Fruits: In a large mixing bowl, gently combine all the prepared fruits. Be careful not to mash or bruise them, as you want to keep their shape and texture intact.
- Make the Lime Dressing: In a small bowl, whisk together the freshly squeezed lime juice and honey (if using) until well combined. The honey will add a touch of sweetness that complements the tartness of the lime.
- Dress the Salad: Pour the lime dressing over the combined fruits. Gently toss the salad with a spatula or wooden spoon to verify all the fruit pieces are coated with the dressing without breaking them.
- Serve and Garnish: Transfer the fruit salad to a serving dish or individual bowls. Garnish with fresh mint leaves for an added pop of color and flavor. Serve immediately for the best taste and freshness.
Extra Tips:
When preparing your Tropical Fruit Salad, feel free to experiment with different fruits based on your preferences or what you have on hand. Other great additions include passion fruit, guava, or even a sprinkle of coconut flakes for extra tropical flair.
To prevent browning, especially with bananas, consider adding the lime juice directly to them shortly before serving. This not only keeps the fruit looking fresh but also enhances the overall flavor of the salad. Enjoy your delicious and nutritious Tropical Fruit Salad!
Farofa (Toasted Cassava Flour) With Vegetables
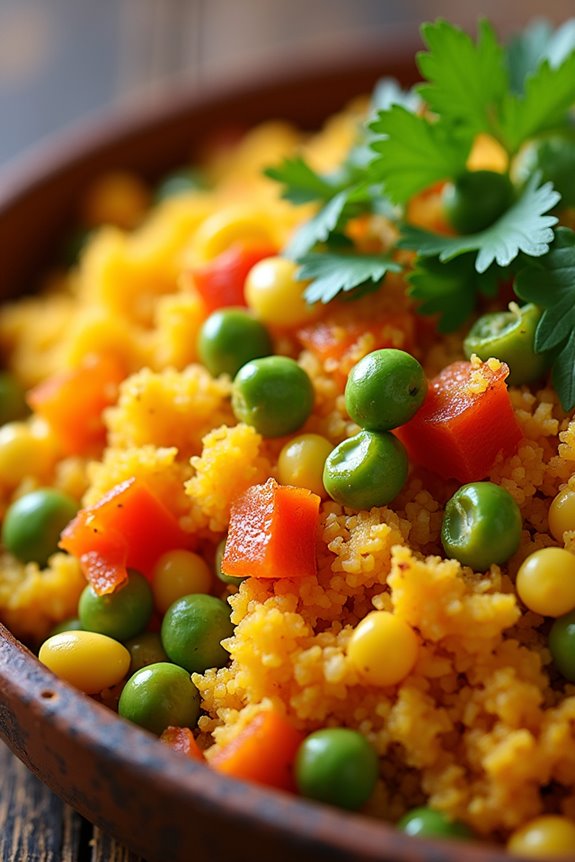
Farofa is a traditional Brazilian dish made from toasted cassava flour, and it’s a staple in many Brazilian households. This versatile side dish is often served alongside rice and beans, grilled meats, or stews, but it can stand alone as a delicious vegetarian option.
The delightful nutty flavor of the toasted cassava flour combined with the vibrant vegetables creates a satisfying and hearty dish that can be enjoyed by everyone, regardless of dietary preferences.
Making Farofa with vegetables is quite simple and can be customized to include your favorite veggies. Common additions include carrots, bell peppers, and onions, but feel free to experiment with whatever produce you have on hand.
The result is a colorful, flavorful dish that brings a taste of Brazil to your dining table. Perfect for gatherings or a cozy family meal, this Farofa will surely impress!
Ingredients (Serves 4-6):
- 2 cups cassava flour
- 1 tablespoon olive oil
- 1 medium onion, finely chopped
- 2 cloves garlic, minced
- 1 medium carrot, grated
- 1 bell pepper (any color), diced
- 1 cup green peas (fresh or frozen)
- 1/2 cup corn (fresh or frozen)
- Salt and black pepper, to taste
- Fresh parsley or cilantro, chopped (for garnish)
Cooking Instructions:
- Toast the Cassava Flour: In a large skillet over medium heat, add the cassava flour. Stir frequently for about 5-7 minutes, or until the flour turns golden brown and emits a nutty aroma. Be careful not to burn it. Once toasted, transfer it to a bowl and set aside.
- Sauté the Vegetables: In the same skillet, add the olive oil and allow it to heat for about a minute. Add the chopped onion and garlic, and sauté for 3-4 minutes, or until the onion becomes translucent and fragrant.
- Add the Carrots and Bell Peppers: Toss in the grated carrot and diced bell pepper. Sauté for an additional 5 minutes, stirring occasionally, until the vegetables soften slightly.
- Include Peas and Corn: Add the green peas and corn to the skillet. Season with salt and black pepper to taste. Stir the mixture well and cook for another 2-3 minutes, ensuring all vegetables are heated through.
- Combine the Cassava Flour: Lower the heat and gradually mix the toasted cassava flour back into the vegetable mixture. Stir until the flour is evenly distributed and the vegetables are coated. Cook for another 2-3 minutes, allowing the flavors to meld.
- Garnish and Serve: Remove from heat and transfer the Farofa to a serving dish. Garnish with fresh parsley or cilantro before serving.
Extra Tips:
To enhance the flavor of your Farofa, consider adding toasted nuts or seeds, such as walnuts or sunflower seeds, for added texture and nutrition.
You can also experiment with spices like cumin or paprika to give the dish an extra kick. For a richer taste, some people like to add a touch of butter or a splash of vegetable broth when mixing in the cassava flour.
Enjoy your Farofa as a side dish or even as a main course with a fresh salad!
Sweet Potato and Chickpea Hash

Sweet Potato and Chickpea Hash is a vibrant and nourishing dish that showcases the bold flavors and textures typical of Brazilian cuisine. This hearty recipe combines the sweetness of roasted sweet potatoes with the nuttiness of chickpeas, creating a delightful and satisfying meal that can be enjoyed for breakfast, lunch, or dinner.
The addition of spices and fresh herbs enhances the overall flavor profile, making it a favorite among vegetarians and those looking to incorporate more plant-based meals into their diets. The beauty of this dish lies in its versatility; it can be served on its own or topped with an avocado, poached eggs, or a dollop of yogurt for added creaminess.
Not only is it delicious, but it’s also packed with nutrients, providing a great source of fiber, vitamins, and minerals. Whether you’re feeding a family or prepping for meal prep, this Sweet Potato and Chickpea Hash is sure to satisfy everyone at the table.
Ingredients (Serves 4-6)
- 2 large sweet potatoes, peeled and diced
- 1 can (15 oz) chickpeas, drained and rinsed
- 1 medium onion, diced
- 2 cloves garlic, minced
- 1 red bell pepper, diced
- 1 teaspoon smoked paprika
- 1 teaspoon ground cumin
- ½ teaspoon chili powder
- Salt and pepper to taste
- 2 tablespoons olive oil
- Fresh cilantro or parsley for garnish
- Optional toppings: avocado, poached eggs, or yogurt
Cooking Instructions
- Preheat the Oven: Start by preheating your oven to 400°F (200°C). This will guarantee that your sweet potatoes roast evenly and develop a delicious caramelized flavor.
- Prepare the Sweet Potatoes: In a large bowl, toss the diced sweet potatoes with 1 tablespoon of olive oil, smoked paprika, ground cumin, chili powder, salt, and pepper. Make sure the sweet potatoes are evenly coated with the oil and spices.
- Roast the Sweet Potatoes: Spread the seasoned sweet potatoes on a baking sheet in a single layer. Roast them in the preheated oven for about 25-30 minutes, or until they’re tender and golden brown, stirring halfway through for even cooking.
- Sauté the Vegetables: While the sweet potatoes are roasting, heat the remaining tablespoon of olive oil in a large skillet over medium heat. Add the diced onion and red bell pepper, and sauté for about 5-7 minutes until they’re softened.
- Add the minced garlic and cook for an additional minute until fragrant.
- Combine Ingredients: Once the sweet potatoes are done roasting, add them to the skillet with the sautéed onions and bell peppers. Then, gently fold in the chickpeas, and cook for another 5 minutes, allowing the flavors to meld together. Adjust seasoning with additional salt and pepper if needed.
- Garnish and Serve: Remove the skillet from heat and garnish the hash with fresh cilantro or parsley. Serve warm, and add any optional toppings like sliced avocado, poached eggs, or yogurt as desired.
Extra Tips
For an added layer of flavor, consider marinating the chickpeas in lemon juice and spices for a few minutes before adding them to the hash. This will infuse them with a tangy zest that complements the sweetness of the potatoes beautifully.
Additionally, feel free to experiment with other vegetables such as zucchini or spinach, and adjust the spices according to your taste preferences. Enjoy this dish as part of a hearty breakfast or a fulfilling dinner!
Acarajé (Black-Eyed Pea Fritters) With Tomato Sauce

Acarajé is a traditional Brazilian dish with roots in African cuisine, particularly from the Yoruba people. These delicious black-eyed pea fritters are deep-fried to golden perfection and served with a spicy, tangy tomato sauce.
Often found at street food stalls in Brazil, Acarajé isn’t only a delightful treat but also a celebration of cultural heritage. The combination of crispy fritters and flavorful sauce makes this dish a favorite among vegetarians and non-vegetarians alike.
Making Acarajé requires a few steps, but the result is well worth the effort. The fritters are made from a simple batter of black-eyed peas, which are soaked, ground, and mixed with spices. They’re then shaped into balls and fried until crispy. The accompanying tomato sauce adds an extra layer of flavor, making this dish a complete meal that can be enjoyed as a snack or a main course.
Ingredients (Serves 4-6)
- 2 cups black-eyed peas (dried)
- 1 small onion, finely chopped
- 2 cloves garlic, minced
- 1 teaspoon salt
- 1/2 teaspoon black pepper
- 1/2 teaspoon cayenne pepper (or to taste)
- 1/4 cup chopped fresh cilantro (or parsley)
- Oil for frying (such as vegetable or peanut oil)
For the tomato sauce:
- 2 cups ripe tomatoes, chopped
- 1 small onion, chopped
- 2 cloves garlic, minced
- 1 tablespoon olive oil
- 1 teaspoon sugar
- Salt and pepper to taste
- 1/2 teaspoon chili flakes (optional)
Cooking Instructions
- Soak the Black-Eyed Peas: Begin by rinsing the black-eyed peas under cold water to remove any impurities. Place them in a bowl and cover with water, allowing them to soak overnight. This softens the peas and makes them easier to blend.
- Prepare the Fritter Mixture: After soaking, drain the peas and place them in a food processor. Add the chopped onion, minced garlic, salt, black pepper, cayenne pepper, and cilantro. Pulse the mixture until it forms a thick paste, making sure not to over-process it; a little texture is desirable.
- Shape the Fritters: Using your hands, scoop out portions of the mixture and shape them into small balls or patties, about the size of a golf ball. Set aside on a plate while you heat the oil.
- Heat the Oil: In a deep frying pan, pour enough oil to submerge the fritters. Heat the oil over medium heat until it reaches around 350°F (175°C). You can test the temperature by dropping a small amount of batter into the oil; it should sizzle and float to the top.
- Fry the Acarajé: Carefully place the shaped fritters into the hot oil in batches, making sure not to overcrowd the pan. Fry for about 4-5 minutes on each side or until they’re golden brown and crispy. Remove them using a slotted spoon and place them on paper towels to drain excess oil.
- Make the Tomato Sauce: In a separate saucepan, heat the olive oil over medium heat. Add the chopped onion and sauté until translucent. Add the minced garlic and cook for another minute. Stir in the chopped tomatoes, sugar, salt, and pepper. Simmer for about 10-15 minutes until the sauce thickens. Adjust the seasoning and add chili flakes if you prefer a spicier sauce.
- Serve: Arrange the hot Acarajé fritters on a serving platter, drizzle with the tomato sauce, and garnish with additional herbs if desired. Serve immediately while they’re still warm.
Extra Tips
When preparing Acarajé, it’s crucial to verify the oil is hot enough before frying to achieve the perfect crispiness. If the oil isn’t hot enough, the fritters will absorb too much oil and become greasy.
Additionally, you can customize the tomato sauce by adding other spices or vegetables to suit your taste. For an authentic touch, consider serving Acarajé with a side of vatapá, a creamy dish made from bread, shrimp, and coconut milk, often enjoyed alongside the fritters in Brazilian cuisine.
Cassava and Spinach Casserole

Cassava and Spinach Casserole is a delightful Brazilian dish that combines the earthy flavors of cassava with the vibrant green of spinach, creating a hearty and nutritious meal. This casserole isn’t only delicious but also showcases the versatility of cassava, a staple ingredient in Brazilian cuisine. The creamy texture and rich taste make it a perfect option for a family dinner or a gathering with friends.
The dish is simple to prepare and can be made ahead of time, making it an excellent choice for busy weeknights or entertaining. When baked to perfection, the casserole develops a golden crust that adds a delightful crunch to each bite. This vegetarian recipe is sure to impress both vegetarians and meat-lovers alike, as it’s packed with flavor and nutrients.
Ingredients (Serves 4-6):
- 2 cups cassava (yuca), peeled and grated
- 4 cups fresh spinach, chopped
- 1 medium onion, finely chopped
- 2 cloves garlic, minced
- 1 cup grated cheese (such as mozzarella or parmesan)
- 1 cup coconut milk
- 2 large eggs
- 1 teaspoon salt
- 1/2 teaspoon black pepper
- 1/2 teaspoon nutmeg
- 2 tablespoons olive oil
Instructions:
1. Preheat the Oven: Begin by preheating your oven to 375°F (190°C). This will guarantee that your casserole cooks evenly and develops a nice golden crust while baking.
2. Prepare the Cassava: In a large bowl, combine the grated cassava with salt, pepper, and nutmeg. Mix well to guarantee that the spices are evenly distributed throughout the cassava.
3. Sauté the Vegetables: In a skillet, heat the olive oil over medium heat. Add the chopped onion and sauté for about 5 minutes, or until the onion becomes translucent.
Then, add the minced garlic and chopped spinach. Cook for an additional 3-4 minutes until the spinach has wilted. Remove from heat and let cool slightly.
4. Combine the Mixture: In a large mixing bowl, combine the sautéed spinach mixture with the seasoned cassava. Stir in the grated cheese, coconut milk, and eggs. Mix everything together until well combined.
5. Transfer to Baking Dish: Pour the cassava and spinach mixture into a greased 9×13 inch baking dish, spreading it evenly with a spatula.
6. Bake the Casserole: Place the baking dish in the preheated oven and bake for 35-40 minutes, or until the top is golden brown and a toothpick inserted in the center comes out clean.
7. Cool and Serve: Once baked, remove the casserole from the oven and let it cool for a few minutes before slicing. Serve warm as a main dish or a side.
Extra Tips:
When cooking Cassava and Spinach Casserole, make sure to fully peel and grate the cassava to avoid any bitterness from the skin.
You can also add other vegetables such as bell peppers or tomatoes for additional flavor and nutrition. For a creamier texture, consider increasing the amount of coconut milk or cheese.
This dish can be stored in the refrigerator for up to three days, making it perfect for meal prep!