

There’s something truly captivating about the vibrant flavors of Brazilian cuisine, especially when you focus on plant-based dishes. The unique blend of spices and fresh ingredients truly makes every meal feel like a celebration. From hearty stews bursting with flavor to delightful snacks that satisfy any craving, there’s so much deliciousness to explore. If you’re eager to transform traditional recipes into vegan delights, you’re in for a treat. Let me share some inspired options that are sure to impress.
Feijoada Vegana: A Plant-Based Twist on a Classic Stew
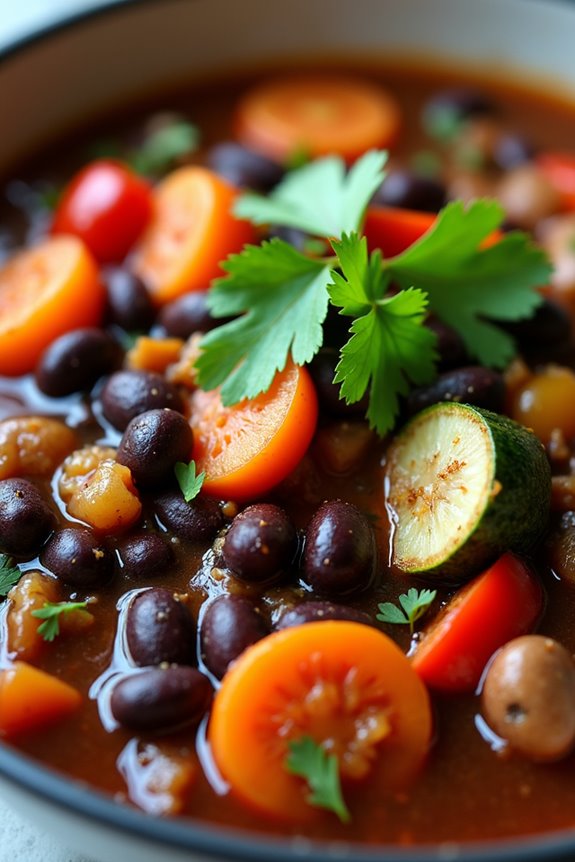
Feijoada is a traditional Brazilian stew that’s typically made with black beans and a variety of meats, simmered together to create a hearty and flavorful dish. However, this vegan version maintains all the essence of the original recipe while substituting meat with a blend of wholesome plant-based ingredients. The result is a rich, satisfying dish that not only preserves the spirit of feijoada but also caters to those who follow a vegan lifestyle.
With fragrant spices and a medley of vegetables, this stew is perfect for gatherings or cozy family dinners. This Feijoada Vegana is a comforting meal that’s sure to impress both vegans and non-vegans alike. The beans are the stars of the dish, providing protein and fiber, while the variety of vegetables and seasonings bring depth and complexity to the flavor profile.
Serve it with fluffy white rice and a sprinkle of fresh cilantro for a complete and delicious meal that captures the heart of Brazilian cuisine.
Ingredients (Serves 4-6 people):
- 2 cups black beans (soaked overnight)
- 1 tablespoon olive oil
- 1 large onion, diced
- 4 cloves garlic, minced
- 1 bell pepper (red or green), diced
- 2 carrots, diced
- 1 zucchini, diced
- 1 cup mushrooms, sliced
- 1 teaspoon smoked paprika
- 1 teaspoon cumin
- 1 bay leaf
- Salt and pepper to taste
- 4 cups vegetable broth
- 1 tablespoon soy sauce
- 1 tablespoon lime juice
- Fresh cilantro for garnish
Cooking Instructions:
- Prepare the Beans: After soaking the black beans overnight, drain and rinse them. In a large pot, cover the beans with fresh water, bring to a boil, then reduce to a simmer. Cook for about 45 minutes or until the beans are tender. Drain and set aside.
- Sauté the Aromatics: In a large Dutch oven or heavy pot, heat the olive oil over medium heat. Add the diced onion and sauté for about 5 minutes until it turns translucent. Then, add the minced garlic and sauté for an additional minute, until fragrant.
- Add the Vegetables: Stir in the diced bell pepper, carrots, zucchini, and sliced mushrooms. Cook for about 7-10 minutes, stirring occasionally, until the vegetables begin to soften.
- Spice It Up: Sprinkle in the smoked paprika, cumin, salt, and pepper. Add the bay leaf and stir well to combine, allowing the spices to toast for a minute to release their aromas.
- Combine with Beans and Broth: Add the cooked black beans to the pot, followed by the vegetable broth and soy sauce. Stir well, bringing the mixture to a gentle simmer. Cover the pot and let it cook for 20-25 minutes, allowing the flavors to meld together.
- Finish with Lime: Once the feijoada has simmered, remove the bay leaf and stir in the lime juice. Taste and adjust the seasoning if necessary.
- Serve: Ladle the Feijoada Vegana into bowls, garnishing with fresh cilantro. Serve hot with steamed white rice and additional lime wedges on the side.
Extra Tips: For an even richer flavor, consider adding a few slices of smoked tempeh or vegan sausage during the cooking process. You can also customize the vegetables based on what you have on hand or prefer.
To enhance the dish further, let it sit for a few hours or overnight in the fridge; many find that feijoada tastes even better the next day as the flavors develop.
Moqueca De Palmito: Coconut and Hearts of Palm Stew
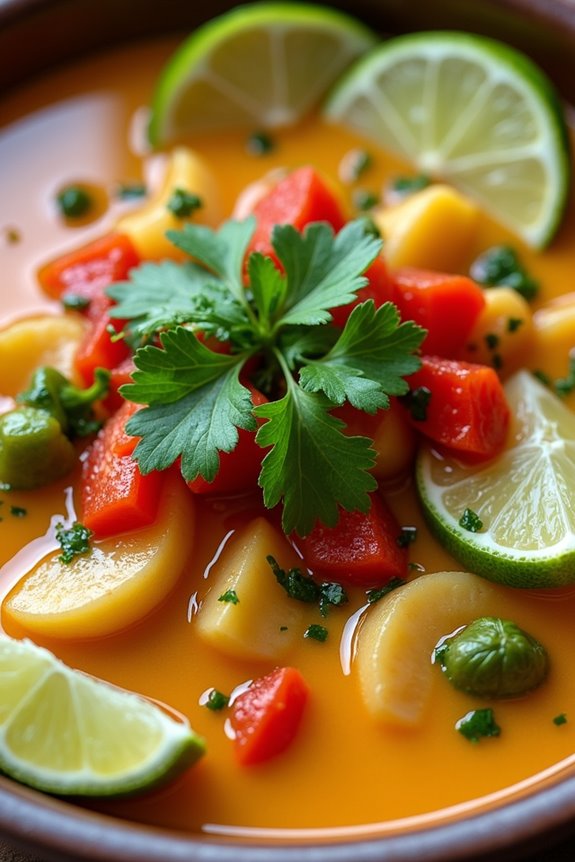
Moqueca De Palmito is a vibrant and flavorful Brazilian stew that’s both hearty and comforting, making it a perfect dish for vegans and lovers of plant-based cuisine. This particular version uses hearts of palm, which have a delicate texture and mild flavor, mimicking the seafood traditionally found in the dish.
The rich coconut milk base, combined with fresh vegetables and spices, creates a deliciously aromatic dish that will transport you straight to the beaches of Brazil. This stew isn’t only satisfying but also packed with nutrients, making it a great option for families and gatherings.
The colorful presentation, thanks to the bell peppers and tomatoes, makes it an eye-catching centerpiece on any dining table. Serve it with rice or crusty bread to soak up the delicious sauce, and enjoy a taste of Brazil right in your own home.
Ingredients (Serves 4-6)
- 2 tablespoons of olive oil
- 1 large onion, chopped
- 3 cloves of garlic, minced
- 1 red bell pepper, chopped
- 1 green bell pepper, chopped
- 2 medium tomatoes, diced
- 1 can (14 oz) of hearts of palm, sliced
- 1 can (14 oz) of coconut milk
- 1 tablespoon of tomato paste
- 1 teaspoon of paprika
- 1 teaspoon of cumin
- Salt and black pepper to taste
- 1 bunch of fresh cilantro, chopped (for garnish)
- Lime wedges (for serving)
Cooking Instructions
- Sauté the Aromatics: In a large pot or Dutch oven, heat the olive oil over medium heat. Add the chopped onion and cook until it becomes translucent, about 5 minutes. Stir in the minced garlic and cook for another minute until fragrant.
- Add the Vegetables: Incorporate the chopped red and green bell peppers into the pot. Sauté the mixture for about 5-7 minutes until the peppers begin to soften. Then, add the diced tomatoes and cook for an additional 3-4 minutes until the tomatoes release their juices.
- Stir in the Hearts of Palm: Gently fold in the sliced hearts of palm. These will add a lovely texture to the stew and absorb the flavors of the other ingredients.
- Create the Stew Base: Pour in the coconut milk and add the tomato paste, paprika, and cumin. Stir everything together to combine well. Season with salt and black pepper to taste.
- Simmer the Stew: Bring the mixture to a gentle simmer, then reduce the heat to low. Cover the pot and let the stew cook for about 15-20 minutes, allowing the flavors to meld together and the stew to thicken slightly.
- Finish and Serve: Once cooked, taste and adjust seasoning if necessary. Remove from heat and garnish with freshly chopped cilantro. Serve the Moqueca De Palmito hot, accompanied by lime wedges to squeeze over the top.
Extra Tips
For an added depth of flavor, consider marinating the hearts of palm in lime juice for about 30 minutes before adding them to the stew. This will enhance their taste and give a zesty kick to the dish.
Additionally, feel free to customize the vegetables based on what you have on hand or what’s in season. Adding ingredients like zucchini or squash can elevate the dish even further. Enjoy the stew with a side of steamed rice or a warm baguette to soak up all the delicious coconut sauce!
Pão De Queijo Vegano: Cheesy Cassava Bites

Pão de Queijo is a beloved Brazilian snack traditionally made with cheese and tapioca flour. However, this vegan version offers a delightful twist that captures the essence of the original dish while remaining completely plant-based. These cheesy cassava bites are perfect for a party appetizer, snack, or even as a side dish. The combination of cassava flour and nutritional yeast gives them a cheesy flavor and a chewy texture, making them irresistible.
Making vegan Pão de Queijo isn’t only simple but also quick, requiring just a handful of ingredients. With a few steps, you can enjoy these delicious bites that are gluten-free and plant-based. Serve them warm with your favorite dipping sauce, and watch them disappear in no time!
Ingredients (Serves 4-6):
- 2 cups cassava flour
- 1 cup water
- 1/3 cup olive oil
- 1/4 cup nutritional yeast
- 1 teaspoon garlic powder
- 1 teaspoon onion powder
- 1 teaspoon salt
- 1 teaspoon baking powder
- 1/4 cup chopped fresh parsley (optional for garnish)
Cooking Instructions:
- Preheat the Oven: Begin by preheating your oven to 375°F (190°C). This guarantees that the Pão de Queijo will bake evenly and develop a lovely golden crust.
- Prepare the Dough: In a medium saucepan, combine the water, olive oil, garlic powder, onion powder, and salt. Bring the mixture to a gentle boil over medium heat, stirring occasionally. Once boiling, remove it from the heat.
- Mix in the Cassava Flour: Gradually add the cassava flour to the hot mixture while stirring continuously. This helps to create a smooth dough. Once fully combined, let the dough cool for about 5 minutes.
- Add Nutritional Yeast and Baking Powder: After the dough has cooled slightly, stir in the nutritional yeast and baking powder. This step is essential for achieving a cheesy flavor and giving the bites a light texture.
- Shape the Bites: Using your hands, take small portions of the dough and roll them into balls, about the size of a golf ball. Place them on a greased baking sheet, leaving some space between each ball to allow for expansion during baking.
- Bake: Place the baking sheet in the preheated oven and bake for 25-30 minutes, or until the bites are golden brown and puffed up. Keep an eye on them to prevent over-baking.
- Serve Warm: Once baked, remove the Pão de Queijo from the oven and let them cool slightly before serving. Garnish with fresh parsley if desired. Enjoy them warm for the best texture and flavor!
Extra Tips:
To enhance the flavor of your Pão de Queijo, feel free to experiment with different spices or herbs, such as smoked paprika or oregano, in the dough. For a spicier kick, you can also add a pinch of cayenne pepper.
These cassava bites are best enjoyed freshly baked, but if you have leftovers, they can be stored in an airtight container for a day or two and re-heated in the oven to revive their texture. Enjoy your vegan cheesy cassava bites!
Farofa: Savory Toasted Cassava Flour Topping
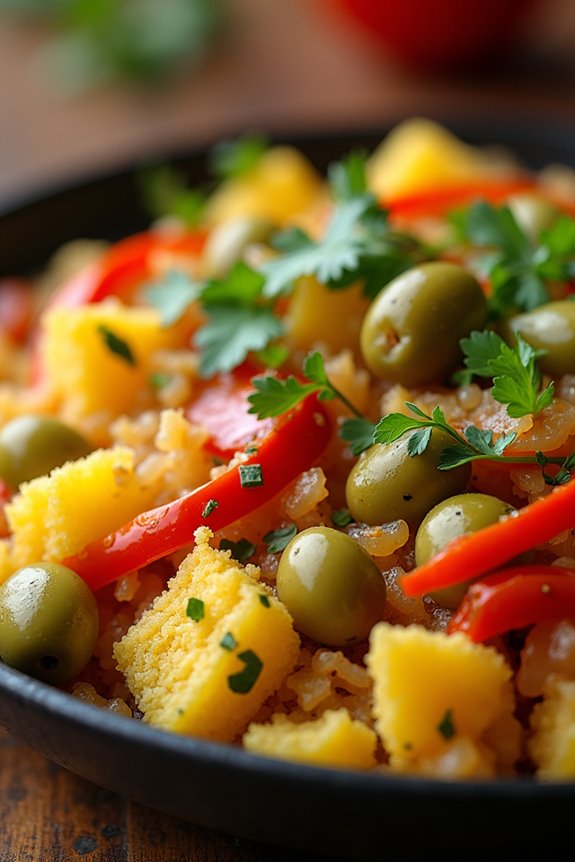
Farofa is a traditional Brazilian side dish that adds a delightful crunch and rich flavor to any meal. Made from toasted cassava flour, this dish is versatile and can be customized with various ingredients to suit your palate. It’s often served alongside grilled meats, rice, and beans, making it a perfect complement to a hearty Brazilian feast.
This vegan version of farofa incorporates aromatic onions, garlic, and colorful bell peppers, giving it a savory depth that elevates the dish to new heights.
The beauty of farofa lies in its simplicity and the ease with which it can be prepared. With just a few ingredients, you can create a flavorful topping that adds texture and enhances the overall dining experience. Whether you’re hosting a gathering or just looking to spice up your weeknight dinner, this vegan farofa recipe will be a hit at your table.
Ingredients (Serves 4-6):
- 2 cups cassava flour
- 1 medium onion, finely chopped
- 2 cloves garlic, minced
- 1 red bell pepper, diced
- 1 yellow bell pepper, diced
- 1/2 cup green olives, sliced
- 1/4 cup fresh parsley, chopped
- 1/4 cup olive oil
- Salt and black pepper to taste
Instructions:
- Prepare the Ingredients: Start by gathering all your ingredients. Finely chop the onion and garlic, and dice the red and yellow bell peppers. This will help guarantee that everything cooks evenly and allows for a more harmonious blend of flavors in your farofa.
- Sauté the Vegetables: In a large skillet, heat the olive oil over medium heat. Add the chopped onion and minced garlic, sautéing them until the onion becomes translucent and fragrant, about 3-5 minutes. This step brings out the natural sweetness of the onions and garlic, forming the flavor base for your farofa.
- Add the Bell Peppers: Stir in the diced red and yellow bell peppers into the skillet. Cook for an additional 4-5 minutes, until the peppers are tender. The vibrant colors of the peppers not only add visual appeal but also contribute to the overall flavor profile of the dish.
- Toast the Cassava Flour: Gradually sprinkle in the cassava flour while stirring continuously. This process should take about 5-7 minutes, allowing the flour to toast and absorb the flavors from the vegetables. The goal is to achieve a light golden color and a nutty aroma, which indicates that the flour is properly toasted.
- Season and Mix: Add the sliced green olives, chopped parsley, salt, and black pepper to the mixture. Stir well to combine all the ingredients, ensuring that the seasoning is evenly distributed throughout the farofa. Taste and adjust the seasoning if necessary.
- Serve: Once everything is well combined and heated through, remove the skillet from the heat. Transfer the farofa to a serving dish and enjoy it warm, either as a topping or a side dish to your favorite meals.
Extra Tips:
When making farofa, feel free to experiment with additional ingredients such as nuts, raisins, or even spices like smoked paprika for added depth.
You can also adjust the level of toastiness based on your preference; if you like a more pronounced nutty flavor, allow the cassava flour to toast a little longer. Additionally, farofa can be made ahead of time and reheated, making it a great option for meal prep or festive occasions.
Vatapá: Creamy Bread and Peanut Stew
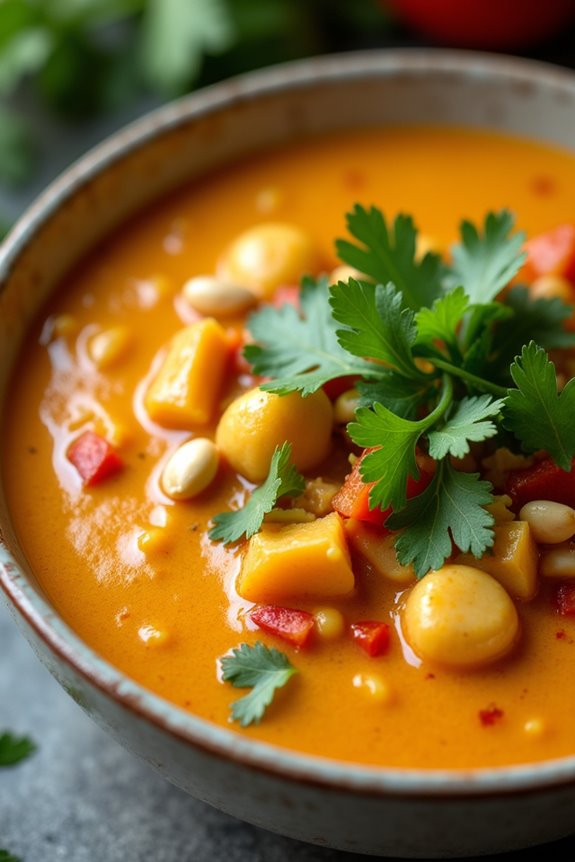
Vatapá is a traditional Brazilian dish that hails from the state of Bahia, known for its vibrant and rich cuisine. This creamy stew combines a delightful mix of flavors, including bread, peanuts, and coconut milk, resulting in a dish that’s both satisfying and comforting. Originally made with seafood, this vegan version captures the essence of the original while keeping it plant-based, making it perfect for those who follow a vegan lifestyle or are simply looking to explore delicious Brazilian flavors.
Cooking vatapá is a rewarding experience that allows you to engage with the complexity of Brazilian cuisine. The combination of ingredients creates a unique texture and flavor profile that’s both nutty and creamy. This dish is typically served with rice, creating a complete meal that’s hearty and full of nutrition. Whether you’re cooking for family or friends, vatapá is sure to impress with its delicious taste and vibrant colors.
Ingredients (serving size: 4-6 people)
- 1 cup bread (preferably stale, cubed)
- 1 cup coconut milk
- 1/2 cup peanuts (unsalted, roasted)
- 1/2 cup vegetable broth
- 1 small onion (chopped)
- 3 cloves garlic (minced)
- 1 small red bell pepper (chopped)
- 1 tablespoon ginger (grated)
- 1 tablespoon olive oil
- 1 teaspoon ground cumin
- 1 teaspoon paprika
- 1/2 teaspoon cayenne pepper (optional, for heat)
- Salt to taste
- Fresh cilantro (for garnish)
Cooking Instructions
- Prepare the Bread: Begin by placing the cubed bread in a bowl and pour the coconut milk over it. Allow the bread to soak for approximately 15 minutes until it becomes soft and mushy. This will create the creamy base for your vatapá.
- Blend the Peanuts: While the bread is soaking, place the roasted peanuts in a food processor and pulse until they form a smooth paste. If you prefer a coarser texture, pulse less. Set aside the peanut paste for later use.
- Sauté the Vegetables: In a large pot or skillet, heat the olive oil over medium heat. Add the chopped onion and cook until translucent, about 5 minutes. Then, add the minced garlic, chopped red bell pepper, and grated ginger. Sauté for an additional 3-4 minutes until the vegetables are fragrant and softened.
- Combine Ingredients: Once the vegetables are ready, add the soaked bread mixture and the peanut paste to the pot. Stir well to combine all ingredients. Gradually add the vegetable broth, mixing continuously to achieve a smooth consistency.
- Season the Stew: Add the ground cumin, paprika, cayenne pepper (if using), and salt to taste. Stir well and let the mixture simmer on low heat for about 10-15 minutes, allowing the flavors to meld together. You may need to add more vegetable broth if the stew is too thick.
- Serve: Once the vatapá has reached your desired consistency, remove it from the heat. Serve hot, garnished with fresh cilantro, alongside cooked rice for a complete meal.
Extra Tips
When making vatapá, feel free to customize the dish to suit your taste. You can add vegetables such as spinach or kale for added nutrition, or adjust the spices to suit your heat preference.
If you prefer a smoother texture, blend the entire mixture in a blender after cooking. Additionally, using stale bread not only adds authenticity but also helps in thickening the stew.
Enjoy your cooking, and don’t forget to share this delicious dish with family and friends!
Brigadeiro Vegano: Rich Chocolate Truffles

Brigadeiro is a beloved Brazilian sweet treat, traditionally made with condensed milk, cocoa powder, butter, and chocolate sprinkles. This vegan version, Brigadeiro Vegano, uses plant-based ingredients to create a rich and indulgent chocolate truffle that’s both creamy and satisfying. Perfect for parties, celebrations, or simply to enjoy as a dessert, these truffles offer a delightful way to experience a classic Brazilian dessert while maintaining a vegan lifestyle.
This recipe is simple and requires minimal ingredients, making it accessible for anyone interested in trying their hand at vegan cooking. The combination of cocoa powder and coconut milk gives these truffles a luscious texture, while the natural sweetness from the maple syrup or agave nectar guarantees that they’re just as delicious as their traditional counterparts. With a bit of patience and a little rolling, you’ll have a beautiful plate of Brigadeiro Vegano ready to impress family and friends.
Ingredients (Serves 4-6):
- 1 cup full-fat coconut milk
- 1 cup cocoa powder
- 1/2 cup maple syrup or agave nectar
- 1/4 cup coconut oil, melted
- 1 teaspoon vanilla extract
- A pinch of salt
- Chocolate sprinkles or crushed nuts for rolling
Cooking Instructions:
- Prepare the Mixture: In a medium saucepan, combine the full-fat coconut milk, cocoa powder, maple syrup (or agave nectar), melted coconut oil, vanilla extract, and a pinch of salt. Stir the ingredients together over medium heat until fully combined and smooth.
- Cook the Mixture: Continue to cook the mixture, stirring constantly, for about 10-15 minutes. The goal is to reduce the mixture until it thickens and begins to pull away from the sides of the pan. You’ll know it’s ready when you can see the bottom of the pan while stirring.
- Cool the Mixture: Once the mixture has thickened, remove it from the heat and transfer it to a bowl. Allow it to cool to room temperature, then cover it with plastic wrap and refrigerate for at least 1 hour, or until it’s firm enough to handle.
- Form the Truffles: Once the mixture is chilled and firm, use your hands to scoop out small portions (about 1 tablespoon each) and roll them into balls. If the mixture is too sticky, you can lightly grease your hands with coconut oil.
- Coat the Truffles: Roll each truffle in chocolate sprinkles or crushed nuts, guaranteeing they’re evenly coated. Press gently to help the coating adhere to the truffles.
- Chill and Serve: Place the coated truffles on a plate and refrigerate them for an additional 30 minutes to firm up. Serve them cold or at room temperature for an enjoyable treat.
Extra Tips:
When making Brigadeiro Vegano, feel free to experiment with different toppings to suit your taste. You can use shredded coconut, crushed freeze-dried fruit, or even cocoa nibs for added texture and flavor.
Additionally, if you prefer a sweeter truffle, adjust the quantity of maple syrup or agave nectar to your liking. Store any leftovers in an airtight container in the refrigerator where they can last for up to a week, assuring you have a delightful chocolate treat ready to enjoy anytime!
Tacos De Jaca: Jackfruit Tacos With Brazilian Flair
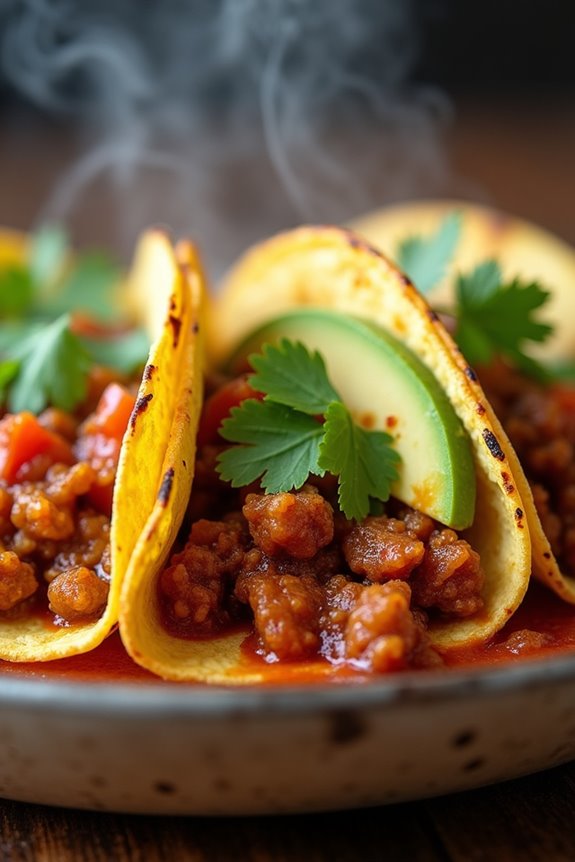
Tacos De Jaca is a delicious and innovative dish that puts a Brazilian twist on traditional tacos, utilizing the versatile jackfruit as the star ingredient. Jackfruit, known for its meaty texture, is perfect for absorbing flavors and works wonderfully in savory dishes. This recipe combines the sweetness of jackfruit with a medley of spices and fresh ingredients, creating a mouthwatering filling that’s sure to please both vegans and non-vegans alike.
Serve these tacos at your next gathering, and watch as everyone raves about this unique and flavorful dish. The beauty of Tacos De Jaca lies not just in its taste but also in its simplicity. Perfect for a casual dinner or a festive celebration, these tacos can be customized with your favorite toppings, such as avocado, salsa, and fresh cilantro.
This recipe serves 4-6 people, making it an ideal choice for sharing among friends and family. Get ready to impress your guests with a dish that’s not only packed with flavor but also showcases the vibrant culinary traditions of Brazil.
Ingredients (Serves 4-6):
- 2 cans of young green jackfruit in brine or water, drained and rinsed
- 1 tablespoon olive oil
- 1 medium onion, diced
- 3 cloves garlic, minced
- 1 red bell pepper, diced
- 1 teaspoon smoked paprika
- 1 teaspoon cumin
- 1 teaspoon chili powder
- Salt and pepper to taste
- Juice of 1 lime
- 8-10 small corn tortillas
- Fresh cilantro, chopped (for garnish)
- Avocado slices (for topping)
- Salsa (for topping)
Instructions:
- Prepare the Jackfruit: Begin by draining and rinsing the jackfruit to remove excess brine. Using your hands or a fork, shred the jackfruit into smaller pieces, mimicking a pulled meat texture. Set aside.
- Cook the Vegetables: In a large skillet, heat the olive oil over medium heat. Add the diced onion and sauté for about 5 minutes, or until the onions become translucent. Then, add the minced garlic and red bell pepper, cooking for an additional 3-4 minutes until they soften.
- Add Jackfruit and Spices: Stir in the shredded jackfruit along with the smoked paprika, cumin, chili powder, salt, and pepper. Mix well to coat the jackfruit with the spices. Continue to cook for about 10-15 minutes, stirring occasionally, until the jackfruit is tender and has absorbed the flavors.
- Finish with Lime Juice: Once the jackfruit is cooked, squeeze in the lime juice and stir to combine. Taste and adjust seasoning if necessary, adding more salt or spices as desired.
- Warm the Tortillas: In a separate skillet or on a griddle, warm the corn tortillas over medium heat for about 30 seconds on each side, or until they’re pliable and slightly toasted.
- Assemble the Tacos: To serve, place a generous amount of the jackfruit mixture onto each tortilla. Top with fresh cilantro, avocado slices, and salsa as desired.
Extra Tips:
For the best flavor, consider marinating the jackfruit in lime juice and spices for an hour before cooking. This allows the flavors to meld beautifully.
Additionally, feel free to get creative with toppings; chopped onions, radishes, or a drizzle of vegan sour cream can elevate your Tacos De Jaca. Enjoy your culinary adventure with this tasty Brazilian-inspired dish!
Salada De Quinoa Com Manga: Quinoa Salad With Mango
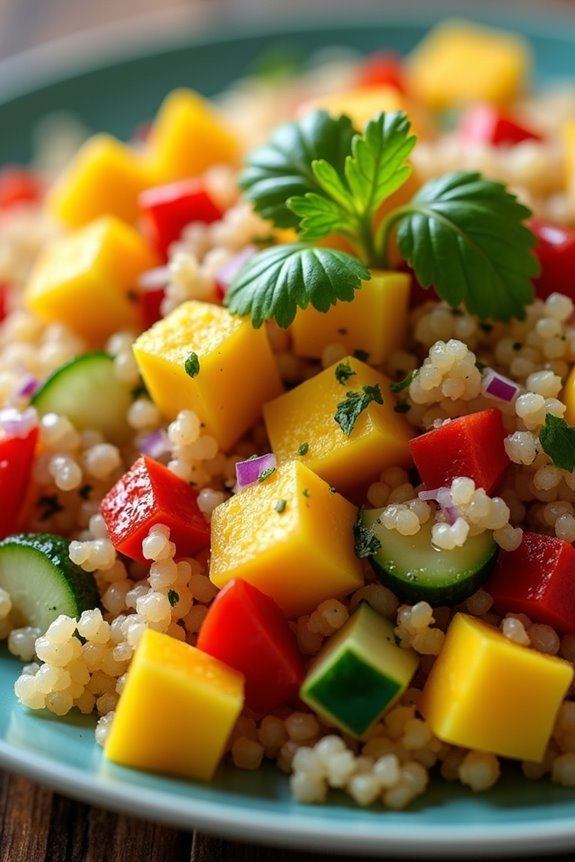
Salada de Quinoa Com Manga is a vibrant and invigorating dish that perfectly embodies the essence of Brazilian cuisine while being entirely plant-based. This colorful quinoa salad combines the nutty flavor of quinoa with the sweetness of ripe mango, creating a delightful balance of flavors and textures. Packed with nutrients, this dish isn’t only visually appealing but also a healthy option for lunch or dinner.
It’s a fantastic way to incorporate more whole grains and fruits into your diet while enjoying a taste of Brazil. Preparing this salad is a breeze, making it suitable for gatherings or meal prep. The combination of fresh vegetables, zesty lime, and fragrant herbs elevates the dish, ensuring that every bite is bursting with flavor.
Whether served as a main course or a side dish, Salada de Quinoa Com Manga is sure to impress both vegans and non-vegans alike. Let’s explore the ingredients and cooking instructions for this delicious salad.
Ingredients (Serves 4-6):
- 1 cup quinoa
- 2 cups water
- 1 ripe mango, diced
- 1 red bell pepper, diced
- 1 cucumber, diced
- 1/4 red onion, finely chopped
- 1/4 cup fresh cilantro, chopped
- 1/4 cup fresh lime juice
- 2 tablespoons olive oil
- Salt and pepper to taste
Cooking Instructions:
- Rinse the Quinoa: Start by rinsing the quinoa under cold water in a fine-mesh sieve. This step is essential as it helps remove the saponins that can give quinoa a bitter taste. Rinse for about 1-2 minutes until the water runs clear.
- Cook the Quinoa: In a medium saucepan, combine the rinsed quinoa and 2 cups of water. Bring the mixture to a boil over medium-high heat. Once boiling, reduce the heat to low, cover the saucepan, and let it simmer for about 15 minutes, or until the quinoa is tender and the water has been absorbed.
- Fluff the Quinoa: Once cooked, remove the saucepan from heat and let it sit, covered, for an additional 5 minutes. Then, use a fork to fluff the quinoa gently. This will help separate the grains and give the salad a light texture.
- Prepare the Vegetables: While the quinoa is cooling, prepare your vegetables. Dice the mango, red bell pepper, cucumber, and finely chop the red onion and cilantro. Place all the chopped ingredients in a large mixing bowl.
- Combine the Salad: Once the quinoa has cooled to room temperature, add it to the bowl with the diced vegetables. Pour in the fresh lime juice and olive oil, then season with salt and pepper to taste. Gently toss everything together until well combined.
- Chill and Serve: For the best flavor, let the salad chill in the refrigerator for at least 30 minutes before serving. This allows the flavors to meld beautifully. Serve it as an invigorating main dish or a side that complements any meal.
Extra Tips:
When preparing Salada de Quinoa Com Manga, feel free to customize the ingredients to your liking. You can add other fruits, like avocado or pineapple, or even incorporate beans for added protein.
Make sure to taste and adjust the seasoning as needed, especially the lime juice and salt, to suit your palate. This salad keeps well in the refrigerator, making it perfect for meal prep—just remember to give it a good stir before serving to redistribute the flavors!
Acarajé: Black-Eyed Pea Fritters With Spicy Filling

Acarajé is a beloved street food from Brazil, particularly popular in the northeastern region, particularly in Bahia. This delightful dish is made from black-eyed peas that are formed into fritters and deep-fried until golden brown.
Traditionally, Acarajé is filled with a spicy shrimp paste, but it can easily be adapted to suit a vegan lifestyle by using a mix of vegetables and spices for the filling. This dish isn’t only a treat for the taste buds but also a wonderful example of Afro-Brazilian cuisine, showcasing the rich cultural influences that shape Brazilian food.
Making Acarajé requires a bit of preparation, but the process is rewarding and the end result is worth it. The fritters are crispy on the outside and soft on the inside, while the filling packs a flavorful punch.
Whether enjoyed as a snack or as part of a meal, Acarajé is sure to impress family and friends alike. Let’s plunge into making this exquisite dish that serves 4-6 people!
Ingredients:
- 2 cups dried black-eyed peas
- 1 medium onion, roughly chopped
- 4 cloves garlic
- 1 teaspoon salt
- 1 teaspoon cayenne pepper (adjust to taste)
- ½ teaspoon black pepper
- ½ teaspoon cumin
- 1 cup chopped tomatoes
- 1 cup chopped green bell pepper
- 1 cup chopped onion (for filling)
- 2 tablespoons olive oil (for filling)
- Vegetable oil (for frying)
Cooking Instructions:
1. Soak the Black-Eyed Peas: Start by rinsing the dried black-eyed peas under cold water. Place them in a large bowl, cover them with water, and let them soak overnight or for at least 8 hours. This softens the peas and makes them easier to blend.
2. Prepare the Fritter Batter: Once the peas are soaked, drain and rinse them. In a food processor, combine the black-eyed peas, chopped onion, garlic, salt, cayenne pepper, black pepper, and cumin. Blend until you achieve a smooth but thick batter, scraping down the sides as necessary. Transfer the mixture to a bowl and set aside.
3. Make the Filling: In a medium skillet, heat olive oil over medium heat. Add the chopped onion and sauté until translucent. Then, add the chopped tomatoes and green bell pepper. Cook for about 5-7 minutes until the vegetables are tender.
Season with salt and pepper if desired, then remove from heat and let it cool.
4. Form the Fritters: Heat vegetable oil in a deep frying pan over medium-high heat. Take about ¼ cup of the black-eyed pea mixture and flatten it slightly in your palm. Place a spoonful of the vegetable filling in the center and fold the batter over it to seal. Gently shape it into a ball or patty.
5. Fry the Acarajé: Carefully place the formed fritters into the hot oil, frying a few at a time to avoid overcrowding. Fry until golden brown and crispy, about 4-5 minutes per side. Use a slotted spoon to remove the fritters and place them on a paper towel-lined plate to drain excess oil.
6. Serve: Serve the Acarajé hot with your favorite dipping sauces or toppings such as vegan mayonnaise or a spicy salsa. Enjoy!
Extra Tips:
When making Acarajé, it’s essential to monitor the oil temperature; too hot and the outside may burn before the inside is cooked, too cool and they’ll absorb excess oil and become greasy.
Additionally, feel free to experiment with the filling by adding ingredients like sautéed mushrooms, corn, or even a dash of coconut milk for extra creaminess. Let your creativity shine and don’t hesitate to adjust the spice levels to suit your palate!
Bolo De Rolo: Vegan Rolled Cake With Guava Paste

Bolo De Rolo is a traditional Brazilian dessert known for its beautiful layers and delightful flavors. This rolled cake, traditionally made with eggs and dairy, is reinvented here in a vegan version that still captures the essence of the original. The key to this cake lies in the delicate balance of the cake batter and the luscious guava paste, which creates a stunning visual and an irresistible taste.
Making Bolo De Rolo is simpler than it may seem, and once you get the hang of rolling the cake, you’ll be able to impress your friends and family with this stunning dessert. The guava paste, often found in Brazilian markets or online, adds a unique tropical flavor that complements the cake’s lightness perfectly.
So, gather your ingredients and get ready to create a beautiful and delicious vegan treat!
Ingredients (Servings: 4-6 people)
- 1 cup all-purpose flour
- 1 cup almond milk (or any plant-based milk)
- 1 cup granulated sugar
- 1/3 cup vegetable oil
- 1 teaspoon vanilla extract
- 1 teaspoon baking powder
- 1/2 teaspoon salt
- 1 cup guava paste (softened)
Cooking Instructions
- Preheat the Oven: Start by preheating your oven to 350°F (175°C). This guarantees that your cake bakes evenly and rises properly.
- Prepare the Baking Pan: Line a 10×15-inch jelly roll pan with parchment paper. This will help prevent the cake from sticking and make it easier to roll later.
- Mix the Dry Ingredients: In a large mixing bowl, whisk together the flour, baking powder, and salt. This guarantees that the leavening agent is evenly distributed throughout the flour.
- Combine Wet Ingredients: In another bowl, mix the almond milk, sugar, vegetable oil, and vanilla extract. Stir until the sugar has mostly dissolved.
- Combine Wet and Dry Mixtures: Gradually pour the wet ingredients into the dry ingredients, stirring gently until just combined. Be careful not to overmix, as this can lead to a dense cake.
- Pour the Batter: Pour the batter into the prepared jelly roll pan, spreading it evenly with a spatula to guarantee a uniform thickness.
- Bake the Cake: Place the pan in the preheated oven and bake for about 15-20 minutes, or until the cake is lightly golden and a toothpick inserted in the center comes out clean.
- Cool the Cake: Once baked, remove the cake from the oven and let it cool in the pan for about 5 minutes. Then, carefully flip it onto a clean kitchen towel dusted with powdered sugar, removing the parchment paper.
- Spread the Guava Paste: While the cake is still warm, spread the softened guava paste evenly over the surface of the cake. Make sure to cover it entirely for maximum flavor.
- Roll the Cake: Using the towel to help, gently roll the cake starting from one short end to the other. Be careful to roll it tightly but not so tight that the cake cracks.
- Chill and Slice: Allow the rolled cake to cool completely, then refrigerate it for about 30 minutes. This will help the cake set. Once chilled, slice it into pieces to reveal the beautiful layers.
Extra Tips
When making Bolo De Rolo, patience is key. Allow the cake to cool completely before attempting to roll it to prevent cracking. If you find that the guava paste is too firm, you can warm it slightly in the microwave or on the stovetop to make it more spreadable.
Additionally, consider dusting the finished cake with powdered sugar or serving it with a scoop of vegan ice cream for an added touch of decadence. Enjoy your delicious Brazilian vegan treat!
Caipirinha De Frutas: Fruity Vegan Caipirinha Cocktail

The Caipirinha is Brazil’s national cocktail, traditionally made with cachaça, sugar, and lime. This fruity vegan version, known as Caipirinha De Frutas, infuses seasonal fruits into the classic drink, making it a delightful and invigorating choice for gatherings, parties, or simply enjoying at home.
The vibrant colors and flavors of the fruits, combined with the zesty lime and sweetness, create a tropical experience that transports you straight to the beaches of Brazil.
Making the Caipirinha De Frutas is a fun and simple process. You can customize the fruits based on what’s in season or your personal preferences. Popular choices include strawberries, kiwi, or passion fruit, but feel free to experiment with whatever fruits you enjoy most.
This recipe serves 4-6 people, guaranteeing that everyone can indulge in this invigorating and fruity cocktail.
Ingredients (Serves 4-6 people)
- 4 limes, cut into wedges
- 1 cup of fresh fruit (e.g., strawberries, kiwi, pineapple, or mango), chopped
- ½ cup of sugar (adjust to taste)
- 1 cup of cachaça (or a non-alcoholic substitute)
- 2 cups of ice cubes
- Fresh mint leaves for garnish (optional)
Instructions
- Prepare the Fruit: Begin by washing and chopping the fresh fruit of your choice into small pieces. If you’re using strawberries, slice them; for pineapples, chop them into small cubes. The fruit should be vibrant and ripe to guarantee the best flavor.
- Muddle the Ingredients: In a large pitcher or bowl, add the lime wedges and chopped fruit. Sprinkle the sugar over the top. Using a muddler or the back of a wooden spoon, gently press down on the limes and fruit to release their juices. Be careful not to pulverize them too much; you want to create a nice mixture without turning it into mush.
- Add Cachaça: Once the limes and fruit have been muddled and are releasing their juices, pour the cachaça into the mixture. Stir well to combine all the ingredients, allowing the flavors to meld together.
- Prepare for Serving: Fill glasses with ice cubes, then pour the muddled fruit and cachaça mixture over the ice. Make sure to include some of the fruit and lime wedges in each glass for an appealing presentation.
- Garnish and Serve: If desired, garnish each drink with fresh mint leaves. Serve immediately and enjoy your invigorating Caipirinha De Frutas!
Extra Tips
For a unique twist on your Caipirinha De Frutas, consider adding different herbs like basil or rosemary to infuse an aromatic flavor.
Additionally, if you prefer a non-alcoholic version, you can replace cachaça with a sparkling water or coconut water to keep the drink invigorating without the alcohol.
Experiment with various fruit combinations and adjust the sweetness to your liking for a personalized cocktail experience.