

Exploring the vibrant world of Argentinian street food is like embarking on a flavorful journey. Each dish, from the sizzling choripán to the comforting locro, offers a taste of tradition and culture. The sweet, creamy alfajores are a delight you won’t want to miss. This collection of recipes invites you to experience the warmth and richness of Argentinian cuisine. Let’s uncover what makes these dishes so special together.
Choripán

Choripán is a beloved Argentinian street food that captures the essence of Argentine culture in every bite. This simple yet flavorful dish consists of a chorizo sausage grilled to perfection and served in a crusty baguette, often topped with chimichurri sauce. The combination of smoky, spicy sausage and the bright, herbaceous chimichurri creates a delightful experience that’s both satisfying and comforting.
It’s a staple at barbecues, street fairs, and food stalls across the country, making it a must-try for anyone who wishes to experience authentic Argentinian cuisine.
Making choripán at home is easier than you might think, and it allows you to customize the ingredients to suit your taste. While the star of the show is certainly the chorizo, the quality of the bread and the freshness of the chimichurri will elevate this dish to new heights.
Whether you’re hosting a summer barbecue or simply craving a taste of Argentina, this recipe will transport you straight to the vibrant streets of Buenos Aires.
Ingredients (serving size: 4-6 people):
- 4-6 Argentine chorizo sausages
- 4-6 crusty baguette rolls or bolillo bread
- 1 cup fresh parsley, finely chopped
- 4 cloves garlic, minced
- ½ teaspoon red pepper flakes (optional)
- ½ cup olive oil
- 2 tablespoons red wine vinegar
- Salt and pepper to taste
Cooking Instructions:
- Prepare the Chimichurri: In a bowl, combine the finely chopped parsley, minced garlic, red pepper flakes, olive oil, red wine vinegar, salt, and pepper. Mix well until all ingredients are thoroughly combined. Taste and adjust seasoning if necessary. Set aside to let the flavors meld while you prepare the chorizo.
- Grill the Chorizo: Preheat your grill to medium heat. Place the chorizo sausages on the grill and cook for about 10-12 minutes, turning occasionally. The sausages should be browned and cooked through. You can also use a grill pan or skillet if a grill isn’t available; just verify you cook them on medium heat to avoid burning.
- Toast the Bread: While the chorizo is grilling, cut the baguette rolls in half lengthwise. If desired, place them on the grill or in a toaster for a couple of minutes to lightly toast the insides. This step adds a nice crunch and enhances the overall texture.
- Assemble the Choripán: Once the chorizo is cooked, remove it from the grill and let it rest for a couple of minutes. Place each sausage into a toasted baguette roll. Generously spoon chimichurri over the top of each choripán, allowing it to soak into the bread.
- Serve and Enjoy: Serve the choripán immediately while they’re hot, with extra chimichurri on the side for dipping. Enjoy this delicious taste of Argentina with friends and family!
Extra Tips: When making choripán, feel free to experiment with different types of chorizo, such as spicy or mild, to suit your preferences. Additionally, if you’re a fan of toppings, consider adding sliced avocado, pickled onions, or even cheese for extra flavor.
For an authentic experience, serve your choripán with a chilled Argentine wine or a invigorating beer to complete your meal.
Empanadas

Empanadas are a beloved street food in Argentina, known for their flaky pastry and diverse fillings. These savory pastries can be found at street vendors, local eateries, and family gatherings, each with its own unique twist on the filling. Traditionally, empanadas are made with a variety of ingredients, including meats, cheeses, vegetables, and spices, resulting in endless combinations that cater to every palate.
Whether baked or fried, these delicious pastries are perfect for a quick bite or a hearty meal. Making empanadas at home allows you to customize the flavors and fillings to your liking. The dough is simple to prepare and can be filled with anything from spiced ground beef to creamy cheese and spinach. In this recipe, we’ll focus on a classic beef filling, but feel free to experiment with other ingredients that you enjoy. Gather your friends or family, as making empanadas can be a fun and interactive cooking experience!
Ingredients (Serves 4-6 people)
- For the dough:
- 4 cups all-purpose flour
- 1 teaspoon salt
- 1/2 cup unsalted butter, chilled and cubed
- 1 large egg
- 1/2 cup cold water
- For the filling:
- 1 pound ground beef
- 1 medium onion, finely chopped
- 1 red bell pepper, finely chopped
- 2 hard-boiled eggs, chopped
- 1/2 cup green olives, chopped
- 1 tablespoon paprika
- 1 teaspoon cumin
- Salt and pepper to taste
- 1 tablespoon olive oil
- For assembly:
- 1 egg (for egg wash)
Cooking Instructions
1. Prepare the dough: In a large mixing bowl, combine the flour and salt. Add the chilled, cubed butter and use your fingers or a pastry cutter to mix until the mixture resembles coarse crumbs.
In a separate bowl, whisk together the egg and cold water. Gradually add this mixture to the flour mixture, stirring until a dough forms. Knead the dough gently on a floured surface for about 5 minutes, then wrap it in plastic wrap and refrigerate for at least 30 minutes.
2. Make the filling: In a large skillet, heat the olive oil over medium heat. Add the chopped onion and red bell pepper, cooking until softened, about 5 minutes. Add the ground beef to the skillet, breaking it apart with a wooden spoon.
Cook until browned, about 7-10 minutes. Stir in the paprika, cumin, salt, and pepper. Remove from heat and let the mixture cool slightly before adding the chopped hard-boiled eggs and green olives. Mix well and set aside.
3. Roll out the dough: Once the dough has chilled, divide it into two halves for easier handling. On a floured surface, roll out one half of the dough to about 1/8-inch thickness. Use a round cutter or a glass to cut out circles (about 4-6 inches in diameter) from the dough.
Repeat with the other half of the dough.
4. Fill the empanadas: Place a tablespoon or two of the beef filling in the center of each dough circle. Be careful not to overfill. Fold the dough over to create a half-moon shape, pressing the edges together to seal.
For a decorative touch, crimp the edges with a fork or your fingers.
5. Prepare for baking: Preheat your oven to 375°F (190°C). Place the empanadas on a baking sheet lined with parchment paper. In a small bowl, whisk the remaining egg and brush the mixture over the tops of the empanadas for a golden finish.
6. Bake the empanadas: Bake in the preheated oven for 25-30 minutes, or until the empanadas are golden brown and crispy. Remove from the oven and allow to cool slightly before serving.
Extra Tips
When making empanadas, the freshness of the ingredients can greatly enhance the flavor, so opt for high-quality meat and fresh vegetables. Additionally, you can prepare the filling a day in advance and store it in the refrigerator to save time.
If you prefer a vegetarian option, substitute the ground beef with sautéed mushrooms, spinach, or cheese. Don’t forget to serve your empanadas with chimichurri sauce or a spicy salsa for an authentic Argentine experience!
Milanesa

Milanesa is a beloved dish in Argentina, often enjoyed as a hearty and satisfying meal. It consists of thinly sliced meat, usually beef or chicken, which is breaded and fried to a crispy perfection. This dish isn’t only popular in Argentina but has also found its way into the hearts of food lovers in other parts of Latin America and beyond.
The beauty of milanesa lies in its simplicity and versatility; it can be served on its own, as a sandwich, or accompanied by a fresh salad or mashed potatoes. The origins of milanesa can be traced back to the Italian cotoletta, but over time, it has evolved into a distinctive Argentine dish, often seasoned with unique spices and served with a variety of sauces.
The crunch of the breaded exterior combined with the tenderness of the meat makes for an irresistible combination that’s perfect for family dinners or casual gatherings. Once you learn how to prepare milanesa, you’ll find that it quickly becomes a favorite in your household.
Ingredients (serving size: 4-6 people)
- 4 boneless beef or chicken cutlets (about 1/2 inch thick)
- 1 cup all-purpose flour
- 2 large eggs
- 2 cups breadcrumbs (preferably homemade or panko)
- 1 teaspoon salt
- 1 teaspoon black pepper
- 1 teaspoon garlic powder (optional)
- 1 teaspoon dried oregano (optional)
- Vegetable oil (for frying)
- Lemon wedges (for serving)
Cooking Instructions
- Prepare the Meat: Place the beef or chicken cutlets between two pieces of plastic wrap or parchment paper. Use a meat mallet or rolling pin to gently pound the meat to about 1/4 inch thickness. This helps to tenderize the meat and guarantees even cooking.
- Season the Meat: Sprinkle both sides of the cutlets with salt, pepper, and any additional spices you choose, such as garlic powder or oregano. Let the meat rest for about 15 minutes to absorb the flavors.
- Set Up Breading Station: In one shallow dish, place the flour. In a second dish, whisk together the eggs until well combined. In a third dish, spread out the breadcrumbs. This setup will make it easy to coat the cutlets.
- Bread the Cutlets: Dredge each cutlet in the flour, making sure to coat all sides, then dip it into the beaten eggs, allowing any excess to drip off. Finally, press the cutlet into the breadcrumbs, ensuring an even coating on both sides. Repeat for all cutlets.
- Heat the Oil: In a large skillet, pour enough vegetable oil to cover the bottom by about 1/2 inch. Heat the oil over medium-high heat until it shimmers—this indicates it’s hot enough for frying.
- Fry the Cutlets: Carefully place the breaded cutlets into the hot oil, making sure not to overcrowd the pan. Fry for about 3-4 minutes on each side or until they’re golden brown and crispy. If necessary, cook in batches and keep the cooked cutlets warm in a low oven.
- Drain and Serve: Once cooked, transfer the milanesa to a plate lined with paper towels to absorb any excess oil. Serve immediately with lemon wedges on the side for squeezing over the top.
Extra Tips
When preparing milanesa, feel free to experiment with different types of meat, such as pork or even eggplant for a vegetarian option. For extra flavor, you can also add grated cheese to the breadcrumb mixture.
Make sure the oil is hot enough before adding the cutlets; if it’s not, the breading can become soggy. Finally, serving milanesa with a fresh salad or chimichurri sauce can elevate the dish even further, providing a delicious contrast to the crispy meat. Enjoy your homemade milanesa!
Provoleta
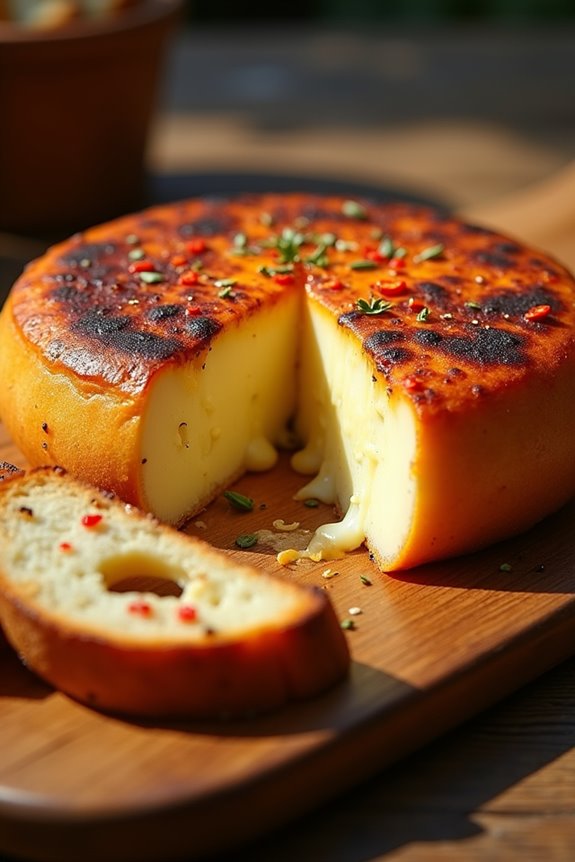
Provoleta is a beloved Argentinian street food that showcases the country’s passion for grilling and cheese. This delicious dish features provolone cheese, which is grilled until it melts and bubbles, creating a perfect blend of gooey texture and rich flavor.
Traditionally served as an appetizer or a snack, provoleta is often enjoyed with crusty bread and a sprinkle of oregano, making it a favorite among locals and tourists alike. The dish is simple yet indulgent, embodying the essence of Argentine cuisine, which prioritizes high-quality ingredients and bold flavors.
Preparing provoleta isn’t only a treat for the palate but also a fun experience to share with friends and family. The smoky, charred aroma of grilled cheese fills the air, inviting everyone to gather around the grill.
Once cooked, it’s best served immediately, accompanied by chimichurri or a drizzle of olive oil for an extra kick. This recipe will guide you through the steps to create the perfect provoleta for a serving size of 4-6 people.
Ingredients
- 1 large wheel of provolone cheese (about 1 pound)
- 2 tablespoons olive oil
- 1 teaspoon dried oregano
- 1/2 teaspoon crushed red pepper flakes (optional)
- Freshly ground black pepper to taste
- Crusty bread for serving
Cooking Instructions
1. Prepare the Grill: Preheat your grill to medium heat. If using a charcoal grill, make sure the coals are evenly distributed. A well-heated grill guarantees that the cheese will melt evenly and develop a beautiful char without burning.
2. Prep the Cheese: While the grill is heating, take the wheel of provolone cheese and drizzle olive oil over both sides. This not only adds flavor but also helps prevent the cheese from sticking to the grill.
Sprinkle dried oregano, crushed red pepper flakes (if using), and freshly ground black pepper on top.
3. Grill the Cheese: Place the prepared provolone directly onto the grill grates. Grill the cheese for about 5-7 minutes, or until it starts to bubble and develop a golden-brown crust.
Keep an eye on it to avoid overcooking; the ideal texture is gooey and melty with a slightly charred exterior.
4. Serve Immediately: Once the provoleta is beautifully grilled, carefully remove it from the grill using a spatula. Serve it hot, straight from the grill, with slices of crusty bread for dipping.
You can also drizzle some additional olive oil or chimichurri sauce on top for extra flavor.
5. Enjoy: Gather your friends and family around the table and Enjoy this delicious street food while it’s still warm. Encourage everyone to dig in with their bread and savor the gooey goodness of the provoleta.
Extra Tips
To elevate your provoleta experience, consider experimenting with different seasonings or toppings, such as fresh herbs like parsley or basil.
You can also try adding a touch of balsamic vinegar for a tangy contrast. If you don’t have a grill, a cast-iron skillet can work well on the stovetop, just make sure it’s preheated to get that perfect sear.
Locro
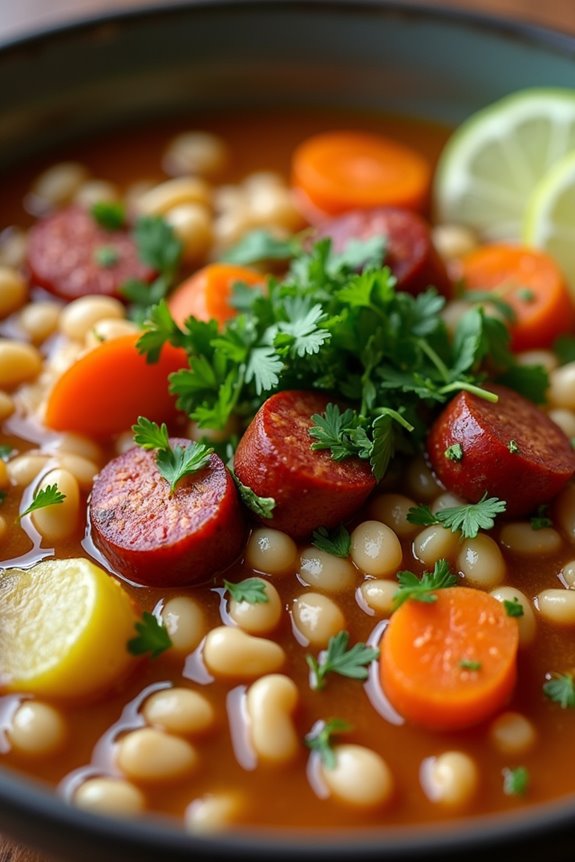
Locro is a traditional Argentinian stew that embodies the essence of comfort food, especially during the colder months or national holidays. This hearty dish combines various ingredients, including corn, beans, potatoes, and different cuts of meat, creating a flavorful and filling meal. Its roots can be traced back to indigenous cultures and Spanish influences, making it a beloved staple in the country.
Often enjoyed during the May Revolution celebrations and other festivities, Locro is more than just a dish; it’s a celebration of Argentine culture and history.
Making Locro is a labor of love, as it requires time and patience to allow the flavors to meld beautifully. The preparation involves soaking beans, simmering meats, and slowly cooking the vegetables to achieve the perfect texture and taste. Although the recipe may seem extensive, the results are rewarding, and the leftovers are just as delicious, making it an excellent option for meal prep.
Gather your ingredients, roll up your sleeves, and prepare to enjoy a delicious taste of Argentina!
Ingredients (Serves 4-6):
- 1 cup dried white beans
- 1 cup dried hominy corn (or 2 cups canned hominy)
- 2 tablespoons vegetable oil
- 1 onion, chopped
- 2 cloves garlic, minced
- 2 medium potatoes, diced
- 1 medium carrot, diced
- 1 green bell pepper, chopped
- 1 cup chorizo sausage, sliced
- 1 cup smoked bacon, chopped
- 1 liter (4 cups) beef or chicken broth
- 1 teaspoon paprika
- 1 teaspoon cumin
- Salt and pepper to taste
- Fresh parsley, chopped (for garnish)
- Lime wedges (for serving)
Cooking Instructions:
- Soak the Beans: Begin by soaking the dried white beans in water overnight. This softens them, reducing cooking time and ensuring they cook evenly. If using canned hominy, skip this step and rinse the hominy under cold water to remove excess salt.
- Prepare the Hominy: If using dried hominy, rinse and add it to a pot of boiling water. Cook for about 30 minutes until tender, then drain and set aside. If using canned, drain and rinse as mentioned earlier.
- Sauté the Aromatics: In a large pot, heat the vegetable oil over medium heat. Add the chopped onion and garlic, sautéing until they’re translucent and fragrant, about 5 minutes. This step builds the flavor base of your Locro.
- Add the Vegetables: Stir in the diced potatoes, carrots, and green bell pepper. Cook for an additional 5-7 minutes, allowing the vegetables to soften slightly while continuing to absorb the flavors from the aromatics.
- Incorporate the Meats: Add the sliced chorizo and chopped bacon to the pot. Cook until the meats are browned and their fat has rendered, about 5-10 minutes. This step adds a smoky depth to the dish.
- Combine the Beans and Broth: Drain the soaked beans and add them to the pot, along with the cooked hominy. Pour in the beef or chicken broth, ensuring all ingredients are submerged. Stir to combine.
- Season the Stew: Add the paprika, cumin, salt, and pepper to taste. Bring the mixture to a boil, then reduce the heat to low. Cover and let it simmer for about 1.5 to 2 hours, stirring occasionally, until the beans are tender and the stew has thickened.
- Serve: Once the Locro is ready, taste and adjust the seasoning if necessary. Ladle the stew into bowls, garnish with fresh parsley, and serve with lime wedges on the side for a burst of fresh flavor.
Extra Tips:
When preparing Locro, feel free to customize the meats based on your preference, using beef or other sausages if desired. Additionally, for a vegetarian version, omit the meats and increase the variety of vegetables and beans.
Cooking Locro a day in advance allows the flavors to deepen, making it an excellent dish for gatherings. Don’t hesitate to experiment with the spices to make it truly your own, and enjoy your culinary journey through Argentina!
Dulce De Leche

Dulce de leche, often translated as “sweet milk,” is a traditional Argentine dessert that has captured the hearts of many around the world. This creamy caramel-like sauce is made by slowly simmering milk and sugar until it thickens and turns a beautiful golden brown.
It’s a beloved staple in Argentina, often used as a filling for pastries, drizzled over pancakes, or simply enjoyed by the spoonful. The beauty of dulce de leche lies in its versatility and rich flavor, making it a must-try for any dessert lover.
While making dulce de leche may seem intimidating, it’s quite simple with the right technique. The key is to be patient as you stir the mixture, allowing the sugar to dissolve and the milk to reduce. The result is a luscious caramel that can elevate any dish, whether it’s spread on toast or used as a topping for ice cream.
With just a few ingredients and your dedication, you can create this delightful treat from the comfort of your kitchen.
Ingredients (serving size: 4-6 people)
- 4 cups whole milk
- 1 cup granulated sugar
- 1/4 teaspoon baking soda
- 1 teaspoon vanilla extract (optional)
Cooking Instructions
- Combine Ingredients: In a large, heavy-bottomed saucepan, combine the whole milk, granulated sugar, and baking soda. The baking soda helps to prevent the milk from curdling and gives the dulce de leche its characteristic creamy texture.
- Heat the Mixture: Place the saucepan over medium heat and stir the mixture constantly until the sugar has completely dissolved. This should take about 5-7 minutes. Avoid allowing the mixture to boil at this stage; you want to gently heat it.
- Simmer and Stir: Once the sugar is dissolved, reduce the heat to low. Let the mixture simmer while stirring frequently. This process can take anywhere from 1 to 2 hours, depending on your heat level. As it cooks, you’ll notice it thickening and changing color to a deep caramel.
- Check Consistency: When the dulce de leche has thickened to your desired consistency, remove it from heat. To test, drop a small amount on a cold plate; if it holds its shape, it’s ready.
- Add Flavor: If using vanilla extract, stir it in now for added flavor. Allow the dulce de leche to cool slightly before transferring it to a clean jar or container.
- Cool and Store: Let the dulce de leche cool completely at room temperature, then store it in the refrigerator. It will thicken further as it cools.
Extra Tips
For an even richer flavor, consider using whole milk from a local dairy farm, as it often has a creamier consistency compared to store-bought milk.
Always stir the mixture frequently, especially as it thickens, to prevent it from sticking to the bottom of the pan and burning. If you notice any lumps, simply whisk the mixture vigorously until smooth.
Dulce de leche can be stored in the refrigerator for up to two weeks, making it a perfect make-ahead treat for any occasion. Enjoy experimenting with it in various desserts or as a decadent topping!
Alfajores

Alfajores are a beloved traditional Argentinian treat that consists of two crumbly cookies sandwiching a rich filling, typically dulce de leche. Originating from the Moorish influence in Spanish cuisine, these delightful confections have become a staple in Argentina and throughout Latin America.
The cookies are often dusted with powdered sugar or coated in chocolate, making them perfect for any occasion, whether it’s a casual coffee break or a festive gathering.
Making alfajores at home is a rewarding experience that brings the taste of Argentina right to your kitchen. The cookies are tender, with a melt-in-your-mouth texture, while the sweet, creamy filling adds a luscious contrast.
With a few simple ingredients, you can create a batch of these delicious treats that will impress family and friends alike.
Ingredients (Serves 4-6)
- 1 cup unsalted butter, softened
- 1 cup sugar
- 2 large egg yolks
- 1 teaspoon vanilla extract
- 2 cups all-purpose flour
- 1 cup cornstarch
- 1 teaspoon baking powder
- 1/4 teaspoon salt
- 1 cup dulce de leche
- Powdered sugar for dusting
- Optional: 1 cup dark chocolate for coating
Cooking Instructions
1. Prepare the Dough: In a large mixing bowl, cream the softened butter and sugar together until light and fluffy. This process should take about 3-5 minutes.
Then, add the egg yolks and vanilla extract, mixing until well combined.
2. Combine Dry Ingredients: In a separate bowl, whisk together the all-purpose flour, cornstarch, baking powder, and salt. Gradually add these dry ingredients into the butter mixture, mixing until the dough comes together.
Don’t overmix; it should be soft and slightly sticky.
3. Chill the Dough: Wrap the dough in plastic wrap and refrigerate for at least 1 hour. Chilling the dough makes it easier to roll out and helps the cookies keep their shape while baking.
4. Roll and Cut the Cookies: Preheat your oven to 350°F (175°C). On a floured surface, roll out the dough to about 1/4 inch thick. Use a round cookie cutter to cut out circles (about 2-3 inches in diameter).
Place the cookies on a parchment-lined baking sheet, spaced apart.
5. Bake the Cookies: Bake in the preheated oven for 10-12 minutes or until the edges are lightly golden. Allow them to cool on the baking sheet for a few minutes before transferring to a wire rack to cool completely.
6. Assemble the Alfajores: Once the cookies are completely cool, spread a generous layer of dulce de leche on the bottom of one cookie and top it with another cookie to create a sandwich.
Repeat with the remaining cookies.
7. Dust and Serve: If desired, dust the assembled alfajores with powdered sugar before serving. For an added twist, you can melt dark chocolate and dip half of each alfajor in it, allowing it to set before enjoying.
Extra Tips
When making alfajores, the key is to guarantee that the cookies aren’t overbaked, as they should remain soft and tender.
For the best flavor, allow the assembled cookies to sit for a few hours or overnight, as this lets the dulce de leche soak into the cookies, enhancing their taste and texture.
Additionally, experiment with different fillings such as fruit preserves or chocolate ganache for a unique twist on this classic treat!
Picada

Picada is a beloved Argentinian street food that embodies the spirit of sharing and celebration. It’s fundamentally a platter filled with an assortment of cured meats, cheeses, olives, and bread, making it a perfect appetizer or snack for gatherings. Traditionally, Picada is enjoyed with friends and family, often accompanied by a glass of Malbec wine or a revitalizing Fernet and cola.
The beauty of Picada lies in its versatility; you can customize it based on your preferences or the ingredients you have on hand. When preparing Picada, the key is to select high-quality ingredients that reflect the rich culinary heritage of Argentina. You can include a variety of cured meats like salami, prosciutto, or chorizo, along with different types of cheeses such as queso fresco, aged provolone, and blue cheese.
Adding pickled vegetables, marinated olives, and some crusty bread will give your platter an authentic touch. The result is a colorful spread that’s as pleasing to the eyes as it’s to the palate.
Ingredients (serving size: 4-6 people):
- 200g cured chorizo
- 200g salami
- 200g prosciutto
- 150g aged provolone cheese
- 150g queso fresco
- 100g blue cheese
- 150g olives (mixed varieties)
- 200g marinated artichokes
- 1 baguette or country-style bread
- Fresh parsley (for garnish)
- Olive oil (for drizzling)
- Cracked black pepper (to taste)
Cooking Instructions:
- Select a Serving Platter: Choose a large wooden or slate board to create an appealing presentation. The platter should have enough space to display all the ingredients beautifully.
- Prepare the Meats: Slice the cured chorizo, salami, and prosciutto into thin, bite-sized pieces. Arrange the slices artfully on one side of the platter. You can fan them out or layer them for visual interest.
- Arrange the Cheeses: Cut the aged provolone, queso fresco, and blue cheese into wedges or cubes. Place the cheeses on the opposite side of the meats, ensuring there’s a variety of textures and flavors showcased.
- Add the Olives and Artichokes: Scatter the olives and marinated artichokes around the meats and cheeses. This will add color and provide a briny contrast to the rich flavors of the meats and cheeses.
- Include the Bread: Slice the baguette or country-style bread into thick rounds and arrange them in a basket or on the platter itself. Drizzle a little olive oil over the bread for added flavor.
- Garnish: Sprinkle fresh parsley over the entire platter for a pop of color and freshness. You can also add some cracked black pepper over the cheeses for an extra kick.
- Serve Immediately: Picada is best enjoyed fresh. Serve it with toothpicks or small forks for easy snacking, and pair it with your favorite drinks.
Extra Tips:
When preparing Picada, feel free to experiment with different ingredients based on your taste preferences or seasonal availability. Adding nuts, fresh fruits, or even grilled vegetables can create a unique twist on this classic dish.
Additionally, don’t hesitate to play with the presentation; using various heights and arrangements can make your platter look even more inviting. Finally, remember to serve your Picada at room temperature for the best flavor experience!
Fugazzeta

Fugazzeta is a delicious and iconic Argentinian street food that combines the beloved cheesy goodness of pizza with the soft, fluffy texture of focaccia. Originating from the immigrant communities in Argentina, particularly the Italian diaspora, this dish features a thick crust filled with a generous amount of cheese, often accompanied by caramelized onions and herbs.
It’s a perfect snack for gatherings, parties, or a casual dinner, as it can be enjoyed warm or at room temperature. The heart of Fugazzeta lies in its simplicity, yet it packs a flavor punch that’s hard to resist. The dough is typically made from basic ingredients like flour, yeast, and water, which come together to create a soft and airy base.
The real star of the dish is the filling, which is usually a combination of mozzarella and provolone cheese, offering a rich and savory experience. Serve it with a side of chimichurri sauce for an added zing, and you’ll delight your taste buds with this authentic Argentinian street food.
Ingredients (Serves 4-6)
- 4 cups all-purpose flour
- 1 packet (2 ¼ teaspoons) active dry yeast
- 1 ½ cups warm water
- 2 teaspoons sugar
- 2 teaspoons salt
- ¼ cup olive oil
- 2 cups mozzarella cheese, shredded
- 1 cup provolone cheese, shredded
- 2 medium onions, thinly sliced
- 1 tablespoon dried oregano
- Salt and pepper to taste
- Extra olive oil for drizzling
Cooking Instructions
1. Prepare the Dough: In a small bowl, combine the warm water, sugar, and yeast. Let it sit for about 5-10 minutes until it becomes frothy. In a large mixing bowl, combine the flour and salt. Once the yeast mixture is ready, pour it into the flour mixture along with the olive oil. Mix until a dough forms.
2. Knead the Dough: Transfer the dough onto a lightly floured surface and knead for about 8-10 minutes until it becomes smooth and elastic. If the dough is too sticky, add a little more flour as needed.
3. First Rise: Place the kneaded dough in a greased bowl, cover it with a clean kitchen towel or plastic wrap, and let it rise in a warm place for about 1 hour, or until it doubles in size.
4. Prepare the Filling: While the dough is rising, heat a tablespoon of olive oil in a skillet over medium heat. Add the sliced onions and sauté them until they become soft and caramelized, about 10-15 minutes. Season with salt, pepper, and oregano, then remove from heat and let cool.
5. Assemble the Fugazzeta: Once the dough has risen, punch it down to release air. Divide the dough in half. Roll out one half into a large circle and place it in a greased 12-inch round pizza pan. Spread the shredded mozzarella and provolone cheese evenly over the dough, followed by the caramelized onions.
Roll out the second half of the dough and place it on top, sealing the edges by pinching them together.
6. Second Rise: Cover the assembled Fugazzeta with a kitchen towel and let it rise again for about 30 minutes. Preheat your oven to 375°F (190°C) during this time.
7. Bake the Fugazzeta: Drizzle the top of the dough with olive oil and sprinkle with additional oregano. Bake for 25-30 minutes, or until the crust is golden brown. Let it cool slightly before slicing.
8. Serve: Cut into wedges and serve warm or at room temperature, optionally with chimichurri sauce on the side.
Extra Tips
When making Fugazzeta, consider experimenting with different types of cheese to customize the flavor profile to your liking. For a more robust taste, you can add ingredients like sautéed bell peppers or olives into the filling.
Verify not to overfill the Fugazzeta, as this can make it difficult to seal and may lead to spills during baking. Additionally, if you prefer a crisper crust, bake it on a pizza stone or a preheated baking sheet.
Asado

Asado is more than just a meal in Argentina; it’s a traditional barbecue that represents a social gathering and a cultural event. This dish typically features a variety of meats, particularly beef, which are cooked on a grill or open fire, often accompanied by chimichurri sauce and an array of side dishes.
The preparation and cooking process of asado can vary markedly across different regions of Argentina, but the essence remains the same: to celebrate the art of grilling and the joy of sharing food with friends and family.
To prepare a memorable asado, you’ll need to select high-quality cuts of beef, pork, and sometimes chicken, and allow the meat to absorb the smoky flavors from the grill. The key to a great asado lies in the cooking method and patience, as the meat should be cooked slowly over an open flame to achieve that perfect tenderness and flavor.
Pairing the asado with fresh salads, bread, and of course, the essential chimichurri can elevate the dining experience, making it a feast that everyone will enjoy.
Ingredients (Serves 4-6):
- 4 lbs beef ribs
- 2 lbs flank steak
- 2 lbs chorizo sausages
- 1 whole chicken, cut into pieces
- 1 cup chimichurri sauce
- Salt (to taste)
- Black pepper (to taste)
- Fresh herbs (for garnish, optional)
- Assorted vegetables (bell peppers, zucchini, and onions for grilling, optional)
Cooking Instructions:
- Prepare the Grill: Start by preparing your grill or open fire. If using charcoal, light it and let it burn until you have a bed of hot coals. If using a gas grill, preheat it to medium-high heat. It’s important to have a steady and consistent heat source for even cooking.
- Season the Meat: Generously season the beef ribs, flank steak, chorizo sausages, and chicken pieces with salt and black pepper. Let them sit for 15-20 minutes to allow the seasonings to penetrate the meat. You can also marinate the meats in chimichurri for a few hours or overnight for added flavor.
- Grill the Meat: Start by placing the beef ribs and flank steak on the grill, as they take longer to cook. Grill them for about 10-12 minutes on each side, or until they reach your desired level of doneness. Use tongs to flip the meat, avoiding piercing it to retain the juices.
- Add the Sausages and Chicken: Once the beef is nearly done, add the chorizo sausages and chicken pieces to the grill. Cook the sausages for about 7-10 minutes, turning occasionally, and the chicken for about 15-20 minutes, ensuring it’s cooked through and juices run clear.
- Grill the Vegetables (Optional): If you’re using assorted vegetables, place them on the grill after the meats have been cooking for about 10 minutes. Cook until they’re tender and have grill marks, about 5-7 minutes.
- Serve: Once all the meats are cooked, remove them from the grill and let them rest for about 5 minutes. Slice the flank steak against the grain and serve alongside the ribs, sausages, chicken, and grilled vegetables. Don’t forget to offer chimichurri sauce on the side for dipping.
Extra Tips: To enhance your asado experience, consider using wood chips or aromatic herbs like rosemary or thyme on your coals for additional flavor. Always allow the meat to rest after grilling to retain its juiciness, and feel free to experiment with different cuts of meat to find your personal favorites.
Finally, gather friends and family around the grill to share stories and enjoy the atmosphere, as asado is all about community and celebration!
Choclo
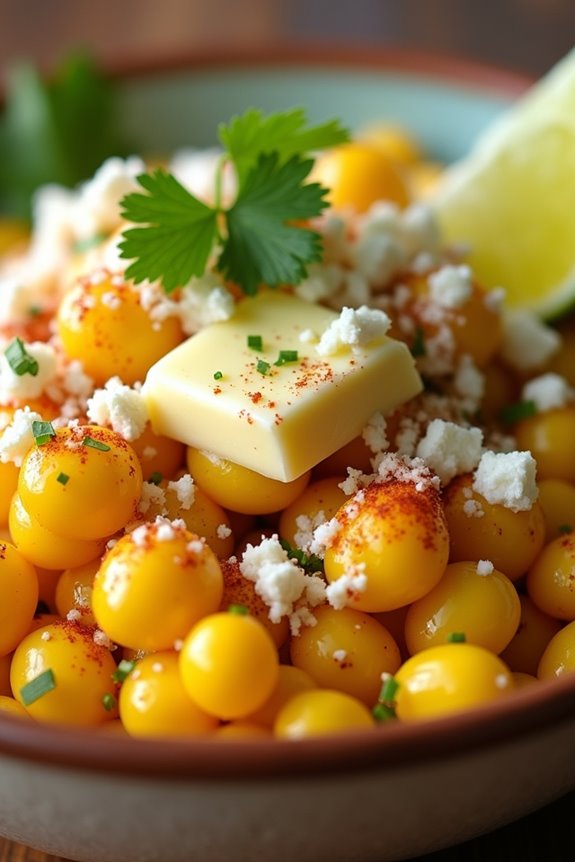
Choclo, or Peruvian corn, is an essential part of Argentinian street food that delights locals and visitors alike. This hearty dish features large, tender kernels of corn, often served with various toppings and accompaniments.
Choclo isn’t just a snack; it embodies the rich agricultural heritage of Argentina, where corn is a staple crop. The unique flavor and texture of choclo make it a perfect addition to any meal or a delicious stand-alone treat.
When preparing choclo, you’ll find that it’s versatile enough to be served in numerous ways. Whether you enjoy it simply boiled and slathered with butter or topped with cheese, herbs, or a drizzle of sauce, choclo offers a delightful culinary experience. This recipe will guide you through making a classic Argentinian choclo dish that serves 4-6 people, perfect for sharing with family and friends.
Ingredients (serving size: 4-6 people):
- 6 large ears of choclo (Peruvian corn)
- 1/4 cup unsalted butter
- 1 cup crumbled queso fresco or grated Parmesan cheese
- 1/4 cup fresh cilantro, chopped
- Salt to taste
- 1/4 teaspoon paprika (optional)
- Lime wedges for serving
Cooking Instructions:
1. Prepare the Corn:
Start by husking the choclo. Remove the outer green leaves and silk threads from each ear of corn. Rinse the ears under cool water to remove any remaining silk or debris.
2. Boil the Choclo:
Fill a large pot with water and bring it to a boil. Once boiling, add the prepared choclo ears. Boil the corn for about 20-30 minutes, or until the kernels are tender but still slightly firm. Check for doneness by piercing a kernel with a fork.
3. Drain and Cool:
Once the corn is cooked, carefully remove the ears from the pot using tongs, and allow them to drain in a colander. Let them cool slightly for a few minutes until they’re safe to handle.
4. Add Toppings:
While the corn is still warm, spread a tablespoon of unsalted butter over each ear. Sprinkle generously with crumbled queso fresco or grated Parmesan cheese, followed by chopped cilantro and a pinch of salt.
For an added touch, you can also sprinkle paprika over the top for a bit of color and flavor.
5. Serve:
Serve the choclo hot, accompanied by lime wedges on the side. Guests can squeeze fresh lime juice over the corn for added zest before digging in.
Extra Tips:
For an authentic experience, consider grilling the choclo instead of boiling it. This method brings out a smoky flavor that complements the sweetness of the corn beautifully.
If you can’t find fresh choclo, you can use regular sweet corn, but keep in mind that the texture and flavor may differ slightly. Additionally, feel free to experiment with different toppings, such as avocado or spicy sauces, to customize your choclo experience!
Helado

One of the most beloved street foods in Argentina is helado, a creamy and delicious ice cream that comes in a variety of flavors. Helado isn’t just a dessert; it’s a cultural experience that brings people together, especially on warm days. The texture is rich and smooth, often made with high-quality ingredients that set it apart from commercial ice creams.
Whether you’re enjoying a scoop in a cone or a cup, helado is a rejuvenating treat that embodies the essence of Argentinian cuisine.
Making helado at home is a delightful venture that allows you to experiment with flavors and create your own unique combinations. While traditional flavors like dulce de leche, chocolate, and fruit are popular, the possibilities are endless. This recipe provides a base that you can customize to suit your taste.
Get ready to indulge in this creamy delight that will transport your taste buds straight to the streets of Buenos Aires!
Ingredients (Serves 4-6)
- 2 cups heavy cream
- 1 cup whole milk
- 3/4 cup granulated sugar
- 1 tablespoon vanilla extract
- 4 large egg yolks
- Pinch of salt
- Optional mix-ins (chocolate chips, fruit, nuts, or dulce de leche)
Cooking Instructions
- Prepare the Base Mixture: In a medium saucepan, combine the heavy cream, whole milk, and half of the sugar (about 1/2 cup). Heat the mixture over medium heat until it’s warm but not boiling, stirring occasionally to help dissolve the sugar.
- Whisk the Egg Yolks: In a separate bowl, whisk together the egg yolks, the remaining sugar, and a pinch of salt until the mixture is pale and slightly thickened. This will help create a rich texture in your helado.
- Temper the Egg Yolks: Once the cream mixture is warm, slowly ladle about a cup of the warm mixture into the bowl with the egg yolks while whisking continuously. This step is essential to prevent the eggs from scrambling. Once combined, pour the egg mixture back into the saucepan with the remaining cream mixture.
- Thicken the Mixture: Cook the combined mixture over medium-low heat, stirring constantly with a wooden spoon, until it thickens enough to coat the back of the spoon (about 5-10 minutes). Be careful not to let it boil, as this can scramble the eggs.
- Cool and Flavor: Once thickened, remove the saucepan from the heat and stir in the vanilla extract. Allow the mixture to cool to room temperature, then cover and refrigerate for at least 4 hours or overnight to chill completely.
- Churn the Helado: Once chilled, pour the mixture into an ice cream maker and churn according to the manufacturer’s instructions until it reaches a soft-serve consistency. If you want to add any mix-ins, fold them in during the last few minutes of churning.
- Freeze: Transfer the churned helado to an airtight container and freeze for at least 4 hours to allow it to firm up before serving.
Extra Tips
For a more intense flavor, consider adding pureed fruit or rich chocolate during the blending stage. You can also experiment with different flavorings like coffee or matcha for a unique twist.
If you don’t have an ice cream maker, you can place the mixture in a shallow dish and freeze it, stirring every 30 minutes until it reaches the desired consistency. Enjoy your homemade helado as a perfect ending to any meal or as a rejuvenating treat on its own!