

Colombian cuisine is a treasure trove of flavors and traditions waiting to be explored. It’s a delightful mix of hearty meals and comforting dishes that speak to the heart. From the iconic Bandeja Paisa to the soul-soothing Ajiaco, each recipe offers a glimpse into the country’s rich culinary heritage. Whether you’re in the mood for crispy Empanadas or a bowl of savory Sancocho, these 13 recipes are sure to inspire your next culinary adventure. Let’s uncover these delicious treasures together.
Arepas
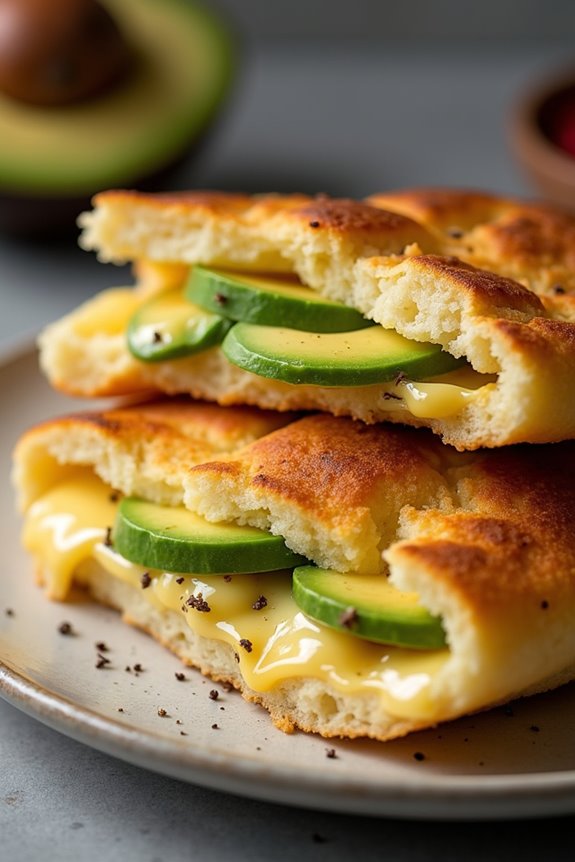
Arepas are a traditional Colombian dish made from ground maize dough, commonly enjoyed as a staple food in many households. They can be served in various ways, often filled or topped with a variety of ingredients. The versatility of arepas allows them to be enjoyed for breakfast, lunch, or dinner, making them an excellent choice for any time of day.
Whether you prefer them grilled, baked, or fried, arepas are a delicious canvas for creativity in the kitchen. In Colombia, arepas are often paired with cheese, meats, or avocado, and they can also be made sweet or savory depending on the preparation. Making arepas is a straightforward process that involves just a few ingredients, yet the final product is incredibly satisfying.
This recipe will guide you through making traditional arepas that serve 4-6 people, perfect for sharing with family and friends.
Ingredients
- 2 cups of pre-cooked corn flour (masarepa)
- 2 ½ cups of warm water
- 1 teaspoon of salt
- 1 tablespoon of butter (optional)
- Cheese or other fillings of your choice (e.g., shredded cheese, avocado, meat)
Cooking Instructions
- Prepare the Dough: In a large mixing bowl, combine the pre-cooked corn flour and salt. Gradually add the warm water while mixing with your hands or a spatula until the dough comes together. If using, melt the butter and add it to the mixture for extra flavor and richness.
- Knead the Dough: Once the dough starts to form, knead it gently for about 2-3 minutes until it’s smooth and pliable. If the dough is too sticky, add a little more flour; if it’s too dry, add a splash more water.
- Shape the Arepas: Divide the dough into equal portions (about the size of a golf ball). Roll each portion into a ball, then flatten it gently into a disk about ½ inch thick. Aim for uniform thickness to guarantee even cooking.
- Cook the Arepas: Preheat a griddle or skillet over medium heat. Place the arepas on the hot surface and cook for about 5-7 minutes on each side, or until they develop a golden-brown crust. If you prefer a softer arepa, you can cover the skillet with a lid while cooking.
- Finish Cooking (Optional): For a crispy finish, you can transfer the cooked arepas to a preheated oven at 400°F (200°C) for an additional 10 minutes. This step is optional but will give them a wonderful texture.
- Fill and Serve: Once the arepas are cooked, slice them open and fill them with your desired ingredients, such as cheese, avocado, or meats. Serve warm and enjoy!
Extra Tips
When making arepas, feel free to experiment with different types of cheese or fillings to suit your taste. For a more authentic flavor, consider using fresh cheese like queso blanco.
Additionally, you can add herbs or spices to the dough for an extra dimension of flavor. If you want to store leftover arepas, they can be refrigerated and reheated in a skillet or microwave for a quick snack or meal. Enjoy the versatility of arepas as you explore different combinations and flavors!
Bandeja Paisa

Bandeja Paisa is a traditional Colombian dish that embodies the rich culinary heritage of the Antioquia region. Known for its hearty ingredients and vibrant flavors, this dish is a true feast for the senses. It’s a perfect representation of Colombian hospitality and is often served on special occasions or family gatherings. The name “Bandeja” translates to “tray,” reflecting the way the dish is presented, with a variety of ingredients artfully arranged on a large platter.
The dish typically includes a generous portion of rice, beans, ground beef, chicharrón (fried pork belly), plantains, avocado, and a fried egg, among other components. Each ingredient brings its unique flavor and texture, creating a delightful balance that satisfies the palate. Preparing Bandeja Paisa may seem intimidating due to the number of components involved, but with careful planning and a bit of time, you can create this iconic dish that will impress your family and friends.
Ingredients (Serves 4-6)
- 2 cups of white rice
- 1 cup of red beans (cooked)
- 1 lb of ground beef
- 1 lb of chicharrón (fried pork belly)
- 2 ripe plantains
- 2 avocados
- 4 eggs
- 1 onion (chopped)
- 2 cloves of garlic (minced)
- 1 tbsp of cumin
- Salt and pepper to taste
- Fresh cilantro (for garnish)
- Lime wedges (for serving)
Cooking Instructions
- Prepare the Rice: Begin by rinsing the white rice under cold water until the water runs clear. In a large pot, add 4 cups of water, a pinch of salt, and the rinsed rice. Bring to a boil over medium heat, then reduce the heat to low, cover, and let it cook for about 15-20 minutes until the rice is tender and the water is absorbed. Fluff the rice with a fork before serving.
- Cook the Beans: If you’re using dried red beans, soak them overnight and then cook them in a pot with fresh water until they’re tender (about 1-2 hours). If you’re using canned beans, simply heat them in a saucepan on medium heat. Add chopped onions, minced garlic, cumin, salt, and pepper to enhance the flavor. Simmer for 10 minutes.
- Prepare the Ground Beef: In a skillet over medium heat, add a tablespoon of oil and sauté the chopped onions until they’re translucent. Then, add the ground beef and cook it until browned. Season with cumin, salt, and pepper. Stir occasionally and break up the meat until fully cooked. This should take about 8-10 minutes.
- Fry the Chicharrón: If your chicharrón isn’t pre-cooked, cut the pork belly into bite-sized pieces and fry them in a skillet over medium heat until they’re crispy and golden. This process usually takes about 20-25 minutes. Drain on paper towels to remove excess fat.
- Fry the Plantains: Peel the ripe plantains and slice them diagonally into thick pieces. In a separate skillet, heat oil over medium heat and fry the plantain slices until they’re golden brown on both sides, about 3-4 minutes per side. Remove and drain on paper towels.
- Fry the Eggs: In the same skillet used for the plantains, crack the eggs and fry them sunny-side up or over-easy, depending on your preference. Season with salt and pepper.
- Assemble the Bandeja Paisa: On a large serving platter, arrange the rice, beans, ground beef, chicharrón, fried plantains, sliced avocado, and fried eggs. Garnish with fresh cilantro and serve with lime wedges on the side for squeezing over the top.
Extra Tips
When preparing Bandeja Paisa, it’s crucial to balance the cooking times of each component to guarantee everything is served hot and fresh. Consider cooking the rice and beans ahead of time, as they can be reheated quickly.
Also, feel free to customize the dish by adding or substituting ingredients based on personal preference or availability, such as including corn arepas or a side salad for added freshness. Enjoy the process and the rich flavors that come together in this beloved Colombian dish!
Ajiaco

Ajiaco is a traditional Colombian soup that’s both hearty and flavorful, often enjoyed during family gatherings and special occasions. This dish originates from the Andean region of Colombia, specifically Bogotá, and is characterized by its rich, savory broth, tender chicken, and a medley of potatoes.
Ajiaco is typically served with a side of avocado, capers, and cream, allowing each person to personalize their bowl to their liking. The secret to a great Ajiaco lies in the combination of different types of potatoes, which provide a unique texture and flavor to the soup. The use of guascas, a Colombian herb, infuses the dish with a distinctive aroma that elevates the overall experience.
Whether you’re cooking for family or friends, Ajiaco is a comforting dish that brings warmth and joy to any table.
Ingredients (Serves 4-6)
- 2 chicken breasts (bone-in)
- 8 cups of water
- 2 medium yellow potatoes, peeled and diced
- 2 medium red potatoes, peeled and diced
- 2 medium russet potatoes, peeled and diced
- 1 cup of corn on the cob (cut into chunks) or canned corn
- 1 medium onion, chopped
- 2 cloves of garlic, minced
- 1 tablespoon of guascas (dried Colombian herb)
- 1 teaspoon of salt (or to taste)
- ½ teaspoon of black pepper (or to taste)
- 1 tablespoon of olive oil
- 1 cup of heavy cream (for serving)
- 1 cup of capers (for serving)
- 1 avocado (sliced, for serving)
- Fresh cilantro (for garnish)
Cooking Instructions
- Prepare the Chicken: In a large pot, add the chicken breasts along with the 8 cups of water. Bring it to a boil over high heat, then reduce the heat to medium-low, skimming any foam that forms on the surface. This will help create a clear and flavorful broth.
- Sauté the Aromatics: In a separate skillet, heat the olive oil over medium heat. Add the chopped onion and minced garlic, sautéing until the onion becomes translucent and fragrant, about 5 minutes. This step enhances the flavor profile of your soup.
- Add the Aromatics to the Pot: Once the chicken has been boiling for about 20 minutes, add the sautéed onion and garlic mixture to the pot. This will incorporate the sautéed flavors into the broth.
- Add the Potatoes and Corn: After the chicken has cooked for about 30 minutes, add the diced yellow, red, and russet potatoes along with the corn. Stir in the guascas, salt, and black pepper. Let the soup simmer for an additional 30-40 minutes or until the potatoes are tender and the chicken is fully cooked.
- Shred the Chicken: Once the chicken is cooked, remove it from the pot and let it cool slightly. Shred the chicken into bite-sized pieces and return it to the soup. This will add texture and protein to the dish.
- Adjust Seasoning: Taste the soup and adjust the seasoning with additional salt and pepper if needed. Allow the soup to simmer for a few more minutes to meld the flavors together.
- Serve: Ladle the Ajiaco into bowls. Serve with slices of avocado, a dollop of heavy cream, and a sprinkle of capers on the side. Garnish with fresh cilantro before serving.
Extra Tips
For an authentic Ajiaco experience, consider using a variety of local potatoes if available, as they can add depth to the flavor and texture. Additionally, the soup can be prepared a day in advance; in fact, many people find that Ajiaco tastes even better the next day as the flavors develop further.
When serving, allow guests to customize their bowls with the cream, capers, and avocado to suit their tastes. Enjoy this warm and comforting Colombian classic with some crusty bread or rice for a complete meal!
Sancocho

Sancocho is a traditional Colombian stew that’s beloved for its rich flavors and hearty ingredients. This comforting dish is a perfect representation of Colombian culinary culture, often enjoyed during family gatherings or festive occasions.
Each region in Colombia has its own variation of sancocho, featuring different types of meats and vegetables, but the essence remains the same: a warm, nourishing meal that brings people together. The combination of meats, root vegetables, and spices creates a symphony of flavors that’s both satisfying and soul-warming.
This dish isn’t only delicious but also quite versatile. You can customize it based on your preferences or what you have available. Commonly, sancocho includes chicken, beef, or fish, along with a variety of vegetables such as yuca, plantains, and corn.
The recipe below will guide you through making a hearty chicken sancocho that serves 4-6 people, perfect for sharing with family and friends.
Ingredients
- 1 whole chicken, cut into pieces
- 2 liters of water
- 2 medium yuca, peeled and cut into chunks
- 2 medium green plantains, peeled and sliced
- 2 ears of corn, cut into thirds
- 2 medium potatoes, peeled and diced
- 1 medium onion, chopped
- 2 cloves garlic, minced
- 1 bell pepper, chopped
- 1 bunch of cilantro, chopped
- 1 teaspoon cumin
- Salt and pepper to taste
- Lime wedges for serving
Instructions
- Prepare the Chicken: In a large pot, add the pieces of chicken and cover them with water. Bring the water to a boil over medium-high heat. Skim off any foam that rises to the surface to keep the broth clear. This will help enhance the flavor of the broth.
- Add Aromatics: Once the chicken is boiling, add the chopped onion, minced garlic, and bell pepper to the pot. These ingredients will infuse the broth with a rich flavor. Reduce the heat to medium-low and let it simmer for about 20-30 minutes until the chicken is cooked through.
- Incorporate Vegetables: Carefully remove the chicken pieces and set them aside to cool slightly. Add the yuca, plantains, corn, and potatoes to the pot. Allow the stew to simmer for another 15-20 minutes, or until the vegetables are tender.
- Shred the Chicken: While the vegetables are cooking, shred the chicken into bite-sized pieces. Once the vegetables are done, return the shredded chicken to the pot.
- Season the Stew: Stir in the cumin, chopped cilantro, salt, and pepper to taste. Allow the sancocho to simmer for an additional 5-10 minutes to let the flavors meld together.
- Serve: Ladle the sancocho into bowls and serve hot, garnished with additional cilantro and lime wedges for squeezing over the top.
Extra Tips
When preparing sancocho, feel free to experiment with different meats or vegetables based on your personal taste or what’s in season. If you want a richer broth, consider adding some beef or pork bones to the initial chicken broth stage.
For a spicier kick, add some chopped jalapeños or hot sauce when serving. Additionally, serving sancocho with a side of rice or avocado can enhance the meal and provide extra nutrition. Enjoy this hearty dish with family and friends for a truly Colombian experience!
Empanadas

Colombian empanadas are a beloved snack and street food, celebrated for their golden, crispy exterior and flavorful fillings. These pastry pockets are versatile, allowing for a variety of fillings, but the classic version often features a savory mixture of ground beef, potatoes, and spices. The dough is made from corn flour, giving empanadas their distinct texture and taste. A perfect blend of crunch and softness, they’re often served with aji sauce or guacamole, making them a crowd-pleaser at any gathering.
Making Colombian empanadas at home can be a delightful cooking experience, especially when shared with family and friends. The process may seem a bit labor-intensive, but the reward of biting into a freshly made empanada is well worth the effort. Whether you’re preparing them for a casual snack or a festive occasion, these empanadas are sure to impress. With just a few ingredients and some careful steps, you can recreate this traditional Colombian dish in your own kitchen.
Ingredients (serves 4-6 people)
- 2 cups of corn flour (arepa flour)
- 1 ½ cups of warm water
- 1 teaspoon of salt
- 1 tablespoon of vegetable oil
- 1 pound of ground beef
- 1 medium potato, peeled and diced
- 1 small onion, finely chopped
- 2 cloves of garlic, minced
- 1 teaspoon of ground cumin
- 1 teaspoon of paprika
- Salt and pepper to taste
- Vegetable oil for frying
Cooking Instructions
1. Prepare the Filling: In a large skillet, heat a tablespoon of vegetable oil over medium heat. Add the chopped onion and minced garlic, sautéing until the onion becomes translucent.
Then, add the ground beef, breaking it apart as it cooks. Once browned, stir in the diced potatoes, cumin, paprika, salt, and pepper. Cook until the potatoes are tender, about 10-15 minutes. Set aside to cool.
2. Make the Dough: In a mixing bowl, combine the corn flour, warm water, salt, and 1 tablespoon of vegetable oil. Mix with your hands until you have a smooth and pliable dough.
If the dough feels too dry, add a little more water; if it’s too wet, sprinkle in more corn flour.
3. Shape the Empanadas: Divide the dough into small balls, about the size of a golf ball. On a clean surface, flatten each ball into a circle about ¼ inch thick.
Place a tablespoon of the filling in the center of each circle. Fold the dough over to create a half-moon shape, and press the edges to seal. You can crimp the edges with a fork for a decorative touch.
4. Fry the Empanadas: In a deep skillet or frying pan, heat enough vegetable oil to submerge the empanadas over medium-high heat.
Once hot, carefully add the empanadas in batches, frying until they’re golden brown and crispy on both sides, about 3-4 minutes per side. Remove them with a slotted spoon and place them on paper towels to drain excess oil.
5. Serve: Serve the empanadas hot with a side of aji sauce or guacamole for dipping. Enjoy the delightful crunch and savory filling!
Extra Tips
When making empanadas, verify your dough isn’t too thick, as it can become chewy once fried.
Adjust the filling according to your taste; you can mix in vegetables or cheese for added flavor. If you’re looking for a healthier option, consider baking the empanadas instead of frying them. Just brush them with a bit of oil and bake at 375°F (190°C) for about 20-25 minutes or until golden.
Experiment with different fillings to create a variety of flavors, and don’t forget to enjoy them fresh!
Tamales
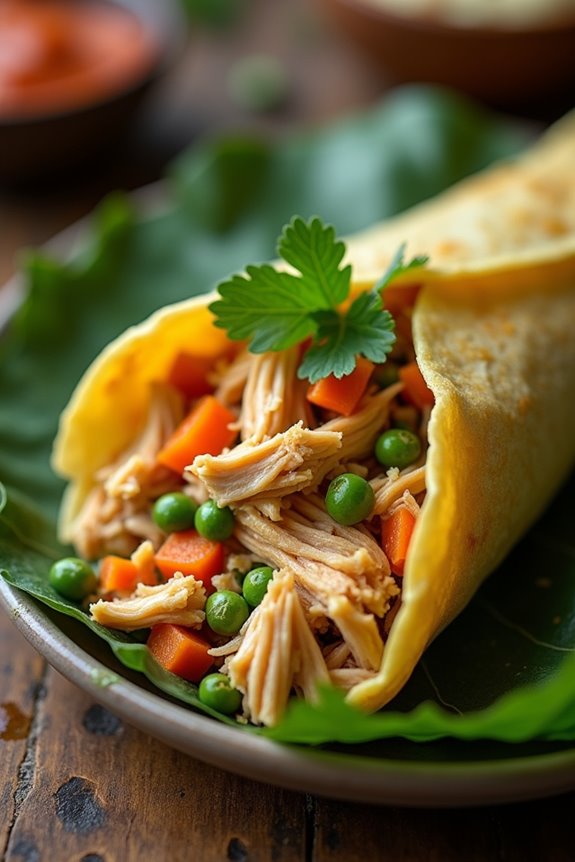
Tamales are a traditional Colombian dish that’s deeply rooted in the country’s culinary culture. These delicious parcels consist of masa (corn dough) filled with a variety of ingredients such as meats, vegetables, and spices, wrapped in banana leaves or corn husks, and then steamed to perfection.
Each region in Colombia has its own unique take on tamales, making them a versatile dish that can be enjoyed for breakfast, lunch, or dinner. Their comforting flavors and satisfying textures make them a popular choice for family gatherings and festive occasions.
Making tamales can be an enjoyable and rewarding experience, allowing you to explore the rich flavors of Colombian cuisine. The process involves preparing the masa, selecting your fillings, and then meticulously wrapping and steaming the tamales.
While it may seem labor-intensive, the end result is worth the effort, as you’ll be rewarded with a delightful dish that brings together the warmth of family and tradition.
Ingredients (Serves 4-6)
- 2 cups masa harina (corn flour)
- 1 cup chicken or vegetable broth
- 1/2 cup unsalted butter, softened
- 1 teaspoon baking powder
- 1 teaspoon salt
- 1 cup cooked and shredded chicken (or any desired protein)
- 1/2 cup diced potatoes
- 1/2 cup diced carrots
- 1/4 cup peas
- 1/2 cup chopped onions
- 1/4 cup chopped cilantro
- 6-8 banana leaves or corn husks (soaked in warm water)
- Optional: spices such as cumin, paprika, or chili powder for added flavor
Cooking Instructions
1. Prepare the Masa: In a large mixing bowl, combine the masa harina, baking powder, and salt. Mix well.
Then, gradually add the chicken or vegetable broth and softened butter. Knead the mixture until it reaches a smooth, pliable consistency. If the dough is too dry, add more broth as needed.
2. Cook the Filling: In a skillet over medium heat, sauté the chopped onions until they’re translucent. Add the diced potatoes and carrots, cooking until they’re slightly tender.
Stir in the shredded chicken, peas, and any additional spices you desire. Cook for a few more minutes until everything is well combined and heated through. Set the filling aside to cool slightly.
3. Prepare the Wrapping: Take a soaked banana leaf or corn husk and lay it flat on a clean surface. If using banana leaves, cut them into squares (about 10×10 inches) for easier wrapping.
Place about 2-3 tablespoons of masa in the center, flattening it out slightly.
4. Add the Filling: Spoon about 2 tablespoons of the filling mixture onto the masa. Be careful not to overfill, as it may leak out during cooking.
5. Wrap the Tamales: Fold the sides of the leaf or husk over the masa and filling to enclose it completely.
Then, fold the ends up to secure the tamale into a neat package. Repeat this process until all the masa and filling are used.
6. Steam the Tamales: In a large steamer or pot with a steaming rack, add water and bring it to a boil.
Place the wrapped tamales upright in the steamer, ensuring they don’t touch the water. Cover with a lid and steam for about 1 to 1.5 hours, or until the masa is firm and pulls away easily from the wrapping.
7. Serve and Enjoy: Once cooked, remove the tamales from the steamer and let them cool for a few minutes before unwrapping.
Serve warm with your favorite sauces or toppings, such as homemade salsa or avocado.
Extra Tips
When making tamales, don’t hesitate to experiment with different fillings and spices to suit your taste preferences.
You can also prepare the masa and filling ahead of time, allowing you to assemble and steam the tamales when you’re ready to serve. If you’re new to wrapping tamales, practice makes perfect, and you can always use kitchen twine to secure the wraps if needed.
Enjoy the process and the delicious outcome of your Colombian tamales!
Lechona
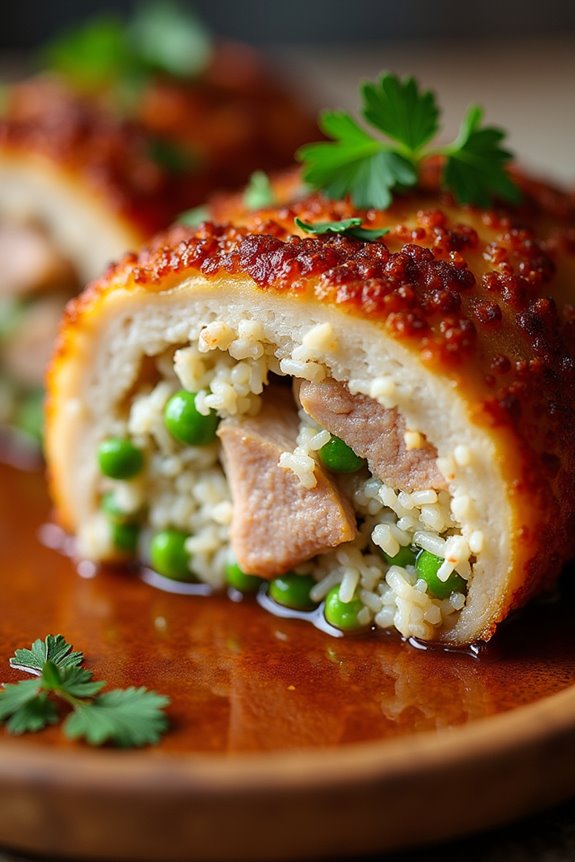
Lechona is a traditional Colombian dish that showcases the rich flavors of the country’s culinary heritage. This delectable roasted pig dish is often served during celebrations and festive occasions, making it a staple at family gatherings and parties. The dish features a whole pig stuffed with a delicious mixture of rice, peas, spices, and pork, then roasted to perfection until the skin is crispy and golden brown. The result is a savory, succulent meal that’s sure to impress your guests and create lasting memories around the dining table.
Preparing lechona requires some time and effort, but the end result is a rewarding experience that brings the essence of Colombian cuisine into your home. The combination of spices and the slow roasting process infuse the meat with deep flavors, while the crispy skin adds a satisfying texture. When served alongside traditional side dishes like arepas or plantains, lechona becomes an unforgettable centerpiece for any feast.
Ingredients (Serves 4-6):
- 1 whole pig (about 8-10 pounds), cleaned and prepared
- 2 cups of white rice
- 1 cup of green peas
- 1 cup of diced pork belly
- 1 large onion, finely chopped
- 4 cloves of garlic, minced
- 1 tablespoon of ground cumin
- 1 tablespoon of paprika
- 2 teaspoons of salt (or to taste)
- 1 teaspoon of black pepper
- 1/4 cup of fresh cilantro, chopped
- 1/4 cup of vegetable oil
- 2 tablespoons of lemon juice
- 2 cups of chicken broth
- 1-2 cups of water (as needed)
- Banana leaves (for wrapping, optional)
Cooking Instructions:
- Prepare the Filling: In a large skillet, heat the vegetable oil over medium heat. Add the diced pork belly and cook until browned. Then, add the chopped onion and minced garlic, sautéing until the onions become translucent. Stir in the rice, green peas, cumin, paprika, salt, and pepper. Mix well to combine all ingredients and cook for about 2 minutes. Add the chicken broth and bring to a boil. Reduce heat to low, cover, and let cook until the rice is fully cooked and the liquid is absorbed, about 15-20 minutes. Once done, remove from heat and stir in the chopped cilantro.
- Prepare the Pig: While the rice is cooking, preheat your oven to 325°F (160°C). If using banana leaves, line the inside of the pig with them to add flavor and moisture. Carefully stuff the cooked rice mixture into the pig’s cavity, ensuring it’s well packed but not overly tight.
- Season the Pig: Rub the outside of the pig with lemon juice, salt, pepper, and any additional spices you prefer. Make sure to coat it evenly for maximum flavor. You can also score the skin to help it crisp up during roasting.
- Roasting the Pig: Place the stuffed pig on a large roasting rack in a roasting pan. If needed, add a little water to the bottom of the pan to prevent burning. Cover the pig loosely with aluminum foil to retain moisture. Roast in the preheated oven for about 4-5 hours or until the internal temperature reaches 160°F (71°C) and the skin is crispy. Baste the pig occasionally with its own juices to keep it moist.
- Rest and Serve: Once cooked, remove the lechona from the oven and let it rest for about 15-20 minutes before carving. This allows the juices to redistribute throughout the meat. Serve with your choice of traditional Colombian sides.
Extra Tips: When preparing lechona, the key to achieving a perfectly crispy skin is to allow the pig to dry out slightly before roasting. You can do this by letting it rest uncovered in the refrigerator for a few hours or overnight.
Additionally, if you want to enhance the flavor, consider marinating the pig with your seasoning mix a day in advance. This will deepen the flavors and make the dish even more delicious when it’s finally served.
Caldo De Costilla

Caldo De Costilla is a traditional Colombian beef rib soup that’s perfect for warming the soul on a chilly day. This hearty dish is commonly enjoyed for breakfast or as a comforting lunch, thanks to its rich flavors and nourishing ingredients. The soup is characterized by its tender beef ribs, aromatic herbs, and a variety of vegetables that provide depth and complexity to the broth.
It’s not just a meal; it’s a culinary experience that brings families together around the table.
To prepare Caldo De Costilla, you can customize the soup according to your taste preferences. The combination of spices and fresh ingredients creates a delightful aroma that fills your kitchen. Serve the soup with a side of arepas or rice, and don’t forget to add a squeeze of lime for an extra zing. With its hearty ingredients and robust flavor, Caldo De Costilla is sure to become a family favorite.
Ingredients (serving size: 4-6 people)
- 2 pounds beef ribs
- 10 cups water
- 1 large onion, chopped
- 2 garlic cloves, minced
- 2 medium potatoes, peeled and cubed
- 2 carrots, sliced
- 1 cup corn kernels (fresh or frozen)
- 1 bunch fresh cilantro, chopped
- 1 tablespoon ground cumin
- 1 teaspoon black pepper
- 1 teaspoon salt (adjust to taste)
- 2 green onions, chopped
- Juice of 1 lime (for serving)
Cooking Instructions
- Prepare the Beef Ribs: Start by rinsing the beef ribs under cold water to remove any impurities. Pat them dry with paper towels. This helps enhance the flavor of the broth.
- Boil the Ribs: In a large pot, add the beef ribs and pour in 10 cups of water. Bring it to a boil over medium-high heat. Once boiling, reduce the heat to low and let it simmer for about 30 minutes. This initial boiling helps to extract the flavors from the ribs.
- Add Aromatics: After the ribs have simmered, add the chopped onion, minced garlic, and ground cumin to the pot. Stir the mixture well and allow it to simmer for an additional 15 minutes. The aromatics will infuse the soup with a delicious flavor.
- Incorporate Vegetables: Next, add the cubed potatoes, sliced carrots, and corn kernels to the pot. Stir gently to combine all the ingredients, then cover the pot and let it simmer for about 20-25 minutes or until the vegetables are tender. The potatoes will also help thicken the broth slightly.
- Season the Soup: Once the vegetables are cooked through, season the soup with black pepper and salt to taste. Add the chopped cilantro and green onions, and give the soup a final stir. Allow it to simmer for another 5 minutes for the flavors to meld together.
- Serve: Ladle the Caldo De Costilla into bowls and garnish with a sprinkle of fresh cilantro. Serve each bowl with a wedge of lime on the side for squeezing over the soup to enhance the flavor.
Extra Tips
For an even richer flavor, let the soup simmer longer, allowing the beef ribs to become even more tender.
If you prefer a spicier kick, consider adding chopped jalapeños or a pinch of cayenne pepper. This dish can also be made in advance; simply reheat before serving, and it may taste even better the next day as the flavors develop.
Enjoy your Caldo De Costilla with some crusty bread or traditional Colombian arepas for a complete meal!
Arroz Con Coco
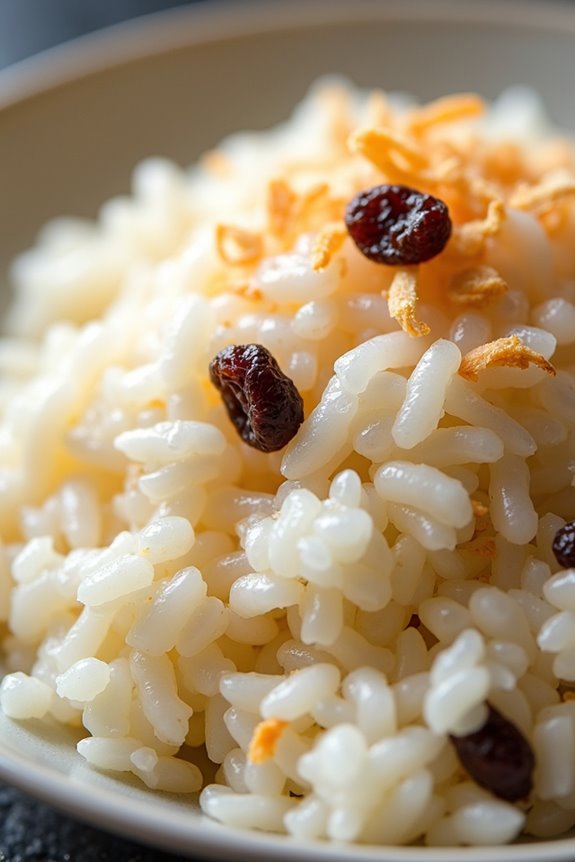
Arroz Con Coco, or Coconut Rice, is a delightful Colombian dish that embodies the tropical essence of the Caribbean coast. This dish combines the creaminess of coconut milk with the nutty flavor of rice, creating a harmonious and flavorful experience. Often served as a side dish, Arroz Con Coco pairs beautifully with fish, chicken, or can be enjoyed on its own as a comforting meal. The sweetness of the coconut also makes it a popular choice for breakfast or dessert, showcasing its versatility.
The origins of Arroz Con Coco can be traced back to the coastal regions of Colombia, where coconuts are abundant and play a significant role in local cuisine. The dish is typically prepared with few ingredients, making it both simple and accessible for home cooks. As you commence on this culinary journey, you’ll appreciate not only the flavors but also the rich culture that this dish represents.
Ingredients (Serves 4-6):
- 2 cups of long-grain white rice
- 1 can (14 oz) of coconut milk
- 1 cup of water
- 1/2 cup of grated coconut (fresh or dried)
- 1/4 cup of sugar (adjust to taste)
- 1/2 teaspoon of salt
- 1 cinnamon stick (optional)
- 1/4 cup of raisins (optional)
Cooking Instructions:
- Rinse the Rice: Begin by rinsing the long-grain white rice under cold water until the water runs clear. This step removes excess starch and prevents the rice from becoming overly sticky during cooking. Drain the rice well.
- Combine Ingredients: In a large pot, combine the rinsed rice, coconut milk, water, grated coconut, sugar, salt, and the optional cinnamon stick. Stir the mixture gently to combine all the ingredients, ensuring the rice is evenly distributed within the liquid.
- Bring to a Boil: Place the pot over medium-high heat and bring the mixture to a boil. Keep an eye on it to prevent boiling over. The sugar will dissolve, and the fragrant aroma of coconut will begin to fill your kitchen.
- Simmer the Rice: Once the mixture reaches a boil, reduce the heat to low and cover the pot with a tight-fitting lid. Allow the rice to simmer for about 20-25 minutes, or until the liquid has been absorbed and the rice is tender. Avoid lifting the lid during this time, as it can release steam and affect the cooking process.
- Add Raisins (Optional): If you’re using raisins, add them to the rice during the last 5 minutes of cooking. The residual heat will plump the raisins, adding a delightful sweetness to the dish.
- Fluff and Serve: Once the rice is cooked, turn off the heat and let it sit for an additional 5 minutes with the lid on. This resting period allows the rice to firm up slightly. Remove the cinnamon stick (if used), fluff the rice with a fork, and serve warm.
Extra Tips: To enhance the flavor of your Arroz Con Coco, consider toasting the grated coconut in a dry pan until golden brown before adding it to the pot. This will intensify the coconut flavor and add a nice crunch to the dish.
Additionally, if you prefer a richer coconut flavor, you can substitute part of the water with extra coconut milk. Serve Arroz Con Coco with a sprinkle of fresh cilantro or a squeeze of lime for a revitalizing contrast. Enjoy this delicious Colombian treat!
Patacones
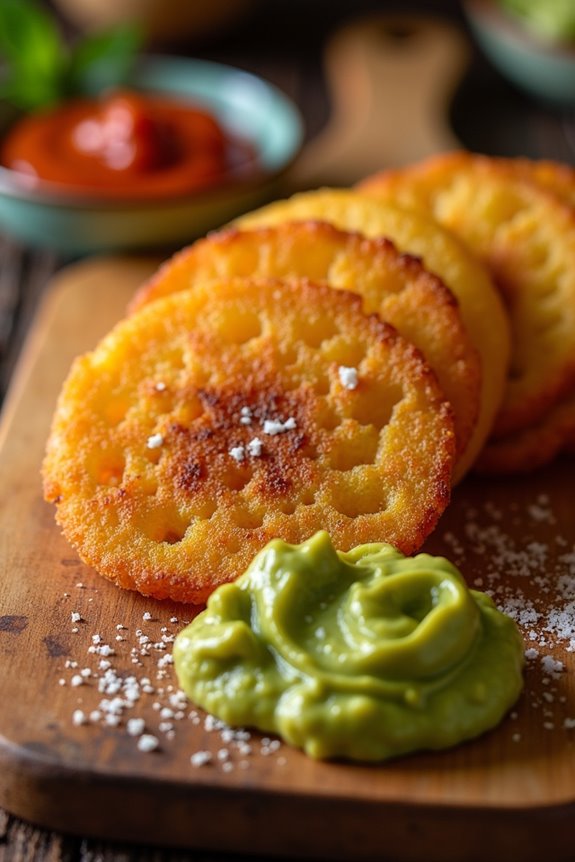
Patacones, also known as tostones, are a beloved Colombian dish made from green plantains that are sliced, fried, flattened, and then fried again until crispy. This traditional snack or side dish is often enjoyed with various toppings or served with guacamole, hogao (a Colombian tomato and onion sauce), or simply sprinkled with salt.
Patacones aren’t only delicious but also easy to make, making them a popular choice for gatherings or family meals.
The secret to perfect patacones lies in selecting the right plantains. Make certain to choose firm, green plantains, as they’ll yield the best texture when fried. The first fry should be done at a lower temperature to cook the plantains through, while the second fry should be at a higher temperature to achieve that satisfying crunch.
Whether you’re serving them as an appetizer or alongside your favorite main dish, patacones are sure to be a hit!
Ingredients (serving size: 4-6 people)
- 3-4 green plantains
- 4 cups vegetable oil (for frying)
- Salt (to taste)
- Optional: hogao sauce, guacamole, or toppings of choice
Cooking Instructions
- Prepare the Plantains: Start by peeling the green plantains. To do this, cut off both ends of the plantain and make a lengthwise slit along the skin. Gently remove the peel to reveal the flesh. Once peeled, slice the plantains into 1-inch thick pieces.
- First Fry: In a large, deep skillet, heat the vegetable oil over medium heat until it reaches about 350°F (175°C). Carefully add the sliced plantains to the hot oil in batches, ensuring not to overcrowd the pan. Fry them for about 4-5 minutes until they’re soft but not browned. Remove them from the oil and drain on paper towels.
- Flatten the Plantains: Once the plantains have cooled slightly, take each piece and place it on a flat surface. Use the bottom of a heavy pan or a plantain press to flatten each piece to about half an inch thick. Be gentle to avoid breaking them apart.
- Second Fry: Increase the heat of the oil to medium-high. Once the oil is hot, return the flattened plantains to the skillet in batches. Fry them for about 2-3 minutes on each side until they’re golden brown and crispy. Remove them from the oil and place them on paper towels to drain excess oil.
- Season and Serve: While the patacones are still hot, sprinkle them with salt to taste. Serve them immediately with your choice of hogao, guacamole, or any other desired toppings.
Extra Tips
When making patacones, verify that your oil is at the proper temperature for each frying stage; using a thermometer can help. If you don’t have a plantain press, you can use a flat-bottomed dish or even a cutting board to flatten the slices.
For added flavor, consider infusing the oil with garlic or herbs while frying. Enjoy experimenting with different toppings and dips to make your patacones even more delightful!
Buñuelos

Buñuelos are a traditional Colombian treat that brings a touch of festive joy to any gathering. These delicious, deep-fried cheese balls are particularly popular during the holiday season, but they can be enjoyed year-round. The crispy exterior and soft, cheesy interior make buñuelos an irresistible snack or dessert that pairs beautifully with a cup of hot chocolate or coffee. With their delightful texture and flavor, they’re sure to impress your family and friends.
Making buñuelos at home is easier than you might think, and with just a few simple ingredients, you can whip up a batch in no time. The key to achieving the perfect buñuelo lies in the dough’s consistency and guaranteeing the oil is hot enough for frying. Once you master this recipe, you can customize your buñuelos by adding different types of cheese or experimenting with the level of sweetness.
Ingredients (serving size: 4-6 people):
- 1 cup of tapioca flour
- 1 cup of grated cheese (preferably queso fresco)
- 1/2 cup of milk
- 1/4 cup of sugar
- 1/2 teaspoon of baking powder
- 1/4 teaspoon of salt
- 2 eggs
- Oil for frying
Cooking Instructions:
- Prepare the Dough: In a large bowl, combine the tapioca flour, grated cheese, baking powder, and salt. Mix until the dry ingredients are well combined.
- Mix Wet Ingredients: In a separate bowl, whisk together the eggs, milk, and sugar until blended. Pour this mixture into the dry ingredients gradually, stirring continuously until a smooth dough forms.
- Knead the Dough: Once the dough comes together, use your hands to knead it gently on a floured surface for about 2 minutes. The dough should be soft and slightly sticky but manageable.
- Shape the Buñuelos: Divide the dough into small balls, approximately the size of a golf ball. Make sure they’re uniform in size for even cooking.
- Heat the Oil: In a deep frying pan, heat oil over medium heat. The oil should be deep enough to submerge the buñuelos halfway. To test if the oil is hot enough, drop a small piece of dough into the oil; it should sizzle and rise to the surface.
- Fry the Buñuelos: Carefully place a few dough balls into the hot oil, making sure not to overcrowd the pan. Fry them until they’re golden brown on all sides, about 4-5 minutes. Use a slotted spoon to turn them for even cooking.
- Drain and Serve: Once cooked, remove the buñuelos from the oil and place them on a paper towel-lined plate to drain excess oil. Serve them warm, sprinkled with powdered sugar if desired.
Extra Tips: When frying buñuelos, it’s important to maintain a consistent oil temperature to guarantee they cook evenly. If the oil is too hot, the outside will brown too quickly while the inside remains raw; if it’s too cool, they’ll absorb too much oil and become greasy.
If you don’t have queso fresco, you can substitute it with mozzarella or any mild cheese. Enjoy your homemade buñuelos with a side of guava paste or dulce de leche for an extra treat!
Posta Negra Cartagenera
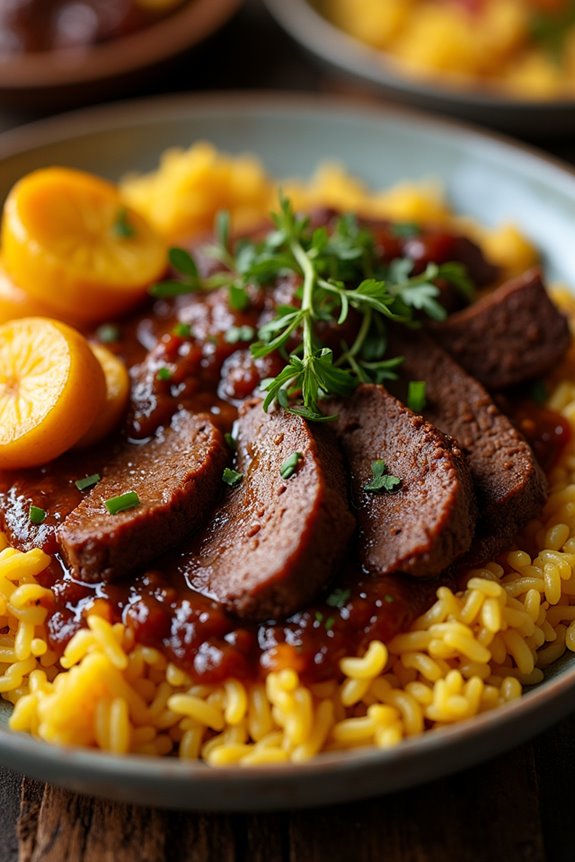
Posta Negra Cartagenera is a traditional Colombian dish that hails from the coastal city of Cartagena. This flavorful beef dish is characterized by its rich, dark sauce made from a blend of spices, sauces, and sweet ingredients that create a unique and savory flavor profile. The combination of these elements not only enhances the taste of the beef but also brings a touch of the Caribbean to your dining table.
Often served with rice and fried plantains, Posta Negra Cartagenera is perfect for special occasions or family gatherings, making it a cherished recipe passed down through generations.
Cooking Posta Negra Cartagenera may seem intimidating, but with the right ingredients and a little patience, you can achieve a melt-in-your-mouth beef dish that will impress your guests. The key to this recipe lies in the marination and slow-cooking process, allowing the flavors to meld beautifully.
Whether you’re an experienced cook or a beginner, this recipe is designed to guide you through each step to guarantee a successful outcome.
Ingredients (Serves 4-6)
- 2 to 3 pounds beef flank or round steak
- 1 cup soy sauce
- 1 cup brown sugar
- 1 cup red wine
- 1/2 cup vinegar (white or apple cider)
- 1 onion, finely chopped
- 4 cloves garlic, minced
- 2 teaspoons ground cumin
- 1 teaspoon black pepper
- 1 teaspoon paprika
- 1 teaspoon dried oregano
- 2 bay leaves
- 1 cup beef broth
- 2 tablespoons vegetable oil
- Salt to taste
Cooking Instructions
- Marinate the Beef: In a large bowl, combine the soy sauce, brown sugar, red wine, vinegar, chopped onion, minced garlic, ground cumin, black pepper, paprika, dried oregano, and bay leaves. Mix well. Add the beef to the marinade, making sure it’s thoroughly coated. Cover and refrigerate for at least 4 hours, preferably overnight. This marinating process infuses the beef with flavor and helps tenderize the meat.
- Sear the Beef: Remove the beef from the marinade and pat it dry with paper towels. Heat the vegetable oil in a large skillet or Dutch oven over medium-high heat. Once hot, add the beef and sear on all sides until browned, about 3-4 minutes per side. This step creates a flavorful crust on the meat that enhances the overall taste of the dish.
- Add Marinade and Broth: Once the beef is seared, pour the marinade into the pot along with the beef broth. Bring the mixture to a simmer, scraping any browned bits from the bottom of the pot to incorporate all the flavors.
- Slow Cook the Beef: Reduce the heat to low, cover the pot, and let the beef cook gently for about 2-3 hours, or until the meat is tender and easily shreds with a fork. If using a slow cooker, set it to low and cook for 6-8 hours.
- Thicken the Sauce: After the beef is cooked, remove it from the pot and let it rest for a few minutes. Meanwhile, increase the heat and simmer the sauce uncovered for about 10-15 minutes to thicken. Adjust seasoning with salt if necessary.
- Serve: Slice the beef against the grain and serve it with the thickened sauce poured on top. Pair it with rice and fried plantains for a complete and authentic Colombian meal.
Extra Tips
When preparing Posta Negra Cartagenera, using a good quality cut of beef will make a significant difference in flavor and tenderness. Additionally, allowing the beef to marinate for longer enhances the dish’s richness.
If time permits, consider making the dish a day ahead, as the flavors tend to deepen and improve overnight. Always taste and adjust the seasoning before serving, as the sweetness of the brown sugar and the saltiness of the soy sauce can vary based on personal preference. Enjoy your culinary journey into Colombian cuisine!
Cocada
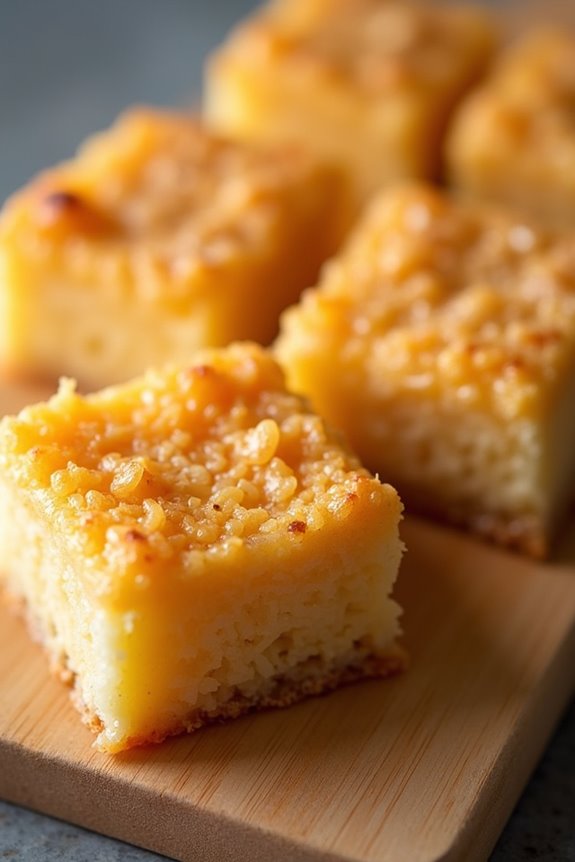
Cocada is a delightful Colombian dessert that showcases the rich flavors of coconut. This traditional sweet treat is made primarily from shredded coconut, sugar, and milk, resulting in a chewy, sweet, and utterly satisfying confection. Cocada is often enjoyed during festive occasions but is simple enough to make at home for any day. The balance of sweetness and the tropical essence of coconut makes it a favorite among many.
Making cocada is a straightforward process, and once you master it, you might find yourself experimenting with additional ingredients like nuts or chocolate. This recipe yields a batch that serves 4-6 people, making it perfect for sharing with family and friends during gatherings or celebrations. The warm, inviting aroma that fills your kitchen while preparing cocada is sure to entice everyone around.
Ingredients (Serves 4-6):
- 3 cups shredded coconut (fresh or dried)
- 1 cup sugar
- 1 cup condensed milk
- 1/2 cup whole milk
- 1 teaspoon vanilla extract
- 1/4 teaspoon salt
- 1 tablespoon butter (for greasing)
Cooking Instructions:
- Prepare the Baking Pan: Start by preheating your oven to 350°F (175°C). Grease a square baking pan (approximately 8×8 inches) with butter. This will prevent the cocada from sticking to the pan once it’s baked.
- Combine Ingredients: In a large mixing bowl, combine the shredded coconut, sugar, condensed milk, whole milk, vanilla extract, and salt. Mix everything together until all the ingredients are well incorporated and the coconut is evenly coated with the sweet mixture.
- Transfer to the Pan: Pour the coconut mixture into the prepared baking pan. Use a spatula or your hands to spread it evenly across the surface, pressing it down gently to compact the mixture. This will help the cocada hold its shape once it’s baked.
- Bake: Place the pan in the preheated oven and bake for about 25-30 minutes. Keep an eye on it—the cocada should turn a light golden brown on top and firm up.
- Cool and Cut: Once baked, remove the pan from the oven and allow it to cool at room temperature. After about 10-15 minutes, use a sharp knife to cut the cocada into squares or rectangles. Allow it to cool completely before serving.
- Serve: Enjoy your cocada at room temperature or chilled. They can be stored in an airtight container for several days, allowing you to savor this delightful treat longer.
Extra Tips:
For a twist on the traditional cocada, consider adding chopped nuts like almonds or walnuts to the mixture for added texture and flavor. If you prefer a more intense coconut flavor, you can use coconut milk instead of whole milk.
Additionally, make sure to keep an eye on the cocada while baking, as ovens can vary in temperature; you want to achieve that perfect golden brown without burning the edges. Enjoy your cocada with a warm cup of coffee or a cold glass of milk!