

When it comes to starting the day with a burst of flavor, Brazilian breakfast recipes are a personal favorite. These dishes are a perfect blend of taste and texture that bring a little joy to the morning routine. From the comforting bite of Pão de Queijo to the refreshing Açaí Bowl, there’s a delightful option for everyone. Let’s explore these vibrant and nourishing recipes that are sure to energize your day.
Pão De Queijo (Cheese Bread)
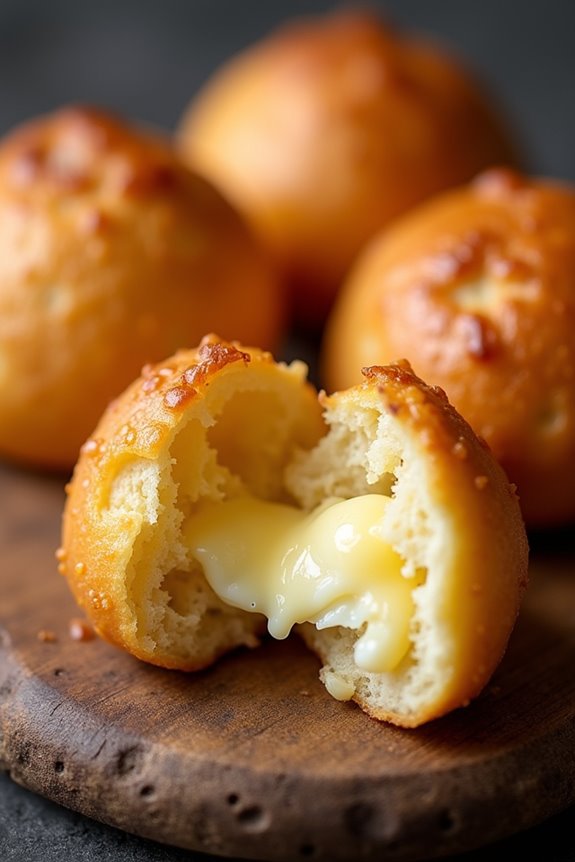
Pão de Queijo, or Brazilian cheese bread, is a delightful treat that has become a staple in Brazilian cuisine. These small, fluffy cheese bread balls are made with tapioca flour, which gives them a unique chewy texture that’s simply irresistible. Traditionally enjoyed at breakfast or as a snack, Pão de Queijo is perfect for any time of day. The combination of cheese, eggs, and milk creates a rich flavor that pairs well with coffee or tea.
Making Pão de Queijo at home is easier than you might think, and the result is a warm, cheesy delight that will fill your kitchen with a mouthwatering aroma. Whether you’re entertaining guests or just indulging in a cozy morning at home, these little bites of heaven are bound to impress. With just a few simple ingredients, you can create a batch of Pão de Queijo that will leave everyone asking for seconds.
Ingredients (Serves 4-6 people):
- 2 cups tapioca flour
- 1 cup milk
- 1/2 cup vegetable oil
- 1 teaspoon salt
- 2 large eggs
- 1 cup grated cheese (Parmesan, mozzarella, or a mix)
- 1/2 teaspoon baking powder (optional)
Cooking Instructions:
- Preheat the Oven: Begin by preheating your oven to 375°F (190°C). This guarantees that your Pão de Queijo will bake evenly and develop a nice golden crust.
- Combine Wet Ingredients: In a medium saucepan, combine the milk, vegetable oil, and salt. Heat this mixture over medium heat until it comes to a boil, stirring occasionally to prevent sticking.
- Add Tapioca Flour: Once the mixture is boiling, remove it from heat and immediately stir in the tapioca flour. Mix well until the flour is fully incorporated, and the mixture forms a sticky dough. Allow this dough to cool for a few minutes.
- Incorporate Eggs and Cheese: After the dough has cooled slightly, add the eggs one at a time, mixing thoroughly after each addition. Next, fold in the grated cheese and, if using, the baking powder. The dough should be smooth and slightly sticky.
- Shape the Dough: With your hands, shape the dough into small balls, about the size of a golf ball. If the dough is too sticky, lightly grease your hands with oil to make shaping easier.
- Bake the Cheese Bread: Place the formed dough balls onto a greased baking sheet or a parchment-lined sheet, spacing them about an inch apart. Bake in the preheated oven for 15-20 minutes or until they’re puffed and lightly golden on the outside.
- Cool and Serve: Once baked, remove the Pão de Queijo from the oven and allow them to cool slightly on a wire rack. Serve warm, and enjoy their cheesy goodness!
Extra Tips:
For the best flavor, use a combination of cheeses, such as Parmesan and mozzarella, to enhance the richness of the Pão de Queijo. Additionally, you can experiment with adding herbs or spices to the dough for a unique twist.
If you want to prepare them in advance, you can freeze the shaped dough balls and bake them straight from the freezer, adding a few extra minutes to the baking time. Enjoy your delicious homemade Pão de Queijo!
Açaí Bowl

The Açaí Bowl is a revitalizing and nutritious breakfast that originates from Brazil. This vibrant dish is made with açaí berries, which are known for their high antioxidant content and unique flavor. The bowl is typically topped with an array of fruits, granola, and seeds, making it not only delicious but also visually appealing. This delightful breakfast is perfect for those who want to start their day off with something healthy and energizing.
Creating an Açaí Bowl is a simple process that allows for customization based on your preferences. Whether you prefer it sweetened or loaded with various toppings, the possibilities are endless. This dish isn’t only popular in Brazil but has also gained worldwide fame as a go-to breakfast option for health enthusiasts.
Let’s explore the recipe for a classic Açaí Bowl that serves 4-6 people.
Ingredients (Serves 4-6)
- 4 frozen açaí puree packets (about 100g each)
- 2 ripe bananas, sliced
- 1 cup unsweetened almond milk (or any milk of choice)
- 1 tablespoon honey or maple syrup (optional)
- 1 cup granola
- 1 cup mixed fresh fruits (such as strawberries, blueberries, and kiwi)
- ¼ cup shredded coconut (unsweetened)
- ¼ cup chia seeds or flaxseeds
- Mint leaves for garnish (optional)
Cooking Instructions
- Blend the Base: In a high-powered blender, combine the frozen açaí puree, sliced bananas, almond milk, and honey or maple syrup (if using). Blend on high until smooth and creamy. If the mixture is too thick, you can add a little more almond milk until you reach your desired consistency.
- Prepare the Bowls: Once the açaí mixture is ready, divide it evenly among 4-6 bowls. Use a spoon to smooth the surface of each bowl for an appealing presentation.
- Add Toppings: Start by sprinkling a generous amount of granola over each açaí bowl. Then, arrange the mixed fresh fruits on top in a decorative manner. Feel free to be creative with the placement of the fruits for visual appeal.
- Finish with Extras: Sprinkle shredded coconut and chia seeds or flaxseeds over the bowls. These ingredients not only add flavor but also enhance the nutritional value of your breakfast.
- Garnish and Serve: If desired, add fresh mint leaves on top for a pop of color and extra freshness. Serve immediately and enjoy your delicious Açaí Bowls!
Extra Tips
When preparing your Açaí Bowl, feel free to experiment with different toppings based on what you have available or your personal preferences. Nut butters, seeds, and other fruits can also be great additions.
For a creamier bowl, you can use a bit of yogurt as a topping or mix it into the base. Additionally, freezing the bananas beforehand will create a thicker texture, making your Açaí Bowl even more satisfying!
Tapioca Crepes

Tapioca crepes, known as “crepes de tapioca” in Brazil, are a popular gluten-free breakfast option made from tapioca flour. These crepes aren’t only easy to prepare but also incredibly versatile, allowing you to fill them with a variety of sweet or savory ingredients.
Originating from the indigenous peoples of Brazil, tapioca has become a staple in Brazilian cuisine, offering a unique texture and flavor that pairs well with numerous fillings.
To make tapioca crepes, you’ll need just a few simple ingredients. The key to achieving the perfect crepe lies in the technique of cooking the tapioca flour until it forms a delicate, pliable disc. You can customize your crepes by using fillings such as cheese, ham, coconut, or fruit, making them suitable for breakfast, lunch, or even dessert.
This dish isn’t only delicious but also a great way to explore the rich flavors of Brazilian breakfast culture.
Ingredients (serving size: 4-6 people)
- 2 cups tapioca flour
- 1 cup water
- 1/4 teaspoon salt
- 1/2 cup grated cheese (optional)
- 1/2 cup shredded coconut (optional)
- 1 ripe banana, sliced (optional)
- Sugar or honey (for sweetening, optional)
- Butter or oil (for cooking)
Cooking Instructions
- Prepare the Tapioca Mixture: In a large bowl, combine the tapioca flour and salt. Gradually add the water while stirring continuously. The mixture should have a consistency similar to wet sand. Allow it to rest for about 10 minutes so the flour can absorb the moisture.
- Heat the Pan: Preheat a non-stick skillet or frying pan over medium heat. It’s crucial that the pan is hot enough to cook the crepes quickly without burning them.
- Cook the Crepes: Using a fine sieve or sifter, sprinkle about 1/4 cup of the tapioca mixture evenly over the surface of the heated pan, creating a thin layer. Cook for about 2-3 minutes, or until the edges start to lift and the center is set.
- Flip the Crepe: Carefully flip the crepe using a spatula. Cook for an additional 1-2 minutes on the other side until it becomes slightly golden but still flexible.
- Add Fillings: If desired, add your choice of fillings (cheese, coconut, banana, etc.) on one half of the crepe. Fold the other half over to create a semi-circle and let it cook for another minute to warm the fillings.
- Serve: Remove the crepe from the pan and repeat the process with the remaining mixture. Serve warm, with a drizzle of honey or a sprinkle of sugar if desired.
Extra Tips
When preparing tapioca crepes, it’s important to maintain a consistent heat to prevent burning while ensuring the crepes cook evenly.
Experiment with different fillings to find your favorite combinations, whether you prefer sweet flavors like chocolate and fruits or savory options like meats and vegetables.
Also, if you find the crepes sticking to the pan, a light brushing of butter or oil before cooking each crepe can help create a non-stick surface. Enjoy your delicious Brazilian breakfast!
Brazilian Omelette

The Brazilian omelette, or “omelete,” is a delicious and versatile dish that’s a staple in many Brazilian households. Known for its fluffy texture and rich flavors, this dish can be customized with a variety of fillings, making it perfect for breakfast or a light meal at any time of the day.
The use of fresh ingredients and simple techniques allows you to create a comforting and satisfying meal that showcases the vibrant flavors of Brazil.
Typically filled with cheese, vegetables, and herbs, the Brazilian omelette can cater to different tastes and preferences. Whether you prefer a classic cheese omelette or a more adventurous version loaded with sautéed vegetables, this dish is sure to please everyone at the breakfast table.
Serve it with fresh bread, a side of fruit, or even a drizzle of hot sauce for an extra kick!
Ingredients (Serves 4-6)
- 8 large eggs
- 1/2 cup milk
- 1 cup grated cheese (cheddar, mozzarella, or a blend)
- 1 cup chopped vegetables (bell peppers, onions, tomatoes, or spinach)
- 1/4 cup chopped fresh herbs (parsley, chives, or cilantro)
- Salt and pepper to taste
- 2 tablespoons butter or olive oil
- Optional: cooked sausage or ham, diced
Cooking Instructions
- Prepare the Ingredients: Begin by chopping your choice of vegetables and herbs. If you’re using sausage or ham, make sure they’re cooked and diced into small pieces. Having everything prepped in advance will make the cooking process smoother.
- Whisk the Eggs: In a large mixing bowl, crack the eggs and add the milk. Season with salt and pepper. Using a whisk or a fork, beat the mixture until it’s well combined and slightly frothy, which will help create a fluffy texture in the omelette.
- Cook the Vegetables: In a large non-stick skillet, heat the butter or olive oil over medium heat. Add the chopped vegetables and sauté for about 3-5 minutes, or until they’re tender. If you’re using sausage or ham, add them to the skillet during the last minute of cooking to warm them through.
- Add Egg Mixture: Pour the egg mixture over the sautéed vegetables in the skillet, ensuring it’s evenly distributed. Allow it to cook undisturbed for about 2-3 minutes, or until the edges start to set.
- Add Cheese and Herbs: Sprinkle the grated cheese and fresh herbs over one half of the omelette. Using a spatula, gently lift the other half of the omelette and fold it over to cover the cheese and herbs. Continue cooking for an additional 2-3 minutes, or until the cheese has melted and the eggs are fully cooked.
- Serve: Gently slide the omelette onto a large plate. You can cut it into wedges for easy serving. Enjoy it warm with a side of fresh bread or fruit.
Extra Tips
For a fluffier omelette, try separating the egg whites from the yolks and whisking the whites until they form soft peaks before folding them back into the yolks.
Additionally, feel free to experiment with different fillings based on your preferences or what you have on hand—avocado, olives, or even a dollop of salsa can add a unique twist to your Brazilian omelette.
Remember to adjust cooking times based on the size of your skillet, as larger skillets may require a bit more time for even cooking.
Bolo De Fubá (Cornmeal Cake)

Bolo De Fubá is a traditional Brazilian cake that’s loved for its simplicity and rich flavor. Made primarily from cornmeal, this cake isn’t only a delightful treat for breakfast but can also be enjoyed as a snack or dessert throughout the day. It has a moist texture with a slightly crumbly consistency, giving it a unique charm that sets it apart from other cakes.
The sweetness of the cake is perfectly balanced by the earthy taste of corn, making it a favorite among those who appreciate homemade baked goods. This cake can be made with minimal ingredients and requires very little time to prepare. Often enjoyed with a cup of coffee or tea, Bolo De Fubá is a wonderful addition to any breakfast table.
Whether served plain or topped with a sprinkle of powdered sugar, this cake is sure to please both family and guests alike. Let’s explore the details of how to create this delicious Brazilian classic!
Ingredients (Serves 4-6)
- 1 cup cornmeal
- 1 cup milk
- 1 cup sugar
- ½ cup vegetable oil
- 3 large eggs
- 1 tablespoon baking powder
- ½ teaspoon salt
- 1 teaspoon vanilla extract
- Optional: grated coconut or cheese for extra flavor
Instructions
- Preheat the Oven: Begin by preheating your oven to 350°F (175°C). This guarantees that the cake bakes evenly and rises properly. Grease a round or square cake pan with butter or cooking spray to prevent sticking.
- Mix Wet Ingredients: In a large mixing bowl, combine the milk, vegetable oil, and eggs. Use a whisk to blend these ingredients together until the mixture is smooth and well combined. This step is essential as it helps to incorporate air into the batter, making the cake light and fluffy.
- Combine Dry Ingredients: In a separate bowl, whisk together the cornmeal, sugar, baking powder, and salt. This helps to evenly distribute the baking powder and salt throughout the flour, making sure that your cake rises uniformly.
- Combine Mixtures: Gradually add the dry ingredients into the wet mixture, stirring gently with a spatula or wooden spoon. Add the vanilla extract at this stage. Mix until just combined; be careful not to overmix, as this can lead to a dense cake.
- Pour into Pan: Pour the batter into the prepared cake pan, smoothing the top with a spatula. If desired, sprinkle grated coconut or cheese on top for added flavor and texture.
- Bake: Place the cake in the preheated oven and bake for about 30-35 minutes, or until a toothpick inserted in the center comes out clean. Keep an eye on it as baking times can vary based on your oven.
- Cool and Serve: Once baked, remove the cake from the oven and let it cool in the pan for about 10 minutes. Then, transfer it to a wire rack to cool completely. Once cooled, cut into slices and serve plain or with a dusting of powdered sugar.
Extra Tips
For the best flavor and texture, use freshly ground cornmeal if possible, as it will elevate the taste of your Bolo De Fubá. Additionally, feel free to experiment by adding ingredients like lemon zest or cinnamon for a unique twist.
If you prefer a richer flavor, consider substituting half of the milk with coconut milk. This will give the cake a delightful tropical essence. Enjoy your baking experience and savor the delightful flavors of this Brazilian treat!
Cuscuz Paulista
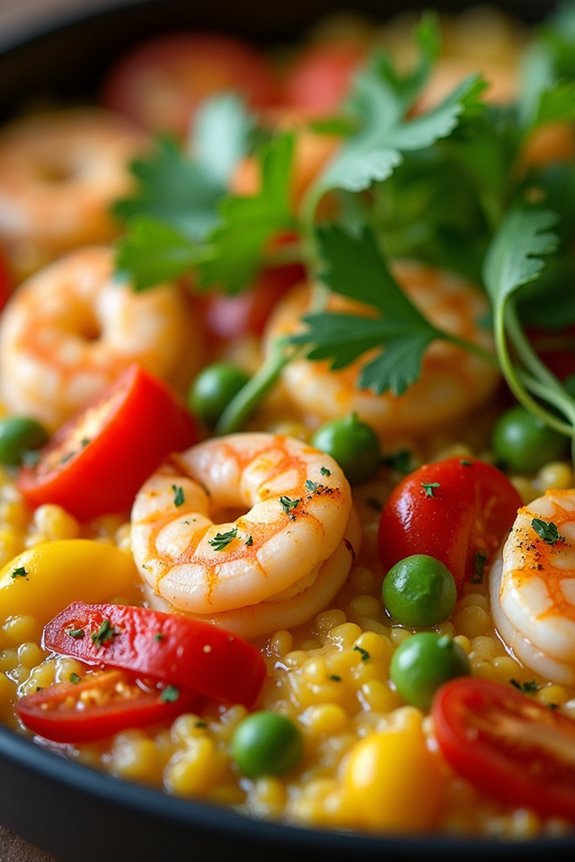
Cuscuz Paulista is a traditional Brazilian dish that reflects the diverse culinary heritage of the country. Originating from the northeastern region of Brazil, this savory steamed cornmeal dish is often served as a breakfast option or a light meal. It’s typically enriched with an array of ingredients such as vegetables, meats, and seafood, making it a flavorful and satisfying choice. The vibrant colors and textures of the ingredients not only make it appealing but also add a nutritious element to your breakfast table.
Preparing Cuscuz Paulista can be a delightful experience as it brings together the flavors of Brazil in one dish. The base of the recipe is cornmeal, which is mixed with water and various fillings. After the mixture is steamed in a special mold, it’s inverted onto a plate, creating a beautiful presentation that showcases the colorful ingredients. Whether you’re enjoying it on a sunny morning or serving it at a gathering, Cuscuz Paulista is sure to impress your family and friends.
Ingredients (Serves 4-6)
- 2 cups cornmeal
- 2 cups vegetable or chicken broth
- 1 cup cooked shredded chicken or shrimp
- 1 medium onion, finely chopped
- 2 cloves garlic, minced
- 1 bell pepper, diced (red or yellow)
- 1 medium tomato, diced
- ½ cup green peas (fresh or frozen)
- 2 tablespoons olive oil
- 1 tablespoon tomato paste
- 1 teaspoon salt
- ½ teaspoon black pepper
- 1 tablespoon chopped fresh parsley (for garnish)
- 1 tablespoon chopped green onions (for garnish)
Cooking Instructions
- Sauté the Vegetables: In a large skillet, heat the olive oil over medium heat. Add the chopped onion and garlic, and sauté until the onion becomes translucent (about 3-4 minutes). This step builds a flavorful base for the Cuscuz.
- Add the Remaining Ingredients: Stir in the diced bell pepper, tomato, green peas, shredded chicken or shrimp, tomato paste, salt, and black pepper. Mix well and cook for another 5 minutes until the vegetables are tender and the mixture is heated through. This step incorporates all the flavors together.
- Prepare the Cornmeal: In a large bowl, combine the cornmeal with the vegetable or chicken broth. Stir until the cornmeal absorbs the liquid and becomes a thick, smooth mixture. This step guarantees that the cornmeal is well-hydrated, which is essential for the final texture of the Cuscuz.
- Combine the Mixtures: Gently fold the sautéed mixture into the cornmeal mixture until evenly distributed. Be careful not to overmix, as you want to keep some texture in the dish. This step guarantees that every bite is packed with flavor.
- Steam the Cuscuz: Transfer the mixture to a Cuscuz mold or a round cake pan. Smooth the top and cover it with a cloth or foil. Place the mold in a steamer pot over boiling water and steam for about 30-40 minutes. This step allows the Cuscuz to firm up and take shape.
- Unmold and Serve: Once cooked, carefully remove the mold from the steamer and let it cool for a few minutes. To serve, invert the mold onto a serving plate, allowing the Cuscuz to gently release. Garnish with chopped parsley and green onions. This step enhances the presentation and adds a fresh touch.
Extra Tips
When making Cuscuz Paulista, feel free to customize the ingredients according to your preferences or what you have on hand. You can use different proteins like sausage or tofu, and add other vegetables such as corn or carrots for added flavor and nutrition.
If you don’t have a Cuscuz mold, a regular cake pan works just fine. Just make sure you grease it well to prevent sticking. For a more intense flavor, consider letting the mixture sit for a few minutes before steaming, allowing the cornmeal to fully absorb the flavors of the broth and seasonings.
Enjoy your Cuscuz Paulista warm as a hearty breakfast or a delicious snack throughout the day!
Banana Pudding (Pudim De Banana)
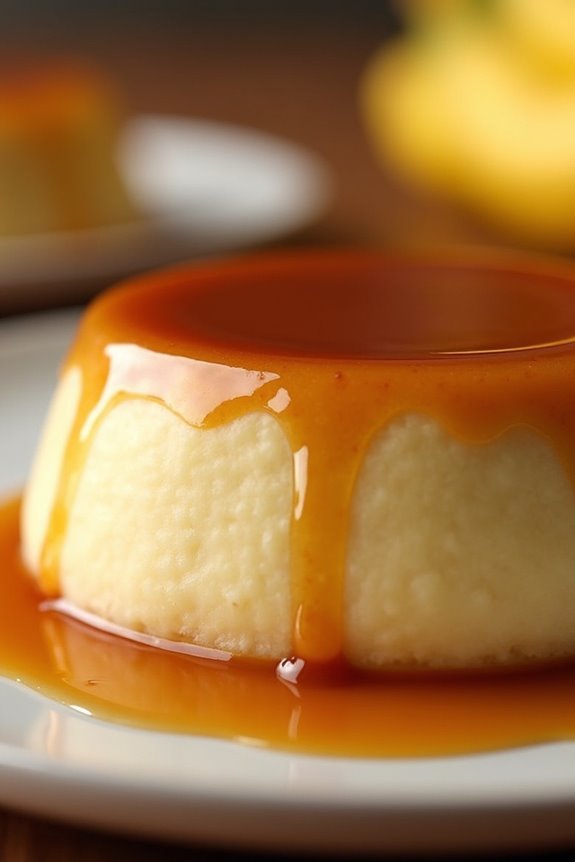
Banana Pudding, or Pudim De Banana, is a delightful Brazilian dessert that combines the creaminess of pudding with the natural sweetness of ripe bananas. This dish isn’t only popular in Brazil but has also gained a following in various parts of the world due to its simple yet indulgent flavor profile.
The smooth texture and rich taste make it a perfect end to any meal or a sweet treat at breakfast. This recipe captures the essence of traditional Brazilian desserts, striking a balance between sweetness and a hint of caramel. The combination of fresh bananas with a silky pudding base creates a comforting dish that’s both satisfying and easy to prepare.
Whether you’re hosting a brunch or simply looking to enjoy a delicious dessert, this Banana Pudding is guaranteed to impress your family and friends.
Ingredients (Serves 4-6):
- 4 ripe bananas
- 1 cup sugar
- 2 cups whole milk
- 3 large eggs
- 1 teaspoon vanilla extract
- 1 tablespoon cornstarch
- A pinch of salt
- Butter (for greasing)
Cooking Instructions:
- Prepare the Baking Dish: Begin by preheating your oven to 350°F (175°C). Grease a medium-sized baking dish with butter to prevent the pudding from sticking.
- Caramelize the Sugar: In a saucepan over medium heat, add 1 cup of sugar. Allow it to melt, stirring occasionally until it turns a golden amber color. Carefully pour the caramel into the greased baking dish, swirling it around to coat the bottom evenly. Be cautious, as the caramel will be very hot.
- Blend the Bananas: In a blender, add the ripe bananas, whole milk, eggs, vanilla extract, cornstarch, and a pinch of salt. Blend until you achieve a smooth, creamy consistency. This mixture will serve as the base for your pudding.
- Combine and Pour: Once blended, pour the banana mixture over the caramelized sugar in the baking dish. Verify that it’s evenly distributed.
- Bake in a Water Bath: Place the baking dish in a larger baking pan and fill the outer pan with hot water until it reaches halfway up the sides of the pudding dish. This water bath will help cook the pudding gently and evenly. Bake for about 45-50 minutes or until the pudding is set and a knife inserted in the center comes out clean.
- Cool and Serve: Once done, remove the pudding from the oven and allow it to cool at room temperature. After cooling, refrigerate for at least 2 hours before serving. When ready to serve, carefully invert the pudding onto a serving plate to reveal the caramel topping.
Extra Tips:
For a richer flavor, consider adding a splash of coconut milk to the banana mixture. You can also garnish the pudding with sliced bananas or a sprinkle of cinnamon before serving for an extra touch.
If you prefer, try using different fruits like mango or passionfruit to give a unique twist to the classic Banana Pudding. Enjoy your delicious Pudim De Banana with friends and family, and watch as it becomes a favorite in your household!
Smoothie With Tropical Fruits

A Smoothie With Tropical Fruits is a revitalizing and vibrant way to start your day, especially in Brazil where the sun shines brightly and the flavors burst with life. This smoothie not only offers a taste of tropical paradise, but it also packs a nutritious punch with its blend of fresh fruits.
Whether you’re enjoying it on a warm morning or as a midday pick-me-up, this smoothie is sure to energize your senses.
To make this smoothie, you’ll be using a combination of tropical fruits that are readily available in Brazil, such as bananas, mangoes, and pineapples. These fruits aren’t only delicious but also rich in vitamins and minerals. The addition of coconut milk gives the smoothie a creamy texture and an exotic flavor that complements the fruits beautifully.
This recipe serves 4-6 people, making it perfect for sharing with family or friends.
Ingredients:
- 2 ripe bananas
- 2 cups fresh mango chunks
- 2 cups fresh pineapple chunks
- 1 cup coconut milk
- 1 tablespoon honey (optional)
- 1 cup ice cubes
- Fresh mint leaves for garnish (optional)
Cooking Instructions:
- Prepare the Fruits: Start by peeling and chopping the ripe bananas and mangoes. Remove the skin from the pineapple and cut it into chunks. This preparation will guarantee that the fruits are ready to blend smoothly, allowing for a creamy texture in your smoothie.
- Combine Ingredients: In a blender, add the prepared bananas, mangoes, and pineapples. Pour in the coconut milk and, if desired, add honey for sweetness. The honey is optional and can be adjusted based on your preference for sweetness. This step is fundamental as it combines all the ingredients that will create the base of your smoothie.
- Blend: Add the ice cubes to the blender and blend on high speed until all the ingredients are well combined and the mixture is smooth. This usually takes about 30-60 seconds. Make sure to stop and scrape down the sides of the blender if necessary to make sure everything is blended evenly.
- Serve: Once the smoothie reaches a smooth consistency, pour it into tall glasses. If you want to add a decorative touch, you can garnish each glass with fresh mint leaves. This final step enhances the presentation and adds a revitalizing aroma to your smoothie.
- Enjoy: Serve the smoothie immediately while it’s cold and invigorating. This is the best way to enjoy the tropical flavors and the creamy texture.
Extra Tips:
For an added nutritional boost, consider incorporating a handful of spinach or kale into the smoothie without compromising the flavor.
You can also experiment with other tropical fruits like papaya or passion fruit for a unique twist. If you prefer a thinner consistency, simply add more coconut milk until you reach your desired texture.
Enjoy your smoothie fresh, as it’s best consumed right after blending to retain its vibrant flavor and nutrients.
Pastel De Nata (Custard Tart)

Pastel de Nata, also known as Portuguese custard tart, is a beloved pastry that has captured the hearts of many, not just in Brazil but around the world. These delightful tarts feature a flaky, golden crust filled with a rich and creamy custard, typically flavored with a hint of vanilla and a sprinkle of cinnamon.
Originating from the monks of the Jerónimos Monastery in Lisbon, Pastel de Nata has become synonymous with Portuguese cuisine and is often enjoyed with a sprinkle of powdered sugar or cinnamon on top.
Making Pastel de Nata at home can be a rewarding experience. While the process may seem intricate, with a little patience and practice, you can create these decadent treats that will impress your family and friends. Perfect for breakfast or as a sweet snack, these tarts can be enjoyed warm or at room temperature. Here’s how to make this delicious dish for a serving size of 4-6 people.
Ingredients:
- 1 package of puff pastry (thawed)
- 1 cup heavy cream
- 1 cup whole milk
- 3/4 cup granulated sugar
- 6 large egg yolks
- 1/4 cup cornstarch
- 1 teaspoon vanilla extract
- 1/2 teaspoon ground cinnamon (optional)
- Powdered sugar (for dusting)
Cooking Instructions:
- Preheat the Oven: Begin by preheating your oven to 475°F (245°C). This high temperature is vital for achieving a crispy, flaky crust while guaranteeing that the custard sets perfectly.
- Prepare the Puff Pastry: Roll out the puff pastry on a lightly floured surface to make sure it’s thin and pliable. Cut the pastry into circles that are approximately 4 inches in diameter. You’ll need enough circles to line your muffin or tart tin. Gently press each circle into the bottom and up the sides of the greased muffin tin.
- Make the Custard Filling: In a medium saucepan, combine the heavy cream, whole milk, and granulated sugar. Heat over medium heat until the mixture is warm, stirring occasionally to dissolve the sugar. Don’t let it boil.
- Combine Egg Yolks and Cornstarch: In a separate bowl, whisk together the egg yolks and cornstarch until smooth. Gradually add the warm cream and milk mixture to the egg yolks, whisking continuously to prevent curdling.
- Cook the Custard: Return the custard mixture to the saucepan and cook over medium heat, stirring constantly until it thickens and coats the back of a spoon. This should take about 5-7 minutes. Remove from heat and stir in the vanilla extract and ground cinnamon, if using.
- Fill the Pastry Shells: Pour the custard filling into each prepared pastry shell, filling them about three-quarters full. Be careful not to overfill, as the custard may bubble over while baking.
- Bake the Tarts: Place the muffin tin in the preheated oven and bake for 15-20 minutes, or until the custards are set, and the pastry is golden brown. You may see some caramelization on the top of the custard, which is a sign of a perfectly baked Pastel de Nata.
- Cool and Serve: Once baked, remove the tarts from the oven and allow them to cool in the tin for a few minutes before transferring them to a wire rack. Serve warm or at room temperature, dusted with powdered sugar and a sprinkle of cinnamon if desired.
Extra Tips:
When making Pastel de Nata, it’s important to verify your ingredients are at the right temperature, especially the milk and cream, to avoid any lumps in the custard.
Additionally, for an even flakier crust, consider chilling the puff pastry before rolling it out. If you’re feeling adventurous, try experimenting with different flavorings such as lemon zest or almond extract to create your unique twist on this classic recipe.
Enjoy your homemade Pastel de Nata!
French Toast With Guava Paste
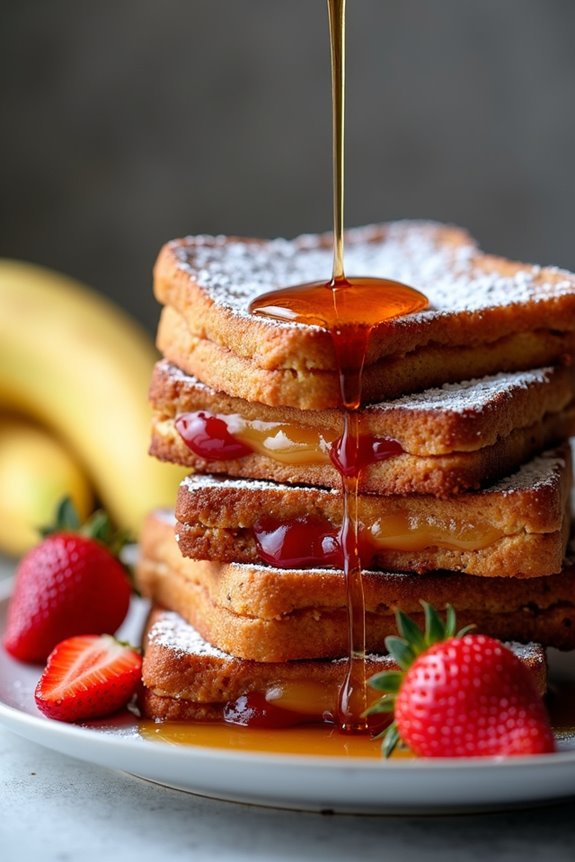
French toast is a beloved breakfast dish that can be found in various forms around the world, and in Brazil, it’s often elevated with the addition of guava paste, known as “goiabada.” This sweet and fruity twist brings a delightful flavor profile to the classic recipe. The creamy texture of the French toast pairs beautifully with the rich, sweet guava paste, creating a perfect balance that will leave your taste buds dancing.
It’s an excellent choice to impress guests at brunch or to enjoy a special breakfast with family. Making French toast with guava paste isn’t only simple but also a fun cooking experience. The dish can be served with a sprinkle of powdered sugar and a drizzle of maple syrup or honey for added sweetness.
It’s best enjoyed fresh off the skillet, but you can also prepare the ingredients ahead of time for a quick assembly in the morning. Let’s explore this delicious recipe that serves 4-6 people!
Ingredients:
- 8 slices of thick bread (such as brioche or challah)
- 4 large eggs
- 1 cup whole milk
- 1 teaspoon vanilla extract
- 1 teaspoon ground cinnamon
- 1/4 teaspoon salt
- 4 ounces guava paste, sliced
- Butter or oil for frying
- Powdered sugar for serving (optional)
- Maple syrup or honey for serving (optional)
Cooking Instructions:
- Prepare the Egg Mixture: In a large mixing bowl, crack the eggs and whisk them together until well beaten. Add the whole milk, vanilla extract, ground cinnamon, and salt to the eggs. Whisk until everything is fully combined and the mixture is smooth. This will create a rich custard base for the French toast.
- Heat the Skillet: Place a large skillet or griddle over medium heat and add a tablespoon of butter or oil. Allow it to heat up until the butter is melted and slightly bubbling, which indicates it’s hot enough for cooking.
- Dunk the Bread: Take a slice of bread and dip it into the egg mixture, ensuring that both sides are fully coated but not soaking. Allow any excess egg mixture to drip off before placing it on the skillet. Repeat this step for additional slices of bread.
- Cook the French Toast: Place the coated slices on the skillet in a single layer, making sure not to overcrowd the pan. Cook for about 3-4 minutes on one side, or until golden brown. Carefully flip the slices and cook on the other side for an additional 3-4 minutes until golden and cooked through.
- Add the Guava Paste: Once the French toast is cooked, take a slice and place a few slices of guava paste on top. Then, add another slice of French toast on top to create a sandwich. Press down gently to help the guava paste adhere. Repeat this with the remaining slices.
- Serve: Slice the French toast sandwiches in half and serve warm, dusted with powdered sugar and drizzled with maple syrup or honey if desired.
Extra Tips:
When making French toast with guava paste, using day-old or slightly stale bread can produce the best results, as it absorbs the egg mixture without becoming too soggy.
Also, feel free to customize the dish by adding fresh fruits like bananas or strawberries on the side for a burst of freshness. If you want a more indulgent experience, consider adding a dollop of whipped cream on top!
Quinoa Breakfast Bowl
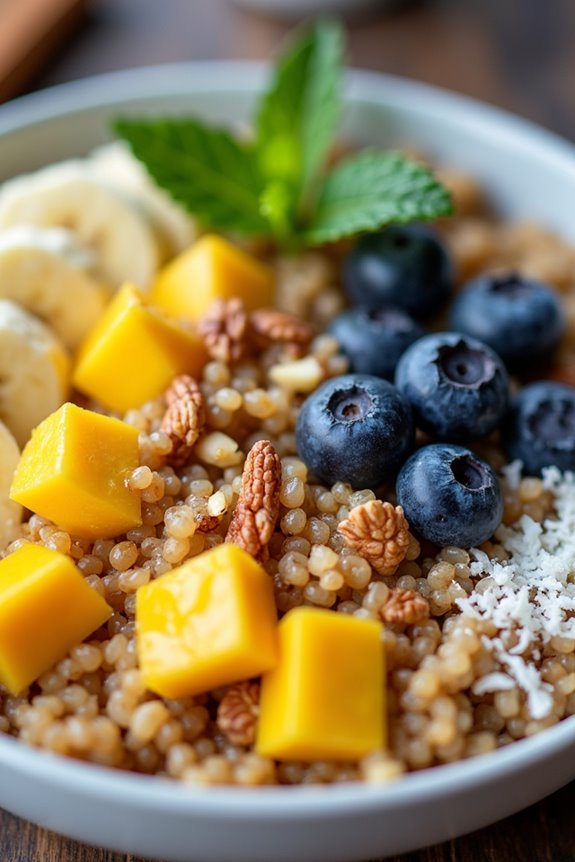
The Quinoa Breakfast Bowl is a nutritious and hearty dish that perfectly encapsulates the essence of a Brazilian breakfast. Combining fluffy quinoa with a variety of vibrant toppings, this breakfast bowl is both filling and wholesome, making it an ideal start to your day. Rich in protein and fiber, quinoa serves as a fantastic base, allowing you to customize your bowl with fruits, nuts, and seeds, ensuring a delightful experience tailored to your taste preferences.
In Brazil, breakfast often includes a variety of flavors and textures, and this Quinoa Breakfast Bowl reflects that culinary diversity. You can easily prepare this dish ahead of time and store it in the refrigerator for a quick and healthy breakfast option throughout the week. Whether you enjoy it warm or cold, this versatile breakfast bowl can be modified for any season, offering a revitalizing start to your day that’s sure to keep you energized.
Ingredients (Serves 4-6):
- 1 cup quinoa
- 2 cups water
- 1/2 teaspoon salt
- 1 cup diced mango
- 1 cup sliced bananas
- 1/2 cup blueberries
- 1/4 cup chopped nuts (almonds or walnuts)
- 1/4 cup shredded coconut (unsweetened)
- 1/4 cup honey or maple syrup (optional)
- 1 teaspoon cinnamon (optional)
- Fresh mint leaves for garnish (optional)
Cooking Instructions:
- Rinse the Quinoa: Begin by rinsing the quinoa under cold water in a fine-mesh strainer. This step is essential as it removes the natural coating called saponin, which can impart a bitter flavor to the grain. Rinse thoroughly until the water runs clear.
- Cook the Quinoa: In a medium saucepan, combine the rinsed quinoa, 2 cups of water, and 1/2 teaspoon of salt. Bring the mixture to a boil over medium-high heat. Once boiling, reduce the heat to low, cover the saucepan, and let it simmer for about 15 minutes, or until the quinoa has absorbed all the water and is fluffy.
- Fluff the Quinoa: After cooking, remove the saucepan from heat and let it sit covered for an additional 5 minutes. This resting period allows the quinoa to steam and become even fluffier. After 5 minutes, uncover and use a fork to fluff the quinoa gently.
- Prepare the Toppings: While the quinoa is cooking, prepare your toppings. Dice the mango, slice the bananas, and measure out the blueberries, nuts, and coconut. You can also get your sweetener ready if you choose to use honey or maple syrup.
- Assemble the Bowls: Divide the cooked quinoa among serving bowls. Then, artfully arrange the diced mango, sliced bananas, and blueberries on top of the quinoa. Sprinkle the chopped nuts and shredded coconut over the bowls for added texture.
- Add Sweetness and Flavor: Drizzle honey or maple syrup over the top if desired for extra sweetness. For a warm spice note, sprinkle a little cinnamon over the bowl.
- Garnish and Serve: Finally, garnish your Quinoa Breakfast Bowls with fresh mint leaves for a revitalizing touch. Serve immediately and enjoy your healthy Brazilian breakfast!
Extra Tips:
When preparing the Quinoa Breakfast Bowl, feel free to get creative with your toppings. Seasonal fruits can be swapped in based on availability, and you can also experiment with different nuts and seeds to add crunch.
For a more indulgent twist, consider adding a dollop of yogurt or a sprinkle of chia seeds for an extra nutritional boost. If you’re making this dish in advance, store the quinoa and toppings separately to keep everything fresh and prevent sogginess.
Coffee With Milk (Café Com Leite)

Coffee with Milk, or Café Com Leite, is a beloved Brazilian breakfast staple that perfectly balances the boldness of coffee with the creaminess of milk. This simple yet delightful beverage is often enjoyed in Brazilian homes each morning, providing a comforting start to the day.
The combination creates a rich and satisfying drink that isn’t only energizing but also soothing, making it a favorite among coffee lovers of all ages.
To prepare Café Com Leite, you’ll need freshly brewed coffee and warm milk. The proportions can be adjusted based on personal preference, whether you like it stronger or creamier. Traditionally, a robust Brazilian coffee is used, which adds depth to the flavor. Enjoying this drink alongside traditional Brazilian bread, pastries, or biscuits can enhance the breakfast experience, making it a hearty meal to kick off your day.
Ingredients (serving size: 4-6 people)
- 4 cups of water
- 1 cup of coarsely ground Brazilian coffee
- 2 cups of whole milk
- Sugar (to taste)
Cooking Instructions
- Boil the Water: Start by bringing 4 cups of water to a boil in a medium saucepan. This is the base for your coffee, and boiling the water guarantees that it reaches the right temperature to extract the best flavors from the coffee grounds.
- Brew the Coffee: Once the water is boiling, remove it from the heat and add the 1 cup of coarsely ground Brazilian coffee. Stir gently to combine, then cover the pot and allow the coffee to steep for about 4-5 minutes. This steeping time allows the coffee to develop a rich flavor while minimizing bitterness.
- Strain the Coffee: After the steeping time, strain the coffee using a fine mesh sieve or a coffee filter into a separate container. This provides a smooth coffee without any grounds, giving you a clean and enjoyable drink.
- Heat the Milk: In a separate saucepan, heat 2 cups of whole milk over medium heat. Stir occasionally to prevent it from scorching. You want the milk to be hot but not boiling. If desired, you can froth the milk using a whisk or milk frother for a creamier texture.
- Combine Coffee and Milk: In a large serving pitcher or individual cups, combine the brewed coffee with the heated milk. The typical ratio is 1 part coffee to 1 part milk, but feel free to adjust according to your taste preferences.
- Sweeten to Taste: Add sugar to taste, stirring well to dissolve. This step is vital, as the sweetness will enhance the flavors of the coffee and milk, making for a more enjoyable drink.
- Serve and Enjoy: Pour the Café Com Leite into mugs and serve immediately. Enjoy it with your favorite breakfast treats like pão de queijo (cheese bread) or a slice of banana bread for a complete Brazilian breakfast experience.
Extra Tips
When making Café Com Leite, using fresh, high-quality coffee beans will greatly enhance the flavor of your drink.
If you’re looking for a richer taste, consider using espresso instead of brewed coffee. Additionally, you can customize your Café Com Leite by experimenting with flavored syrups or adding spices such as cinnamon for a unique twist.
Finally, remember that the perfect balance of coffee and milk is subjective, so feel free to adjust the proportions to suit your palate!