

Snacking just got a whole lot better with Pão De Queijo, those cheesy Brazilian bites that are simply irresistible. They’re gluten-free and so versatile, making them a snack-time favorite. Whether you love the classic version or want to try something new like Pizza-Stuffed or Vegan options, there’s something here for everyone. Trust me, once you give them a try, you’ll be eager to explore all the tasty variations. Let’s get into the delicious world of these little gems.
Classic Pão De Queijo
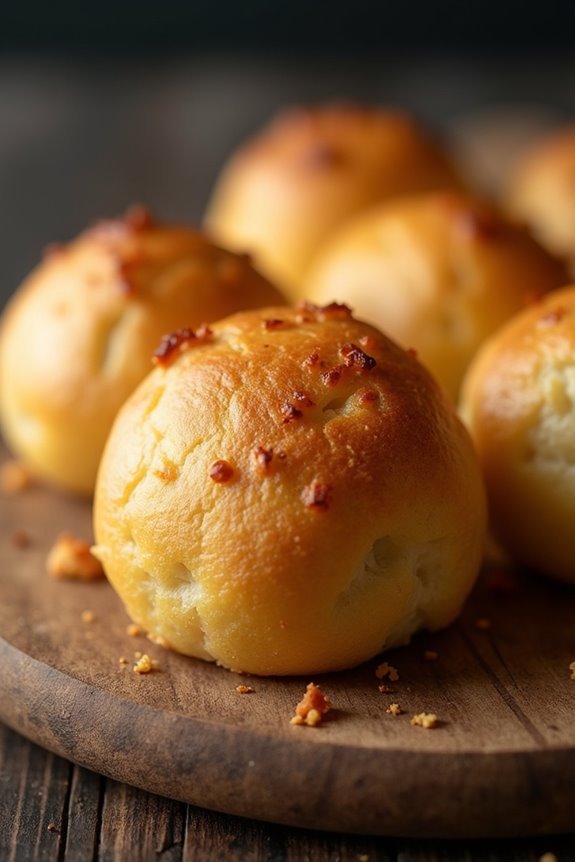
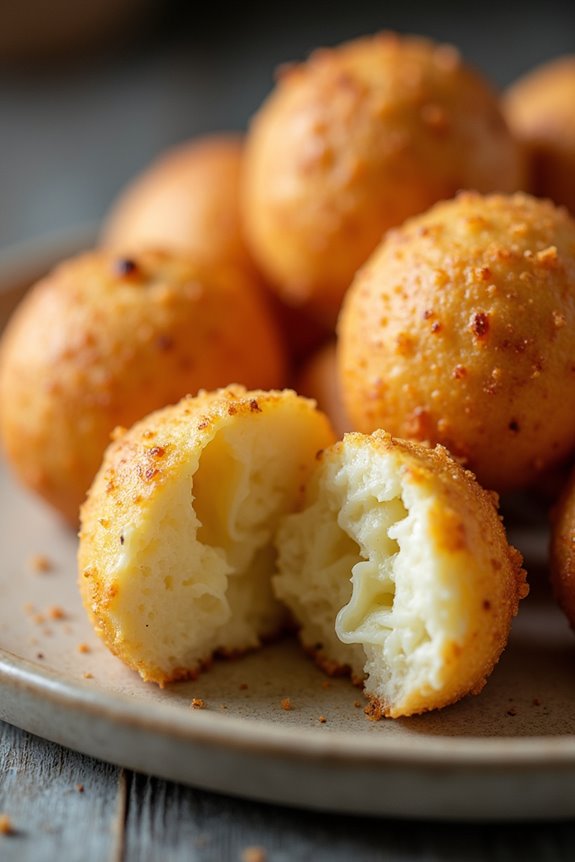
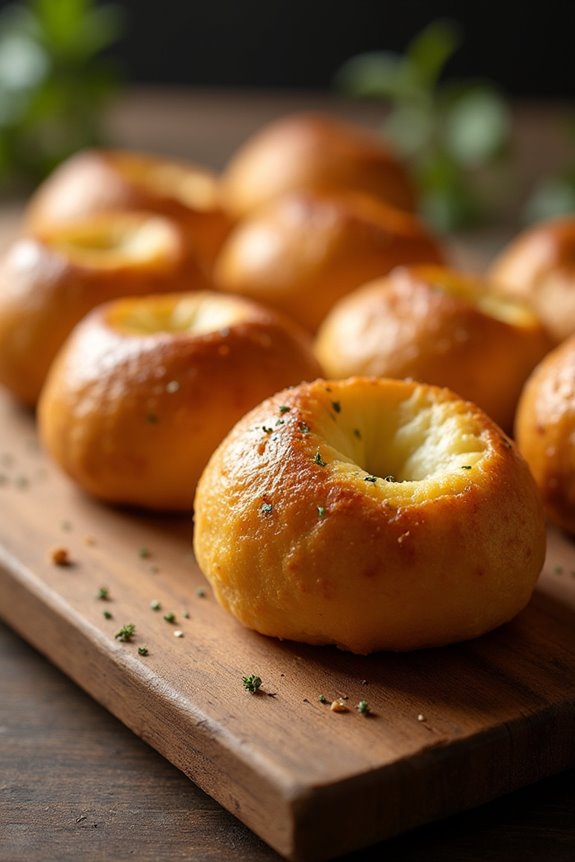
Pão de Queijo, a delightful Brazilian cheese bread, is a beloved snack known for its chewy texture and cheesy flavor. Originating from the state of Minas Gerais, this gluten-free treat is a staple in Brazilian households and is often enjoyed for breakfast or as an afternoon snack. Made primarily with tapioca flour, Pão de Queijo isn’t only easy to make but also incredibly satisfying, making it a favorite among cheese lovers.
The beauty of Classic Pão de Queijo lies in its simplicity and versatility. With just a few basic ingredients, you can whip up a batch of these irresistible cheese puffs in no time. Pair them with your morning coffee or serve them at your next gathering, and watch as they quickly disappear. Once you’ve mastered the classic version, feel free to experiment with different cheeses or add herbs and spices to personalize your dough.
Ingredients (Serves 4-6)
- 1 cup whole milk
- 1/2 cup vegetable oil
- 1 teaspoon salt
- 2 cups tapioca flour
- 2 large eggs
- 1 cup grated cheese (such as Parmesan or mozzarella)
- 1/4 teaspoon baking powder (optional for extra fluffiness)
Cooking Instructions
- Preheat the Oven: Begin by preheating your oven to 375°F (190°C). This guarantees that your Pão de Queijo will bake evenly and achieve a golden-brown color.
- Combine Milk and Oil: In a medium saucepan, combine the whole milk, vegetable oil, and salt. Heat the mixture over medium heat until it begins to simmer, but don’t let it boil. Stir occasionally to prevent the mixture from scorching.
- Incorporate Tapioca Flour: Once the milk and oil mixture is simmering, remove it from the heat. Gradually add the tapioca flour, stirring continuously with a wooden spoon until a dough forms. This process helps to hydrate the tapioca flour and create the chewy texture characteristic of Pão de Queijo.
- Cool the Mixture: Allow the dough to cool slightly for about 5-10 minutes. This step is important to avoid scrambling the eggs when you add them to the mixture.
- Add Eggs and Cheese: Once the dough has cooled but is still warm, add the eggs one at a time, mixing well after each addition. Then, fold in the grated cheese and baking powder (if using) until fully incorporated. The dough should be smooth and slightly sticky.
- Shape the Dough: Using your hands or a cookie scoop, form small balls of dough, about the size of a golf ball, and place them on a greased or parchment-lined baking sheet, leaving some space between each ball for expansion.
- Bake: Place the baking sheet in the preheated oven and bake for 15-20 minutes, or until the Pão de Queijo puff up and turn a beautiful golden brown. Keep an eye on them to avoid over-baking.
- Serve Warm: Once done, remove them from the oven and let them cool slightly. Serve warm and enjoy the cheesy goodness.
Extra Tips
For the best flavor, use a high-quality cheese that melts well, such as a sharp cheddar or a mix of cheeses for a more complex taste. If you prefer a more pronounced cheese flavor, consider adding an extra 1/2 cup of cheese to the dough.
Additionally, you can experiment with different seasonings, such as garlic powder or fresh herbs, to customize your Pão de Queijo. Finally, these cheese breads can be frozen after baking; simply reheat them in the oven for a quick and delicious snack later on.
Spinach and Feta Pão De Queijo
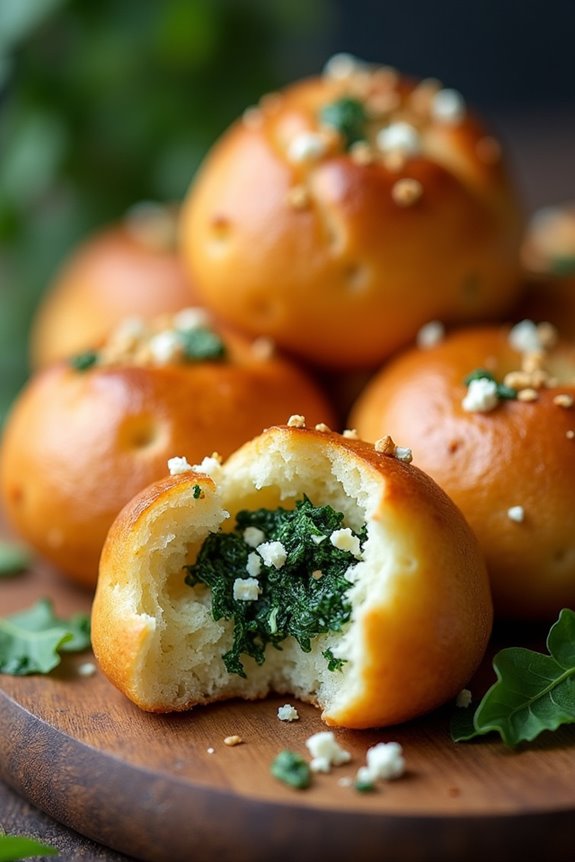
Spinach and Feta Pão De Queijo combines the delightful chewiness of traditional Brazilian cheese bread with the vibrant flavors of spinach and feta cheese. This variation not only enhances the nutritional profile of the classic dish but also introduces a savory twist that makes it perfect for any occasion.
Whether served as an appetizer, snack, or side dish, these gluten-free cheese puffs are sure to impress your family and friends. The recipe is quite simple, requiring just a few ingredients and minimal preparation time.
With a fluffy texture and a cheesy, salty flavor, these Pão De Queijo are a delicious way to incorporate greens into your diet. They’re best enjoyed warm from the oven, making them ideal for gatherings or as a fun treat for kids. Let’s explore the ingredients and preparation steps to create this delightful dish!
Ingredients (Serves 4-6 people):
- 1 cup tapioca flour
- 1/2 cup milk
- 1/4 cup vegetable oil
- 1 large egg
- 1 cup fresh spinach, chopped
- 1/2 cup feta cheese, crumbled
- 1/2 teaspoon salt
- 1/4 teaspoon black pepper
- 1/4 teaspoon garlic powder (optional)
- 1/4 teaspoon onion powder (optional)
Instructions:
- Preheat the Oven: Begin by preheating your oven to 375°F (190°C). This guarantees that your Pão De Queijo will bake evenly and develop a beautiful golden crust.
- Combine Wet Ingredients: In a medium saucepan, combine the milk and vegetable oil. Heat the mixture over medium heat until it just begins to simmer. Remove from heat and let it cool slightly.
- Mix Dry Ingredients: In a mixing bowl, combine the tapioca flour, salt, black pepper, garlic powder, and onion powder (if using). Stir the dry ingredients together to guarantee an even distribution of seasoning.
- Combine Mixtures: Pour the warm milk and oil mixture into the bowl with the dry ingredients. Stir until a dough-like consistency forms. This may take a few minutes as the tapioca flour absorbs the liquid.
- Add Egg: Once the mixture is combined, add the egg and stir until fully incorporated. The dough will become sticky, which is expected.
- Fold in Spinach and Feta: Gently fold in the chopped spinach and crumbled feta cheese until evenly distributed throughout the dough.
- Shape the Dough: Using your hands, shape the dough into small balls, roughly the size of a golf ball. Place them on a baking sheet lined with parchment paper, leaving some space between each ball for expansion during baking.
- Bake: Place the baking sheet in the preheated oven and bake for about 20-25 minutes, or until the Pão De Queijo are puffed and golden brown.
- Cool and Serve: Once baked, remove them from the oven and let them cool for a few minutes before serving. They’re best enjoyed warm.
Extra Tips:
For an extra cheesy flavor, consider adding shredded mozzarella or Parmesan cheese to the dough along with the feta. You can also experiment with different herbs, such as dill or oregano, to enhance the flavor profile even further.
If you want to make ahead of time, you can freeze the uncooked dough balls and bake them directly from frozen, adding a few extra minutes to the baking time. Enjoy your Spinach and Feta Pão De Queijo fresh from the oven for the best taste and texture!
Bacon and Cheese Pão De Queijo
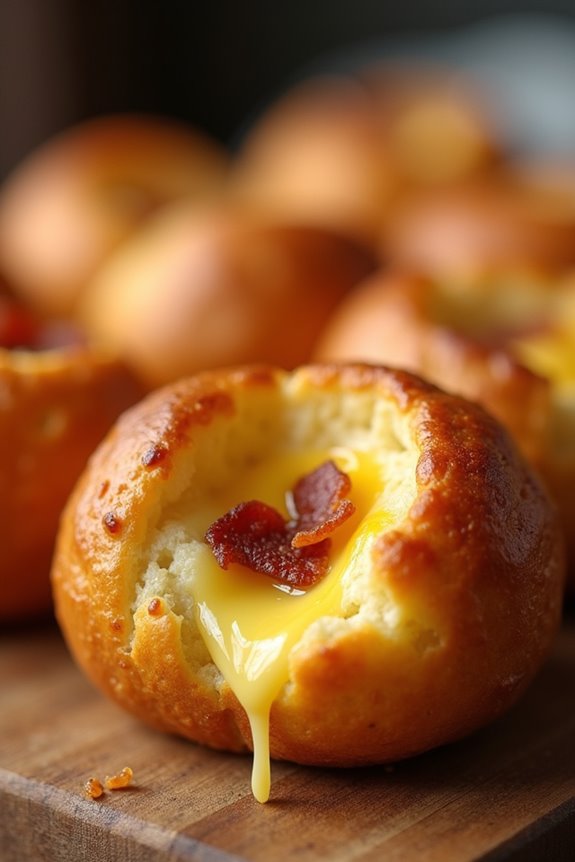
Bacon and Cheese Pão De Queijo is a delightful twist on the traditional Brazilian cheese bread, known for its chewy texture and cheesy flavor. This version incorporates crispy bacon, which adds a savory depth that perfectly complements the gooey cheese.
Whether served as an appetizer, snack, or side dish, these bite-sized treats are bound to impress your family and friends. The combination of cheese, bacon, and cassava flour creates a unique flavor profile that will have everyone reaching for seconds.
Making Bacon and Cheese Pão De Queijo isn’t only easy but also a fun activity to do with loved ones. With the right ingredients and a bit of patience, you can create these delicious cheesy morsels that are perfect for any occasion.
The best part is that they’re gluten-free, making them a suitable option for those with gluten sensitivities. So, let’s gather our ingredients and get ready to whip up some delicious Bacon and Cheese Pão De Queijo!
Ingredients (serving size: 4-6 people)
- 1 cup of milk
- 1/2 cup of vegetable oil
- 1 teaspoon of salt
- 2 cups of tapioca flour (also known as cassava flour)
- 2 large eggs
- 1 cup of shredded cheese (mozzarella or a mix of cheeses)
- 1 cup of cooked, crumbled bacon
- 1 teaspoon of baking powder (optional for fluffiness)
Cooking Instructions
- Preheat the Oven: Preheat your oven to 375°F (190°C). This guarantees that your Pão De Queijo will bake evenly and achieve that perfect golden-brown color.
- Prepare the Dough Base: In a medium saucepan, combine the milk, vegetable oil, and salt over medium heat. Stir occasionally and bring the mixture to a gentle boil. Once it reaches a boil, remove it from the heat.
- Incorporate the Tapioca Flour: Gradually add the tapioca flour to the hot mixture, stirring continuously with a wooden spoon until the dough comes together and forms a ball. It should be slightly sticky but manageable. Let it cool for about 10 minutes.
- Add Eggs and Cheese: Once the dough has cooled slightly, add the eggs one at a time, mixing well after each addition. This will help incorporate the eggs smoothly into the dough. Next, fold in the shredded cheese and crumbled bacon until evenly distributed.
- Shape the Pão De Queijo: With your hands, take small amounts of dough and roll them into balls about the size of a golf ball. Place them on a baking sheet lined with parchment paper, leaving some space between each ball to allow for expansion during baking.
- Bake: Place the baking sheet in the preheated oven and bake for 15-20 minutes or until the Pão De Queijo are puffed up and golden brown on top. Keep an eye on them to prevent over-baking.
- Cool and Serve: Once baked, remove them from the oven and let them cool for a few minutes on the baking sheet. Serve warm for the best cheesy experience. Enjoy!
Extra Tips
For extra flavor, consider adding herbs or spices to the dough, such as garlic powder, onion powder, or fresh herbs like chives.
If you prefer a cheesier taste, feel free to mix different types of cheese, such as cheddar or parmesan, to enhance the flavor profile.
Additionally, these Pão De Queijo can be frozen before baking; simply place the uncooked dough balls on a baking sheet, freeze them, and then transfer them to a freezer-safe bag for later use.
When ready to bake, just pop them in the oven straight from the freezer, adding a couple of extra minutes to the baking time. Enjoy your cooking!
Jalapeño Cheddar Pão De Queijo
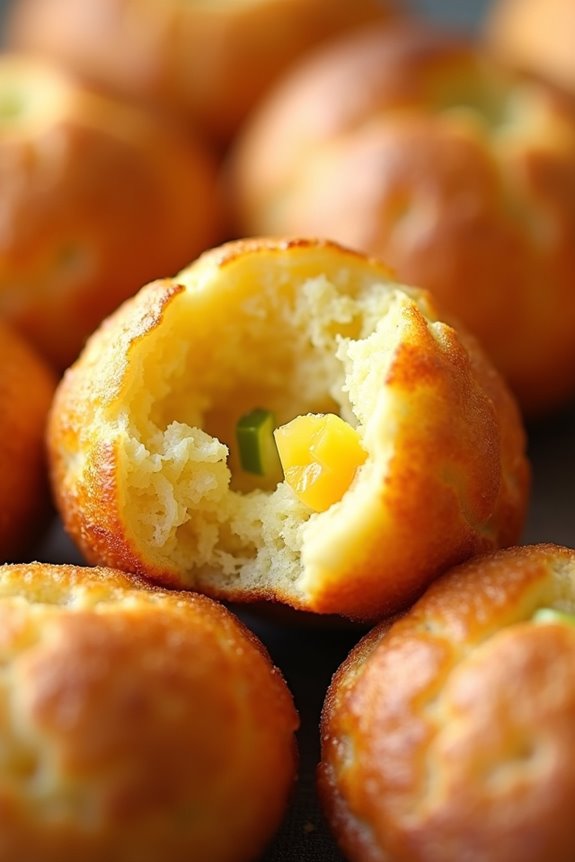
Jalapeño Cheddar Pão De Queijo is a delightful twist on the traditional Brazilian cheese bread, combining the rich, gooey goodness of cheese with the spicy kick of jalapeños.
These small, fluffy bites are perfect for snacking, appetizers, or even as a side dish to accompany your favorite meal. The combination of tapioca flour and cheese creates a wonderfully chewy texture, while the jalapeños add a zesty flavor that will tantalize your taste buds.
This recipe is simple and requires minimal ingredients, making it a great choice for both seasoned chefs and kitchen novices. With just a few steps, you can whip up a batch of these irresistible treats to impress your family and friends.
Serve them warm and fresh out of the oven for the best experience, and watch as they disappear in no time!
Ingredients (Serves 4-6 people)
- 1 cup whole milk
- 1/2 cup vegetable oil
- 1 teaspoon salt
- 2 cups tapioca flour
- 2 large eggs
- 1 cup shredded sharp cheddar cheese
- 1/2 cup diced jalapeños (fresh or pickled)
- 1/2 teaspoon baking powder (optional)
Cooking Instructions
1. Preheat the Oven: Begin by preheating your oven to 375°F (190°C). This guarantees the oven is at the right temperature for baking the Pão De Queijo, resulting in perfectly puffed and golden cheese breads.
2. Heat the Milk and Oil: In a medium saucepan over medium heat, combine the whole milk, vegetable oil, and salt. Stir the mixture until it comes to a gentle boil.
Once boiling, remove the saucepan from the heat and let it cool slightly for about 5 minutes.
3. Mix the Tapioca Flour: In a large mixing bowl, add the tapioca flour. Pour the hot milk and oil mixture over the tapioca flour and stir with a wooden spoon until well combined.
The mixture will be sticky and lumpy at first but will come together as it cools.
4. Incorporate the Eggs: Once the dough has cooled enough to handle, add the eggs one at a time, mixing thoroughly after each addition.
You can use your hands to knead the dough gently until it becomes smooth and elastic.
5. Add Cheese and Jalapeños: Fold in the shredded sharp cheddar cheese and diced jalapeños into the dough, making sure of even distribution.
If desired, you can also add baking powder at this stage for a slightly lighter texture.
6. Shape the Dough: Using your hands, form small balls (about 1-inch in diameter) from the dough and place them on a baking sheet lined with parchment paper.
Make sure to leave a little space between each ball to allow for expansion during baking.
7. Bake: Place the baking sheet in the preheated oven and Bake for 15-20 minutes or until the Pão De Queijo are puffed up and golden brown.
Keep an eye on them, as oven temperatures may vary.
8. Serve: Once out of the oven, let them cool slightly before serving. Enjoy these cheesy delights warm for the best flavor and texture!
Extra Tips
For an extra kick, consider adding more jalapeños or using a spicier cheese, like pepper jack, to elevate the flavor profile.
You can also experiment with different cheese blends or even incorporate herbs and spices to customize your Pão De Queijo.
If you have leftovers, these cheese breads can be stored in an airtight container and reheated in the oven for a few minutes to regain their delightful texture. Enjoy your cooking adventure!
Herb and Garlic Pão De Queijo
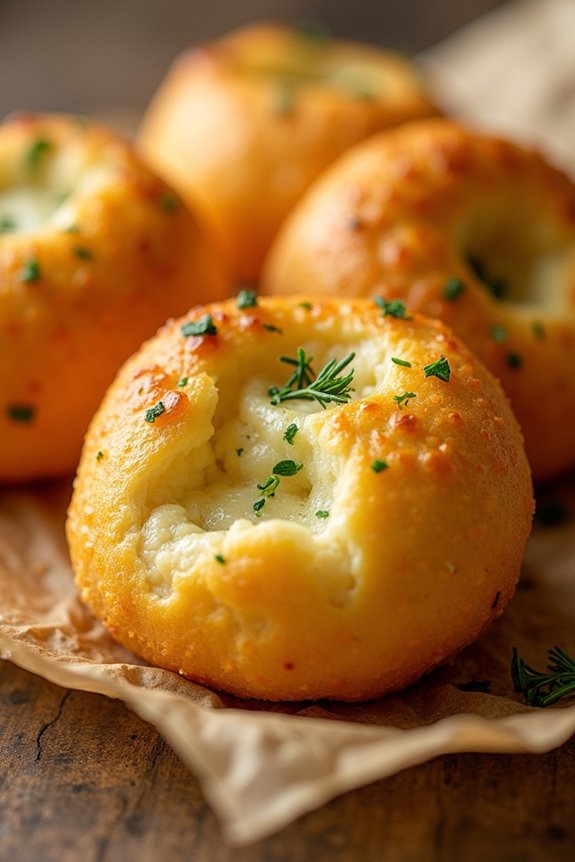
Pão de Queijo, a delightful Brazilian cheese bread, is a beloved snack that’s crispy on the outside and chewy on the inside. This version incorporates fragrant herbs and the robust flavor of garlic, elevating the traditional recipe to new heights. Perfect for serving at gatherings or enjoying as a cozy snack at home, these cheesy bites are guaranteed to be a hit with everyone.
Making Herb and Garlic Pão De Queijo isn’t only simple but also a fun way to experiment with flavors. The combination of cheese, garlic, and fresh herbs creates a mouthwatering aroma and taste that will have your guests coming back for more. This recipe yields enough for 4-6 people, making it an ideal choice for sharing.
Ingredients:
- 1 cup tapioca flour
- 1/2 cup milk
- 1/4 cup vegetable oil
- 1 teaspoon garlic powder
- 1 teaspoon salt
- 1/2 cup grated Parmesan cheese
- 1/2 cup shredded mozzarella cheese
- 2 large eggs
- 1/4 cup fresh parsley, chopped
- 1 tablespoon fresh rosemary, chopped
- 1 tablespoon fresh thyme, chopped
- 1/2 teaspoon black pepper
Cooking Instructions:
- Preheat Oven: Begin by preheating your oven to 375°F (190°C). This guarantees that your Pão de Queijo bakes evenly and achieves that perfect golden color.
- Prepare the Liquid Mixture: In a saucepan, combine the milk, vegetable oil, garlic powder, and salt. Heat over medium until the mixture starts to boil, stirring occasionally. Once it boils, remove it from the heat immediately to prevent it from scorching.
- Combine with Tapioca Flour: In a large mixing bowl, add the tapioca flour. Pour the hot milk mixture over the tapioca flour and mix well with a wooden spoon until fully combined. The mixture will appear somewhat sticky.
- Incorporate Eggs and Cheese: Allow the mixture to cool slightly, then add the eggs, one at a time, mixing well after each addition. Next, fold in the Parmesan and mozzarella cheese until thoroughly incorporated.
- Add Herbs and Seasoning: Gently stir in the chopped parsley, rosemary, thyme, and black pepper. The fresh herbs will add a beautiful aroma and flavor to the dough.
- Shape the Dough: With your hands, take small portions of the dough (about a tablespoon each) and roll them into balls. Place them on a greased or parchment-lined baking sheet, spacing them about an inch apart.
- Bake: Place the baking sheet in the preheated oven and bake for 20-25 minutes or until the Pão de Queijo are puffed and golden brown on the outside.
- Cool and Serve: Once baked, remove them from the oven and allow them to cool for a few minutes on the baking sheet before transferring them to a wire rack. Serve warm and enjoy!
Extra Tips:
For the best texture, make sure not to overmix the dough once the cheese and herbs are added, as this can affect the chewiness of the Pão de Queijo. If you’re feeling adventurous, you can experiment with different types of cheese or herbs based on your preference.
Additionally, these bites are best enjoyed fresh out of the oven, but you can freeze any leftovers and reheat them for a quick snack later.
Sweet Potato Pão De Queijo
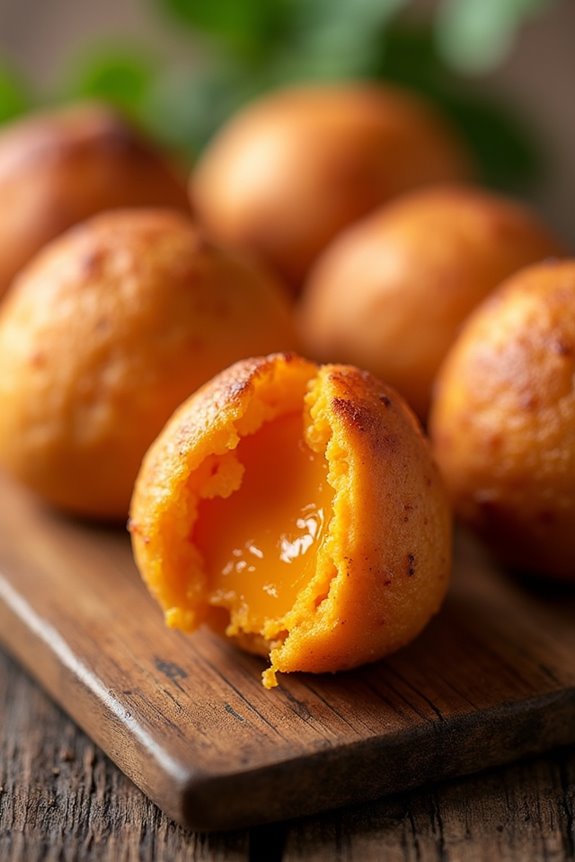
Sweet Potato Pão De Queijo is a delightful twist on the classic Brazilian cheese bread. This version incorporates the rich flavor and vibrant color of sweet potatoes, making it not only delicious but also visually appealing. The combination of the naturally sweet and earthy flavor of the sweet potato with the cheesy goodness creates a mouthwatering treat that can be enjoyed as a snack or appetizer. The gluten-free nature of the traditional Pão De Queijo, thanks to tapioca flour, makes this dish suitable for those with gluten sensitivities.
Making Sweet Potato Pão De Queijo is a straightforward process, perfect for both seasoned cooks and beginners alike. The dough comes together quickly, and the addition of cheese provides a wonderfully gooey texture. Once baked, these little cheese puffs turn golden brown and have a crisp exterior with a soft, chewy inside. Serve them warm, and watch them disappear in no time!
Ingredients (serving size: 4-6 people)
- 1 medium sweet potato (about 1 cup mashed)
- 1 cup tapioca flour
- 1 cup shredded cheese (such as mozzarella or cheddar)
- 1/4 cup milk
- 1/4 cup vegetable oil
- 1 large egg
- 1 teaspoon salt
- 1/2 teaspoon baking powder
Cooking Instructions
- Prepare the Sweet Potato: Begin by peeling and cubing the sweet potato. Boil the cubes in a pot of salted water until tender, about 15-20 minutes. Once cooked, drain and mash the sweet potato until smooth. Allow it to cool slightly before using it in the recipe.
- Mix Wet Ingredients: In a large mixing bowl, combine the mashed sweet potato with the milk, vegetable oil, and egg. Whisk together until the mixture is smooth and well-blended.
- Combine Dry Ingredients: In a separate bowl, mix the tapioca flour, salt, and baking powder. Verify there are no lumps in the mixture.
- Incorporate the Dry Ingredients: Gradually add the dry ingredients to the wet mixture, stirring continuously until a dough forms. You may find the dough is sticky, which is normal.
- Add Cheese: Fold in the shredded cheese into the dough until evenly distributed. The dough should be cohesive but still slightly tacky.
- Form the Balls: Preheat your oven to 375°F (190°C). Use your hands to form small balls, about 1 inch in diameter, and place them on a baking sheet lined with parchment paper. Make sure to leave some space between each ball.
- Bake: Place the baking sheet in the preheated oven and bake for 20-25 minutes, or until the tops are lightly golden brown and puffed up.
- Cool and Serve: Once baked, remove the Sweet Potato Pão De Queijo from the oven and let them cool for a few minutes. Serve warm for the best texture and flavor.
Extra Tips
For a more intense flavor, consider adding herbs or spices to the dough, such as garlic powder, onion powder, or even a pinch of cayenne for a kick.
You can also experiment with different types of cheese to discover your favorite combination. If you want to prepare the dough ahead of time, you can refrigerate it for a couple of hours before baking, just allow it to come to room temperature before forming the balls and baking.
Truffle Pão De Queijo
Truffle Pão De Queijo is a delightful twist on the traditional Brazilian cheese bread, infusing the rich, earthy flavor of truffles into the incredibly cheesy and chewy dough. This gluten-free treat is made with tapioca flour, which gives Pão De Queijo its signature texture: crispy on the outside and soft and gooey on the inside. Perfect as an appetizer or snack, this version elevates the classic recipe with the luxurious touch of truffle oil or truffle paste, making it a perfect addition to any gathering or a fancy night in.
Making Truffle Pão De Queijo is quite simple, and once you make it, you’ll want to serve it at every occasion! The combination of cheese and truffle creates an irresistible aroma that fills your kitchen while baking. Gather your ingredients, and let’s plunge into this cheesy indulgence that will impress your guests and make your taste buds dance with joy.
Ingredients (Serves 4-6):
- 1 cup tapioca flour
- 1/2 cup milk
- 1/4 cup vegetable oil
- 1/2 teaspoon salt
- 1/2 cup grated Parmesan cheese
- 1/2 cup shredded mozzarella cheese
- 1 large egg
- 1 tablespoon truffle oil (or more to taste)
- 1 teaspoon black pepper (optional)
- Additional Parmesan cheese for topping (optional)
Cooking Instructions:
- Preheat the Oven: Preheat your oven to 375°F (190°C). This guarantees that the Pão De Queijo bakes evenly and achieves a golden, crispy exterior.
- Combine Milk, Oil, and Salt: In a small saucepan, combine the milk, vegetable oil, and salt. Heat over medium heat until the mixture begins to simmer, but don’t boil. Stir occasionally to prevent burning.
- Mix with Tapioca Flour: Once heated, pour the milk mixture over the tapioca flour in a large mixing bowl. Stir with a wooden spoon until well combined. The mixture will be sticky and may clump together.
- Add Cheese and Egg: Allow the mixture to cool for a few minutes. Then, add the grated Parmesan, shredded mozzarella, and the egg. Mix until fully incorporated. The dough should be smooth and elastic.
- Incorporate Truffle Oil and Pepper: Add the truffle oil and black pepper to the dough. Mix thoroughly to guarantee that the truffle flavor is evenly distributed throughout the mixture.
- Shape the Dough: Using your hands, form small balls of dough (about 1 inch in diameter) and place them on a baking sheet lined with parchment paper. If desired, sprinkle additional Parmesan cheese on top for added flavor.
- Bake: Place the baking sheet in the preheated oven and bake for 15-20 minutes or until the Pão De Queijo are puffed up and golden brown. Keep an eye on them to guarantee they don’t overbake.
- Cool and Serve: Once baked, remove them from the oven and let them cool slightly before serving. Enjoy warm for the best taste and texture!
Extra Tips:
For an enhanced truffle flavor, consider adding a touch more truffle oil to the dough before baking. You can also experiment with different types of cheese to customize the flavor profile.
If you’re not serving them immediately, allow the Pão De Queijo to cool completely before storing them in an airtight container; they can be reheated in the oven for about 5 minutes to regain their crispy texture. Enjoy your gourmet treat!
Pizza-Stuffed Pão De Queijo
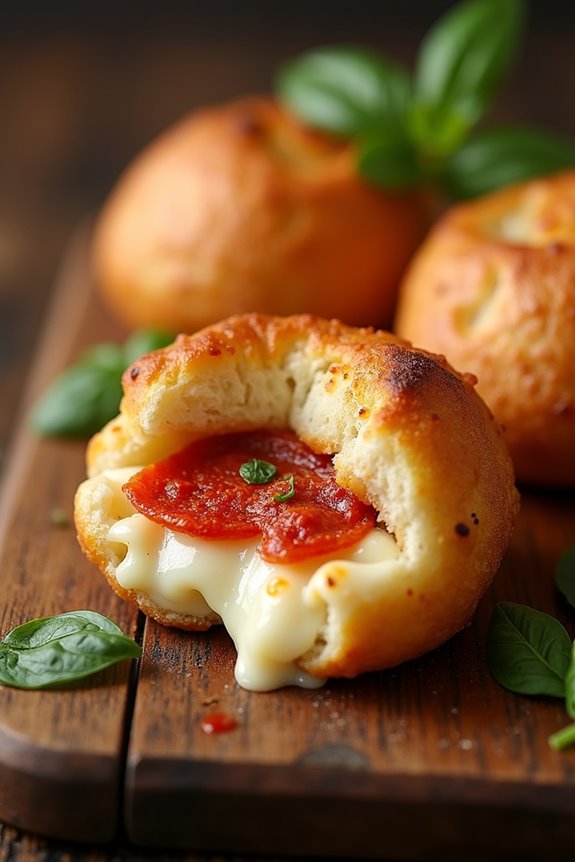
Pizza-Stuffed Pão De Queijo combines the delightful flavors of traditional Brazilian cheese bread with the classic toppings of pizza. These cheesy, gluten-free bites are a unique twist on the beloved pão de queijo, making them perfect as an appetizer or a party snack. With a gooey cheese center and a crispy exterior, they’re bound to be a hit among kids and adults alike.
The beauty of this recipe is its versatility; you can fill these cheesy bites with your favorite pizza toppings. Whether you prefer classic pepperoni, a veggie medley, or a combination of both, the options are endless. With a simple preparation method and a short cooking time, you’ll be enjoying these delightful treats in no time.
Ingredients (serving size: 4-6 people):
- 2 cups tapioca flour
- 1 cup milk
- 1/2 cup vegetable oil
- 2 large eggs
- 1 cup shredded mozzarella cheese
- 1/2 cup grated Parmesan cheese
- 1 teaspoon salt
- 1/2 teaspoon garlic powder
- 1/2 cup pizza sauce
- 1/2 cup pepperoni slices (or desired toppings)
- Optional: Italian seasoning for extra flavor
Cooking Instructions:
- Preheat the Oven: Begin by preheating your oven to 375°F (190°C). This guarantees that your Pão De Queijo will bake evenly and achieve the perfect golden-brown crust.
- Prepare the Dough: In a medium saucepan, combine the milk, vegetable oil, and salt. Heat over medium heat until the mixture is hot but not boiling. Remove from heat and gradually stir in the tapioca flour until fully incorporated. The dough will be sticky, so be sure to mix well.
- Incorporate the Eggs and Cheese: Allow the dough to cool slightly before adding the eggs, one at a time, mixing well after each addition. Once the eggs are fully incorporated, fold in the shredded mozzarella and grated Parmesan cheese. Add garlic powder and mix until the dough is smooth and stretchy.
- Shape the Dough: Using your hands, take a small amount of dough (about the size of a golf ball) and flatten it in the palm of your hand. Place a teaspoon of pizza sauce and a few pieces of your desired toppings (like pepperoni) in the center. Fold the dough around the filling and roll it into a ball. Repeat this process until all the dough is used.
- Bake the Pão De Queijo: Arrange the stuffed dough balls on a baking sheet lined with parchment paper, leaving some space between them. Bake for approximately 20-25 minutes, or until they’re puffed up and golden brown.
- Serve and Enjoy: Once done, remove from the oven and let them cool for a few minutes. Serve warm, and enjoy the gooey, cheesy center with your favorite dipping sauce!
Extra Tips: For an extra flavor boost, consider adding Italian seasoning to the dough or mixing some into the cheese filling. These stuffed Pão De Queijo are best enjoyed fresh but can be stored in an airtight container for a few days. If you wish to reheat them, do so in a toaster oven or regular oven to maintain their crispy texture. Adjust the fillings based on your preference to create a variety of flavors!
Vegan Pão De Queijo
Vegan Pão De Queijo is a delightful twist on the traditional Brazilian cheese bread, offering the same fluffy texture but without any animal products. This recipe substitutes the cheese with nutritional yeast and vegan cheese alternatives, creating a savory snack that’s perfect for any occasion, whether it’s a cozy family gathering or a casual get-together with friends.
The best part is that they’re easy to make and can be enjoyed warm from the oven or later as a delicious treat. These little bites of goodness are gluten-free as well, making them suitable for those with gluten sensitivities.
With a blend of cassava flour and plant-based ingredients, they aren’t just healthy but also packed with flavor. Serve them as an appetizer, a side dish, or even a party snack, and watch them disappear in no time!
Ingredients (serving size: 4-6 people)
- 1 cup cassava flour
- 1/2 cup unsweetened almond milk (or any plant-based milk)
- 1/4 cup nutritional yeast
- 1/4 cup vegan cheese (shredded)
- 1/4 cup olive oil
- 1 teaspoon baking powder
- 1/2 teaspoon salt
- 1/4 teaspoon black pepper
- 1 tablespoon apple cider vinegar
- Optional: herbs or spices for added flavor (e.g., garlic powder, oregano)
Cooking Instructions
- Preheat the Oven: Begin by preheating your oven to 375°F (190°C). This guarantees that your Pão De Queijo will bake evenly and become perfectly golden brown.
- Mix the Wet Ingredients: In a large mixing bowl, combine the almond milk, olive oil, and apple cider vinegar. Whisk these ingredients together until they’re well incorporated.
- Combine the Dry Ingredients: In a separate bowl, mix the cassava flour, nutritional yeast, baking powder, salt, and black pepper. This step is essential as it guarantees that the leavening agent and seasonings are evenly distributed throughout the dough.
- Combine Wet and Dry Ingredients: Gradually add the dry mixture to the wet ingredients, stirring with a spoon or spatula until a dough starts to form. If you choose to add any optional herbs or spices, now is the time to mix them in.
- Add Vegan Cheese: Once the dough is combined, fold in the shredded vegan cheese. This will add a cheesy flavor and richness to your Pão De Queijo.
- Shape the Dough: With your hands, take small portions of dough and roll them into balls about the size of a golf ball. Place them on a baking sheet lined with parchment paper, leaving space between each ball as they’ll expand while baking.
- Bake: Place the baking sheet in the preheated oven and bake for 25-30 minutes, or until the tops are golden brown and the rolls have risen.
- Cool and Serve: Once baked, remove the Pão De Queijo from the oven and let them cool for a few minutes. Serve warm and enjoy!
Extra Tips
For the best texture, be sure to use cassava flour, as it’s key to replicating the traditional Pão De Queijo’s chewy and gooey qualities.
If you want to enhance the flavor, consider experimenting with different herbs or spices in your dough. Additionally, these vegan cheese breads can be frozen after baking; simply reheat them in the oven when you’re ready to serve for a quick and easy snack!
Chocolate Pão De Queijo
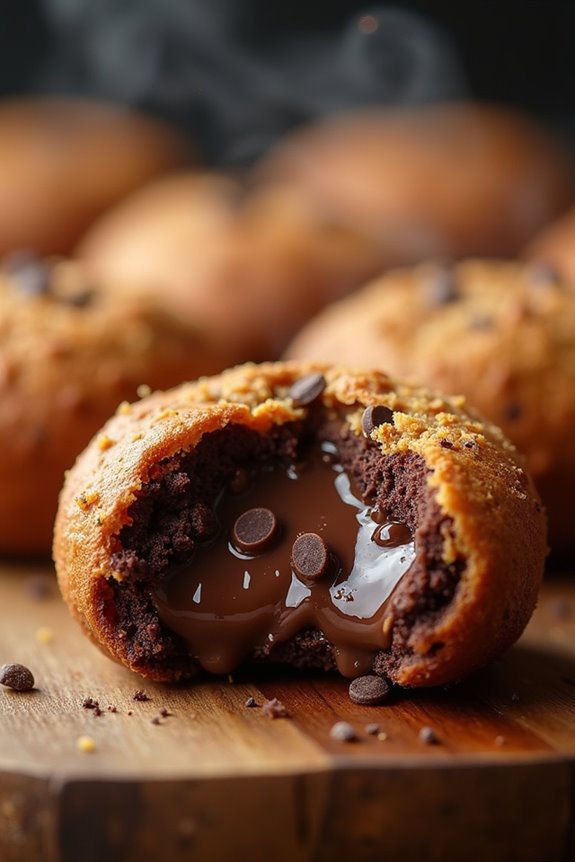
Chocolate Pão De Queijo is a delightful twist on the traditional Brazilian cheese bread, combining the savory, chewy texture of pão de queijo with the rich sweetness of chocolate. This unique fusion creates a delightful snack or dessert that’s perfect for any occasion.
Whether you’re hosting a gathering or simply treating yourself, these chocolatey bites are bound to impress with their gooey center and crispy exterior.
To make Chocolate Pão De Queijo, you’ll use cassava flour, which is key to achieving that iconic chewy texture. The addition of cocoa powder and chocolate chips takes this comforting classic to new heights, making it indulgent yet still packed with the beloved flavors of cheese bread.
Enjoy them warm from the oven for the best experience, as the chocolate will be melty and irresistible.
Ingredients (Serves 4-6):
- 1 cup tapioca flour (cassava flour)
- 1/2 cup cocoa powder
- 1 cup shredded mozzarella cheese
- 1/2 cup milk
- 1/4 cup vegetable oil
- 1/2 teaspoon salt
- 1/4 cup granulated sugar
- 1 large egg
- 1/2 cup chocolate chips
Cooking Instructions:
- Preheat the Oven: Begin by preheating your oven to 375°F (190°C). This guarantees that your Chocolate Pão De Queijo will bake evenly and achieve a golden-brown crust.
- Mix Wet Ingredients: In a medium saucepan over medium heat, combine the milk, vegetable oil, and salt. Stir until the mixture is warmed through but not boiling. Remove from heat and let it cool for a few minutes.
- Combine Dry Ingredients: In a large mixing bowl, whisk together the tapioca flour, cocoa powder, and granulated sugar until fully combined. This will help make sure that the cocoa powder is evenly distributed throughout the dough.
- Incorporate Wet and Dry Mixtures: Pour the warmed milk mixture into the dry ingredients and stir until well combined. The dough will be sticky at this point.
- Add the Egg: Once the mixture is cool enough to handle, add the egg and mix thoroughly until the dough is smooth. You may need to use your hands to knead it slightly.
- Fold in Cheese and Chocolate Chips: Gently fold in the shredded mozzarella cheese and chocolate chips, ensuring they’re evenly distributed in the dough.
- Shape the Dough: Using your hands, shape the dough into small balls, about 1 inch in diameter, and place them on a baking sheet lined with parchment paper, leaving space between each ball.
- Bake: Place the baking sheet in the preheated oven and bake for 15-20 minutes, or until the tops are slightly puffed and golden.
- Cool and Serve: Once baked, remove the Chocolate Pão De Queijo from the oven and let them cool for a few minutes. Serve warm for the best texture and flavor.
Extra Tips:
For the best results, make certain to use fresh mozzarella cheese, as it melts beautifully and adds to the overall flavor profile of the chocolate bread.
If you prefer a richer chocolate flavor, you can increase the cocoa powder slightly or add a few more chocolate chips. Additionally, serve these warm alongside a glass of milk or coffee to enhance the experience.
Enjoy your cooking adventure with these delightful treats!
Mediterranean Pão De Queijo
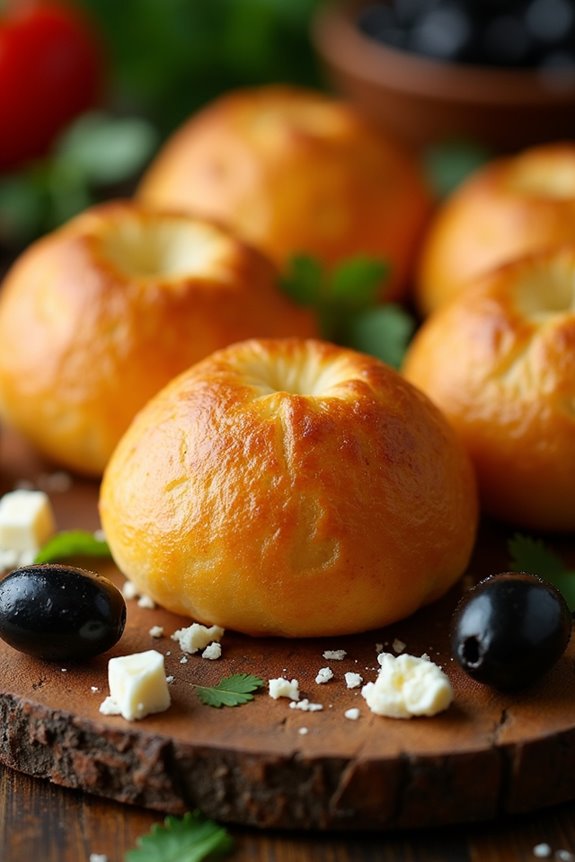
Pão de Queijo, the beloved Brazilian cheese bread, gets a delightful twist with Mediterranean flavors in this recipe. By incorporating ingredients like feta cheese, olives, and herbs, we create a unique and savory snack that’s perfect for gatherings or as an appetizer.
The chewy texture of the cheese bread pairs beautifully with the saltiness of the feta and the earthy flavors of the herbs, making each bite an explosion of taste that transports you to the sunny shores of the Mediterranean.
This Mediterranean Pão De Queijo isn’t only easy to make but also gluten-free, thanks to the use of tapioca flour. Whether you’re hosting a dinner party or simply craving a cheesy snack, this recipe serves 4-6 people and is sure to impress your guests with its bold flavors and delightful texture.
Get ready to enjoy a cheesy treat with a Mediterranean twist!
Ingredients
- 2 cups tapioca flour
- 1 cup milk
- 1/2 cup olive oil
- 2 large eggs
- 1 cup feta cheese, crumbled
- 1/2 cup black olives, chopped
- 1/4 cup fresh parsley, chopped
- 1 tablespoon dried oregano
- 1 teaspoon salt
- 1/2 teaspoon black pepper
Cooking Instructions
- Preheat the Oven: Start by preheating your oven to 375°F (190°C). This guarantees that the Pão de Queijo will bake evenly and achieve a nice golden color.
- Combine Wet Ingredients: In a medium saucepan, combine the milk and olive oil. Heat the mixture over medium heat until it comes to a gentle simmer. Remove from heat once it simmers and set aside.
- Mix Tapioca Flour and Salt: In a large mixing bowl, combine the tapioca flour and salt. Mix well to guarantee the salt is evenly distributed throughout the flour.
- Incorporate Wet Mixture: Gradually pour the warm milk and olive oil mixture into the tapioca flour while stirring continuously. This helps to hydrate the flour evenly.
- Add Eggs: Once the wet and dry ingredients are well combined, add the eggs one at a time, mixing well after each addition. The mixture should become a sticky dough.
- Stir in Cheese and Herbs: Gently fold in the crumbled feta cheese, chopped olives, parsley, oregano, and black pepper. Make sure all ingredients are well combined.
- Shape the Dough: With slightly damp hands, take small portions of the dough and roll them into balls about the size of a golf ball. Place them on a baking sheet lined with parchment paper, leaving some space between each ball.
- Bake: Place the baking sheet in the oven and bake for 20-25 minutes, or until the Pão de Queijo are puffed and golden brown on the outside.
- Cool and Serve: Once baked, remove from the oven and let them cool for a few minutes before serving. Enjoy warm for the best flavor and texture!
Extra Tips
For an extra twist, feel free to substitute or add other Mediterranean ingredients such as sun-dried tomatoes, artichokes, or different herbs like basil or thyme.
You can also experiment with the cheese types; combining mozzarella for stretchiness along with feta can enhance the flavor and texture.
Remember to serve them warm, as they’re at their best right out of the oven, and consider pairing them with a revitalizing yogurt dip or a simple olive oil and balsamic vinegar for dipping.
Enjoy your delicious Mediterranean Pão De Queijo!