

Discover the vibrant world of Argentinian cuisine where fresh produce takes the spotlight. Each recipe, from the roasted vegetable salad to the hearty lentil stew, celebrates the season’s bounty with a unique blend of flavors. Whether you’re looking to elevate your meals with bold tastes or nutritious ingredients, these delightful recipes promise to inspire your next culinary adventure. Let’s explore these colorful Argentinian vegetable dishes together. Get ready to be inspired by the beauty and taste of fresh produce.
Ensalada De Verduras Asadas (Roasted Vegetable Salad)
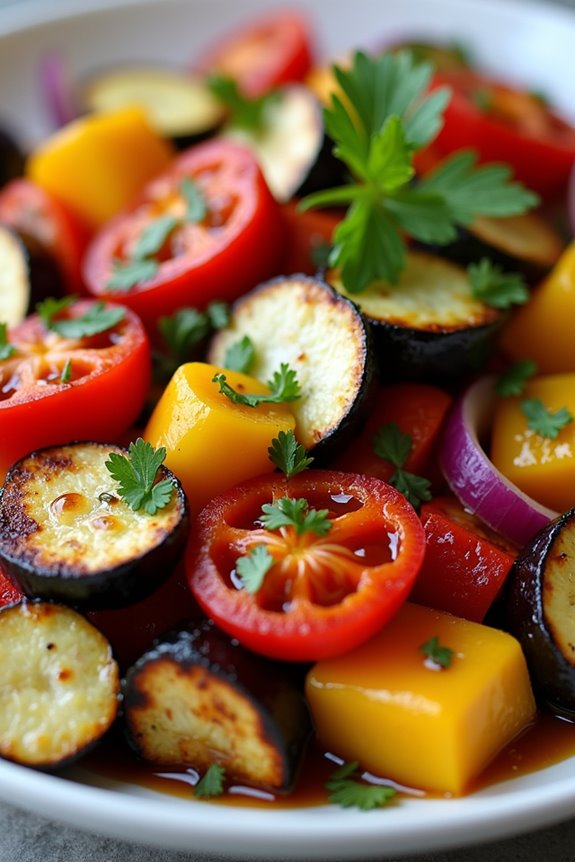
Ensalada De Verduras Asadas, or Roasted Vegetable Salad, is a vibrant and flavorful dish that showcases the natural sweetness of seasonal vegetables. This Argentinian salad isn’t only healthy but also incredibly versatile, making it perfect for any meal. The roasting process enhances the flavors of the vegetables, creating a deliciously charred and tender texture that pairs wonderfully with a zesty dressing.
This dish can be served warm or at room temperature, making it ideal for gatherings or a simple family dinner. To prepare this salad, you’ll want to select a colorful array of vegetables to roast, including bell peppers, zucchini, and eggplant. The combination of these vegetables not only provides a visually appealing dish but also guarantees a variety of flavors and nutrients.
You can customize the ingredients based on your preferences or what you have on hand, making it a flexible recipe that can be adjusted to suit your taste.
Ingredients (Serves 4-6):
- 1 red bell pepper, diced
- 1 yellow bell pepper, diced
- 1 medium zucchini, sliced
- 1 medium eggplant, diced
- 1 red onion, cut into wedges
- 3 tablespoons olive oil
- 1 teaspoon salt
- 1/2 teaspoon black pepper
- 1 teaspoon dried oregano
- 1 teaspoon balsamic vinegar
- Fresh parsley, chopped (for garnish)
Cooking Instructions:
- Preheat the Oven: Start by preheating your oven to 400°F (200°C). This high temperature is essential for roasting the vegetables, as it allows them to caramelize and develop rich flavors.
- Prepare the Vegetables: Wash and cut the vegetables into bite-sized pieces. Aim for uniform sizes to guarantee even cooking. Place the diced red and yellow bell peppers, zucchini slices, eggplant cubes, and red onion wedges into a large mixing bowl.
- Season the Vegetables: Drizzle the olive oil over the chopped vegetables. Sprinkle with salt, black pepper, and dried oregano. Toss everything together until the vegetables are well coated with the oil and seasonings.
- Roast the Vegetables: Spread the seasoned vegetables in a single layer on a baking sheet. This will help them roast evenly. Place the baking sheet in the preheated oven and roast for about 25-30 minutes, stirring halfway through to guarantee even browning.
- Prepare the Dressing: While the vegetables are roasting, prepare the dressing by mixing balsamic vinegar with a pinch of salt and pepper in a small bowl. This will add a tangy flavor that complements the roasted vegetables beautifully.
- Combine and Serve: Once the vegetables are tender and slightly charred, remove them from the oven. Allow them to cool for a few minutes before transferring them to a serving bowl. Drizzle the balsamic dressing over the warm vegetables and toss gently. Finish with a sprinkle of fresh parsley for garnish.
Extra Tips: When making Ensalada De Verduras Asadas, feel free to experiment with different vegetables based on what’s in season or your personal preferences.
Root vegetables like carrots or sweet potatoes can add a delightful sweetness, while adding a squeeze of lemon juice before serving can brighten the flavors. This salad can be stored in the refrigerator for a couple of days, making it perfect for meal prep or leftovers. Enjoy the robust flavors of this Argentinian classic!
Provoleta Con Pimientos (Provolone Cheese With Peppers)

Provoleta Con Pimientos is a delightful dish that showcases the rich flavors of Argentinian cuisine. This appetizer features provolone cheese, which is melted to perfection, and is complemented by sautéed bell peppers. It’s a popular choice in Argentine asados (barbecues) and is a fantastic way to start a meal. The combination of gooey cheese and vibrant peppers creates a dish that isn’t only delicious but also visually appealing.
Preparing Provoleta Con Pimientos is simple and requires minimal ingredients, making it an excellent option for both casual gatherings and festive occasions. The key to this dish lies in the quality of the cheese and the peppers, so be sure to select fresh, flavorful varieties. Once you’ve gathered your ingredients, you’ll find that this dish is straightforward to make and will impress your guests with its taste and presentation.
Ingredients (Serves 4-6):
- 1 large wheel of provolone cheese (approximately 500g)
- 2 tablespoons olive oil
- 2 red bell peppers, sliced
- 1 yellow bell pepper, sliced
- 1 teaspoon dried oregano
- Salt and pepper to taste
- Fresh parsley, chopped (for garnish)
- Crusty bread (for serving)
Cooking Instructions:
- Prepare the Cheese: Start by slicing the provolone cheese into thick rounds or wedges, about 1 inch thick. This thickness will allow the cheese to melt nicely without losing its shape during cooking.
- Sauté the Peppers: In a large skillet, heat the olive oil over medium heat. Add the sliced red and yellow bell peppers to the skillet and season with salt, pepper, and dried oregano. Sauté the peppers for about 10-15 minutes, stirring occasionally, until they’re tender and slightly caramelized. Remove them from the heat and set aside.
- Melt the Cheese: In the same skillet, or on a grill pan, place the slices of provolone cheese. Cook over medium heat for about 5-7 minutes, or until the cheese is bubbling and starts to turn golden brown. Keep an eye on it to prevent burning.
- Combine and Serve: Once the cheese is melted and golden, carefully transfer it to a serving platter. Top the melted provolone with the sautéed peppers. Garnish with freshly chopped parsley for added color and flavor.
- Serve with Bread: Serve your Provoleta Con Pimientos hot, alongside slices of crusty bread for dipping. This will allow your guests to enjoy every gooey, cheesy bite.
Extra Tips:
When preparing Provoleta Con Pimientos, feel free to experiment with the types of peppers you use. Adding a mix of colors not only enhances the visual appeal but also offers a variety of flavors.
For a bit of heat, consider including a sliced jalapeño pepper or a sprinkle of red pepper flakes. Additionally, if you prefer a smoky flavor, try grilling the cheese and peppers instead of sautéing them. This will add an extra layer of depth to the dish, making it even more delicious. Enjoy your cooking!
Locro (Argentinian Stew)
Locro is a traditional Argentinian stew that has deep roots in the country’s culinary history. It’s particularly popular during national celebrations and is often enjoyed on the May Revolution anniversary and Independence Day. This hearty dish is a comforting blend of vegetables, meats, and spices that warms the soul. The base typically consists of corn, beans, and potatoes, making it a nutritious and filling meal.
The origins of Locro can be traced back to indigenous cultures, and over the years, it has been adapted with various regional ingredients. Each family may have their own secret twist, but the essence remains the same—creating a dish that brings people together. This recipe serves 4-6 people, making it perfect for family gatherings or cozy dinners with friends.
Ingredients
- 1 cup dried white beans
- 1 cup corn kernels (fresh or frozen)
- 2 large potatoes, diced
- 1 large onion, chopped
- 2 cloves garlic, minced
- 1 cup diced pumpkin or butternut squash
- 1/2 cup chorizo, sliced
- 1/2 cup bacon, diced
- 1 teaspoon smoked paprika
- 1 teaspoon cumin
- 1 bay leaf
- Salt and pepper to taste
- 4 cups vegetable or chicken broth
- Fresh parsley, chopped (for garnish)
Cooking Instructions
- Soak the Beans: Begin by soaking the dried white beans in water overnight to soften them. If you’re short on time, you can use the quick soak method by boiling them for 2 minutes, then letting them sit for 1 hour.
- Prepare the Base: In a large pot, heat a tablespoon of oil over medium heat. Add the chopped onion and minced garlic, sautéing until the onion becomes translucent and fragrant, about 5 minutes.
- Cook the Meats: Add the diced bacon and sliced chorizo to the pot. Cook until the meats are browned and crispy, which should take about 5-7 minutes. This will add a rich flavor to the stew.
- Add Vegetables and Spices: Stir in the diced potatoes, pumpkin, corn, soaked beans, smoked paprika, cumin, and bay leaf. Mix everything together well to guarantee the spices coat the vegetables evenly.
- Pour in the Broth: Add the vegetable or chicken broth to the pot. Bring the mixture to a boil, then reduce the heat to a simmer. Cover the pot and let it cook for about 1.5 to 2 hours, or until the beans and vegetables are tender.
- Season and Serve: Once the stew is cooked, taste it and adjust the seasoning with salt and pepper as needed. Remove the bay leaf before serving. Ladle the Locro into bowls and garnish with fresh parsley.
Extra Tips
When preparing Locro, feel free to customize the ingredients based on your preferences or what you have on hand. You can include other vegetables like carrots or zucchini, and adjust the type of meat for a vegetarian version by omitting the bacon and chorizo.
Gently simmering the stew allows the flavors to meld beautifully, so be patient during the cooking process. Additionally, Locro tastes even better the next day, making it a great dish to make ahead of time!
Humita En Chala (Corn and Cheese Tamales)

Humita en Chala, a delectable dish from Argentina, features a delightful combination of corn and cheese wrapped in corn husks. This traditional dish not only highlights the flavors of fresh corn but also showcases the culinary techniques passed down through generations in Argentine cuisine. The soft, moist texture of the tamales is complemented by the creamy cheese, making it a comforting and satisfying meal that can be enjoyed by all.
Making Humita en Chala is a wonderful way to experience the authentic flavors of Argentina. These tamales can be served as a main dish or a side, and they’re often enjoyed during family gatherings and festive occasions. The process of wrapping the mixture in corn husks adds a unique touch, allowing the flavors to meld beautifully during cooking. With the right ingredients and a little patience, you can recreate this classic dish in your own kitchen.
Ingredients (Serving Size: 4-6 people)
- 2 cups fresh corn kernels (or 1 can of corn, drained)
- 1 cup cornmeal (masa harina)
- 1 cup milk
- 1 cup crumbled cheese (such as queso fresco or feta)
- 1 small onion, finely chopped
- 2 tablespoons butter
- 2 teaspoons baking powder
- 1 teaspoon salt
- 1/4 teaspoon black pepper
- 10-12 dried corn husks, soaked in warm water for 30 minutes
Cooking Instructions
- Prepare the Corn Husks: Begin by soaking the dried corn husks in warm water for about 30 minutes. This softens them and makes them pliable for wrapping later. After soaking, drain and lay them flat on a clean surface.
- Make the Corn Mixture: In a blender or food processor, combine the fresh corn kernels (or canned corn), milk, and half of the chopped onion. Blend until you achieve a smooth mixture. In a large mixing bowl, combine the cornmeal, baking powder, salt, and black pepper. Slowly pour the blended corn mixture into the dry ingredients and mix until well incorporated.
- Add Cheese and Onion: Gently fold in the crumbled cheese and the remaining chopped onion into the corn mixture. This will add flavor and texture to the tamales. Confirm the ingredients are evenly mixed.
- Assemble the Tamales: Take a soaked corn husk and lay it flat. Spoon about 2-3 tablespoons of the corn mixture in the center of the husk. Fold the sides of the husk over the mixture, then fold the bottom up, securing the tamale. Repeat this process with the remaining husks and mixture.
- Steam the Tamales: Place a steamer basket over a pot of boiling water, ensuring that the water doesn’t touch the bottom of the basket. Arrange the tamales upright in the steamer, with the open ends facing up. Cover the tamales with a damp cloth and steam for about 30-40 minutes, or until the tamales are firm and easily pull away from the husks.
- Serve: Once cooked, remove the tamales from the steamer and let them cool for a few minutes. Serve them warm, either on their own or accompanied by a fresh salsa or guacamole.
Extra Tips
When preparing Humita en Chala, using fresh corn will yield the best flavor, but frozen corn can be a convenient alternative if fresh isn’t available. Confirm that the corn husks are soaked properly, as this will prevent them from tearing during the wrapping process.
If you prefer a spicier version, consider adding diced jalapeños or a pinch of cayenne pepper to the corn mixture. Enjoy experimenting with different types of cheese for varied flavors, and don’t hesitate to pair the tamales with traditional Argentine sauces for an authentic touch!
Empanadas De Espinaca (Spinach Empanadas)

Empanadas de Espinaca, or spinach empanadas, are a popular and delicious dish in Argentinian cuisine. These savory pastries are filled with a flavorful mixture of spinach, cheese, and spices, all wrapped in a golden, flaky crust. They make for a perfect appetizer, snack, or even a light meal, appealing to both vegetarians and meat lovers alike. The combination of textures and flavors in these empanadas is sure to delight your taste buds and impress your guests.
Creating empanadas from scratch may seem intimidating, but with a little preparation, you can whip up a batch that rivals those found in local Argentinian eateries. Whether baked or fried, these empanadas are versatile and can be served with chimichurri sauce or a tangy salsa for added flavor. Gather your ingredients, roll up your sleeves, and get ready to enjoy a taste of Argentina in your own kitchen!
Ingredients (Serves 4-6)
- 2 cups fresh spinach, chopped
- 1 cup ricotta cheese
- 1 cup mozzarella cheese, shredded
- 1 small onion, finely chopped
- 2 cloves garlic, minced
- 2 tablespoons olive oil
- 1 teaspoon salt
- ½ teaspoon black pepper
- ½ teaspoon nutmeg
- 1 package of empanada dough (about 20 discs)
- 1 egg, beaten (for egg wash)
Cooking Instructions
1. Sauté the Spinach and Onions**: In a large skillet, heat the olive oil over medium heat. Add the finely chopped onion and sauté** until it becomes translucent, about 3-4 minutes.
Then, add the minced garlic and chopped spinach. Cook until the spinach wilts down, which should take about 2-3 minutes. Remove the skillet from heat and let the mixture cool slightly.
2. Prepare the Filling****: In a mixing bowl, combine the cooked spinach mixture with ricotta cheese, mozzarella cheese, salt, pepper, and nutmeg. Mix everything together until well combined.
This filling should be creamy and flavorful, providing the perfect contrast to the crispy pastry.
3. Assemble the Empanadas: Preheat your oven to 375°F (190°C). Take one empanada disc and place a generous tablespoon of the filling in the center.
Be careful not to overfill, as this can cause the empanadas to burst during cooking. Fold the disc in half to create a half-moon shape and press the edges together to seal. You can crimp the edges with a fork or your fingers for a decorative touch.
Repeat this step with the remaining discs and filling.
4. Brush and Bake: Place the assembled empanadas on a baking sheet lined with parchment paper. Brush the tops with the beaten egg to give them a golden color while baking.
Bake in the preheated oven for about 20-25 minutes, or until the empanadas are golden brown and crispy.
5. Serve: Once baked, remove the empanadas from the oven and let them cool for a few minutes before serving.
These empanadas can be enjoyed warm or at room temperature, making them ideal for gatherings or meal prep.
Extra Tips
When making empanadas, it’s crucial to keep the dough cold until you’re ready to use it, as this helps achieve that perfect flaky texture.
If you’re short on time, you can use store-bought dough, but homemade dough can elevate the dish remarkably. Additionally, feel free to experiment with the filling by adding ingredients like chopped bell peppers or herbs to enhance the flavor.
These empanadas can also be frozen before baking; simply bake them straight from the freezer for a quick and convenient meal later on.
Pisto (Vegetable Ratatouille)
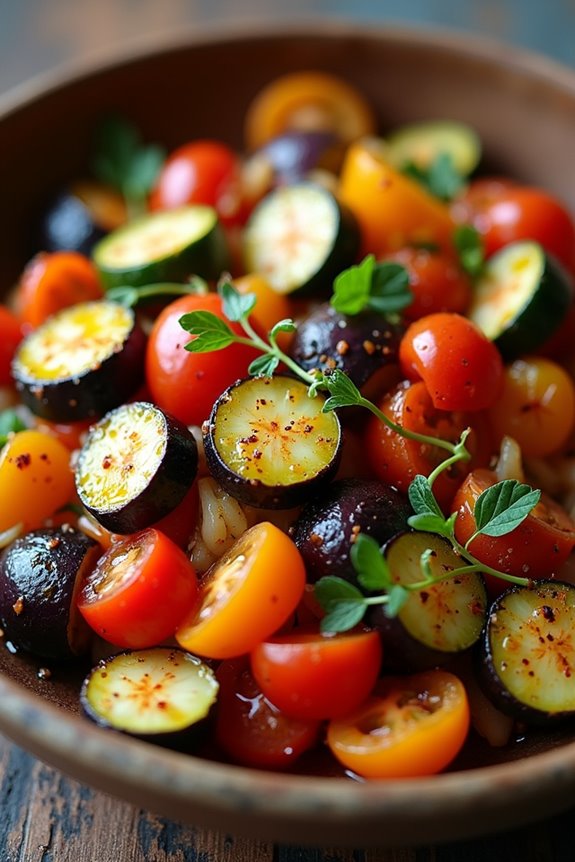
Pisto, a traditional Argentinian vegetable ratatouille, is a vibrant and hearty dish that showcases the rich flavors of fresh vegetables. Typically served as a main or side dish, it’s a wonderful way to incorporate a variety of seasonal produce into your meals.
Originating from the Spanish dish “pisto manchego,” the Argentinian version has adapted to include local vegetables and herbs, making it a beloved favorite in many households.
This dish isn’t only delicious but also incredibly versatile. Pisto can be served warm or at room temperature, making it perfect for gatherings and potlucks. Additionally, it pairs beautifully with crusty bread, rice, or even as a topping for grilled meats.
The beautiful colors and textures of the vegetables make it as appealing to the eye as it’s to the palate.
Ingredients (serving size: 4-6 people)
- 2 tablespoons olive oil
- 1 medium onion, diced
- 2 garlic cloves, minced
- 1 bell pepper (red or green), diced
- 1 medium zucchini, diced
- 1 medium eggplant, diced
- 2 medium tomatoes, diced
- 1 teaspoon smoked paprika
- Salt and pepper to taste
- Fresh basil or parsley for garnish
Cooking Instructions
- Prepare the Vegetables: Begin by washing and dicing all the vegetables. Make sure to cut the onion, garlic, bell pepper, zucchini, eggplant, and tomatoes into uniform pieces for even cooking. Set them aside in separate bowls to streamline the cooking process.
- Sauté the Aromatics: In a large skillet or sauté pan, heat the olive oil over medium heat. Once hot, add the diced onion and minced garlic. Sauté for about 3-4 minutes until the onions become translucent and the garlic is fragrant, stirring occasionally to prevent burning.
- Add the Bell Pepper: Next, add the diced bell pepper to the skillet. Cook for another 3-4 minutes until it softens. The bell pepper will add sweetness and color to the dish.
- Incorporate the Eggplant: Now, add the diced eggplant, stirring well to combine with the other vegetables. Cook for about 5 minutes, allowing the eggplant to absorb the flavors and soften. If the mixture gets too dry, you can add a splash of water or vegetable broth.
- Add Zucchini and Tomatoes: Once the eggplant is tender, add the diced zucchini and tomatoes to the skillet. Sprinkle in the smoked paprika, salt, and pepper to taste. Stir everything together and let it cook for an additional 10-15 minutes, or until all the vegetables are tender and the flavors meld together.
- Garnish and Serve: Once cooked, remove the skillet from heat. Taste and adjust seasoning if necessary. Garnish with fresh basil or parsley before serving. Enjoy your pisto warm, or let it cool to serve at room temperature.
Extra Tips
For a richer flavor, consider adding a splash of balsamic vinegar or a pinch of red pepper flakes for some heat.
Feel free to customize the vegetable selection based on what you have on hand or what’s in season. Pisto is also excellent for meal prepping, as the flavors deepen when stored in the refrigerator, making it an ideal dish to enjoy throughout the week.
Berenjenas Al Escabeche (Pickled Eggplants)
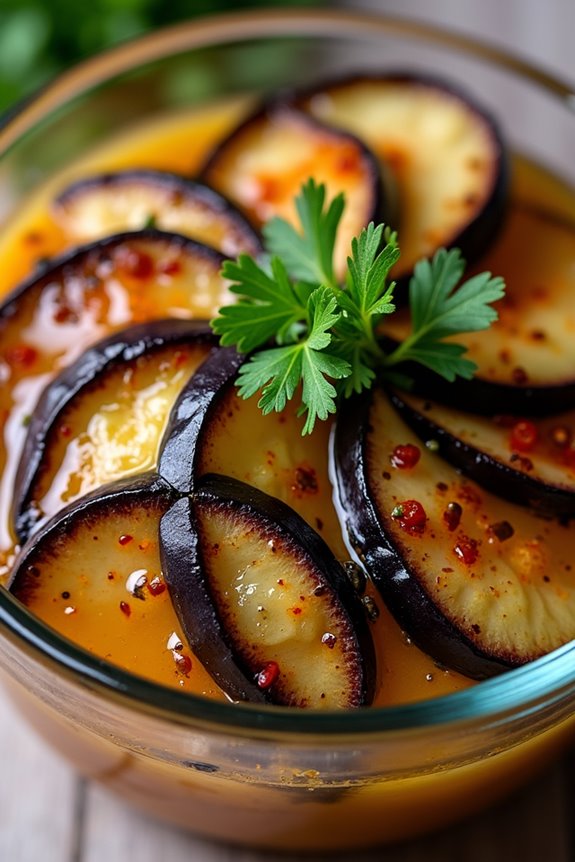
Berenjenas Al Escabeche is a traditional Argentinian dish that highlights the rich flavors of pickled vegetables, particularly eggplants. This dish combines the natural sweetness of eggplants with a tangy marinade made from vinegar, oil, and spices, creating a delightful appetizer or side dish that can be enjoyed year-round.
The pickling process not only preserves the eggplants but also enhances their flavor, making them a popular choice in many Argentinian households.
Preparing Berenjenas Al Escabeche is a straightforward process that involves slicing the eggplants and marinating them in a flavorful mixture. This dish can be served cold or at room temperature, making it an ideal accompaniment to grilled meats, sandwiches, or as part of a charcuterie board.
Once you try this dish, you’ll understand why it’s a staple in Argentinian cuisine.
Ingredients (Serves 4-6):
- 2 large eggplants
- 1 cup white vinegar
- 1 cup water
- 1/2 cup olive oil
- 2 cloves garlic, minced
- 1 teaspoon dried oregano
- 1 teaspoon paprika
- 1/2 teaspoon red pepper flakes (optional)
- Salt to taste
- Fresh parsley or cilantro for garnish (optional)
Cooking Instructions:
1. Prepare the Eggplants: Start by washing the eggplants thoroughly. Cut off the ends and slice the eggplants into 1/4-inch thick rounds or half-moons, depending on your preference.
Place the slices in a colander, sprinkle them with salt, and let them sit for about 30 minutes to draw out excess moisture and bitterness. After 30 minutes, rinse the salt off and pat the slices dry with a paper towel.
2. Cook the Eggplants: In a large pot, bring water to a boil. Add the eggplant slices and blanch them for about 3-5 minutes, until they’re slightly tender but still firm.
Drain the eggplants and let them cool down completely. This blanching step helps to soften the eggplants and prepare them for the pickling process.
3. Prepare the Marinade: In a separate bowl, whisk together the white vinegar, water, olive oil, minced garlic, dried oregano, paprika, red pepper flakes, and salt.
Taste the marinade and adjust the seasoning as needed. The marinade should have a nice balance of tanginess and flavor.
4. Combine and Marinate: Once the eggplants are cool, place them in a clean glass jar or container. Pour the marinade over the eggplants, making sure they’re fully submerged.
If necessary, you can add a little more vinegar or water to guarantee the eggplants are covered. Seal the jar tightly.
5. Refrigerate: Place the jar in the refrigerator and let the eggplants marinate for at least 24 hours, although 48 hours is recommended for the best flavor.
The longer they sit, the more intense the flavors will become.
Extra Tips:
When making Berenjenas Al Escabeche, feel free to experiment with additional spices and herbs to customize the flavor to your liking.
You can add sliced onions, bell peppers, or even carrots to the pickling mixture for a more colorful and varied dish. This recipe also keeps well in the refrigerator for up to two weeks, so you can make a large batch and enjoy it throughout the week.
Always serve the pickled eggplants chilled or at room temperature for the best taste.
Sopa De Zapallo (Pumpkin Soup)

Sopa de Zapallo is a traditional Argentinian pumpkin soup that embodies the rich flavors and comforting warmth of South American cuisine. This dish is especially popular during the fall season when pumpkins are in abundance. The creamy texture of the soup, combined with the sweetness of the pumpkin, makes it a delightful starter or a main course when paired with crusty bread.
Adding spices like cumin and a touch of cream enhances the flavor profile, making it a comforting meal for families and friends alike. Making Sopa de Zapallo isn’t only simple but also allows you to showcase the natural sweetness of the pumpkin. You can customize the soup to your liking by adding different herbs or spices, or even incorporating other vegetables for added nutrition.
This recipe is perfect for serving 4 to 6 people, making it an excellent choice for gatherings or cozy dinners at home.
Ingredients (Serves 4-6)
- 1 medium pumpkin (about 3-4 pounds), peeled and diced
- 1 large onion, chopped
- 2 cloves garlic, minced
- 4 cups vegetable broth or chicken broth
- 1 teaspoon ground cumin
- 1/2 teaspoon ground nutmeg
- Salt and pepper to taste
- 1 tablespoon olive oil
- 1/2 cup cream (optional for garnish)
- Fresh parsley or cilantro for garnish
Cooking Instructions
- Prepare the Pumpkin: Start by peeling and dicing the pumpkin into small cubes. This will help the pumpkin cook evenly and blend smoothly later on. Make sure to remove the seeds and any stringy bits from the inside.
- Sauté the Aromatics: In a large pot, heat the olive oil over medium heat. Add the chopped onion and sauté for about 5 minutes until it becomes translucent. Then, add the minced garlic and cook for an additional minute, stirring frequently to prevent burning.
- Cook the Pumpkin: Add the diced pumpkin to the pot with the sautéed onions and garlic. Stir to combine, then sprinkle in the ground cumin and nutmeg. Cook for about 5 minutes, allowing the pumpkin to absorb the flavors of the spices.
- Add the Broth: Pour in the vegetable or chicken broth, ensuring that the pumpkin is fully submerged. Bring the mixture to a boil, then reduce the heat to low. Cover the pot and let it simmer for about 20-25 minutes, or until the pumpkin is tender.
- Blend the Soup: Once the pumpkin is cooked, use an immersion blender to puree the soup directly in the pot until it reaches a smooth and creamy consistency. If you don’t have an immersion blender, you can carefully transfer the soup in batches to a countertop blender.
- Season and Serve: Taste the soup and season with salt and pepper as needed. If desired, swirl in the cream for added richness. Serve hot, garnished with fresh parsley or cilantro.
Extra Tips
When making Sopa de Zapallo, feel free to experiment with different spices like paprika or cayenne for a kick of heat. You can also add other vegetables, such as carrots or sweet potatoes, to enhance the flavor and nutrition of the soup.
For a vegan version, simply omit the cream or substitute it with coconut milk for a tropical twist. Enjoy this heartwarming dish on its own or with a side of crusty bread for a satisfying meal!
Ensalada Rusa (Russian Salad)
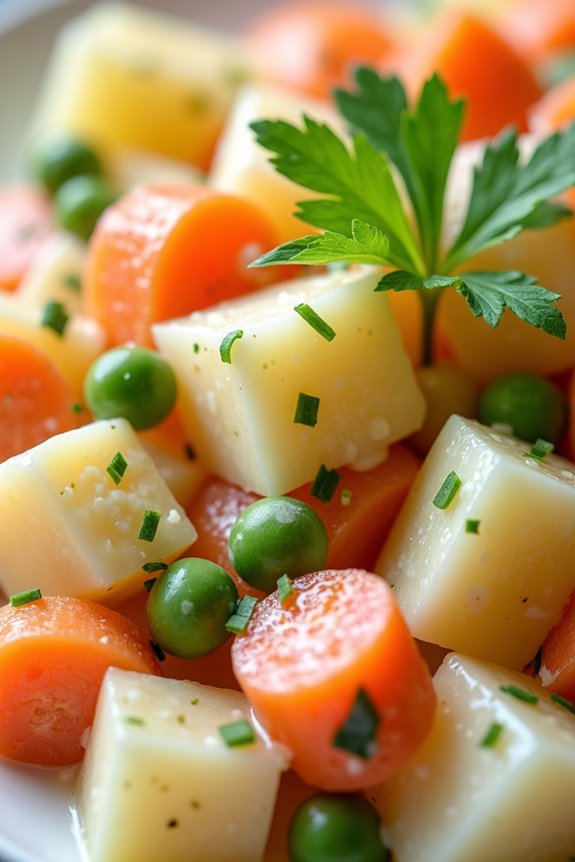
Ensalada Rusa, or Russian Salad, is a beloved dish in Argentina, showcasing the culinary fusion that thrives in the country. This vibrant salad typically combines a variety of vegetables, making it a versatile and colorful addition to any meal. Often served as an appetizer or side dish, it’s particularly popular during festive occasions and family gatherings, where it can be savored by everyone. The creamy dressing and tender vegetables create a delightful combination that’s both invigorating and satisfying.
The origins of Ensalada Rusa can be traced back to the Russian imperial cuisine, but it has been adapted over time to fit the Argentinian palate. Each family might’ve its own twist on the recipe, incorporating different ingredients based on personal preferences. The base remains consistent, typically featuring potatoes, carrots, and peas, all mingled together in a creamy mayonnaise dressing. Whether served at a barbecue or a holiday feast, this dish is sure to please the crowd.
Ingredients (Serves 4-6)
- 4 medium potatoes
- 3 medium carrots
- 1 cup frozen peas
- 1/2 cup diced pickles (gherkin or dill)
- 1/2 cup mayonnaise
- 1 tablespoon mustard
- Salt to taste
- Pepper to taste
- Chopped parsley for garnish (optional)
Cooking Instructions
- Prepare the Vegetables: Begin by washing the potatoes and carrots thoroughly. Peel the carrots and cut both the potatoes and carrots into small cubes. This guarantees that they cook evenly and fit well into the salad.
- Boil the Potatoes and Carrots: In a large pot, bring water to a boil. Add the diced potatoes and carrots, and cook them until they’re tender, about 10-15 minutes. To check for doneness, poke them with a fork; they should be soft but not mushy. Once cooked, drain the vegetables and let them cool.
- Cook the Peas: In the same pot, add the frozen peas and cook them for about 2-3 minutes until they’re bright green and heated through. Drain and allow them to cool alongside the potatoes and carrots.
- Combine the Ingredients: In a large mixing bowl, combine the cooled potatoes, carrots, and peas. Add the diced pickles for an additional crunch and flavor.
- Prepare the Dressing: In a separate bowl, mix the mayonnaise, mustard, salt, and pepper until well combined. Adjust the seasoning according to your taste preferences.
- Mix Everything Together: Pour the dressing over the vegetable mixture and gently fold everything together using a spatula. Be careful not to mash the vegetables; you want to keep them intact for texture.
- Chill and Serve: Once combined, cover the bowl with plastic wrap and refrigerate the salad for at least 30 minutes to allow the flavors to meld. Before serving, garnish with chopped parsley if desired.
Extra Tips
For a unique twist on Ensalada Rusa, consider adding diced cooked chicken or ham for extra protein. You can also experiment with different vegetables such as corn or bell peppers to suit your taste.
If you prefer a lighter version, use Greek yogurt instead of mayonnaise for the dressing. Finally, verify that all ingredients are well chilled before serving to enhance the invigorating quality of the salad. Enjoy your culinary creation!
Choclo Con Queso (Corn With Cheese)

Choclo Con Queso, a delightful Argentinian dish, celebrates the sweet, vibrant flavor of fresh corn combined with rich, creamy cheese. This traditional recipe is often enjoyed as a side dish or as a light snack, showcasing the simplicity and deliciousness of Argentine cuisine.
The dish brings together the freshness of corn, typically used in its natural form, and melty cheese, which enhances the dish’s flavor and texture, making it a favorite among locals and visitors alike. In Argentina, choclo (corn) is a staple ingredient, often enjoyed roasted or boiled.
The addition of cheese elevates this simple dish into something truly special. While variations exist depending on the region, the core ingredients remain consistent, guaranteeing that each bite is a taste of Argentina. Whether served at a family gathering or a festive occasion, Choclo Con Queso is sure to impress and satisfy.
Ingredients (Serves 4-6)
- 4 large ears of fresh corn
- 1 cup of crumbled queso fresco (or any soft cheese)
- 2 tablespoons of unsalted butter
- 1 teaspoon of salt
- 1 teaspoon of black pepper
- Fresh parsley or cilantro for garnish (optional)
Cooking Instructions
- Prepare the Corn: Begin by husking the corn and removing all the silk. Rinse the ears of corn under cold water to remove any remaining debris. This will assure that the corn is clean and ready for cooking.
- Boil the Corn: Fill a large pot with water and add a teaspoon of salt. Bring the water to a rolling boil. Once boiling, carefully add the prepared corn and cook for about 8-10 minutes, or until the kernels are tender but still crisp. This helps to retain the natural sweetness of the corn.
- Drain and Cool: After boiling, remove the corn from the pot and drain well. Allow it to cool for a few minutes until you can handle it safely. This will make it easier to handle when adding the cheese.
- Add Butter and Seasoning: While the corn is still warm, spread the unsalted butter evenly over the corn. Sprinkle with black pepper to taste. This step enhances the flavor and makes the dish more indulgent.
- Top with Cheese: Generously sprinkle the crumbled queso fresco over the buttered corn. The heat from the corn will slightly melt the cheese, creating a deliciously creamy layer.
- Garnish and Serve: If desired, chop fresh parsley or cilantro and sprinkle it over the finished dish for a pop of color and additional flavor. Serve warm and enjoy the delightful combination of sweet corn and savory cheese.
Extra Tips
For the best flavor, try to use fresh, in-season corn, as it will be sweeter and juicier than out-of-season corn. If queso fresco is hard to find, you can substitute it with other soft cheeses like feta or even mozzarella for a different texture.
Additionally, for a twist, consider adding a dash of chili powder or a squeeze of lime juice for a little extra kick. Enjoy experimenting with this dish to suit your taste!
Pimientos Rellenos (Stuffed Peppers)

Pimientos Rellenos, or stuffed peppers, are a classic dish in Argentinian cuisine that showcases a delightful combination of flavors and textures. These vibrant bell peppers are filled with a savory mixture of ingredients, often including rice, vegetables, and meat, making them a hearty and satisfying meal.
The beauty of this dish lies in its versatility, allowing for various fillings based on personal preferences or what’s available in your pantry. Traditionally, Pimientos Rellenos are baked until the peppers are tender and the filling is heated through, resulting in a colorful presentation that’s sure to impress. They can be served as a main course alongside a fresh salad or as a side dish.
This recipe will guide you through creating a delicious version of this beloved Argentinian dish, perfect for a serving size of 4-6 people.
Ingredients:
- 4-6 medium bell peppers (any color)
- 1 cup cooked rice
- 1 pound ground beef or turkey
- 1 small onion, finely chopped
- 2 cloves garlic, minced
- 1 cup diced tomatoes (fresh or canned)
- 1 teaspoon paprika
- 1 teaspoon cumin
- Salt and pepper to taste
- 1 cup shredded cheese (mozzarella or cheddar)
- Fresh parsley, for garnish
Cooking Instructions:
- Prepare the Peppers: Preheat your oven to 375°F (190°C). Wash the bell peppers, then cut the tops off and remove the seeds and membranes. Set them aside in a baking dish.
- Cook the Filling: In a large skillet, heat a tablespoon of oil over medium heat. Add the chopped onion and cook until softened, about 3-4 minutes. Stir in the minced garlic and cook for an additional minute until fragrant.
- Add Meat and Spices: Add the ground beef or turkey to the skillet, breaking it up with a spoon. Cook until browned and fully cooked, about 7-8 minutes. Season with paprika, cumin, salt, and pepper, stirring to combine.
- Incorporate Rice and Tomatoes: Add the cooked rice and diced tomatoes to the meat mixture. Stir well to combine all ingredients and let it simmer for about 5 minutes, allowing flavors to meld. Taste and adjust seasoning if necessary.
- Stuff the Peppers: Carefully spoon the filling into each prepared bell pepper, packing it in gently. Leave a little space at the top, as the filling may expand while cooking.
- Bake the Peppers: Sprinkle the shredded cheese generously over the stuffed peppers. Cover the baking dish with aluminum foil and bake in the preheated oven for 25 minutes. Remove the foil and bake for an additional 10-15 minutes, or until the peppers are tender and the cheese is bubbly and golden.
- Serve: Once done, remove from the oven and let cool for a few minutes. Garnish with fresh parsley before serving.
Extra Tips: To enhance the flavor of your Pimientos Rellenos, consider adding spices like oregano or chili flakes to the filling for an extra kick. You can also experiment with different fillings such as quinoa, beans, or even a mix of vegetables for a vegetarian version.
Additionally, if you have leftover filling, it can be served as a side dish or mixed into a salad. Enjoy your delightful creation!
Tortilla De Patatas (Potato Tortilla)

Tortilla De Patatas, also known as Spanish Tortilla, is a classic dish that hails from Spain but is beloved in Argentina as well. This hearty, flavorful omelet is made with simple ingredients that come together to create a comforting and satisfying meal. The main components are potatoes, onions, and eggs, which are cooked to perfection and can be enjoyed at any time of the day—be it breakfast, lunch, or dinner.
The charm of this dish lies in its versatility; it can be served warm or at room temperature, making it a great option for gatherings or picnics.
Making Tortilla De Patatas is an easy process, but it requires some patience and care to achieve the perfect texture and flavor. The key is to guarantee that the potatoes are tender and well-cooked without being overly browned. This dish isn’t only filling but also serves as a canvas for various additions, such as herbs, peppers, or even cheese, depending on your preference.
With a few simple steps, you can create a delicious Tortilla De Patatas that will impress your family and friends.
Ingredients (Serves 4-6):
- 4 large potatoes
- 1 medium onion
- 6 large eggs
- ½ cup olive oil
- Salt to taste
- Pepper to taste
Cooking Instructions:
- Prepare the Potatoes and Onion: Peel the potatoes and slice them thinly, about 1/8 inch thick. Peel and finely chop the onion. This will guarantee they cook evenly and blend well in the tortilla.
- Cook the Potatoes and Onion: In a large skillet, heat the olive oil over medium heat. Add the sliced potatoes and onions, making sure they’re covered in oil. Cook gently for about 15-20 minutes, stirring occasionally, until the potatoes are tender but not browned. You want them to be soft, so lower the heat if necessary.
- Drain Excess Oil: Once the potatoes and onions are cooked, use a slotted spoon to transfer them to a bowl, leaving as much oil in the skillet as possible. Allow them to cool slightly before adding to the egg mixture.
- Beat the Eggs: In a separate bowl, crack the eggs and beat them well. Season with salt and pepper. Fold in the cooled potato and onion mixture until everything is well combined.
- Cook the Tortilla: In the same skillet, add a little more olive oil if needed and heat over medium heat. Pour the egg, potato, and onion mixture into the skillet, spreading it evenly. Cook for about 5-7 minutes, or until the edges start to set and the bottom is golden brown.
- Flip the Tortilla: To flip the tortilla, place a large plate over the skillet and carefully invert the tortilla onto the plate. Slide it back into the skillet to cook the other side for another 5-7 minutes, until it’s fully set and golden brown.
- Serve: Once cooked, slide the tortilla onto a cutting board and let it rest for a few minutes. Cut into wedges and serve warm or at room temperature.
Extra Tips:
For the best results, choose waxy potatoes such as Yukon Gold or Red Bliss, as they hold their shape better during cooking. Additionally, feel free to experiment with flavors by adding herbs like parsley or chives, or other vegetables such as bell peppers.
Remember to let the tortilla sit for a few minutes before cutting; this will help it firm up and make slicing easier. Enjoy your Tortilla De Patatas with a side salad or as part of a tapas spread!
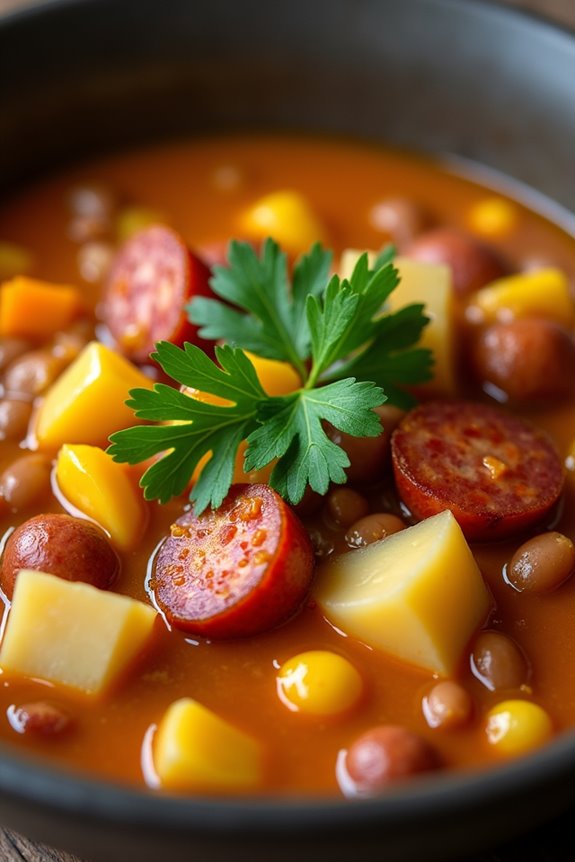
Guiso De Lentejas (Lentil Stew)
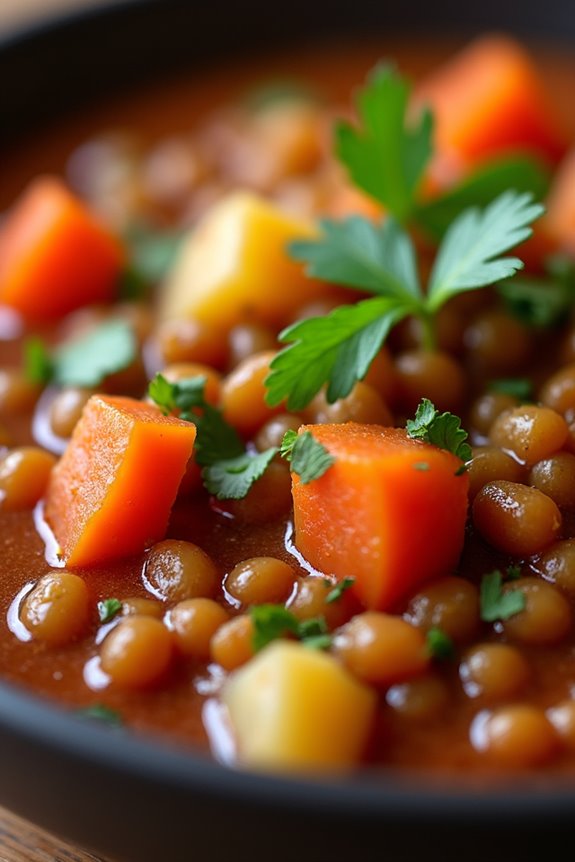
Guiso De Lentejas, or Lentil Stew, is a hearty and nutritious dish that’s a staple in Argentinian cuisine. This comforting stew is packed with protein-rich lentils and a variety of vegetables, making it an excellent choice for a wholesome meal. It’s perfect for chilly evenings and can be enjoyed as a main dish or served alongside crusty bread.
Each family may have its own special twist on the recipe, but the core ingredients remain the same, allowing for flexibility and creativity in the kitchen. This dish isn’t only easy to prepare but also very satisfying. The lentils provide a rich texture and absorb the flavors of the herbs and spices beautifully.
Whether you’re a seasoned chef or a novice cook, Guiso De Lentejas is a great dish to try. With its vibrant colors and comforting aroma, this stew is sure to become a favorite in your household.
Ingredients (Serves 4-6):
- 1 cup dried lentils, rinsed and drained
- 1 tablespoon olive oil
- 1 medium onion, chopped
- 2 cloves garlic, minced
- 1 medium carrot, diced
- 1 medium bell pepper, diced (red or green)
- 2 medium potatoes, peeled and diced
- 1 can (14 oz) diced tomatoes
- 4 cups vegetable broth or water
- 1 teaspoon ground cumin
- 1 teaspoon smoked paprika
- Salt and pepper to taste
- Fresh parsley, chopped for garnish
Cooking Instructions:
- Prepare the Lentils: Begin by rinsing the dried lentils under cold water. This helps remove any dust or impurities. Set them aside to drain while you prepare the other ingredients.
- Sauté the Vegetables: In a large pot or Dutch oven, heat the olive oil over medium heat. Add the chopped onion and sauté for about 3-4 minutes until it becomes translucent. Then, add the minced garlic and cook for an additional minute, stirring frequently to avoid burning.
- Add Remaining Vegetables: Incorporate the diced carrot and bell pepper into the pot. Cook for another 5 minutes, stirring occasionally, until the vegetables soften. This will enhance the flavor base of your stew.
- Combine Ingredients: Add the diced potatoes, rinsed lentils, diced tomatoes (with their juices), vegetable broth, ground cumin, and smoked paprika to the pot. Stir everything together until well combined.
- Simmer the Stew: Bring the mixture to a boil, then reduce the heat to low. Cover the pot and let it simmer for about 30-40 minutes, or until the lentils are tender and the potatoes are cooked through. Stir occasionally to prevent sticking.
- Season and Serve: Once the stew is ready, taste and adjust the seasoning with salt and pepper as needed. Remove from heat and let it sit for a few minutes before serving. Garnish with freshly chopped parsley for an added touch of flavor and color.
Extra Tips: When cooking Guiso De Lentejas, feel free to customize the vegetables according to your preferences or what you have on hand. Leafy greens like spinach or kale can be added in the last few minutes of cooking for extra nutrition.
Additionally, this stew can be made ahead of time and stored in the refrigerator for up to three days, allowing the flavors to meld even further. Simply reheat when ready to serve!
Ensalada De Tomate Y Cebolla (Tomato and Onion Salad)
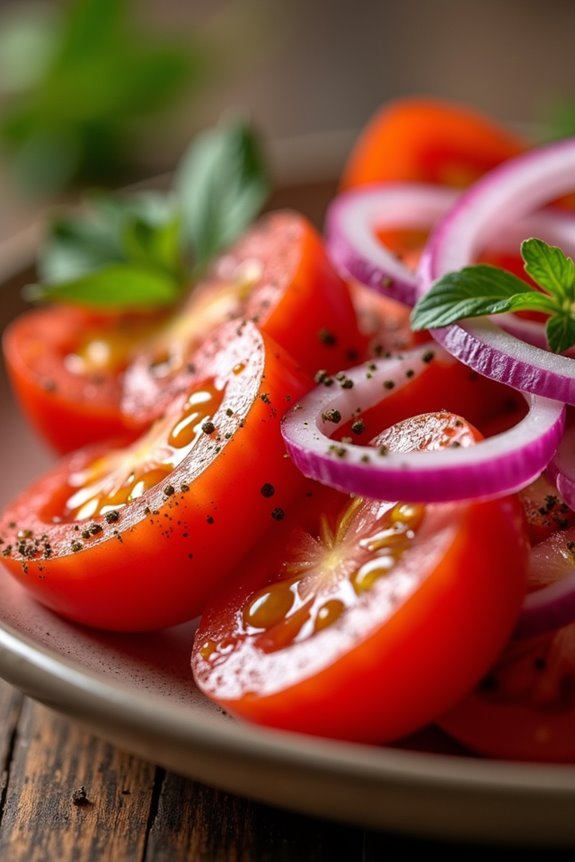
Ensalada De Tomate Y Cebolla is a crisp and vibrant salad that showcases the simplicity and deliciousness of its main ingredients: ripe tomatoes and pungent onions. This dish is a staple in Argentine cuisine, often served as a side alongside grilled meats or enjoyed as a light meal on warm days. The key to a great Ensalada De Tomate Y Cebolla lies in using the freshest ingredients and balancing the flavors with a touch of salt, olive oil, and vinegar.
The salad isn’t only quick to prepare but also wonderfully versatile. You can adjust the ingredients based on your personal preferences or what you have on hand. Adding herbs like parsley or oregano can enhance the flavor, while a dash of chili flakes adds a touch of heat for those who like a little spice. Whether you’re hosting a barbecue or simply looking for a revitalizing side dish, this salad is sure to please.
Ingredients (Serves 4-6):
- 4 large ripe tomatoes
- 1 large red onion
- 2 tablespoons of olive oil
- 1 tablespoon of red wine vinegar
- Salt to taste
- Freshly ground black pepper to taste
- Fresh parsley (optional, for garnish)
Cooking Instructions:
- Prepare the Vegetables: Begin by washing the tomatoes thoroughly under running water. Pat them dry with a paper towel. Next, slice the tomatoes into wedges or rounds, depending on your preference.
- Slice the Onion: Peel the red onion and slice it thinly. If you find the flavor of raw onion too strong, you can soak the slices in cold water for about 10 minutes to mellow the taste before draining and adding them to the salad.
- Combine Ingredients: In a large mixing bowl, gently combine the sliced tomatoes and onions. Make sure they’re evenly mixed to guarantee every bite has a balance of flavors.
- Dress the Salad: Drizzle the olive oil and red wine vinegar over the tomato and onion mixture. Season with salt and freshly ground black pepper to taste. Toss everything together gently to coat the vegetables in the dressing without breaking them apart.
- Rest Before Serving: Allow the salad to sit for about 10-15 minutes before serving. This resting time allows the flavors to meld together, enhancing the overall taste of the salad.
- Garnish and Serve: If desired, chop some fresh parsley and sprinkle it over the salad just before serving for a pop of color and added flavor. Serve the Ensalada De Tomate Y Cebolla chilled or at room temperature.
Extra Tips:
For an added layer of flavor, consider incorporating other ingredients such as sliced cucumbers, bell peppers, or even a sprinkle of feta cheese.
Experimenting with the vinegar type can also yield different flavor profiles; balsamic vinegar is a great alternative for a sweeter taste.
Finally, always remember to taste and adjust the seasoning according to your preference. Enjoy your crisp and vibrant Ensalada De Tomate Y Cebolla!
Batatas Al Horno (Roasted Sweet Potatoes)
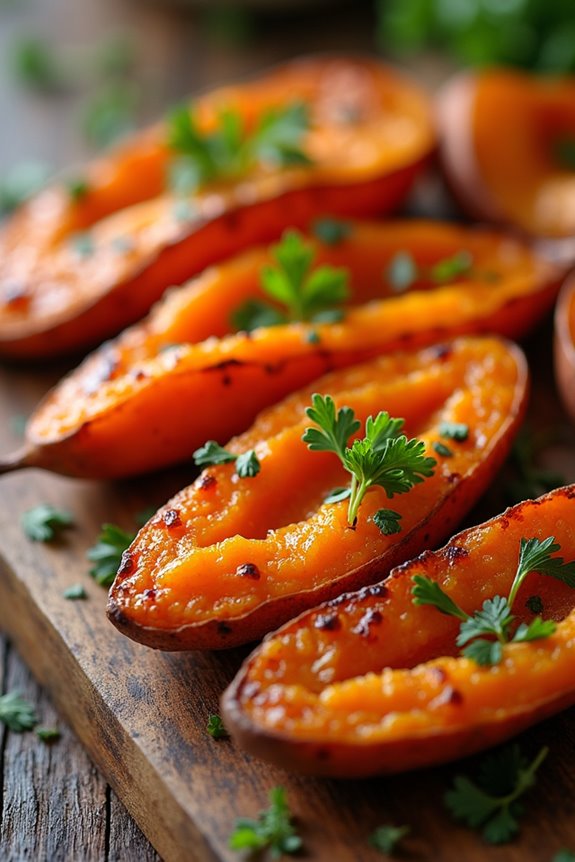
Batatas Al Horno, or roasted sweet potatoes, is a delightful and simple dish that showcases the natural sweetness and rich flavor of sweet potatoes. This dish is popular in Argentina and is often served as a side dish, complementing a variety of meats or other vegetable dishes.
The roasting process caramelizes the sugars in the sweet potatoes, creating a crispy exterior while keeping the inside tender and flavorful. It’s a fantastic choice for a cozy family dinner or a gathering with friends.
Preparing Batatas Al Horno is quite straightforward, making it an accessible dish for cooks of all skill levels. With just a handful of ingredients, you can create a side dish that not only tastes delicious but also brings a touch of Argentinian culinary tradition to your table.
Whether you’re looking for something to accompany your main course or a healthy snack, these roasted sweet potatoes will undoubtedly impress everyone.
Ingredients (serving size: 4-6 people)
- 4 medium sweet potatoes
- 3 tablespoons olive oil
- 1 teaspoon salt
- 1 teaspoon black pepper
- 1 teaspoon paprika (optional)
- 1 teaspoon garlic powder (optional)
- Fresh herbs for garnish (e.g., parsley or thyme)
Cooking Instructions
1. Preheat the Oven: Start by preheating your oven to 425°F (220°C). A hot oven is crucial for achieving that perfect roasted texture, giving the sweet potatoes a crispy exterior.
2. Prepare the Sweet Potatoes: Wash the sweet potatoes thoroughly under running water to remove any dirt. Peel them if you prefer, but leaving the skin on adds flavor and nutrients.
Cut the sweet potatoes into evenly sized cubes, roughly 1-inch in size, to guarantee they cook evenly.
3. Season the Sweet Potatoes: In a large mixing bowl, combine the cubed sweet potatoes with olive oil, salt, black pepper, and any optional seasonings such as paprika or garlic powder.
Toss everything together until the sweet potatoes are evenly coated with the oil and seasonings.
4. Arrange on a Baking Sheet: Spread the seasoned sweet potatoes in a single layer on a baking sheet lined with parchment paper. Make sure they’re not overcrowded, as this will help them roast rather than steam.
5. Roast the Sweet Potatoes: Place the baking sheet in the preheated oven and roast the sweet potatoes for about 25-30 minutes. Halfway through the cooking time, stir the sweet potatoes to guarantee even browning.
They should be fork-tender and golden brown when done.
6. Garnish and Serve: Once roasted, remove the sweet potatoes from the oven and let them cool for a few minutes. Transfer them to a serving dish and garnish with fresh herbs for an added touch of flavor and color.
Extra Tips
For an extra layer of flavor, consider adding a drizzle of honey or maple syrup over the roasted sweet potatoes just before serving. This enhances their natural sweetness and adds a delightful contrast to the savory seasonings.
Additionally, feel free to experiment with different spices or herbs according to your preference, as sweet potatoes pair well with a variety of flavors.