

Thanksgiving is a time for tradition, but it can also be an opportunity to try something new. Picture the comforting warmth of feijoada alongside the classic turkey or the delightful taste of pão de queijo as a starter. Brazilian flavors bring a fresh twist to familiar dishes, making your holiday table extra special. Let’s explore some unique recipes that could transform your Thanksgiving into a vibrant celebration of flavors. Trust me, you won’t want to miss out on these!
Feijoada
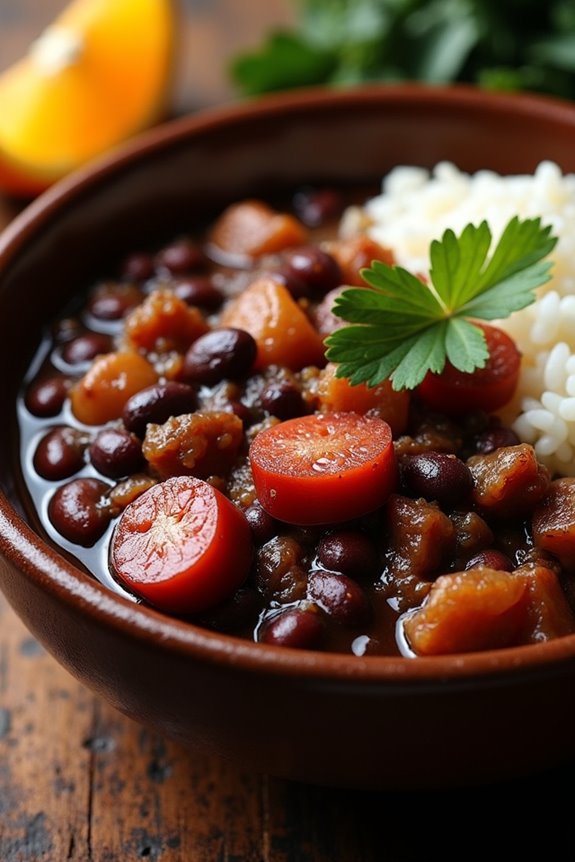
Feijoada is a traditional Brazilian stew that showcases the rich culinary heritage of the country. This hearty dish is made with black beans and a variety of meats, including pork and beef. Often served with rice, collard greens, and orange slices, feijoada is a beloved comfort food that brings friends and family together, especially during festive occasions. The depth of flavor and the combination of ingredients create a satisfying meal that reflects Brazil’s diverse culture.
The origins of feijoada can be traced back to Portuguese cuisine, but it has evolved into a unique Brazilian specialty. Each region of Brazil has its own variation, with different meats and spices added to create distinct flavors. Making feijoada requires some preparation, but the result is a delicious and filling meal that’s well worth the effort. Whether you’re hosting a gathering or simply want to enjoy a taste of Brazil, feijoada is a perfect choice.
Ingredients (serving size: 4-6 people)
- 1 lb black beans
- 1/2 lb pork shoulder, cut into cubes
- 1/2 lb chorizo sausage, sliced
- 1/2 lb smoked sausage, sliced
- 1/2 lb bacon, chopped
- 1 onion, chopped
- 4 cloves garlic, minced
- 2 bay leaves
- 1 teaspoon cumin
- 1 teaspoon black pepper
- 1 teaspoon paprika
- 4 cups water or chicken broth
- Salt to taste
- Cooked white rice (for serving)
- Collard greens, sautéed (for serving)
- Orange slices (for garnish)
Cooking Instructions
- Prepare the Black Beans: Rinse the black beans under cold water and soak them overnight in a large bowl with enough water to cover them completely. This will help soften the beans and reduce cooking time.
- Cook the Meats: In a large pot, cook the chopped bacon over medium heat until crispy. Remove the bacon and set it aside, leaving the rendered fat in the pot. Add the pork shoulder to the pot and brown it on all sides for about 5-7 minutes. Then, add the sliced chorizo and smoked sausage, cooking for an additional 3-4 minutes until browned.
- Sauté Onions and Garlic: Add the chopped onions to the pot and sauté until they become translucent, about 5 minutes. Stir in the minced garlic and cook for another minute until fragrant.
- Combine Ingredients: Drain the soaked black beans and add them to the pot along with the cooked bacon, bay leaves, cumin, black pepper, and paprika. Pour in the water or chicken broth, ensuring all ingredients are submerged.
- Simmer the Stew: Bring the mixture to a boil, then reduce the heat to low. Cover the pot and let the feijoada simmer for about 2-3 hours, stirring occasionally, until the beans are tender and the flavors meld together. Add salt to taste towards the end of cooking.
- Prepare the Sides: While the feijoada is simmering, prepare the white rice and sauté the collard greens in a separate pan with a little olive oil, garlic, and salt until wilted.
- Serve: Once the feijoada is ready, serve it hot in bowls alongside the cooked white rice, sautéed collard greens, and garnish with fresh orange slices.
Extra Tips
When preparing feijoada, feel free to customize the meats to your preference; other options like beef ribs or even chicken can be used. To save time, you can use pressure cookers for the beans, which can cut down the cooking time considerably.
Additionally, letting the feijoada sit overnight allows the flavors to develop even further, making it taste even better the next day. Always adjust the seasoning to your taste, and don’t hesitate to experiment with additional spices or ingredients to make the dish your own.
Pão De Queijo
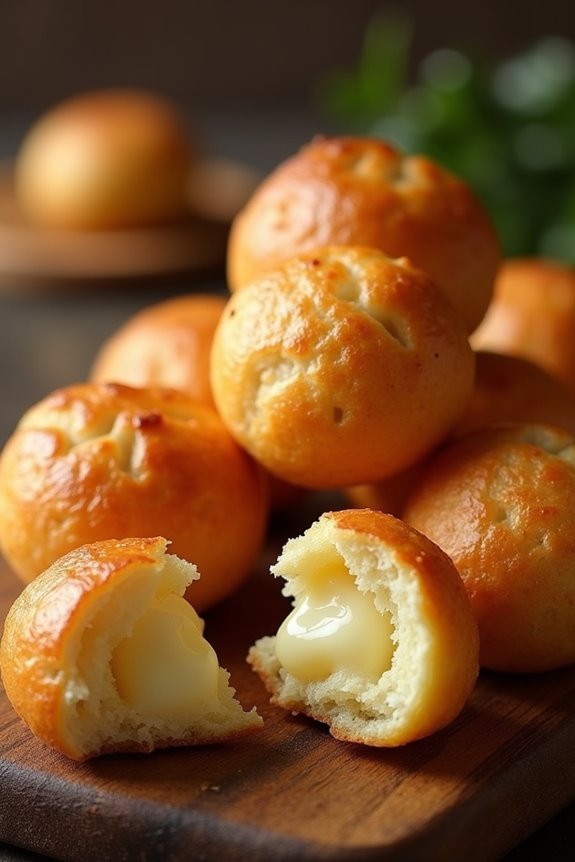
Pão De Queijo, or Brazilian cheese bread, is a delightful gluten-free treat that has gained popularity beyond Brazil’s borders. This delicious bread is characterized by its chewy texture and cheesy flavor, making it a perfect accompaniment for any meal or a tasty snack on its own.
Traditionally made with tapioca flour, which gives it a unique texture, Pão De Queijo is often enjoyed at breakfast or during special occasions, but it’s so irresistible that it can be savored any time of the day.
Making Pão De Queijo at home is simpler than you might think, and the result is a batch of warm, cheesy goodness that will have everyone coming back for seconds. Whether you’re hosting a gathering or just want to indulge in a comforting treat, this recipe will guide you through the process of creating these delightful cheese puffs. Serve them fresh out of the oven for the best experience!
Ingredients (serving size: 4-6 people)
- 1 cup tapioca flour
- 1/2 cup milk
- 1/4 cup vegetable oil
- 1/2 teaspoon salt
- 1 cup grated cheese (such as parmesan or mozzarella)
- 2 large eggs
- 1 teaspoon baking powder
Cooking Instructions
- Preheat the Oven: Begin by preheating your oven to 375°F (190°C). This guarantees that your Pão De Queijo will bake evenly and become perfectly golden brown.
- Prepare the Dough: In a medium saucepan, combine the milk, vegetable oil, and salt. Place the saucepan over medium heat and bring the mixture to a gentle boil, stirring occasionally to prevent burning.
- Mix the Tapioca Flour: Once the milk mixture is boiling, remove it from the heat and immediately add the tapioca flour. Stir vigorously with a wooden spoon until the mixture is well combined and forms a smooth dough. Allow it to cool for a few minutes.
- Incorporate the Eggs and Cheese: Once the dough has cooled slightly, add the eggs one at a time, mixing well after each addition. Then, fold in the grated cheese and baking powder until everything is well incorporated and the dough is smooth.
- Shape the Pão De Queijo: Using your hands, shape the dough into small balls, about the size of a golf ball. Place the balls on a baking sheet lined with parchment paper, making sure to leave some space between them as they’ll expand while baking.
- Bake: Place the baking sheet in the preheated oven and bake for 15-20 minutes, or until the cheese breads have puffed up and are lightly golden on the outside.
- Cool and Serve: Once baked, remove the Pão De Queijo from the oven and allow them to cool for a few minutes on the baking sheet. Serve warm and enjoy!
Extra Tips
For the best results, use a high-quality cheese that melts well, such as mozzarella or a sharp cheddar. You can also experiment with different types of cheese or add herbs and spices to enhance the flavor.
If you want to make the dough ahead of time, it can be refrigerated for up to 24 hours; just allow it to come to room temperature before shaping and baking. Enjoy these delightful cheese puffs fresh out of the oven for the ultimate experience!
Moqueca
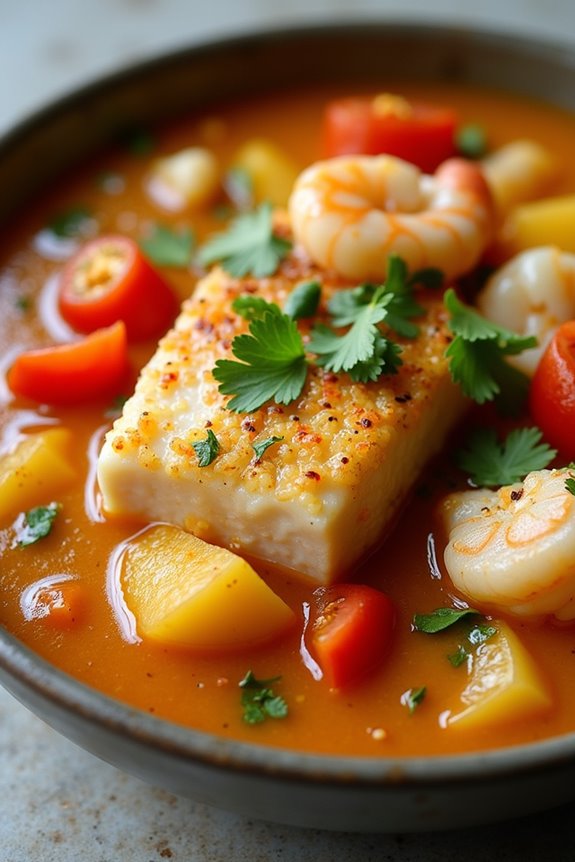
Moqueca is a traditional Brazilian seafood stew that hails from the coastal regions, particularly Bahia and Espírito Santo. This vibrant dish is characterized by its rich flavors, combining fresh fish, prawns, and a medley of aromatic vegetables, all simmered together in a fragrant coconut milk sauce seasoned with herbs and spices. The dish is often served with rice and farofa, a toasted cassava flour mixture that adds a delightful crunch.
Making Moqueca isn’t just about the ingredients; it’s about celebrating the spirit of Brazilian cuisine, where freshness and quality are paramount. This dish can be easily adapted to suit personal tastes, allowing the addition of different seafood or vegetables. The key to a great Moqueca lies in the layers of flavor developed during the cooking process.
The use of dendê oil (palm oil) adds a unique richness and beautiful color to the stew; however, if you can’t find it, extra virgin olive oil can be used as a substitute. The result is a dish that isn’t only delicious but also a feast for the eyes, perfect for a Brazilian Thanksgiving gathering.
Ingredients (serving size: 4-6 people):
- 1 lb (450 g) firm white fish fillets (such as cod or snapper)
- 1 lb (450 g) shrimp, peeled and deveined
- 1 tablespoon dendê oil (or extra virgin olive oil)
- 1 large onion, thinly sliced
- 4 cloves garlic, minced
- 1 bell pepper (red or yellow), thinly sliced
- 2 medium tomatoes, diced
- 1 can (14 oz) coconut milk
- 1 cup fish or vegetable broth
- 1 lime, juiced
- 1 tablespoon fresh cilantro, chopped
- Salt and black pepper to taste
- Optional: sliced hot peppers for heat
Cooking Instructions:
- Prepare the Ingredients: Start by cleaning and preparing the seafood. Rinse the fish fillets and shrimp under cold water, then pat them dry with paper towels. Cut the fish into large chunks and season with lime juice, salt, and black pepper. Let it marinate while you prepare the vegetables.
- Cook the Aromatics: In a large, heavy-bottomed pot or Dutch oven, heat the dendê oil (or olive oil) over medium heat. Add the sliced onion and garlic, sautéing until softened and fragrant, about 3-4 minutes. This will create a flavorful base for your Moqueca.
- Add the Vegetables: Stir in the sliced bell pepper and diced tomatoes, cooking for an additional 5 minutes until the vegetables have softened. The moisture from the tomatoes will help deglaze the bottom of the pot, enhancing the overall flavor.
- Combine with Coconut Milk and Broth: Pour in the coconut milk and fish or vegetable broth, bringing the mixture to a gentle simmer. Stir well to combine and allow the flavors to meld together for about 5 minutes.
- Add the Seafood: Carefully add the marinated fish and shrimp to the pot, ensuring they’re submerged in the coconut milk mixture. Cover the pot and let it simmer for 10-15 minutes or until the seafood is cooked through and tender.
- Finish and Garnish: Once the seafood is cooked, check for seasoning and adjust with additional salt, pepper, and lime juice if desired. Stir in the chopped cilantro and remove from heat.
- Serve: Ladle the Moqueca into bowls, ensuring each serving has a good amount of broth. Serve hot with steamed rice and farofa on the side for a complete meal.
Extra Tips: When making Moqueca, feel free to experiment with different types of seafood based on availability and preference. If you prefer a thicker stew, you can let it simmer uncovered for a few extra minutes to reduce the liquid.
Don’t hesitate to add your favorite vegetables such as zucchini or carrots for added texture and flavor. Ultimately, for a spicier kick, include sliced hot peppers into the stew during the cooking process. Enjoy your culinary journey into Brazilian cuisine!
Coxinha
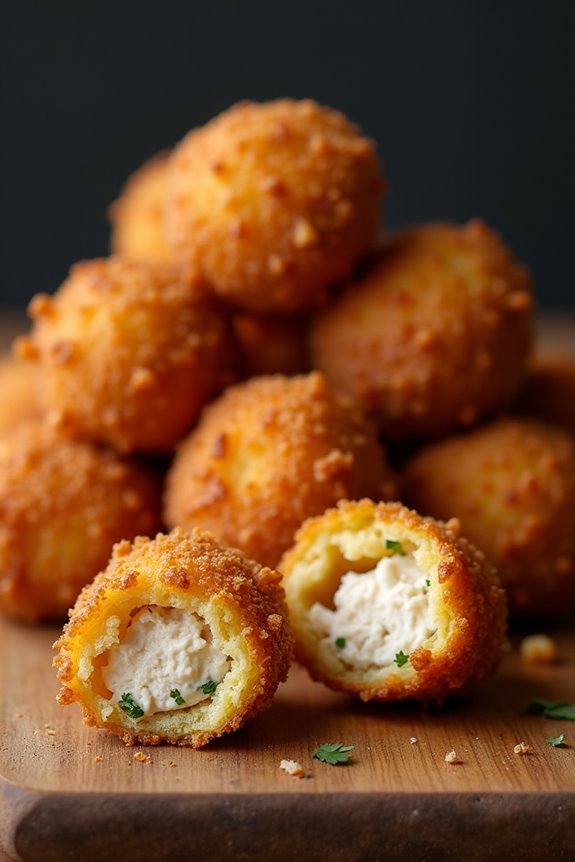
Coxinha is a beloved Brazilian snack that has become a staple in Brazilian cuisine, often enjoyed during celebrations, gatherings, or simply as a delicious treat. These savory dough balls are filled with a flavorful mixture of shredded chicken and spices, shaped like little drumsticks, and then coated with breadcrumbs before being fried to golden perfection. The name “coxinha” translates to “little thigh,” a nod to their shape and the traditional chicken filling that makes them so irresistible.
Making coxinha may seem intimidating, but with the right ingredients and a step-by-step approach, you can create this delightful dish in your own kitchen. The combination of a crispy exterior and a savory, tender filling creates a perfect bite that’s sure to impress your family and friends. Serve them with a side of hot sauce or your favorite dipping sauce for an added kick!
Ingredients (Serves 4-6)
- 2 cups of all-purpose flour
- 1 cup of chicken broth (homemade or store-bought)
- 1 tablespoon of butter
- 1 cup of shredded cooked chicken (rotisserie chicken works well)
- ½ cup of cream cheese
- 1 onion, finely chopped
- 2 cloves of garlic, minced
- 1 teaspoon of salt
- ½ teaspoon of black pepper
- ¼ teaspoon of paprika
- 1 egg, beaten (for egg wash)
- 1 cup of breadcrumbs (for coating)
- Oil for frying
Cooking Instructions
- Prepare the Dough: In a saucepan, combine the chicken broth, butter, salt, and pepper. Bring the mixture to a boil. Once boiling, gradually add the flour, stirring continuously until the dough forms a ball and pulls away from the sides of the pan. Remove from heat, cover, and let it cool for about 10 minutes.
- Make the Filling: In a skillet, heat a small amount of oil over medium heat. Add the chopped onion and garlic, sautéing until they become translucent. Stir in the shredded chicken, cream cheese, and paprika. Cook for a few minutes until the mixture is well combined and heated through. Remove from heat and let it cool.
- Shape the Coxinhas: Once the dough is cool enough to handle, take a small piece of dough and flatten it in the palm of your hand. Place a spoonful of the chicken filling in the center, then fold the dough over the filling, pinching the edges to seal it. Shape the coxinha into a drumstick shape by tapering one end. Repeat with the remaining dough and filling.
- Coat the Coxinhas: Set up a breading station with a bowl of beaten egg and a plate of breadcrumbs. Dip each shaped coxinha into the egg wash, allowing any excess to drip off, then roll it in the breadcrumbs until fully coated. Place the breaded coxinhas on a plate.
- Fry the Coxinhas: In a deep skillet or fryer, heat oil over medium heat until it reaches about 350°F (175°C). Carefully add the coxinhas to the hot oil, frying in batches to avoid overcrowding. Fry until golden brown and crispy, about 3-4 minutes on each side. Remove from the oil and drain on paper towels.
- Serve: Allow the coxinhas to cool slightly before serving. Enjoy them warm with your favorite dipping sauce!
Extra Tips
When making coxinhas, it’s crucial to confirm that the dough isn’t too dry; if needed, you can add a bit more broth while cooking the dough. For added flavor, consider mixing in herbs like parsley or cilantro into the filling.
If you’re looking to make these coxinhas ahead of time, you can freeze them before frying. Just layer them with parchment paper in a container, and when you’re ready to eat, fry them straight from the freezer, adding a couple of extra minutes to the cooking time. Enjoy your delicious homemade coxinhas!
Farofa
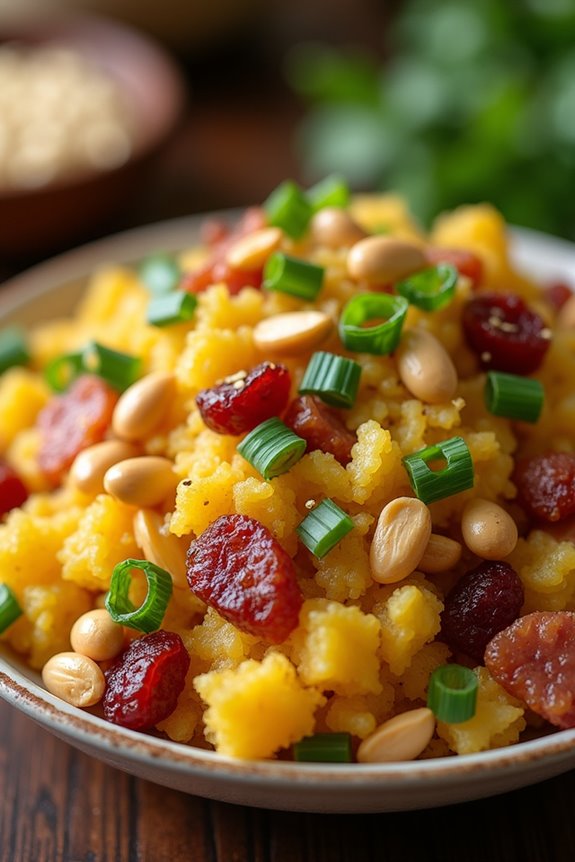
Farofa is a beloved Brazilian side dish made primarily from toasted cassava flour, often enriched with various ingredients such as bacon, onions, and nuts. It’s a traditional accompaniment served during festive occasions, including Thanksgiving celebrations in Brazil.
The dish isn’t only flavorful but also adds a delightful crunch to the meal, making it a perfect complement to meats and stews. This versatile dish can be customized to suit your taste preferences, whether you prefer it savory with the addition of meats or more on the sweet side with dried fruits.
Farofa embodies the essence of Brazilian cooking – simple yet rich in flavor and texture. It’s easy to prepare and can be made ahead of time, allowing you to focus on other dishes for your festive gathering.
Ingredients (Serves 4-6)
- 2 cups cassava flour
- 4 strips of bacon, diced
- 1 medium onion, finely chopped
- 2 cloves garlic, minced
- 1/2 cup green onions, chopped
- 1/2 cup roasted peanuts, chopped
- 1/2 cup raisins (optional)
- 4 tablespoons unsalted butter
- Salt and pepper to taste
- Fresh parsley for garnish (optional)
Cooking Instructions
1. Cook the Bacon: In a large skillet, over medium heat, cook the diced bacon until it’s crispy and the fat has rendered, about 5-7 minutes. Stir occasionally to guarantee even cooking.
Once done, use a slotted spoon to transfer the bacon to a paper towel-lined plate to drain the excess fat, leaving the rendered fat in the skillet.
2. Sauté the Aromatics: In the same skillet with the bacon fat, add the chopped onion and cook until translucent, about 3-4 minutes.
Then, add the minced garlic and sauté for an additional minute, stirring frequently to avoid burning.
3. Add the Cassava Flour: Gradually sprinkle the cassava flour into the skillet while continuously stirring to combine it with the onion and garlic mixture.
Toast the flour for about 5-7 minutes, stirring constantly until it turns a light golden color and has a nutty aroma.
4. Incorporate Other Ingredients: Once the flour is toasted, add the crispy bacon, chopped green onions, roasted peanuts, and raisins (if using).
Stir everything together until well combined and heated through. Season with salt and pepper to taste.
5. Finish with Butter: Remove the skillet from heat and stir in the unsalted butter until melted and fully incorporated.
This adds richness to the dish.
6. Garnish and Serve: Transfer the farofa to a serving dish and garnish with fresh parsley if desired.
Serve warm alongside your favorite main dishes.
Extra Tips
When preparing farofa, feel free to experiment with additional ingredients like sautéed mushrooms, diced bell peppers, or even chopped hard-boiled eggs for added texture and flavor.
Confirm that you toast the cassava flour properly, as this is key to achieving the desired nuttiness and crunch. Farofa can be made ahead of time and reheated before serving, making it a convenient option for holiday gatherings.
Arroz Com Pequi
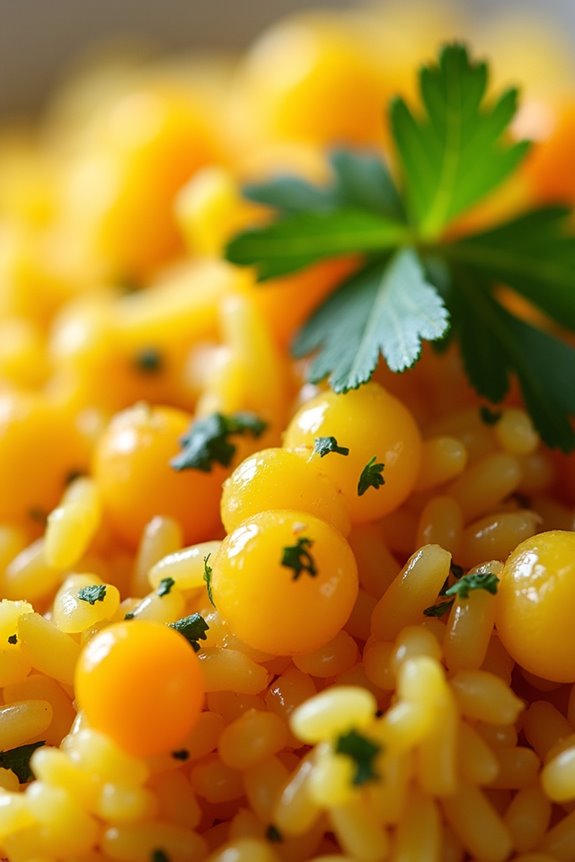
Arroz Com Pequi is a traditional Brazilian dish that beautifully marries the nutty flavor of pequi fruit with the comforting texture of rice. Originating from the central-western regions of Brazil, particularly in Goiás and Minas Gerais, this dish is often served during festive occasions, including family gatherings and Thanksgiving celebrations.
Pequi is a unique fruit that has a strong aroma and a distinct taste that can be an acquired one, but it adds an unmistakable essence to the dish. This recipe is perfect for those wanting to explore authentic Brazilian cuisine and add a touch of exotic flavor to their holiday table.
The preparation of Arroz Com Pequi is straightforward, yet it requires a bit of attention to detail to guarantee that the rice cooks perfectly, absorbing the fruity flavors while maintaining a delightful texture. The combination of other ingredients, such as onions, garlic, and spices, enhances the overall taste profile, making it a delicious accompaniment to meats or a satisfying vegetarian main course.
When serving Arroz Com Pequi, consider pairing it with a rejuvenating salad or some grilled vegetables to balance the rich flavors of this dish.
Ingredients (Serves 4-6):
- 2 cups of long-grain rice
- 1 can (about 400g) of pequi, drained and chopped
- 1 medium onion, finely chopped
- 2 cloves of garlic, minced
- 4 cups of chicken or vegetable broth
- 2 tablespoons of olive oil
- 1 teaspoon of salt (adjust to taste)
- 1/2 teaspoon of black pepper
- 1 teaspoon of paprika (optional)
- Fresh cilantro or parsley for garnish (optional)
Cooking Instructions:
- Heat the Olive Oil: In a large pot or saucepan, heat the olive oil over medium heat. This will create a base for your dish and help to infuse the oil with the flavors of the next ingredients.
- Sauté the Onion and Garlic: Add the finely chopped onion to the pot and sauté for about 3-4 minutes, or until it becomes translucent. Then, add the minced garlic and cook for an additional 1-2 minutes. This step is vital as it builds the foundational flavors for the dish.
- Add the Rice: Pour the long-grain rice into the pot and stir well to coat the rice with the oil, onion, and garlic mixture. Toast the rice for about 2-3 minutes, which helps to enhance its flavor and prevents it from becoming mushy during cooking.
- Incorporate the Pequi: Add the chopped pequi to the pot and mix it gently with the rice. Be careful not to mash the pequi pieces, as you want them to maintain their shape and provide delightful bites throughout the dish.
- Pour in the Broth: Slowly add the chicken or vegetable broth to the pot. Stir to combine all the ingredients, and then bring the mixture to a gentle boil. This step is important as it guarantees that the rice absorbs all the flavors from the broth and the pequi.
- Season and Simmer: Add salt, black pepper, and paprika (if using) to the pot. Once the mixture reaches a boil, reduce the heat to low and cover the pot with a lid. Let it simmer for about 15-20 minutes, or until the rice is cooked and has absorbed all the liquid.
- Fluff and Serve: Once the rice is cooked, remove the pot from the heat and let it sit covered for an additional 5 minutes. Afterward, fluff the rice with a fork and garnish with fresh cilantro or parsley before serving.
Extra Tips:
When using pequi, be mindful of its small, hard seeds, which aren’t edible. Guarantee that the fruit is chopped carefully to minimize the chances of biting into a seed during the meal.
If you can’t find fresh or canned pequi, you can substitute it with a similar fruit like jackfruit or a nutty-flavored ingredient for a different but still delicious experience. Additionally, to elevate the dish, consider adding sautéed vegetables or nuts for extra texture and flavor.
Vatapá
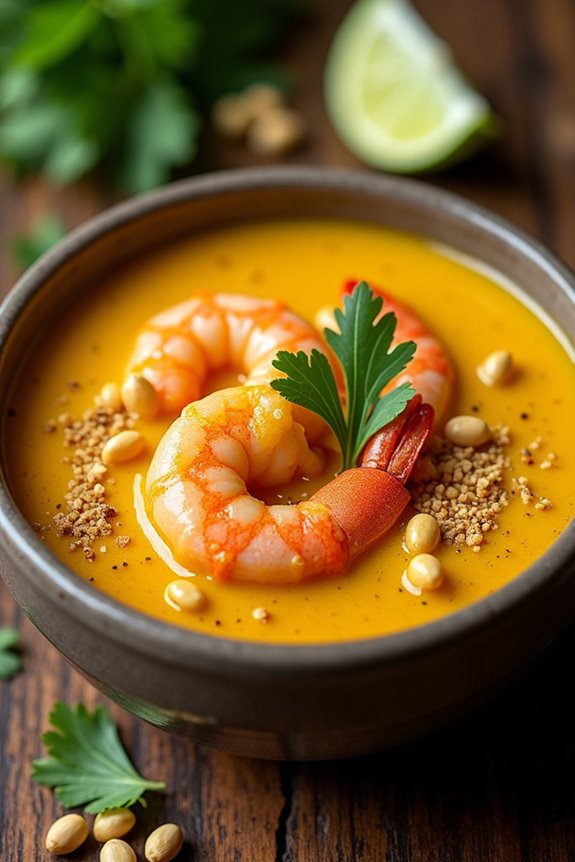
Vatapá is a traditional Brazilian dish that originates from the northeastern region of Brazil, particularly Bahia. It’s a rich, creamy dish made with a combination of bread, shrimp, coconut milk, and various spices, resulting in a flavor-packed delicacy that’s often served with rice or farofa. Vatapá is a perfect addition to any Brazilian Thanksgiving feast, bringing a taste of Brazilian culture and heritage to your table.
The dish isn’t only delicious but also quite versatile, allowing for variations based on personal preference, whether you choose to use fish, chicken, or a mix of ingredients.
The preparation of Vatapá requires some patience and attention to detail, as the blending of ingredients is key to achieving its signature texture and flavor. The dish is typically enjoyed as a main course, and its vibrant flavors are sure to impress your guests. With its unique combination of ingredients, Vatapá embodies the spirit of Brazilian cuisine, making it an excellent choice for special occasions and holiday celebrations.
Ingredients (Serves 4-6)
- 500g (1 lb) of fresh or dried shrimp, cleaned
- 1 cup of stale bread, torn into pieces
- 1 cup of coconut milk
- 1 medium onion, finely chopped
- 2 cloves of garlic, minced
- 1/2 cup of dendê oil (palm oil)
- 1/2 cup of peanuts, ground
- 1 tablespoon of ginger, grated
- 1/2 teaspoon of cayenne pepper (adjust to taste)
- Salt and black pepper, to taste
- Fresh cilantro, chopped (for garnish)
- Lime wedges (for serving)
Cooking Instructions
- Prepare the Shrimp: If using dried shrimp, soak them in water for about 30 minutes to rehydrate. For fresh shrimp, simply clean and devein them. Set aside.
- Make the Bread Mixture: In a bowl, combine the torn pieces of stale bread with the coconut milk. Allow it to soak for about 10-15 minutes until the bread is soft. Once soft, mash it together to create a smooth mixture.
- Sauté Aromatics: In a large skillet, heat the dendê oil over medium heat. Add the chopped onion and minced garlic, sautéing until the onion is translucent and fragrant, about 3-5 minutes.
- Add Shrimp and Seasoning: Incorporate the prepared shrimp into the skillet, followed by the grated ginger, cayenne pepper, salt, and black pepper. Cook for about 5-7 minutes, stirring occasionally, until the shrimp are cooked through and pink.
- Combine Ingredients: Stir in the mashed bread and coconut milk mixture, along with the ground peanuts. Mix well to combine all ingredients, allowing the dish to simmer on low heat for an additional 10-15 minutes. The mixture should thicken and become creamy.
- Serve: Once the Vatapá has reached the desired consistency, remove it from heat. Transfer to a serving dish, garnish with fresh cilantro, and serve with lime wedges on the side.
Extra Tips
When preparing Vatapá, be mindful of the balance of flavors; the richness of the coconut milk and dendê oil should complement the shrimp without overpowering them.
If you prefer a milder dish, adjust the amount of cayenne pepper according to your taste. Additionally, you can enhance the flavor profile by adding diced tomatoes or bell peppers to the sautéed aromatics.
Finally, make sure to serve the dish freshly made, as it tastes best when enjoyed warm, paired with fluffy white rice or crunchy farofa. Enjoy your culinary journey through Brazilian cuisine!
Bobó De Camarão
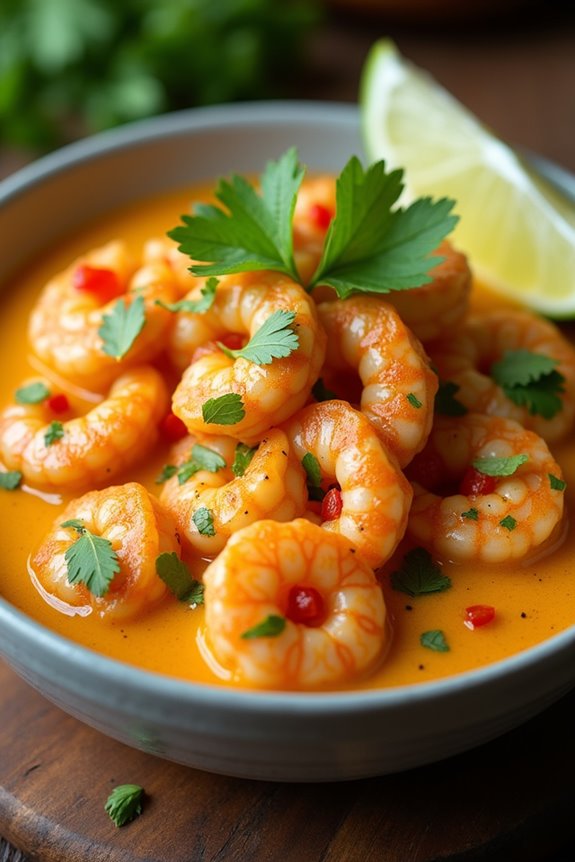
Bobó de Camarão is a traditional Brazilian dish that beautifully combines the flavors of shrimp with the creamy texture of manioc (cassava) and coconut milk. Originating from the coastal regions of Brazil, this dish is a perfect representation of the country’s rich culinary heritage, showcasing the influence of indigenous, African, and Portuguese cuisines.
The combination of spices, herbs, and fresh ingredients results in a comforting meal that’s both hearty and satisfying, making it an ideal centerpiece for any Thanksgiving table or festive gathering.
The preparation of Bobó de Camarão is a labor of love that brings together a variety of vibrant flavors. The shrimp is marinated to enhance its taste, while the manioc is blended into a creamy base that serves as a deliciously rich sauce. Topped with fresh cilantro and served with rice, Bobó de Camarão isn’t only a feast for the palate but also a feast for the eyes, showcasing vibrant colors and textures that celebrate the bounty of Brazilian cuisine.
Ingredients (Serves 4-6):
- 1 lb (450g) shrimp, peeled and deveined
- 1 lb (450g) manioc (cassava), peeled and cut into chunks
- 1 can (14 oz) coconut milk
- 1 medium onion, finely chopped
- 3 cloves garlic, minced
- 1 red bell pepper, chopped
- 2 tablespoons olive oil
- 1 tablespoon palm oil (optional)
- 1 teaspoon paprika
- 1 teaspoon ground cumin
- Salt and pepper to taste
- Fresh cilantro, chopped (for garnish)
- Lime wedges (for serving)
Cooking Instructions:
- Prepare the Shrimp: In a bowl, combine the shrimp with salt, pepper, and paprika. Let it marinate for about 15-20 minutes to absorb the flavors. This step is essential as it enhances the shrimp’s taste and guarantees a more flavorful dish.
- Cook the Manioc: In a large pot, bring water to a boil and add the manioc chunks. Cook for about 20-25 minutes or until the manioc is fork-tender. Drain and let it cool slightly, then blend it in a food processor with a little bit of the coconut milk until smooth. This creates the creamy base for the dish.
- Sauté the Vegetables: In a large skillet, heat olive oil and palm oil (if using) over medium heat. Add the chopped onion and cook until translucent, about 5 minutes. Then, add the minced garlic and chopped red bell pepper, sautéing for another 3-4 minutes until the vegetables are softened and fragrant.
- Combine Ingredients: Add the marinated shrimp to the skillet and cook for about 3-4 minutes until they turn pink. Then, stir in the blended manioc and the remaining coconut milk. Mix well to combine all ingredients and let it simmer on low heat for about 10 minutes, allowing the flavors to meld together.
- Season and Serve: Taste the mixture and adjust seasoning with salt and pepper if necessary. Once everything is heated through, remove from heat. Serve the Bobó de Camarão hot, garnished with fresh cilantro and lime wedges on the side for an extra burst of flavor.
Extra Tips:
When making Bobó de Camarão, verify that the shrimp are fresh for the best flavor and texture. If you can’t find manioc, you can substitute it with mashed potatoes for a similar creamy consistency, though the flavor will be slightly different.
Additionally, feel free to adjust the spice levels to your liking by adding more paprika or even a touch of chili pepper for heat. Serve it with a side of fluffy white rice to balance the richness of the dish and enjoy!
Bolo De Rolo

Bolo De Rolo is a traditional Brazilian cake known for its stunning presentation and delightful flavors. Originating from the state of Pernambuco, this rolled sponge cake is filled with vibrant guava paste, creating a beautiful spiral pattern when sliced. The cake isn’t only a feast for the eyes but also a delicious treat that combines the sweetness of guava with the lightness of a perfectly baked sponge.
Often served during special occasions, it has become a beloved staple in Brazilian homes, especially during Thanksgiving celebrations.
Making Bolo De Rolo requires some patience and technique, but the end result is absolutely worth the effort. The sponge cake is made from simple ingredients, but the key to achieving that signature thinness is in the careful spreading and rolling of the batter. This cake is best enjoyed fresh, but it can also be stored for a few days, allowing the flavors to meld beautifully.
Ingredients (Serves 4-6):
- 4 large eggs
- 1 cup granulated sugar
- 1 cup all-purpose flour
- 1/4 cup unsalted butter, melted
- 1 teaspoon baking powder
- 1/2 teaspoon vanilla extract
- 1 cup guava paste, softened
- Powdered sugar for dusting (optional)
Cooking Instructions:
- Preheat the Oven: Start by preheating your oven to 375°F (190°C). This guarantees that the cake bakes evenly and achieves a nice golden color.
- Prepare the Baking Sheet: Line a jelly roll pan (approximately 10×15 inches) with parchment paper. This prevents the cake from sticking and makes it easier to roll later.
- Mix the Batter: In a large mixing bowl, beat the eggs and granulated sugar together until the mixture is light and fluffy. This should take about 5-7 minutes. The air incorporated at this stage will help the cake rise.
- Combine Dry Ingredients: In a separate bowl, whisk together the flour and baking powder. Gradually fold this dry mixture into the egg and sugar mixture. Be gentle to preserve the airiness of the batter.
- Add Butter and Vanilla: Carefully fold in the melted butter and vanilla extract until just combined. Again, be cautious not to overmix, as this can deflate the batter.
- Spread the Batter: Pour the batter onto the prepared baking sheet and use a spatula to spread it evenly into the corners. Aim for a thickness of about 1/4 inch.
- Bake the Cake: Place the baking sheet in the preheated oven and bake for 10-12 minutes or until the edges are lightly golden and the cake springs back when touched.
- Cool and Roll: Once baked, remove the cake from the oven and allow it to cool for about 5 minutes. Place a clean kitchen towel on a flat surface, and then flip the cake onto the towel. Carefully peel off the parchment paper.
- Spread the Guava Paste: While the cake is still warm, spread the softened guava paste evenly over the surface, leaving a small border around the edges.
- Roll the Cake: Starting from one end, gently roll the cake up tightly with the help of the towel. Be cautious not to press too hard to avoid cracking. Once rolled, wrap it in the towel and let it cool completely.
- Slice and Serve: Once cooled, carefully unwrap the cake and slice it into rounds. Dust with powdered sugar if desired before serving.
Extra Tips: To achieve the best results with Bolo De Rolo, make certain that all your ingredients are at room temperature before starting. This allows the eggs to whip better and helps the batter to mix more smoothly.
Additionally, the guava paste can be substituted with other fruit pastes like mango or passion fruit for a different flavor profile. Practice makes perfect with the rolling technique, so don’t be discouraged if your first attempt isn’t flawless!
Brigadeiros

Brigadeiros are a delightful Brazilian treat that brings a touch of sweetness to any holiday celebration, including Thanksgiving. These chocolate truffles are made with just a few simple ingredients and are a fantastic way to indulge your guests with a rich and creamy dessert.
Traditionally enjoyed at birthday parties and celebrations, brigadeiros have become a beloved staple in Brazilian cuisine and are sure to impress anyone who tries them.
The beauty of brigadeiros lies not only in their taste but also in their simplicity. With a rich chocolate flavor and a soft, fudgy texture, these treats are rolled in chocolate sprinkles or nuts for an extra crunch.
Perfect for sharing, brigadeiros can be served as a sweet end to your Thanksgiving feast or as a fun addition to dessert tables. Let’s explore making this decadent treat that will surely be a hit among family and friends.
Ingredients (Serves 4-6 people)
- 1 can (14 oz) sweetened condensed milk
- 2 tablespoons unsweetened cocoa powder
- 2 tablespoons unsalted butter
- A pinch of salt
- Chocolate sprinkles (for rolling)
Cooking Instructions
- Combine Ingredients: In a medium-sized saucepan, add the sweetened condensed milk, unsweetened cocoa powder, unsalted butter, and a pinch of salt. Stir the mixture well until all ingredients are thoroughly combined before placing it on the stove.
- Cook the Mixture: Place the saucepan over medium heat. Continuously stir the mixture with a wooden spoon or spatula to prevent it from sticking to the bottom of the pan. Cook for about 10-15 minutes until the mixture thickens and starts pulling away from the sides of the pan, forming a cohesive mass. It should have a fudge-like consistency.
- Cool the Mixture: Once the mixture has thickened, remove it from the heat and transfer it to a greased plate or bowl. Allow it to cool at room temperature for about 30 minutes, or until it’s easy to handle.
- Shape the Brigadeiros: Once cooled, grease your hands with a little butter to prevent sticking. Take small portions of the mixture (about a tablespoon) and roll them into balls, approximately the size of a cherry.
- Coat the Brigadeiros: After shaping the brigadeiros, place the chocolate sprinkles in a shallow dish. Roll each ball in the sprinkles until fully coated. Confirm that each brigadeiro is well-covered for an appealing finish.
- Serve and Enjoy: Place the finished brigadeiros in small paper cups or a serving platter. Serve them immediately or refrigerate for later. They can be enjoyed chilled or at room temperature.
Extra Tips
When making brigadeiros, it’s crucial to stir continuously during the cooking process to achieve the perfect texture and avoid burning.
You may also experiment with different coatings such as crushed nuts or coconut flakes for variation. Brigadeiros can be stored in an airtight container in the refrigerator for up to a week, making them an excellent make-ahead dessert option for your Thanksgiving gathering.
Enjoy these delightful treats and watch them disappear quickly!
Quindim

Quindim is a traditional Brazilian dessert that showcases the wonderful combination of coconut, sugar, and egg yolks, resulting in a sweet and custardy delight. This bright yellow treat isn’t only visually appealing but also offers a unique texture that’s both creamy and slightly chewy.
Originating from Portuguese influence, quindim has become a popular choice during festive occasions, including Brazilian Thanksgiving, where it adds a touch of sweetness to the table.
Making quindim is a delightful experience, as you can enjoy the aroma of coconut while it bakes. This dessert is typically served chilled, allowing the flavors to meld together beautifully. Whether you’re preparing it for a special occasion or simply to indulge yourself, quindim is sure to impress both family and friends with its rich taste and elegant presentation.
Ingredients (Serves 4-6)
- 1 cup granulated sugar
- 1/2 cup unsweetened shredded coconut
- 1/2 cup coconut milk
- 1/4 cup unsalted butter, melted
- 6 large egg yolks
- 1 teaspoon vanilla extract
- Pinch of salt
Cooking Instructions
- Preheat the Oven: Start by preheating your oven to 350°F (175°C). This temperature is ideal for baking the quindim, ensuring it cooks evenly while developing a lovely golden top.
- Prepare the Baking Dish: Grease a muffin tin or small ramekins with butter to prevent the quindim from sticking. You can also sprinkle some sugar at the bottom of each mold for added sweetness and a nice caramelized effect.
- Mix the Ingredients: In a mixing bowl, combine the granulated sugar, shredded coconut, coconut milk, melted butter, egg yolks, vanilla extract, and a pinch of salt. Use a whisk to mix until all the ingredients are well incorporated and the mixture is smooth.
- Pour the Batter: Carefully pour the coconut mixture into the prepared muffin tin or ramekins. Fill them about three-quarters full, as the quindim will rise slightly during baking.
- Bake the Quindim: Place the filled muffin tin or ramekins in the preheated oven and bake for about 25-30 minutes, or until the tops are golden and a toothpick inserted in the center comes out clean.
- Cool and Chill: Once baked, remove the quindim from the oven and allow them to cool in the tin for about 10 minutes. Then, gently remove them and transfer to a cooling rack. For the best flavor and texture, refrigerate the quindim for at least 2 hours before serving.
- Serve: Serve the quindim chilled, either on their own or garnished with fresh fruit or a sprinkle of toasted coconut for added flair.
Extra Tips
When making quindim, using fresh coconut can elevate the flavor considerably, but if you’re short on time, unsweetened shredded coconut will work just fine.
Be cautious not to overmix the batter, as you want to maintain a light and airy texture. Additionally, if you want a richer flavor, feel free to add a splash of rum or a hint of lime zest to the mixture for a tropical twist.
Beijinho
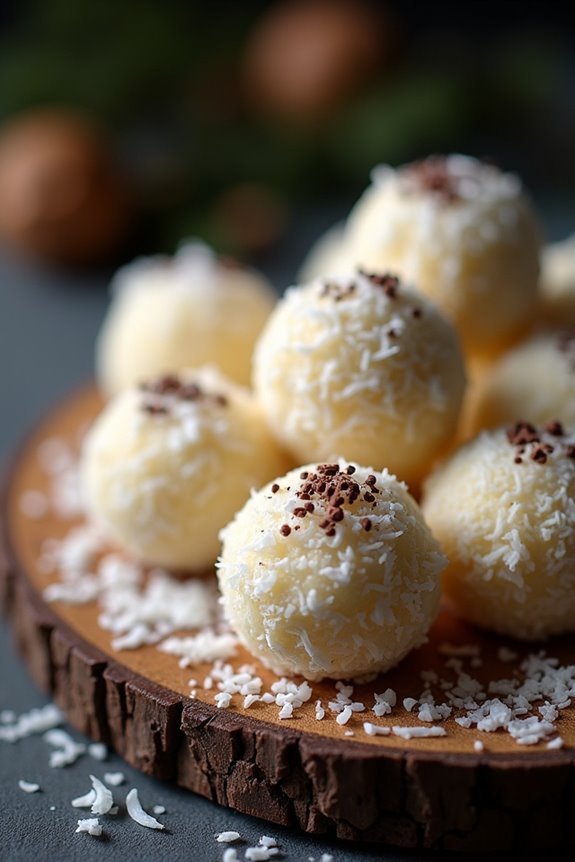
Beijinho, which translates to “little kiss” in Portuguese, is a beloved Brazilian sweet often enjoyed during festive occasions, including Thanksgiving. These delightful coconut truffles are similar to their more famous cousin, brigadeiro, but are made with grated coconut instead of cocoa powder. The rich, creamy texture and the sweet, tropical flavor of coconut make beijinho a favorite treat for both children and adults alike.
They’re usually rolled in grated coconut or chocolate sprinkles, adding an extra layer of sweetness and a beautiful appearance. This simple yet delicious dessert can easily be prepared at home, providing a taste of Brazilian culture to your Thanksgiving table. With just a few ingredients and straightforward steps, you can impress your family and friends with these delightful little bites.
Beijinho isn’t only a treat for the palate, but it’s also a joy to make together with loved ones, making it a perfect addition to any holiday gathering.
Ingredients (Serves 4-6 people):
- 1 can (14 oz) sweetened condensed milk
- 1 cup shredded coconut (unsweetened)
- 1 tablespoon unsalted butter
- 1/2 teaspoon vanilla extract
- 1/2 cup grated coconut (for rolling)
- Chocolate sprinkles (optional, for rolling)
Cooking Instructions:
- Prepare the Mixture: In a medium-sized saucepan, combine the sweetened condensed milk, shredded coconut, unsalted butter, and vanilla extract. Mix the ingredients well until they’re fully combined.
- Cook the Mixture: Place the saucepan over medium heat. Stir the mixture continuously to prevent it from sticking to the bottom of the pan. Cook for about 10-15 minutes, or until the mixture thickens and pulls away from the sides of the pan. You’ll know it’s ready when you can see the bottom of the pan for a few seconds when you stir.
- Cool the Mixture: Once the mixture is cooked, remove it from the heat and transfer it to a bowl. Allow it to cool to room temperature. You can speed up the cooling process by placing the bowl in the refrigerator for about 30 minutes.
- Shape the Beijinhos: Once the mixture is cool enough to handle, use your hands to form small balls, about the size of a marble. Make sure to keep your hands slightly greased with butter to prevent sticking.
- Roll in Coconut: Roll each ball in the grated coconut until they’re fully coated. If desired, you can also roll some of the beijinhos in chocolate sprinkles for added flavor and texture.
- Chill and Serve: Place the finished beijinhos on a plate or in small paper cups. Chill them in the refrigerator for about 30 minutes before serving to allow them to set firm.
Extra Tips:
When making beijinho, feel free to get creative with the toppings! While traditional grated coconut is lovely, you can also experiment with chopped nuts or even crushed cookies for a unique twist.
Additionally, if you prefer a softer texture, you can reduce the cooking time slightly. Just be cautious not to undercook the mixture too much, or it may not hold its shape when rolled. Enjoy your beijinhos as a sweet treat at your Thanksgiving gathering, or pack them as delightful gifts for friends and family!
Canjica
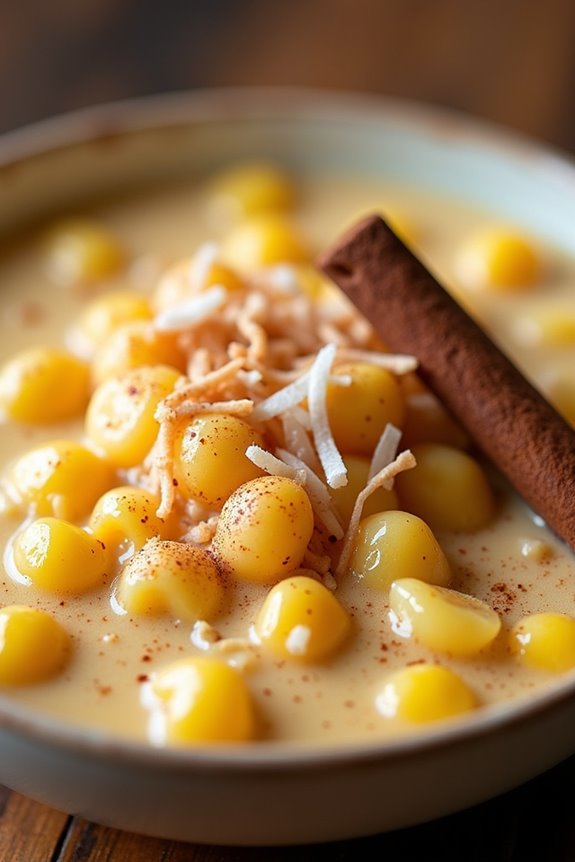
Canjica, also known as “mugunzá,” is a traditional Brazilian dish that embodies the spirit of comfort food, especially during festive occasions like Thanksgiving. Made from hominy corn, coconut milk, and a blend of sweet spices, this dish offers a creamy texture and a delightful balance of flavors that can warm the heart and satisfy the palate.
It’s often enjoyed as a dessert or a sweet treat and is loved by families across Brazil for its simplicity and comforting qualities. Preparing Canjica is a wonderful way to celebrate Brazilian culture while bringing a unique dish to your Thanksgiving table.
The process involves cooking the corn until tender, then sweetening it with ingredients like sugar, cinnamon, and coconut milk. The end result is a deliciously rich and creamy dish that can be garnished with a sprinkle of cinnamon or a drizzle of coconut for added flair.
Let’s explore the ingredients and instructions for making this delightful Canjica for 4-6 people.
Ingredients
- 1 cup of dried hominy corn
- 4 cups of water
- 1 can (400ml) of coconut milk
- 1 cup of sugar (adjust to taste)
- 1 teaspoon of ground cinnamon
- 1/2 teaspoon of salt
- 1 cup of shredded coconut (unsweetened)
- Cinnamon sticks for garnish (optional)
Cooking Instructions
1. Soak the Hominy Corn: Begin by rinsing the dried hominy corn under cold water. Then, soak it in a bowl of water for at least 8 hours or overnight. This step helps to soften the corn and reduces cooking time.
2. Cook the Corn: After soaking, drain the corn and place it in a large pot. Add 4 cups of fresh water and bring it to a boil over medium-high heat. Once boiling, reduce the heat to low, cover the pot, and let it simmer for about 1.5 to 2 hours or until the corn is tender. Stir occasionally to prevent sticking.
3. Add Coconut Milk and Sweeteners: Once the corn is cooked and tender, stir in the coconut milk, sugar, ground cinnamon, and salt. Mix well to combine all the ingredients.
Continue to cook on low heat for an additional 20-30 minutes, stirring occasionally. This allows the flavors to meld and the mixture to thicken slightly.
4. Incorporate Shredded Coconut: After the mixture has thickened, stir in the shredded coconut. Let it cook for another 5-10 minutes, allowing the coconut to blend well into the Canjica.
5. Serve and Garnish: Once done, remove the pot from the heat. Ladle the Canjica into bowls and garnish with a sprinkle of ground cinnamon or a cinnamon stick if desired. Serve warm for the best experience.
Extra Tips
When making Canjica, feel free to adjust the sweetness according to your taste preferences; some may prefer a sweeter dish, while others may enjoy a more subtle flavor.
Additionally, you can experiment with toppings such as chopped nuts or raisins for added texture. For a creamier consistency, you can blend a portion of the cooked mixture before adding the coconut, but this is entirely optional.
Finally, Canjica tastes even better the next day as the flavors continue to develop, so consider making it ahead of time!
Pastel

Pastel is a beloved Brazilian street food that consists of a thin, crispy pastry filled with various savory or sweet fillings. Often found at markets and food stalls, these delightful treats aren’t only popular for their flavor but also for their versatility. The dough is typically made from flour, water, and a touch of salt, then rolled out and filled with a variety of ingredients such as cheese, meat, or vegetables.
Once filled, the pastéis are deep-fried until golden brown and served hot, making them a perfect appetizer or snack for any occasion, including Thanksgiving celebrations. This Brazilian staple is especially popular during festive gatherings, where the aroma of fried pastry fills the air, drawing everyone in.
Making pastéis at home can be a fun culinary adventure, perfect for getting family and friends involved in the cooking process. The great thing about pastéis is that they can be customized to suit your taste preferences, so feel free to get creative with the fillings. Whether you choose a traditional cheese filling or opt for something more adventurous, pastéis are sure to impress your guests.
Ingredients (Serves 4-6)
- 2 cups all-purpose flour
- 1/2 cup cold water
- 1/4 cup vegetable oil
- 1/2 teaspoon salt
- Filling of choice (e.g., 1 cup shredded mozzarella cheese, 1 cup seasoned ground beef, or 1 cup sautéed vegetables)
- Oil for frying
Cooking Instructions
1. Prepare the Dough: In a large mixing bowl, combine the all-purpose flour and salt. Add the vegetable oil and cold water gradually, mixing with your hands or a spoon until the dough comes together. Knead the dough for about 5-7 minutes until it’s smooth and elastic.
Wrap the dough in plastic wrap and let it rest for at least 30 minutes at room temperature.
2. Prepare the Filling: While the dough is resting, prepare your desired filling. For a cheese filling, simply shred the mozzarella. For a meat filling, cook ground beef with onions, garlic, and seasonings until browned. For a vegetable filling, sauté your choice of vegetables until tender. Allow the filling to cool slightly before using.
3. Roll Out the Dough: After the dough has rested, divide it into small balls (about the size of a golf ball). On a lightly floured surface, use a rolling pin to roll each ball into a thin circle, approximately 5-6 inches in diameter. Confirm the edges are thin for a crispy texture.
4. Fill the Pastéis: Place a tablespoon of your chosen filling in the center of each dough circle. Be careful not to overfill, as this can cause the pastéis to burst during frying. Fold the dough over the filling to create a semi-circle and press the edges tightly with your fingers to seal. For a decorative touch, you can crimp the edges with a fork.
5. Fry the Pastéis: In a deep skillet or pot, heat enough oil for deep frying (about 2 inches deep) over medium heat. Once the oil is hot (around 350°F or 175°C), carefully add the pastéis in batches, frying for about 2-3 minutes on each side or until golden brown.
Use a slotted spoon to remove them from the oil and place them on paper towels to drain excess oil.
6. Serve: Serve the pastéis hot, with optional dipping sauces such as hot sauce, chimichurri, or a simple vinaigrette.
Extra Tips
When making pastéis, it’s crucial to keep the dough moist but not sticky during the preparation. If the dough dries out, it can become difficult to work with. You can also experiment with different fillings based on seasonal ingredients or personal preferences.
For a healthier option, consider baking the pastéis instead of frying, brushing them lightly with oil before placing them in the oven at 375°F (190°C) until golden brown. Ultimately, serve them fresh out of the fryer for the best texture and flavor, as they tend to lose their crispiness if left to sit for too long.
Empadão
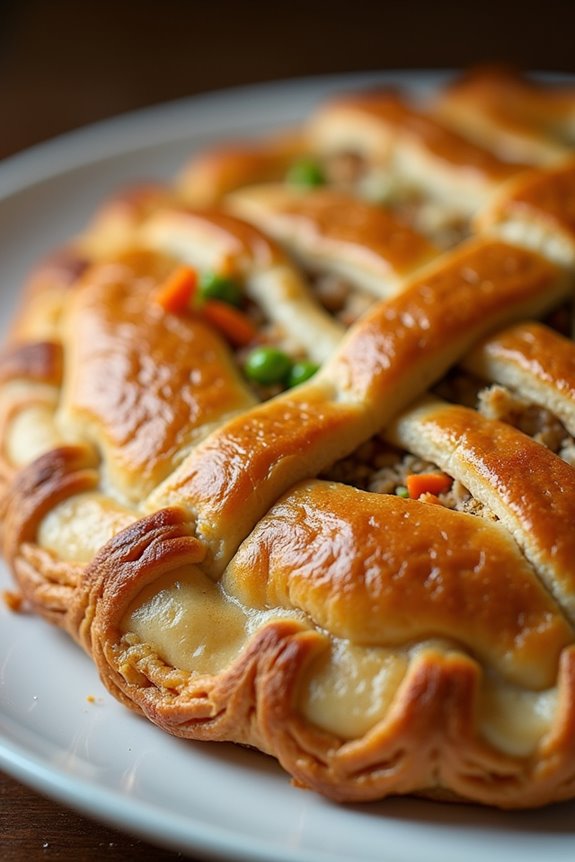
Empadão is a Brazilian savory pie that’s a beloved dish in many households, especially during festive occasions like Thanksgiving. This hearty dish is known for its flaky crust and delicious filling, typically made with shredded chicken, vegetables, and a blend of spices.
The empadão isn’t only a satisfying meal but also a great way to bring family and friends together around the table. Its rich flavors and comforting texture make it a perfect centerpiece for any holiday gathering.
Making empadão requires a bit of preparation, but the end result is well worth the effort. The dough is made from scratch, creating a buttery and flaky crust that perfectly complements the savory filling. You can customize the filling based on your preferences, incorporating different proteins or vegetables.
Serve this delightful dish with a side salad or rice, and you’ll have a complete meal that everyone will love.
Ingredients (Serves 4-6)
- 2 cups all-purpose flour
- 1 cup unsalted butter, cold and cubed
- 1/4 cup cold water
- 1 teaspoon salt
- 2 cups shredded cooked chicken
- 1 cup diced carrots
- 1 cup peas
- 1 onion, chopped
- 2 cloves garlic, minced
- 1 teaspoon paprika
- 1/2 teaspoon black pepper
- 1/2 cup grated Parmesan cheese
- 1 egg, beaten (for egg wash)
Cooking Instructions
1. Prepare the Dough: In a large mixing bowl, combine the flour and salt. Add the cold, cubed butter and use your fingers or a pastry cutter to mix until the mixture resembles coarse crumbs. Gradually add the cold water, mixing until the dough comes together.
Wrap the dough in plastic wrap and refrigerate for at least 30 minutes.
2. Cook the Filling: In a large skillet over medium heat, add a splash of oil and sauté the chopped onion and minced garlic until translucent. Add the diced carrots and cook for about 5 minutes until they start to soften.
Stir in the peas and shredded chicken, then season with paprika, black pepper, and salt to taste. Cook for an additional 5-7 minutes, then remove from heat and let it cool slightly.
3. Assemble the Empadão: Preheat your oven to 375°F (190°C). Divide the chilled dough in half. On a floured surface, roll out one half to fit a 9-inch pie dish.
Transfer the rolled dough to the pie dish and fill it with the chicken and vegetable mixture. Sprinkle the grated Parmesan cheese evenly over the filling.
4. Top the Pie: Roll out the second half of the dough and place it over the filling. Trim any excess dough and crimp the edges to seal the pie. Cut a few slits in the top crust to allow steam to escape.
Brush the top with the beaten egg for a golden finish.
5. Bake: Place the assembled empadão in the preheated oven and bake for 30-35 minutes, or until the crust is golden brown.
Once done, remove from the oven and let it cool for about 10 minutes before slicing and serving.
Extra Tips
For an added depth of flavor, consider incorporating herbs like thyme or parsley into your chicken filling. You can also experiment with different fillings, such as beef or a vegetarian mix, to suit your taste.
If you’re short on time, using store-bought pie crust can save you some effort, but making it from scratch truly elevates the dish. Serve the empadão warm, and don’t hesitate to make it ahead of time, as it can be reheated without losing its delightful texture and flavor.