

Peruvian cuisine is a feast for the senses, and it’s a delightful surprise to see how well it pairs with a keto lifestyle. Each recipe, from the refreshing Avocado and Tuna Ceviche to the satisfying Keto Lomo Saltado, brings a unique twist to the table. These dishes will not only tantalize your taste buds but also fit perfectly into your low-carb days. If you’re ready to infuse your meals with vibrant flavors and keep things keto-friendly, stay tuned. There’s a world of delicious possibilities waiting for you.
Cauliflower Causa Rellena
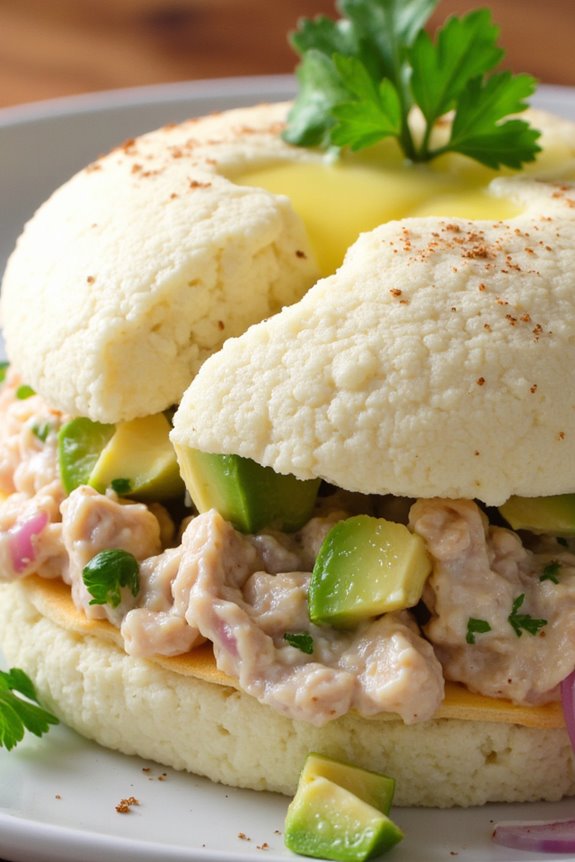
Cauliflower Causa Rellena is a keto-friendly twist on the traditional Peruvian dish known as Causa. This delicious recipe substitutes the starchy yellow potato with cauliflower, making it a low-carb alternative while still retaining the essence of the original dish. The creamy filling is made with avocado, tuna, and spices that complement the vibrant layers of seasoned cauliflower, creating a dish that’s both visually appealing and packed with flavor.
This dish is perfect for special occasions or a unique weeknight dinner. The combination of textures and flavors will surely impress your family and friends while keeping your carb intake in check. With the added health benefits of cauliflower and avocado, this Cauliflower Causa Rellena is a delightful way to enjoy a Peruvian classic without compromising your keto lifestyle.
Ingredients (serving size: 4-6 people):
- 1 medium head of cauliflower
- 2 ripe avocados
- 1 can (5 oz) of tuna, drained
- 1 small red onion, finely chopped
- 1 lime, juiced
- 2 tablespoons of mayonnaise
- 2 tablespoons of cilantro, chopped
- 1 teaspoon of yellow mustard
- 1 teaspoon of aji amarillo paste (or to taste)
- Salt and pepper, to taste
- Olive oil, for drizzling
- Fresh cilantro leaves, for garnish (optional)
Cooking Instructions:
- Prepare the Cauliflower: Begin by cutting the cauliflower into florets and steaming them until tender, about 10-15 minutes. You want the cauliflower to be soft enough to mash but not overly mushy. Once cooked, drain any excess water and let it cool slightly.
- Mash the Cauliflower: Transfer the steamed cauliflower to a mixing bowl. Use a potato masher or fork to mash the cauliflower until it reaches a smooth consistency. You can also use a food processor for a finer texture. Season with salt and pepper to taste, and add a drizzle of olive oil to enhance the flavor.
- Make the Filling: In another bowl, combine the drained tuna, chopped red onion, diced avocados, lime juice, mayonnaise, cilantro, yellow mustard, and aji amarillo paste. Mix everything well until fully combined. Taste the filling and adjust the seasoning with salt and pepper as needed.
- Assemble the Layers: In a serving dish or individual molds, begin layering the mashed cauliflower and the tuna-avocado filling. Start with a layer of cauliflower at the bottom, followed by a layer of the filling, and then another layer of cauliflower on top. Repeat until you reach the desired height, finishing with a layer of cauliflower.
- Chill and Serve: Once assembled, cover the dish with plastic wrap and refrigerate for at least 30 minutes to allow the flavors to meld together and the dish to firm up. Before serving, gently unmold if using molds and garnish with fresh cilantro leaves for an added touch.
Extra Tips: When preparing the Cauliflower Causa Rellena, feel free to customize the filling with additional ingredients such as olives or hard-boiled eggs for added texture and flavor. If you prefer a spicier kick, adjust the amount of aji amarillo paste to your liking.
This dish can be made ahead of time and stored in the refrigerator, making it an ideal option for meal prep or gatherings. Enjoy this unique Peruvian dish as an appetizer or a main course, and don’t forget to pair it with your favorite keto-friendly side!
Zucchini Noodles With Aji Verde
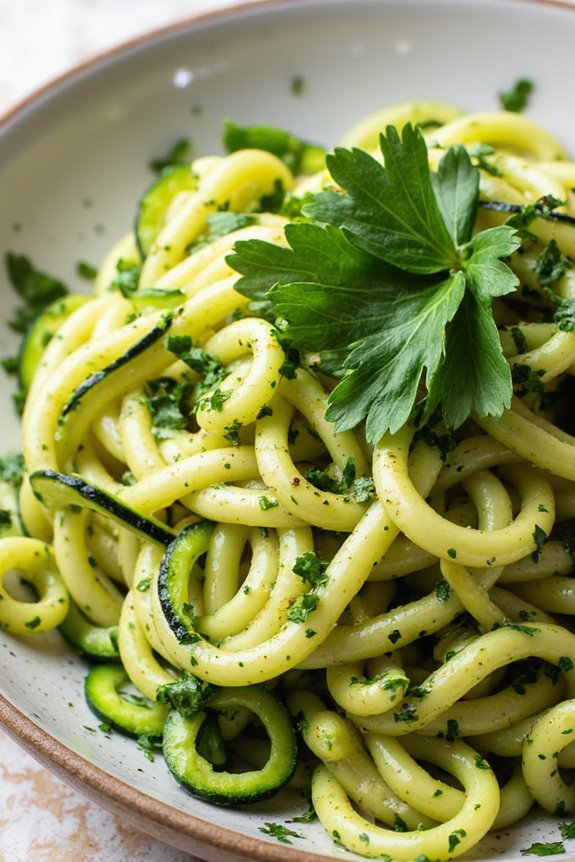
Zucchini Noodles with Aji Verde is a delightful low-carb dish that brings the vibrant flavors of Peru right to your kitchen. This recipe is perfect for those following a ketogenic diet, as it substitutes traditional pasta with zucchini, providing a fresh and healthy alternative. The zesty Aji Verde sauce, made from cilantro, jalapeños, and lime, adds a spicy kick that elevates the entire dish, making it both nutritious and delicious.
This dish isn’t only easy to prepare but also incredibly versatile. You can serve it as a main course or as a side dish, and it pairs wonderfully with grilled meats or seafood. With the bright colors and bold flavors, Zucchini Noodles with Aji Verde is sure to impress family and friends, showcasing how keto cooking can be both satisfying and flavorful.
Ingredients (Serves 4-6):
- 4 medium zucchinis
- 1 tablespoon olive oil
- 1 teaspoon salt
- 1 teaspoon black pepper
- ½ cup fresh cilantro
- 1 jalapeño, seeded and chopped
- 2 cloves garlic, minced
- 2 tablespoons lime juice
- ¼ cup mayonnaise
- 1 tablespoon water (optional, for thinning the sauce)
Cooking Instructions:
- Prepare the Zucchini Noodles: Using a spiralizer or a vegetable peeler, create noodles from the zucchinis. Once done, place them in a colander and sprinkle with salt to draw out excess moisture. Let them sit for about 20 minutes. This will help prevent the noodles from becoming watery when cooked.
- Make the Aji Verde Sauce: In a blender or food processor, combine the fresh cilantro, jalapeño, minced garlic, lime juice, mayonnaise, and a pinch of salt. Blend until smooth. If the sauce is too thick, add a tablespoon of water to reach your desired consistency. Taste and adjust the seasoning if necessary.
- Cook the Zucchini Noodles: Rinse the zucchini noodles under cold water to remove excess salt, then pat them dry with paper towels. In a large skillet, heat the olive oil over medium heat. Add the zucchini noodles and sauté for about 3-5 minutes, stirring frequently until they’re tender but still al dente. Season with black pepper.
- Combine and Serve: Once the zucchini noodles are cooked, remove the skillet from heat. Pour the Aji Verde sauce over the noodles and toss gently to combine, ensuring all the noodles are coated in the flavorful sauce. Serve immediately, garnished with additional cilantro if desired.
Extra Tips:
When preparing Zucchini Noodles with Aji Verde, it’s important to avoid overcooking the zucchini, as this can lead to a mushy texture. Aim for a firm yet tender bite.
Additionally, you can customize the Aji Verde sauce by adjusting the spice level based on your preference; simply add more or fewer jalapeños. This dish can also be made ahead of time; just store the sauce separately to keep the noodles fresh. Enjoy this dish warm for the best flavor experience!
Keto Lomo Saltado

Keto Lomo Saltado is a delicious twist on the traditional Peruvian stir-fry that combines marinated steak, fresh vegetables, and a savory sauce, all while keeping it low in carbs. This dish isn’t only packed with flavor but also adheres to the ketogenic diet principles, guaranteeing you can enjoy a hearty meal without sacrificing your dietary goals.
The recipe substitutes high-carb ingredients with keto-friendly alternatives, allowing you to savor the iconic tastes of Peru. This dish is perfect for family dinners or gatherings, offering a satisfying balance of protein and vegetables.
The use of tender beef, fresh tomatoes, and onions gives this meal a vibrant and colorful presentation. Plus, by using cauliflower rice instead of traditional starches, you can keep the carb count low while still enjoying a delightful and filling dish.
Ingredients (Serves 4-6)
- 1.5 lbs sirloin steak, sliced into thin strips
- 2 tablespoons olive oil
- 1 medium red onion, sliced
- 2 medium tomatoes, diced
- 1 yellow bell pepper, sliced
- 3 cloves garlic, minced
- 2 tablespoons soy sauce or coconut aminos
- 1 tablespoon red wine vinegar
- 1 teaspoon cumin
- Salt and pepper to taste
- 1 cup cauliflower rice (optional for serving)
- Fresh cilantro, chopped (for garnish)
Cooking Instructions
- Marinate the Steak: In a bowl, combine the sliced sirloin steak, soy sauce (or coconut aminos), red wine vinegar, cumin, salt, and pepper. Mix well to confirm the steak is evenly coated. Let it marinate for at least 15-30 minutes to absorb the flavors.
- Sauté the Onions and Peppers: Heat 1 tablespoon of olive oil in a large skillet over medium-high heat. Add the sliced red onion and yellow bell pepper. Sauté for about 3-4 minutes until they begin to soften and the onions turn translucent. Remove the vegetables from the skillet and set them aside.
- Cook the Steak: In the same skillet, add the remaining tablespoon of olive oil. Once hot, add the marinated steak strips in a single layer. Cook for about 3-5 minutes, stirring occasionally, until the steak is browned and cooked to your desired doneness. Be careful not to overcook the meat.
- Add Garlic and Tomatoes: Once the steak is cooked, add the minced garlic and diced tomatoes to the skillet. Stir everything together and cook for another 2-3 minutes until the tomatoes begin to soften and release their juices.
- Combine Everything Together: Return the sautéed onions and bell peppers to the skillet. Mix all the ingredients thoroughly and cook for an additional minute to heat through and combine the flavors. Adjust seasoning with more salt and pepper if needed.
- Serve: If using cauliflower rice, quickly sauté it in a separate pan for about 2-3 minutes until warmed through. Serve the Lomo Saltado over the cauliflower rice, garnished with fresh chopped cilantro.
Extra Tips
For the best flavor, allow the steak to marinate longer, up to a few hours if time permits. This will enhance the tenderness and depth of flavor.
You can also experiment with different vegetables, such as zucchini or mushrooms, for added texture and taste. To make meal prep easier, consider preparing a larger batch and storing leftovers in the refrigerator for quick meals throughout the week.
Enjoy your Keto Lomo Saltado with a side of fresh avocado for a creamy contrast!
Peruvian Chicken With Cilantro Sauce

Peruvian Chicken with Cilantro Sauce is a vibrant and flavorful dish that embodies the rich culinary traditions of Peru while adhering to a keto diet. The tender, juicy chicken is marinated in a mixture of spices that infuse it with bold flavors, and the cilantro sauce adds a fresh herbaceous element that elevates the dish to new heights.
This recipe is perfect for a weeknight dinner or a special occasion, offering both nutrition and taste without compromising on your dietary goals. The combination of grilled or baked chicken with a zesty cilantro sauce makes this dish not only delicious but also visually appealing.
Serve it alongside a keto-friendly side, such as roasted vegetables or a fresh salad, for a complete meal. This recipe caters to 4-6 people, making it perfect for family gatherings or meal prep for the week ahead.
Ingredients:
- 4-6 chicken thighs or breasts
- 4 cloves garlic, minced
- 1 tablespoon cumin
- 1 tablespoon paprika
- 1 teaspoon salt
- 1 teaspoon black pepper
- 2 tablespoons olive oil
- 1 cup fresh cilantro leaves, packed
- 1/2 cup Greek yogurt or sour cream
- 2 tablespoons lime juice
- 1 jalapeño, seeds removed (optional for heat)
- 1/4 teaspoon salt (for the sauce)
Cooking Instructions:
- Marinate the Chicken: In a large bowl, combine minced garlic, cumin, paprika, salt, black pepper, and olive oil. Mix well to create a marinade. Add the chicken thighs or breasts to the bowl, making sure each piece is evenly coated in the marinade. Cover and refrigerate for at least 1 hour, or up to overnight for maximum flavor.
- Prepare the Cilantro Sauce: In a blender or food processor, add the fresh cilantro leaves, Greek yogurt (or sour cream), lime juice, jalapeño (if using), and 1/4 teaspoon salt. Blend until smooth and creamy. Taste and adjust seasoning or lime juice as needed. Set aside.
- Cook the Chicken: Preheat your grill or oven to 400°F (200°C). If using a grill, cook the marinated chicken for about 6-8 minutes on each side, or until the internal temperature reaches 165°F (75°C). If using the oven, place the chicken on a baking sheet and bake for 25-30 minutes, turning halfway through, until cooked through.
- Serve: Once the chicken is cooked, remove it from the grill or oven and let it rest for a few minutes. Slice the chicken if desired, and serve it drizzled with the cilantro sauce. Garnish with additional cilantro leaves or lime wedges, if you like.
Extra Tips: For added depth of flavor, consider adding a splash of apple cider vinegar or a teaspoon of honey to the marinade for a hint of sweetness. If you prefer a spicier sauce, leave some seeds in the jalapeño or add a dash of hot sauce to the cilantro sauce.
This dish is incredibly versatile, so feel free to pair it with your favorite keto-friendly sides, such as sautéed zucchini or a mixed greens salad, for a complete meal.
Avocado and Tuna Ceviche

Avocado and Tuna Ceviche is a delightful twist on the classic Peruvian dish, bringing together the rich creaminess of ripe avocados and the fresh, tangy zest of ceviche. This keto-friendly recipe incorporates fresh ingredients that not only highlight the flavors of the sea but also fit perfectly within a low-carb lifestyle.
Whether you’re looking for a light lunch, an impressive appetizer, or a revitalizing dish for a gathering, this ceviche is sure to impress. The combination of tuna, lime juice, and spices creates a vibrant and satisfying dish that bursts with flavor.
The avocado adds a luxurious texture that complements the tuna while providing healthy fats, making it a perfect choice for those on a ketogenic diet. Serve this ceviche chilled, garnished with fresh cilantro and slices of lime for a beautiful presentation that will have everyone coming back for more.
Ingredients (Serves 4-6):
- 2 (8 oz) cans of solid white tuna in water, drained
- 2 ripe avocados, diced
- 1/2 red onion, finely diced
- 1-2 jalapeños, finely chopped (adjust according to spice preference)
- 1 cup fresh lime juice (about 8-10 limes)
- 1/2 cup fresh cilantro, chopped
- Salt and pepper to taste
- Optional: Tortilla chips (for serving, if not strictly keto)
Cooking Instructions:
- Prepare the Tuna: Open the canned tuna and drain any excess water. Place the tuna in a large mixing bowl and use a fork to gently break it apart into smaller pieces. This will help the flavors meld together in the ceviche.
- Dice the Vegetables: While the tuna is resting, finely dice the red onion and jalapeños. Make sure to remove the seeds from the jalapeños if you prefer a milder flavor. Add the diced onion and jalapeños to the bowl with the tuna.
- Add Lime Juice: Pour the fresh lime juice over the tuna mixture. The acidity of the lime juice is essential as it “cooks” the tuna slightly and infuses it with flavor. Mix everything gently to confirm the tuna and vegetables are evenly coated.
- Incorporate Avocado and Cilantro: Carefully fold in the diced avocados and chopped cilantro. Be gentle to avoid mashing the avocados too much, as you want to maintain their texture in the dish.
- Season to Taste: Sprinkle salt and pepper over the ceviche according to your taste preferences. Mix once more to combine all ingredients thoroughly. Let the ceviche sit for about 10-15 minutes to allow the flavors to develop.
- Serve: Serve the ceviche chilled in bowls, garnished with additional cilantro and lime wedges if desired. If you’re using tortilla chips, place them on the side for dipping.
Extra Tips:
For an added burst of flavor, consider marinating the tuna in lime juice for a longer period before adding the avocados. This will enhance the ceviche’s taste but be cautious not to let the tuna sit too long as it can become overly “cooked.”
Additionally, if you prefer a milder taste, feel free to reduce the amount of jalapeño or replace it with a milder pepper. Enjoy your Avocado and Tuna Ceviche with friends and family for a nutritious and delicious meal!
Keto Causa With Shrimp
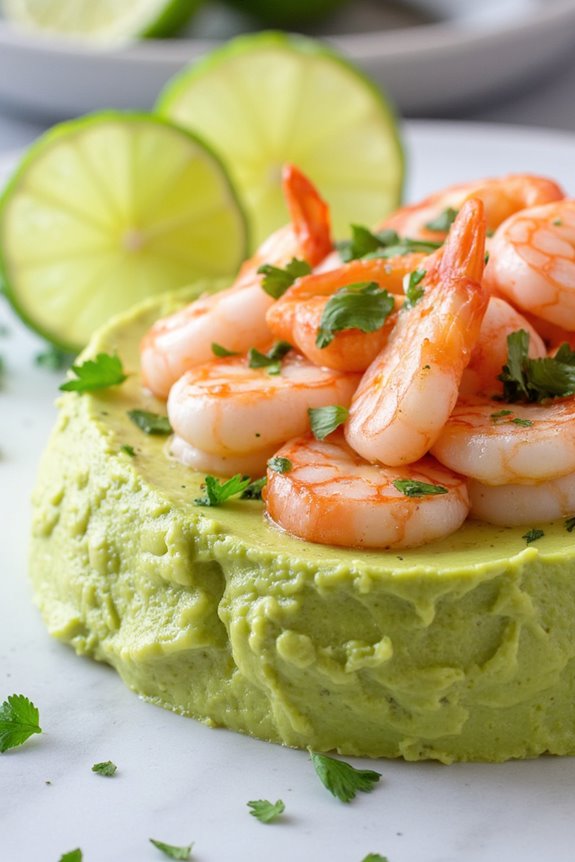
Keto Causa With Shrimp is a delightful twist on the traditional Peruvian dish, Causa. This version maintains the essence of the original while complying with a ketogenic diet, using avocado and cauliflower instead of the typical potato base. The result is a creamy, flavorful layered dish that’s both satisfying and low in carbs, making it perfect for those following a keto lifestyle.
The combination of shrimp adds a burst of flavor and protein, making this dish a complete meal that’s sure to impress. This vibrant dish not only looks appealing but also brings the authentic flavors of Peru to your table. The use of lime juice and aji amarillo (yellow chili) in the filling gives it a unique taste that perfectly complements the creamy avocado and cauliflower mix.
Whether you’re hosting a dinner party or looking for a meal prep option, Keto Causa With Shrimp is versatile enough to be served as an appetizer or a main course.
Ingredients (Serves 4-6)
- 1 medium head of cauliflower, steamed and riced
- 2 ripe avocados
- 1 lb shrimp, peeled and deveined
- 3 tablespoons lime juice
- 1-2 tablespoons aji amarillo paste (or yellow chili paste)
- 1/4 cup mayonnaise
- 1/4 cup cilantro, chopped
- 1 teaspoon garlic powder
- Salt and pepper, to taste
- Olive oil, for cooking
- Lettuce leaves, for serving (optional)
- Slices of lime, for garnish
Cooking Instructions
- Prepare Cauliflower: Start by steaming the cauliflower until tender. Once cooked, allow it to cool slightly before ricing it using a food processor or grater. This will form the base of your keto causa.
- Make the Avocado Mixture: In a mixing bowl, mash the ripe avocados until smooth. Add lime juice, aji amarillo paste, garlic powder, salt, and pepper to the mashed avocado. Mix well until all ingredients are combined.
- Combine Cauliflower and Avocado: Gently fold the riced cauliflower into the avocado mixture until fully integrated. Adjust seasoning if necessary, confirming the mixture is flavorful.
- Cook the Shrimp: In a skillet, heat a drizzle of olive oil over medium heat. Add the shrimp and season with salt, pepper, and a little lime juice. Cook for about 2-3 minutes on each side or until they turn pink and opaque. Remove from heat and let cool slightly.
- Assemble the Causa: In a serving dish or individual molds, layer half of the cauliflower-avocado mixture at the bottom. Next, add a layer of cooked shrimp, followed by the remaining cauliflower-avocado mixture on top. Press down gently to compact the layers.
- Chill and Serve: Refrigerate the assembled causa for at least 30 minutes to allow the flavors to meld and the dish to set. When ready to serve, garnish with cilantro and lime slices. Optionally, serve on lettuce leaves for a fresh touch.
Extra Tips
When preparing Keto Causa With Shrimp, verify that the shrimp are cooked just until they turn pink to avoid overcooking, which can make them tough.
If you can’t find aji amarillo paste, you can substitute it with a mix of yellow bell pepper and a pinch of cayenne for some heat. Additionally, for a variation, consider adding diced cucumber or bell peppers to the shrimp mixture for added crunch and freshness.
Enjoy experimenting with flavors to make this dish your own!
Spicy Peruvian Meatballs
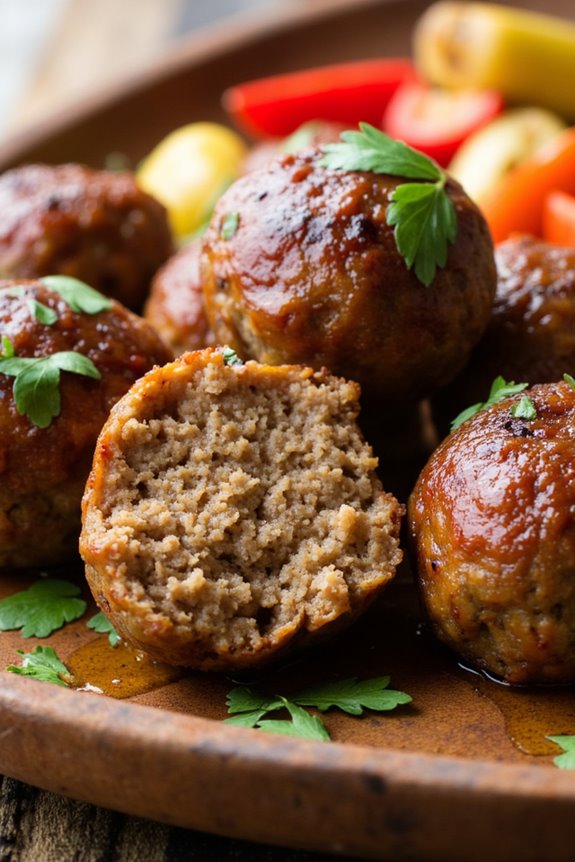
Spicy Peruvian Meatballs, known as “Albondigas Picantes,” are a delightful twist on traditional meatballs, infused with a medley of Peruvian spices that deliver a kick of flavor. This dish isn’t only keto-friendly but also rich in protein and satisfying, making it an excellent option for those following a low-carb diet.
Perfect for a family dinner or a gathering with friends, these meatballs can be served with a zesty dipping sauce or over a bed of sautéed vegetables for a complete meal. The combination of ground meats—typically beef and pork—paired with Peruvian chili peppers, garlic, and fresh herbs creates a dish that’s bursting with flavor.
The meatballs are baked to perfection, guaranteeing they’re juicy on the inside while having a delightful crust on the outside. Whether you’re craving something hearty or looking to impress your guests with a unique dish, Spicy Peruvian Meatballs are sure to satisfy.
Ingredients (Serves 4-6)
- 1 pound ground beef
- 1 pound ground pork
- 1/2 cup almond flour
- 1/4 cup grated Parmesan cheese
- 2 large eggs
- 4 cloves garlic, minced
- 1 small red onion, finely chopped
- 1-2 Peruvian chili peppers (Aji Amarillo or Rocoto), finely chopped (adjust for spice preference)
- 1 teaspoon cumin
- 1 teaspoon paprika
- 1 teaspoon salt
- 1/2 teaspoon black pepper
- 1 tablespoon fresh cilantro, chopped (plus extra for garnish)
- 1 tablespoon olive oil (for drizzling)
Cooking Instructions
1. Preheat the Oven: Begin by preheating your oven to 400°F (200°C). This guarantees that your meatballs will cook evenly and achieve a nice golden brown color.
2. Prepare the Mixture: In a large mixing bowl, combine the ground beef and ground pork. Add the almond flour, grated Parmesan cheese, eggs, minced garlic, chopped onion, and chopped chili peppers. Season the mixture with cumin, paprika, salt, black pepper, and chopped cilantro.
Use your hands to mix everything together until well combined, being careful not to overmix.
3. Shape the Meatballs: Once the mixture is well combined, take a small portion of the mixture and roll it into a ball about the size of a golf ball. Place the shaped meatballs on a parchment-lined baking sheet, ensuring they’re spaced apart to allow for even cooking.
4. Drizzle with Olive Oil: Lightly drizzle olive oil over the meatballs to enhance their flavor and help them achieve a crispy exterior during baking.
5. Bake the Meatballs: Place the baking sheet in the preheated oven and bake for 20-25 minutes, or until the meatballs are cooked through and reach an internal temperature of at least 160°F (70°C). They should be golden brown on the outside.
6. Serve: Once cooked, remove the meatballs from the oven and let them rest for a couple of minutes. Serve them warm, garnished with extra cilantro. They can be enjoyed on their own, with a dipping sauce, or over a bed of sautéed vegetables.
Extra Tips
When making Spicy Peruvian Meatballs, feel free to experiment with the level of spiciness by adjusting the amount of Peruvian chili peppers used. If you prefer a milder flavor, you can substitute the chili peppers with bell peppers or omit them altogether.
Additionally, consider pairing these meatballs with a side of avocado or a fresh salad to enhance the meal while keeping it keto-friendly. For added flavor, you can also incorporate other herbs such as parsley or oregano into the meatball mixture. Enjoy your culinary adventure with these delicious meatballs!
Chicharrones With Rocoto Sauce

Chicharrones, a staple in Peruvian cuisine, are crispy fried pork belly or pork rinds that pack a flavorful punch. When paired with rocoto sauce, a spicy and tangy condiment made from the fiery rocoto pepper, this dish transforms into a delightful keto-friendly meal that’s both satisfying and low in carbohydrates. The combination of the rich, succulent pork with the vibrant and piquant sauce makes for an irresistible culinary experience, perfect for gatherings or a special family dinner.
Preparing chicharrones with rocoto sauce may seem intimidating, but it’s surprisingly straightforward. Start by selecting good-quality pork belly for the chicharrones to guarantee a crispy and tender result. The rocoto sauce adds an authentic Peruvian touch, allowing you to experience the true flavors of the Andes. This recipe serves 4-6 people, making it an ideal choice for sharing with friends or family.
Ingredients (Serves 4-6):
- 2 pounds pork belly, skin on
- 4 cups water
- 1 tablespoon salt
- 1 teaspoon black pepper
- 1 teaspoon garlic powder
- 1 cup avocado oil (for frying)
For the Rocoto Sauce:
- 2 fresh rocoto peppers (or substitute with habanero for heat)
- 1/2 cup mayonnaise
- 2 tablespoons lime juice
- 1 clove garlic, minced
- Salt to taste
Cooking Instructions:
1. Prepare the Pork Belly:
Begin by cutting the pork belly into bite-sized cubes. Make sure to leave the skin on, as this is vital for achieving that crispy texture. In a large pot, combine the cubed pork belly, water, salt, black pepper, and garlic powder. Bring the mixture to a boil over medium-high heat.
2. Boil the Pork:
Once boiling, reduce the heat to low and simmer for about 30-40 minutes. This process helps to render some of the fat and tenderize the meat. Keep an eye on the liquid level; you may need to add a little more water if it evaporates too quickly.
3. Drain and Dry:
After the pork belly has simmered, carefully drain it and let it rest for at least 15 minutes. This resting period allows the meat to cool slightly and the moisture to evaporate, which is key for achieving crispiness when frying.
4. Fry the Pork:
In a large skillet or deep frying pan, heat the avocado oil over medium-high heat. Once the oil is hot, add the pork belly cubes in batches to avoid overcrowding. Fry each batch for about 4-5 minutes or until they’re golden brown and crispy. Use a slotted spoon to remove the chicharrones and place them on paper towels to absorb excess oil.
5. Prepare the Rocoto Sauce:
While the chicharrones are frying, prepare the rocoto sauce. In a blender or food processor, combine the rocoto peppers (seeds removed for less heat if desired), mayonnaise, lime juice, minced garlic, and salt. Blend until smooth and adjust seasoning to taste. Be cautious with the peppers; rocoto is quite spicy!
6. Serve:
Once all the chicharrones are fried and crispy, plate them up and serve hot with a generous drizzle of rocoto sauce on top or on the side for dipping. Enjoy your delicious Peruvian keto meal!
Extra Tips:
When cooking chicharrones, it’s important to monitor the oil temperature closely to achieve the perfect crispiness without burning the meat. You can test the oil readiness by dropping a small piece of pork; if it sizzles immediately, the oil is hot enough.
Additionally, feel free to adjust the heat level of the rocoto sauce by adding more or fewer peppers based on your preference. Pair the dish with a simple side salad or avocado slices for a complete meal.
Creamy Peruvian Mushroom Soup
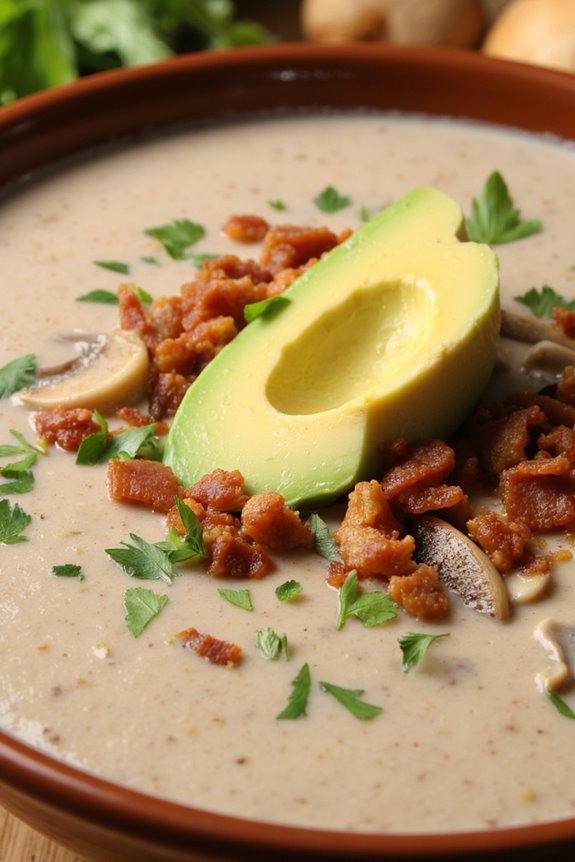
Creamy Peruvian Mushroom Soup, or “Sopa de Champiñones,” is a delightful dish that brings the rich flavors of Peru right into your kitchen. This comforting soup is perfect for those following a keto diet, as it’s low in carbs and high in healthy fats. The combination of fresh mushrooms, aromatic herbs, and creamy goodness makes this soup a soothing meal option for any time of the year.
The use of Peruvian ingredients such as aji amarillo or huacatay can elevate this dish, infusing it with authentic flavors. Paired with a side of crispy bacon or avocado, this creamy mushroom soup becomes a nourishing and satisfying meal. Whether you’re enjoying it on a chilly day or serving it to impress guests, this recipe will surely be a hit.
Ingredients (serving size: 4-6 people)
- 1 pound fresh mushrooms (cremini or button), sliced
- 1 medium onion, finely chopped
- 3 cloves garlic, minced
- 4 cups vegetable or chicken broth
- 1 cup heavy cream
- 2 tablespoons olive oil
- 1 teaspoon dried thyme
- 1 teaspoon aji amarillo paste (optional)
- Salt and pepper to taste
- Fresh cilantro or parsley, for garnish
Cooking Instructions
- Sauté the Aromatics: In a large pot, heat the olive oil over medium heat. Add the chopped onion and sauté until it becomes translucent, about 5 minutes. Then, add the minced garlic and sauté for an additional minute until fragrant. This step builds a flavor base for the soup.
- Cook the Mushrooms: Add the sliced mushrooms to the pot and cook for about 8-10 minutes, stirring occasionally, until the mushrooms are tender and have released their moisture. This step enhances the umami flavor of the soup.
- Add Broth and Seasoning: Pour in the vegetable or chicken broth and add the dried thyme, aji amarillo paste (if using), and salt and pepper to taste. Bring the mixture to a gentle boil, then reduce the heat and let it simmer for about 15-20 minutes. This allows the flavors to meld together beautifully.
- Blend the Soup: After simmering, use an immersion blender to puree the soup until smooth. If you don’t have an immersion blender, you can carefully transfer the soup in batches to a regular blender. This step creates the creamy texture that’s characteristic of this soup.
- Incorporate Cream: Once blended, return the soup to the pot over low heat and stir in the heavy cream. Allow it to heat through for a few minutes without boiling. This final step adds richness and creaminess to the soup.
- Serve and Garnish: Ladle the soup into bowls and garnish with fresh cilantro or parsley. You can also add crispy bacon bits or avocado slices for extra flavor and texture. Serve hot and enjoy!
Extra Tips
For an added depth of flavor, consider incorporating a splash of white wine or sherry during the cooking process before adding the broth.
If you want a bit of heat, feel free to increase the amount of aji amarillo paste or add a pinch of cayenne pepper.
This soup can also be made ahead of time and stored in the refrigerator for a few days, making it a convenient option for meal prep. Just reheat gently before serving to maintain its creamy consistency.
Low-Carb Anticuchos

Anticuchos are a traditional Peruvian dish that usually consists of marinated beef heart skewers, grilled to perfection and served with a spicy sauce. While the classic recipe is rich in flavor and a beloved street food, our low-carb version preserves all the authentic taste without the carbs, making it perfect for those following a ketogenic diet. This recipe uses tender pieces of beef, infused with a delicious marinade, and grilled to achieve a smoky flavor that makes anticuchos irresistible.
To make these low-carb anticuchos, the key is to marinate the meat long enough to absorb the spices and flavors. The combination of cilantro, garlic, and a touch of vinegar creates a tangy and aromatic base that enhances the beef’s taste. Paired with a zesty dipping sauce, these skewers can be served as an appetizer or a main course, making them a versatile option for any meal. Enjoy these low-carb anticuchos with a side of avocado or a fresh salad for a complete keto-friendly feast.
Ingredients (serving size: 4-6 people)
- 2 pounds beef sirloin or ribeye, cut into 1-inch cubes
- 1 cup fresh cilantro, chopped
- 4 cloves garlic, minced
- 1/4 cup red wine vinegar
- 1 tablespoon cumin
- 1 tablespoon paprika
- 1 teaspoon salt
- 1 teaspoon black pepper
- 1 tablespoon olive oil
- 1/2 teaspoon chili powder (optional, for spiciness)
- Skewers (if using wooden skewers, soak them in water for 30 minutes)
Cooking Instructions
- Prepare the Marinade: In a large bowl, combine the chopped cilantro, minced garlic, red wine vinegar, cumin, paprika, salt, black pepper, olive oil, and chili powder (if using). Mix well until all the ingredients are evenly blended. This marinade will impart a rich flavor to the beef.
- Marinate the Beef: Add the cubed beef to the marinade, guaranteeing each piece is well coated. Cover the bowl with plastic wrap or transfer everything to a resealable plastic bag. Refrigerate for at least 1 hour, but for best results, marinate for 4-6 hours or overnight to allow the flavors to fully penetrate the meat.
- Preheat the Grill: About 15-20 minutes before cooking, preheat your grill to medium-high heat. If using a charcoal grill, ensure the coals are ashed over and glowing. A hot grill is essential for achieving that perfect char on the meat.
- Skewer the Beef: Thread the marinated beef cubes onto the skewers, leaving a little space between each piece to allow for even cooking. If using wooden skewers, make sure they’re soaked to prevent them from burning on the grill.
- Grill the Anticuchos: Place the skewers on the preheated grill. Cook for about 8-10 minutes, turning occasionally until the beef is cooked to your desired level of doneness. For medium-rare, aim for an internal temperature of 135°F (57°C).
- Serve: Once cooked, remove the skewers from the grill and let them rest for a few minutes. Serve the anticuchos warm, accompanied by a side of your favorite dipping sauce, such as aji verde, and garnish with additional cilantro if desired.
Extra Tips
For an extra burst of flavor, consider adding diced bell peppers or onions to the skewers along with the beef. This not only enhances the visual appeal but also provides additional texture.
If you’re looking to keep the dish completely low-carb, stick with just the meat. Additionally, don’t skip the resting step after grilling; it allows the juices to redistribute, making the beef even more tender and flavorful.
Enjoy your low-carb anticuchos with friends and family, and watch them disappear quickly!
Fluffy Peruvian Egg Frittata

The Fluffy Peruvian Egg Frittata, or “frittata de huevo,” is a delightful dish that embodies the essence of Peruvian flavor while maintaining a keto-friendly diet. This dish isn’t only simple to prepare but also incredibly satisfying, making it perfect for breakfast, lunch, or even a light dinner.
The frittata is loaded with eggs, vegetables, and cheese, creating a fluffy and savory meal that can be easily customized with your favorite ingredients. Traditional Peruvian flavors shine through in this recipe, as you can incorporate local vegetables like bell peppers, onions, and even a hint of ají amarillo for a touch of heat.
The combination of fluffy eggs and fresh ingredients results in a hearty dish that’s both nutritious and delicious. Best of all, this frittata is low in carbs and high in healthy fats, making it an ideal choice for those following a ketogenic lifestyle.
Ingredients (Serves 4-6):
- 8 large eggs
- 1/2 cup heavy cream
- 1 cup bell peppers, diced (red, green, or yellow)
- 1/2 cup onion, finely chopped
- 1 cup spinach, chopped
- 1 cup feta cheese or queso fresco, crumbled
- 1 teaspoon salt
- 1/2 teaspoon black pepper
- 1 tablespoon olive oil or butter
- 1/2 teaspoon paprika (optional)
- Fresh herbs (such as cilantro or parsley) for garnish
Cooking Instructions:
- Preheat the Oven: Begin by preheating your oven to 375°F (190°C). This will guarantee that the frittata cooks evenly and gets a nice golden top.
- Prepare the Egg Mixture: In a large mixing bowl, crack the 8 large eggs and add 1/2 cup of heavy cream. Whisk them together until well combined and slightly frothy. This mixture is the base of your frittata and will give it that fluffy texture.
- Add Vegetables and Seasoning: To the egg mixture, add the diced bell peppers, chopped onion, chopped spinach, crumbled feta cheese, salt, black pepper, and paprika if using. Stir everything together gently so that the vegetables and cheese are evenly distributed throughout the egg mixture.
- Cook the Vegetables: In a large, oven-safe skillet, heat 1 tablespoon of olive oil or butter over medium heat. Once hot, add the chopped onion and bell peppers. Sauté for about 5 minutes until they’re softened and fragrant, then add the chopped spinach and cook for an additional 2 minutes until wilted.
- Combine and Cook: Pour the egg and vegetable mixture into the skillet over the sautéed vegetables. Stir slightly to combine. Allow the frittata to cook on the stovetop for about 3-4 minutes until the edges begin to set.
- Bake the Frittata: Transfer the skillet to the preheated oven and bake for 15-20 minutes, or until the center is firm and the top is lightly golden. Check for doneness by inserting a knife into the center; it should come out clean.
- Cool and Serve: Once cooked, remove the frittata from the oven and let it cool for a few minutes. Slice it into wedges and serve warm, garnished with fresh herbs if desired.
Extra Tips:
To add a unique twist to your Fluffy Peruvian Egg Frittata, consider incorporating other traditional Peruvian ingredients such as diced tomatoes, avocado, or even cooked chorizo for extra flavor.
You can also experiment with different cheeses or herbs to suit your taste preferences. For a more substantial meal, serve the frittata alongside a simple green salad or avocado slices. This dish can be made ahead of time and reheats well, making it an excellent option for meal prep!