

Strolling through the vibrant streets of Colombia, the enticing aromas of street food are simply irresistible. Each vendor offers a taste of Colombian culture, with every bite of crispy arepas and savory empanadas sharing its own unique story. If you’re eager to bring these market-style delights into your kitchen, you’re definitely in for a treat. Let’s uncover ten mouthwatering recipes that will fill your home with the lively flavors of Colombia.
Arepas: The Versatile Corn Cake
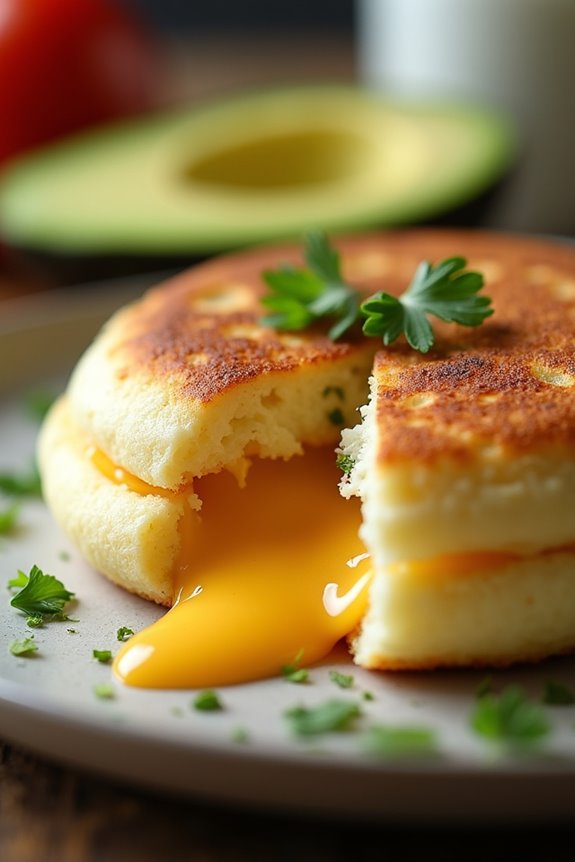
Arepas are a beloved staple in Colombian cuisine, enjoyed at any time of the day. These delicious corn cakes can be grilled, baked, or fried, and they serve as a perfect base for a variety of fillings, making them incredibly versatile. Traditionally made with precooked corn flour, arepas have a slightly crispy exterior and a soft, comforting interior. They can be enjoyed plain, with cheese, or filled with meats and vegetables, making them a favorite among street food vendors and home cooks alike.
Making arepas isn’t only easy but also allows for creativity in the kitchen. You can customize them with different toppings and fillings to suit your taste. Whether you’re serving them for breakfast with eggs, as a snack with cheese, or as a main dish with shredded beef, these corn cakes are sure to be a hit. Let’s explore the recipe for arepas that serves 4-6 people.
Ingredients:
- 2 cups precooked corn flour (arepa flour)
- 2 1/2 cups warm water
- 1 teaspoon salt
- 1 tablespoon vegetable oil (for frying or grilling)
- Optional fillings: cheese, avocado, shredded beef, chicken, or black beans
Cooking Instructions:
- Prepare the Dough: In a large mixing bowl, combine the precooked corn flour and salt. Gradually add the warm water while mixing with your hands or a spoon until a soft and pliable dough forms. The dough shouldn’t be sticky; if it is, add a little more flour.
- Shape the Arepas: Divide the dough into equal portions (about 8-10 pieces for smaller arepas). Roll each portion into a ball and then flatten it gently between your palms to form a disc about 1/2 inch thick. Confirm that the edges are smooth to help them cook evenly.
- Cook the Arepas: Heat a non-stick skillet or griddle over medium heat and add a tablespoon of vegetable oil. Place the arepas in the skillet, making sure not to overcrowd them. Cook for about 5-7 minutes on each side, or until they develop a golden-brown crust. You can also bake them in a preheated oven at 400°F (200°C) for about 20 minutes, flipping halfway through.
- Check for Doneness: To check if the arepas are ready, they should sound hollow when tapped on the sides. If you’re adding cheese or other fillings, slice the arepas open while still warm and fill them to your liking.
- Serve: Enjoy the arepas warm, either plain or filled with your desired ingredients. They can be served alongside sauces or salsas for an extra kick of flavor.
Extra Tips:
When making arepas, it’s important to use warm water as it helps to activate the flour, resulting in a better texture. If you’re feeling adventurous, try adding seasonings like garlic powder or chopped herbs to the dough for added flavor.
Additionally, leftovers can be stored in an airtight container in the refrigerator for a few days and reheated on a skillet for a quick meal. Don’t be afraid to experiment with different fillings and toppings for a unique twist on this classic dish!
Empanadas: Flavorful Stuffed Pastries

Empanadas are a beloved street food across Colombia, celebrated for their crispy exterior and savory fillings. These delightful pastries have a rich history and are often filled with a variety of ingredients, such as beef, chicken, cheese, or vegetables, making them a versatile option for any meal or snack.
Perfect for gatherings or a quick bite on the go, empanadas offer a taste of Colombian culture that’s both satisfying and delicious.
Making empanadas may seem challenging at first, but with a little practice, you can create a batch that rivals those found at your favorite street vendor. The key to a successful empanada lies in the dough, which should be perfectly tender yet firm enough to hold the filling.
Once you master the art of sealing the edges, you’ll be well on your way to impressing your family and friends with this flavorful dish.
Ingredients (serving size: 4-6 people):
- 2 cups of all-purpose flour
- 1/2 teaspoon of salt
- 1/4 cup of unsalted butter, chilled and diced
- 1/2 cup of water (or more as needed)
- 1 cup of cooked and shredded beef or chicken (or your choice of filling)
- 1/2 cup of diced potatoes (optional)
- 1/2 cup of chopped onions
- 1/2 teaspoon of ground cumin
- 1/2 teaspoon of paprika
- 1/4 cup of chopped cilantro (optional)
- Vegetable oil for frying
Cooking Instructions:
1. Prepare the Dough: In a large mixing bowl, combine the all-purpose flour and salt. Add the diced butter and mix with your fingertips or a pastry cutter until the mixture resembles coarse crumbs. Gradually add water, mixing until the dough comes together.
Knead the dough on a lightly floured surface for about 5 minutes until smooth. Cover with a kitchen towel and let it rest for at least 30 minutes.
2. Make the Filling: In a skillet over medium heat, add a splash of vegetable oil and sauté the onions until translucent. Add the cooked and shredded beef or chicken, diced potatoes (if using), ground cumin, and paprika.
Cook for about 5-7 minutes until everything is well combined and heated through. Stir in chopped cilantro if desired. Remove from heat and let the mixture cool.
3. Roll Out the Dough: After the dough has rested, divide it into small balls (about the size of a golf ball). On a floured surface, roll each ball into a thin circle, about 5-6 inches in diameter.
Aim for an even thickness to guarantee even cooking.
4. Fill the Empanadas: Place a generous tablespoon of the filling in the center of each dough circle. Be careful not to overfill, as this can make sealing difficult. Fold the dough over to create a half-moon shape, pressing the edges together to seal.
5. Seal the Edges: Using your fingers, crimp the edges of the empanada to make sure they’re securely closed. You can also use a fork to press down on the edges for a decorative touch and extra security.
6. Fry the Empanadas: In a deep skillet or pot, heat vegetable oil over medium-high heat. Once hot, carefully add a few empanadas at a time, being careful not to overcrowd the pan.
Fry for about 3-4 minutes on each side or until golden brown and crispy. Remove with a slotted spoon and drain on paper towels.
7. Serve: Enjoy the empanadas warm, preferably with a side of aji sauce or your favorite dipping sauce.
Extra Tips:
When making empanadas, verify that your dough isn’t too sticky; if it is, gradually add more flour while kneading.
Additionally, for a healthier alternative, consider baking the empanadas instead of frying them. Preheat your oven to 375°F (190°C), place the filled empanadas on a baking sheet, and brush them lightly with egg wash before baking for 20-25 minutes or until golden brown.
This will give you a deliciously crispy pastry without the extra oil.
Buñuelos: Crispy Cheese Balls

Buñuelos are a beloved Colombian street food that showcase the perfect blend of savory and crispy textures. These delightful cheese balls are often enjoyed during festive occasions, holidays, or simply as a delectable snack. The combination of cheese and flour creates a unique flavor that’s both comforting and satisfying, making buñuelos a favorite among locals and visitors alike.
When expertly fried, they develop a golden-brown exterior while remaining soft and cheesy on the inside—an irresistible treat that captures the essence of Colombian culinary traditions.
Making buñuelos at home isn’t only rewarding but also allows you to experience a taste of Colombia in your own kitchen. The preparation is straightforward, and with a few simple ingredients, you can whip up a batch that will impress your family and friends.
Serve them warm, dusted with powdered sugar or alongside a sweet sauce, and watch as they disappear in no time. Let’s explore the recipe and discover how to create these crispy cheese balls that are sure to delight!
Ingredients (Serves 4-6)
- 1 cup of queso fresco (or any fresh cheese)
- 1 cup of tapioca or yuca starch
- 1 cup of all-purpose flour
- 1 teaspoon of baking powder
- 1/4 teaspoon of salt
- 1/4 cup of milk
- 1 large egg
- Oil for frying
Cooking Instructions
- Prepare the Cheese Mixture: In a mixing bowl, crumble the queso fresco into small pieces. This will guarantee that the cheese melts and incorporates well into the dough. If you’re using a firmer cheese, consider grating it for a smoother texture.
- Combine Dry Ingredients: In a separate bowl, mix together the tapioca starch, all-purpose flour, baking powder, and salt. Whisk the dry ingredients together until they’re well combined to avoid clumps in your dough.
- Mix Wet Ingredients: In another bowl, whisk together the milk and the egg until they’re fully combined. This mixture will help bind the dough and add moisture to the buñuelos.
- Combine Mixtures: Gradually add the wet ingredients to the dry ingredients while mixing. Stir the mixture until it begins to come together, then fold in the crumbled cheese. The dough should be slightly sticky but manageable.
- Shape the Buñuelos: With your hands, take small portions of the dough and roll them into balls about the size of a golf ball. Make sure they’re evenly shaped for uniform cooking.
- Heat the Oil: In a deep frying pan or pot, heat enough oil to submerge the buñuelos (about 2-3 inches deep). Heat the oil over medium heat until it reaches around 350°F (175°C). You can test the oil’s readiness by dropping a small piece of dough into it; it should sizzle and rise to the surface.
- Fry the Buñuelos: Carefully drop the buñuelos into the hot oil in batches, being cautious not to overcrowd the pan. Fry them for about 4-5 minutes or until they’re golden brown, turning them occasionally to guarantee even cooking.
- Drain and Serve: Once they’re cooked, use a slotted spoon to remove the buñuelos from the oil and place them on a paper towel-lined plate to drain excess oil. Serve warm, optionally dusted with powdered sugar or alongside a sweet dipping sauce.
Extra Tips
When making buñuelos, it’s important to keep an eye on the oil temperature; too hot and they’ll burn on the outside while remaining raw inside, too cool and they’ll absorb too much oil.
If you find your dough is too sticky, dust your hands with some flour to make shaping easier. Additionally, using a mix of cheeses can add depth to the flavor—experiment with different varieties to find your favorite combination.
Enjoy your buñuelos fresh and hot for the best experience!
Tamales: Hearty Wrapped Delights
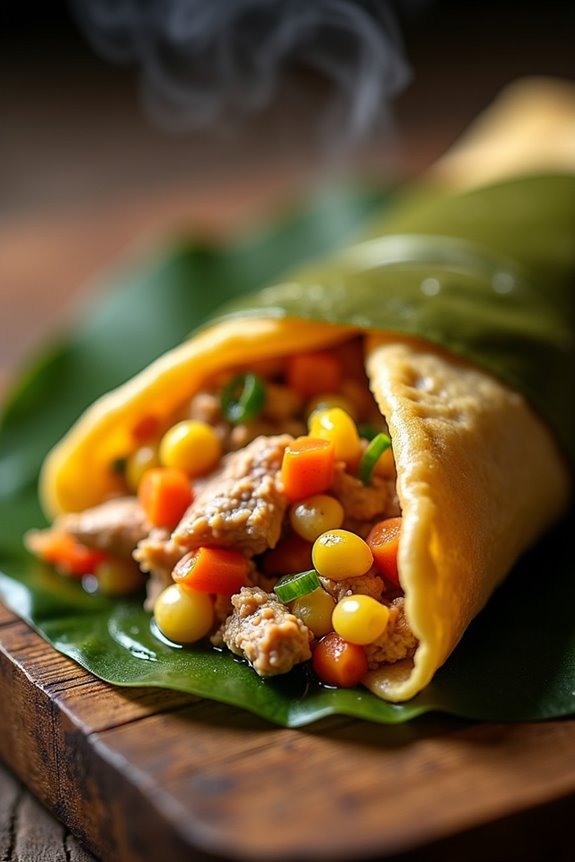
Tamales are a traditional Colombian dish that brings together the warmth of family gatherings and the rich flavors of the countryside. Typically made with masa (corn dough) and a variety of fillings, these hearty delights are wrapped in banana leaves or corn husks and steamed to perfection. The versatility of tamales allows for an array of fillings, from savory meats to vegetables, making them a beloved staple across Colombia and beyond.
Preparing tamales can be a labor of love, but the result is undeniably rewarding. The combination of flavors and textures creates a comforting dish that’s perfect for special occasions or a cozy family meal. Whether you’re enjoying them at a festive gathering or savoring them on a quiet evening, tamales are sure to bring a taste of Colombian culture to your table.
Ingredients (serving size: 4-6 people)
- 2 cups masa harina (corn flour)
- 1 cup chicken broth (or vegetable broth for a vegetarian option)
- 1/2 cup vegetable oil or melted butter
- 1 teaspoon baking powder
- 1 teaspoon salt
- 2 cups cooked and shredded chicken (or other preferred fillings)
- 1 cup cooked vegetables (like potatoes, carrots, or corn)
- 1/2 cup diced onion
- 1/2 teaspoon cumin
- 1/2 teaspoon paprika
- 1 package of banana leaves or corn husks (soaked in hot water)
- Optional: salsa or hot sauce for serving
Cooking Instructions
- Prepare the Filling: In a large bowl, mix the cooked and shredded chicken (or your choice of filling) with the cooked vegetables, diced onion, cumin, and paprika. Confirm that all ingredients are well combined and season with salt to taste. Set aside to let the flavors meld.
- Make the Dough: In another bowl, combine the masa harina, baking powder, and salt. Gradually add the chicken broth and vegetable oil (or melted butter), mixing with your hands or a wooden spoon until the dough is soft and pliable. The consistency should be similar to playdough; if it’s too dry, add a bit more broth.
- Prepare the Wrappers: If using banana leaves, cut them into rectangles about 10×8 inches. If using corn husks, confirm they’re soaked and pliable. Lay the wrappers on a clean surface.
- Assemble the Tamales: Take a piece of the dough and flatten it in the center of the wrapper, leaving space at the edges. Add a spoonful of the filling on top and fold the sides of the wrapper over the dough, then fold the ends to secure the filling inside. Repeat this process until all the dough and filling are used.
- Steam the Tamales: Place a steaming rack in a large pot filled with water. Arrange the tamales upright in the pot, with the open ends facing up. Cover with additional banana leaves or a clean kitchen towel to retain steam. Cover the pot and steam for about 1 to 1.5 hours, checking occasionally to confirm there’s enough water in the pot.
- Serve: Once cooked, carefully remove the tamales from the pot. Allow them to cool slightly before unwrapping. Serve warm with salsa or hot sauce for an extra kick.
Extra Tips
When making tamales, don’t hesitate to experiment with different fillings and spices to suit your taste. You can try variations such as cheese and jalapeños, or even sweet fillings like fruit or chocolate. Confirm that the masa dough is adequately seasoned, as it serves as the foundation of flavor.
Additionally, tamales can be made ahead of time and frozen, making them a convenient option for busy days. Just steam them directly from frozen, adding a few extra minutes to the cooking time. Enjoy your culinary adventure with this delightful Colombian dish!
Chocoramo: Chocolate-Covered Cake Treat

Chocoramo is a beloved Colombian snack that features a soft cake filled with delicious strawberry jam, all enveloped in a rich layer of chocolate. This delightful treat isn’t only popular in Colombia but has also gained a following in various parts of the world. Making your own Chocoramo at home allows you to customize the flavors and enjoy a fresh, homemade version of this iconic street food.
The process of creating Chocoramo may seem intricate, but with a little patience and the right ingredients, you can recreate this indulgent dessert. Whether you’re indulging yourself or sharing with friends and family, this chocolate-covered cake is sure to impress. Follow this recipe to bring a taste of Colombia to your kitchen.
Ingredients (serving size: 4-6 people)
- 1 cup all-purpose flour
- 1 teaspoon baking powder
- 1/2 teaspoon baking soda
- 1/4 teaspoon salt
- 1/2 cup unsalted butter, softened
- 1 cup granulated sugar
- 2 large eggs
- 1 teaspoon vanilla extract
- 1/2 cup buttermilk
- 1/2 cup strawberry jam
- 1 cup semi-sweet chocolate chips
- 1 tablespoon vegetable oil
Cooking Instructions
- Preheat the Oven: Begin by preheating your oven to 350°F (175°C). This guarantees that the cake bakes evenly and rises properly. While the oven heats, you can prepare your baking pan.
- Prepare the Baking Pan: Grease an 8×8 inch baking dish with butter or line it with parchment paper. This will prevent the cake from sticking to the pan and make it easier to remove once baked.
- Mix Dry Ingredients: In a medium bowl, whisk together the flour, baking powder, baking soda, and salt. This helps to evenly distribute the leavening agents and guarantees a light and fluffy cake.
- Cream Butter and Sugar: In a large bowl, beat the softened butter and granulated sugar together using an electric mixer on medium speed until the mixture is light and fluffy. This process incorporates air into the batter, helping the cake rise.
- Add Eggs and Vanilla: Add the eggs one at a time, mixing well after each addition. Then stir in the vanilla extract. This adds moisture and flavor to your cake.
- Combine Wet and Dry Ingredients: Gradually add the dry ingredient mixture to the butter mixture, alternating with the buttermilk. Start and end with the dry ingredients. Mix until just combined; overmixing can lead to a dense cake.
- Bake the Cake: Pour the batter into the prepared baking dish and spread it evenly. Bake in the preheated oven for about 25-30 minutes or until a toothpick inserted into the center comes out clean.
- Cool and Fill: Once baked, allow the cake to cool in the pan for about 10 minutes, then transfer it to a wire rack to cool completely. Once cooled, slice the cake into rectangles and spread a layer of strawberry jam on half of the pieces before topping with the other halves to create sandwiches.
- Melt the Chocolate: In a microwave-safe bowl, combine the chocolate chips and vegetable oil. Microwave in 30-second intervals, stirring in between, until the chocolate is completely melted and smooth.
- Coat the Cakes: Dip each cake sandwich into the melted chocolate, ensuring it’s fully coated. Place the coated Chocoramos on a baking sheet lined with parchment paper to set.
- Set and Serve: Allow the chocolate to harden at room temperature or place the tray in the fridge for about 15-20 minutes to speed up the process. Once set, your Chocoramos are ready to be enjoyed!
Extra Tips
When making Chocoramo, feel free to experiment with different fillings such as dulce de leche or other fruit jams to suit your taste.
Additionally, you can adjust the thickness of the chocolate coating by adding more or less vegetable oil.
For a fun twist, consider adding a sprinkle of sea salt on top of the chocolate before it sets for a sweet and salty flavor combination.
Storing the Chocoramos in an airtight container will keep them fresh for several days, making them perfect for snacking throughout the week!
Tacos De Carne: Savory Meat Tacos
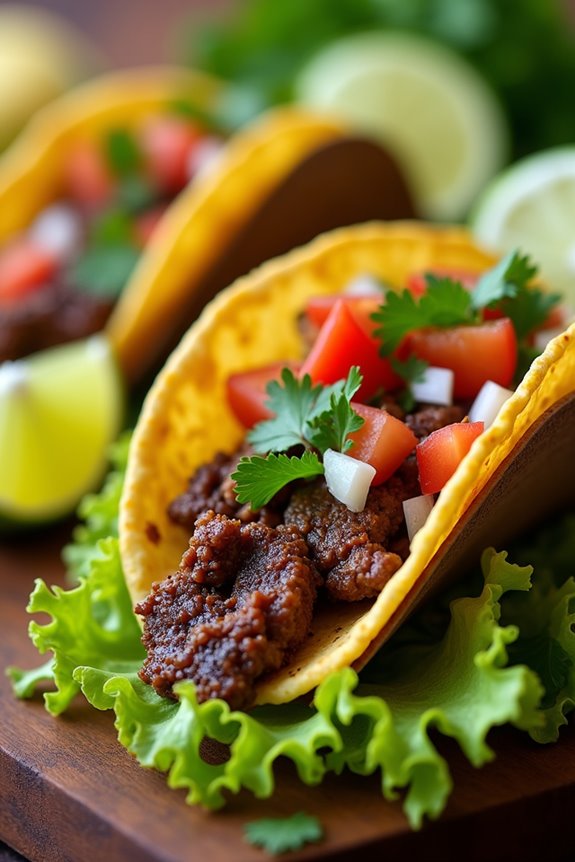
Tacos De Carne are a beloved street food in Colombia, offering a delightful combination of flavors and textures that makes them a favorite among locals and visitors alike. These savory meat tacos are filled with juicy, seasoned beef, complemented by fresh toppings that elevate the overall experience. The dish isn’t only quick to prepare but also versatile, allowing you to customize the toppings to suit your taste preferences.
Whether you’re hosting a gathering or just craving a delicious meal, Tacos De Carne are guaranteed to impress.
To achieve the perfect Tacos De Carne, the key lies in selecting high-quality meat and using fresh ingredients. The beef is marinated in a blend of spices, then grilled or sautéed to perfection. Served in warm corn tortillas and topped with a variety of accompaniments, these tacos are a celebration of Colombian flavors that you won’t want to miss.
Ingredients (Serves 4-6 People):
- 1.5 lbs of flank steak or sirloin, thinly sliced
- 2 tablespoons olive oil
- 3 cloves garlic, minced
- 1 teaspoon ground cumin
- 1 teaspoon smoked paprika
- 1 teaspoon chili powder
- Salt and pepper to taste
- 12 small corn tortillas
- 1 cup chopped onions
- 1 cup chopped cilantro
- 1 cup diced tomatoes
- 1 cup shredded lettuce
- Lime wedges for serving
Cooking Instructions:
- Marinate the Meat: In a large bowl, combine the olive oil, minced garlic, cumin, smoked paprika, chili powder, salt, and pepper. Add the thinly sliced beef to the bowl and mix well to ascertain each piece is coated in the marinade. Cover the bowl with plastic wrap and let it marinate in the refrigerator for at least 30 minutes, or up to 2 hours for more flavor.
- Cook the Beef: Heat a large skillet or grill pan over medium-high heat. Once hot, add the marinated beef in a single layer, ensuring not to overcrowd the pan. Cook for about 3-4 minutes on each side, or until the beef is browned and cooked to your desired doneness. Remove the beef from the pan and let it rest for a few minutes before slicing it into bite-sized pieces.
- Warm the Tortillas: While the beef is resting, warm the corn tortillas. You can do this by placing them on a dry skillet over medium heat for about 30 seconds on each side until they’re pliable and slightly toasted. Alternatively, you can wrap them in foil and warm them in the oven.
- Assemble the Tacos: Take a warm tortilla and place a generous portion of the cooked beef in the center. Top with chopped onions, cilantro, diced tomatoes, and shredded lettuce as desired. Squeeze fresh lime juice over the filling for added flavor.
- Serve: Arrange the assembled tacos on a platter and serve with lime wedges on the side. Enjoy them while they’re warm for the best experience!
Extra Tips:
When preparing Tacos De Carne, feel free to experiment with the toppings to match your preferences. Popular additions include avocado slices, jalapeños for an extra kick, or crumbled queso fresco for added creaminess.
You can also substitute the beef with chicken or pork for a different flavor profile. Make sure to serve the tacos immediately after assembling them to confirm the tortillas remain warm and the ingredients stay fresh. Enjoy your Colombian culinary adventure!
Patacones: Twice-Fried Green Plantains
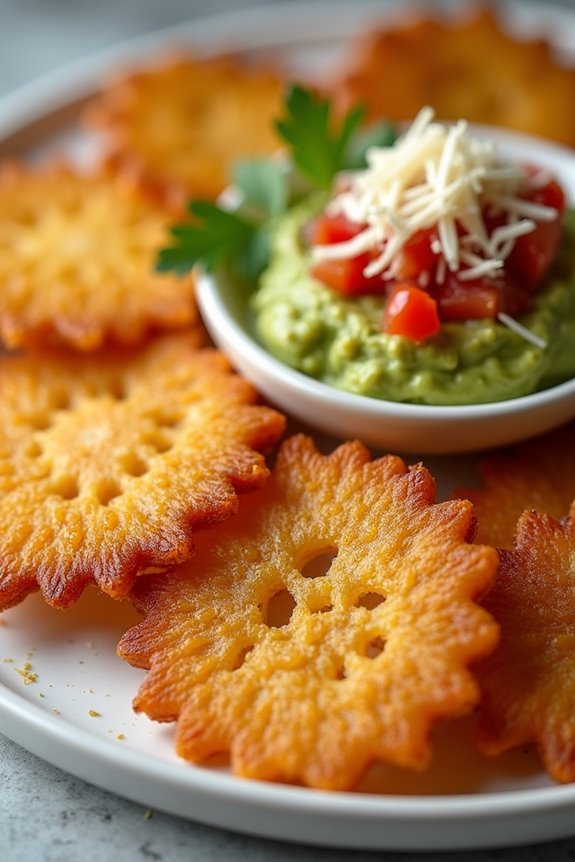
Patacones, also known as tostones, are a beloved Colombian street food that showcases the simplicity and flavor of green plantains. This dish involves twice-frying the plantains, resulting in a crispy exterior and a tender, starchy interior.
Often served as a snack or side dish, patacones are typically enjoyed with various toppings like guacamole, salsa, or cheese, making them versatile and appealing to many palates. The process of preparing patacones is satisfying, and the end result is a crunchy treat that pairs perfectly with a variety of dips.
To make the perfect patacones, it’s vital to use green plantains, which are unripe and starchy, providing the right texture for frying. The twice-frying technique is what gives patacones their signature crunch, so be certain to follow the steps carefully.
Once you master this recipe, you can enjoy patacones any time, whether as a snack at home or as a part of a festive gathering with friends and family.
Ingredients (serving size: 4-6 people)
- 3-4 green plantains
- Salt (to taste)
- Vegetable oil (for frying)
- Optional toppings: guacamole, salsa, cheese, or shredded meat
Cooking Instructions
- Prepare the Plantains: Start by peeling the green plantains. Cut off the ends of each plantain, then make vertical slits along the skin. Gently pry the skin off with your fingers or a knife. Once peeled, cut the plantains into 1-inch thick slices.
- First Frying: In a deep pot or frying pan, heat enough vegetable oil over medium heat to submerge the plantain slices. Once the oil is hot (around 350°F or 175°C), carefully add the plantain slices in batches. Fry them for about 3-4 minutes, until they’re slightly golden and soft but not fully cooked. Remove them from the oil and place them on paper towels to drain excess oil.
- Flatten the Plantains: After the first frying, take each fried plantain slice and use a flat surface (like the bottom of a glass or a plate) to gently press down and flatten them to about ½ inch thick. Be careful not to apply too much pressure, as you want them to remain intact.
- Second Frying: Return the flattened plantains to the hot oil and fry them again for about 2-3 minutes on each side, until they’re golden brown and crispy. Remove the patacones from the oil and place them on paper towels once again to absorb excess oil.
- Season and Serve: While the patacones are still hot, sprinkle them with salt to taste. Serve immediately with your choice of toppings, such as guacamole, salsa, cheese, or shredded meat.
Extra Tips
For the best results, make sure to use firm, green plantains, as ripe ones won’t yield the desired texture.
When frying, verify the oil is at the correct temperature to avoid sogginess; too low oil temperature will lead to greasy patacones. If you prefer a more flavorful twist, consider marinating the plantains in lime juice and garlic for an hour before frying.
Enjoy experimenting with different toppings and dips to find your favorite combination!
Ajiaco: Hearty Chicken and Potato Soup

Ajiaco is a traditional Colombian soup that highlights the rich flavors of the Andes. It’s a comforting dish that combines chicken, a variety of potatoes, and fresh herbs, resulting in a flavorful and hearty meal that warms the soul. This dish is particularly popular in Bogotá, where the unique combination of ingredients reflects the culinary diversity of Colombia.
Ajiaco isn’t only delicious but also a great way to explore the country’s rich gastronomic heritage. The soup’s most distinguishing feature is the use of three types of potatoes: criolla, pastusa, and sabanera, each adding its own texture and flavor to the dish.
Ajiaco is typically served with a side of avocado, capers, and a dollop of sour cream to enhance its rich taste. Whether you’re enjoying it on a rainy day or sharing it with friends and family, Ajiaco is a delightful dish that brings comfort and warmth to any table.
Ingredients (Serves 4-6):
- 1 whole chicken (about 3-4 pounds)
- 8 cups water
- 2 medium yellow potatoes, peeled and diced
- 2 medium red potatoes, peeled and diced
- 2 medium criolla potatoes (or Yukon gold), peeled and diced
- 1 large onion, chopped
- 2 cloves garlic, minced
- 1 cup corn on the cob (or frozen corn)
- 1 cup guascas (dried herb; can be substituted with oregano)
- 1 teaspoon salt (to taste)
- 1 teaspoon black pepper (to taste)
- 1 avocado, sliced (for serving)
- 1 cup sour cream (for serving)
- Capers (for serving)
- Fresh cilantro (for garnish)
Cooking Instructions:
- Prepare the Chicken Broth: In a large pot, combine the whole chicken and 8 cups of water. Bring to a boil over medium-high heat, skimming off any foam that rises to the surface. This step is essential for a clear broth. Reduce the heat to low, cover the pot, and let the chicken simmer for about 45 minutes, or until it’s fully cooked and tender.
- Sauté the Aromatics: While the chicken is cooking, heat a separate pan over medium heat. Add a splash of oil, then sauté the chopped onion and minced garlic until they’re soft and fragrant, around 5 minutes. This step adds depth to the flavor of the soup.
- Add Vegetables to the Broth: Once the chicken is cooked, carefully remove it from the pot and set it aside to cool. In the same broth, add the sautéed onions and garlic, diced yellow and red potatoes, and corn. Stir in the guascas, salt, and pepper. Allow the mixture to simmer for about 20 minutes, or until the potatoes are tender.
- Shred the Chicken: While the potatoes are cooking, shred the chicken into bite-sized pieces after it has cooled down. Discard the skin and bones. Return the shredded chicken to the pot once the potatoes are tender.
- Final Touches: Stir in the diced criolla potatoes and let the soup simmer for another 10-15 minutes until all the potatoes are cooked through. Taste and adjust the seasoning if needed.
- Serve: Ladle the Ajiaco into bowls and serve hot. Offer slices of avocado, a dollop of sour cream, and capers on the side for guests to add according to their taste. Garnish with fresh cilantro for an added touch of flavor.
Extra Tips: For an authentic touch, look for criolla potatoes at your local Latin grocery store; they’ve a unique flavor that enhances the soup. If you can’t find guascas, dried oregano can be used as a substitute, but the flavor won’t be as authentic.
This soup can be made ahead of time and stored in the fridge for a couple of days; the flavors actually improve as they meld together. When reheating, add a bit of water if the soup has thickened too much. Enjoy your delicious Ajiaco!
Sancocho: Colombian Chicken Stew
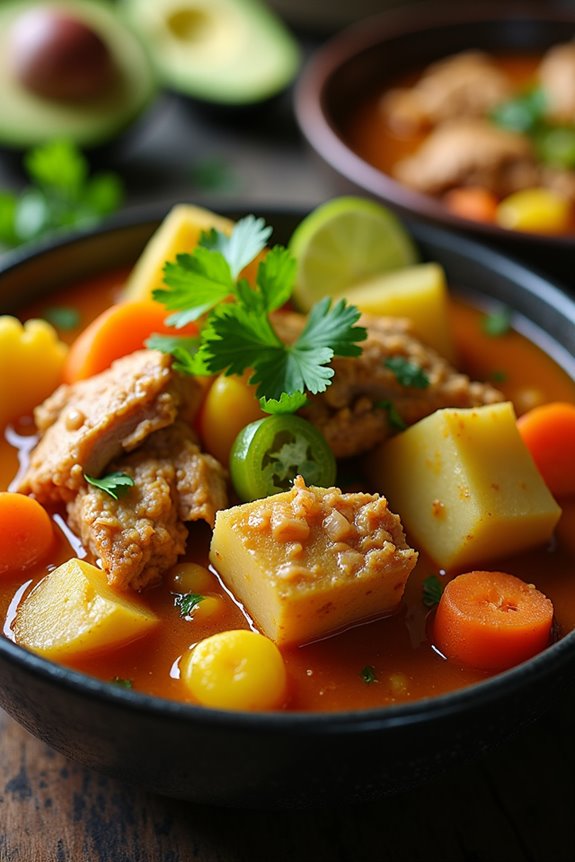
Sancocho is a traditional Colombian chicken stew that embodies the heart and soul of Colombian cuisine. This hearty dish is often enjoyed during family gatherings and celebrations, showcasing a delightful mix of flavors and textures.
With tender chicken, a variety of vegetables, and aromatic spices, Sancocho is a comforting meal that warms both the body and spirit. It’s usually served with rice and avocado, making it a complete and satisfying dish.
The beauty of Sancocho lies in its versatility; you can adjust the ingredients based on personal preferences or what you have on hand. While chicken is the star of the show, feel free to experiment with different types of meat or even seafood.
This recipe provides a classic version that’s sure to impress your family and friends, bringing a taste of Colombia right to your kitchen.
Ingredients (Serves 4-6)
- 1 whole chicken (cut into pieces)
- 6 cups of water
- 2 medium potatoes (peeled and cubed)
- 1 medium yuca (cassava, peeled and cut into chunks)
- 1 ear of corn (cut into 2-inch pieces)
- 1 medium carrot (peeled and sliced)
- 1 medium onion (chopped)
- 2 cloves of garlic (minced)
- 1 green bell pepper (chopped)
- 1 tablespoon of salt (or to taste)
- 1 teaspoon of black pepper
- 1 tablespoon of cumin
- 1 bunch of cilantro (chopped)
- 2 green plantains (peeled and cut into chunks)
- Lime wedges (for serving)
- Avocado slices (for serving)
- Cooked white rice (for serving)
Cooking Instructions
- Prepare the Chicken: Start by rinsing the whole chicken pieces under cold water. In a large pot, add the chicken and cover it with 6 cups of water. Bring the water to a boil over medium-high heat and skim off any foam that rises to the surface.
- Add Aromatics: Once the chicken is boiling, reduce the heat to medium and add the chopped onion, minced garlic, and green bell pepper. These aromatics will enhance the flavor of the stew. Allow the mixture to simmer for about 10 minutes.
- Season the Broth: After simmering, add salt, black pepper, and cumin to the pot. Stir well to combine the seasonings with the broth. This step is essential to guarantee that the chicken and vegetables absorb all the delicious flavors.
- Incorporate Vegetables: Add the cubed potatoes, yuca, carrot, and corn to the pot. These vegetables will add texture and heartiness to the stew. Continue to simmer for about 20 minutes, or until the vegetables are tender.
- Add Plantains: Once the other vegetables are tender, add the green plantains to the pot. Simmer for an additional 10-15 minutes until the plantains are cooked through and soft. Taste the broth and adjust the seasoning if necessary.
- Finish and Serve: Once everything is cooked, add the chopped cilantro to the pot and stir gently. Serve the Sancocho hot, accompanied by lime wedges, avocado slices, and a side of cooked white rice to create a complete meal.
Extra Tips
When making Sancocho, the key is to allow the flavors to meld together during the cooking process. If time permits, let the stew sit for a while before serving; the flavors will deepen even further.
Additionally, you can customize the dish by using your favorite vegetables or adding more spices according to your taste. For an authentic experience, serve Sancocho with a side of arepas or fried plantains to enhance the Colombian flair of your meal.
Chicha: Traditional Fermented Beverage
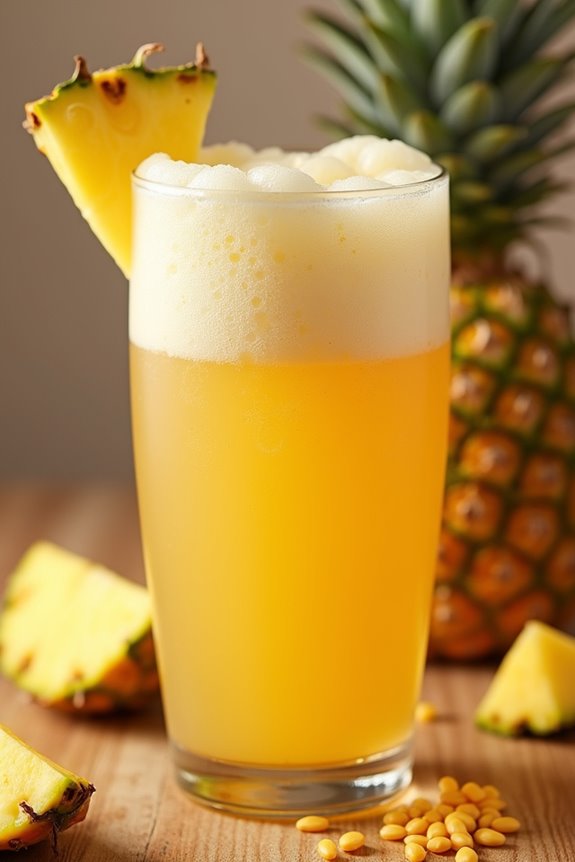
Chicha is a traditional Colombian beverage with deep cultural roots, often enjoyed during celebrations and festivals. This invigorating drink is made by fermenting maize (corn), which gives it a unique flavor profile that’s both sweet and tangy. The process of making chicha can be traced back to ancient indigenous communities, and while there are numerous regional variations, the essence of chicha remains the same: a deliciously fermented drink that embodies the spirit of Colombian heritage.
Making chicha at home can be a rewarding experience, allowing you to explore the fermentation process and appreciate the nuances of this historic beverage. The preparation involves cooking and fermenting corn, which can take a bit of time, but the end result is a delightful drink that’s perfect for sharing with family and friends. Whether you’re looking to quench your thirst on a hot day or wanting to introduce a traditional Colombian flavor to your gatherings, chicha is an excellent choice.
Ingredients (Serves 4-6 people):
- 2 cups of dried yellow maize (corn)
- 8 cups of water
- 1 ½ cups of sugar
- 1 cup of pineapple (chopped, optional)
- 1 teaspoon of cinnamon (optional)
- ½ teaspoon of cloves (optional)
- 2-3 tablespoons of honey (optional)
- 1 packet of dry yeast (optional)
Cooking Instructions:
- Soak the Corn: Begin by rinsing the dried maize thoroughly. Place the corn in a large bowl and cover it with water, allowing it to soak for 24 to 48 hours. This soaking process softens the corn and kick-starts the fermentation process.
- Cook the Corn: After soaking, drain the corn and transfer it to a large pot. Add 8 cups of fresh water and bring it to a boil. Once boiling, reduce the heat and let it simmer for about 1 to 2 hours, or until the corn is tender. Stir occasionally to prevent sticking.
- Blend the Mixture: Once the corn is cooked, allow it to cool slightly. In batches, blend the corn with some of the cooking water until you achieve a smooth consistency. You may need to adjust the water amount to guarantee a drinkable texture.
- Strain the Mixture: Using a fine mesh strainer or cheesecloth, strain the blended corn mixture into a large container, discarding the solid remains. This will leave you with a liquid base for your chicha.
- Add Sweeteners and Flavorings: To the strained liquid, add sugar, honey, and any optional ingredients like chopped pineapple, cinnamon, or cloves. Stir well until the sugar is completely dissolved.
- Ferment the Chicha: Allow the mixture to cool to room temperature. If you choose to use dry yeast, sprinkle it over the surface and gently stir it in. Cover the container with a clean cloth or plastic wrap, and let it sit at room temperature for 2 to 5 days, depending on the desired level of fermentation. Taste daily to monitor the flavor.
- Bottle and Refrigerate: Once fermented to your liking, transfer the chicha into clean bottles or jars. Seal tightly and refrigerate to slow down the fermentation process. Serve chilled, and enjoy the invigorating taste of your homemade chicha!
Extra Tips: When making chicha, the fermentation process can vary based on temperature and humidity, so keep an eye on it to guarantee it doesn’t over-ferment. If you prefer a non-alcoholic version, you can skip the yeast and simply enjoy the sweet corn flavor that develops over time. Additionally, chicha can be customized with various fruits and spices, so feel free to experiment with flavors that you enjoy!