

Exploring the world of Brazilian cookies is like discovering little bites of happiness. Each recipe offers unique flavors and textures, from the fudgy Brigadeiros to the airy Biscoitos De Polvilho. These treats are perfect for every palate and occasion. They satisfy a sweet tooth while bringing a sense of warmth and tradition. Let’s uncover the magic behind these delightful recipes together.
Brigadeiros

Brigadeiros are a beloved Brazilian treat that has captured the hearts (and taste buds) of many around the world. These delightful chocolate truffles are traditionally made with just a few simple ingredients: sweetened condensed milk, cocoa powder, butter, and chocolate sprinkles for rolling. Their rich, fudgy texture and sweet flavor make them a perfect dessert for celebrations, parties, or just a sweet indulgence at home.
The best part? They’re incredibly easy to make and require no baking, making them a fantastic option for both novice and experienced cooks.
These little chocolate balls aren’t only a treat for the palate but also a joy to prepare. Making Brigadeiros can be a fun activity to do with friends or family, as everyone can join in on the rolling and decorating process. Plus, you can customize them by experimenting with different toppings, such as coconut flakes or crushed nuts.
Whether you’re celebrating a special occasion or simply looking to satisfy a chocolate craving, Brigadeiros are sure to please.
Ingredients (Serves 4-6):
- 1 (14 oz) can of sweetened condensed milk
- 2 tablespoons unsweetened cocoa powder
- 1 tablespoon unsalted butter
- Chocolate sprinkles (for rolling)
- Additional butter (for greasing your hands)
Instructions:
- Combine Ingredients: In a medium saucepan, combine the sweetened condensed milk, cocoa powder, and 1 tablespoon of unsalted butter. Stir the mixture well to guarantee that all the ingredients are evenly incorporated.
- Cook the Mixture: Place the saucepan over medium heat. Continuously stir the mixture with a wooden spoon or silicone spatula to prevent it from sticking to the bottom of the pan. Cook for about 10-15 minutes, or until the mixture thickens and begins to pull away from the sides of the pan. You’ll know it’s ready when it resembles a thick fudge.
- Cool the Mixture: Once the mixture has reached the right consistency, remove the saucepan from the heat. Transfer the Brigadeiro mixture to a greased plate or shallow dish to cool. Allow it to sit for at least 30 minutes until it’s cool enough to handle.
- Shape the Brigadeiros: Grease your hands with a little butter to prevent sticking. Take small amounts of the cooled mixture and roll them into small balls, about 1 inch in diameter.
- Coat with Sprinkles: Roll each ball in chocolate sprinkles until they’re fully coated. Place the finished Brigadeiros on a plate or in mini cupcake liners for a festive touch.
- Serve and Enjoy: Once all the Brigadeiros are rolled and coated, they’re ready to be served. Enjoy immediately or store them in an airtight container in the refrigerator for up to a week.
Extra Tips:
When making Brigadeiros, be sure to keep an eye on the cooking process as the mixture can quickly go from perfect to burnt.
If you prefer a softer texture, you can remove the mixture from heat when it’s still slightly runny, but remember that they’ll firm up as they cool. Additionally, feel free to experiment with different toppings beyond chocolate sprinkles, such as crushed nuts, shredded coconut, or even colored sugar to match a theme or occasion.
Enjoy your homemade Brigadeiros!
Pães De Mel
Pães De Mel, or honey bread, is a beloved Brazilian treat that seamlessly combines the warmth of spices with the sweetness of honey. Traditionally enjoyed during festive times or as a comforting snack, these cookies are soft, flavorful, and often filled with dulce de leche or chocolate. Their unique texture and aromatic spices make them a popular choice in Brazilian bakeries, and they’re perfect for sharing with family and friends.
Making Pães De Mel at home is a delightful experience that allows you to customize the flavors to your liking. Whether you choose to fill them with chocolate or spread a layer of icing on top, these cookies are sure to impress. Gather your ingredients, don your apron, and let’s plunge into this delicious recipe that serves approximately 4-6 people.
Ingredients:
- 2 cups all-purpose flour
- 1 cup honey
- 1/2 cup sugar
- 1/2 cup milk
- 1/4 cup unsweetened cocoa powder
- 1/4 cup butter, softened
- 1 large egg
- 1 teaspoon baking powder
- 1 teaspoon ground cinnamon
- 1/2 teaspoon ground ginger
- 1/4 teaspoon ground cloves
- 1/4 teaspoon salt
- 1 cup dulce de leche or chocolate filling (optional)
- Chocolate glaze (optional, for topping)
Cooking Instructions:
- Preheat the Oven: Begin by preheating your oven to 350°F (175°C). This guarantees that your cookies will bake evenly and achieve the perfect texture.
- Prepare the Baking Pan: Grease a baking pan or line it with parchment paper. This will prevent your Pães De Mel from sticking and make cleanup easier.
- Mix Wet Ingredients: In a large mixing bowl, combine the honey, sugar, milk, butter, and egg. Use a whisk to mix everything together until it’s smooth and well-blended. This step creates a sweet base for your cookies.
- Combine Dry Ingredients: In a separate bowl, whisk together the flour, cocoa powder, baking powder, cinnamon, ginger, cloves, and salt. Mixing dry ingredients separately ensures that the baking powder is evenly distributed throughout the flour mixture.
- Combine Wet and Dry Mixtures: Gradually add the dry ingredients to the wet mixture, stirring until just combined. Be careful not to overmix; a few lumps are okay. This will create a soft dough.
- Fill the Molds: If you want to add filling, spoon a small amount of dough into the prepared molds, then add a teaspoon of dulce de leche or chocolate filling, and cover with more dough. Make sure the filling is sealed inside.
- Bake: Place the filled molds in the preheated oven and bake for about 15-20 minutes, or until a toothpick inserted in the center comes out clean. Keep an eye on them to avoid overbaking.
- Cool: Once baked, remove the cookies from the oven and let them cool in the pan for a few minutes before transferring them to a wire rack to cool completely.
- Glaze (Optional): If desired, melt some chocolate and drizzle it over the cooled cookies for an extra touch of sweetness and visual appeal.
Extra Tips:
When making Pães De Mel, feel free to experiment with the spices to suit your taste. You can also try different fillings such as fruit jams or even nut butters for a unique twist.
If you want a more intense flavor, let the cookies sit for a day before serving, as this allows the flavors to meld beautifully. Enjoy your delightful Pães De Mel with a cup of coffee or tea!
Biscoitos De Polvilho
Biscoitos De Polvilho, also known as Brazilian cheese puffs, are delightful little snacks made from manioc starch. These gluten-free treats are crispy on the outside and airy on the inside, making them perfect for any occasion. Popular in Brazil, they’re often enjoyed with coffee or tea, and their subtle cheese flavor can be adjusted to suit your taste by varying the types of cheese used.
The preparation of Biscoitos De Polvilho is relatively simple, as the main ingredients are easy to find. They’re a great option for gatherings or simply a snack at home. Once baked, they can be stored in an airtight container, though they’re best enjoyed fresh. Let’s plunge into making these delicious Brazilian treats!
Ingredients (Serves 4-6)
- 2 cups of manioc starch (polvilho doce)
- 1 cup of milk
- ½ cup of vegetable oil
- 1 teaspoon of salt
- 1 cup of grated cheese (such as queijo minas or Parmesan)
- 2 large eggs
Cooking Instructions
- Preheat the Oven: Start by preheating your oven to 375°F (190°C). This guarantees that the cookies bake evenly and achieve that perfect crispy texture.
- Combine Dry Ingredients: In a large mixing bowl, add the manioc starch and salt. Stir them together to combine, making sure that the salt is evenly distributed throughout the starch.
- Heat Milk and Oil: In a small saucepan, combine the milk and vegetable oil. Heat this mixture over medium heat until it’s just about to boil. Remove it from the heat once it starts bubbling.
- Mix Wet and Dry Ingredients: Pour the hot milk and oil mixture into the bowl with the manioc starch and salt. Mix with a spatula or a wooden spoon until it forms a dough. It will be sticky at first, but continue mixing until it becomes more manageable.
- Add Cheese and Eggs: Once the dough has cooled slightly, add the grated cheese and eggs. Knead the dough with your hands until everything is well combined. The texture should be smooth and slightly elastic.
- Shape the Cookies: Using your hands, take small pieces of dough and roll them into balls or shape them into small sticks. Place them on a baking sheet lined with parchment paper, leaving some space between each cookie to allow for expansion while baking.
- Bake the Cookies: Place the baking sheet in the preheated oven and bake for about 15-20 minutes, or until the cookies are puffed up and golden brown. Keep an eye on them to verify they don’t overbake.
- Cool and Serve: Once baked, remove the cookies from the oven and let them cool slightly on the baking sheet before transferring them to a wire rack. Serve them warm or at room temperature.
Extra Tips
For an added twist, consider experimenting with different types of cheese or herbs to enhance the flavor of your Biscoitos De Polvilho. You can also adjust the size of the cookies according to your preference, but remember that smaller cookies will bake faster.
If you find the dough too sticky, you can add a bit more manioc starch until the consistency is manageable. Enjoy your delicious Brazilian cheese puffs!
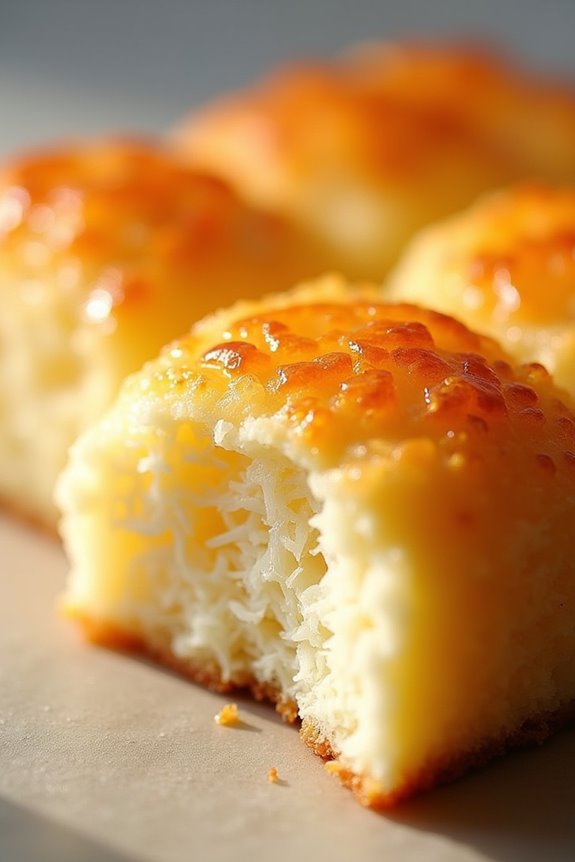
Cocada

Cocada is a delightful Brazilian treat that combines the rich flavors of coconut with sweetened condensed milk, resulting in a chewy, satisfying cookie. Traditionally, cocada is made with shredded coconut, which gives it a distinct texture and flavor that’s beloved by many.
These cookies are often enjoyed as a sweet snack or dessert and can be found in various forms throughout Brazil, from soft and chewy to crunchy and crumbly.
This recipe for cocada is straightforward and requires only a few ingredients, making it an ideal choice for both novice bakers and experienced cooks. With the right balance of coconut and sweetness, these cookies will certainly impress your family and friends.
Perfect for gatherings or as an indulgent treat for yourself, cocada is a must-try Brazilian cookie that brings a taste of Brazil to your kitchen.
Ingredients (Serves 4-6)
- 2 cups shredded coconut (unsweetened)
- 1 cup sweetened condensed milk
- 1/4 cup granulated sugar
- 1/4 teaspoon salt
- 1 teaspoon vanilla extract
- 1 cup all-purpose flour
- 2 large eggs
- 1/2 teaspoon baking powder
Cooking Instructions
- Preheat the Oven: Begin by preheating your oven to 350°F (175°C). This step is essential as it guarantees that the cookies bake evenly and achieve the perfect texture.
- Prepare the Baking Sheet: Line a baking sheet with parchment paper to prevent the cookies from sticking. This will also make for an easier cleanup after baking.
- Mix the Wet Ingredients: In a large mixing bowl, combine the sweetened condensed milk, eggs, vanilla extract, and salt. Whisk these ingredients together until they’re well blended and smooth.
- Combine the Dry Ingredients: In a separate bowl, mix together the shredded coconut, granulated sugar, all-purpose flour, and baking powder. Stir until the dry ingredients are evenly distributed.
- Combine Wet and Dry Mixtures: Gradually add the dry mixture into the wet mixture, stirring gently until everything is fully incorporated. Be careful not to overmix; just combine until you see no dry flour.
- Scoop and Shape the Cookies: Using a tablespoon or a cookie scoop, drop rounded mounds of the cookie dough onto the prepared baking sheet, leaving space between each cookie as they’ll spread slightly while baking.
- Bake the Cookies: Place the baking sheet in the preheated oven and bake for 15-20 minutes or until the edges are golden brown and the tops are slightly firm to the touch.
- Cool and Serve: Once baked, remove the cookies from the oven and let them cool on the baking sheet for about 5 minutes before transferring them to a wire rack to cool completely. Enjoy your delicious cocada cookies either warm or at room temperature!
Extra Tips
For an added twist, consider mixing in chocolate chips or nuts to the cocada dough for extra flavor and texture.
If you prefer a softer cookie, take them out of the oven a minute or two earlier, as they’ll continue to firm up as they cool.
Store any leftovers in an airtight container at room temperature, and they should stay fresh for a few days. Enjoy your sweet journey into Brazilian baking!
Alfajores
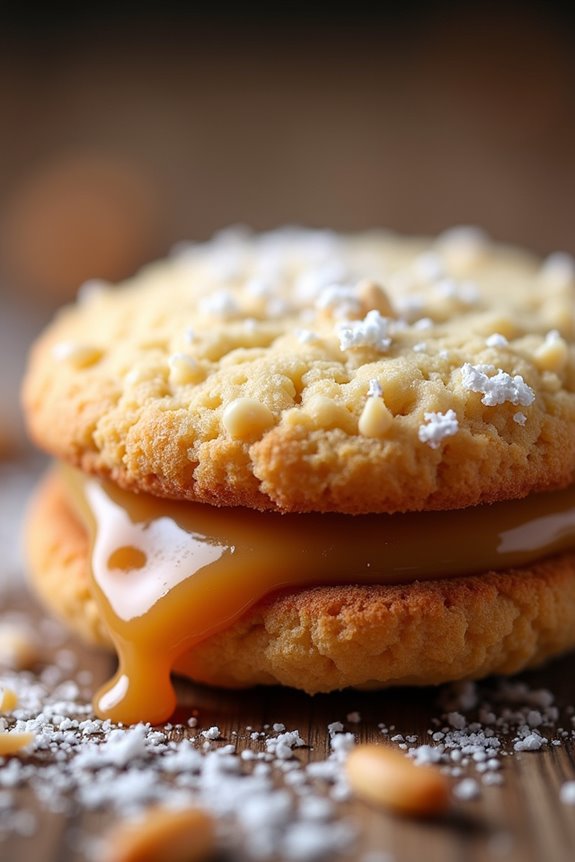
Alfajores are traditional South American cookies that are especially popular in Brazil, Argentina, and Peru. These delightful treats consist of two soft, crumbly cookies filled with a rich layer of dulce de leche and often rolled in shredded coconut or dusted with powdered sugar. The contrast between the buttery cookies and the sweet, creamy filling makes alfajores a favorite snack or dessert, perfect for sharing with friends and family.
Making alfajores at home is a rewarding experience. The process combines simple ingredients to create a delicious treat that captures the essence of Brazilian cuisine. While the cookies can be enjoyed on their own, the addition of dulce de leche elevates them to a whole new level of indulgence. Whether you’re planning a special occasion or simply want to treat yourself, these cookies are sure to astonish.
Ingredients (Serves 4-6 people):
- 1 cup unsalted butter, softened
- 1 cup sugar
- 2 large egg yolks
- 1 teaspoon vanilla extract
- 2 cups all-purpose flour
- 1 cup cornstarch
- 1 teaspoon baking powder
- 1/4 teaspoon salt
- 1 cup dulce de leche
- 1/2 cup shredded coconut (optional)
- Powdered sugar for dusting (optional)
Cooking Instructions:
- Preheat the Oven: Begin by preheating your oven to 350°F (175°C). This guarantees that the cookies will bake evenly and have the right texture when they come out of the oven.
- Prepare the Dough: In a large mixing bowl, cream together the softened butter and sugar until the mixture is light and fluffy. This can take about 3-5 minutes. Then, add the egg yolks and vanilla extract, mixing until combined.
- Combine Dry Ingredients: In a separate bowl, sift together the all-purpose flour, cornstarch, baking powder, and salt. Gradually add the dry mixture to the wet mixture, stirring until the dough comes together. It should be soft but not sticky.
- Shape the Cookies: Lightly flour your work surface and roll out the dough to about 1/4 inch thickness. Use a round cookie cutter (about 2 inches in diameter) to cut out the cookies. Place them on a baking sheet lined with parchment paper, leaving space between each cookie.
- Bake the Cookies: Bake the cookies in the preheated oven for about 10-12 minutes, or until the edges are lightly golden. They should be firm to the touch but still soft. Remove them from the oven and allow them to cool completely on a wire rack.
- Assemble the Alfajores: Once the cookies are cool, spread a generous layer of dulce de leche on the flat side of one cookie, then sandwich it with another cookie. Repeat this process until all cookies are filled.
- Optional Rolling or Dusting: If desired, roll the edges of the filled alfajores in shredded coconut or dust the tops with powdered sugar for added sweetness and decoration.
Extra Tips:
To guarantee the best flavor and texture, make sure to use high-quality butter and dulce de leche. You can also experiment with different fillings, such as chocolate ganache or fruit preserves, for a unique twist on traditional alfajores.
Additionally, if you want a more festive look, consider adding a drizzle of melted chocolate over the cookies before serving. Store any leftovers in an airtight container to maintain freshness. Enjoy your homemade alfajores!
Biscoitos De Manteiga
Biscoitos De Manteiga, or butter cookies, are a delightful treat that has become a staple in Brazilian homes. Known for their rich, buttery flavor and melt-in-your-mouth texture, these cookies are perfect for any occasion, whether it’s a festive gathering, a casual afternoon tea, or simply a sweet snack.
The simplicity of the ingredients combined with the ease of preparation makes this recipe a favorite among both novice and experienced bakers alike.
The beauty of Biscoitos De Manteiga lies not only in their taste but also in their versatility. You can enjoy them plain, or you can get creative by adding chocolate chips, nuts, or even a sprinkle of cinnamon for an extra flavor boost.
These cookies can also be shaped into various forms—round, oval, or even cut into fun shapes using cookie cutters. Let’s explore this delicious recipe that serves 4-6 people.
Ingredients
- 1 cup unsalted butter, softened
- 1 cup granulated sugar
- 2 cups all-purpose flour
- 1 teaspoon vanilla extract
- 1/4 teaspoon salt
- 1 egg yolk (optional for richness)
Cooking Instructions
- Preheat the Oven: Begin by preheating your oven to 350°F (175°C). This guarantees that your cookies will bake evenly and achieve that perfect golden color.
- Cream Butter and Sugar: In a large mixing bowl, combine the softened butter and granulated sugar. Using an electric mixer, cream them together on medium speed until the mixture is light and fluffy. This process incorporates air into the batter, giving your cookies a tender texture.
- Add Vanilla and Egg Yolk: Next, add the vanilla extract and the egg yolk (if using) into the creamed mixture. Mix well until fully incorporated. The vanilla enhances the flavor, while the egg yolk adds richness to the cookies.
- Combine Dry Ingredients: In a separate bowl, whisk together the all-purpose flour and salt. Gradually add this dry mixture to the wet ingredients, mixing on low speed until just combined. Be careful not to overmix, as this can lead to tough cookies.
- Shape the Cookies: Using your hands or a cookie scoop, shape the dough into small balls (about 1 inch in diameter) and place them on a baking sheet lined with parchment paper, leaving some space between each cookie as they’ll spread slightly during baking.
- Bake the Cookies: Place the baking sheet in the preheated oven and bake for 10-12 minutes, or until the edges are lightly golden. Keep a close eye on them, as baking times may vary based on your oven.
- Cool and Serve: Once baked, remove the cookies from the oven and allow them to cool on the baking sheet for a few minutes before transferring them to a wire rack to cool completely. This helps them firm up and makes them easier to handle.
Extra Tips
When making Biscoitos De Manteiga, make sure your butter is at room temperature for easy mixing.
If you prefer a more intense flavor, consider chilling the dough for about 30 minutes before baking, which can enhance the taste and texture.
Experimenting with different add-ins such as lemon zest or cocoa powder can also provide delightful variations.
Store your cookies in an airtight container to keep them fresh for several days, although they likely won’t last that long! Enjoy your baking!
Quindim
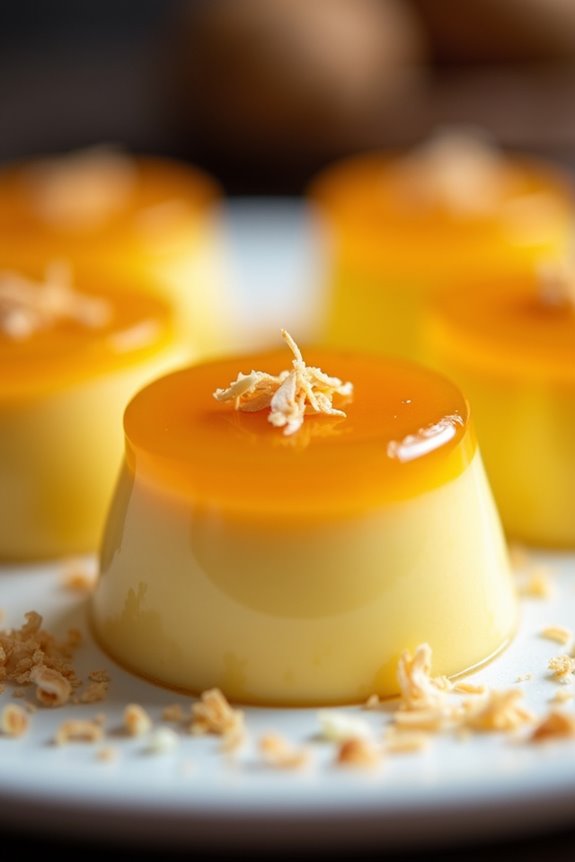
Quindim is a traditional Brazilian dessert that showcases the vibrant flavors of coconut and egg yolk. This delightful treat is known for its glossy yellow top and rich, custardy texture, making it a favorite among many. The name “quindim” originates from the African language Kimbundu, which reflects the influence of African culture on Brazilian cuisine.
With its sweet, creamy center and a hint of coconut, quindim is perfect for celebrations or as a sweet indulgence after a meal. Making quindim is relatively simple, yet it yields impressive results. The key to achieving the perfect texture lies in the careful blending of ingredients and the baking process.
Traditionally baked in small molds, these little custards transform into beautiful golden bites that are both visually appealing and delicious. Let’s explore the recipe and bring a taste of Brazil to your kitchen!
Ingredients (serving size: 4-6 people):
- 1 cup granulated sugar
- 1 cup shredded coconut (unsweetened)
- 1/2 cup unsalted butter, melted
- 6 large egg yolks
- 1 whole egg
- 1/2 cup milk
- 1 teaspoon vanilla extract
- A pinch of salt
Cooking Instructions:
1. Preheat the Oven: Begin by preheating your oven to 350°F (175°C). This allows the oven to reach the right temperature for baking the quindim, guaranteeing even cooking and proper texture.
2. Prepare the Molds: Grease small individual molds or ramekins with butter. You can also use silicone molds for easier removal. This step is vital as it prevents the quindim from sticking to the molds during baking and makes for easier serving.
3. Mix the Ingredients: In a large mixing bowl, combine the granulated sugar, shredded coconut, melted butter, egg yolks, whole egg, milk, vanilla extract, and a pinch of salt. Use a whisk or a fork to mix until all ingredients are well incorporated and the mixture is smooth.
This step guarantees that the flavors blend well and that the texture remains creamy.
4. Pour into Molds: Carefully pour the batter into the prepared molds, filling them about three-quarters full. This allows enough space for the quindim to rise slightly while baking. Avoid overfilling to prevent spillage.
5. Bake the Quindim: Place the filled molds in a baking dish and pour hot water into the dish until it reaches halfway up the sides of the molds. This water bath helps create a gentle cooking environment, preventing the quindim from cracking. Bake for about 30-35 minutes, or until the tops are set and a toothpick inserted in the center comes out clean.
6. Cool and Unmold: Once baked, remove the molds from the water bath and let them cool to room temperature. After cooling, carefully run a knife around the edges of the quindim and invert them onto a serving plate.
This step is critical for achieving that beautiful glossy top.
7. Serve: Allow the quindim to chill in the refrigerator for at least an hour before serving. This enhances their flavor and makes them even more invigorating.
Extra Tips: When preparing quindim, using fresh coconut can elevate the flavor and texture greatly. If you opt for dried coconut, make sure it’s unsweetened to maintain the balance of sweetness in the dish.
Additionally, you can experiment with flavor variations by adding a splash of coconut extract or lime zest for a revitalizing twist. Finally, don’t rush the cooling process; allowing the quindim to chill thoroughly enhances their creaminess and makes for a more enjoyable dessert.
Beijinho
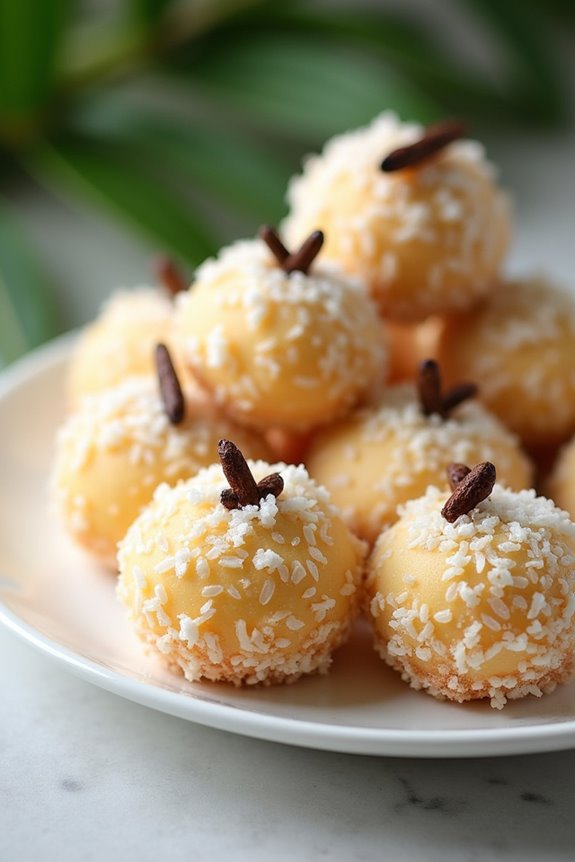
Beijinho, which translates to “little kiss” in Portuguese, is a beloved traditional Brazilian sweet that’s often served at birthday parties and celebrations. This delicious treat is made primarily from sweetened condensed milk and grated coconut, giving it a rich, creamy texture and a delightful coconut flavor.
Often rolled in granulated sugar and topped with a clove, beijinho is a simple yet exquisite dessert that brings a taste of Brazil to your home. Making beijinho isn’t only straightforward but also a fun activity that you can enjoy with family and friends. The combination of coconut and the sweetness of condensed milk creates a mouthwatering treat that’s certain to impress everyone. Serve them at your next gathering, and watch as they quickly disappear!
Ingredients (Serves 4-6)
- 1 can (14 ounces) sweetened condensed milk
- 1 cup grated coconut (unsweetened)
- 1 tablespoon unsalted butter
- 1/4 cup granulated sugar (for rolling)
- Whole cloves (for garnish)
Cooking Instructions
1. Prepare the Mixture: In a medium saucepan, combine the sweetened condensed milk, grated coconut, and unsalted butter. Stir well to combine the ingredients evenly. This mixture will form the base of your beijinho.
2. Cook the Mixture: Place the saucepan over medium heat and Cook the Mixture, stirring constantly to prevent it from sticking to the bottom of the pan. Continue cooking until the mixture thickens and starts to pull away from the sides of the pan, about 10-15 minutes.
You’ll know it’s ready when you can see the bottom of the pan while stirring.
3. Cool the Mixture: Once thickened, remove the saucepan from heat and transfer the mixture to a greased plate or bowl. Allow it to cool at room temperature for about 30 minutes. This cooling step is important for handling the mixture easily when forming the balls.
4. Shape the Beijinhos: Once the mixture is cool enough to handle, grease your hands with a bit of butter to prevent sticking. Scoop a tablespoon of the mixture and roll it into a small ball (about the size of a cherry). Repeat this process until all the mixture is shaped into balls.
5. Coat the Beijinhos: Place the granulated sugar in a shallow dish. Roll each coconut ball in the sugar until fully coated. This will give the beijinhos their signature sweet crust.
6. Garnish and Serve: Finally, place a whole clove on the top of each beijinho as a garnish. Arrange the beijinhos on a serving platter and they’re ready to be enjoyed!
Extra Tips
When making beijinho, verify that you use unsweetened grated coconut for the best flavor balance, as the sweetness from the condensed milk is already substantial.
For a twist, you can add a splash of vanilla extract to the mixture before cooking for added depth. Beijinhos can also be stored in an airtight container in the refrigerator for up to one week, making them a perfect make-ahead treat for parties or gatherings.
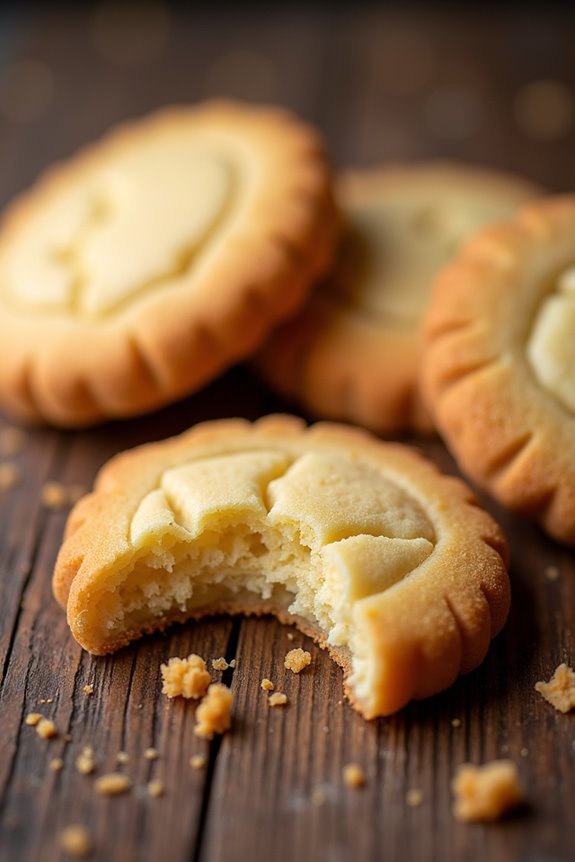
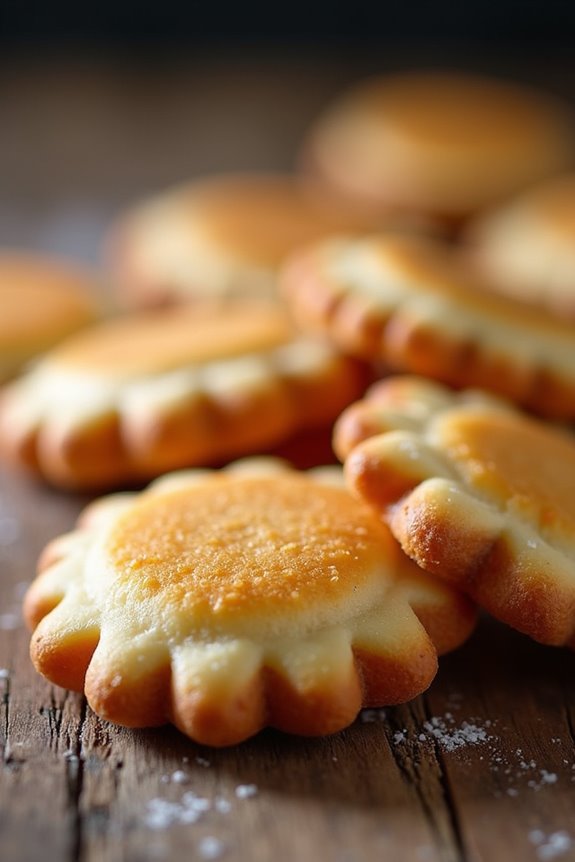
Rosquinhas
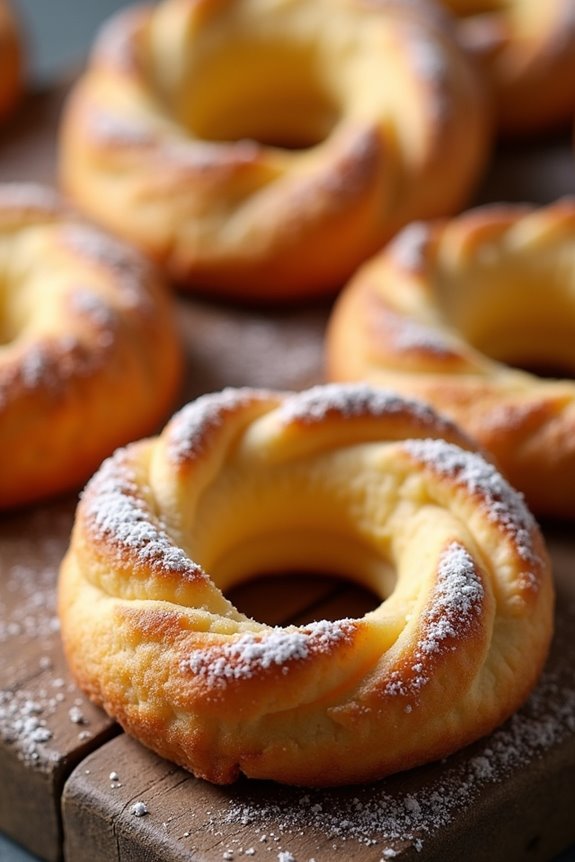
Rosquinhas are delightful Brazilian cookies that come with a rich, buttery flavor and a hint of sweetness. These traditional treats are often enjoyed with a cup of coffee or tea, making them a perfect accompaniment for breakfast or an afternoon snack.
Their unique shape—typically resembling small rings—adds to their charm and makes them fun to eat. The dough is relatively simple to prepare, and the end result is a crispy, yet tender cookie that can be customized with a variety of toppings or flavors.
This recipe for Rosquinhas yields about 4-6 servings, making it an ideal choice for a family gathering or a small get-together. With a handful of ingredients and straightforward steps, these cookies are accessible for both novice bakers and seasoned chefs.
Once you master the basic recipe, you can experiment with different flavors by adding spices or citrus zest to make them your own.
Ingredients:
- 2 cups all-purpose flour
- ½ cup granulated sugar
- 1/2 cup unsalted butter, softened
- 2 large eggs
- 1 teaspoon baking powder
- 1 teaspoon vanilla extract
- 1/4 teaspoon salt
- Powdered sugar for dusting (optional)
Instructions:
- Prepare the Dough: In a large mixing bowl, cream together the softened butter and granulated sugar until the mixture is light and fluffy. This process incorporates air into the dough, giving the cookies a tender texture.
- Add Eggs and Flavoring: Beat in the eggs one at a time, mixing well after each addition. Then, stir in the vanilla extract. The eggs not only add richness but also aid in binding the ingredients together.
- Combine Dry Ingredients: In a separate bowl, whisk together the all-purpose flour, baking powder, and salt. Gradually add this dry mixture to the wet ingredients, stirring until just combined. Avoid over-mixing to keep the cookies light.
- Shape the Cookies: Once the dough is formed, take small portions and roll them into ropes about ½ inch thick. Form each rope into a ring, pinching the ends together to seal. Place the shaped cookies on a baking sheet lined with parchment paper, leaving space between them for spreading.
- Bake the Cookies: Preheat the oven to 350°F (175°C). Bake the cookies in the preheated oven for about 15-20 minutes, or until they’re lightly golden around the edges. Keep an eye on them to prevent over-baking, as you want them to remain soft inside.
- Cool and Dust: Once baked, remove the cookies from the oven and allow them to cool on the baking sheet for a few minutes before transferring them to a wire rack. If desired, dust them with powdered sugar for an elegant touch before serving.
Extra Tips:
When making Rosquinhas, feel free to get creative with flavors—adding a bit of lemon or orange zest can give them a revitalizing twist.
Furthermore, if you prefer a crunchier texture, you can bake them a few minutes longer. Store the cookies in an airtight container to keep them fresh, and they can be enjoyed for several days.
Additionally, these cookies also freeze well, making them a great make-ahead treat for future enjoyments.
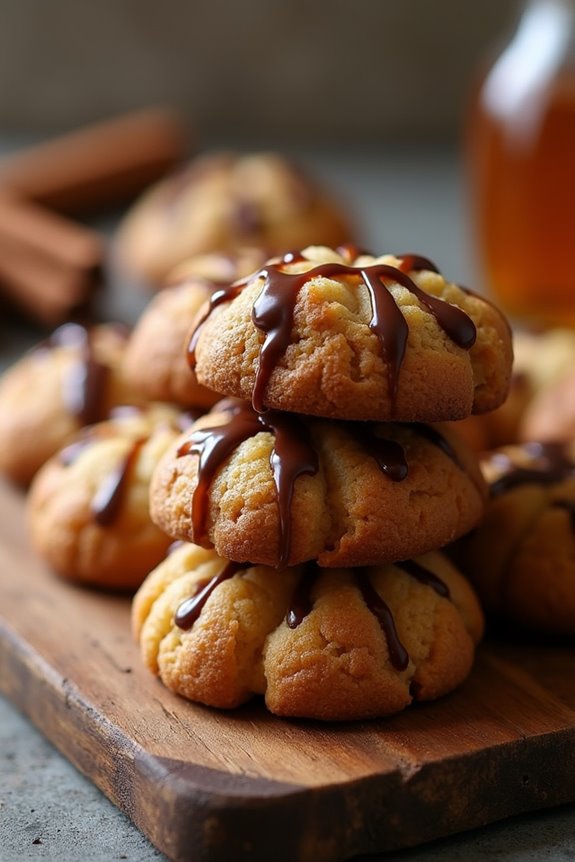
Biscoitos De Chocolate

Biscoitos De Chocolate, or Chocolate Cookies, are a delightful treat that captures the essence of Brazilian baking. These cookies aren’t only rich and flavorful but also incredibly easy to make, making them perfect for any occasion.
Whether you’re hosting a family gathering, celebrating a special event, or simply craving something sweet, these cookies will satisfy your taste buds and bring a smile to your face.
The charm of Biscoitos De Chocolate lies in their melt-in-your-mouth texture and the balance of sweetness combined with the richness of chocolate. Made with simple ingredients, they can be prepared quickly and enjoyed fresh out of the oven.
This recipe yields a scrumptious batch of cookies that can serve 4-6 people, perfect for sharing with loved ones or enjoying as a personal treat.
Ingredients (Serves 4-6)
- 1 cup unsalted butter, softened
- 1 cup granulated sugar
- 1 cup brown sugar, packed
- 2 large eggs
- 2 teaspoons vanilla extract
- 2 cups all-purpose flour
- 1 cup unsweetened cocoa powder
- 1 teaspoon baking soda
- ½ teaspoon salt
- 1 cup chocolate chips (semi-sweet or dark)
Cooking Instructions
1. Preheat the Oven: Begin by preheating your oven to 350°F (175°C). This step is essential as it guarantees that your cookies bake evenly and achieve the perfect texture.
2. Creaming the Butter and Sugars: In a large mixing bowl, combine the softened butter, granulated sugar, and brown sugar. Using an electric mixer, beat them together on medium speed until the mixture is light and fluffy.
This process usually takes about 3-5 minutes and helps to incorporate air into the mixture, which will give your cookies a nice rise.
3. Adding Eggs and Vanilla: Next, add the eggs one at a time, mixing well after each addition. Then, stir in the vanilla extract. This will enhance the flavor of your cookies and provide moisture to the batter.
4. Combining Dry Ingredients: In a separate bowl, whisk together the all-purpose flour, cocoa powder, baking soda, and salt. Gradually add this dry mixture to the wet ingredients, mixing on low speed until just combined.
Be careful not to overmix; this can lead to tough cookies.
5. Incorporating Chocolate Chips: Fold in the chocolate chips using a spatula or wooden spoon. The chocolate chips add a delightful texture and extra chocolate flavor to your cookies.
6. Shaping the Cookies: Using a tablespoon or a cookie scoop, portion out the dough onto a baking sheet lined with parchment paper. Leave space between each cookie, as they’ll spread while baking.
7. Baking the Cookies: Place the baking sheet in the preheated oven and bake for 10-12 minutes. The edges should be set while the centers remain soft.
Don’t overbake, as the cookies will continue to firm up as they cool.
8. Cooling the Cookies: Once baked, remove the cookies from the oven and allow them to cool on the baking sheet for about 5 minutes before transferring them to a wire rack.
This cooling process helps to maintain their soft texture.
Extra Tips
To elevate your Biscoitos De Chocolate, consider adding a pinch of espresso powder to enhance the chocolate flavor, or sprinkle some sea salt on top before baking for a sweet and salty contrast.
For added texture, try incorporating chopped nuts or swapping some of the chocolate chips for white chocolate or caramel chips.
Store any leftover cookies in an airtight container at room temperature for up to a week, but trust us, they won’t last that long!
Pão De Queijo
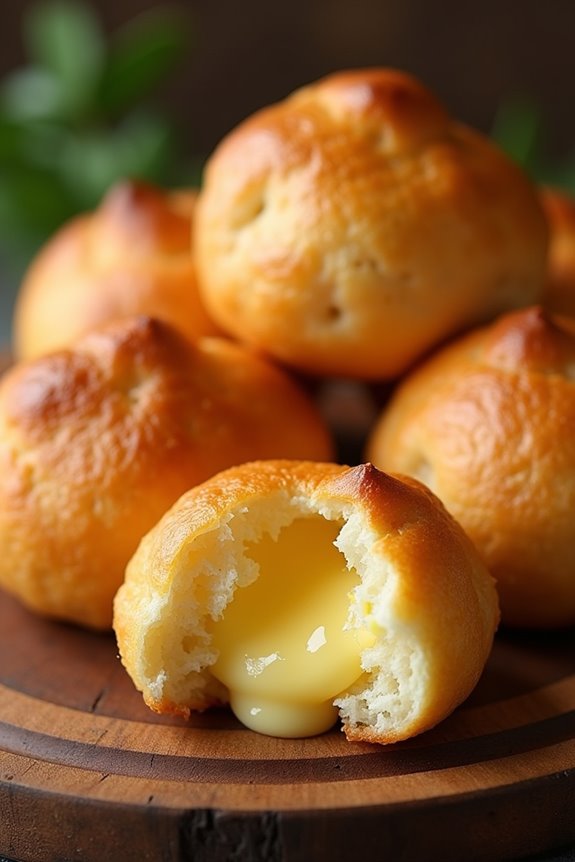
Pão De Queijo, or Brazilian cheese bread, is a delightful snack that hails from the state of Minas Gerais in Brazil. These small, chewy rolls are made primarily from tapioca flour and cheese, resulting in a gluten-free treat that’s both crispy on the outside and soft on the inside. Perfect for breakfast, as an afternoon snack, or served at parties, they’re incredibly easy to make and are certain to impress anyone who tries them.
The origins of Pão De Queijo date back to the 18th century when cheese was introduced to the region. The traditional recipe has evolved over time, but it remains a staple in Brazilian cuisine. With its irresistible cheesy flavor and unique texture, it’s no wonder that Pão De Queijo has gained popularity beyond Brazil’s borders. Follow this recipe to make your own batch of these delicious cheese breads, perfect for serving 4-6 people.
Ingredients
- 2 cups tapioca flour
- 1 cup milk
- ½ cup vegetable oil
- 1 teaspoon salt
- 1 cup grated cheese (preferably Parmesan or a mix of cheeses)
- 2 large eggs
- ½ teaspoon baking powder
Cooking Instructions
- Preheat the Oven: Start by preheating your oven to 375°F (190°C). This guarantees that the Pão De Queijo will bake evenly and develop a nice golden color.
- Heat the Mixture: In a medium saucepan, combine the milk, vegetable oil, and salt. Heat over medium heat until the mixture is warm but not boiling. Stir occasionally to prevent sticking. This will help the tapioca flour absorb the liquids more effectively.
- Combine with Tapioca Flour: Once the mixture is warm, remove it from the heat and gradually add the tapioca flour. Mix well using a wooden spoon or spatula until the mixture becomes a sticky dough. This step is vital as it allows the tapioca flour to hydrate properly.
- Add Cheese and Eggs: Allow the dough to cool slightly, then add the grated cheese, eggs, and baking powder. Mix until well combined. You might find it easier to use your hands to knead the dough at this stage, resulting in a smooth and homogenous mixture.
- Shape the Dough: Take small portions of the dough and roll them into balls about the size of a golf ball (1 inch in diameter). Place them on a greased baking sheet, leaving some space between them to allow for expansion.
- Bake: Place the baking sheet in the preheated oven and bake for 15-20 minutes or until the tops are lightly browned and puffed up. The Pão De Queijo should be chewy inside and crispy on the outside.
- Cool and Serve: Once baked, remove the cheese breads from the oven and let them cool for a few minutes before serving. They’re best enjoyed warm, straight from the oven.
Extra Tips
When making Pão De Queijo, feel free to experiment with different types of cheese for varied flavors. Additionally, for a more pronounced cheese flavor, you can add extra cheese into the dough.
If you prefer your Pão De Queijo with a hint of seasoning, try incorporating herbs like oregano or garlic powder. Store any leftovers in an airtight container, and reheat them in the oven to restore their crispiness. Enjoy your delicious homemade Pão De Queijo!
Bombocado
Bombocado is a delicious Brazilian treat that combines the rich flavors of coconut and sweetened condensed milk, resulting in a moist, cake-like dessert that’s perfect for any occasion.
This beloved Brazilian cookie isn’t only easy to make, but it also requires minimal ingredients, making it accessible for both novice and experienced bakers. With its unique texture and delightful taste, Bombocado is guaranteed to impress your friends and family, offering them a sweet slice of Brazilian culture.
Traditionally enjoyed during festive gatherings, Bombocado is often served alongside coffee or tea. The combination of the chewy coconut and the creamy base makes for a delightful bite that’s hard to resist.
Whether you’re looking to indulge your sweet tooth or introduce your loved ones to a new treat, this recipe for Bombocado will undoubtedly become a favorite in your household.
Ingredients (Serves 4-6):
- 2 cups shredded coconut (unsweetened)
- 1 can (14 ounces) sweetened condensed milk
- 1 cup milk
- 2 large eggs
- 1 teaspoon baking powder
- 1 teaspoon vanilla extract
- A pinch of salt
- Butter (for greasing the baking dish)
Cooking Instructions:
- Preheat the Oven: Begin by preheating your oven to 350°F (175°C). This guarantees that your Bombocado will bake evenly and achieve a golden brown color.
- Prepare the Baking Dish: Grease a square or rectangular baking dish (approximately 8×8 inches or 9×13 inches) with butter. This step is essential to prevent the Bombocado from sticking to the dish once it’s baked.
- Mix Ingredients: In a large mixing bowl, combine the shredded coconut, sweetened condensed milk, milk, eggs, baking powder, vanilla extract, and a pinch of salt. Use a whisk or a spatula to mix everything together until well combined. The mixture should be somewhat thick and creamy.
- Pour into the Baking Dish: Once the mixture is fully combined, pour it into the prepared baking dish. Use a spatula to spread it evenly across the dish, making sure that the surface is smooth.
- Bake the Bombocado: Place the baking dish in the preheated oven and bake for 25-30 minutes, or until the top is golden brown and a toothpick inserted in the center comes out clean. Keep an eye on it to avoid overbaking.
- Cool and Serve: Once baked, remove the Bombocado from the oven and allow it to cool in the dish for about 10-15 minutes. After cooling, cut it into squares and serve warm or at room temperature.
Extra Tips:
For an added twist, consider sprinkling some chocolate chips or nuts into the mixture before baking for extra flavor and texture.
You can also experiment with different types of coconut, such as sweetened or toasted, depending on your preference. If you want a bit more sweetness, feel free to adjust the amount of sweetened condensed milk.
Store any leftovers in an airtight container at room temperature for up to three days, or refrigerate for longer freshness. Enjoy your Bombocado!
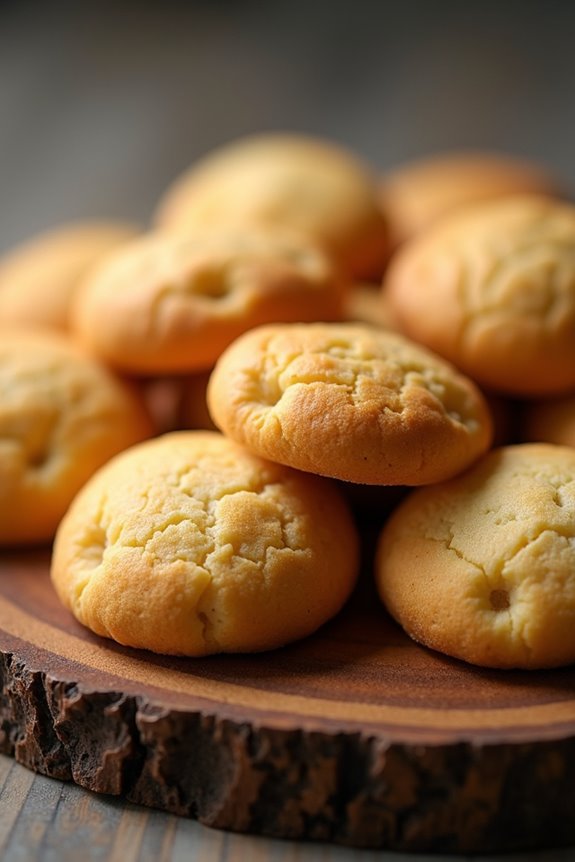
Bolacha Maria
Bolacha Maria is a beloved Brazilian cookie that has captured the hearts of many with its simple yet delightful flavor. These cookies are light, crisp, and slightly sweet, making them a perfect companion for a cup of coffee or tea. Often enjoyed as a snack on their own, Bolacha Maria can also be used as a base for desserts, such as layered cakes and tiramisu. The beauty of this recipe lies in its straightforward preparation, requiring only a handful of ingredients that are easily accessible.
The origins of Bolacha Maria date back to the early 20th century and are inspired by European biscuit recipes. However, over the years, these cookies have developed a unique identity in Brazil, becoming a staple in many households. They’re often enjoyed by children and adults alike, thanks to their versatile nature and the ability to pair well with various toppings, such as chocolate or dulce de leche.
Now, let’s plunge into making these delicious cookies at home!
Ingredients (serving size: 4-6 people)
- 1 cup all-purpose flour
- 1/2 cup sugar
- 1/2 cup unsalted butter, softened
- 1/4 cup milk
- 1 teaspoon baking powder
- 1 teaspoon vanilla extract
- A pinch of salt
Cooking Instructions
- Preheat the Oven: Begin by preheating your oven to 350°F (175°C). This guarantees that the cookies will bake evenly and achieve the perfect golden color.
- Mix the Butter and Sugar: In a large mixing bowl, cream together the softened butter and sugar using a hand mixer or a whisk. Beat the mixture until it becomes light and fluffy, which should take about 3-5 minutes. This process incorporates air into the mixture, giving the cookies a light texture.
- Add the Wet Ingredients: Next, add the milk and vanilla extract to the butter-sugar mixture. Mix well until fully combined. The liquid ingredients will help to bind the dry ingredients together in the next steps.
- Combine the Dry Ingredients: In a separate bowl, whisk together the all-purpose flour, baking powder, and salt. Gradually add the dry mixture to the wet ingredients, stirring until just combined. Be careful not to overmix, as this can lead to tough cookies.
- Shape the Cookies: Using a tablespoon or cookie scoop, portion out the dough onto a baking sheet lined with parchment paper. Make sure to leave some space between each cookie, as they’ll spread out slightly while baking.
- Bake the Cookies: Place the baking sheet in the preheated oven and bake for about 12-15 minutes, or until the edges are lightly golden. Keep a close eye on them to avoid over-baking.
- Cool the Cookies: Once baked, remove the cookies from the oven and allow them to cool on the baking sheet for a few minutes before transferring them to a wire rack. This will help them firm up and maintain their texture.
Extra Tips
When making Bolacha Maria, it’s crucial to measure your ingredients accurately for the best results. If you want to add a twist to your cookies, consider adding cocoa powder for a chocolate version or spices like cinnamon for added flavor.
Storing the cookies in an airtight container will keep them fresh for several days, and they can also be frozen for longer storage. Enjoy your Bolacha Maria with a hot beverage or incorporate them into your favorite dessert recipes!
Biscoito De Amendoim
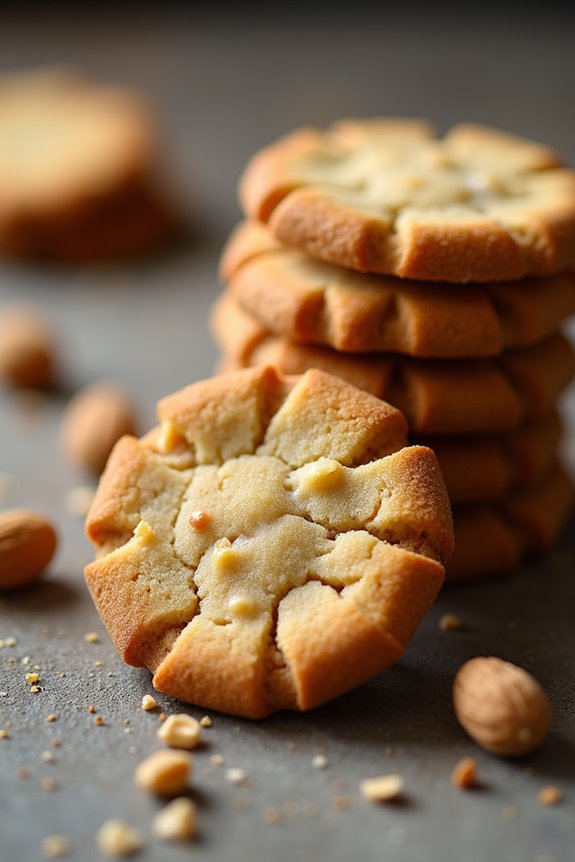
Biscoito De Amendoim, or Peanut Cookies, is a beloved treat in Brazil that combines the rich, nutty flavor of peanuts with a delightful sweetness. These cookies are often enjoyed during festive occasions, family gatherings, or simply as a delightful snack with your afternoon coffee.
They’re easy to make and require minimal ingredients, making them perfect for both novice and experienced bakers alike. The combination of ground peanuts and simple baking staples creates a deliciously crumbly texture that melts in your mouth.
These cookies aren’t only tasty but also versatile. You can experiment with different types of nuts or add chocolate chips to customize the flavor. Whether you’re baking for a special occasion or just to satisfy a sweet tooth, Biscoito De Amendoim is sure to impress.
Serve them alongside a cup of tea or coffee, and you have a delightful treat that everyone will love.
Ingredients (serving size: 4-6 people)
- 1 cup of roasted unsalted peanuts (ground)
- 1 cup of granulated sugar
- 1 large egg
- 1 teaspoon of vanilla extract
- 1 teaspoon of baking powder
- A pinch of salt
Cooking Instructions
- Preheat the Oven: Begin by preheating your oven to 350°F (175°C). This guarantees that the cookies will bake evenly and achieve that perfect golden-brown color.
- Prepare the Baking Sheet: Line a baking sheet with parchment paper. This will prevent the cookies from sticking and make for easier cleanup.
- Mix the Ingredients: In a large mixing bowl, combine the ground peanuts, sugar, baking powder, and salt. Stir these dry ingredients until they’re well blended.
- Add Wet Ingredients: Create a well in the center of the dry ingredients and add the egg and vanilla extract. Mix everything together until a consistent dough forms. The dough should be slightly sticky but manageable.
- Shape the Cookies: Using your hands, shape small balls of dough (about 1 inch in diameter) and place them onto the prepared baking sheet, leaving space between each cookie, as they’ll spread while baking.
- Flatten the Cookies: Gently press down on each ball with the back of a fork or your hand to flatten them slightly. This will help them bake evenly.
- Bake: Place the baking sheet in the preheated oven and bake for 10-12 minutes or until the edges are lightly golden. Keep an eye on them, as they can brown quickly.
- Cool: Once baked, remove the cookies from the oven and let them cool on the baking sheet for a few minutes before transferring them to a wire rack to cool completely.
Extra Tips
For the best flavor, use freshly roasted peanuts or toast raw peanuts in the oven before grinding them. You can also adjust the sweetness by varying the amount of sugar based on your preference.
If you want to add a bit of flair, consider sprinkling a pinch of sea salt on top of the cookies before baking. This contrast in flavors can elevate your Biscoito De Amendoim and make them even more delicious. Enjoy your baking!