

When time is tight but you’re longing for something delicious, Brazilian recipes can be a lifesaver. Dishes like Feijoada and Pão de Queijo are perfect for bringing comfort to your table without taking up your whole evening. They offer a delightful balance of simplicity and rich flavors that can transform your weeknights. If you’re looking for easy ways to add a touch of Brazil to your meals, these recipes might just become your new favorites. Get ready to elevate your dinner routine with these flavorful and straightforward ideas.
Feijoada: Brazil’s Hearty Black Bean Stew
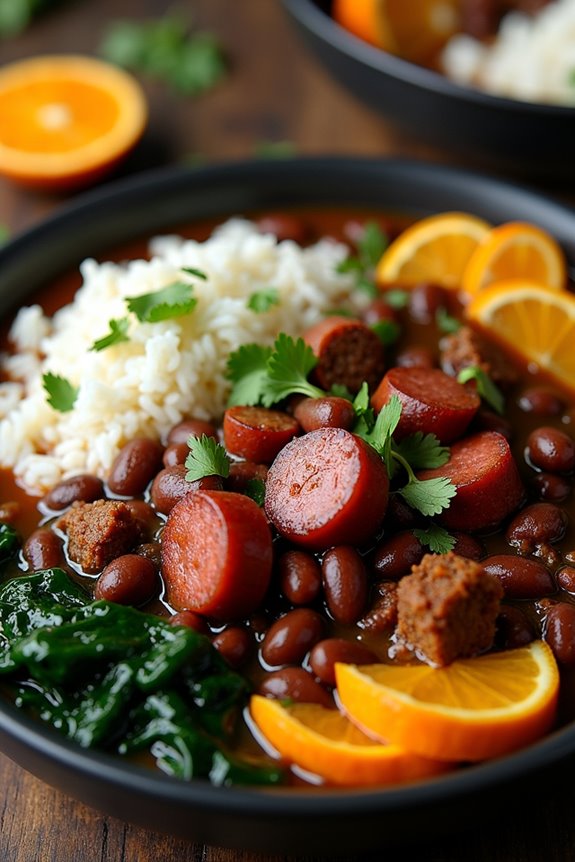
Feijoada is a traditional Brazilian dish that showcases the country’s rich culinary heritage, combining black beans with a variety of meats to create a hearty and flavorful stew. Originating from the Portuguese settlers, this dish has evolved over time, incorporating local ingredients and preferences.
It’s often enjoyed during festive gatherings and is a symbol of Brazilian culture, reflecting the diverse influences that have shaped the nation’s cuisine. The stew is typically served with rice, collard greens, and orange slices, making it a well-rounded meal that delights the palate.
This beloved dish is perfect for family gatherings or a cozy dinner with friends, as it serves 4-6 people. With its melange of flavors and textures, feijoada is both comforting and satisfying. The slow cooking process allows the beans to absorb the flavors of the meats, resulting in a rich and savory stew that warms both the heart and soul.
Ingredients:
- 2 cups black beans, soaked overnight
- 1 lb pork shoulder, cut into chunks
- 1 lb beef brisket, cut into chunks
- 1/2 lb smoked sausage, sliced
- 1/2 lb chorizo or spicy sausage, sliced
- 1 onion, chopped
- 4 cloves garlic, minced
- 2 bay leaves
- 1 teaspoon cumin
- 1 teaspoon paprika
- Salt and pepper to taste
- 4 cups water or chicken broth
- Olive oil for sautéing
- Cooked white rice (for serving)
- Chopped fresh cilantro (for garnish)
- Sliced oranges (for serving)
- Collard greens, sautéed (for serving)
Cooking Instructions:
- Prepare the Beans: Begin by draining the soaked black beans and rinsing them under cold water. This helps to remove any impurities and excess starch. Set them aside while you prepare the meats.
- Sear the Meats: In a large Dutch oven or heavy pot, heat a few tablespoons of olive oil over medium-high heat. Add the pork shoulder and beef brisket, searing them on all sides until browned. This step adds depth of flavor to the dish. Once browned, remove the meats and set them aside.
- Cook the Sausages: In the same pot, add the sliced smoked sausage and chorizo. Cook them for about 5 minutes until they release their oils and become slightly crispy. This will enhance the flavor profile of the stew.
- Sauté Vegetables: Add the chopped onion and minced garlic to the pot, stirring frequently for about 3-4 minutes until the onion becomes translucent. This will create a fragrant base for the stew.
- Combine Ingredients: Return the seared pork and beef to the pot, along with the soaked black beans. Stir in the bay leaves, cumin, paprika, salt, and pepper. This is when the dish starts to come together, as the spices will add a warm and complex flavor.
- Add Liquid: Pour in the water or chicken broth, ensuring all ingredients are covered. Bring the mixture to a boil, then reduce the heat to low, covering the pot. Let it simmer gently for about 2-3 hours, stirring occasionally. The long cooking time allows the flavors to meld and the beans to become tender.
- Final Adjustments: After the cooking time, check the consistency of the stew. If it’s too thick, add a little more water or broth. Taste and adjust the seasoning with more salt and pepper if needed. Remove the bay leaves before serving.
- Serve: Ladle the feijoada into bowls and serve hot over cooked white rice. Garnish with chopped fresh cilantro and accompany with sliced oranges and sautéed collard greens for a traditional touch.
Extra Tips: For an authentic touch, consider using traditional cuts of meat like trotters or smoked pork ribs if available. This will deepen the flavor even further.
Additionally, feijoada is often better the next day, as the flavors continue to develop. Feel free to customize the meat selection based on your preferences or what you have on hand. Enjoy this hearty stew with friends and family for a truly Brazilian experience!
Pão De Queijo: Cheesy Bread Rolls
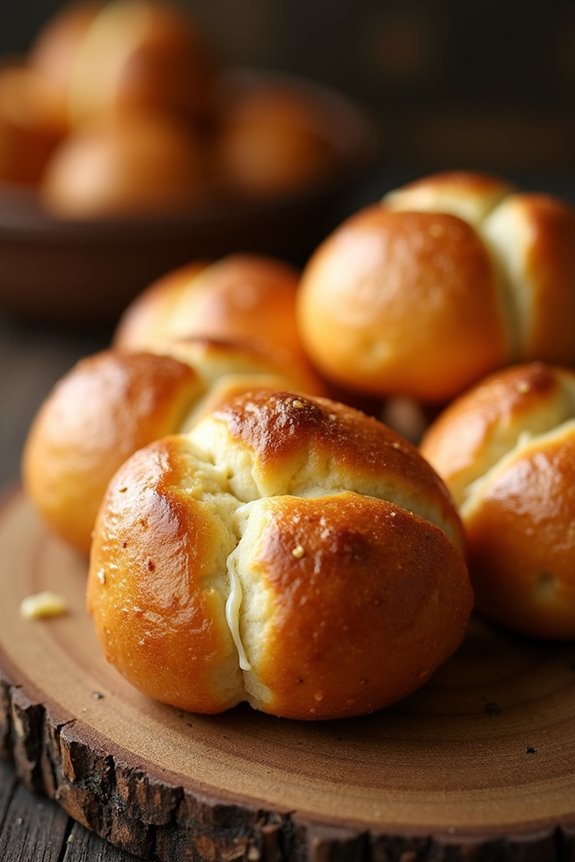
Pão de Queijo, or Brazilian cheese bread, is a delightful treat that has captured the hearts and taste buds of many around the globe. These little cheese rolls aren’t only gluten-free but also incredibly easy to make. With their crispy exterior and chewy, cheesy interior, they’re perfect as a snack, appetizer, or even a breakfast item.
Originating from the state of Minas Gerais, this recipe combines the traditional flavors of tapioca flour with cheese to create a unique and delicious bread roll.
The beauty of Pão de Queijo lies in its simplicity. With just a handful of ingredients and minimal preparation, you can whip up a batch in no time. Whether you’re hosting a gathering or simply indulging in a personal treat, these cheesy bread rolls are sure to impress.
Let’s explore the ingredients and instructions to create this wonderful Brazilian delicacy that serves 4-6 people.
Ingredients:
- 2 cups tapioca flour
- 1 cup milk
- 1/2 cup vegetable oil
- 1 teaspoon salt
- 1 cup grated cheese (preferably Parmesan, but cheddar works too)
- 2 large eggs
- 1/2 teaspoon baking powder
Cooking Instructions:
- Preheat the Oven: Start by preheating your oven to 375°F (190°C). This guarantees that the Pão de Queijo will cook evenly and become beautifully golden brown.
- Heat the Liquid Ingredients: In a medium saucepan, combine the milk, vegetable oil, and salt. Heat the mixture over medium heat until it comes to a gentle boil. Stir occasionally to prevent sticking.
- Combine with Tapioca Flour: Once the milk mixture is boiling, remove it from the heat and gradually add in the tapioca flour. Stir vigorously with a wooden spoon until the mixture is smooth and well combined. It will resemble a thick paste.
- Add Eggs and Cheese: Allow the dough mixture to cool for a few minutes. Then, add the eggs one at a time, mixing well after each addition. Finally, fold in the grated cheese and baking powder until evenly distributed throughout the dough.
- Shape the Dough: With your hands (lightly greased with oil to prevent sticking), pinch off small portions of the dough and roll them into balls about the size of a golf ball. Place the dough balls on a parchment-lined baking sheet, leaving some space between each.
- Bake: Place the baking sheet in the preheated oven and bake for 15-20 minutes, or until the Pão de Queijo are puffed up and golden brown on the outside. They should feel slightly firm to the touch.
- Serve Hot: Remove from the oven and let them cool for a minute before serving. Enjoy them warm for the best experience!
Extra Tips:
For an extra cheesy flavor, consider mixing different types of cheese into the dough, such as mozzarella or gouda. You can also experiment with adding herbs like rosemary or thyme for an aromatic twist.
Pão de Queijo is best enjoyed fresh out of the oven, but they can also be frozen after baking; just reheat them in the oven when you’re ready to enjoy more.
Moqueca: Brazilian Fish Stew
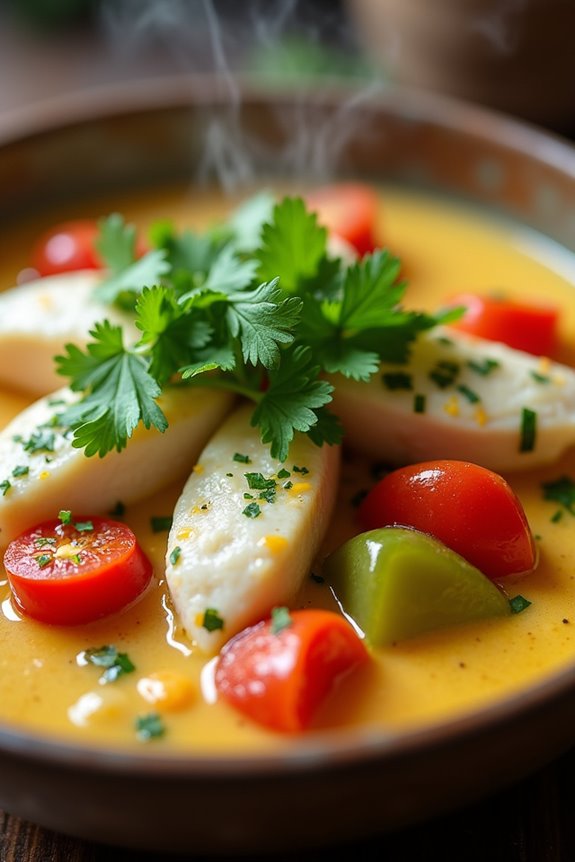
Moqueca is a delightful and aromatic Brazilian fish stew that originates from the northeastern coastal regions of Brazil, particularly Bahia and Espírito Santo. This dish is known for its vibrant flavors and use of fresh ingredients, making it a staple in Brazilian cuisine. The combination of fish, coconut milk, tomatoes, onions, and spices creates a warm and comforting meal that reflects the rich culinary heritage of Brazil.
Traditionally, moqueca is served with rice and farofa, a toasted cassava flour mixture, which complements the stew beautifully.
To create an authentic moqueca, it’s vital to use fresh fish, ideally firm white fish such as snapper or cod. The marinating process is essential for infusing the fish with flavor, while the slow cooking allows the ingredients to meld together harmoniously. This dish is perfect for gatherings and celebrations, showcasing the colorful and diverse flavors of Brazilian cooking.
Ingredients (Serves 4-6)
- 2 lbs firm white fish fillets (such as snapper or cod)
- 1 cup lime juice
- 1 teaspoon salt
- 1 teaspoon black pepper
- 2 tablespoons olive oil
- 1 large onion, chopped
- 3 cloves garlic, minced
- 2 bell peppers (one red and one green), sliced
- 2 medium tomatoes, chopped
- 1 can (14 oz) coconut milk
- 1 tablespoon palm oil (optional)
- 1 bunch fresh cilantro, chopped
- Cooked white rice, for serving
- Farofa, for serving (optional)
Cooking Instructions
- Marinate the Fish: In a large bowl, combine the fish fillets with lime juice, salt, and black pepper. Make sure the fish is well-coated with the marinade. Cover the bowl and refrigerate for at least 30 minutes to allow the flavors to meld and the fish to tenderize.
- Sauté the Aromatics: In a large pot or Dutch oven, heat the olive oil over medium heat. Add the chopped onion and sauté until it becomes translucent, about 5 minutes. Then, add the minced garlic and cook for an additional minute, stirring frequently to prevent burning.
- Add the Vegetables: Incorporate the sliced bell peppers and chopped tomatoes into the pot. Cook the mixture for about 5-7 minutes until the peppers soften and the tomatoes start to break down, releasing their juices.
- Combine with Coconut Milk: Pour in the coconut milk and stir well to combine all of the ingredients. If using, add the palm oil for additional flavor and color. Bring the mixture to a gentle simmer.
- Cook the Fish: Gently place the marinated fish fillets on top of the vegetable mixture in the pot. Cover the pot and let the fish cook for about 15-20 minutes, or until the fish is opaque and flakes easily with a fork. Avoid stirring too much to keep the fish intact.
- Finish with Fresh Herbs: Once the fish is cooked, carefully stir in the chopped cilantro, reserving a bit for garnish. Taste the stew and adjust seasoning if necessary.
- Serve: Ladle the moqueca into bowls, garnishing with remaining cilantro. Serve hot alongside cooked white rice and farofa if desired.
Extra Tips
For the best results when making moqueca, try to use fresh, high-quality fish, as it greatly impacts the flavor of the dish. Additionally, allowing the fish to marinate longer than 30 minutes can enhance the taste even further.
If you want to add more depth to the flavor, consider including spices such as paprika or cayenne pepper for a little heat. Moqueca can also be made with shrimp or other seafood, providing a delicious alternative for seafood lovers. Enjoy this Brazilian classic with family and friends for a truly memorable meal!
Coxinha: Chicken Croquettes

Coxinha is a beloved Brazilian snack that consists of a dough filled with a savory chicken mixture, shaped like a teardrop, and then deep-fried to golden perfection. Originating from the state of São Paulo, these delicious croquettes are often served at parties, celebrations, or as a delectable treat during festive gatherings. The contrast of the crispy outer layer with the tender and flavorful filling is what makes coxinha a favorite among many.
Making coxinha might seem a bit elaborate at first, but with a little patience and practice, you can master this delightful recipe in your own kitchen. The key to achieving the right texture lies in preparing the dough and filling correctly, followed by a careful frying process. Once you’ve made them, coxinhas can be enjoyed fresh or frozen for later use, providing a tasty snack option whenever you crave a taste of Brazil.
Ingredients (Serves 4-6)
- 2 cups shredded cooked chicken
- 1 small onion, finely chopped
- 2 cloves garlic, minced
- 1/2 cup cream cheese
- 2 tablespoons olive oil
- 1 cup chicken broth
- 2 cups all-purpose flour
- 1/2 teaspoon paprika
- Salt and pepper, to taste
- 2 eggs, beaten
- 2 cups breadcrumbs
- Oil, for frying
Instructions
- Prepare the Filling: In a skillet, heat the olive oil over medium heat. Add the chopped onion and minced garlic, sautéing until they become translucent. Incorporate the shredded chicken, cream cheese, paprika, salt, and pepper. Mix thoroughly and cook for about 5-7 minutes until the mixture is heated through. Set aside to cool.
- Make the Dough: In a saucepan, bring chicken broth to a boil. Gradually add the flour, stirring continuously until the dough forms a ball and pulls away from the sides of the pan. Remove from heat and let it cool slightly.
- Shape the Coxinha: Once the dough is cool enough to handle, knead it for a few minutes until smooth. Take a small portion of the dough (about the size of a golf ball) and flatten it in your palm. Place a spoonful of the chicken filling in the center and fold the edges over the filling, shaping it into a teardrop or oval shape. Confirm the filling is completely sealed inside.
- Coat the Coxinhas: Set up a breading station with the beaten eggs in one bowl and breadcrumbs in another. Dip each shaped coxinha into the egg, allowing excess to drip off, and then coat it in breadcrumbs. Repeat this process until all coxinhas are breaded.
- Fry the Coxinhas: In a deep skillet or frying pan, heat oil over medium-high heat. Once the oil is hot (about 350°F or 175°C), carefully add the coxinhas in batches to avoid overcrowding. Fry them until they’re golden brown and crispy, about 4-5 minutes per side. Remove them with a slotted spoon and drain on paper towels.
- Serve and Enjoy: Allow the coxinhas to cool slightly before serving. They can be enjoyed warm as a snack, appetizer, or party food. Serve with your favorite dipping sauce, such as a spicy salsa or aioli.
Extra Tips
For an extra layer of flavor, consider adding herbs like parsley or cilantro to the chicken filling. Additionally, you can experiment with different fillings, such as cheese or vegetables, to cater to various tastes.
If you want to make a larger batch, coxinhas freeze well; just verify they’re fully cooled before placing them in an airtight container. When ready to enjoy, simply reheat them in the oven or fryer until hot and crispy.
Arroz E Feijão: Rice and Beans
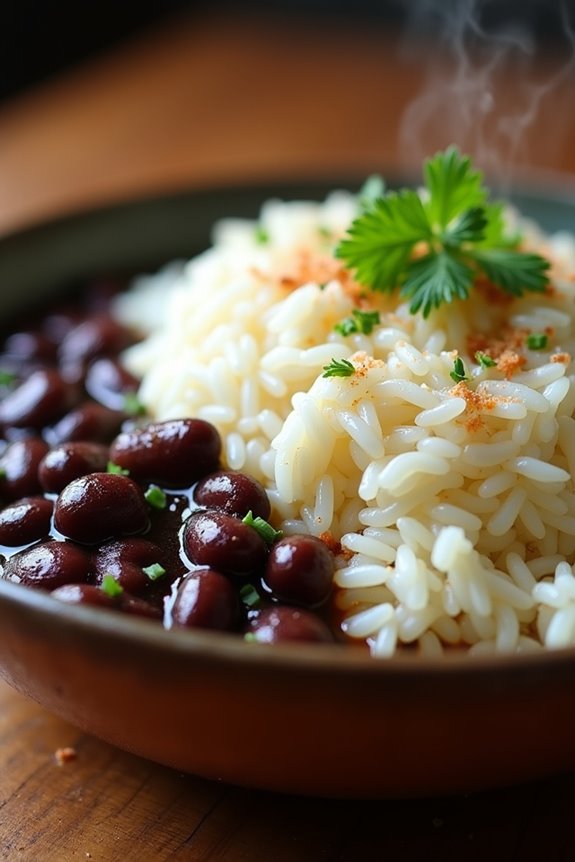
Arroz e Feijão, or Rice and Beans, is a staple dish in Brazilian cuisine, embodying both simplicity and heartiness. This dish is more than just a combination of rice and beans; it’s a symbol of Brazilian culture and comfort food that brings families together around the dining table.
Traditionally served with a variety of accompaniments, this dish is versatile enough to be enjoyed on its own or as a side to meats, stews, and salads.
Cooking Arroz e Feijão isn’t only a delicious venture but also a nutritious one. Beans are an excellent source of protein and fiber, while rice complements them perfectly, creating a balanced meal. This recipe will guide you through the process of making a flavorful and satisfying serving of Arroz e Feijão for 4-6 people, showcasing the essential elements that make this dish a beloved favorite.
Ingredients:
- 2 cups of white rice
- 1 cup of dried black beans (or pinto beans)
- 4 cups of water (for cooking beans)
- 4 cups of water (for cooking rice)
- 1 medium onion, finely chopped
- 2 cloves of garlic, minced
- 2 tablespoons of vegetable oil
- 1 bay leaf
- Salt, to taste
- Fresh parsley or cilantro, for garnish (optional)
Cooking Instructions:
1. Prepare the Beans: Rinse the dried black beans under cold water and soak them in water for at least 8 hours or overnight. This softens the beans and reduces cooking time.
After soaking, drain the beans and set them aside.
2. Cook the Beans: In a large pot, add the soaked beans, 4 cups of fresh water, and a bay leaf. Bring to a boil over medium-high heat.
Once boiling, reduce the heat to low and cover the pot. Simmer for about 1-1.5 hours, or until the beans are tender. Stir occasionally and add more water if necessary to keep the beans submerged.
3. Cook the Rice: While the beans are cooking, rinse the rice under cold water until the water runs clear.
In a separate pot, heat 2 tablespoons of vegetable oil over medium heat. Add the chopped onion and sauté until translucent, about 3-5 minutes. Add the minced garlic and cook for an additional minute until fragrant.
4. Combine Rice and Water: Once the onion and garlic are ready, add the rinsed rice to the pot and stir to coat.
Pour in 4 cups of water and season with salt to taste. Bring the mixture to a boil, then reduce the heat to low and cover the pot. Cook for about 15-20 minutes or until the rice is tender and the water has been absorbed.
5. Serve the Dish: Once both the beans and rice are cooked, serve them together on a plate.
You can mix the beans with some of the cooking broth for added flavor. Garnish with fresh parsley or cilantro if desired.
Extra Tips:
To enhance the flavor of your Arroz e Feijão, consider adding some smoked sausage or bacon to the beans while they cook.
This will impart a rich, savory flavor to the dish. Additionally, feel free to adjust the consistency of the beans by mashing some of them for a creamier texture. Serving the dish with a side of sautéed greens or a fresh salad can also elevate the meal.
Enjoy your cooking experience and the delightful taste of authentic Brazilian cuisine!
Brigadeiro: Chocolate Truffles

Brigadeiro is a beloved Brazilian treat that has captured the hearts of many around the world. These delightful chocolate truffles aren’t only easy to make but also incredibly rich and decadent. Traditionally served at birthday parties and celebrations, brigadeiros are made from just a few simple ingredients, yet they deliver an explosion of flavor that can satisfy any sweet tooth.
If you’re looking to impress your friends or indulge in a sweet treat, brigadeiros are the perfect choice. Making brigadeiros is a fun and interactive cooking experience that can be enjoyed by both novice and experienced cooks alike. The process of stirring the mixture until it reaches the right consistency is often a cherished memory for many Brazilians.
Once rolled into little balls and coated in chocolate sprinkles, these truffles become a beautiful and irresistible dessert. So, gather your ingredients and let’s explore this delightful recipe!
Ingredients (Serves 4-6 people)
- 1 can (14 ounces) sweetened condensed milk
- 2 tablespoons unsweetened cocoa powder
- 2 tablespoons unsalted butter
- A pinch of salt
- Chocolate sprinkles (for rolling)
Cooking Instructions
1. Combine Ingredients: In a medium saucepan, combine the sweetened condensed milk, cocoa powder, unsalted butter, and a pinch of salt. Stir the mixture well until all the ingredients are fully incorporated.
2. Cook the Mixture: Place the saucepan over medium heat. Continuously stir the mixture with a wooden spoon or spatula. Keep stirring until the mixture thickens and starts to pull away from the sides of the pan. This process usually takes about 10-15 minutes.
You’ll know it’s ready when it can be easily spread and holds a shape.
3. Cool the Mixture: Once the brigadeiro mixture has thickened, remove the saucepan from heat. Transfer the mixture to a greased plate or bowl and let it cool down to room temperature. This step is essential as you need the mixture to be cool enough to handle when rolling into balls.
4. Shape the Brigadeiros: Once cooled, grease your hands with a little butter to prevent sticking. Take small portions of the mixture (about a tablespoon) and roll them into small balls, about the size of a cherry.
5. Coat with Sprinkles: Pour the chocolate sprinkles onto a plate. Roll each brigadeiro ball in the sprinkles until fully coated. Place the coated brigadeiros on a serving plate.
6. Serve and Enjoy: Let the brigadeiros rest for a few minutes before serving. They can be enjoyed immediately or stored in an airtight container for later.
Extra Tips
When making brigadeiros, consistency is key. Be patient while cooking the mixture, as undercooked brigadeiros will be too soft, and overcooked ones will be too hard.
If you want to add a twist to your brigadeiros, consider experimenting with different toppings like crushed nuts, coconut flakes, or even flavored sprinkles. Additionally, you can infuse the brigadeiro mixture with a hint of vanilla or coffee for a unique flavor profile.
Enjoy your brigadeiros fresh for the best taste, but they can also be stored in the refrigerator for a few days!
Farofa: Toasted Cassava Flour Mix
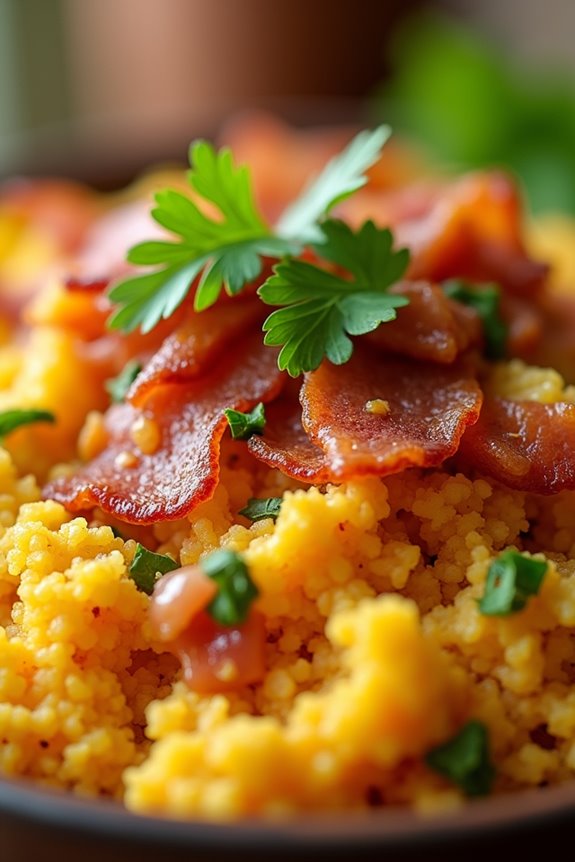
Farofa is a traditional Brazilian dish made primarily from toasted cassava flour, which is known for its versatility and rich flavor. This dish is often served as a side to accompany grilled meats, beans, and other hearty Brazilian meals, providing a delightful crunch and a nutty flavor that complements various flavors.
Farofa can be customized with a variety of ingredients, such as onions, garlic, bacon, and even vegetables, making it a favorite among many families and at festive gatherings.
The preparation of farofa is simple yet rewarding. Toasting the cassava flour creates a unique texture that enhances the overall dish. While there are many variations of farofa, the basic recipe allows you to experiment with different additions based on your personal taste preferences. Whether you’re looking to add some protein with meat or keep it vegetarian, farofa is a wonderful side dish that can elevate any meal.
Ingredients (Serves 4-6)
- 2 cups cassava flour (also known as manioc flour)
- 4 tablespoons unsalted butter or olive oil
- 1 medium onion, finely chopped
- 2 cloves garlic, minced
- 1/2 cup cooked bacon, chopped (optional)
- 1/2 cup green onions, chopped
- 1/2 cup grated carrots (optional)
- 1/2 teaspoon salt (or to taste)
- 1/4 teaspoon black pepper (or to taste)
- 1/4 cup chopped fresh parsley or cilantro (for garnish)
Cooking Instructions
- Prepare the Ingredients: Start by gathering all your ingredients. If you’re using bacon, cook it in a skillet over medium heat until crispy. Remove the bacon from the skillet and set aside, leaving the rendered fat in the pan. If you’re skipping the bacon, simply heat the butter or olive oil in the skillet.
- Sauté the Aromatics: In the same skillet with the bacon fat (or with the butter/oil), add the chopped onion and sauté over medium heat for about 5 minutes or until they become translucent. Add the minced garlic and cook for an additional 1-2 minutes, stirring frequently to prevent burning.
- Add the Cassava Flour: Slowly sprinkle the cassava flour into the pan while stirring continuously. This will guarantee that the flour mixes well with the sautéed onions and garlic. Continue to cook for about 5-10 minutes, stirring frequently, until the flour turns a light golden brown and becomes fragrant.
- Incorporate Additional Ingredients: If you’re using bacon, add it back to the mixture along with the chopped green onions and grated carrots (if using). Stir everything together until well combined. Season with salt and black pepper to taste. Cook for another 2-3 minutes to allow the flavors to meld.
- Serve and Garnish: Once the farofa is well mixed and toasted to your liking, remove it from the heat. Transfer it to a serving dish and garnish with fresh parsley or cilantro. Serve warm alongside your favorite dishes.
Extra Tips
When cooking farofa, it’s important to keep an eye on the cassava flour as it can burn easily. Stirring frequently while toasting will help achieve the perfect golden color without any bitter taste.
Additionally, feel free to customize your farofa by adding nuts, dried fruits, or even spices like paprika or cumin to enhance the flavor profile. This dish is incredibly forgiving and can accommodate a wide range of ingredients, so don’t hesitate to get creative!
Bife À Cavalo: Steak With Fried Egg

Bife À Cavalo, translating to “Steak with a Horse,” is a delightful Brazilian dish that features a juicy steak topped with a perfectly fried egg. This dish is beloved for its simplicity and the rich flavors that come together to create a satisfying meal.
It’s often served with rice and beans, making it a hearty and fulfilling option for any dinner table. The combination of tender beef, sunny-side-up eggs, and a sprinkle of seasoning makes Bife À Cavalo a favorite among meat lovers.
The dish isn’t just about the steak; the egg adds a creamy texture that complements the meat beautifully, elevating the entire experience. Whether you’re enjoying it during a family gathering or a casual weeknight dinner, Bife À Cavalo is sure to impress.
Ingredients (Serves 4-6)
- 4-6 beef steaks (about 6-8 oz each, such as sirloin or ribeye)
- 4-6 large eggs
- 2 tablespoons olive oil
- 2 cloves garlic, minced
- Salt and freshly ground black pepper, to taste
- Fresh parsley, chopped (for garnish)
- Cooked white rice (for serving)
- Black beans (for serving)
Cooking Instructions
- Prepare the Steak: Start by seasoning the beef steaks with salt and freshly ground black pepper on both sides. Let them sit for about 15 minutes at room temperature to allow the seasoning to penetrate the meat.
- Heat the Pan: In a large skillet, heat 1 tablespoon of olive oil over medium-high heat. Once the oil is hot, add the minced garlic and sauté for about 30 seconds until fragrant, being careful not to burn it.
- Cook the Steaks: Place the seasoned steaks in the skillet and cook for 4-5 minutes on each side, depending on your desired level of doneness. For medium-rare, aim for an internal temperature of about 130°F (54°C). Remove the steaks from the skillet and let them rest on a plate, covered with foil to keep warm.
- Fry the Eggs: In the same skillet, add another tablespoon of olive oil if needed. Crack the eggs into the skillet, being careful not to break the yolks. Fry the eggs for about 3-4 minutes until the whites are set but the yolks are still runny, or longer if you prefer them more cooked.
- Assemble the Dish: Place each steak on a plate and top with a fried egg. Sprinkle with chopped parsley for a touch of color and freshness.
- Serve: Serve the Bife À Cavalo alongside cooked white rice and black beans to complete the meal. Enjoy!
Extra Tips
For an enhanced flavor, marinate the steaks in a mixture of olive oil, garlic, and herbs for a few hours before cooking. This will tenderize the meat and infuse it with additional taste.
Additionally, consider using a cast-iron skillet for cooking the steaks, as it retains heat well and gives a beautiful sear. Finally, feel free to experiment with different cuts of steak or even add a side of sautéed vegetables for a more balanced meal. Enjoy your Bife À Cavalo!
Vatapá: Shrimp and Bread Stew
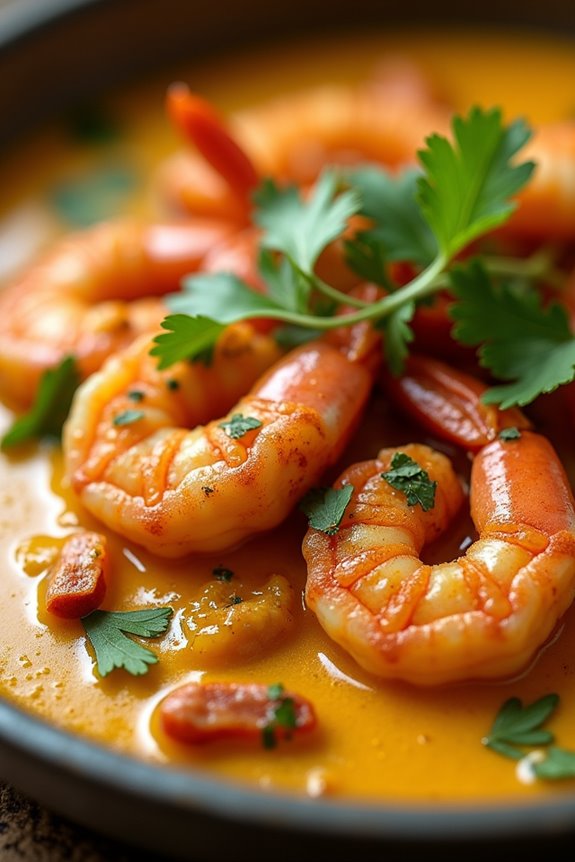
Vatapá is a traditional Brazilian dish that hails from the northeastern region of the country, particularly Bahia. This delicious stew combines the rich flavors of shrimp with bread, nuts, and coconut milk, making it a comforting and hearty meal.
Often served over rice, Vatapá is a staple in Afro-Brazilian cuisine and is typically enjoyed during festive occasions or family gatherings. The dish’s unique blend of spices and ingredients reflects the diverse cultural influences that shape Brazilian cooking.
Making Vatapá is an art that balances texture and flavor. The bread adds a creamy consistency, while the shrimp brings a savory depth to the dish. The inclusion of coconut milk and palm oil introduces a tropical essence that’s both aromatic and flavorful. This recipe serves 4-6 people, making it perfect for sharing with family and friends.
Ingredients:
- 1 lb (450 g) shrimp, peeled and deveined
- 4 slices of stale bread, crusts removed
- 1 onion, chopped
- 3 cloves garlic, minced
- 1 cup coconut milk
- 1/2 cup palm oil (dendê oil)
- 1/2 cup ground peanuts or cashews
- 1/2 tsp ground cumin
- 1/2 tsp ground coriander
- 1 tsp chili powder (adjust to taste)
- Salt and pepper to taste
- 1/2 cup chopped cilantro for garnish
- 2 cups water
Cooking Instructions:
- Prepare the Bread: Tear the stale bread into small pieces and place it in a bowl. Pour in the coconut milk and let it soak for about 15-20 minutes until it softens. This soaking process will help create a creamy base for the stew.
- Sauté Aromatics: In a large pot, heat the palm oil over medium heat. Once hot, add the chopped onion and sauté for 3-4 minutes until translucent. Then, add the minced garlic and sauté for another minute until fragrant.
- Add Shrimp: Add the peeled and deveined shrimp to the pot. Cook them for about 5 minutes until they turn pink and are cooked through. Remove the shrimp from the pot and set aside, leaving the oil and aromatics behind.
- Blend Bread Mixture: In a blender, combine the soaked bread and coconut milk mixture with the sautéed onions and garlic. Blend until smooth, creating a thick paste. If necessary, add a little water to help it blend smoothly.
- Simmer the Stew: Pour the blended mixture back into the pot. Add the ground peanuts or cashews, cumin, coriander, chili powder, and season with salt and pepper. Stir well and add 2 cups of water to thin the stew slightly. Bring it to a simmer, allowing it to cook for about 15 minutes, stirring occasionally.
- Finish with Shrimp: Once the stew has thickened to your liking, add the cooked shrimp back into the pot. Let it simmer for an additional 5 minutes, allowing the flavors to meld together.
- Garnish and Serve: Once done, remove the pot from heat. Serve the Vatapá hot, garnished with chopped cilantro. It pairs beautifully with steamed rice.
Extra Tips:
When preparing Vatapá, it’s essential to use fresh shrimp for the best flavor, but if unavailable, frozen shrimp can work as well.
Additionally, you can customize the spice level by adjusting the amount of chili powder according to your taste preference. For an even richer flavor, consider adding a splash of lime juice before serving. Don’t forget to serve this dish with a side of fluffy rice to soak up the delicious sauce!
Pastel: Fried Pastry Filled With Meat

Pastel is a beloved Brazilian street food that tantalizes the taste buds with its crispy exterior and savory filling. Originating in the state of São Paulo, this delightful pastry has become a staple in Brazilian cuisine, often enjoyed at fairs, markets, and street vendors. The flaky dough is typically filled with a variety of ingredients, but the classic version features seasoned ground meat, making it a satisfying snack or meal option.
Making pastel at home may seem intimidating, but the process is quite manageable and rewarding. With a few simple ingredients and some patience, you can create a batch of these delicious pastries that are perfect for sharing with family and friends. Whether served with a side of hot sauce or an invigorating dipping sauce, these fried pastries are sure to be a hit at any gathering.
Ingredients (serving size: 4-6 people)
- 2 cups all-purpose flour
- 1/2 teaspoon salt
- 1/4 cup vegetable oil
- 1/2 cup warm water
- 1 pound ground beef
- 1 small onion, finely chopped
- 2 cloves garlic, minced
- 1/2 teaspoon paprika
- 1/2 teaspoon black pepper
- 1/2 teaspoon cumin
- 1/4 cup chopped parsley
- Oil for frying
Cooking Instructions
- Prepare the Dough: In a large mixing bowl, combine the all-purpose flour and salt. Create a well in the center and add the vegetable oil and warm water gradually. Mix the ingredients with your hands or a spoon until a dough forms. Knead the dough on a floured surface for about 5-7 minutes until it’s smooth and elastic. Cover the dough with a clean kitchen towel and let it rest for 30 minutes.
- Cook the Filling: In a skillet over medium heat, add a little oil and sauté the finely chopped onion until translucent, about 3-4 minutes. Then, add the minced garlic and cook for an additional minute. Next, add the ground beef, breaking it apart with a spatula, and cook until browned. Season with paprika, black pepper, cumin, and stir in the chopped parsley. Once cooked, remove from heat and let the filling cool slightly.
- Roll Out the Dough: After the dough has rested, divide it into small balls, about the size of a golf ball. On a floured surface, roll each ball into thin circles, about 5-6 inches in diameter. Make sure that the edges are slightly thinner than the center to create a good seal when folded.
- Assemble the Pastéis: Place a spoonful of the meat filling in the center of each circle. Fold the dough over to create a half-moon shape, pressing the edges together to seal. For a decorative touch, you can crimp the edges with a fork or twist them by hand to guarantee they’re securely closed.
- Fry the Pastéis: In a deep frying pan or pot, heat oil over medium-high heat until it reaches about 350°F (175°C). Carefully add the filled pastéis, a few at a time, making sure not to overcrowd the pan. Fry them for about 2-3 minutes on each side, or until they’re golden brown and crispy. Remove them with a slotted spoon and drain on paper towels.
- Serve: Allow the pastéis to cool slightly before serving. They can be enjoyed warm or at room temperature with hot sauce or a dipping sauce of your choice.
Extra Tips
When making pastel, it’s crucial to confirm that the dough is rolled out evenly to prevent uneven cooking. Additionally, make sure the oil is hot enough before frying, as this will help create a perfect crispy texture.
If you want to experiment, you can try different fillings such as cheese, chicken, or vegetables. Leftover pastéis can be frozen before frying; just make sure to separate them with parchment paper to prevent sticking. Enjoy your cooking adventure!
Quindim: Coconut Custard

Quindim is a beloved Brazilian dessert known for its rich, creamy texture and delightful coconut flavor. This traditional treat is often served in small, round shapes, making it not only delicious but also visually appealing. The combination of egg yolks, sugar, and shredded coconut results in a custard that’s both sweet and slightly chewy. Quindim is typically served chilled, making it a revitalizing end to a meal, especially in warm weather.
Making Quindim is a straightforward process that requires a few key ingredients and some patience. The dessert is baked in a water bath, which helps create a silky smooth custard while preventing the top from browning too quickly. Once baked, the Quindim is allowed to cool before being unmolded, revealing its bright yellow color and glossy surface. With its unique flavor and elegant presentation, Quindim is sure to impress your guests.
Ingredients (Serves 4-6):
- 1 cup granulated sugar
- 1 cup shredded coconut (unsweetened)
- 1 cup coconut milk
- 6 egg yolks
- 1 tablespoon unsalted butter, melted
- 1 teaspoon vanilla extract
- A pinch of salt
Cooking Instructions:
- Preheat the Oven: Begin by preheating your oven to 350°F (175°C). This guarantees that the Quindim will bake evenly once you have prepared the mixture.
- Prepare the Baking Dish: Grease a muffin tin or individual ramekins with butter. You can also use a larger flan mold if you prefer to serve the Quindim as one whole dessert. This step is essential to prevent sticking when it’s time to unmold the custard.
- Mix the Ingredients: In a mixing bowl, combine the granulated sugar, shredded coconut, coconut milk, egg yolks, melted butter, vanilla extract, and a pinch of salt. Use a whisk to blend the ingredients until they’re well combined and the mixture is smooth. This will create a rich custard base for your Quindim.
- Pour into Molds: Carefully pour the coconut custard mixture into the prepared molds, filling each one about three-quarters full. This allows for some expansion as they bake without overflowing.
- Create a Water Bath: Place the filled molds into a larger baking dish and add hot water to the outer dish until it reaches halfway up the sides of the molds. This water bath helps maintain an even temperature during baking, resulting in a creamy texture.
- Bake: Place the baking dish in the preheated oven and bake for about 30-40 minutes, or until the edges are set and the tops are lightly golden. You can test for doneness by inserting a toothpick into the center of one of the custards; it should come out clean.
- Cool and Unmold: Once baked, remove the baking dish from the oven and let the Quindim cool in the molds for about 10 minutes. Then, carefully run a knife around the edges to loosen them before inverting onto a serving plate. Allow them to cool completely in the refrigerator before serving.
Extra Tips: When making Quindim, it’s important to use fresh, high-quality ingredients to achieve the best flavor. If you want a more intense coconut taste, consider using coconut cream instead of coconut milk. Additionally, letting the Quindim chill overnight can enhance the flavors and improve the texture. Finally, for a decorative touch, you can garnish the top with toasted coconut flakes or serve with a dollop of whipped cream. Enjoy your homemade Quindim!
Acarajé: Black-Eyed Pea Fritters

Acarajé is a traditional Brazilian street food that hails from the state of Bahia. These delicious fritters are made primarily from black-eyed peas, which are soaked, peeled, and mashed into a dough-like consistency. The fritters are then deep-fried in palm oil until they’re golden brown and crispy on the outside while remaining soft and fluffy on the inside.
Acarajé is often served with a spicy shrimp filling, a tangy vinaigrette, and a variety of flavorful toppings, making it a beloved dish that embodies the rich flavors and cultural heritage of Brazil.
The preparation of Acarajé is a labor of love, requiring some time and patience, but the result is well worth the effort. The combination of the crunchy exterior with the savory fillings creates an irresistible treat that’s perfect as a snack or a main dish.
Whether enjoyed at a street cart or made at home, Acarajé offers a unique taste of Brazilian cuisine that’s sure to impress family and friends.
Ingredients (Serves 4-6)
- 2 cups black-eyed peas
- 1 small onion, chopped
- 1 teaspoon salt
- 1 teaspoon ground black pepper
- 1 teaspoon cayenne pepper (optional for heat)
- 1 cup palm oil (for frying)
- 1 cup cooked and seasoned shrimp (for filling)
- ½ cup vatapá (a Brazilian shrimp paste) or any desired filling
- ½ cup spicy vinaigrette (to serve)
- Fresh cilantro and sliced tomatoes (for garnish)
Cooking Instructions
- Soak the Black-Eyed Peas: Begin by placing the black-eyed peas in a bowl and covering them with water. Allow them to soak for at least 8 hours or overnight. This softens the peas and makes them easier to peel and blend.
- Peel the Black-Eyed Peas: After soaking, drain the peas and rinse them under running water. To remove the skins, gently rub the peas between your hands. The skins should come off easily. Rinse again to remove the loose skins.
- Make the Dough: Place the peeled black-eyed peas in a food processor along with the chopped onion, salt, black pepper, and cayenne pepper, if using. Blend until you achieve a smooth, thick batter. Make sure there are no large chunks, but the mixture should still be thick enough to hold its shape when fried.
- Heat the Palm Oil: In a deep frying pan or pot, heat the palm oil over medium heat until it’s hot but not smoking. You can test the oil’s readiness by dropping a small amount of batter into the oil; it should sizzle immediately.
- Fry the Fritters: Using a spoon or your hands, form small balls or patties of the black-eyed pea mixture and carefully drop them into the hot oil. Fry in batches, being careful not to overcrowd the pan. Cook for about 4-5 minutes on each side, or until golden brown and crispy.
- Drain and Cool: Once fried, remove the Acarajé fritters from the oil and place them on a plate lined with paper towels to absorb excess oil. Allow them to cool slightly before serving.
- Assemble the Dish: To serve, cut open each Acarajé fritter and stuff it with the cooked shrimp and vatapá or any filling of your choice. Drizzle with spicy vinaigrette and garnish with fresh cilantro and sliced tomatoes.
Extra Tips
When preparing Acarajé, make sure to use high-quality palm oil, as it contributes greatly to the flavor of the dish. If you’re short on time, you can prepare the batter in advance and store it in the refrigerator for up to 24 hours.
For an authentic touch, consider serving Acarajé with a side of hot sauce for those who enjoy an extra kick. Remember that the key to perfect Acarajé is the frying process; verify that the oil is at the right temperature for a crispy exterior without absorbing too much oil.
Enjoy your culinary adventure into Brazilian flavors!
Salgadinhos: Savory Pastries

Salgadinhos are a beloved Brazilian snack that are perfect for any gathering or celebration. These savory pastries come in various shapes and fillings, often featuring a delightful combination of meats, cheeses, and vegetables encased in a golden, flaky dough. They’re usually served warm and are a popular choice at birthday parties, family reunions, and festive occasions.
The beauty of salgadinhos lies in their versatility; you can customize the filling to suit your taste or dietary preferences.
Making salgadinhos from scratch is a rewarding experience that allows you to enjoy these delicious treats fresh from the oven. While they may seem intricate, the recipe can be broken down into manageable steps. With some preparation and a bit of patience, you can impress your family and friends with these tasty morsels that bring a touch of Brazilian flavor to your table.
Ingredients (Serves 4-6 people)
- 3 cups all-purpose flour
- 1 cup unsalted butter (softened)
- 1 teaspoon salt
- 1/2 cup cold water
- 1 egg (for egg wash)
- 1 cup shredded chicken or beef (cooked)
- 1/2 cup cream cheese
- 1/4 cup chopped green onions
- 1/2 teaspoon black pepper
- 1/2 teaspoon paprika
- Oil for frying (optional)
Cooking Instructions
- Prepare the Dough: In a large mixing bowl, combine the flour and salt. Add the softened butter and mix until the mixture resembles coarse crumbs. Gradually add the cold water, mixing until the dough comes together. Knead the dough for a few minutes until smooth. Wrap it in plastic wrap and refrigerate for at least 30 minutes to allow it to firm up.
- Make the Filling: In a separate bowl, mix the cooked shredded chicken or beef with cream cheese, chopped green onions, black pepper, and paprika. Stir until the filling is well combined and creamy. Taste and adjust seasoning as needed.
- Roll Out the Dough: After chilling, take the dough out of the refrigerator. On a floured surface, roll out the dough to about 1/8 inch thickness. Using a round cutter or a glass, cut out circles of dough about 3 inches in diameter.
- Fill the Pastries: Place a tablespoon of the filling in the center of each dough circle. Be careful not to overfill, as this can cause them to burst during cooking. Fold the dough over to create a half-moon shape and press the edges together to seal. You can crimp the edges with a fork for a decorative touch.
- Cook the Salgadinhos: You can either bake or fry the salgadinhos. For baking, preheat your oven to 375°F (190°C) and place the sealed pastries on a baking sheet lined with parchment paper. Brush the tops with beaten egg for a golden finish. Bake for 20-25 minutes or until golden brown. For frying, heat oil in a deep skillet over medium heat and fry the pastries until golden, about 3-4 minutes per side. Drain on paper towels.
- Serve and Enjoy: Once cooked, allow the salgadinhos to cool for a few minutes before serving. They’re best enjoyed warm and can be served with a side of hot sauce or your favorite dipping sauce.
Extra Tips
When preparing salgadinhos, consider making a larger batch to freeze for later use. You can assemble them and freeze them raw, then fry or bake them directly from the freezer without thawing — just add a few extra minutes to the cooking time.
Additionally, experiment with different fillings such as mozzarella and herbs, or even vegetarian options like spinach and ricotta for a delightful twist. Don’t hesitate to get creative with spices and flavors to make these pastries your own!
Caldo Verde: Portuguese Kale Soup
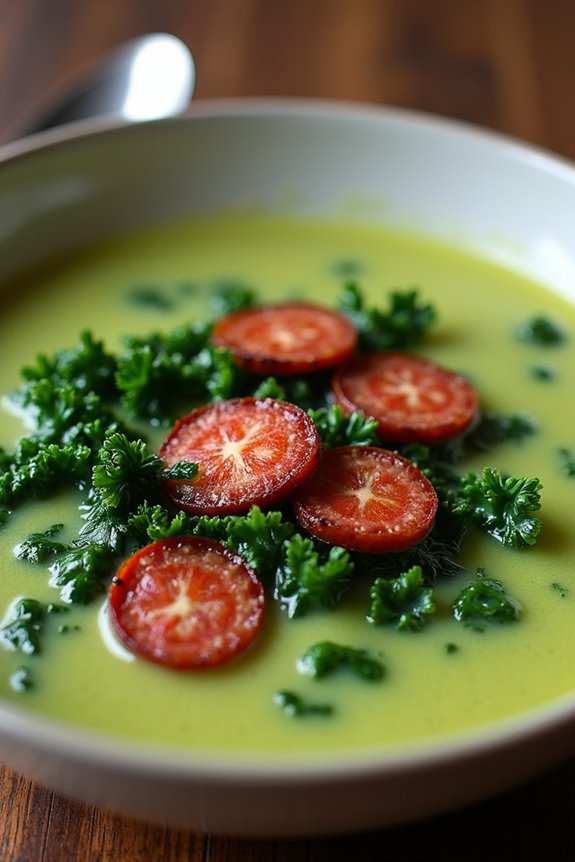
Caldo Verde is a beloved Portuguese dish that has found its way into Brazilian cuisine, celebrated for its comforting flavors and simplicity. This vibrant green soup is traditionally made with potatoes, kale, and chorizo, making it a hearty meal perfect for any occasion. Its origins trace back to the Minho province in northern Portugal, but it has become a staple throughout the country and in Brazil, where it’s often enjoyed during family gatherings and festive celebrations.
Making Caldo Verde is straightforward, requiring minimal ingredients and time, making it an accessible dish for cooks of all levels. The key to a delicious Caldo Verde lies in the quality of the ingredients, particularly the kale and chorizo, which infuse the soup with rich flavors. This comforting soup isn’t only nutritious but also a delightful way to warm up on cool evenings.
Ingredients (Serves 4-6):
- 4 medium potatoes, peeled and diced
- 1 large onion, chopped
- 3 cloves garlic, minced
- 6 cups vegetable or chicken broth
- 1 bunch kale, stems removed and leaves finely chopped
- 2 tablespoons olive oil
- 1/2 pound chorizo sausage, sliced (or Portuguese sausage)
- Salt and pepper to taste
- Optional: Crusty bread for serving
Cooking Instructions:
- Prepare the Potatoes: In a large pot, heat the olive oil over medium heat. Add the chopped onion and sauté until it becomes translucent, about 5 minutes. Add the minced garlic and sauté for an additional minute until fragrant.
- Cook the Potatoes: Add the diced potatoes to the pot, stirring to coat them in the oil. Pour in the vegetable or chicken broth, and bring the mixture to a boil. Reduce the heat and let it simmer until the potatoes are tender, about 15-20 minutes.
- Blend the Soup: Once the potatoes are cooked, use an immersion blender to puree the soup until smooth. If you don’t have an immersion blender, carefully transfer the soup in batches to a traditional blender, then return it to the pot.
- Add the Kale: Stir in the chopped kale and allow it to cook in the simmering soup for about 5-7 minutes until it wilts and becomes tender.
- Cook the Chorizo: In a separate pan, sauté the sliced chorizo over medium heat until it’s crispy and browned, about 5-7 minutes. Once cooked, add the chorizo to the pot, stirring to combine all the flavors.
- Season and Serve: Taste the soup and adjust the seasoning with salt and pepper as needed. Serve hot, optionally with crusty bread on the side for dipping.
Extra Tips:
When preparing Caldo Verde, it’s crucial to use fresh kale to achieve the best flavor and texture. If you prefer a more robust flavor, consider using smoked chorizo, as it adds a delightful smoky note to the soup.
Additionally, for a creamier texture, you can blend a portion of the kale with the potatoes before adding it back to the pot. This soup is versatile; feel free to customize it by adding other vegetables or spices based on your preferences!