

If you’re looking to add some Brazilian flair to your meals, these side dishes are just what you need. I’ve found 14 fresh recipes that will brighten up any plate and pair perfectly with your favorite main dishes. From the comforting Feijão Tropeiro to the zesty Salada De Couve, each one is a burst of flavor. These vibrant sides will bring something special to your table. Let’s get cooking and elevate your meals with these delightful Brazilian treats!
Feijão Tropeiro
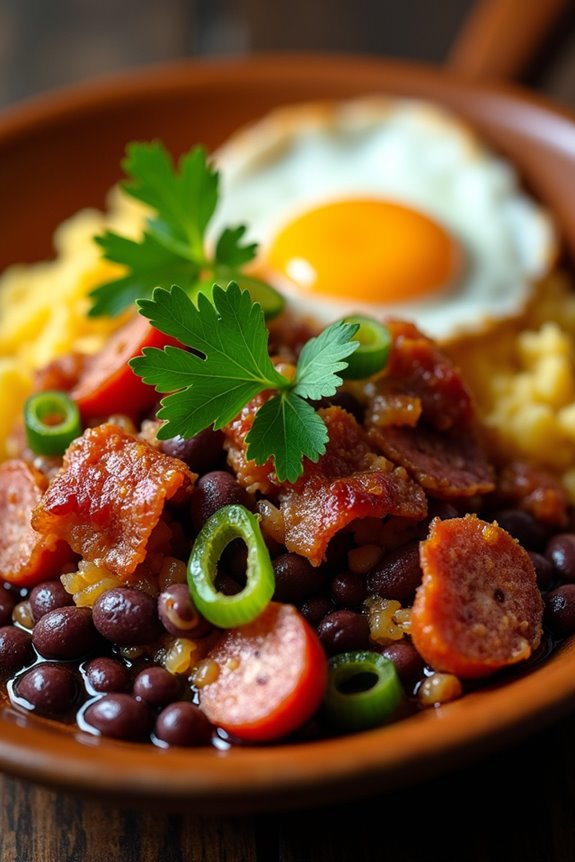
Feijão Tropeiro is a traditional Brazilian dish that combines the hearty flavors of beans with the savory goodness of bacon, sausage, and eggs. This dish has its roots in the Brazilian countryside, where it was originally prepared by traveling merchants, or “tropeiros,” who needed a filling, nutritious meal that could be cooked easily over an open fire.
Feijão Tropeiro isn’t only a delicious side dish but also a wonderful representation of Brazilian culinary heritage, often enjoyed during gatherings and celebrations.
The dish is characterized by its unique combination of ingredients, particularly the use of cooked beans, which are usually black or brown, mixed with farofa (toasted cassava flour). This delightful mixture is then enhanced with the addition of crispy bacon, seasoned sausage, and sometimes even vegetables, making it a wholesome meal that can stand on its own.
Whether served alongside grilled meats or as part of a larger feast, Feijão Tropeiro is sure to impress and satisfy.
Ingredients (Serves 4-6)
- 2 cups cooked black beans (or brown beans)
- 1 cup cooked farofa (toasted cassava flour)
- 150g bacon, chopped into small pieces
- 200g sausage (preferably smoked), sliced
- 2 large eggs
- 1 onion, finely chopped
- 2 cloves garlic, minced
- 1 bunch green onions, chopped
- Salt and pepper to taste
- Olive oil (for cooking)
- Fresh parsley (for garnish)
Cooking Instructions
- Cook the Bacon and Sausage: In a large skillet, heat a tablespoon of olive oil over medium heat. Add the chopped bacon and cook until it’s crispy, which should take about 5-7 minutes. Once the bacon is cooked, add the sliced sausage and continue to cook for an additional 4-5 minutes, allowing the sausage to brown slightly.
- Sauté the Aromatics: Add the finely chopped onion to the skillet with the bacon and sausage. Cook for about 3-4 minutes or until the onion becomes translucent. Then, add the minced garlic and sauté for another minute, stirring frequently to prevent burning.
- Scramble the Eggs: Push the bacon, sausage, and onion mixture to one side of the skillet. Crack the two eggs into the cleared space, stirring them gently to scramble. Once the eggs are cooked through, mix them with the bacon and sausage mixture.
- Combine with Beans and Farofa: Add the cooked black beans to the skillet, along with the farofa. Stir everything together until the ingredients are well combined. Season with salt and pepper to taste and cook for an additional 2-3 minutes to heat everything through.
- Finish and Serve: Remove the skillet from heat and stir in the chopped green onions for a fresh touch. Transfer the Feijão Tropeiro to a serving dish and garnish with fresh parsley before serving.
Extra Tips
When preparing Feijão Tropeiro, feel free to customize the dish by adding vegetables such as bell peppers or tomatoes for extra flavor and nutrition.
Additionally, verify that the beans are well-cooked and seasoned, as they’re a key component of the dish. If you prefer a vegetarian version, you can omit the bacon and sausage and use mushrooms or smoked paprika to add depth to the flavor.
Enjoy this dish warm, as it’s best served fresh!
Farofa

Farofa is a quintessential Brazilian side dish made from toasted cassava flour (also known as manioc flour). It’s often served alongside meats, particularly during festive occasions and barbecues, to augment the overall meal with its unique texture and flavor.
This versatile dish can be customized with various ingredients, such as bacon, onions, and vegetables, allowing it to complement a wide range of main dishes. The beauty of farofa lies in its simplicity and the way it absorbs the flavors of the ingredients it’s paired with.
It’s not only a staple in Brazilian cuisine but also a dish that brings comfort and nostalgia to many. Whether enjoyed on a regular Tuesday night or during a festive celebration, farofa adds a delightful crunch and richness to every plate.
Ingredients (Serves 4-6):
- 2 cups cassava flour
- 4 tablespoons unsalted butter
- 1 medium onion, finely chopped
- 2 cloves garlic, minced
- 1 cup cooked and chopped bacon (optional)
- 1/2 cup green onions, chopped
- 1/2 cup carrots, grated
- Salt to taste
- Fresh parsley, chopped (for garnish)
Cooking Instructions:
- Prepare the Ingredients: Begin by gathering all your ingredients. Chop the onion, garlic, bacon (if using), and green onions. Grate the carrot to facilitate even cooking. This preparation will make the cooking process smoother.
- Cook the Bacon (if using): In a large skillet over medium heat, melt 2 tablespoons of butter. Add the chopped bacon and cook until crispy, about 5-7 minutes. Use a slotted spoon to remove the bacon and set it aside, leaving the rendered fat in the skillet.
- Sauté the Aromatics: In the same skillet, add the remaining 2 tablespoons of butter. Once melted, add the chopped onion and sauté until it becomes translucent, about 3-4 minutes. Then, add the minced garlic and sauté for an additional minute until fragrant.
- Incorporate the Vegetables: Add the grated carrots and green onions to the skillet. Cook for about 2-3 minutes, stirring frequently, until the vegetables are tender and well combined with the onion and garlic.
- Toast the Cassava Flour: Gradually add the cassava flour to the skillet, stirring constantly to combine with the vegetable mixture. Toast the flour for about 5-7 minutes, or until it turns golden brown and aromatic. Be careful not to let it burn.
- Season and Finish: Once the cassava flour is toasted, return the cooked bacon to the skillet, and season with salt to taste. Mix everything thoroughly to make sure the flavors meld together. Cook for an additional 2-3 minutes.
- Serve: Remove the farofa from the heat and transfer it to a serving dish. Garnish with freshly chopped parsley before serving.
Extra Tips:
When preparing farofa, feel free to get creative with the ingredients. You can add diced bell peppers, raisins for a touch of sweetness, or even chopped nuts for extra crunch.
The key to a great farofa is the toasting process, as it enhances the nutty flavor of the cassava flour. Keep an eye on it while cooking to prevent burning, and don’t hesitate to adjust the seasonings to your taste. Enjoy your delicious farofa as a delightful accompaniment to your favorite Brazilian dishes!
Salada De Couve
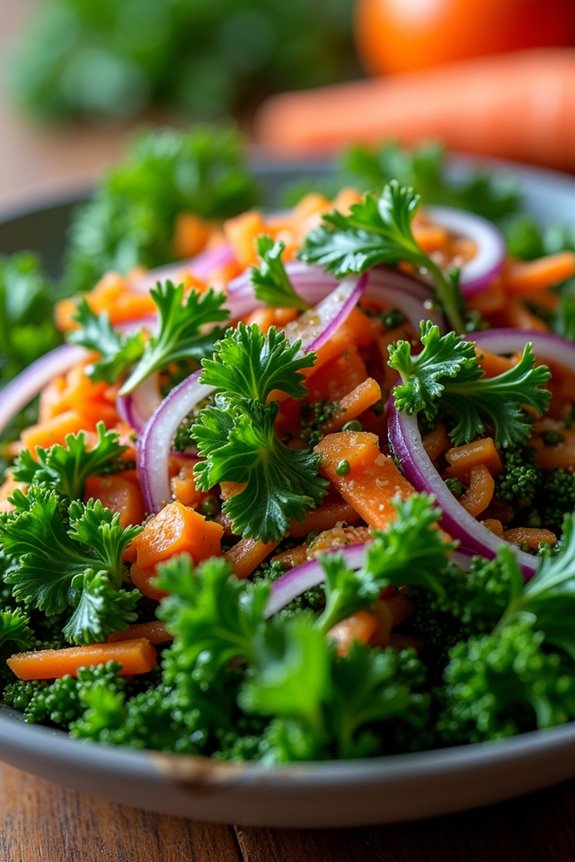
Salada De Couve is a vibrant and nutritious Brazilian side dish that highlights the rich flavors of kale, often complemented by tangy lime and aromatic garlic. This invigorating salad isn’t only simple to prepare but also adds a delightful crunch and a burst of color to any meal.
Traditionally served alongside grilled meats or as part of a larger spread, this dish embodies the essence of Brazilian cuisine, showcasing local ingredients and bold flavors.
The beauty of Salada De Couve lies in its versatility. You can enjoy it as a standalone salad, a side dish, or even as a topping for rice and beans. With its bright green leaves and zesty dressing, it offers a nutritious option that can be tailored to your family’s taste.
Whether you’re hosting a barbecue or just looking for a quick and healthy addition to your weekly meal prep, this salad is a fantastic choice.
Ingredients (Serves 4-6)
- 1 bunch of kale (approximately 8-10 leaves)
- 1/2 cup of finely chopped red onion
- 1/2 cup of grated carrots
- 1/4 cup of chopped fresh parsley
- 3 tablespoons of olive oil
- 2 tablespoons of lime juice (freshly squeezed)
- 1 clove of garlic (minced)
- Salt and pepper to taste
Cooking Instructions
- Prepare the Kale: Start by washing the kale leaves thoroughly under cold water to remove any dirt or grit. Once clean, remove the tough stems from the leaves and discard them. Stack the leaves, roll them tightly, and slice them into thin strips, creating a chiffonade. This will give your salad a beautiful texture and make it easier to eat.
- Mix the Vegetables: In a large mixing bowl, combine the sliced kale, finely chopped red onion, grated carrots, and chopped parsley. Toss them gently to guarantee that the vegetables are well mixed and evenly distributed.
- Make the Dressing: In a small bowl, whisk together the olive oil, lime juice, minced garlic, salt, and pepper. Adjust the seasoning according to your personal taste preferences. The dressing should be tangy and flavorful, complementing the earthy taste of the kale.
- Combine and Toss: Drizzle the dressing over the kale mixture and toss everything together thoroughly. Confirm that all the kale and vegetables are coated in the dressing for maximum flavor.
- Let it Rest: Allow the salad to sit for about 10-15 minutes before serving. This resting period helps the kale to soften slightly and allows the flavors to meld together beautifully.
- Serve: Give the salad one last toss before serving to redistribute the dressing and garnish. Enjoy your Salada De Couve as an invigorating side dish to your main course!
Extra Tips
When preparing Salada De Couve, feel free to experiment with additional ingredients such as cherry tomatoes, avocado, or even a sprinkle of toasted nuts for added crunch.
If you prefer a milder garlic flavor, consider roasting the garlic before adding it to the dressing. Additionally, for a more substantial salad, you can incorporate protein such as chickpeas or grilled chicken.
This dish is best enjoyed fresh but can be stored in the refrigerator for a day or two. Just remember to give it a good toss before serving again!
Vinagrete

Vinagrete is a vibrant and zesty Brazilian side dish that serves as a perfect accompaniment to grilled meats, especially during a traditional barbecue or “churrasco.” This fresh condiment is fundamentally a vinaigrette made with diced vegetables, vinegar, and oil, resulting in a rejuvenating mix that adds a delightful contrast to richer dishes. The combination of tomatoes, onions, and peppers creates a colorful presentation, while the acidity of the vinegar balances out the flavors beautifully.
This dish isn’t only easy to prepare but also offers versatility, as you can adjust the ingredients according to your personal taste. Whether you enjoy it chunky or finely chopped, Vinagrete can be tailored to suit your preferences, making it a go-to side dish for gatherings and celebrations. Perfectly served chilled, it brings a burst of freshness to your plate and showcases the vibrant culinary heritage of Brazil.
Ingredients (Serves 4-6):
- 2 medium ripe tomatoes, diced
- 1 medium red onion, finely chopped
- 1 green bell pepper, diced
- 1/4 cup fresh parsley, chopped
- 1/4 cup olive oil
- 1/4 cup white vinegar
- Salt and black pepper to taste
Cooking Instructions:
- Prepare the Vegetables: Start by washing all your vegetables thoroughly. Dice the tomatoes into small cubes, making sure to remove the seeds to prevent excess moisture. Finely chop the red onion and green bell pepper. This step is essential as the size and uniformity of the vegetable cuts will affect the texture and appearance of your Vinagrete.
- Mix Ingredients in a Bowl: In a large mixing bowl, combine the diced tomatoes, chopped onion, and diced bell pepper. Use a spatula or wooden spoon to gently stir them together. This mixing allows the flavors to start melding together, creating a harmonious base for your Vinagrete.
- Add Fresh Herbs: Sprinkle the chopped parsley over the vegetable mixture. This addition not only enhances the flavor but also adds a fresh aroma to the dish. Mix gently to guarantee the parsley is evenly distributed throughout the vegetables.
- Prepare the Dressing: In a small bowl, whisk together the olive oil and white vinegar. You can adjust the ratio based on your preference for acidity; for a tangier flavor, add more vinegar. Season the mixture with salt and black pepper to taste. Whisking creates an emulsion that helps the dressing coat the vegetables evenly.
- Combine Dressing with Vegetables: Pour the dressing over the mixed vegetables in the large bowl. Toss everything together gently until all the ingredients are well-coated with the dressing. This step is important to make sure that every bite of Vinagrete has that delicious vinaigrette flavor.
- Chill and Serve: Cover the bowl with plastic wrap and refrigerate for at least 30 minutes before serving. Chilling allows the flavors to develop and the vegetables to absorb the dressing. Serve chilled as a side dish to grilled meats or as part of a larger Brazilian meal.
Extra Tips:
For an extra layer of flavor, consider adding a clove of minced garlic or a splash of lime juice to your Vinagrete. Additionally, you can experiment with other vegetables such as cucumbers or radishes for a variation in texture and taste.
Vinagrete can be stored in the refrigerator for up to two days, but it’s best enjoyed fresh to maintain the crunchiness of the vegetables. Adjust the seasoning as needed before serving to make sure it’s just right!
Arroz Com Pequi

Arroz Com Pequi is a traditional Brazilian side dish that beautifully showcases the unique flavors of the pequi fruit, which is native to the Brazilian cerrado. This dish is particularly popular in the central regions of Brazil, where pequi trees thrive. The combination of fragrant rice with the distinct aromatic qualities of pequi creates a delightful culinary experience that brings the essence of Brazilian cuisine to your table.
This dish is commonly served alongside meats or stews, making it the perfect accompaniment for a robust meal.
Cooking Arroz Com Pequi isn’t only about the ingredients but also about embracing the cultural heritage of Brazil. The preparation is straightforward, and the flavors meld together beautifully, making it a favorite among families. When you cook this dish, you’ll notice the richness of the pequi, which has a creamy texture and a slightly nutty flavor. This recipe serves 4-6 people, guaranteeing that you can share this delightful side with family and friends.
Ingredients:
- 2 cups long-grain rice
- 1 cup pequi (fresh or canned)
- 4 cups water or chicken broth
- 1 medium onion, finely chopped
- 3 cloves garlic, minced
- 2 tablespoons olive oil
- 1 teaspoon salt (or to taste)
- ½ teaspoon black pepper
- Fresh cilantro, chopped (for garnish)
Cooking Instructions:
- Prepare the Ingredients: Start by rinsing the long-grain rice under cold water until the water runs clear. This step helps to remove excess starch and prevents the rice from becoming overly sticky during cooking. Set the rinsed rice aside.
- Sauté Aromatics: In a large pot, heat the olive oil over medium heat. Add the finely chopped onion and sauté until it’s translucent and fragrant, about 3-5 minutes. Next, add the minced garlic and continue to sauté for another minute until the garlic is lightly golden. This process builds a flavorful base for your rice.
- Add Pequi: Carefully add the pequi to the pot, stirring gently to coat it with the sautéed onions and garlic. If using canned pequi, make sure to drain and rinse it. Sauté for about 2-3 minutes to allow the flavors to meld. The pequi will release its rich aroma during this time.
- Combine Rice and Liquid: Add the rinsed rice to the pot and stir to mix it with the pequi and aromatics. Pour in the water or chicken broth, and add salt and black pepper. Stir well to confirm that the rice is evenly distributed in the liquid.
- Cook the Rice: Bring the mixture to a boil over high heat. Once it reaches a boil, reduce the heat to low, cover the pot, and let it simmer for about 20 minutes. Avoid lifting the lid during this time to confirm that steam remains trapped, allowing the rice to cook evenly.
- Fluff and Serve: After 20 minutes, remove the pot from the heat and let it sit, covered, for an additional 5 minutes. Finally, fluff the rice with a fork, garnish with fresh cilantro, and serve hot. Enjoy your Arroz Com Pequi alongside your favorite main dishes!
Extra Tips:
When preparing Arroz Com Pequi, it’s essential to pay attention to the quality of the pequi used. If you can find fresh pequi, it will elevate the dish with its vibrant flavor.
However, if you only have access to canned pequi, guarantee that it’s of good quality and rinsed well to remove any excess brine. Additionally, feel free to adjust the seasoning according to your taste preferences, and consider adding other ingredients such as diced bell peppers or tomatoes for added color and flavor. Enjoy experimenting with this delightful dish!
Polenta Frita

Polenta Frita, or fried polenta, is a delightful Brazilian side dish that offers a wonderful mix of textures and flavors. Made from cornmeal, this dish is traditionally cooked until creamy and then allowed to set before being sliced and fried to a golden crisp. The result is a crunchy exterior that contrasts beautifully with the soft, comforting interior, making it the perfect accompaniment to a variety of main courses, from grilled meats to hearty stews.
This dish isn’t only versatile but also incredibly easy to prepare. The simplicity of the ingredients allows the natural sweetness of the corn to shine through, while the frying process adds a deliciously savory flavor. Whether served as an appetizer or a side, Polenta Frita is sure to captivate your guests and become a favorite at your dinner table.
Ingredients (Serves 4-6)
- 1 cup cornmeal
- 4 cups water
- 1 teaspoon salt
- 2 tablespoons butter
- 1 teaspoon olive oil (for frying)
- Grated Parmesan cheese (optional, for serving)
- Fresh herbs (such as parsley or basil, optional, for garnish)
Cooking Instructions
- Prepare the Polenta Mixture: In a large saucepan, bring 4 cups of water to a boil. Once boiling, add 1 teaspoon of salt. Gradually whisk in the cornmeal to prevent lumps from forming. Continue to stir until the mixture thickens, which should take about 5-7 minutes.
- Cook the Polenta: Once thickened, reduce the heat to low and stir in 2 tablespoons of butter. Continue to cook for an additional 10-15 minutes, stirring frequently, until the polenta is creamy and smooth.
- Set the Polenta: Pour the cooked polenta into a greased baking dish or a flat surface. Spread it out evenly to a thickness of about 1 inch. Allow it to cool at room temperature for about 30 minutes, or refrigerate for at least an hour until firm.
- Slice the Polenta: Once the polenta has set and is firm, carefully turn it out onto a cutting board. Using a sharp knife, slice the polenta into rectangles or triangles, as per your preference.
- Fry the Polenta: In a large skillet, heat 1 teaspoon of olive oil over medium-high heat. Add the sliced polenta in batches, making sure not to overcrowd the pan. Fry until golden brown and crispy on both sides, about 3-4 minutes per side. Remove from the skillet and place on paper towels to drain any excess oil.
- Serve: Transfer the fried polenta to a serving platter. If desired, sprinkle with grated Parmesan cheese and garnish with fresh herbs before serving.
Extra Tips
For an extra layer of flavor, consider adding spices or herbs to the polenta mixture while it cooks, such as garlic powder or dried oregano. This can elevate the taste profile and complement the dish even more.
Additionally, confirm that the polenta is cooled thoroughly before slicing; this will help maintain its shape during frying. Serving with a dipping sauce, such as marinara or a spicy aioli, can also enhance the eating experience!
Batata Doce Assada
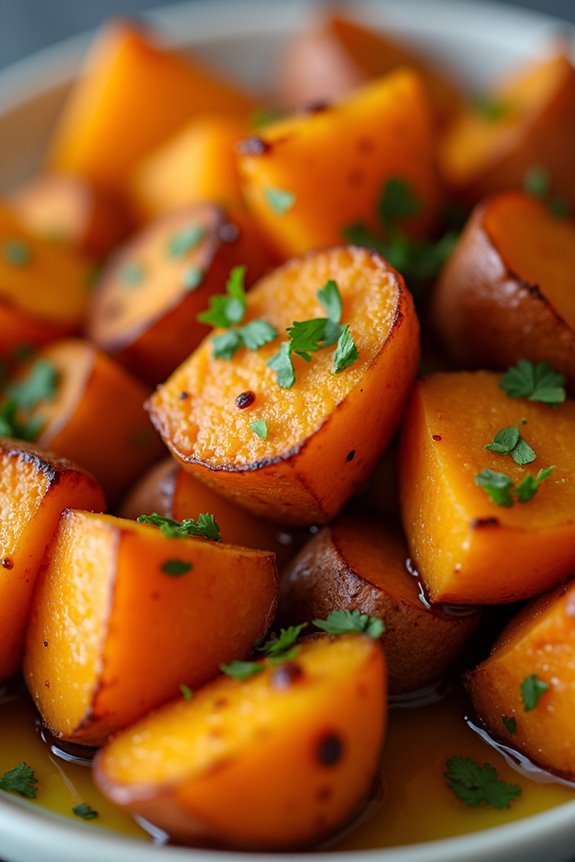
Batata Doce Assada, or roasted sweet potatoes, is a beloved Brazilian side dish that’s both nutritious and delicious. The natural sweetness of the batata doce (sweet potato) pairs beautifully with the crispy, caramelized edges that develop during roasting. This dish not only adds vibrant color to your plate but also provides a satisfying and healthy addition to any meal.
Whether served alongside grilled meats or enjoyed as a standalone snack, Batata Doce Assada is bound to delight both your taste buds and your guests.
Preparing Batata Doce Assada is simple and requires minimal ingredients. The key to achieving perfect roasted sweet potatoes is to cut them into uniform pieces, guaranteeing they cook evenly. You can customize the flavor by adding your favorite spices or herbs, making this dish versatile enough to complement a variety of cuisines.
With just a few steps, you’ll have a crowd-pleasing side dish that everyone will enjoy.
Ingredients (serving size: 4-6 people):
- 4 medium-sized sweet potatoes (batata doce)
- 3 tablespoons olive oil
- 1 teaspoon salt
- 1 teaspoon black pepper
- 1 teaspoon paprika (optional)
- 1 teaspoon garlic powder (optional)
- Fresh herbs for garnish (such as parsley or cilantro, optional)
Cooking Instructions:
- Preheat the Oven: Begin by preheating your oven to 425°F (220°C). This high temperature will help the sweet potatoes cook quickly and develop a crispy exterior.
- Prepare the Sweet Potatoes: Wash and peel the sweet potatoes. After peeling, cut them into even-sized cubes, roughly 1-inch in size. This uniformity will guarantee that all pieces roast at the same rate.
- Season the Sweet Potatoes: In a large mixing bowl, combine the cubed sweet potatoes with olive oil, salt, black pepper, and any optional spices like paprika or garlic powder. Toss everything together until the sweet potatoes are evenly coated with the oil and seasonings.
- Arrange on Baking Sheet: Spread the seasoned sweet potatoes out in a single layer on a baking sheet. Make sure there’s enough space between the pieces to allow for proper roasting, which will help them become crispy.
- Roast in the Oven: Place the baking sheet in the preheated oven and roast the sweet potatoes for about 25-30 minutes. Halfway through the roasting time, stir the sweet potatoes to guarantee even cooking and browning.
- Check for Doneness: After 25-30 minutes, the sweet potatoes should be tender and have a golden brown color on the edges. You can test their doneness by piercing a piece with a fork; it should easily break apart.
- Serve and Garnish: Remove the baking sheet from the oven and let the sweet potatoes cool for a few minutes. Transfer them to a serving dish and garnish with fresh herbs if desired. Serve warm and enjoy!
Extra Tips:
When preparing Batata Doce Assada, feel free to experiment with different spices and herbs to suit your taste preferences. For added sweetness, try drizzling a little honey or maple syrup over the sweet potatoes just before serving.
Additionally, if you prefer a crunchier texture, you can roast them for a few extra minutes or use a convection setting on your oven if available. Remember to keep an eye on them to prevent burning. Enjoy your delicious and colorful side dish!
Maionese De Batata

Maionese de Batata, or Brazilian Potato Salad, is a delightful side dish that adds a creamy and flavorful touch to any meal. This dish is particularly popular during family gatherings, barbecues, and festive occasions, where its vibrant flavors and colorful presentation can complement a variety of main dishes.
The combination of tender potatoes, crisp vegetables, and a rich mayonnaise dressing creates a satisfying and delicious salad that everyone will love.
Making Maionese de Batata isn’t only simple but also allows for some flexibility regarding ingredients. While the classic recipe includes potatoes, carrots, and peas, you can customize it by adding your favorite vegetables or even proteins. This makes it a versatile dish that can be adjusted to suit your taste preferences or seasonal produce availability.
Whether served cold or at room temperature, this potato salad will surely become a favorite in your culinary repertoire.
Ingredients (serving size: 4-6 people):
- 4 medium-sized potatoes
- 2 medium carrots
- 1 cup of frozen peas
- 1/2 cup of mayonnaise
- 1/4 cup of chopped green olives (optional)
- 1 tablespoon of mustard
- Salt and pepper to taste
- Fresh parsley for garnish (optional)
Cooking Instructions:
- Prepare the Vegetables: Begin by peeling the potatoes and carrots. Cut the potatoes into small cubes (about 1-inch pieces) and slice the carrots into thin rounds. This will help them cook evenly and blend well in the salad.
- Cook the Potatoes and Carrots: In a large pot, bring water to a boil and add a pinch of salt. Carefully add the cubed potatoes and sliced carrots to the boiling water. Let them cook for about 10-15 minutes, or until they’re fork-tender but not mushy. You can test the doneness by piercing them with a fork.
- Add the Peas: Five minutes before the potatoes and carrots are done cooking, add the frozen peas to the pot. This will allow them to cook just enough to become tender while maintaining their bright green color.
- Drain and Cool: Once the vegetables are cooked, drain them in a colander and rinse with cold water to stop the cooking process. Let them cool completely; this step is vital to prevent the mayonnaise from melting and becoming runny.
- Prepare the Dressing: In a large mixing bowl, combine the mayonnaise, mustard, salt, and pepper. Adjust the seasoning according to your taste. If you love olives, add them to the dressing for an extra tangy flavor.
- Combine Everything: Once the vegetables are cooled, gently fold them into the bowl with the dressing. Be careful not to mash the potatoes; you want to keep them intact for a nice texture. Mix until all the vegetables are well coated with the mayonnaise dressing.
- Chill and Serve: Cover the bowl with plastic wrap or transfer the salad to a serving dish. Refrigerate for at least one hour before serving to allow the flavors to meld together. Garnish with fresh parsley if desired before serving.
Extra Tips:
When making Maionese de Batata, it’s important to let the salad chill for a while before serving, as this enhances the flavors and gives the dish a better texture.
Additionally, feel free to experiment with other ingredients such as diced bell peppers, corn, or even boiled eggs for added richness. Make sure to taste and adjust the seasoning before chilling, as the flavors will develop in the refrigerator.
Finally, for a lighter version, you can substitute part of the mayonnaise with Greek yogurt. Enjoy your delicious Brazilian potato salad!
Pão De Queijo

Pão de Queijo, or Brazilian cheese bread, is a delightful and gluten-free side dish that has won the hearts of many across the globe. These small, chewy rolls are made with tapioca flour and cheese, resulting in a deliciously crispy exterior and a soft, cheesy interior.
Traditionally served as a snack or breakfast item, Pão de Queijo can be enjoyed on its own or as an accompaniment to a variety of meals. The versatility and rich flavor of this dish make it a must-try for anyone looking to explore Brazilian cuisine.
Making Pão de Queijo is surprisingly simple, requiring just a few basic ingredients and minimal preparation time. With a burst of cheesy goodness in every bite, these little rolls are perfect for gatherings or as a comforting treat at home.
Whether you’re hosting a party or just indulging in a cozy night in, Pão de Queijo is bound to impress your family and friends.
Ingredients (Serves 4-6 People)
- 1 cup of milk
- 1/2 cup of vegetable oil
- 1 teaspoon of salt
- 2 cups of tapioca flour
- 2 large eggs
- 1 cup of grated Parmesan cheese (or a cheese of your choice)
- Optional: 1/2 cup of shredded mozzarella cheese for extra cheesiness
Cooking Instructions
- Preheat the Oven: Begin by preheating your oven to 375°F (190°C). This guarantees that your Pão de Queijo will bake evenly and achieve that perfect golden-brown color.
- Heat the Milk and Oil: In a medium-sized saucepan, combine the milk, vegetable oil, and salt. Place the saucepan over medium heat and bring the mixture to a gentle boil. Stir occasionally to prevent burning.
- Mix in the Tapioca Flour: Once the milk mixture reaches a boil, remove it from the heat and immediately add the tapioca flour. Stir vigorously with a wooden spoon until the mixture is well combined and forms a dough-like consistency.
- Cool the Dough: Allow the dough to cool for about 15 minutes. This step is essential as it prevents the eggs from cooking when added to the mixture.
- Add Eggs and Cheese: Once the dough has cooled, add the eggs one at a time, mixing well after each addition. Finally, stir in the grated Parmesan cheese (and shredded mozzarella if using) until fully incorporated.
- Shape the Dough: With your hands slightly moistened (to prevent sticking), take small portions of the dough and roll them into balls about the size of a golf ball. Place the balls on a baking sheet lined with parchment paper, spacing them about 2 inches apart.
- Bake: Transfer the baking sheet to the preheated oven and bake for 15-20 minutes, or until the Pão de Queijo are puffed up and golden brown. Keep an eye on them to avoid over-baking.
- Serve: Once baked, remove them from the oven and let them cool for a few minutes before serving. Enjoy these delicious cheese breads warm!
Extra Tips
For an added depth of flavor, consider experimenting with different types of cheese, such as cheddar or a spicy pepper jack. You can also customize your Pão de Queijo by adding herbs, spices, or even cooked bacon bits for a savory twist.
Salada De Feijão Fradinho

Salada De Feijão Fradinho, or Black-eyed Pea Salad, is a vibrant and nutritious Brazilian side dish that shines at any gathering or family meal. This salad highlights the unique flavor of black-eyed peas, complemented by fresh vegetables, herbs, and a zesty dressing. It’s not only delicious but also packed with protein and fiber, making it a healthy addition to your dining table.
This dish is commonly enjoyed during festive occasions but is simple enough to prepare any day of the week. The beauty of Salada De Feijão Fradinho lies in its versatility. You can serve it as a side dish alongside grilled meats or as a light lunch on its own. The combination of textures and flavors creates a revitalizing experience, and it can be easily adjusted to suit your taste preferences.
Whether you’re hosting a summer barbecue or just looking for a light meal, this salad will surely impress your guests and family alike.
Ingredients (Serves 4-6):
- 1 cup dried black-eyed peas (feijão fradinho)
- 1 medium red onion, finely chopped
- 1 medium bell pepper (red or yellow), diced
- 1 medium tomato, diced
- 1 cup fresh parsley, chopped
- 1/4 cup olive oil
- 2 tablespoons apple cider vinegar
- 1 tablespoon lime juice
- 1 teaspoon salt (or to taste)
- 1/2 teaspoon black pepper
- 1/2 teaspoon cumin (optional)
Cooking Instructions:
- Prepare the Black-eyed Peas: Start by rinsing the dried black-eyed peas under running water to remove any dirt or impurities. Soak them in a bowl of water for at least 4 hours or overnight to soften. This will shorten the cooking time and enhance the texture of the peas.
- Cook the Black-eyed Peas: After soaking, drain the peas and place them in a pot. Cover them with fresh water, about 2 inches above the peas. Bring the water to a boil over medium-high heat, then reduce the heat to a simmer. Cook for about 20-30 minutes, or until the peas are tender but not mushy. Drain and let them cool.
- Chop the Vegetables: While the peas are cooking, prepare the vegetables. Finely chop the red onion, dice the bell pepper, and tomato, and chop the parsley. Confirm all ingredients are ready to mix together for a uniform salad.
- Make the Dressing: In a small bowl, whisk together the olive oil, apple cider vinegar, lime juice, salt, black pepper, and cumin (if using). Adjust the seasoning to taste, confirming a balanced flavor that will enhance the salad.
- Combine Ingredients: In a large mixing bowl, combine the cooled black-eyed peas, chopped vegetables, and dressing. Toss well to confirm that all ingredients are evenly coated with the dressing. Let the salad sit for about 15-30 minutes at room temperature to allow the flavors to meld together.
- Serve: Once the salad has rested, give it one last toss and serve it as a delicious side dish or a light main course. Garnish with additional parsley if desired.
Extra Tips:
When preparing Salada De Feijão Fradinho, feel free to customize the ingredients based on what you have on hand or your personal preferences. Adding ingredients like corn, avocado, or diced cucumber can enhance the texture and flavor profile.
Additionally, this salad can be made a day in advance, allowing the flavors to deepen; just be sure to store it in an airtight container in the refrigerator. Serve it chilled or at room temperature for the best flavor experience!
Quinoa Com Legumes
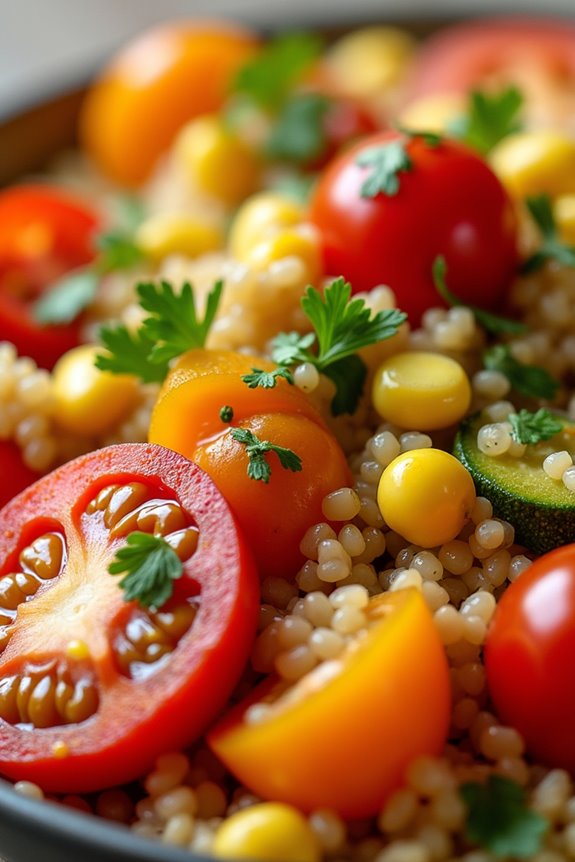
Quinoa Com Legumes is a vibrant and nutritious Brazilian side dish that combines the nutty flavor of quinoa with an assortment of colorful vegetables. This dish isn’t only a feast for the eyes but also a powerhouse of nutrients, making it a perfect addition to any meal.
The quinoa serves as a fantastic base, absorbing the flavors of the spices and vegetables, while providing a delightful texture that complements the dish beautifully.
Cooking Quinoa Com Legumes is simple and quick, making it an excellent choice for busy weeknights or special occasions. It can be easily customized to include your favorite vegetables or whatever you have on hand.
The combination of quinoa and vegetables isn’t only delicious but also gluten-free and packed with protein, fiber, and essential vitamins. Let’s get started on creating this tasty and healthy side dish that will surely impress your family and friends!
Ingredients (Serves 4-6)
- 1 cup quinoa
- 2 cups vegetable broth or water
- 1 tablespoon olive oil
- 1 medium onion, diced
- 2 cloves garlic, minced
- 1 bell pepper (red, yellow, or green), diced
- 1 medium zucchini, diced
- 1 cup cherry tomatoes, halved
- 1 cup corn kernels (fresh or frozen)
- 1 teaspoon cumin
- 1 teaspoon paprika
- Salt and pepper to taste
- Fresh parsley or cilantro, chopped (for garnish)
Cooking Instructions
1. Rinse the Quinoa: Start by rinsing the quinoa under cold water in a fine mesh strainer. This step is important as it removes the natural coating called saponin, which can give the quinoa a bitter taste. Rinse thoroughly until the water runs clear.
2. Cook the Quinoa: In a medium saucepan, combine the rinsed quinoa and vegetable broth (or water). Bring it to a boil over medium-high heat. Once boiling, reduce the heat to low, cover the pot, and let it simmer for about 15 minutes, or until the liquid is absorbed and the quinoa is fluffy.
Remove from heat and let it sit covered for another 5 minutes before fluffing it with a fork.
3. Sauté the Vegetables: While the quinoa is cooking, heat olive oil in a large skillet over medium heat. Add the diced onion and sauté for about 3-4 minutes, until translucent. Then add the minced garlic and sauté for another minute until fragrant.
4. Add Remaining Vegetables: Stir in the bell pepper and zucchini, cooking for about 5 minutes until they’re tender. Next, add the cherry tomatoes and corn, and cook for an additional 3-4 minutes.
The vegetables should be vibrant and slightly softened but still have some crunch.
5. Season the Mixture: Sprinkle in the cumin, paprika, salt, and pepper to taste. Mix well to combine all the flavors. Allow the mixture to cook for another minute or two, ensuring all ingredients are heated through.
6. Combine Quinoa and Vegetables: Once the quinoa is ready, add it to the skillet with the sautéed vegetables. Gently fold the quinoa into the vegetable mixture, ensuring everything is evenly distributed.
Cook for an additional 2-3 minutes, allowing the flavors to meld together.
7. Garnish and Serve****: Remove from heat and transfer the quinoa and vegetable mixture to a serving dish. Garnish with freshly chopped parsley or cilantro before serving.
Extra Tips
When preparing Quinoa Com Legumes, feel free to experiment with different vegetables based on the season or your personal preferences. Seasonal vegetables like spinach, asparagus, or carrots can add a unique twist to the dish.
Additionally, for a more robust flavor, consider adding a splash of lemon juice or a sprinkle of feta cheese before serving. This dish can be made ahead of time and reheated, making it a fantastic option for meal prep or potlucks!
Tomate Recheado
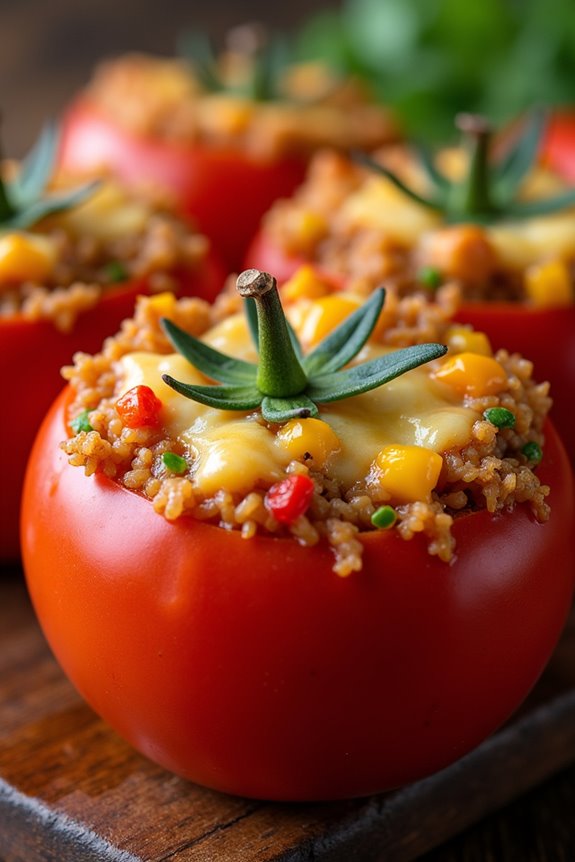
Tomate Recheado, or Stuffed Tomatoes, is a delightful Brazilian side dish that embodies the vibrant flavors and ingredients of Brazilian cuisine. This dish isn’t only visually appealing but also bursting with fresh and hearty flavors, making it a perfect accompaniment to any main course. The tomatoes are hollowed out and filled with a savory mixture of rice, ground meat, herbs, and spices, then baked until tender. It’s an excellent way to showcase seasonal tomatoes while providing a nutritious option for family gatherings or dinner parties.
Preparing Tomate Recheado is straightforward and allows for variations based on personal preferences or available ingredients. Whether you choose to use ground beef, chicken, or even a vegetarian filling, this dish can easily be adapted to suit different dietary needs. The combination of juicy tomatoes and flavorful stuffing creates a satisfying experience that will impress your guests and leave them wanting more.
Ingredients (Serves 4-6)
- 4-6 large ripe tomatoes
- 1 cup cooked rice
- 1 lb ground beef (or chicken)
- 1 small onion, finely chopped
- 2 cloves garlic, minced
- 1/2 cup chopped bell pepper (any color)
- 1/4 cup chopped fresh parsley
- 1/2 cup grated cheese (Parmesan or mozzarella)
- 1 tablespoon olive oil
- Salt and pepper to taste
- 1 teaspoon paprika (optional)
- 1/2 teaspoon cumin (optional)
Cooking Instructions
- Preheat the Oven: Start by preheating your oven to 375°F (190°C). This guarantees that the tomatoes will bake evenly and develop a lovely tender texture.
- Prepare the Tomatoes: Carefully slice the tops off the tomatoes and scoop out the insides using a spoon, creating a hollow cavity. Make sure to reserve the pulp for later use. Place the hollowed tomatoes upside down on a paper towel to drain excess moisture.
- Cook the Filling: In a large skillet, heat the olive oil over medium heat. Add the chopped onion and garlic, sautéing until they’re translucent and fragrant, about 3-4 minutes. Then, add the ground beef (or chicken) and cook until browned, breaking it apart with a spatula.
- Mix in Vegetables and Rice: Once the meat is cooked, add the chopped bell pepper, reserved tomato pulp, cooked rice, parsley, paprika, cumin, salt, and pepper. Stir to combine, allowing the mixture to cook for another 5 minutes so that the flavors meld together.
- Stuff the Tomatoes: Carefully fill each hollowed tomato with the meat and rice mixture, pressing down gently to pack it in. Top each stuffed tomato with a sprinkle of grated cheese.
- Bake the Tomatoes: Arrange the stuffed tomatoes in a baking dish and place them in the preheated oven. Bake for about 25-30 minutes, or until the tomatoes are tender and the cheese is bubbly and golden.
- Serve: Remove from the oven and allow to cool for a few minutes before serving. These stuffed tomatoes can be enjoyed warm or at room temperature.
Extra Tips
When making Tomate Recheado, don’t hesitate to get creative with the filling! You can add ingredients like olives, corn, or even different spices to tailor the flavor to your liking.
If you prefer a vegetarian option, substitute the meat with cooked lentils or quinoa and add more vegetables to the mix. Additionally, make sure you select firm tomatoes to prevent them from collapsing during baking.
This dish can also be made ahead of time; simply prepare the stuffed tomatoes and refrigerate them until ready to bake, making for a convenient and delicious side dish for any occasion.
Cuscuz Paulista
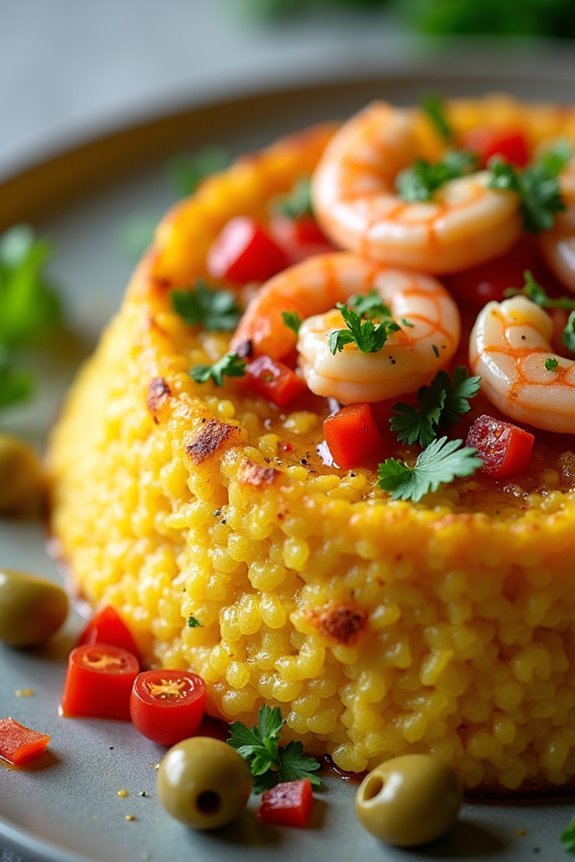
Cuscuz Paulista is a delicious and traditional Brazilian side dish that originates from the state of São Paulo. This savory dish is made from cornmeal and is often enriched with a variety of ingredients, such as vegetables, meats, and seafood, making it a versatile and satisfying meal option.
Cuscuz Paulista is typically served cold and can be enjoyed as a side dish or as a light main course. Its unique texture and flavors make it a beloved staple in Brazilian cuisine, perfect for gatherings and celebrations.
The preparation of Cuscuz Paulista involves a steaming process, which allows the cornmeal to absorb the flavors of the added ingredients. The dish is often molded into a beautiful cake shape, making it visually appealing on the table.
With a combination of fresh vegetables, spices, and your choice of protein, Cuscuz Paulista isn’t only a feast for the palate but also a feast for the eyes.
Ingredients (Servings: 4-6):
- 2 cups of fine cornmeal
- 1 cup of warm water
- 1 cup of cooked chicken, shredded
- 1/2 cup of cooked shrimp, peeled and deveined
- 1/2 cup of corn (fresh or frozen)
- 1/2 cup of diced tomatoes
- 1/4 cup of diced bell peppers
- 1/4 cup of green olives, sliced
- 1/4 cup of chopped parsley
- 1/4 cup of chopped onion
- 2 cloves of garlic, minced
- 1 teaspoon of salt
- 1/2 teaspoon of black pepper
- 1 tablespoon of olive oil
- 1 tablespoon of vinegar
- 1/2 teaspoon of paprika (optional)
- 1/2 cup of vegetable or chicken broth (optional, for added moisture)
Cooking Instructions:
1. Prepare the Base: In a large mixing bowl, combine the fine cornmeal, warm water, salt, and black pepper. Mix well until the cornmeal absorbs the water and the mixture is smooth. Allow it to sit for about 10 minutes to hydrate.
2. Cook the Vegetables: In a skillet over medium heat, add the olive oil. Once hot, sauté the diced onions and minced garlic until they’re fragrant and translucent. Add the diced bell peppers and corn, cooking for an additional 3-4 minutes until slightly softened.
Stir in the diced tomatoes, olives, and paprika (if using), and cook for another 2 minutes. Remove from heat and let cool slightly.
3. Combine Ingredients: Once the vegetable mixture has cooled, add the shredded chicken, cooked shrimp, chopped parsley, and the cornmeal mixture to the skillet. Mix everything together thoroughly, ensuring that the meat and vegetables are evenly distributed throughout the cornmeal.
4. Prepare the Mold: Lightly grease a round or rectangular mold with olive oil. If you don’t have a mold, you can use a heatproof bowl. Pour the Cuscuz mixture into the mold, pressing down gently to compact it. Smooth the top with a spatula.
5. Steam Cuscuz: Fill a large pot with water and bring it to a simmer. Place a steaming rack inside the pot, ensuring the water doesn’t touch the mold. Cover the pot with a lid and steam the Cuscuz for about 30-40 minutes, or until firm to the touch.
6. Cool and Serve: After steaming, carefully remove the mold from the pot and let it cool for about 10 minutes. To serve, invert the Cuscuz onto a serving platter. Slice into wedges and enjoy cold or at room temperature.
Extra Tips: For an added layer of flavor, consider marinating the chicken in olive oil, vinegar, and spices before cooking. You can customize the ingredients based on your preferences; for instance, adding different vegetables or using other proteins like sausage or fish will create unique variations of Cuscuz Paulista.
Additionally, serve it with a side of hot sauce or a zesty dressing for an extra kick!
Purê De Abóbora

Purê de Abóbora, or Pumpkin Puree, is a delightful Brazilian side dish that showcases the natural sweetness and rich texture of pumpkin. This dish is often served alongside grilled meats, rice, or beans, making it a versatile addition to any meal.
The creamy and smooth consistency of the puree is achieved through a simple cooking process, and it can be enhanced with various seasonings to suit your taste. Not only is it delicious, but it’s also a healthy option packed with vitamins and minerals.
The preparation of Purê de Abóbora is straightforward, making it an excellent choice for both novice and experienced cooks. With just a few ingredients and minimal cooking time, you can create a comforting side dish that will impress your family and friends.
Whether you’re enjoying a casual weeknight dinner or hosting a festive gathering, Purê de Abóbora is sure to be a hit on your table.
Ingredients (Serves 4-6)
- 1 kg (about 2.2 lbs) pumpkin, peeled and diced
- 2 tablespoons olive oil or butter
- 1 medium onion, finely chopped
- 2 cloves garlic, minced
- Salt, to taste
- Black pepper, to taste
- A pinch of nutmeg (optional)
- Fresh parsley or cilantro, for garnish (optional)
Cooking Instructions
- Prepare the Pumpkin: Start by peeling the pumpkin and removing the seeds. Cut the pumpkin into small, even-sized cubes to guarantee uniform cooking. This will help the pumpkin cook evenly and quickly.
- Cook the Pumpkin: In a large pot, add the diced pumpkin and enough water to cover it. Bring the water to a boil over medium-high heat, then reduce the heat to medium and let it simmer for about 15-20 minutes, or until the pumpkin is tender and easily pierced with a fork.
- Sauté the Aromatics: While the pumpkin is cooking, heat the olive oil or butter in a skillet over medium heat. Add the chopped onion and sauté for about 5 minutes, or until the onion is translucent. Then, add the minced garlic and sauté for another minute until fragrant.
- Mash the Pumpkin: Once the pumpkin is cooked, drain it and return it to the pot. Using a potato masher or an immersion blender, mash the pumpkin until you achieve a smooth consistency. If you prefer a chunkier texture, you can mash it less.
- Combine Ingredients: Add the sautéed onion and garlic mixture to the mashed pumpkin. Stir well to combine, then season with salt, black pepper, and nutmeg (if using) to taste. Mix until everything is evenly incorporated.
- Serve and Garnish: Transfer the Purê de Abóbora to a serving dish. Garnish with fresh parsley or cilantro if desired. Serve warm alongside your favorite main dishes.
Extra Tips
For a richer flavor, consider roasting the pumpkin instead of boiling it. Simply cut the pumpkin into wedges, drizzle with olive oil, season with salt and pepper, and roast in the oven at 200°C (400°F) for about 30-35 minutes until tender.
This method enhances the natural sweetness of the pumpkin and adds a lovely caramelized flavor to your puree. Additionally, feel free to experiment with other spices such as cinnamon or paprika for a unique twist on the classic recipe.