

When it comes to sharing food, Peruvian cuisine offers vibrant and diverse flavors that are perfect for gatherings. I’ve found 13 delightful snack recipes that celebrate the rich culture of Peru and are perfect for sharing with friends. Picture enjoying crispy Tequeños de Queso or refreshing Ceviche De Champiñones with your loved ones. Each bite is a story, and these culinary experiences are not to be missed. Let’s explore these delicious options together.
Ceviche De Champiñones
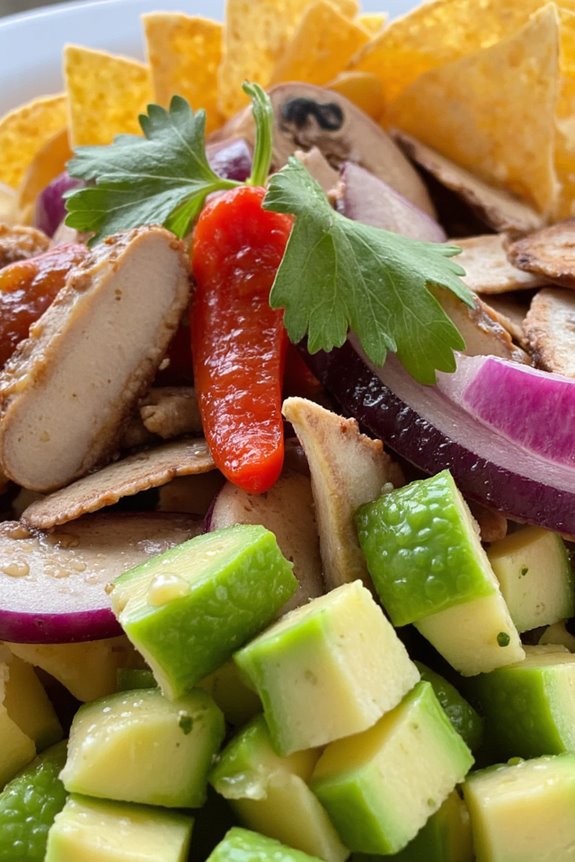
Ceviche De Champiñones is a delightful vegetarian twist on the traditional Peruvian ceviche, utilizing mushrooms instead of fish to create a reviving and zesty dish. This vibrant recipe highlights the umami flavor of mushrooms, combined with the zesty brightness of citrus, which makes it a perfect appetizer or snack for gatherings.
The use of fresh herbs and spices adds layers of flavor, making it a crowd-pleaser for both vegetarians and non-vegetarians alike. In this dish, the mushrooms are marinated in lime juice, which “cooks” them and infuses them with a tangy flavor.
The addition of onions, cilantro, and a touch of chili pepper lends a delightful crunch and spice, while the avocado adds a creamy texture that complements the dish perfectly. Serve this ceviche with tortilla chips or on its own for a reviving taste of Peru.
Ingredients (Serves 4-6):
- 500g raw mushrooms (preferably button or cremini)
- 1 cup fresh lime juice
- 1 small red onion, thinly sliced
- 1-2 fresh chili peppers (like jalapeño), finely chopped
- 1 cup fresh cilantro, chopped
- 1 ripe avocado, diced
- Salt to taste
- Pepper to taste
- Tortilla chips (for serving)
Cooking Instructions:
- Prepare the Mushrooms: Clean the mushrooms by wiping them with a damp cloth to remove any dirt. Slice them thinly to maximize their surface area for marinating. Place the sliced mushrooms in a large mixing bowl.
- Marinate the Mushrooms: Pour the fresh lime juice over the sliced mushrooms in the mixing bowl. The acidity in the lime juice will “cook” the mushrooms. Stir well to make sure all the slices are coated. Let this mixture sit for about 20-30 minutes at room temperature, allowing the flavors to meld.
- Add Vegetables and Herbs: After the mushrooms have marinated, add the thinly sliced red onion, finely chopped chili peppers, and chopped cilantro to the bowl. Gently toss everything together, ensuring that the ingredients are evenly distributed.
- Season the Ceviche: Taste the ceviche and add salt and pepper to your preference. Remember that the lime juice will add some acidity, so adjust the seasoning accordingly.
- Incorporate the Avocado: Just before serving, gently fold in the diced avocado to the mixture. This adds creaminess to the ceviche and balances the acidity from the lime juice.
- Serve: Serve the ceviche in small bowls or on a platter, paired with tortilla chips for dipping. Garnish with additional cilantro if desired for a pop of color.
Extra Tips:
When preparing Ceviche De Champiñones, opt for the freshest mushrooms available to enhance the dish’s flavor and texture. If you want to add a bit more depth, consider including diced tomatoes or corn to the salad mix.
For an extra kick, you can also use a splash of hot sauce or a sprinkle of smoked paprika. Remember that the longer the mushrooms marinate, the more pronounced the flavor will be, but avoid letting them sit too long (over an hour) to prevent them from becoming overly soft. Enjoy this vibrant dish as a reviving appetizer, especially on warm days!
Papa a La Huancaína
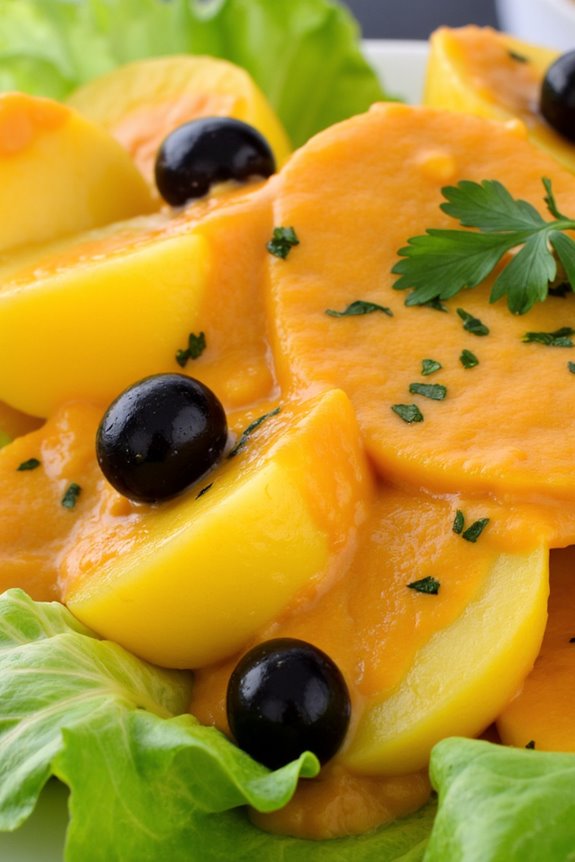
Papa a La Huancaína is a classic Peruvian dish that embodies the rich flavors and culinary traditions of Peru. This creamy, spicy potato dish is named after the Huancayo region, where it originated. The combination of boiled potatoes topped with a vibrant cheese and pepper sauce creates a delightful appetizer or side dish that’s loved by many.
It’s often served cold, making it a perfect choice for gatherings or picnics, showcasing the freshness of its ingredients. The sauce, known as Huancaína sauce, is made from a blend of queso fresco (fresh cheese), aji amarillo (yellow chili pepper), garlic, and evaporated milk, which contribute to its creamy and slightly spicy profile.
This dish not only satisfies the taste buds but also offers a colorful presentation, making it a favorite among both locals and visitors. Whether you’re enjoying it as a snack or as part of a larger meal, Papa a La Huancaína is sure to delight.
Ingredients (serves 4-6):
- 4 large yellow potatoes
- 1 cup queso fresco (or feta cheese as a substitute)
- 2 aji amarillo peppers (or yellow bell peppers for a milder flavor)
- 1 clove garlic
- 1 cup evaporated milk
- 2 tablespoons vegetable oil
- Salt to taste
- 6 black olives (for garnish)
- Fresh parsley (for garnish)
- Lettuce leaves (for serving)
Cooking Instructions:
1. Boil the Potatoes: Begin by washing the yellow potatoes thoroughly. Place them in a large pot and cover with water. Add a pinch of salt to the water and bring to a boil over medium-high heat. Cook the potatoes for about 20-30 minutes, or until they’re tender when pierced with a fork.
Once done, drain the water and let the potatoes cool slightly before peeling them.
2. Prepare the Huancaína Sauce: In a blender, combine the queso fresco, aji amarillo peppers (remove seeds for less heat), garlic, evaporated milk, vegetable oil, and a pinch of salt. Blend the ingredients until you achieve a smooth and creamy consistency.
If needed, you can add more evaporated milk to reach your desired thickness.
3. Slice the Potatoes: Once the boiled potatoes have cooled and been peeled, slice them into thick rounds. Arrange the potato slices on a serving platter or individual plates.
4. Top with Sauce: Generously pour the Huancaína sauce over the sliced potatoes, ensuring that each piece is well-coated.
5. Garnish and Serve: For a beautiful presentation, garnish the dish with black olives and fresh parsley. Serve the Papa a La Huancaína on a bed of lettuce leaves for added freshness.
Extra Tips:
When making Papa a La Huancaína, feel free to adjust the level of spiciness by adding more or less aji amarillo to the sauce. If you can’t find aji amarillo, using yellow bell peppers can provide a milder flavor, though the traditional taste may differ.
Additionally, letting the dish chill in the refrigerator for an hour before serving allows the flavors to meld beautifully, enhancing the overall taste. Enjoy this dish with a side of hard-boiled eggs or avocado for a more filling meal!
Anticuchos De Corazón
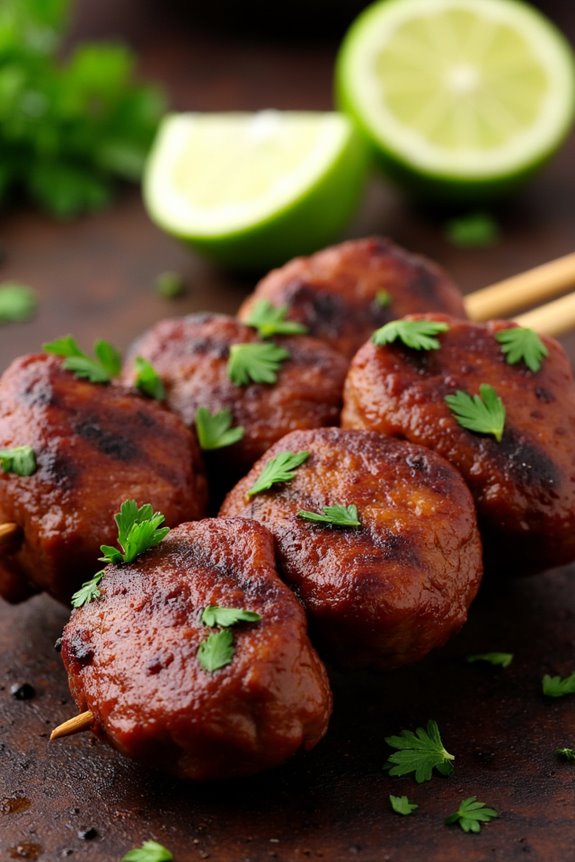
Anticuchos de corazón is a traditional Peruvian street food that offers a delightful mix of flavors and textures. These skewered beef heart bites are marinated in a tangy and spicy sauce before being grilled to perfection. The dish has its roots in the colonial era and has remained a beloved snack throughout Peru, often enjoyed during festivals and gatherings. The preparation is simple yet requires some time to marinate the meat to absorb all the flavors, making it a fantastic dish to share with family and friends.
The heart of the recipe lies in the marinade, typically made from a combination of vinegar, garlic, and spices that infuse the meat with a rich taste. Once grilled, the anticuchos are often served with a side of potatoes or corn and drizzled with a spicy sauce made from aji pepper. This dish not only provides a unique culinary experience but also showcases Peru’s rich gastronomic heritage.
Ingredients (Serves 4-6):
- 1 ½ pounds beef heart, cleaned and cut into 1-inch cubes
- 1 cup red wine vinegar
- 4 cloves garlic, minced
- 2 teaspoons cumin
- 2 teaspoons paprika
- 1 teaspoon black pepper
- ½ teaspoon salt
- 2 tablespoons vegetable oil
- 2 tablespoons aji panca paste (or any mild chili paste)
- 12-15 bamboo skewers (soaked in water for 30 minutes)
- Fresh parsley, chopped (for garnish)
- Lime wedges (for serving)
Cooking Instructions:
- Prepare the Beef Heart: Clean the beef heart thoroughly, removing any excess fat and membranes. Cut the heart into 1-inch cubes for even cooking. This step is fundamental, as it helps to guarantee that the meat cooks uniformly and remains tender.
- Make the Marinade: In a mixing bowl, combine the red wine vinegar, minced garlic, cumin, paprika, black pepper, salt, vegetable oil, and aji panca paste. Stir the ingredients until well blended. This marinade won’t only flavor the meat but also help to tenderize it.
- Marinate the Meat: Add the beef heart cubes to the marinade, making sure that each piece is well coated. Cover the bowl with plastic wrap and refrigerate for at least 2 hours, or ideally overnight. Allowing the meat to marinate for an extended period enhances its flavor profile greatly.
- Skewer the Meat: After marination, thread the beef heart pieces onto the soaked bamboo skewers. Ensure the pieces are packed closely but not overly tight to allow for even cooking. This step helps maintain the integrity of the meat while it grills.
- Grill the Anticuchos: Preheat a grill or grill pan over medium-high heat. Once hot, place the skewers on the grill and cook for about 3-4 minutes on each side, or until the meat develops a nice char and is cooked to your desired doneness. Keep an eye on the skewers to avoid burning.
- Serve and Garnish: Once cooked, remove the skewers from the grill and let them rest for a couple of minutes. Serve the anticuchos hot, garnished with chopped parsley and lime wedges on the side for an extra burst of flavor.
Extra Tips:
When preparing anticuchos de corazón, it’s important to confirm that the beef heart is fresh and properly cleaned to avoid any off flavors. Don’t skip the marination process, as it’s crucial for achieving the characteristic taste of this dish.
Additionally, if you prefer a spicier kick, you can adjust the amount of aji panca or add some chopped fresh chilies to the marinade. Finally, consider serving the anticuchos with a side of Peruvian corn or boiled potatoes for a complete and satisfying meal.
Empanadas Peruanas
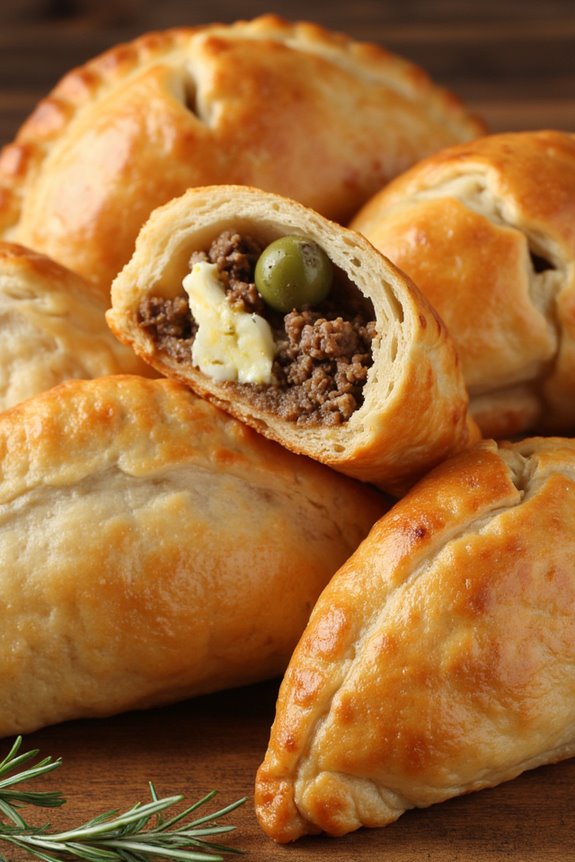
Empanadas Peruanas are a delightful Peruvian snack that combines a flaky pastry with a savory filling, traditionally made with seasoned meats, vegetables, and spices. These delicious turnovers are perfect for any occasion, whether it’s a casual gathering or a festive celebration.
The beauty of empanadas is their versatility; you can customize the filling according to your tastes, making them a favorite among both locals and visitors.
The dough for empanadas is typically made from flour, butter, and a pinch of salt, resulting in a rich and tender crust. Once filled, they can be baked or fried to a golden-brown perfection. Served hot, these empanadas are often accompanied by aji sauce or a side of salad, making for a hearty yet satisfying snack.
Let’s explore this recipe so you can enjoy these scrumptious Peruvian treats right at home!
Ingredients (serving size: 4-6 people)
- 2 cups all-purpose flour
- 1/2 cup unsalted butter, cold and cubed
- 1/2 teaspoon salt
- 1/4 cup cold water
- 1 lb ground beef or chicken
- 1 medium onion, finely chopped
- 1/2 cup green olives, pitted and chopped
- 1/2 cup hard-boiled eggs, chopped
- 1 teaspoon cumin
- 1 teaspoon paprika
- Salt and pepper to taste
- 1 egg, beaten (for egg wash)
Cooking Instructions
1. Prepare the Dough: In a large mixing bowl, combine the flour and salt. Add the cold, cubed butter and use your fingers or a pastry cutter to mix until the mixture resembles coarse crumbs. Gradually add cold water, mixing until the dough comes together.
Shape the dough into a ball, wrap it in plastic wrap, and refrigerate for about 30 minutes.
2. Cook the Filling: In a large skillet over medium heat, add a splash of oil and sauté the chopped onion until translucent. Add the ground meat and cook until browned, breaking it up with a spoon.
Season with cumin, paprika, salt, and pepper. Stir in the chopped olives and hard-boiled eggs, mixing well. Remove from heat and let the filling cool.
3. Roll Out the Dough: On a floured surface, roll out the chilled dough to about 1/8-inch thickness. Use a round cutter or a glass to cut out circles of dough, approximately 4-5 inches in diameter.
4. Fill the Empanadas: Place about a tablespoon of the filling in the center of each dough circle. Fold the dough over to create a half-moon shape, and press the edges firmly to seal.
You can crimp the edges with a fork for a decorative touch.
5. Prepare for Cooking: Preheat your oven to 375°F (190°C) if baking. If frying, heat oil in a deep pan. Brush the tops of the empanadas with the beaten egg for a golden finish.
6. Cook the Empanadas: For baking, place the empanadas on a baking sheet lined with parchment paper and bake for 25-30 minutes, or until golden brown.
For frying, carefully place the empanadas into the hot oil, frying for about 3-4 minutes on each side until golden. Drain on paper towels.
Extra Tips
When making Empanadas Peruanas, feel free to experiment with different fillings such as shredded chicken, cheese, or even vegetables for a vegetarian option.
To guarantee a flaky crust, keep your butter cold and avoid overworking the dough. If you’re short on time, you can also use store-bought pastry dough.
Serve your empanadas with a side of aji sauce or salsa for an added kick of flavor!
Tequeños De Queso
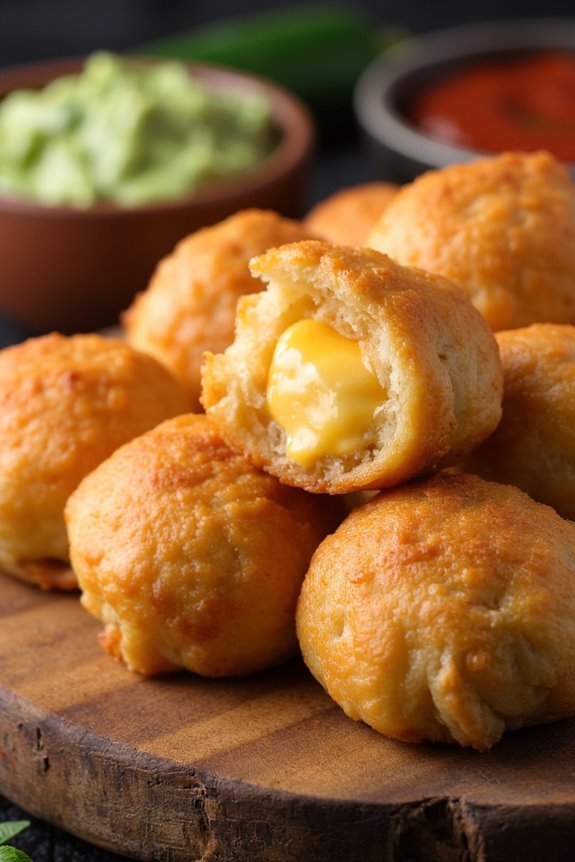
Tequeños de Queso are a beloved Peruvian snack made with a crispy, golden exterior and a gooey cheese filling. These delicious treats are perfect for parties, gatherings, or simply as a delightful snack. Originating from Venezuela, tequeños have found their way into Peruvian cuisine and have become a popular appetizer that pairs wonderfully with various dipping sauces, especially guacamole or a spicy ají sauce.
The combination of the crunchy dough and melty cheese creates a mouthwatering experience that’s hard to resist. Making tequeños at home is simple and rewarding. The key to achieving the perfect texture is to use the right type of cheese, such as queso blanco or mozzarella, which melts beautifully.
Once you master the dough and the technique of wrapping the cheese, you’ll be able to whip up these treats quickly for any occasion. With a few ingredients and a bit of love, you can impress your family and friends with this authentic Peruvian delight.
Ingredients (Serves 4-6):
- 2 cups all-purpose flour
- 1/2 teaspoon salt
- 1/4 cup unsalted butter, softened
- 1/2 cup water (warm)
- 1 1/2 cups queso blanco or mozzarella cheese, cut into sticks
- Oil for frying
Cooking Instructions:
1. Prepare the Dough: In a large mixing bowl, combine the all-purpose flour and salt. Add the softened butter and mix it with your fingers or a pastry cutter until the mixture resembles coarse crumbs. Gradually add the warm water, mixing until a smooth dough forms.
Knead the dough for about 5 minutes until it’s elastic and soft. Wrap it in plastic wrap and let it rest for at least 30 minutes.
2. Shape the Tequeños: Once the dough has rested, divide it into small balls (about the size of a golf ball). On a floured surface, roll each ball into a thin rectangle, approximately 1/8 inch thick. Place a stick of cheese at one end of the rectangle, and then roll the dough tightly around the cheese, ensuring there are no gaps.
Pinch the ends to seal the cheese inside.
3. Heat the Oil: In a deep frying pan or pot, heat about 2 inches of oil over medium heat. To check if the oil is ready, drop a small piece of dough into the oil; if it sizzles and rises to the surface, the oil is hot enough.
4. Fry the Tequeños: Carefully place the tequeños into the hot oil, a few at a time, making sure not to overcrowd the pan. Fry them for about 3-4 minutes on each side or until they’re golden brown and crispy.
Use a slotted spoon to remove them from the oil and drain them on paper towels.
5. Serve and Enjoy: Once all the tequeños are fried, transfer them to a serving platter. Serve them warm with your choice of dipping sauce, such as guacamole or ají.
Extra Tips:
When making tequeños de queso, be sure to use cheese that melts well to get that gooey texture when biting into them. If you want to add a twist, consider mixing herbs or spices into the dough for added flavor.
Additionally, you can experiment with different types of cheese or even add a touch of spice by incorporating jalapeños or hot sauce into the cheese filling. Enjoy your cooking and the delightful taste of these Peruvian snacks!
Choclo Con Queso
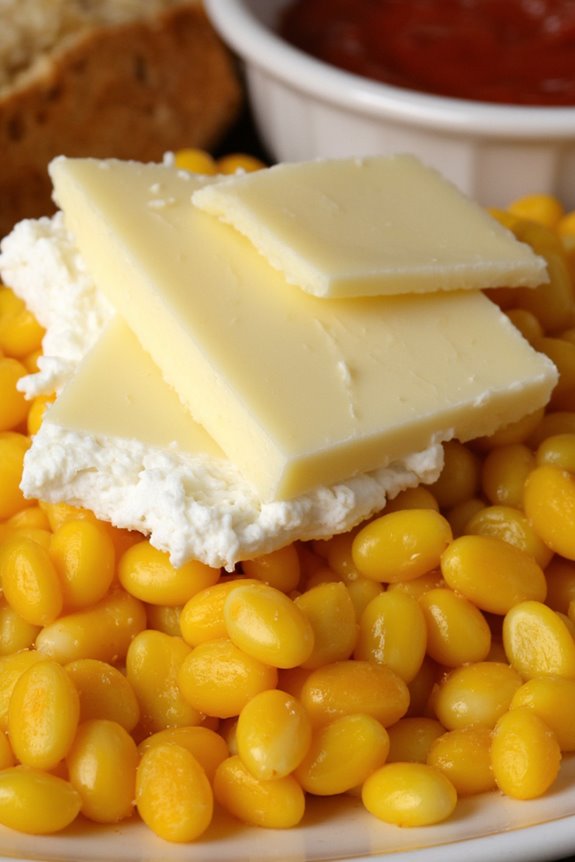
Choclo Con Queso is a delightful Peruvian snack that combines the rich, sweet flavor of fresh corn with the creamy texture of cheese. This traditional dish is particularly popular in the Andean regions of Peru, where the corn, known as “choclo,” is harvested in its prime and served alongside slices of fresh cheese. The combination of these ingredients creates a satisfying and flavorful experience that’s perfect for sharing with family and friends.
Often enjoyed as an appetizer or on the go, Choclo Con Queso showcases the simplicity and deliciousness of Peruvian cuisine. Making Choclo Con Queso isn’t only easy but also allows you to appreciate the fresh flavors of Peruvian ingredients. This dish can be served warm or at room temperature, making it versatile for any occasion.
Whether you’re celebrating a special event or simply snacking at home, this dish is sure to please. Gather your ingredients and get ready to enjoy a taste of Peru right in your kitchen!
Ingredients (Serves 4-6):
- 4 large ears of fresh choclo (Peruvian corn)
- 8 ounces of queso fresco (fresh cheese)
- Salt to taste
- Optional: butter for brushing
- Optional: Aji sauce for serving
Cooking Instructions:
- Prepare the Corn: Start by removing the husks and silk from the ears of choclo. Rinse them under cold water to clean them thoroughly. After washing, you can break the ears in half if they’re too large to fit in your pot.
- Boil the Corn: In a large pot, fill it with water and bring it to a boil. Once boiling, carefully add the prepared choclo. Allow the corn to cook for about 20-30 minutes, or until the kernels are tender. You can test the doneness by piercing a kernel with a fork; it should be easy to penetrate.
- Prepare the Cheese: While the corn is boiling, slice the queso fresco into thick pieces, about half an inch thick. This will allow you to layer the cheese alongside the corn when serving.
- Drain the Corn: Once the choclo has finished cooking, carefully drain it in a colander and let it sit for a minute to remove excess water. If desired, brush the corn with a little melted butter for added flavor.
- Serving: Arrange the cooked choclo on a serving platter and place the slices of queso fresco either on top or alongside the corn. Sprinkle a little salt to taste. You may also serve it with aji sauce on the side for those who enjoy a spicy kick.
- Enjoy: Serve warm or at room temperature, allowing your guests to enjoy the delightful pairing of sweet corn and creamy cheese.
Extra Tips:
When making Choclo Con Queso, using fresh Peruvian corn is essential for an authentic taste, but if that’s not available, you can substitute with fresh sweet corn. The quality of the cheese also matters, so look for a good quality queso fresco that will melt slightly when served warm.
Additionally, feel free to experiment with different types of cheese or add herbs and spices to elevate the flavor even more. Don’t forget to offer aji sauce on the side for those who enjoy a little heat!
Patacones Con Guacamole
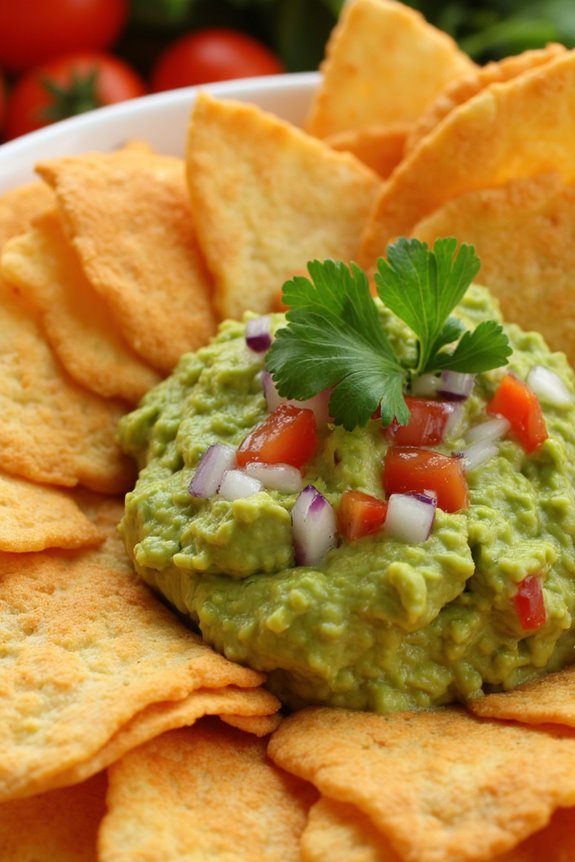
Patacones con guacamole is a delightful Peruvian snack that perfectly combines the crispy texture of fried green plantains with the creamy and flavorful avocado dip. This dish isn’t only popular in Peru but also throughout Latin America, where it’s often enjoyed as an appetizer or a side dish. The contrasting flavors and textures make it a favorite at gatherings and family meals.
The preparation of patacones is simple yet rewarding, and when paired with homemade guacamole, it becomes a treat that everyone will love.
The base of the dish, patacones, is made from unripe plantains that are sliced, fried, smashed, and then fried again to achieve a golden-brown crispiness. The guacamole adds a revitalizing element to the dish, with its creamy texture and zesty flavor complementing the crunchiness of the patacones. This recipe serves 4-6 people and is perfect for sharing, making it a fantastic addition to any appetizer spread or a casual get-together.
Ingredients (Serves 4-6)
- 2 green plantains
- Vegetable oil (for frying)
- Salt (to taste)
For the Guacamole:
- 2 ripe avocados
- 1 small onion, finely chopped
- 1 tomato, diced
- 1 lime (juiced)
- 1 clove garlic, minced
- Salt (to taste)
- Cilantro (optional, for garnish)
Cooking Instructions
- Prepare the Plantains: Start by peeling the green plantains. Cut each plantain into 1-inch thick slices. You can use a knife to slice through the skin and then remove it, or you can make a shallow cut along the length of the plantain and peel it off.
- First Frying: In a large skillet, heat about 1 inch of vegetable oil over medium heat. Once the oil is hot, carefully add the plantain slices in batches. Fry them for about 3-4 minutes on each side, or until they’re lightly golden and slightly softened. Remove them from the oil and place them on a paper towel-lined plate to drain any excess oil.
- Smash the Plantains: Using the bottom of a heavy plate or a plantain press, gently smash each fried plantain slice to flatten it to about ½ inch thick. Be careful not to smash it too thin, as you want them to remain sturdy for the second frying.
- Second Frying: Return the smashed plantains to the hot oil, cooking them for an additional 2-3 minutes on each side until they’re golden brown and crispy. Remove them from the oil and sprinkle with salt while they’re still hot. Set aside.
- Make the Guacamole: In a mixing bowl, scoop out the flesh of the ripe avocados and mash them with a fork until smooth but still slightly chunky. Add the chopped onion, diced tomato, lime juice, minced garlic, and salt. Mix well until all ingredients are combined. Adjust seasoning to taste and garnish with cilantro if desired.
- Serve: Arrange the crispy patacones on a serving platter and serve warm alongside the guacamole. Enjoy this delicious snack with family and friends!
Extra Tips
For the best results, make sure to choose firm, green plantains as they yield the best texture and flavor. If you prefer an extra kick, consider adding diced jalapeños or a pinch of chili powder to the guacamole for some heat.
Patacones can also be topped with other ingredients, such as cheese or grilled shrimp, to create a variation of this classic dish. Enjoy experimenting with different flavors and toppings!
Sándwich De Chicharrón
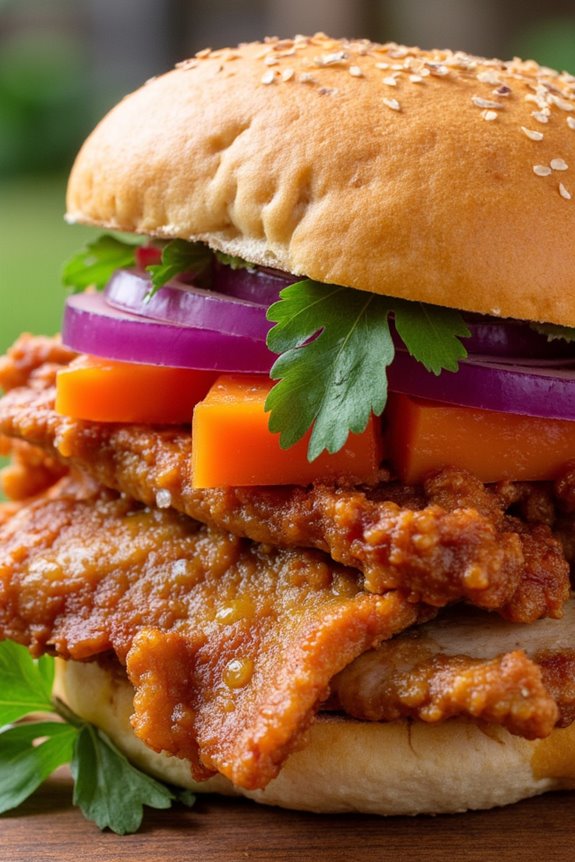
Sándwich De Chicharrón is a beloved Peruvian sandwich that features crispy pork belly, known as chicharrón, served on a fresh bun with a selection of flavorful toppings. This savory dish is often enjoyed as a hearty breakfast or a satisfying snack throughout the day. The combination of tender, juicy meat with the crunch of fried pork creates a delightful contrast that appeals to many palates.
Traditionally, it’s accompanied by a tangy salsa and often includes sweet potato, giving it a unique twist that enhances the overall flavor profile.
Preparing Sándwich De Chicharrón at home is straightforward and can be a fun experience for both novice and seasoned cooks. The key to achieving the best chicharrón lies in the cooking technique, which involves slow-cooking the pork belly to tenderness before frying it to achieve that crispy finish. You can customize the sandwich with your favorite toppings, making it a versatile dish that can cater to various tastes.
Gather your ingredients and get ready to enjoy a taste of Peru right in your kitchen!
Ingredients (serving size: 4-6 people):
- 2 lbs pork belly
- 1 teaspoon salt
- 1 teaspoon black pepper
- 1 tablespoon garlic powder
- 1 tablespoon cumin
- 1 cup water
- 4-6 crusty bread rolls or baguettes
- 1 large sweet potato, cooked and sliced
- 1 red onion, thinly sliced
- 1 bunch of fresh cilantro, chopped
- 1 lime, cut into wedges
- Hot sauce (optional)
Cooking Instructions:
- Prepare the Pork Belly: Start by rinsing the pork belly under cold water and patting it dry with paper towels. Score the skin with a sharp knife, making shallow cuts in a crosshatch pattern. This will help render the fat and create a crispy skin during cooking.
- Season the Meat: In a bowl, mix together the salt, black pepper, garlic powder, and cumin. Rub this spice blend all over the pork belly, making sure to get it into the scored areas. Let it marinate for at least 30 minutes or up to overnight in the refrigerator for maximum flavor.
- Cook the Pork Belly: In a large pot, place the seasoned pork belly and add the cup of water. Cover and cook over medium heat for about 1.5 to 2 hours, or until the pork is tender. Make sure to check occasionally and add water if necessary to prevent burning.
- Fry the Pork Belly: Once the pork is tender, remove it from the pot and let it rest for a few minutes. In a large skillet or frying pan, heat a bit of oil over medium-high heat. Cut the pork belly into thick slices and fry them in the hot skillet for about 3-4 minutes on each side until they’re golden brown and crispy.
- Assemble the Sandwiches: Slice the bread rolls open and layer in the crispy pork belly slices. Top with sweet potato slices, red onion, and fresh cilantro. Squeeze fresh lime juice over the top for an added zing, and add hot sauce if desired.
- Serve: Serve the Sándwich De Chicharrón warm, with extra lime wedges on the side for squeezing over the sandwiches.
Extra Tips:
To achieve the best results, choose a pork belly that has an even distribution of fat and meat for the best flavor and texture. If you prefer a more intense flavor, consider marinating the pork belly overnight.
Additionally, feel free to experiment with toppings; adding avocado or aji amarillo sauce can elevate the sandwich even further. Finally, confirm that your frying oil is hot enough before adding the pork to achieve the perfect crispiness.
Enjoy your homemade Sándwich De Chicharrón!
Alfajores De Dulce De Leche
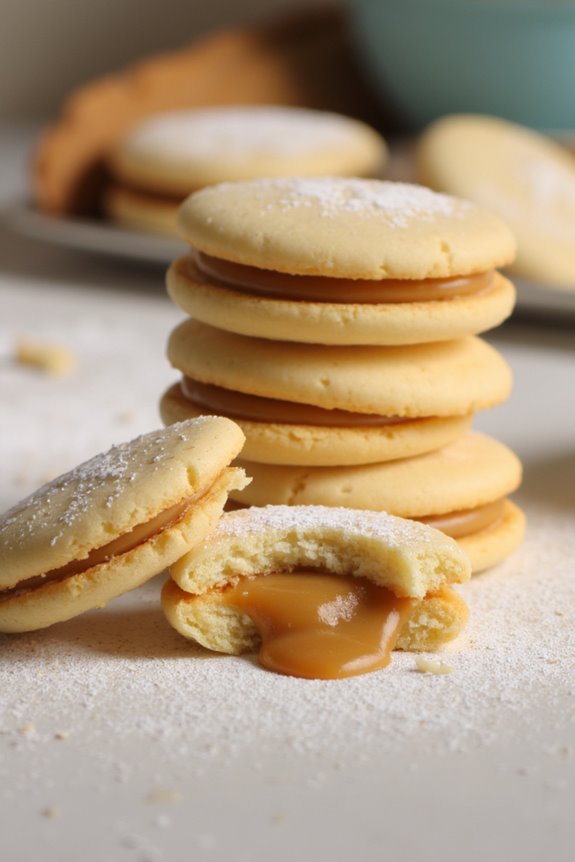
Alfajores de Dulce de Leche are a beloved Peruvian treat, perfect for indulging your sweet tooth. These delightful cookies feature a crumbly, melt-in-your-mouth texture and are filled with rich, creamy dulce de leche. Typically dusted with powdered sugar or coated in chocolate, they’re a staple in many Latin American countries, making them a perfect addition to any dessert table or snack time.
Making alfajores de dulce de leche is a straightforward process that yields impressive results. The cookie dough can be quickly prepared, and the filling is simply a matter of spreading the dulce de leche between two cookies. With just a few simple ingredients, you can create these delightful treats that are bound to impress family and friends alike.
Ingredients (serves 4-6):
- 1 cup unsalted butter, softened
- 1 cup powdered sugar
- 2 large egg yolks
- 1 teaspoon vanilla extract
- 2 cups all-purpose flour
- ½ cup cornstarch
- 1 teaspoon baking powder
- 1 cup dulce de leche
- Powdered sugar for dusting
Cooking Instructions:
- Prepare the Dough: In a mixing bowl, cream together the softened butter and powdered sugar until the mixture is light and fluffy. This should take about 3-4 minutes. Next, add in the egg yolks and vanilla extract, mixing until well combined.
- Combine Dry Ingredients: In a separate bowl, whisk together the all-purpose flour, cornstarch, and baking powder. Gradually add this dry mixture to the wet mixture, stirring until a soft dough forms. Be careful not to overmix; stop once all the flour is incorporated.
- Chill the Dough: Shape the dough into a ball, wrap it in plastic wrap, and refrigerate for at least 30 minutes. Chilling the dough will make it easier to roll out and shape the cookies.
- Roll Out the Dough: Preheat your oven to 350°F (175°C). Once the dough has chilled, take it out and roll it out on a lightly floured surface to about 1/4 inch thick. Use a round cookie cutter to cut out circles of dough.
- Bake the Cookies: Place the cookie circles on a baking sheet lined with parchment paper, leaving space between them. Bake in the preheated oven for about 10-12 minutes or until they’re lightly golden. Allow them to cool on a wire rack.
- Assemble the Alfajores: Once the cookies are completely cooled, spread a generous amount of dulce de leche on the flat side of one cookie and top it with another cookie, flat side down. Gently press them together to form a sandwich.
- Finish with Powdered Sugar: After assembling all the alfajores, dust the tops with powdered sugar before serving. This adds a nice touch and enhances their visual appeal.
Extra Tips: When making alfajores, make certain your butter is at room temperature for easier mixing and a smoother dough. If you want to add a twist, consider dipping the edges of the cookies in melted chocolate or rolling them in shredded coconut.
Store any leftover alfajores in an airtight container at room temperature to maintain their freshness. Enjoy these scrumptious treats with a cup of coffee or tea for an authentic Peruvian experience!
Picarones
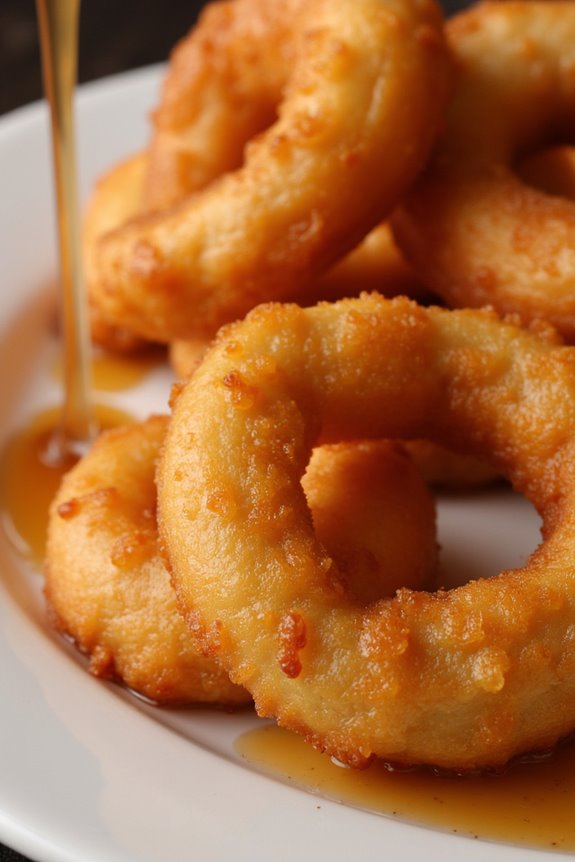
Picarones are a delightful traditional Peruvian dessert made from sweet potato and pumpkin dough, deep-fried to perfection and often served with a delectable syrup known as chancaca. These ring-shaped fritters are a popular street food in Peru, especially enjoyed during festivals and celebrations. The crispy exterior combined with the soft, sweet interior makes them irresistible, while the syrup adds an extra layer of flavor that elevates the dish to new heights.
Making picarones at home is easier than you might think. With just a few simple ingredients and some patience, you can create this delightful treat that will impress your friends and family. These golden-brown ring-shaped fritters are perfect for sharing, making them an ideal snack for gatherings or simply as a sweet indulgence after a meal.
Whether you enjoy them warm or at room temperature, picarones are sure to bring a taste of Peru to your kitchen.
Ingredients (serves 4-6 people):
- 1 cup of cooked sweet potato, mashed
- 1 cup of cooked pumpkin, mashed
- 2 cups of all-purpose flour
- 1 tablespoon of sugar
- 1 teaspoon of salt
- 1 tablespoon of active dry yeast
- 1/2 teaspoon of ground cinnamon
- 1/2 teaspoon of ground nutmeg
- 1/4 cup of warm water
- Oil for frying
Cooking Instructions:
- Prepare the Yeast Mixture: In a small bowl, combine the warm water and sugar, then sprinkle the yeast on top. Allow the mixture to sit for about 5-10 minutes until it becomes frothy. This indicates that the yeast is active and ready to be used.
- Mix the Dough: In a large mixing bowl, combine the mashed sweet potato, mashed pumpkin, flour, salt, cinnamon, and nutmeg. Pour in the frothy yeast mixture and mix everything together until a dough forms. The dough should be slightly sticky but manageable.
- Knead the Dough: Transfer the dough to a floured surface and knead it for about 5-7 minutes until it becomes smooth and elastic. If the dough is too sticky, add a little more flour as needed.
- Let the Dough Rise: Place the kneaded dough in a greased bowl, cover it with a damp cloth, and let it rise in a warm place for about 1-2 hours, or until it has doubled in size.
- Shape the Picarones: Once the dough has risen, punch it down to release any air bubbles. Divide the dough into equal portions and shape each portion into a ring by rolling it out and connecting the ends.
- Heat the Oil: In a deep frying pan or pot, heat oil over medium heat until it reaches about 350°F (175°C). To test if the oil is ready, drop a small piece of dough into the oil; it should sizzle and rise to the surface.
- Fry the Picarones: Carefully place a few dough rings into the hot oil, frying them in batches. Fry for about 2-3 minutes on each side, or until they’re golden brown. Use a slotted spoon to remove them from the oil and place them on a paper towel-lined plate to drain excess oil.
- Serve with Syrup: While the picarones are still warm, serve them drizzled with chancaca syrup or your preferred sweet syrup. Enjoy!
Extra Tips:
When making picarones, it’s essential to verify that your oil is at the right temperature for frying. If the oil is too hot, the outside will cook too quickly, leaving the inside undercooked. Conversely, if the oil isn’t hot enough, the picarones will absorb too much oil, making them greasy.
You can also experiment with different spices in the dough to customize the flavor to your liking. Finally, picarones are best enjoyed fresh, so try to serve them as soon as they’re cooked for the ultimate experience!
Canchita
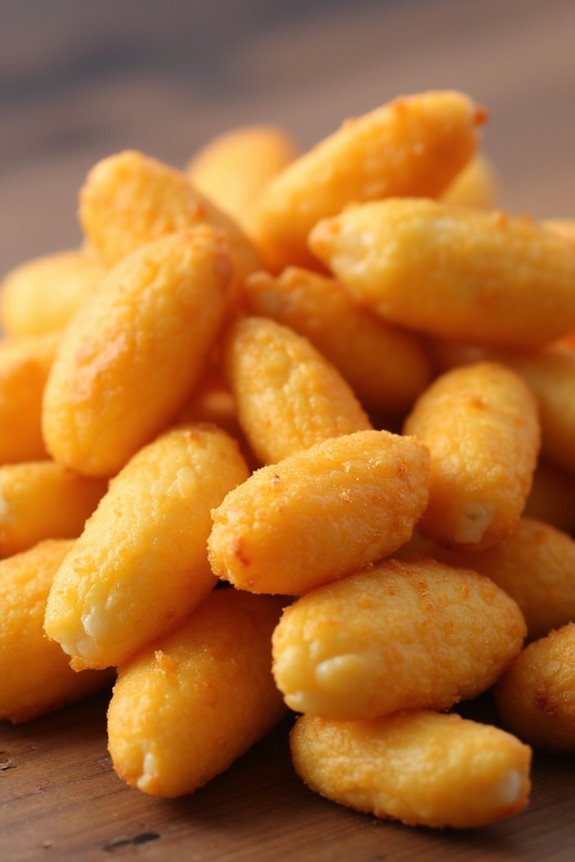
Canchita, or Peruvian corn nuts, is a beloved snack that reflects the rich culinary heritage of Peru. Made from large, dried corn kernels, this crunchy treat is often enjoyed as a snack on its own or served alongside drinks, especially in traditional Peruvian bars and restaurants.
The process of making canchita involves a simple yet effective method of frying or toasting the corn kernels until they become golden and crispy. The result is a delightful snack that bursts with flavor and provides a satisfying crunch with every bite.
Canchita can also be seasoned with a variety of spices, making it a versatile addition to your snacking repertoire. Whether you’re looking to impress guests at a gathering or simply satisfy a craving, canchita is an excellent choice.
Ingredients (serving size: 4-6 people)
- 2 cups of large dried corn kernels (preferably Peruvian chulpe corn)
- 4 cups of water
- 1 teaspoon of salt (optional)
- Vegetable oil for frying
Cooking Instructions
- Soak the Corn: Begin by rinsing the dried corn kernels in cold water to remove any impurities. Then, place the kernels in a bowl and cover them with water. Allow them to soak for at least 8 hours or overnight. This step helps to soften the kernels and prepare them for cooking.
- Drain and Prepare for Cooking: After soaking, drain the corn and rinse it again. This guarantees that any remaining debris is washed away. Let the corn sit in the colander for a few minutes to remove any excess water.
- Heat the Oil: In a deep skillet or pot, pour enough vegetable oil to cover the bottom, about 1-2 inches deep. Heat the oil over medium-high heat until it reaches approximately 350°F (175°C). You can test if the oil is hot enough by dropping in a few kernels; if they sizzle and rise to the surface, the oil is ready.
- Fry the Corn: Carefully add the drained corn kernels to the hot oil in batches, being sure not to overcrowd the pan. Fry the kernels for about 5-7 minutes, stirring occasionally until they puff up and turn golden brown. Keep an eye on them to prevent burning.
- Drain and Season: Once the canchita is cooked, use a slotted spoon to remove the kernels from the oil and transfer them to a plate lined with paper towels to absorb excess oil. If desired, sprinkle the hot canchita with salt or any other seasoning of your choice while they’re still warm for added flavor.
- Cool and Serve: Allow the canchita to cool slightly before serving. They can be enjoyed warm or at room temperature. Serve them in a bowl alongside your favorite beverages or as a crunchy topping for salads.
Extra Tips
When making canchita, selecting high-quality dried corn is key to achieving the perfect texture and flavor. Look for chulpe corn, which is known for its larger size and excellent popping ability.
Additionally, if you want to add a unique twist to your canchita, consider seasoning it with spices like paprika, garlic powder, or chili powder after frying for an extra kick. Enjoy your homemade canchita as a snack or a side dish, and feel free to experiment with different seasonings to find your perfect combination!
Turrón De Doña Pepa
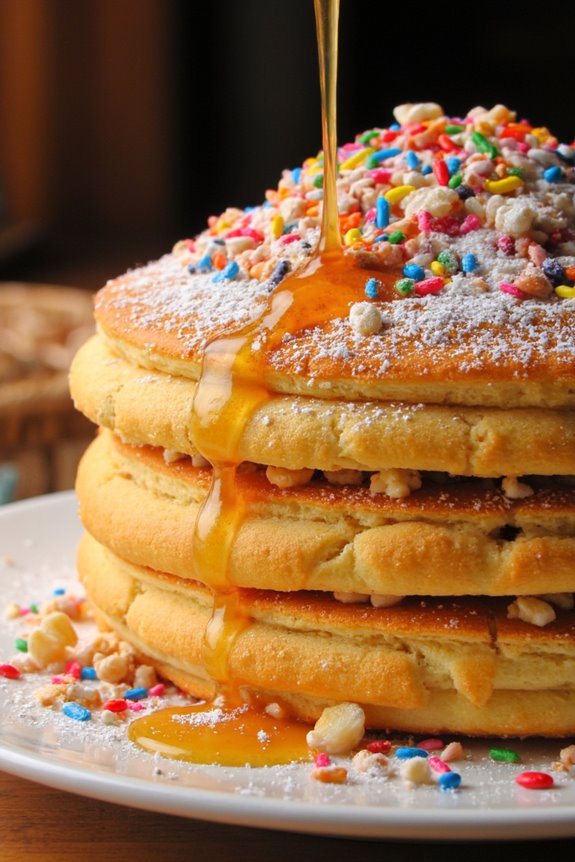
Turrón De Doña Pepa is a traditional Peruvian dessert that’s especially popular during the celebrations of the Lord of Miracles, a significant religious event in Peru. This delicious sweet treat is made up of layers of anise-flavored cookies drizzled with a rich syrup, often adorned with colorful sprinkles and nuts. The combination of flavors and textures makes Turrón De Doña Pepa a beloved dish that captures the essence of Peruvian culinary heritage.
Making Turrón De Doña Pepa is a delightful project that allows you to experience the rich traditions of Peruvian cuisine. While it may take some time to prepare, the process is straightforward and rewarding, resulting in a beautiful and festive dessert that can be enjoyed by family and friends.
Whether you’re celebrating a special occasion or simply indulging in a sweet treat, Turrón De Doña Pepa is sure to captivate.
Ingredients (serving size: 4-6 people)
- 2 cups all-purpose flour
- 1 cup sugar
- 1 cup butter, softened
- 4 large eggs
- 1 teaspoon baking powder
- 1 teaspoon anise extract
- 1/2 cup milk
- 1 cup honey
- 1 cup powdered sugar
- 1/2 cup chopped nuts (e.g., walnuts or almonds)
- Colored sprinkles for decoration
Cooking Instructions
1. Prepare the Dough: In a large mixing bowl, cream together the softened butter and sugar until light and fluffy. Add in the eggs one at a time, mixing well after each addition. Then, mix in the anise extract.
In a separate bowl, combine the flour and baking powder, and then gradually add this dry mixture to the creamed butter and sugar. Finally, add the milk to achieve a smooth dough consistency.
2. Shape and Bake the Cookies: Preheat your oven to 350°F (175°C). On a lightly floured surface, roll out the dough to about 1/4 inch thickness. Cut the dough into rectangles or squares, depending on your preference.
Place the cookies onto a lined baking sheet and bake for about 15-20 minutes or until they’re lightly golden. Once baked, allow the cookies to cool on a wire rack.
3. Prepare the Syrup: In a saucepan over low heat, combine the honey and a couple of tablespoons of water. Stir until the mixture is well blended and heated through.
Allow it to simmer for about 5 minutes, then remove it from the heat and let it cool slightly.
4. Assemble the Turrón: Once the cookies have cooled, take one cookie and dip it into the honey syrup, allowing any excess to drip off. Stack several dipped cookies on top of each other to form a tower.
Repeat this process until all cookies are used, layering them as you go.
5. Decorate: Once the Turrón stack is assembled, drizzle any remaining honey syrup over the top. Then, dust the entire dessert with powdered sugar and sprinkle it generously with chopped nuts and colored sprinkles for a festive touch.
6. Serve: Allow the Turrón De Doña Pepa to sit for at least an hour before serving. This will help the flavors meld together and make slicing easier. Cut into slices and Serve at room temperature.
Extra Tips
When making Turrón De Doña Pepa, feel free to customize the flavors and decorations to suit your taste. For a more intense anise flavor, you can add a few drops of anise oil to the dough.
If you’re feeling creative, try incorporating different types of nuts or dried fruits in the layering process. Additionally, make certain that the syrup isn’t too hot when drizzling it over the cookies, as this will help maintain their structure.
Enjoy the process and share this delightful treat with those you love!
Inca Kola Gelatin
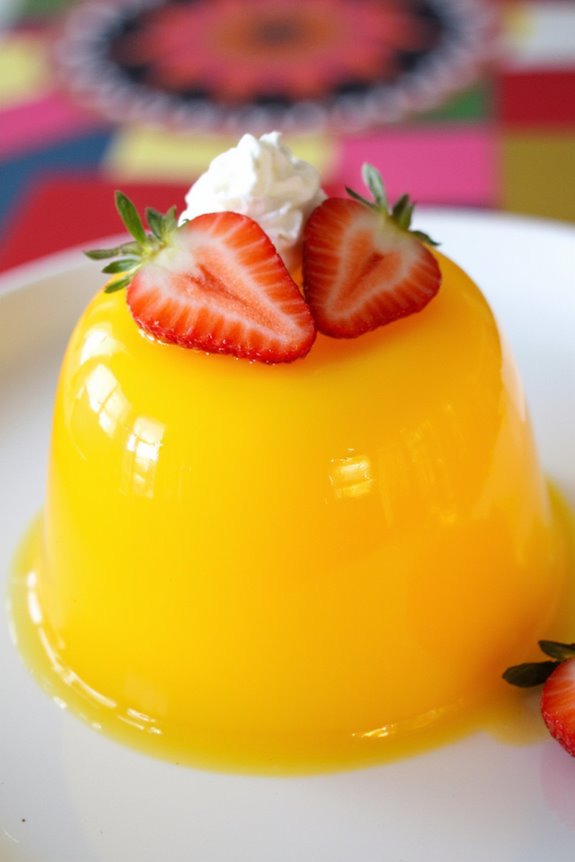
Inca Kola Gelatin is a delightful and vibrant dessert that captures the unique flavor of the beloved Peruvian soda, Inca Kola. This gelatin dessert isn’t only visually appealing with its bright yellow color but also infuses a sweet, soda-like taste that’s guaranteed to please both children and adults alike.
It’s a perfect treat for gatherings and celebrations, bringing a touch of Peruvian culture to your table. Making Inca Kola Gelatin is relatively easy and requires minimal ingredients, making it an accessible recipe for anyone looking to explore Peruvian snacks. The invigorating taste of Inca Kola combined with the smooth texture of gelatin creates a unique dessert experience that’s perfect for warm weather or as a light finish to a meal.
Serve it chilled, and watch as your guests enjoy this delightful treat.
Ingredients (Serves 4-6):
- 1 cup Inca Kola
- 2 cups water
- 1 packet (0.25 oz) unflavored gelatin
- 1/2 cup sugar (adjust to taste)
- 1/2 teaspoon lemon juice (optional)
- Fresh fruit or whipped cream for garnish (optional)
Cooking Instructions:
- Dissolve the Gelatin: In a small bowl, combine the unflavored gelatin with 1/2 cup of cold water. Stir it gently until the gelatin is fully dissolved. Let it sit for about 5 minutes, allowing it to bloom and thicken. This step guarantees that the gelatin will set properly in the final dessert.
- Heat the Mixture: In a saucepan, bring 1 1/2 cups of water to a gentle boil. Once boiling, remove the saucepan from the heat and stir in the sugar until it’s completely dissolved. This syrup will add sweetness to your gelatin dessert.
- Combine Ingredients: Add the dissolved gelatin mixture and the Inca Kola to the saucepan with the sugar water. If desired, add the lemon juice for a hint of acidity that balances the sweetness. Stir well to combine all ingredients thoroughly.
- Pour into Molds: Carefully pour the gelatin mixture into a mold or individual serving cups. Make sure to leave some space at the top, as the gelatin will expand slightly as it sets.
- Chill Until Set: Place the mold or cups in the refrigerator and let the gelatin chill for at least 4 hours or until it’s fully set. The longer it sits, the firmer it will become.
- Serve: Once set, gently run a knife around the edges of the mold to loosen the gelatin. Invert it onto a serving plate or serve directly from individual cups. Garnish with fresh fruit or a dollop of whipped cream if desired.
Extra Tips:
When making Inca Kola Gelatin, feel free to experiment with the sweetness by adjusting the sugar according to your taste preference.
Additionally, incorporating fresh fruit such as diced mango or berries into the gelatin before it sets can add an exciting texture and flavor contrast. For a more pronounced Inca Kola flavor, consider reducing the amount of water used in the recipe, but remember to keep the overall balance of the gelatin mixture to guarantee proper setting.
Enjoy your Peruvian treat!