

When I think of the culinary treasures of Minas Gerais, I feel a deep connection to the warmth and tradition in each recipe. From the iconic Pão De Queijo with its cheesy aroma to the hearty Feijão Tropeiro that warms the soul, each dish tells a story. Let’s explore these heartwarming recipes that capture the essence of home. Starting with a favorite that everyone loves, you’ll find inspiration in every bite. These dishes are perfect for bringing a touch of tradition to your table.
Pão De Queijo: the Iconic Cheese Bread

Pão de Queijo, or Brazilian cheese bread, is a beloved snack originating from the state of Minas Gerais. This delightful treat is made with tapioca flour, which gives it a unique chewy texture, and is typically enjoyed warm and fresh out of the oven. The combination of cheese and the light, airy dough makes it a popular choice for breakfast, snacks, or even as an accompaniment to meals.
Its gluten-free nature makes it accessible for those with dietary restrictions, while its rich flavor appeals to everyone.
The secret to the perfect Pão de Queijo lies in the quality of the cheese used and the mixing technique. Traditionally, a mix of Minas cheese (a type of fresh cheese from Brazil) is used, but any semi-hard cheese with a strong flavor, like Parmesan or cheddar, can work well too. The process may seem intimidating at first, but with a little practice, you’ll be able to whip up these cheesy morsels in no time. Serve them warm and watch them disappear!
Ingredients (serving size: 4-6 people):
- 1 cup of milk
- 1/2 cup of vegetable oil
- 1 teaspoon of salt
- 2 cups of tapioca flour
- 2 large eggs
- 1 cup of grated cheese (preferably Minas cheese, but Parmesan or cheddar can be used)
- 1 teaspoon of baking powder (optional, for extra fluffiness)
Cooking Instructions:
- Preheat the Oven: Preheat your oven to 350°F (175°C). This guarantees that your Pão de Queijo will bake evenly and develop a nice golden crust.
- Prepare the Mixture: In a medium saucepan, combine the milk, vegetable oil, and salt. Heat the mixture over medium heat until it comes to a gentle boil. Stir occasionally to prevent burning.
- Add the Tapioca Flour: Once the milk mixture is boiling, remove it from heat and add the tapioca flour. Mix thoroughly using a wooden spoon or spatula until it forms a thick, sticky dough. Allow the mixture to cool for a few minutes until it’s warm to the touch.
- Incorporate the Eggs: Add the eggs one at a time, mixing well after each addition. The dough will be slightly lumpy, but that’s okay. Then fold in the grated cheese and baking powder if using, combining until the cheese is evenly distributed throughout the dough.
- Shape the Dough: With your hands, shape the dough into small balls about the size of a golf ball. Place them on a greased baking sheet, leaving some space between each ball as they’ll expand slightly while baking.
- Bake: Place the baking sheet in the preheated oven and bake for about 20-25 minutes or until the Pão de Queijo are puffed up and golden brown on the outside.
- Cool and Serve: Remove from the oven and let them cool for a couple of minutes before serving. Enjoy your Pão de Queijo warm, as they’re best eaten fresh!
Extra Tips:
For the best results, use high-quality cheese for maximum flavor. If you prefer a more pronounced cheesy taste, feel free to increase the amount of cheese used in the recipe.
Additionally, you can experiment with different types of cheese to find your perfect combination. Pão de Queijo can also be frozen before baking; simply freeze the shaped dough balls and bake them from frozen, adding a few extra minutes to the baking time.
Feijão Tropeiro: A Hearty Bean Dish
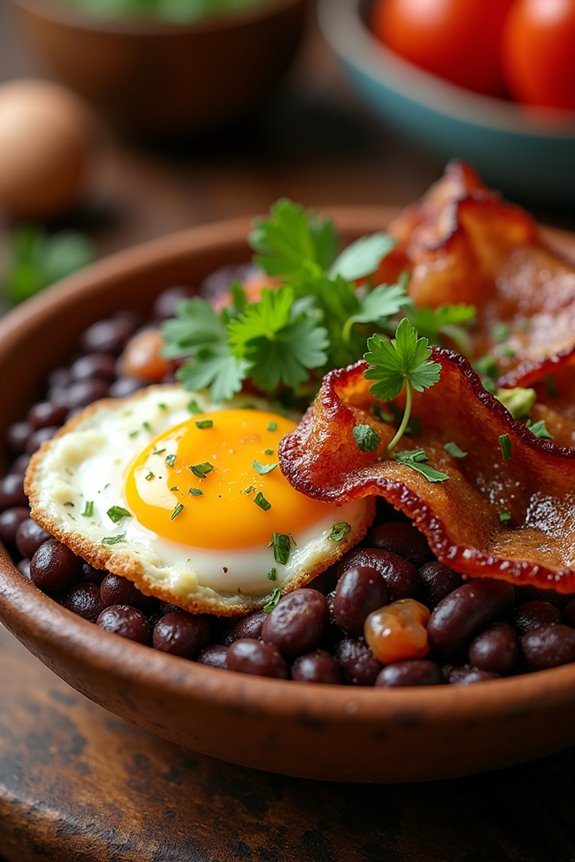
Feijão Tropeiro is a traditional dish from Minas Gerais, Brazil, known for its robust flavors and hearty ingredients. This dish combines black beans with a variety of accompaniments such as bacon, sausage, manioc flour, and eggs, creating a comforting meal that’s both filling and delicious.
The name “tropeiro” refers to the muleteers who traveled the countryside, carrying goods and preparing meals in the open air. This dish is a perfect representation of the region’s rustic culinary traditions and is commonly enjoyed during family gatherings and festive occasions.
The preparation of Feijão Tropeiro is straightforward but requires some attention to detail to achieve the best flavor. The key to a great Feijão Tropeiro lies in cooking the beans to the right tenderness and balancing the savory ingredients. This dish is usually served with rice and a side of sautéed greens, making it a complete meal that embodies the essence of Minas Gerais cuisine.
Ingredients (Serves 4-6)
- 2 cups black beans
- 4 cups water
- 200g bacon, diced
- 200g smoked sausage, sliced
- 1 medium onion, chopped
- 3 cloves garlic, minced
- 4 large eggs
- 1 cup manioc flour (farinha de mandioca)
- 2 tablespoons chopped fresh parsley
- Salt and pepper to taste
- Olive oil for frying
Cooking Instructions
- Cook the Beans: Rinse the black beans and place them in a large pot with 4 cups of water. Bring to a boil and then reduce the heat to a simmer. Cover and cook the beans for about 1 to 1.5 hours, or until they’re tender. Add salt to taste towards the end of the cooking time. Once cooked, drain the beans and set them aside.
- Prepare the Bacon and Sausage: In a large skillet, heat a drizzle of olive oil over medium heat. Add the diced bacon and cook until it becomes crispy and golden brown. Once the bacon is crispy, add the sliced smoked sausage and continue to cook until the sausage is browned and heated through.
- Sauté the Aromatics: Add the chopped onion and minced garlic to the skillet with the bacon and sausage. Sauté for about 3-4 minutes, or until the onion is translucent and fragrant.
- Scramble the Eggs: In a separate bowl, crack the eggs and whisk them until well beaten. Push the bacon, sausage, and onion mixture to one side of the skillet, and pour the eggs into the empty side. Cook the eggs, stirring gently until they’re just set, then mix everything together in the skillet.
- Combine the Beans and Manioc Flour: Add the cooked black beans to the skillet and stir well to combine. Gradually add the manioc flour, mixing until the beans are well coated and the mixture is thickened to your desired consistency. Season with additional salt and pepper to taste.
- Finish and Garnish: Once everything is well combined, sprinkle the chopped fresh parsley over the top and give it a final stir. Serve hot, alongside rice and sautéed greens if desired.
Extra Tips
When making Feijão Tropeiro, feel free to customize the dish by adding other ingredients such as chopped bell peppers or even a touch of chili for heat.
The dish can be made ahead of time and reheats well, allowing the flavors to meld together even more. For an extra layer of flavor, consider using a variety of smoked meats or adding a splash of vinegar for brightness. Enjoy this hearty dish with family and friends for a true taste of Minas Gerais!
Frango Com Quiabo: Chicken With Okra
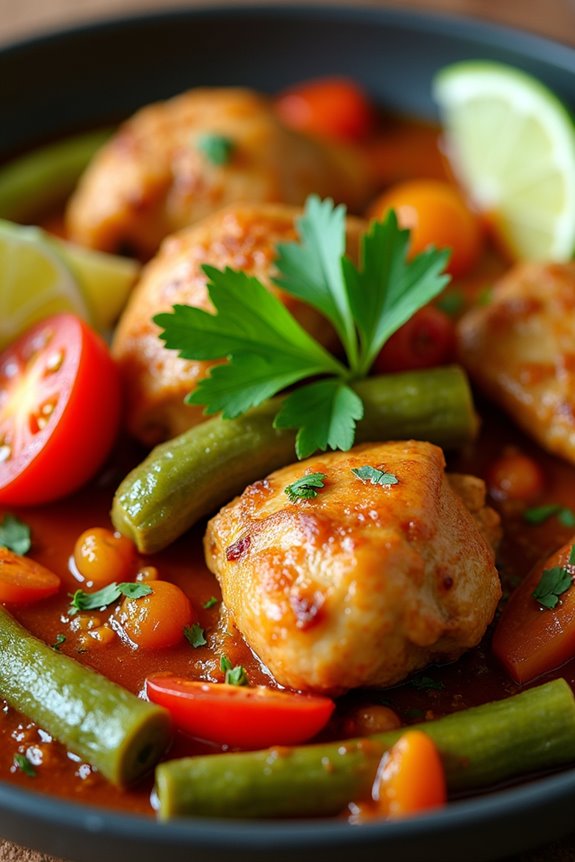
Frango Com Quiabo, or Chicken With Okra, is a beloved dish from Minas Gerais, Brazil, known for its rich flavors and comforting texture. This delicious combination of tender chicken and fresh okra creates a hearty meal that embodies the warmth of Brazilian home cooking. The dish is often served with rice and beans, making it a filling option for family gatherings or casual weeknight dinners.
The origins of this dish can be traced back to the African influence on Brazilian cuisine, particularly in the Minas Gerais region, where ingredients like okra are celebrated. The gentle heat from the spices and the succulent chicken meld beautifully with the unique texture of the okra, making it a standout dish that’s both nutritious and satisfying.
Whether you’re a seasoned cook or trying your hand at Brazilian recipes for the first time, Frango Com Quiabo is sure to impress.
Ingredients (Serves 4-6)
- 1 kg (2.2 lbs) chicken pieces (preferably thighs and drumsticks)
- 300 g (10.5 oz) okra, sliced into 1-inch pieces
- 2 tablespoons vegetable oil
- 1 medium onion, chopped
- 4 cloves garlic, minced
- 1 bell pepper, chopped (red or green)
- 2 tomatoes, diced
- 1 teaspoon paprika
- 1 teaspoon black pepper
- 1 teaspoon salt (to taste)
- ½ teaspoon cayenne pepper (optional, for heat)
- 1 cup chicken broth
- Fresh cilantro or parsley for garnish
- Lime wedges for serving
Cooking Instructions
- Prepare the Chicken: Start by washing the chicken pieces under cold water. Pat them dry with paper towels and season them with salt, black pepper, and paprika. Let the chicken marinate for about 15-20 minutes to absorb the flavors.
- Sauté the Aromatics: In a large skillet or Dutch oven, heat the vegetable oil over medium heat. Add the chopped onions and sauté until they become translucent, about 5 minutes. Then, add the minced garlic and chopped bell pepper, cooking for an additional 2-3 minutes until fragrant.
- Brown the Chicken: Increase the heat to medium-high and add the marinated chicken pieces to the skillet. Brown the chicken on all sides, which will take about 8-10 minutes. This step adds flavor and texture to the dish.
- Add Tomatoes and Broth: Once the chicken is browned, stir in the diced tomatoes and chicken broth. Bring the mixture to a simmer, scraping up any browned bits from the bottom of the skillet. This will enhance the dish’s flavor.
- Cook the Okra: After the mixture is simmering, add the sliced okra to the skillet. Stir well to combine, then cover the skillet and reduce the heat to low. Let it cook for about 20-25 minutes, or until the chicken is cooked through and the okra is tender.
- Final Seasoning: Taste the dish and adjust the seasoning with salt and cayenne pepper, if desired. Cook for an additional 5 minutes uncovered to allow any excess liquid to evaporate.
- Serve: Garnish the Frango Com Quiabo with fresh cilantro or parsley. Serve hot with lime wedges on the side, allowing each person to add a splash of lime juice for added brightness.
Extra Tips
When cooking Frango Com Quiabo, it’s essential to choose fresh okra, as it notably enhances the dish’s texture and flavor. Make sure not to overcook the okra, as it can become slimy.
If you prefer a thicker sauce, you can add a tablespoon of cornstarch mixed with water towards the end of cooking. Additionally, pairing the dish with fluffy white rice and a simple green salad will provide a well-rounded meal that highlights the flavors of Minas Gerais.
Enjoy your culinary adventure!
Tutu De Feijão: a Flavorful Bean Mash
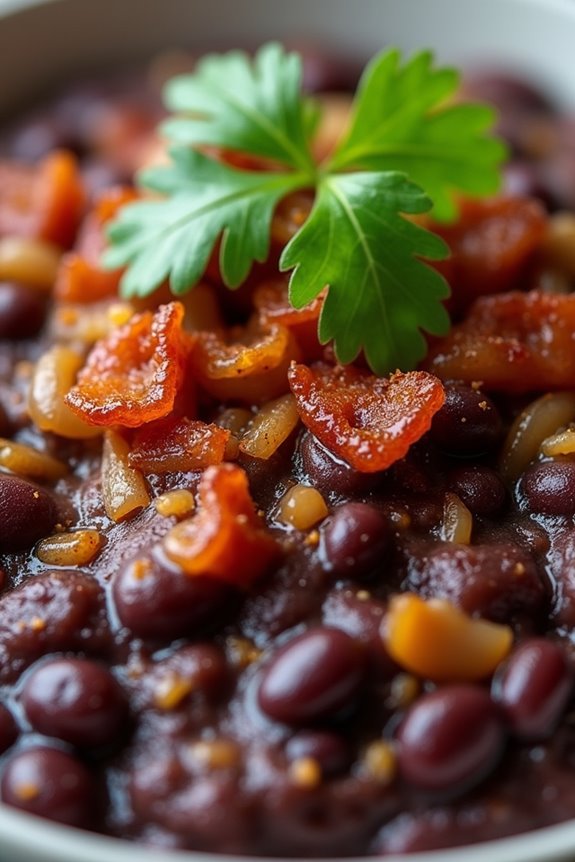
Tutu De Feijão is a traditional dish from Minas Gerais, Brazil, showcasing the region’s rich culinary heritage. This hearty bean mash isn’t only flavorful but also embodies the essence of comfort food. It’s typically made with black beans, which are mashed and combined with sautéed ingredients to create a creamy and savory dish. Tutu De Feijão is often served as a side dish alongside rice, meats, or even fried eggs, making it a versatile addition to any meal.
The preparation of Tutu De Feijão involves a blend of simple ingredients and techniques that highlight the natural flavors of the beans. The dish is often enhanced with the addition of spices and bacon, which gives it a smoky depth. Whether you’re looking to explore Brazilian cuisine or simply want to try a new twist on beans, this recipe is bound to delight your taste buds and warm your soul.
Ingredients (Serves 4-6):
- 2 cups black beans (cooked and drained)
- 1/2 cup water or bean broth
- 1 tablespoon olive oil
- 1 medium onion, finely chopped
- 2 cloves garlic, minced
- 1/2 cup diced bacon (or pancetta)
- 1 teaspoon smoked paprika
- Salt and pepper to taste
- Fresh parsley or cilantro for garnish (optional)
Cooking Instructions:
- Prepare the Beans: If you haven’t already, cook the black beans until tender. This can be done by soaking the beans overnight and then boiling them until soft, or using canned beans that are drained and rinsed. Set the beans aside, making sure you have about 2 cups.
- Cook the Bacon: In a large skillet, heat the olive oil over medium heat. Add the diced bacon and cook until it becomes crispy and releases its fat, which will add flavor to the dish. This should take about 5-7 minutes. Stir occasionally to guarantee even cooking.
- Sauté the Aromatics: Once the bacon is crispy, add the chopped onion to the skillet and sauté until it becomes translucent, about 4-5 minutes. Then, add the minced garlic and sauté for an additional minute until fragrant, being careful not to let it burn.
- Mash the Beans: In the skillet with the bacon and aromatic mixture, add the cooked black beans and water (or bean broth). Use a potato masher or fork to mash the beans to your desired consistency. For a creamier texture, mash more thoroughly, or leave some beans whole for a chunkier dish.
- Season the Mixture: Stir in the smoked paprika, and season with salt and pepper to taste. Allow the mixture to simmer for about 5-10 minutes, stirring occasionally, so the flavors meld together and the mixture thickens. If it becomes too thick, you can add a bit more water or broth.
- Serve: Once the Tutu De Feijão has reached your desired consistency, remove it from heat. Transfer it to a serving dish, and if desired, garnish with fresh parsley or cilantro before serving. Enjoy it warm as a side dish or as a main.
Extra Tips: For an added layer of flavor, consider including other ingredients such as diced bell peppers or a pinch of cayenne pepper for some heat. Additionally, Tutu De Feijão can be prepared in advance and reheated, as the flavors tend to deepen over time. Feel free to adjust the seasoning based on your taste preferences, and experiment with different types of beans if you want to put your twist on this classic dish!
Vaca Atolada: Beef Stew With Cassava
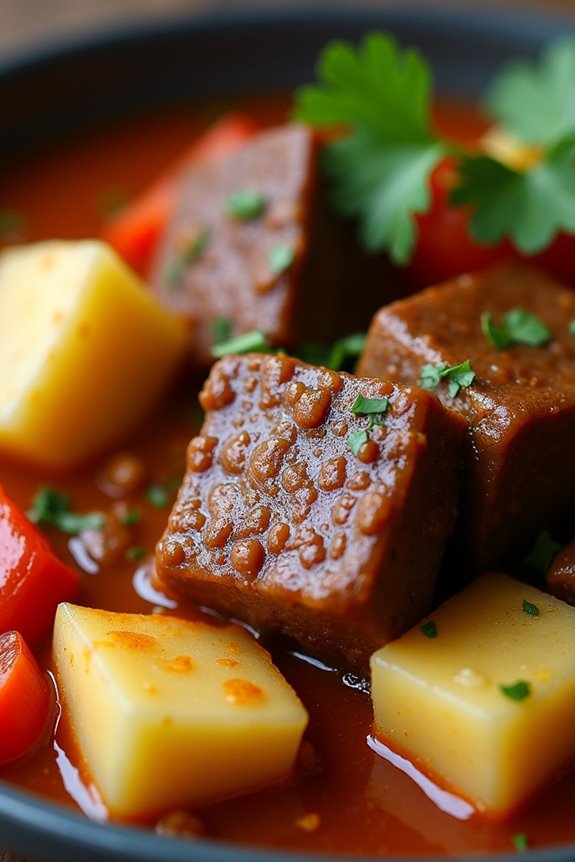
Vaca Atolada is a beloved Brazilian dish that hails from the state of Minas Gerais, known for its rich culinary traditions. This hearty beef stew showcases tender pieces of meat simmered with cassava, also known as yuca, creating a comforting and flavorful meal. The combination of spices and ingredients results in a dish that’s both satisfying and nourishing, perfect for family gatherings or cozy dinners at home.
This recipe for Vaca Atolada serves 4-6 people and is a delightful way to experience the flavors of Minas Gerais. With its robust taste and the creamy texture of cassava, it’s no wonder this stew has gained popularity throughout Brazil and beyond. Whether served with rice or accompanied by fresh bread, this dish is sure to warm your soul and please your palate.
Ingredients:
- 2 pounds beef chuck, cut into 2-inch cubes
- 1 pound cassava (yuca), peeled and cut into 2-inch pieces
- 2 tablespoons vegetable oil
- 1 large onion, chopped
- 4 cloves garlic, minced
- 2 medium tomatoes, diced
- 1 bell pepper, chopped
- 2 cups beef broth
- 1 teaspoon paprika
- 1 teaspoon cumin
- 1 bay leaf
- Salt and pepper to taste
- Fresh parsley, chopped (for garnish)
Cooking Instructions:
- Brown the Beef: In a large pot or Dutch oven, heat the vegetable oil over medium-high heat. Add the beef cubes in batches to avoid overcrowding. Brown the meat on all sides for about 5-7 minutes. This step helps to develop a deep flavor in the stew.
- Sauté the Aromatics: Once the beef is browned, remove it from the pot and set it aside. In the same pot, add the chopped onion and minced garlic. Sauté for about 3-4 minutes until the onion becomes translucent, releasing its sweetness.
- Add Vegetables: Stir in the diced tomatoes and chopped bell pepper, cooking for an additional 3-4 minutes until they soften. These vegetables will enhance the stew’s flavor and provide a rich base for the sauce.
- Combine Ingredients: Return the browned beef to the pot. Sprinkle in the paprika, cumin, salt, and pepper, mixing well. Pour in the beef broth and add the bay leaf, ensuring that all ingredients are well incorporated.
- Simmer the Stew: Bring the mixture to a boil, then reduce the heat to low. Cover the pot and let it simmer for about 1.5 to 2 hours, or until the beef is tender and easily shreds with a fork. Stir occasionally to prevent sticking.
- Add Cassava: Once the beef is tender, add the cassava pieces to the pot. Continue to simmer, covered, for an additional 30-40 minutes, or until the cassava is soft and cooked through.
- Serve: Remove the bay leaf before serving. Ladle the Vaca Atolada into bowls and garnish with fresh parsley. Enjoy with rice or fresh bread for a complete meal.
Extra Tips: When cooking Vaca Atolada, be sure to choose a good quality cut of beef for the best results, as tougher cuts become tender with slow cooking.
If you prefer a thicker stew, you can mash some of the cassava into the broth. Adjust the seasoning according to your taste, adding more salt or spices as needed. This dish also benefits from being made a day in advance, as the flavors deepen and develop overnight.
Polenta Com Ragu: Cornmeal With Meat Sauce

Polenta Com Ragu is a comforting and hearty dish originating from the Brazilian state of Minas Gerais. This dish combines the creamy texture of polenta with a rich and flavorful meat sauce, making it an ideal meal for both family gatherings and cozy nights at home. The polenta, made from cornmeal, serves as a perfect base for the succulent ragu, which is typically made with beef or pork, simmered with tomatoes, spices, and aromatic vegetables.
Cooking Polenta Com Ragu is a wonderful way to explore the flavors of traditional Brazilian cuisine. The dish not only highlights the simplicity and versatility of polenta but also showcases the depth of flavor that comes from slow-cooked sauces. This recipe will guide you through creating a satisfying and delicious meal that can feed 4 to 6 people, ensuring plenty for everyone to enjoy.
Ingredients (Serves 4-6):
- 1 cup cornmeal (polenta)
- 4 cups water
- 1 teaspoon salt
- 1 tablespoon olive oil
- 1 onion, finely chopped
- 2 cloves garlic, minced
- 1 pound ground beef or pork
- 1 can (14 ounces) crushed tomatoes
- 1 tablespoon tomato paste
- 1 teaspoon dried oregano
- 1 teaspoon paprika
- Salt and pepper to taste
- Fresh basil or parsley for garnish (optional)
Cooking Instructions:
- Prepare the Polenta: In a large pot, bring 4 cups of water to a boil. Add 1 teaspoon of salt. Gradually whisk in the cornmeal to avoid lumps. Lower the heat to medium-low and cook, stirring frequently, for about 20-30 minutes until the polenta is thick and creamy. If it becomes too thick, you can add a bit more water to achieve your desired consistency.
- Cook the Meat Sauce: In a separate skillet, heat 1 tablespoon of olive oil over medium heat. Add the chopped onion and sauté for about 5 minutes, or until it becomes translucent. Add the minced garlic and cook for an additional minute until fragrant.
- Brown the Meat: Increase the heat to medium-high and add the ground beef or pork to the skillet. Cook, breaking up the meat with a spatula, until browned and fully cooked, about 7-10 minutes. Drain any excess fat if necessary.
- Add the Sauce Ingredients: Stir in the crushed tomatoes, tomato paste, oregano, paprika, and season with salt and pepper. Reduce the heat to low and let the sauce simmer for about 15-20 minutes. This will allow the flavors to meld together beautifully.
- Combine and Serve: Once the polenta is ready and the ragu has thickened, spoon the creamy polenta onto plates and top with the meat sauce. Garnish with fresh basil or parsley if desired. Serve warm.
Extra Tips:
For a richer flavor, consider adding a splash of red wine to the ragu while it simmers, or incorporating vegetables like bell peppers or carrots for added nutrition.
Additionally, if you prefer a firmer polenta, allow the cooked polenta to cool slightly, then spread it in a baking dish. Once set, cut it into squares and pan-fry for a crispy texture before serving.
Enjoy the wonderful taste of Minas Gerais!
Arroz Com Pequi: Rice With Pequi Fruit
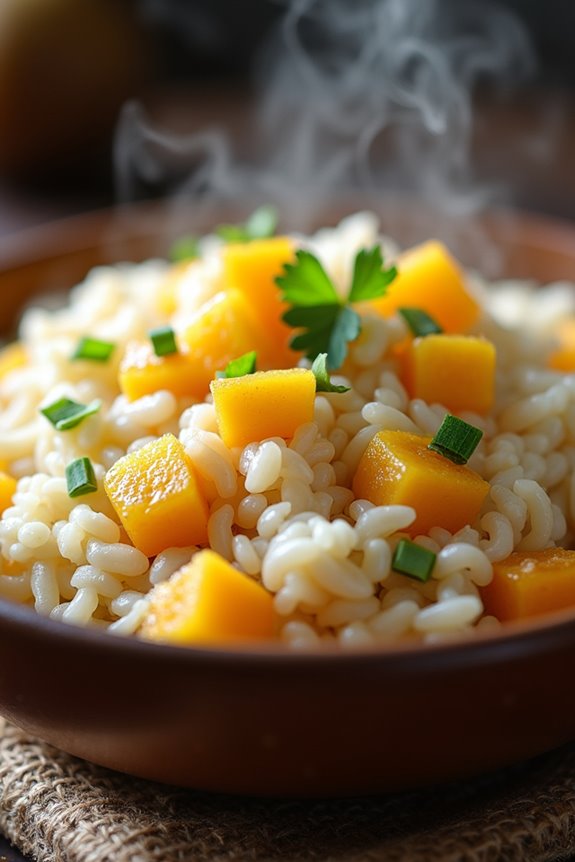
Arroz com pequi is a traditional dish from the state of Minas Gerais, Brazil, celebrated for its unique flavor and rich cultural significance. Pequi, a fruit native to the Brazilian cerrado, has a strong, aromatic taste that can be an acquired preference. The combination of rice and pequi creates a hearty meal that showcases the essence of Brazilian cuisine, making it a must-try for those who appreciate regional dishes.
This dish isn’t only flavorful but also incredibly versatile, as it can be served as a main course or as a side dish to accompany meats and other Brazilian staples. Preparing Arroz com Pequi is a delightful experience that allows you to savor the essence of Minas Gerais right in your own kitchen.
Let’s explore the ingredients and cooking instructions for this delicious rice dish that serves 4-6 people.
Ingredients:
- 2 cups of long-grain rice
- 1 cup of pequi fruit (fresh or canned)
- 4 cups of water or chicken broth
- 1 medium onion, finely chopped
- 2 cloves of garlic, minced
- 2 tablespoons of olive oil or butter
- Salt to taste
- Fresh cilantro or parsley for garnish (optional)
Cooking Instructions:
- Rinse the Rice: Begin by rinsing the long-grain rice under cold water until the water runs clear. This removes excess starch and helps prevent the rice from becoming too sticky during cooking.
- Sauté Aromatics: In a large pot, heat the olive oil or butter over medium heat. Add the chopped onion and sauté until translucent, about 3-4 minutes. Then, add the minced garlic and continue to cook for another minute until fragrant.
- Add Pequi: If using fresh pequi, prepare it by cutting it open and removing the fruit from the seeds. Add the pequi to the pot with the sautéed onions and garlic, stirring gently to combine. If using canned pequi, drain and add it directly.
- Incorporate Rice: Add the rinsed rice to the pot, stirring well to coat the rice grains with the flavors from the onion, garlic, and pequi. This step helps to enhance the overall taste of the dish.
- Add Liquid: Pour in the water or chicken broth and season with salt to taste. Stir everything together and bring the mixture to a boil.
- Cook the Rice: Once boiling, reduce the heat to low, cover the pot, and let it simmer for about 20 minutes or until the rice is cooked through and has absorbed most of the liquid. Avoid lifting the lid too often to guarantee even cooking.
- Fluff and Serve: After the cooking time, remove the pot from heat and let it sit, covered, for an additional 5 minutes. Then, fluff the rice with a fork and serve hot, garnished with fresh cilantro or parsley if desired.
Extra Tips:
When cooking Arroz com Pequi, it’s important to choose ripe pequi for the best flavor. If you find the taste of pequi too strong, you can reduce the amount used or mix it with other ingredients like diced vegetables to balance the flavors.
Additionally, this dish pairs wonderfully with grilled meats or a fresh salad, making it a perfect addition to any meal. Enjoy your culinary journey through Minas Gerais!
Doce De Leite: Creamy Caramel Delight
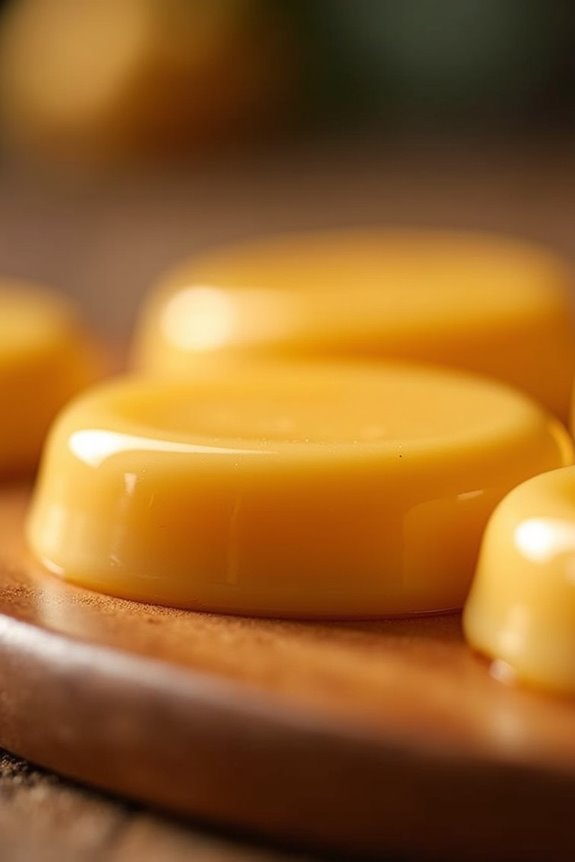
Doce de Leite is a beloved traditional Brazilian treat, particularly popular in the state of Minas Gerais. This luscious caramel-like confection is made simply with milk and sugar, simmered patiently until it reaches a rich, creamy consistency and a beautiful golden hue. The result is a smooth, sweet indulgence that can be enjoyed on its own, spread on bread, or even used as a filling for various desserts.
It’s a dessert that carries the essence of Brazilian home cooking, evoking feelings of warmth and nostalgia.
Making Doce de Leite may seem challenging at first, but with a little patience and attention, anyone can achieve this creamy delight at home. The key lies in the slow cooking process, which allows the milk to caramelize without burning. The end product is a versatile treat that can be drizzled over pancakes, incorporated into cakes, or simply enjoyed by the spoonful.
Prepare to delight your friends and family with this enchanting sweet that will surely impress!
Ingredients (Serves 4-6):
- 4 cups whole milk
- 1 1/4 cups granulated sugar
- 1/4 teaspoon baking soda
- 1 teaspoon vanilla extract (optional)
- Pinch of salt
Cooking Instructions:
- Combine Ingredients: In a large, heavy-bottomed saucepan, combine the whole milk, granulated sugar, baking soda, and a pinch of salt. Stir gently to dissolve the sugar and mix the ingredients well.
- Heat Mixture: Place the saucepan over medium heat and bring the mixture to a gentle simmer. Stir occasionally to prevent the milk from sticking to the bottom of the pan.
- Cook Slowly: Once the mixture starts to boil, reduce the heat to low. Continue to cook, stirring frequently, for about 1 to 1.5 hours. The mixture will gradually thicken and change color. Keep a close eye on it to avoid burning.
- Check for Consistency: After about an hour, you can start checking the consistency of your Doce de Leite. It should be thick enough to coat the back of a spoon. If you want a thicker consistency, continue cooking longer.
- Add Flavor: If desired, stir in the vanilla extract during the last few minutes of cooking to add an extra layer of flavor.
- Cool and Store: Once your Doce de Leite has reached the desired consistency, remove it from the heat and allow it to cool slightly. Pour it into a clean glass jar or container and let it cool completely at room temperature before sealing. It can be stored in the refrigerator for up to a month.
Extra Tips:
When making Doce de Leite, patience is key. The longer you cook it, the richer and deeper the flavor will become.
Make sure to stir often, especially as it thickens, to prevent any burning at the bottom of the pot. If you find that the mixture is bubbling too vigorously, lower the heat to maintain a gentle simmer.
Feel free to experiment with additional flavors like cinnamon or coconut for a unique twist!
Bolo De Fubá: Cornmeal Cake

Bolo De Fubá is a traditional Brazilian cornmeal cake that hails from the state of Minas Gerais. This delightful dessert is characterized by its moist texture and slightly sweet flavor, making it a popular choice for breakfast, afternoon snacks, or special occasions. The combination of cornmeal and milk creates a unique taste that reflects the rich agricultural heritage of the region.
Often enjoyed with coffee or tea, this cake embodies the warmth and hospitality of Brazilian culture. Making Bolo De Fubá is an accessible and rewarding experience, perfect for both novice and experienced bakers. The ingredients are simple and can be found in most kitchens, yet the result is a deliciously satisfying treat that can be shared with friends and family.
Whether you’re looking to impress guests or simply indulge in a comforting dessert, this cornmeal cake is sure to be a hit.
Ingredients (Serves 4-6):
- 1 cup cornmeal (fubá)
- 1 cup milk
- 1 cup sugar
- 1/2 cup vegetable oil
- 3 large eggs
- 1 tablespoon baking powder
- 1/2 teaspoon salt
- 1 teaspoon vanilla extract
- Optional: grated coconut or cheese for topping
Cooking Instructions:
- Preheat the Oven: Begin by preheating your oven to 350°F (180°C). This step is essential as it guarantees that your cake bakes evenly and rises properly.
- Prepare the Baking Pan: Grease a round or rectangular baking pan with butter or oil and lightly dust it with flour. This will prevent the cake from sticking and make it easier to remove once baked.
- Mix Wet Ingredients: In a large mixing bowl, combine the eggs, sugar, and vegetable oil. Whisk these ingredients together until they’re well blended and slightly frothy. This process helps to incorporate air, giving your cake a lighter texture.
- Add Milk and Vanilla: Pour in the milk and add the vanilla extract to the wet mixture. Continue to whisk until everything is combined. The milk adds moisture to the cake, while the vanilla enhances its flavor.
- Combine Dry Ingredients: In a separate bowl, mix the cornmeal, baking powder, and salt. This guarantees that the baking powder is evenly distributed throughout the cake, allowing it to rise properly during baking.
- Incorporate Dry into Wet: Gradually add the dry mixture into the wet mixture, stirring gently with a spatula until just combined. Be careful not to overmix, as this can lead to a dense cake.
- Pour into the Baking Pan: Transfer the batter into the prepared baking pan, smoothing the top with a spatula. If desired, sprinkle grated coconut or cheese on top for added flavor and texture.
- Bake: Place the pan in the preheated oven and bake for approximately 30-40 minutes, or until a toothpick inserted into the center comes out clean. Keep an eye on the cake to prevent overbaking.
- Cool and Serve: Once baked, remove the cake from the oven and allow it to cool in the pan for about 10 minutes. Then, transfer it to a wire rack to cool completely before slicing and serving.
Extra Tips:
When preparing Bolo De Fubá, feel free to experiment with flavors by adding spices like cinnamon or nutmeg to the batter. For an extra moist cake, you can substitute half of the milk with yogurt.
Additionally, serving the cake with a sprinkle of powdered sugar or a drizzle of honey can elevate its presentation. Enjoy this delightful treat fresh or store it in an airtight container for a few days; it tastes even better the next day!
Queijadinha: Coconut and Cheese Treat

Queijadinha is a delightful Brazilian treat that hails from the state of Minas Gerais. This sweet, chewy dessert is a perfect blend of coconut and cheese, creating a unique and satisfying flavor profile that’s hard to resist. Traditionally enjoyed during festivals and celebrations, queijadinha has become a beloved snack for many, often accompanied by a warm cup of coffee. Its rich coconut flavor paired with savory cheese makes it a standout dessert that captures the essence of Brazilian culinary traditions.
Making queijadinha is a simple yet rewarding process that requires just a few ingredients. The combination of sweetened shredded coconut, cheese, and eggs creates a treat that’s both rich and comforting. Whether you’re looking to impress guests at a gathering or simply indulge in a homemade delicacy, queijadinha is sure to satisfy any palate. Follow the recipe below to create this delightful treat for 4-6 people.
Ingredients:
- 2 cups shredded coconut (unsweetened)
- 1 cup grated cheese (preferably a mild cheese like Minas cheese or mozzarella)
- 3/4 cup sugar
- 3 large eggs
- 1/4 cup unsalted butter, melted
- 1 teaspoon vanilla extract
- 1/2 teaspoon baking powder
- A pinch of salt
Cooking Instructions:
- Preheat the Oven: Begin by preheating your oven to 350°F (175°C). This guarantees that the queijadinhas cook evenly and become golden brown as they bake.
- Prepare the Baking Dish: Grease a muffin or cupcake pan with butter or cooking spray. This will prevent the queijadinhas from sticking to the pan, allowing for easy removal once they’re baked.
- Mix the Dry Ingredients: In a large mixing bowl, combine the shredded coconut, grated cheese, sugar, baking powder, and salt. Mix well to guarantee that all ingredients are evenly distributed.
- Combine the Wet Ingredients: In a separate bowl, whisk together the eggs, melted butter, and vanilla extract until smooth. This mixture will help bind the ingredients together and add moisture to the queijadinha.
- Combine Wet and Dry Mixtures: Gradually pour the egg mixture into the dry ingredients, stirring until just combined. Be careful not to overmix; you want the mixture to be well combined but still have some texture.
- Fill the Muffin Pan: Spoon the queijadinha mixture into the prepared muffin pan, filling each cup about three-quarters full. This will allow room for the treats to rise while baking.
- Bake: Place the muffin pan in the preheated oven and bake for about 25-30 minutes, or until the tops are golden brown and a toothpick inserted into the center comes out clean.
- Cool and Serve: Once baked, remove the queijadinhas from the oven and allow them to cool in the pan for about 10 minutes. Carefully remove them from the pan and transfer them to a wire rack to cool completely before serving.
Extra Tips: To enhance the flavor of your queijadinha, consider adding a sprinkle of cinnamon or nutmeg to the mixture. You can also experiment with different types of cheese for varied taste profiles.
These treats can be stored in an airtight container for up to a week, making them perfect for enjoying over several days. Enjoy warm or at room temperature for the best experience!