

Thinking about Brazilian cuisine instantly brings to mind vibrant flavors and comforting aromas that can elevate any meal. Each dish, from the hearty feijoada to the sweet brigadeiro, has its own unique story and purpose. They’re not just food; they’re experiences meant to be shared. If you’re curious about how these delightful meals can transform an ordinary day into something unforgettable, let’s explore the magic of these ten inviting Brazilian dishes.
Feijoada

Feijoada is a traditional Brazilian stew that has become a national dish, celebrated for its rich flavors and hearty ingredients. Originating from Portuguese cuisine, it typically features black beans and a variety of meats, including pork and beef, slow-cooked to perfection. This comforting meal is often served on special occasions and gatherings, making it a staple in Brazilian culture. The dish is usually accompanied by rice, collard greens, and orange slices, which help balance the richness of the stew.
Preparing feijoada requires some time and patience, but the results are well worth the effort. The combination of spices, meats, and beans creates a flavor profile that’s both robust and satisfying. Many families have their own variations of feijoada, often passed down through generations. This recipe serves 4-6 people and is perfect for a cozy family dinner or a festive celebration.
Ingredients (serving size: 4-6 people)
- 1 lb black beans (soaked overnight)
- 1 lb pork shoulder, cut into cubes
- 1/2 lb chorizo sausage, sliced
- 1/2 lb smoked sausage, sliced
- 1/2 lb bacon, chopped
- 1 onion, chopped
- 4 cloves garlic, minced
- 2 bay leaves
- 1 teaspoon paprika
- 1 teaspoon cumin
- 1/2 teaspoon black pepper
- 1/2 teaspoon salt (to taste)
- 4 cups chicken or beef broth
- 2 tablespoons olive oil
- Cooked white rice (for serving)
- Sliced oranges (for garnish)
- Chopped fresh cilantro (for garnish)
- Steamed collard greens (for serving)
Cooking Instructions
- Prepare the Beans: Drain the soaked black beans and rinse them under cold water. Set aside. This step guarantees that the beans are clean and ready to absorb the flavors during cooking.
- Brown the Meats: In a large, heavy pot or Dutch oven, heat the olive oil over medium heat. Add the chopped bacon and cook until crispy. Remove the bacon and set aside, leaving the rendered fat in the pot. Next, add the pork shoulder cubes to the pot and brown them on all sides. This step adds depth of flavor to the dish.
- Sauté the Aromatics: In the same pot, add the chopped onion and minced garlic. Sauté until the onion is translucent and fragrant, about 5 minutes. This will enhance the overall aroma and taste of the feijoada.
- Combine Ingredients: Return the browned bacon to the pot along with the chorizo, smoked sausage, black beans, bay leaves, paprika, cumin, black pepper, and salt. Pour in the broth and stir everything together. This step combines all the ingredients for a well-rounded flavor.
- Simmer the Feijoada: Bring the mixture to a boil, then reduce the heat to low and cover the pot. Let it simmer for about 2 to 3 hours, stirring occasionally, until the beans are tender and the flavors meld together. This slow cooking process is essential for developing the dish’s rich, hearty profile.
- Final Adjustments: Check the seasoning and adjust salt and pepper to taste. If the stew is too thick, you can add a bit more broth or water to reach the desired consistency. This guarantees that the dish meets your flavor preferences.
- Serve: Serve the feijoada hot over cooked white rice, garnished with sliced oranges and chopped cilantro, alongside steamed collard greens. This presentation adds a colorful touch and balances the dish’s richness.
Extra Tips
When cooking feijoada, feel free to customize the meats according to your preference or what you have on hand; common additions include beef ribs or even chicken.
Additionally, allowing the feijoada to sit for a few hours or even overnight can enhance the flavors even further, as the ingredients have more time to meld together.
Leftovers can also be frozen, making it a convenient dish to have on hand for busy days. Enjoy your feijoada with family and friends for an authentic Brazilian experience!
Moqueca
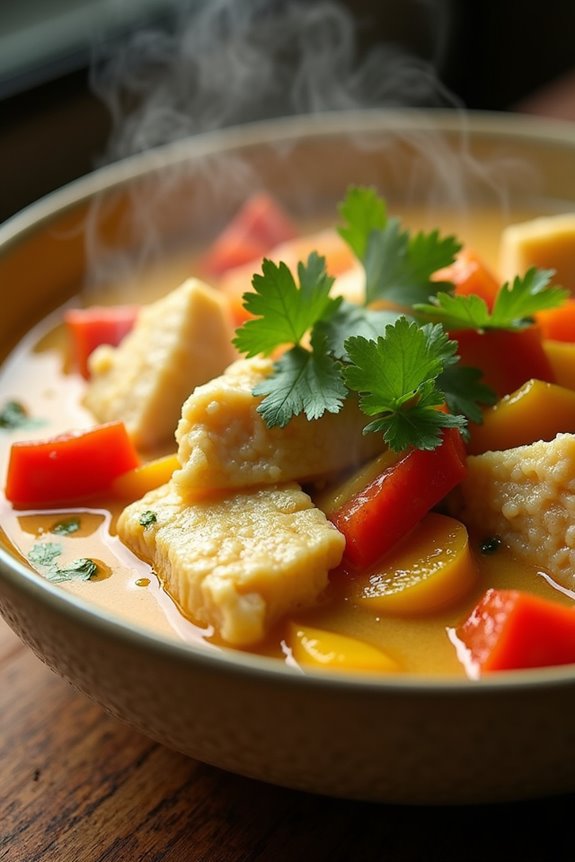
Moqueca is a traditional Brazilian seafood stew that hails primarily from the states of Bahia and Espírito Santo. This vibrant dish showcases a harmony of flavors with its combination of fresh fish, coconut milk, tomatoes, bell peppers, and aromatic herbs, making it a true celebration of Brazilian cuisine.
The dish not only highlights the rich culinary heritage of Brazil but also serves as a delightful way to enjoy the bounty of the sea. With its colorful presentation and fragrant aroma, Moqueca is perfect for gatherings and special occasions, offering a taste of Brazil in every bite.
The base of Moqueca is a blend of spices and fresh ingredients that come together to create a comforting, hearty meal. Typically served with rice and farofa (toasted cassava flour), this dish is both satisfying and delicious.
Whether you’re a seafood lover or simply looking to explore new flavors, Moqueca is a wonderful addition to your recipe repertoire. So gather your ingredients, and let’s plunge into making this exquisite Brazilian stew!
Ingredients (serving size: 4-6 people)
- 2 lbs of white fish fillets (such as cod, snapper, or tilapia)
- 1 cup of coconut milk
- 2 tablespoons of olive oil
- 1 large onion, chopped
- 4 cloves of garlic, minced
- 2 medium tomatoes, diced
- 1 red bell pepper, sliced
- 1 yellow bell pepper, sliced
- 1 bunch of fresh cilantro, chopped
- 1 lime, juiced
- 1 teaspoon of paprika
- 1 teaspoon of cumin
- Salt and pepper to taste
- 1-2 fresh green chilies (optional, for heat)
Cooking Instructions
- Prepare the Fish: Rinse the fish fillets under cold water and pat them dry with paper towels. Cut the fish into large chunks, if desired. Season the pieces with salt, pepper, lime juice, paprika, and cumin, and let them marinate for about 20 minutes to absorb the flavors.
- Sauté the Aromatics: In a large, heavy-bottomed pot or Dutch oven, heat the olive oil over medium heat. Add the chopped onion and sauté until it becomes translucent, about 5 minutes. Then, add the minced garlic and continue to cook for an additional 1-2 minutes until fragrant, being careful not to burn the garlic.
- Add Vegetables: Stir in the diced tomatoes and sliced bell peppers into the pot. Cook the mixture for about 5-7 minutes, allowing the vegetables to soften and release their juices. This will create a flavorful base for the stew.
- Combine with Coconut Milk: Pour in the coconut milk, stirring well to combine everything together. Bring the mixture to a gentle simmer, allowing it to bubble lightly for about 5 minutes. This step allows the flavors to meld beautifully.
- Add the Fish: Carefully place the marinated fish pieces into the pot, making sure they’re submerged in the coconut milk and vegetable mixture. Cover the pot with a lid and let it cook for about 10-15 minutes, or until the fish is cooked through and flakes easily with a fork.
- Finish with Herbs: Once the fish is cooked, gently stir in the chopped cilantro and adjust the seasoning with additional salt, pepper, or lime juice if needed. Allow the stew to simmer for another 2-3 minutes to infuse the flavors.
- Serve: Ladle the Moqueca into bowls and serve hot. Accompany it with steamed white rice and farofa on the side for a complete meal.
Extra Tips
When making Moqueca, feel free to customize the dish according to your preferences. You can use shrimp, squid, or other seafood in place of fish, or even combine different types of seafood for added variety.
For a more intense flavor, consider adding a bay leaf or a splash of fish stock in the cooking process. Additionally, the dish can be made ahead of time and reheated gently, as the flavors tend to deepen with time. Enjoy your culinary adventure into Brazilian cuisine!
Pão De Queijo
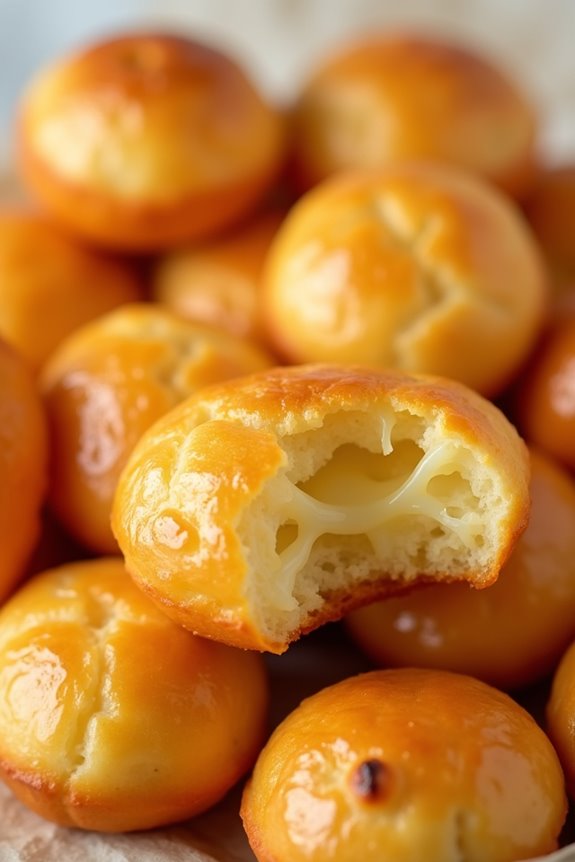
Pão de Queijo, or cheese bread, is a beloved Brazilian snack that has become popular around the world. It’s naturally gluten-free, as the primary ingredient is tapioca flour. These delightful little cheese puffs are crispy on the outside and chewy on the inside, offering a perfect combination of texture and flavor.
Traditionally enjoyed for breakfast or as a snack, they can also be served at parties or gatherings, making them a versatile addition to any menu.
The origins of Pão de Queijo date back to the Brazilian state of Minas Gerais, where the recipe was created by cheese-making families. The use of local cheese varieties, such as Minas cheese, enhances the flavor, but you can use any cheese available to you.
This recipe will guide you through making a batch of Pão de Queijo that serves 4-6 people, guaranteeing you have enough to share with family and friends.
Ingredients:
- 2 cups tapioca flour
- 1 cup milk
- 1/2 cup vegetable oil
- 1 teaspoon salt
- 1/2 teaspoon baking powder
- 2 large eggs
- 1 cup grated cheese (such as Parmesan or mozzarella)
Cooking Instructions:
1. Preheat the Oven: Start by preheating your oven to 375°F (190°C). This guarantees that your Pão de Queijo will bake evenly and achieve that desirable golden-brown color.
2. Prepare the Dough Mixture****: In a medium saucepan, combine the milk, vegetable oil, and salt. Heat the mixture over medium heat until it comes to a gentle boil. Once boiling, remove it from the heat.
3. Combine with Tapioca Flour: Immediately pour the hot milk mixture over the tapioca flour in a large mixing bowl. Stir the mixture with a wooden spoon until a thick dough forms. This step is essential as the heat helps to hydrate the tapioca flour, guaranteeing the right texture.
4. Add Eggs and Cheese: Allow the dough to cool slightly, then add the eggs one at a time, mixing well after each addition. The dough may look a bit lumpy at first, but keep mixing until it’s smooth.
Finally, fold in the grated cheese and baking powder until fully incorporated.
5. Shape the Pão de Queijo: Use your hands to shape the dough into small balls, about the size of a golf ball. Place them on a baking sheet lined with parchment paper, leaving some space between each ball to allow for expansion during baking.
6. Bake: Place the baking sheet in the preheated oven and bake for 15-20 minutes, or until the Pão de Queijo puff up and turn golden brown. Keep an eye on them to avoid over-baking.
7. Serve: Once baked, remove the Pão de Queijo from the oven and let them cool for a few minutes before serving. Enjoy them warm for the best texture and flavor.
Extra Tips:
For an extra cheesy flavor, you can mix different types of cheeses or even add herbs like oregano or garlic powder into the dough.
If you want a softer texture, reduce the baking time slightly. Pão de Queijo is best enjoyed fresh, but you can freeze the unbaked dough balls and bake them directly from frozen when needed. Just add a few extra minutes to the baking time.
Coxinha

Coxinha is a beloved Brazilian snack that embodies the country’s rich culinary heritage. This delicious treat consists of a savory filling, typically made from shredded chicken, enveloped in a soft dough, and then deep-fried to golden perfection.
Coxinhas are often served at parties, family gatherings, and street food fairs, making them a popular choice for those looking to experience authentic Brazilian flavors. The process may seem intricate, but with the right ingredients and step-by-step instructions, you can easily create this delightful dish at home.
To make coxinhas, you’ll need to prepare both the dough and the filling. The dough is made of flour, butter, and broth, while the filling usually consists of sautéed chicken mixed with cream cheese or ricotta for added creaminess.
Once assembled, the coxinhas are breaded and fried until crispy, creating a satisfying contrast between the tender filling and the crunchy exterior. This recipe serves 4-6 people, making it perfect for sharing with friends and family.
Ingredients
- 2 cups shredded cooked chicken
- 1 small onion, finely chopped
- 2 cloves garlic, minced
- 1 tablespoon olive oil
- 1/2 cup cream cheese or ricotta
- 1 teaspoon salt
- 1/2 teaspoon black pepper
- 1/4 teaspoon paprika
- 2 cups all-purpose flour
- 1/2 cup unsalted butter
- 2 cups chicken broth
- 2 eggs, beaten
- 2 cups breadcrumbs
- Vegetable oil (for frying)
Cooking Instructions
1. Prepare the Filling: In a skillet, heat the olive oil over medium heat. Add the chopped onion and minced garlic, sautéing until the onion becomes translucent.
Stir in the shredded chicken and season with salt, pepper, and paprika. Cook for another 2-3 minutes, then mix in the cream cheese or ricotta until well combined. Remove from heat and set aside to cool.
2. Make the Dough: In a saucepan, bring the chicken broth to a boil. Add the butter and let it melt completely.
Once melted, gradually add the flour, stirring continuously until the mixture forms a ball and pulls away from the sides of the pan. Remove from heat and let it cool slightly.
3. Shape the Coxinhas: Once the dough is cool enough to handle, take a small piece (about the size of a golf ball) and flatten it in your palm.
Place a spoonful of the chicken filling in the center and fold the dough over the filling, sealing it tightly and forming a teardrop shape. Repeat this process until all the dough and filling are used.
4. Bread the Coxinhas: Prepare a breading station by placing the beaten eggs in one bowl and the breadcrumbs in another.
Dip each coxinha in the egg mixture, allowing any excess to drip off, then coat it in the breadcrumbs, ensuring it’s completely covered.
5. Fry the Coxinhas: In a large pot, heat vegetable oil over medium-high heat. Once the oil is hot, carefully add the coxinhas in batches, frying them until they’re golden brown and crispy (about 4-5 minutes).
Use a slotted spoon to remove them from the oil and drain on paper towels.
Extra Tips
For the best flavor, be sure to use homemade chicken broth, as it adds depth to the dough.
If you’re short on time, rotisserie chicken can be a great substitute for the filling. Additionally, you can experiment with different fillings, such as cheese or vegetables, to create variations of coxinhas.
Serve them hot with a side of your favorite dipping sauce, like spicy ketchup or garlic mayonnaise, for an extra flavor kick. Enjoy your cooking adventure!
Brigadeiro

Brigadeiro is a delightful Brazilian confection that has earned its place as a beloved treat at parties and celebrations throughout the country. This no-bake chocolate truffle is made from a few simple ingredients, and the end result is a rich, fudgy bite-sized sweet that melts in your mouth.
Traditionally rolled in chocolate sprinkles, brigadeiros aren’t just a dessert; they’re a symbol of Brazilian culture and hospitality, often enjoyed by people of all ages.
Making brigadeiros is a fun and straightforward process that requires minimal cooking skills. It’s perfect for those who want to impress friends and family with a homemade treat that looks as good as it tastes.
Whether you’re hosting a party or simply indulging in a sweet craving, brigadeiros are sure to bring joy and satisfaction to any occasion. Let’s explore the ingredients and cooking instructions to create these delectable chocolate delights for 4-6 people.
Ingredients
- 1 can (14 ounces) sweetened condensed milk
- 2 tablespoons unsweetened cocoa powder
- 2 tablespoons unsalted butter
- A pinch of salt
- Chocolate sprinkles (for rolling)
Cooking Instructions
1. Combine Ingredients: In a medium-sized saucepan, combine the sweetened condensed milk, unsweetened cocoa powder, unsalted butter, and a pinch of salt. Stir well until all the ingredients are thoroughly mixed. This will create a smooth mixture that will develop into the brigadeiro filling.
2. Cook the Mixture: Place the saucepan over medium heat. Continuously stir the mixture with a wooden spoon or a silicone spatula, scraping the bottom and sides of the pan to prevent sticking. Cook for about 10-15 minutes until the mixture thickens and starts to pull away from the sides of the pan.
You’ll know it’s ready when it forms a thick, fudgy consistency.
3. Cool the Mixture: Once the brigadeiro mixture has thickened, remove it from the heat and transfer it to a greased plate or bowl. Allow it to cool to room temperature. This step is essential because you don’t want to burn your hands when rolling the brigadeiros.
4. Form the Brigadeiros: Once the mixture is cool enough to handle, grease your hands lightly with butter. Take a small amount of the mixture (about a tablespoon) and roll it into a ball between your palms. Repeat this process until all the mixture is formed into balls.
5. Coat with Sprinkles: Pour chocolate sprinkles into a shallow dish. Roll each brigadeiro in the sprinkles until they’re fully coated. This step not only adds visual appeal but also enhances the chocolate flavor.
6. Serve: Place the finished brigadeiros in paper cups or on a serving plate. They can be enjoyed immediately or stored in an airtight container in the refrigerator for several days.
Extra Tips
When making brigadeiros, the key is to be patient during the cooking process. Stirring constantly will guarantee that the mixture doesn’t stick or burn.
If you want to get creative, you can experiment with different toppings such as crushed nuts, coconut flakes, or even colored sprinkles for a festive touch. Brigadeiros can also be flavored with different ingredients like vanilla extract or coffee for a unique twist.
Enjoy your sweet creation and share the joy with others!
Acarajé

Acarajé is a beloved street food from Brazil, particularly in the northeastern region, especially Bahia. This dish is made from black-eyed peas that are ground into a dough, shaped into balls, and deep-fried in palm oil. It’s often served with a variety of fillings, including vatapá (a creamy paste made with shrimp, nuts, and spices) and a spicy pepper sauce.
Acarajé isn’t only delicious but also holds cultural significance, often associated with the Afro-Brazilian religion of Candomblé, where it’s offered to the orixás (deities).
Making Acarajé at home can be a rewarding experience, as it allows you to appreciate the intricate flavors of Brazilian cuisine. While the process may seem challenging, especially when it comes to frying the dough and preparing the accompanying fillings, following this recipe will guide you through each step.
Gather your ingredients, and let’s get started on making this delightful dish that will bring a taste of Brazil right to your kitchen.
Ingredients (Serves 4-6 people)
- 2 cups black-eyed peas (dried)
- 1 medium onion, chopped
- 1-2 teaspoons salt (to taste)
- 1-2 cups palm oil (for frying)
- 1 cup vatapá (store-bought or homemade)
- ½ cup dried shrimp, rehydrated and chopped
- ½ cup spicy pepper sauce (optional, to taste)
- Fresh cilantro for garnish (optional)
Cooking Instructions
- Prepare the Black-Eyed Peas: Start by soaking the black-eyed peas in water for at least 8 hours or overnight. This will help soften the peas and make them easier to grind. After soaking, rinse the peas under cold water to remove any debris.
- Make the Acarajé Dough: Drain the soaked black-eyed peas and transfer them to a food processor. Add the chopped onion and salt. Blend the mixture until it forms a smooth, thick paste. You may need to add a little water if it’s too thick, but be careful not to make it too runny.
- Heat the Palm Oil: In a deep frying pan or pot, pour enough palm oil to submerge the Acarajé balls (about 1-2 cups). Heat the oil over medium heat until it reaches around 350°F (175°C). You can test if the oil is ready by dropping a small amount of the dough into the oil; if it sizzles and rises to the surface, it’s ready.
- Fry the Acarajé: Using wet hands or a spoon, form the Acarajé dough into small round balls (about the size of a golf ball). Carefully place them into the hot oil, making sure not to overcrowd the pan. Fry the balls until they’re golden brown on all sides, about 4-5 minutes. Use a slotted spoon to remove them from the oil and drain on paper towels.
- Assemble and Serve: Once the Acarajé balls are fried, slice them open with a knife, creating a pocket. Fill each one with a generous spoonful of vatapá and top with the chopped dried shrimp. You can also add spicy pepper sauce and garnish with fresh cilantro as desired. Serve hot.
Extra Tips
When preparing Acarajé, ensuring your oil is at the right temperature is essential; too hot and they’ll burn on the outside while remaining raw inside, too cool and they’ll absorb excess oil.
If you’re making a large batch, consider frying in smaller batches to maintain the oil temperature. Additionally, feel free to experiment with different fillings, such as a mix of vegetables or meats, to create a unique twist on this traditional dish.
Enjoy your homemade Acarajé as part of a festive meal or as a delicious snack!
Farofa
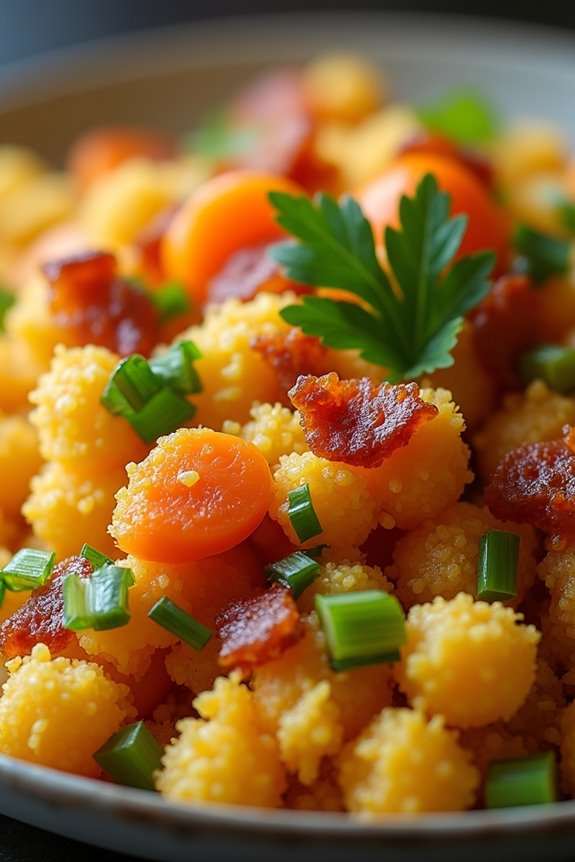
Farofa is a traditional Brazilian side dish made primarily from toasted cassava flour. It’s often served alongside meats, beans, and rice, adding a delightful crunch and nutty flavor to the meal. This versatile dish can be customized with various ingredients such as bacon, onions, and vegetables, making it a favorite at barbecues and family gatherings across Brazil. The preparation of farofa is straightforward, making it an accessible dish for both novice and experienced cooks.
In Brazil, farofa is more than just a side dish; it’s a staple that symbolizes comfort and home-cooked meals. This dish is typically enjoyed with feijoada, a hearty black bean stew, but it can accompany a variety of main courses. The beauty of farofa lies in its adaptability; you can modify the ingredients based on your taste preferences or what you have available in your pantry.
Here’s a simple recipe to prepare a delicious farofa for a serving size of 4-6 people.
Ingredients
- 2 cups cassava flour
- 4 tablespoons unsalted butter
- 1 medium onion, finely chopped
- 2 cloves garlic, minced
- 1 cup cooked bacon, chopped (optional)
- 1/2 cup green onions, sliced
- 1/2 cup grated carrots
- 1/4 cup chopped fresh parsley
- Salt and pepper to taste
Cooking Instructions
- Prepare Ingredients: Begin by gathering all your ingredients. Chop the bacon (if using), onion, garlic, green onions, and parsley. Grate the carrot and measure out the cassava flour. This step guarantees that you have everything ready for a smooth cooking process.
- Cook the Bacon: In a large skillet over medium heat, add the chopped bacon and cook until crispy. This usually takes around 5-7 minutes. If you’re not using bacon, skip to the next step. The rendered fat from the bacon will add flavor to the dish.
- Sauté Aromatics: Remove the crispy bacon from the skillet and set it aside, leaving the fat in the pan. Add 4 tablespoons of unsalted butter to the pan. Once melted, add the chopped onion and minced garlic. Sauté for about 3-4 minutes until the onion is translucent and aromatic.
- Add Vegetables: Stir in the grated carrots and green onions, cooking for an additional 2 minutes. The goal is to incorporate these vegetables into the mix, allowing them to soften slightly and release their flavors.
- Incorporate Cassava Flour: Gradually add the cassava flour to the skillet while continuously stirring. This will help to evenly distribute the flour and prevent clumping. Cook for about 5-7 minutes, stirring frequently, until the flour is golden brown and has a toasted aroma.
- Season and Mix: Once the flour is toasted, return the cooked bacon to the skillet. Add salt and pepper to taste, along with the chopped parsley. Stir everything together to guarantee an even mix and adjust seasoning as necessary. Cook for another minute to combine flavors.
- Serve: Remove the skillet from the heat and transfer the farofa to a serving dish. You can garnish it with additional parsley if desired. Serve alongside your favorite Brazilian dishes, such as grilled meats or feijoada.
Extra Tips
When making farofa, feel free to get creative with your ingredients! You can add nuts, dried fruits, or even different vegetables like bell peppers or mushrooms for added texture and flavor.
If you prefer a spicier kick, consider adding diced jalapeños or a sprinkle of red pepper flakes. Keep an eye on the cassava flour while toasting; it can burn quickly if left unattended.
Finally, farofa can be made ahead of time and stored in an airtight container in the refrigerator for up to a week, making it a convenient option for meal prep.
Vatapá
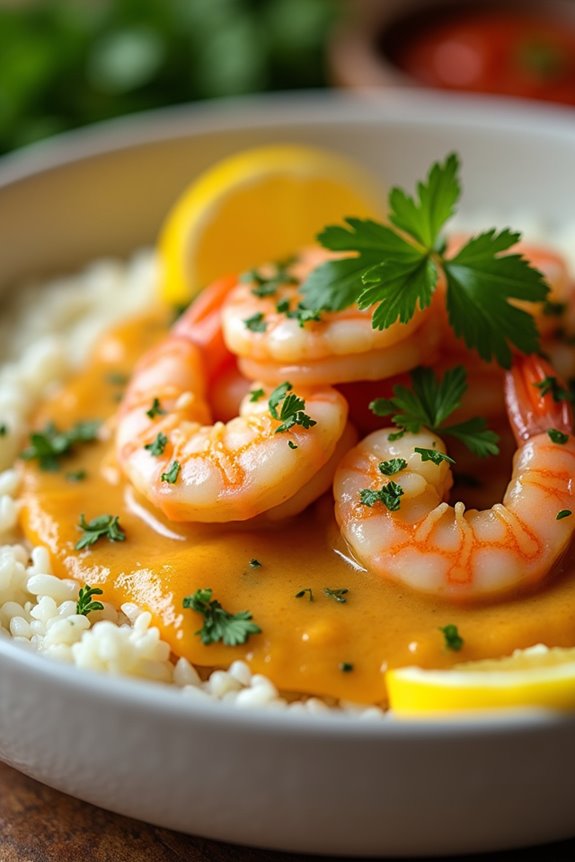
Vatapá is a traditional Brazilian dish that hails from the northeastern region of the country, particularly Bahia. This rich and creamy dish is typically made with bread, shrimp, and a variety of spices, creating a burst of flavors that embodies the essence of Brazilian cuisine. It’s often served with rice, making it a hearty and satisfying meal for families and gatherings.
The origins of vatapá can be traced back to African influences, particularly from enslaved peoples who blended local ingredients with their culinary traditions. This dish isn’t only delicious but also represents the cultural melting pot of Brazil. The combination of ingredients such as coconut milk, peanuts, and palm oil gives vatapá its distinctive flavor profile.
While the traditional recipe may vary from family to family, the core elements remain the same, making it a beloved favorite in many Brazilian households. Whether enjoyed at a festive gathering or a casual dinner, vatapá is sure to impress with its unique taste and texture.
Ingredients (Serves 4-6)
- 500g shrimp, peeled and deveined
- 2 cups stale bread, torn into pieces
- 1 cup coconut milk
- 1/2 cup peanuts, ground
- 1/2 cup palm oil (dendê oil)
- 1 onion, finely chopped
- 2 cloves garlic, minced
- 1 teaspoon ginger, grated
- 1/2 teaspoon cayenne pepper (adjust to taste)
- 1/2 cup chopped cilantro
- Salt and black pepper to taste
- Lemon wedges, for serving
Cooking Instructions
- Prepare the Shrimp: In a large skillet over medium heat, add a tablespoon of palm oil. Once hot, add the shrimp and cook for about 3-4 minutes, or until they turn pink and opaque. Season with salt and pepper. Remove the shrimp from the skillet and set aside.
- Make the Base: In the same skillet, add another tablespoon of palm oil and sauté the chopped onion, garlic, and ginger until the onion is translucent and fragrant, about 5 minutes. Stir frequently to avoid burning.
- Blend the Bread Mixture: In a blender, combine the torn pieces of stale bread, coconut milk, and ground peanuts. Blend until smooth, creating a thick paste. This mixture will give vatapá its creamy consistency.
- Combine Ingredients: Pour the bread mixture into the skillet with the sautéed onions, garlic, and ginger. Mix well and cook over low heat, stirring constantly for about 10 minutes. This will help the flavors meld and thicken the sauce.
- Add the Shrimp: Stir the cooked shrimp back into the mixture along with the cayenne pepper and chopped cilantro. Continue to cook for another 5 minutes, allowing the shrimp to heat through and the sauce to thicken further.
- Final Adjustments: Taste the vatapá and adjust the seasoning with salt, pepper, or additional cayenne, if desired. Remove from heat and let it sit for a few minutes before serving.
- Serve: Serve the vatapá warm, garnished with additional cilantro and alongside rice and lemon wedges for squeezing over the top.
Extra Tips
To enhance the flavor of vatapá, consider marinating the shrimp in lime juice, garlic, and a pinch of salt for about 30 minutes before cooking. This will infuse the shrimp with a zesty flavor.
Additionally, feel free to experiment with other proteins, such as fish or chicken, if shrimp isn’t available. The consistency of the sauce can also be adjusted by adding more coconut milk if you prefer a thinner texture. Ultimately, don’t skip the palm oil, as it’s essential for achieving the authentic taste of this dish.
Churrasco
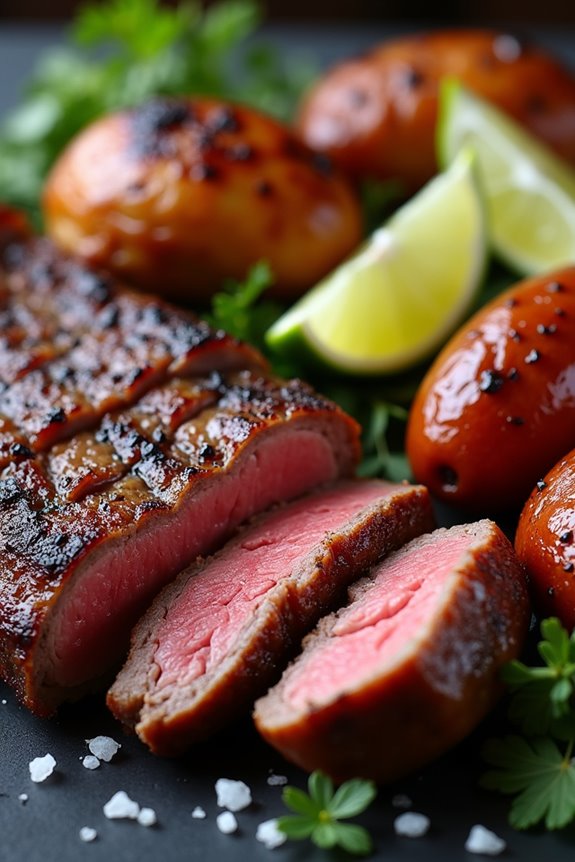
Churrasco, the traditional Brazilian barbecue, is more than just a meal; it’s a celebration of flavors, culture, and community. Typically featuring a variety of meats cooked over an open flame or charcoal grill, this dish is often enjoyed during gatherings with family and friends.
The magic of Churrasco lies not only in the quality of the meat but also in the simple yet mouthwatering marinades and side dishes that accompany it, making every bite a delightful experience.
To create an authentic Churrasco at home, start with high-quality cuts of meat such as beef, pork, and chicken, seasoned simply with salt and sometimes a zesty marinade. The grilling process is crucial to developing that smoky flavor and tender texture that makes Churrasco so beloved.
Pair your grilled meats with traditional sides like farofa (toasted cassava flour), rice, and vinaigrette salsa for a complete meal that captures the essence of Brazil.
Ingredients (Serves 4-6)
- 2 pounds of beef ribs or picanha (top sirloin cap)
- 1 pound of pork sausage
- 1 pound of chicken thighs
- Coarse sea salt
- 1/4 cup of olive oil
- 4 cloves of garlic, minced
- 1 tablespoon of black pepper
- Fresh lime wedges for serving
Cooking Instructions
- Prepare the Marinade: In a bowl, combine the olive oil, minced garlic, and black pepper to create a marinade. This mixture will enhance the flavors of your meats. Coat the chicken thighs thoroughly with the marinade and let them rest for at least 30 minutes to an hour in the refrigerator.
- Preheat the Grill: While the chicken is marinating, preheat your grill to a medium-high temperature. If using charcoal, let the coals turn white and ashy before placing the meat on the grill. This guarantees a steady heat that will sear the meat perfectly.
- Season the Meats: Generously sprinkle coarse sea salt over the beef ribs or picanha and pork sausage. Brazilian tradition often calls for minimal seasoning to allow the natural flavors of the meat to shine through.
- Grill the Chicken: Start by placing the marinated chicken thighs on the grill. Cook for about 10-15 minutes per side, or until they reach an internal temperature of 165°F (75°C), confirming they’re cooked through and juicy.
- Grill the Beef and Pork: Once the chicken is done, move it to a warm area of the grill to rest. Now, add the beef ribs or picanha and pork sausage to the grill. Cook the beef for about 5-7 minutes per side for medium-rare, and the pork sausage until it’s browned and cooked through, about 10-12 minutes.
- Let the Meat Rest: Once all the meats are cooked to your desired doneness, let them rest for about 5-10 minutes. This allows the juices to redistribute, resulting in a more tender and flavorful bite.
- Serve: Slice the beef against the grain and arrange all the grilled meats on a platter. Serve with fresh lime wedges on the side for an extra burst of flavor, along with your favorite accompaniments like farofa, rice, and vinaigrette salsa.
Extra Tips
For the best results, always use high-quality cuts of meat and allow them to come to room temperature before grilling. This helps them cook more evenly.
If you’re new to grilling, consider using a grill thermometer to monitor the temperature accurately. Additionally, soaking wooden skewers in water before use can prevent them from burning on the grill.
Finally, don’t rush the cooking process; patience will reward you with perfectly grilled, mouthwatering Churrasco! Enjoy!
Pastel
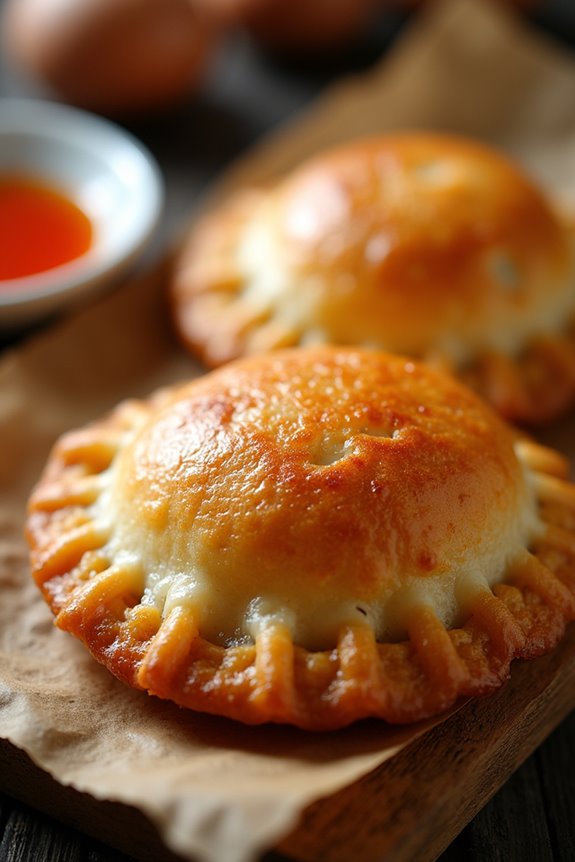
Pastel is a beloved Brazilian street food that showcases a crispy, flaky pastry filled with a variety of delicious fillings. Originating from Chinese immigrants in the early 20th century, this dish has become a staple in Brazilian cuisine, often enjoyed as a snack or appetizer. The dough is made from simple ingredients and can be filled with everything from cheese and meats to vegetables and sweet fillings, making it incredibly versatile.
Pastéis are often served with a side of hot sauce or vinegar for an added kick, bringing a delightful flavor experience.
Making pastel at home is a fun and rewarding endeavor, allowing you to customize the fillings to suit your taste. While the preparation of the dough might seem intimidating, it’s quite straightforward and worth the effort for the crispy texture and delicious flavor that awaits. Once you master the basic recipe, you can experiment with various fillings and sauces, creating your own unique version of this classic Brazilian treat.
Ingredients (Serves 4-6):
- 2 cups all-purpose flour
- 1/2 cup warm water
- 1/4 cup vegetable oil
- 1 teaspoon salt
- 1 egg (for egg wash)
- Filling options (choose one or mix):
- 1 cup shredded mozzarella cheese
- 1 cup cooked, seasoned ground beef
- 1 cup sautéed mushrooms and spinach
- 1 cup sweetened guava paste or chocolate for dessert pastéis
- Oil for frying
Cooking Instructions:
- Prepare the Dough: In a large mixing bowl, combine the all-purpose flour and salt. Create a well in the center and pour in the warm water and vegetable oil. Mix the ingredients together using a fork or your hands until a dough forms. Knead the dough on a floured surface for about 5-7 minutes until it’s smooth and elastic. Wrap the dough in plastic wrap and let it rest for at least 30 minutes.
- Make the Filling: While the dough is resting, prepare your desired filling. If using cheese, simply shred it. For meat, cook and season it with salt, pepper, and spices of your choice. If using vegetables, sauté them until tender. If you’re going for a sweet option, cut the guava paste or chocolate into small pieces.
- Roll Out the Dough: After the resting period, divide the dough into small balls, about the size of a golf ball. On a lightly floured surface, roll each ball out into a thin circle, approximately 5-7 inches in diameter. Keep the rolled-out dough covered with a cloth to prevent it from drying out.
- Fill the Pastéis: Place a tablespoon of your chosen filling in the center of each dough circle. Be careful not to overfill, as this can cause the pastéis to burst during frying. Fold the dough over the filling to create a half-moon shape, and press the edges together to seal. For a stronger seal, you can crimp the edges with a fork.
- Fry the Pastéis: In a large pot or deep fryer, heat oil over medium heat until it reaches 350°F (175°C). Carefully place the pastéis in the hot oil, a few at a time, and fry for about 3-4 minutes on each side or until golden brown and crispy. Use a slotted spoon to remove them from the oil and drain on paper towels.
- Serve: Allow the pastéis to cool slightly before serving. They can be enjoyed hot with your choice of dipping sauces, such as hot sauce or vinegar, or simply on their own.
Extra Tips:
When preparing pastel, it’s crucial to work with a well-floured surface to prevent sticking and guarantee easy rolling of the dough. If you prefer a lighter version, consider baking the pastéis instead of frying them; just brush them with the egg wash and bake at 375°F (190°C) for about 20 minutes, or until golden.
Additionally, you can make the dough in advance and refrigerate it for up to two days, which can save you time during meal prep. Feel free to get creative with fillings—experimenting with local ingredients can lead to exciting new flavors!