

When I think of Brazilian cuisine, I’m instantly captivated by its vibrant flavors and rich traditions. Each dish brings its own unique story, from the comforting feijoada to the sweet brigadeiros. I’ve put together 10 must-try recipes that truly embody the heart of Brazil. Whether you’re an experienced cook or just starting out, these dishes are sure to bring the taste of Brazil to your kitchen. Ready to explore what’s on the menu?
Feijoada: The Heart of Brazilian Cuisine
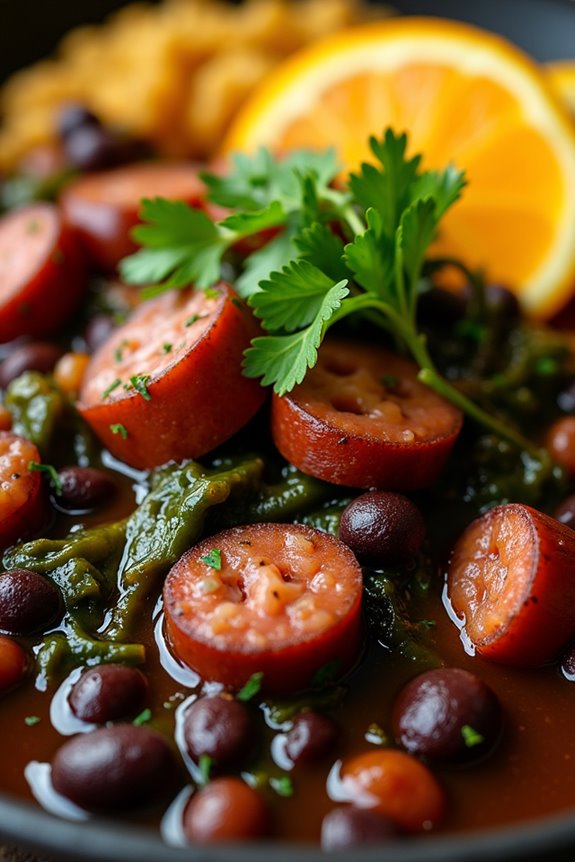
Feijoada is a traditional Brazilian stew that has captured the hearts and palates of people around the world. Often referred to as the national dish of Brazil, this hearty meal is made with black beans and a variety of salted pork or beef products. The origins of feijoada can be traced back to the colonial era, where it was created by African slaves who used available ingredients to make a filling and nourishing meal.
Today, it’s celebrated not only for its rich flavors but also for its communal aspect, often served during family gatherings and festive occasions.
Cooking feijoada is a labor of love, as it requires time to allow the flavors to meld beautifully. The dish is typically accompanied by rice, collard greens, orange slices, and farofa (toasted cassava flour). Each of these sides complements the robust nature of the stew, creating a well-rounded and satisfying dining experience.
Whether you’re hosting a gathering or simply wanting to indulge in a comforting meal, feijoada is a perfect choice that showcases the essence of Brazilian cuisine.
Ingredients (Serves 4-6):
- 1 pound black beans
- 4 cups water
- 1 tablespoon olive oil
- 1 onion, chopped
- 4 cloves garlic, minced
- 1 pound pork shoulder, cut into cubes
- 1/2 pound chorizo sausage, sliced
- 1/2 pound smoked sausage, sliced
- 1/4 pound bacon, chopped
- 2 bay leaves
- 1 teaspoon paprika
- 1/2 teaspoon black pepper
- Salt to taste
- Fresh cilantro for garnish
- Cooked white rice (for serving)
- Collard greens (for serving)
- Orange slices (for serving)
- Farofa (toasted cassava flour, for serving)
Cooking Instructions:
- Prepare the Beans: Rinse the black beans under cold water, then soak them in a large bowl of water overnight. This helps to soften the beans and reduce cooking time.
- Cook the Meats: In a large pot, heat the olive oil over medium heat. Add the chopped bacon and cook until it becomes crispy. Next, add the pork shoulder, chorizo, and smoked sausage, browning them on all sides for about 5-7 minutes.
- Sauté the Aromatics: Once the meats are browned, add the chopped onion and minced garlic to the pot. Sauté for an additional 3-4 minutes until the onion becomes translucent and fragrant.
- Combine Ingredients: Drain the soaked beans and add them to the pot, followed by the bay leaves, paprika, black pepper, and salt. Pour in the 4 cups of water, ensuring all ingredients are submerged.
- Simmer the Stew: Bring the mixture to a boil, then reduce the heat to low. Cover the pot and let it simmer for about 2-3 hours, stirring occasionally. The stew is ready when the beans are tender and the flavors have melded together.
- Serve: Once cooked, taste and adjust seasoning if necessary. Remove the bay leaves before serving. Ladle the feijoada into bowls and garnish with fresh cilantro. Serve with white rice, collard greens, orange slices, and farofa on the side.
Extra Tips: When preparing feijoada, feel free to customize the meats according to your preference or dietary needs. You can add beef jerky or use different cuts of pork.
Additionally, if you have leftovers, the flavors of the stew deepen and improve after a day in the refrigerator, making it even more delicious for the next meal. Don’t rush the cooking process; allowing it to simmer will develop the rich, robust flavors that feijoada is known for.
Enjoy the communal aspect of this dish by sharing it with friends and family!
Pão De Queijo: Cheesy Bread Bites
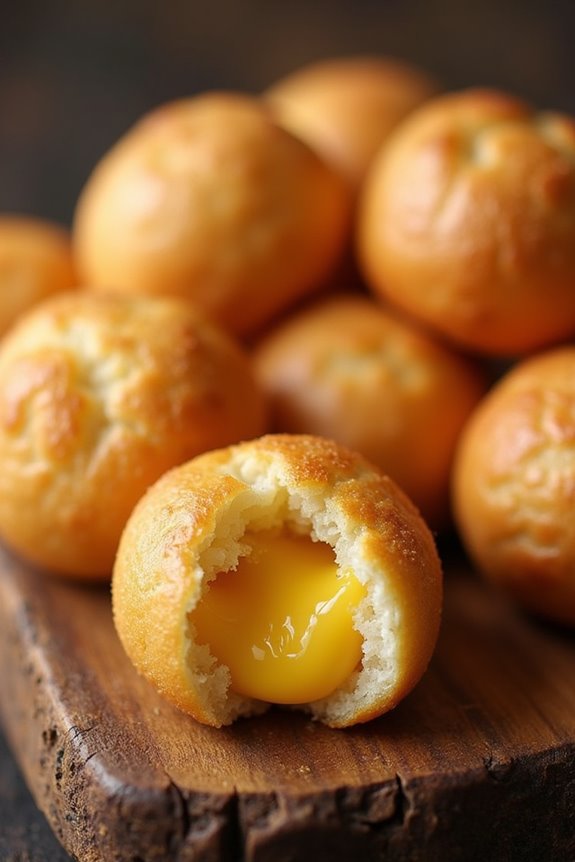
Pão de Queijo, or Brazilian cheese bread, is a delightful and addictive snack that’s loved by many. Originating from the state of Minas Gerais, this gluten-free treat is made from tapioca flour, which gives it a chewy texture that perfectly complements its cheesy flavor.
The distinct combination of cheese, eggs, milk, and oil creates a light and airy bread that can be enjoyed at any time of the day, whether for breakfast, as an appetizer, or simply as a tasty snack.
This recipe is perfect for a gathering, as it serves 4 to 6 people, and the preparation is quite simple. Once you have everything ready, you’ll find that the process of making Pão de Queijo is both quick and rewarding.
These cheesy bites are best served warm, right out of the oven, guaranteeing that their gooey cheese center is still intact. Let’s explore the ingredients and instructions to make this delicious Brazilian delicacy.
Ingredients (Serves 4-6)
- 1 cup tapioca flour
- 1/2 cup milk
- 1/4 cup vegetable oil
- 1 teaspoon salt
- 1 cup grated cheese (preferably Parmesan or a mix of cheeses)
- 2 large eggs
- 1/2 teaspoon baking powder (optional for extra fluffiness)
Cooking Instructions
- Preheat the Oven: Begin by preheating your oven to 375°F (190°C). This guarantees that the Pão de Queijo will bake evenly and acquire a golden-brown crust.
- Combine Liquid Ingredients: In a saucepan over medium heat, combine the milk, vegetable oil, and salt. Stir the mixture until it reaches a gentle boil, then remove it from the heat.
- Mix with Tapioca Flour: In a large mixing bowl, add the tapioca flour. Pour the hot milk mixture over the tapioca flour and stir well using a spatula or wooden spoon until fully combined and smooth. The heat from the liquid will help to hydrate the tapioca flour.
- Incorporate Eggs and Cheese: Allow the mixture to cool slightly before adding the eggs one at a time, mixing well after each addition. Then, fold in the grated cheese until evenly distributed. If you’re using baking powder, fold it in at this stage for a fluffier texture.
- Shape the Dough: With your hands, shape small balls of dough (about 1 inch in diameter) and place them on a baking sheet lined with parchment paper, leaving some space between each ball to allow for expansion.
- Bake: Place the baking sheet in the preheated oven and bake for 15-20 minutes or until the tops are lightly golden and puffy. Avoid opening the oven door during the baking process as this may cause the cheese bread to deflate.
- Cool and Serve: Once baked, remove the Pão de Queijo from the oven and allow them to cool for a few minutes on the baking sheet. Serve warm, and enjoy the cheesy goodness!
Extra Tips
For the best results, use high-quality cheese for a richer flavor. You can experiment with different types of cheese like mozzarella or cheddar to create your own unique version of Pão de Queijo.
Additionally, if you prefer a more savory version, consider adding herbs or spices such as garlic powder or oregano to the dough. Store any leftovers in an airtight container, and they can be reheated in the oven to regain their delightful texture. Enjoy your homemade Pão de Queijo!
Moqueca: A Flavorful Fish Stew
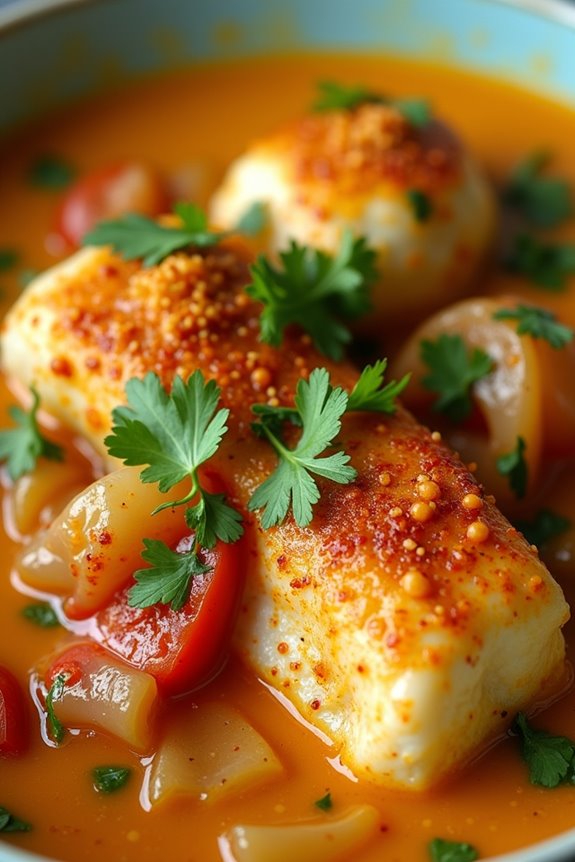
Moqueca is a traditional Brazilian fish stew that hails from the coastal regions of Bahia and Espírito Santo. This aromatic dish highlights the rich and vibrant flavors of the tropics, combining fresh fish with coconut milk, tomatoes, onions, and bell peppers. The preparation of moqueca is both an art and a celebration of Brazilian culture, often enjoyed during family gatherings and festive occasions.
Not only is it delicious, but it also embodies the essence of Brazilian cuisine with its use of fresh, local ingredients and a blend of spices that tantalize the taste buds. The preparation of moqueca varies from region to region, but what remains consistent is its heartwarming and savory flavor profile.
Typically, the fish is marinated prior to cooking, allowing it to absorb the spices and aromatics, which create a depth of flavor in the stew. Served with rice and farofa (toasted cassava flour), moqueca makes for a fulfilling meal that transports you to the sun-soaked beaches of Brazil.
Ingredients (for 4-6 people):
- 2 pounds of firm white fish fillets (such as cod, snapper, or tilapia)
- 1 teaspoon salt
- 1 teaspoon black pepper
- 2 tablespoons lime juice
- 2 tablespoons olive oil
- 1 large onion, sliced
- 1 bell pepper (red or yellow), sliced
- 2 cloves garlic, minced
- 2 medium tomatoes, diced
- 1 can (14 ounces) coconut milk
- 1/2 cup fresh cilantro, chopped
- 1 teaspoon paprika
- 1 teaspoon cayenne pepper (optional, for heat)
- Cooked white rice (for serving)
- Farofa (toasted cassava flour, for serving)
Cooking Instructions:
- Marinate the Fish: In a bowl, season the fish fillets with salt, black pepper, and lime juice. Allow the fish to marinate for at least 30 minutes to soak in the flavors.
- Sauté the Aromatics: In a large pot or Dutch oven, heat the olive oil over medium heat. Add the sliced onion and bell pepper, cooking until they’re softened, about 5 minutes. Stir in the minced garlic and cook for another minute until fragrant.
- Add Tomatoes and Spices: Add the diced tomatoes to the pot, along with the paprika and cayenne pepper (if using). Stir well to combine and let it simmer for about 5 minutes, allowing the tomatoes to break down and create a sauce.
- Incorporate the Coconut Milk: Pour in the coconut milk and bring the mixture to a gentle simmer. Allow it to cook for about 5 minutes, stirring occasionally, so that all the flavors meld together.
- Cook the Fish: Carefully add the marinated fish fillets to the pot, making sure they’re submerged in the coconut milk mixture. Cover the pot and let it simmer for 10-15 minutes, or until the fish is cooked through and flakes easily with a fork.
- Finish with Cilantro: Once the fish is cooked, stir in the chopped cilantro for a fresh flavor. Taste and adjust seasoning if necessary.
- Serve: Serve the moqueca hot over a bed of cooked white rice, along with a side of farofa for added texture.
Extra Tips: When making moqueca, you can customize the dish by adding other seafood like shrimp or mussels for a mixed seafood variation. Additionally, using a variety of colorful bell peppers can enhance the visual appeal of the dish.
If you prefer a thicker stew, let it simmer uncovered for a few extra minutes to reduce the liquid. Finally, don’t hesitate to adjust the level of heat by adding or reducing the cayenne pepper based on your taste preference. Enjoy this delicious taste of Brazil!
Coxinha: Savory Chicken Croquettes

Coxinha is a beloved Brazilian snack that takes the form of savory chicken croquettes, often enjoyed at parties, celebrations, or as a delightful street food treat. The name “coxinha” translates to “little thigh,” referring to the shape of the croquette which resembles a chicken drumstick.
The dish features a delicious filling made from shredded chicken, typically seasoned with spices and herbs, enveloped in a dough made from wheat flour and chicken broth. These croquettes are then breaded and deep-fried to golden perfection, yielding a crispy exterior that contrasts beautifully with the tender chicken filling inside.
Making coxinha is a labor of love, but the end result is well worth the effort. They’re perfect for sharing with family and friends and can be served with a variety of dipping sauces. This recipe is designed to serve 4-6 people, making it an ideal choice for gatherings or simply indulging yourself in a taste of Brazilian cuisine at home.
Ingredients
- For the dough:
- 2 cups all-purpose flour
- 1 cup chicken broth (preferably homemade)
- 2 tablespoons butter
- 1/4 teaspoon salt
- For the filling:
- 2 cups cooked, shredded chicken
- 1 small onion, finely chopped
- 2 cloves garlic, minced
- 1/4 cup cream cheese
- 1/4 cup chopped fresh parsley
- Salt and pepper to taste
- For breading:
- 2 eggs, beaten
- 2 cups breadcrumbs
- Oil for frying
Cooking Instructions
- Prepare the chicken filling: In a skillet, heat a tablespoon of oil over medium heat. Add the chopped onion and garlic, sautéing until they’re translucent. Stir in the shredded chicken, cream cheese, parsley, salt, and pepper. Cook for a few minutes until well combined and heated through. Remove from heat and let it cool.
- Make the dough: In a saucepan, combine the chicken broth, butter, and salt. Bring this mixture to a boil. Once boiling, gradually add the flour while stirring vigorously with a wooden spoon. Continue to cook until the dough pulls away from the sides of the pan and forms a ball. Remove from heat and let it cool slightly.
- Shape the coxinhas: Once the dough is cool enough to handle, take a small piece of dough (about the size of a golf ball) and flatten it in your palm. Place a spoonful of the chicken filling in the center and fold the dough over to encase the filling. Pinch the edges to seal and shape the croquette into a teardrop form. Repeat this process until all the dough and filling are used.
- Bread the coxinhas: Set up a breading station with the beaten eggs in one bowl and breadcrumbs in another. Dip each coxinha in the egg, making certain it’s fully coated, then roll it in the breadcrumbs until well covered.
- Fry the coxinhas: In a deep saucepan or fryer, heat oil to 350°F (175°C). Carefully add a few coxinhas at a time, frying until they’re golden brown on all sides. Use a slotted spoon to transfer them to a paper towel-lined plate to drain excess oil.
- Serve: Allow the coxinhas to cool slightly before serving. They can be enjoyed warm as is or with a dipping sauce of your choice.
Extra Tips
When making coxinha, verify that the dough isn’t too sticky; if it is, sprinkle a little extra flour while kneading.
For added flavor, consider incorporating spices like paprika or cumin into the filling. If you prefer a healthier version, you can bake the coxinhas instead of frying them; just brush them lightly with oil and bake at 375°F (190°C) until golden brown.
Additionally, coxinhas can be frozen before frying; simply thaw and fry them when you’re ready to enjoy this delicious Brazilian treat!
Brigadeiro: Chocolate Truffles

Brigadeiro is a traditional Brazilian sweet that has become a beloved treat not only in Brazil but around the world. These delightful chocolate truffles are made with just a few simple ingredients, making them an easy and enjoyable dessert to prepare.
Originating in the 1940s, brigadeiros have been a staple at Brazilian birthday parties and celebrations, often enjoyed by both children and adults alike. Their rich, fudgy texture and sweet chocolate flavor make them irresistible, and they can be rolled in various toppings, such as sprinkles or crushed nuts, to add a festive touch.
Making brigadeiros is a straightforward process that involves cooking condensed milk, cocoa powder, and butter over low heat until they reach the perfect consistency. Once cooled, the mixture is rolled into small balls and coated in chocolate sprinkles.
These treats aren’t only delicious but can also be customized to suit personal tastes. Whether you’re hosting a party or simply satisfying your sweet tooth, brigadeiros are sure to captivate your family and friends.
Ingredients (Serves 4-6):
- 1 (14-ounce) can sweetened condensed milk
- 2 tablespoons unsweetened cocoa powder
- 2 tablespoons unsalted butter
- A pinch of salt
- Chocolate sprinkles (for rolling)
Cooking Instructions:
- Combine Ingredients: In a medium-sized saucepan, combine the sweetened condensed milk, cocoa powder, unsalted butter, and a pinch of salt. Stir the mixture well to guarantee that the cocoa powder is fully incorporated into the condensed milk.
- Cook the Mixture: Place the saucepan over medium-low heat. Continuously stir the mixture with a wooden spoon or spatula to prevent sticking or burning. Cook for about 10-15 minutes, or until the mixture thickens and starts to pull away from the sides of the pan. You’ll know it’s ready when you can see the bottom of the pan as you stir.
- Cool the Mixture: Once thickened, remove the saucepan from the heat and transfer the brigadeiro mixture to a greased plate or bowl. Allow it to cool to room temperature. This step is essential as it makes the mixture easier to handle when rolling into balls.
- Shape the Brigadeiros: Once cooled, grease your hands with a bit of butter to prevent sticking. Take small amounts of the mixture and roll them into balls, about the size of a cherry.
- Coat the Brigadeiros: Pour the chocolate sprinkles into a shallow dish. Roll each brigadeiro ball in the sprinkles until fully coated. Place the finished brigadeiros on a serving plate.
- Serve and Enjoy: Your brigadeiros are now ready to be enjoyed! They can be served immediately, or stored in an airtight container at room temperature for up to a week.
Extra Tips:
For a unique twist on traditional brigadeiros, consider experimenting with different coatings such as crushed nuts, toasted coconut, or even powdered sugar.
You can also add flavors such as vanilla or almond extract to the mixture for added depth. If you prefer a softer truffle, slightly reduce the cooking time. Brigadeiros are best enjoyed fresh, but they can also be refrigerated for a firmer texture.
Don’t be afraid to get creative with your toppings and enjoy this delightful Brazilian treat!
Acarajé: Spicy Black-Eyed Pea Fritters
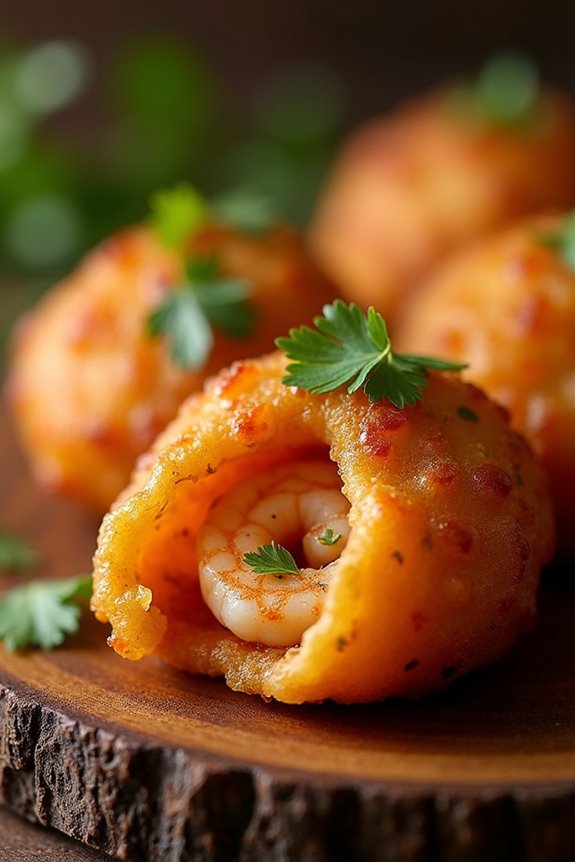
Acarajé is a popular street food from Brazil, particularly in the northeastern region, where the vibrant flavors of African and Brazilian cuisine come together. These delicious fritters are made from black-eyed peas, which are soaked, blended, and shaped into balls before being deep-fried until golden brown.
Traditionally, acarajé is served with a spicy shrimp filling, a zesty sauce, and often accompanied by a side of vatapá, a creamy mixture made with bread, nuts, and coconut milk. The combination of textures and flavors makes acarajé a unique culinary experience that reflects the rich cultural heritage of Brazil.
The preparation of acarajé requires some time and effort, but the end result is definitely worth it. The fritters are crispy on the outside and soft on the inside, while the spicy filling adds an extra kick. This dish isn’t only a treat for the taste buds but also a celebration of Brazilian tradition, often enjoyed as a snack or appetizer during festivities.
So, gather your ingredients and get ready to plunge into the world of Brazilian street food with this delightful acarajé recipe.
Ingredients (Serves 4-6 people)
- 2 cups black-eyed peas (dried)
- 1 medium onion, chopped
- 2 cloves garlic, minced
- 1 teaspoon salt
- 1/2 teaspoon black pepper
- 1 teaspoon cayenne pepper (or to taste)
- 1/2 teaspoon ground cumin
- 1/4 teaspoon baking powder
- Vegetable oil for frying
- 1 cup cooked shrimp, peeled and deveined
- 1/2 cup palm oil (or substitute with vegetable oil)
- 1/4 cup chopped fresh cilantro
- Hot sauce (optional, for serving)
Cooking Instructions
- Soak the Black-Eyed Peas: Place the dried black-eyed peas in a large bowl and cover them with water. Let them soak overnight or for at least 8 hours. This will soften the peas and make them easier to blend.
- Prepare the Fritter Mixture: After soaking, drain and rinse the black-eyed peas. In a food processor, combine the peas, chopped onion, minced garlic, salt, black pepper, cayenne pepper, cumin, and baking powder. Blend until you achieve a thick, smooth batter. Make sure not to over-blend; it should still have some texture.
- Heat the Oil: In a large, deep skillet or frying pan, heat enough vegetable oil (about 2-3 inches deep) over medium-high heat. Make sure the oil is hot enough for frying; you can test it by dropping a small amount of batter into the oil; it should sizzle and float.
- Fry the Fritters: Using a spoon or your hands, carefully scoop out portions of the batter and form them into balls or patties. Gently place them into the hot oil, being careful not to overcrowd the pan. Fry for about 4-5 minutes on each side, or until they’re golden brown and crispy. Once done, remove them from the oil and drain on paper towels.
- Prepare the Shrimp Filling: In a small skillet, heat the palm oil over medium heat. Add the cooked shrimp, cilantro, and any desired spices or hot sauce. Cook for 2-3 minutes until the shrimp is heated through and well combined with the oil and spices.
- Assemble the Acarajé: Once the fritters are fried and slightly cooled, make a slit in the side of each fritter. Fill each fritter with the spicy shrimp mixture, making sure to pack it in well.
- Serve: Serve the acarajé warm, with additional hot sauce on the side if desired. Enjoy this flavorful bite of Brazil!
Extra Tips
When making acarajé, be mindful of the oil temperature while frying; too hot can cause the fritters to burn, while too cool can make them greasy. To keep the fritters crispy, serve them immediately after frying, or store them in a warm oven if needed.
Feel free to customize the filling with your choice of proteins or even vegetables to suit your taste. Enjoy the process, and don’t hesitate to experiment with flavors to create your perfect acarajé!
Farofa: Toasted Cassava Flour Mixture
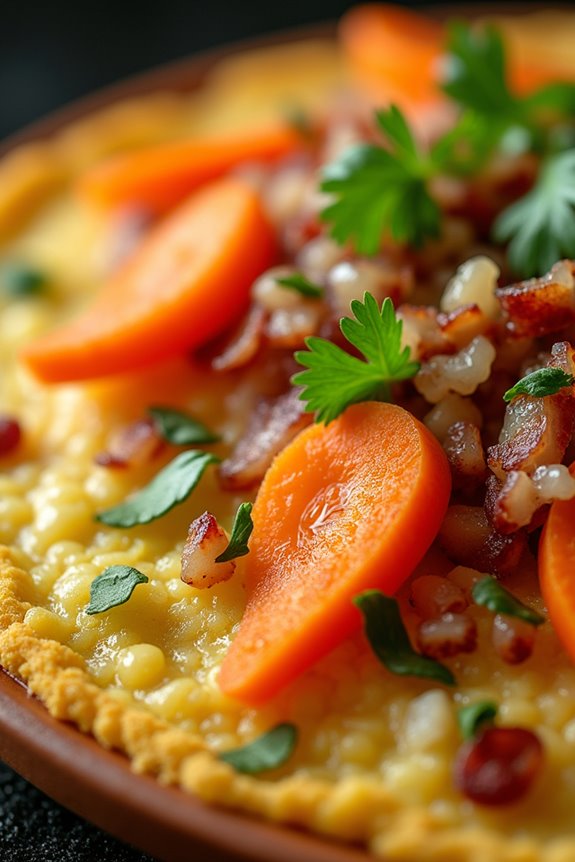
Farofa is a traditional Brazilian dish made from toasted cassava flour, and it’s often served as a side dish during festive occasions, family gatherings, or alongside barbecued meats. This versatile dish can be customized with various ingredients, allowing you to create a version that suits your taste preferences.
The nutty flavor of the toasted cassava flour is a delightful complement to many main dishes, making it a staple in Brazilian cuisine. In addition to its delicious flavor, farofa is also celebrated for its texture and the way it enhances the overall dining experience.
The dish typically includes a combination of onions, garlic, and sometimes bacon or sausage, adding depth and richness to the dish. Whether you enjoy it plain or mixed with additional ingredients, farofa is sure to impress your guests and become a favorite at your table.
Ingredients (Serves 4-6):
- 2 cups cassava flour
- 4 tablespoons butter or olive oil
- 1 medium onion, finely chopped
- 2 cloves garlic, minced
- 1/2 cup cooked bacon, chopped (optional)
- 1/2 cup grated carrots
- 1/4 cup parsley, chopped
- Salt, to taste
- Black pepper, to taste
Cooking Instructions:
- Prepare the Ingredients: Begin by gathering all the ingredients. Chop the onion, mince the garlic, and, if using, cook the bacon until it’s crispy and then chop it into small pieces. Grate the carrot and chop the parsley. This preparation will streamline the cooking process.
- Toast the Cassava Flour: In a large skillet over medium heat, add the cassava flour. Stir continuously for about 5-7 minutes, or until the flour is golden brown and fragrant. This step is vital as it develops the nutty flavor of the farofa. Be careful not to let it burn.
- Cook the Aromatics: In the same skillet, add the butter or olive oil. Once melted, add the chopped onion and cook for about 3-4 minutes until translucent. Then, add the minced garlic and cook for an additional minute until fragrant. The aromatics will enhance the flavor of the dish.
- Combine Ingredients: If using bacon, add it to the skillet along with the grated carrots. Stir everything together and cook for another 2-3 minutes. The heat will soften the carrots and help meld the flavors.
- Mix in the Cassava Flour: Gradually add the toasted cassava flour to the skillet, mixing well to combine all the ingredients. Season with salt and black pepper to taste. Continue to stir for another 2-3 minutes until everything is well incorporated and heated through.
- Finish and Serve: Remove the skillet from heat and stir in the chopped parsley. This adds a fresh touch and a pop of color to the dish. Serve the farofa warm as a side dish, pairing it with grilled meats, rice, or beans.
Extra Tips:
When making farofa, feel free to experiment with additional ingredients such as chopped bell peppers, olives, or even raisins for a hint of sweetness. Adjust the seasoning to your liking, and remember that the toasting process is key to achieving the perfect flavor and texture.
If you prefer a gluten-free option, simply verify that the cassava flour you choose is certified gluten-free. Farofa can also be made in advance and reheated, making it a convenient choice for meal prep or potlucks.
Bolo De Rolo: Rolled Guava Cake

Bolo de Rolo is a traditional Brazilian dessert that hails from the state of Pernambuco. This delightful cake is known for its beautiful rolled appearance and its sweet, fruity filling made from guava paste. The cake is incredibly light, with a delicate sponge that pairs perfectly with the rich guava flavor, making it a favorite at festive gatherings and family celebrations throughout Brazil.
Its unique presentation, which resembles a cake roll, not only captivates the eye but also tantalizes the taste buds, leaving an indelible mark on anyone fortunate enough to try it.
Making Bolo de Rolo requires a bit of patience, as the technique of rolling the cake can be challenging for beginners. However, the end result is worth the effort, as each slice reveals the stunning spiral of guava filling wrapped in soft cake.
Whether you’re preparing this cake for a special occasion or simply to satisfy your sweet tooth, Bolo de Rolo is sure to impress and delight. So gather your ingredients and get ready to create this Brazilian classic that’s both delicious and visually striking.
Ingredients (Serves 4-6 People)
- 4 large eggs
- 1 cup granulated sugar
- 1 cup all-purpose flour
- 1/2 teaspoon baking powder
- 1/4 cup unsalted butter, melted
- 1 teaspoon vanilla extract
- 1 cup guava paste, softened
- Powdered sugar, for dusting
Cooking Instructions
- Preheat the Oven: Begin by preheating your oven to 350°F (175°C). This step is essential as it guarantees that the cake will rise properly and cook evenly.
- Prepare the Baking Pan: Line a 10×15-inch jelly roll pan with parchment paper and lightly grease it with cooking spray or butter. This will prevent the cake from sticking and will make it easier to roll later.
- Mix the Batter: In a large mixing bowl, whisk together the eggs and granulated sugar until the mixture is pale and fluffy, about 5 minutes. This aeration is significant as it helps create a light and airy cake texture.
- Combine Dry Ingredients: In a separate bowl, sift together the flour and baking powder. This helps to remove any lumps and guarantees even distribution of the leavening agent.
- Fold in Ingredients: Gradually fold the dry mixture into the egg and sugar mixture using a spatula. Be gentle to maintain the airiness of the batter. Then, add the melted butter and vanilla extract, folding until just combined.
- Pour and Spread the Batter: Pour the batter into the prepared jelly roll pan and spread it evenly with a spatula. Confirm the batter reaches all corners of the pan for an even bake.
- Bake the Cake: Place the pan in the preheated oven and bake for 12-15 minutes or until the cake is light golden brown and springs back when touched lightly.
- Cool the Cake: Once baked, remove the cake from the oven and let it cool in the pan for about 5 minutes. Then, carefully invert it onto a clean kitchen towel dusted with powdered sugar.
- Spread the Guava Paste: Once the cake is cool enough to handle, gently peel off the parchment paper. Spread the softened guava paste evenly over the top of the cake.
- Roll the Cake: Starting from one end, carefully roll the cake and towel together into a tight log. This step is essential as it shapes the cake and incorporates the filling.
- Chill and Slice: Wrap the rolled cake in plastic wrap and refrigerate for at least 1 hour to set. Once chilled, unwrap and slice into 1-inch pieces to serve.
Extra Tips
When making Bolo de Rolo, it’s important to confirm that the guava paste is soft enough to spread easily; you can warm it slightly in the microwave if needed.
Additionally, practice rolling the cake with the towel to avoid cracking; a gentle touch is key. If you want to elevate the presentation, consider dusting the sliced cake rolls with additional powdered sugar or serving them alongside a dollop of whipped cream.
Enjoy your culinary adventure with this iconic Brazilian treat!
Pastel: Crispy Fried Pastries
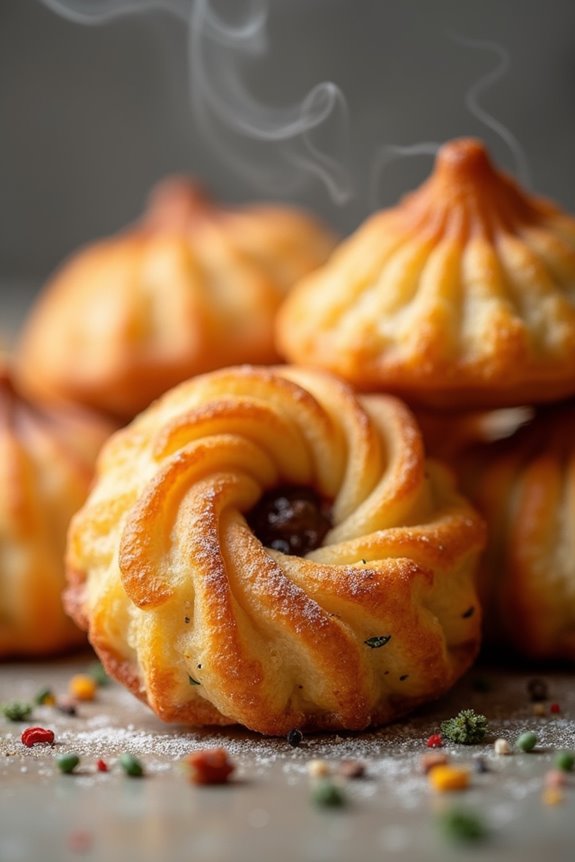
Pastel is a beloved Brazilian street food that showcases a delightful combination of a crispy, flaky crust and a variety of savory or sweet fillings. Originating from the influence of Chinese immigrants, these pastries have become an integral part of Brazilian cuisine, often enjoyed as a snack or appetizer at markets and street fairs.
The beauty of pastel lies in its versatility; you can fill it with cheese, meats, vegetables, or even sweet fillings like chocolate or guava paste. Making pastel at home allows you to customize the fillings to your liking, offering a delicious way to explore Brazilian flavors. The process may seem intricate, but with a bit of patience, you’ll be rewarded with a batch of golden-brown pastries that are crispy on the outside and bursting with flavor on the inside.
Pair them with a side of hot sauce or vinegar-based salsa for an authentic experience.
Ingredients (Serves 4-6 people):
- 2 cups all-purpose flour
- 1/4 cup vegetable oil
- 1 teaspoon salt
- 1/2 cup cold water
- Filling of your choice (e.g., 1 cup shredded cheese, 1 cup ground beef, or 1 cup sautéed vegetables)
- Oil for frying
Cooking Instructions:
1. Prepare the Dough: In a mixing bowl, combine 2 cups of all-purpose flour and 1 teaspoon of salt. Make a well in the center, then add 1/4 cup of vegetable oil. Gradually pour in 1/2 cup of cold water while mixing the dough with your hands or a fork until it comes together. Knead the dough on a lightly floured surface for about 5-7 minutes until it’s smooth and elastic.
Let it rest for 30 minutes, covered with a damp cloth.
2. Prepare the Filling: While the dough is resting, prepare your filling of choice. If using ground beef, cook it in a skillet over medium heat, seasoning with salt, pepper, and any desired spices. For cheese, simply shred it. You can also use cooked vegetables or any combination that pleases your palate.
Make sure the filling isn’t too wet to avoid soggy pastries.
3. Roll Out the Dough: After the resting time, divide the dough into small balls (about the size of a golf ball). On a floured surface, roll each ball out into thin circles, approximately 5-6 inches in diameter.
The thinner the dough, the crispier your pastel will be.
4. Fill the Pastries: Place about 1-2 tablespoons of your filling on one half of each dough circle. Be careful not to overfill, as this can cause the pastries to burst while frying. Fold the other half over to create a half-moon shape, and press the edges together to seal.
For extra security, you can crimp the edges with a fork.
5. Fry the Pastéis: In a deep skillet or frying pan, heat oil over medium-high heat until it reaches about 350°F (175°C). Carefully place the filled pastries in the hot oil, frying a few at a time to avoid overcrowding.
Fry for 2-3 minutes on each side or until they’re golden brown and crispy. Remove them with a slotted spoon and drain on paper towels.
6. Serve: Allow the pastéis to cool slightly before serving. They’re best enjoyed hot and can be paired with your favorite dipping sauce or salsa.
Extra Tips:
When making pastel, it’s essential to keep the dough and filling dry to prevent leaks during frying. You can also experiment with different fillings, such as chicken or seafood, to cater to your taste preferences.
If you want to prepare them in advance, you can freeze the un-fried pastéis; just make sure to separate each one with parchment paper to prevent sticking. Fry them straight from frozen, adjusting the cooking time as needed for a delicious homemade treat!
Vatapá: Creamy Shrimp and Bread Dish
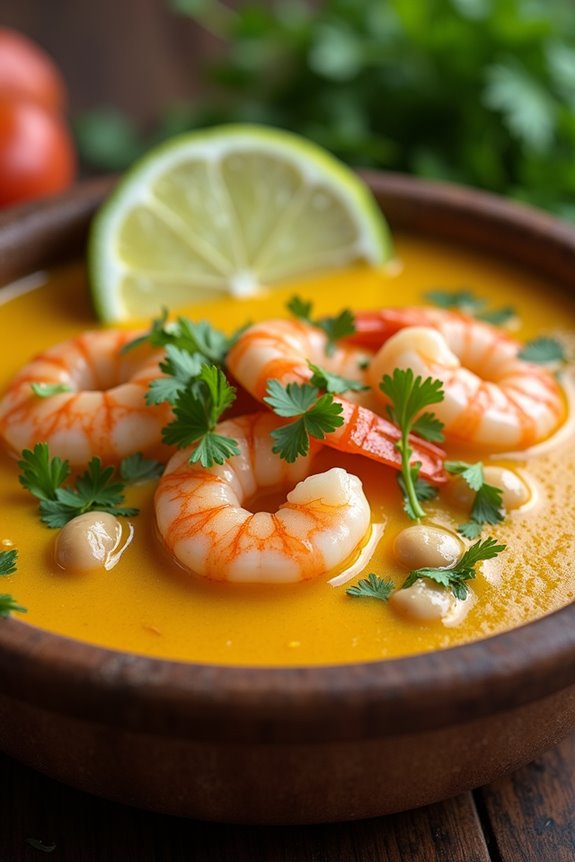
Vatapá is a traditional Brazilian dish that hails from the northeastern region of the country, particularly Bahia. Its rich, creamy texture and vibrant flavors make it a favorite among locals and visitors alike. This dish combines the deliciousness of shrimp with the comforting qualities of bread, creating a hearty meal that’s both satisfying and indulgent. The use of coconut milk, peanuts, and spices adds to its unique flavor profile, making Vatapá a standout dish in Brazilian cuisine.
Preparing Vatapá is a delightful experience that brings together a variety of ingredients, resulting in a dish that’s perfect for sharing. Served with rice or a side of salad, this creamy shrimp and bread concoction is ideal for family gatherings or festive occasions. With a little bit of preparation and the right ingredients, you can bring the taste of Brazil into your kitchen and impress your loved ones with this delectable dish.
Ingredients (Serves 4-6):
- 1 pound shrimp, peeled and deveined
- 4 slices of stale bread (preferably French or white)
- 1 cup coconut milk
- 1/2 cup peanuts, toasted and ground
- 1 onion, finely chopped
- 2 cloves garlic, minced
- 1 tablespoon ginger, minced
- 1/4 cup palm oil (or vegetable oil)
- 1 teaspoon ground cumin
- 1 teaspoon ground coriander
- 1/2 teaspoon chili powder (or to taste)
- Salt and black pepper, to taste
- Fresh cilantro, for garnish
- Lime wedges, for serving
Cooking Instructions:
- Prepare the Shrimp: In a large skillet over medium heat, add the palm oil. Once hot, add the chopped onion and sauté until it becomes translucent, about 3-4 minutes. Then, add the minced garlic and ginger, stirring for an additional minute until fragrant. Add the shrimp to the skillet, season with salt, pepper, and chili powder, and cook until they turn pink, about 3-5 minutes. Remove the shrimp from the skillet and set aside.
- Make the Bread Mixture: In the same skillet, add the ground peanuts and toast for about 2 minutes until they become aromatic. Next, tear the stale bread into pieces and add it to the skillet along with the coconut milk. Stir well to combine all the ingredients, ensuring that the bread soaks up the coconut milk and peanut mixture. Allow this to simmer on low heat for about 5 minutes, stirring occasionally.
- Blend the Mixture: Once the bread has softened, transfer the mixture to a blender or food processor. Blend until smooth and creamy, adding a little more coconut milk if needed to achieve your desired consistency. Taste and adjust seasoning with salt and pepper as necessary.
- Combine and Serve: Return the blended mixture to the skillet and add the cooked shrimp back into the mixture. Stir well to combine, allowing everything to heat through. Cook for an additional 2-3 minutes. Once heated, remove from heat and transfer to a serving dish. Garnish with fresh cilantro and serve with lime wedges on the side.
Extra Tips:
When making Vatapá, you can customize the shrimp with other seafood like fish or even crab, depending on your preference. For a spicier kick, consider adding diced fresh chili peppers or increasing the chili powder to suit your taste.
Additionally, allowing the dish to sit for a few minutes before serving will deepen the flavors, making it even more delicious. Pairing Vatapá with a revitalizing salad or a side of fluffy rice will balance the richness of the dish beautifully. Enjoy your culinary journey into Brazilian flavors!