

When I think of Colombian holiday celebrations, a vibrant table filled with flavors and comforting aromas comes to mind. Each dish tells its own story, from the hearty Ajiaco soup to sweet Buñuelos that bring joy to everyone. These recipes are not only delicious but also tie together cherished traditions. Let’s explore these joyful culinary delights that capture the essence of Colombian festivities. You won’t want to miss what’s next!
Ajiaco – Hearty Chicken and Potato Soup
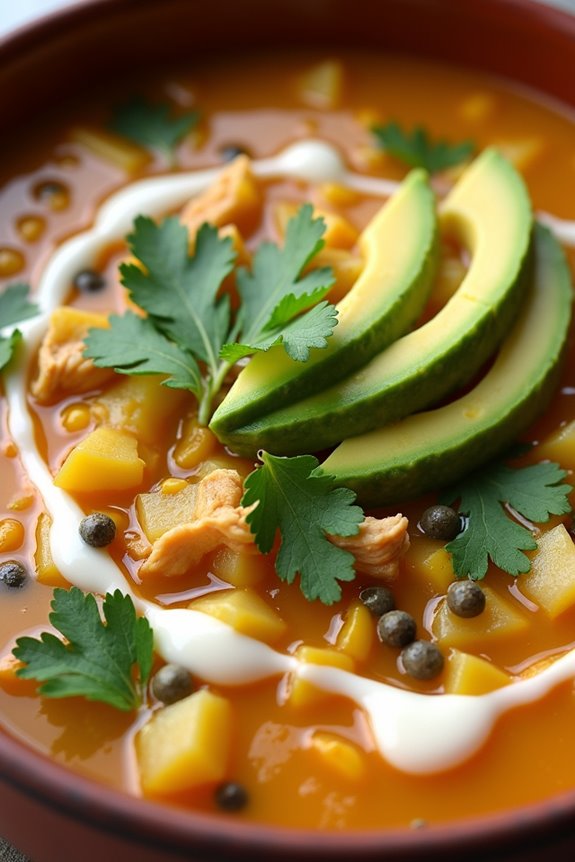
Ajiaco is a traditional Colombian dish that embodies comfort and warmth, making it a perfect addition to any holiday gathering. This hearty chicken and potato soup isn’t only filling but also packed with flavors that represent the rich culinary heritage of Colombia. The dish combines different types of potatoes, fresh herbs, and tender chicken, resulting in a delightful meal that’s sure to please your family and friends.
Served with avocado, capers, and cream on the side, Ajiaco is a dish that invites customization according to personal taste.
The origins of Ajiaco can be traced back to the Andean region of Colombia, where it’s often celebrated for its nourishing properties. The use of “guasca,” an aromatic herb native to Colombia, gives the soup its distinctive flavor. As you prepare this dish, you’ll experience a blend of textures and aromas that will transport you to the vibrant streets of Bogotá.
Whether served on a chilly evening or during festive occasions, Ajiaco is a dish that not only satisfies hunger but also warms the heart.
Ingredients (Serves 4-6):
- 4 boneless, skinless chicken breasts
- 1 tablespoon olive oil
- 1 large onion, chopped
- 3 cloves garlic, minced
- 2 medium russet potatoes, peeled and diced
- 2 medium yellow potatoes, peeled and diced
- 1 cup of corn on the cob or frozen corn
- 6 cups of chicken broth
- 1 cup of chopped fresh cilantro
- 1 teaspoon dried guasca (or substitute with oregano)
- Salt and pepper to taste
- 1 avocado, sliced (for serving)
- 1 cup of heavy cream (for serving)
- Capers (for serving)
Cooking Instructions:
- Sauté the Chicken: In a large pot, heat the olive oil over medium heat. Add the chicken breasts and cook for about 5-7 minutes on each side until they’re browned. Remove the chicken from the pot and set aside.
- Cook the Aromatics: In the same pot, add the chopped onion and minced garlic. Sauté for about 3-4 minutes until the onions are translucent and fragrant.
- Add Potatoes and Broth: Return the chicken to the pot and add the diced russet and yellow potatoes, corn, chicken broth, and dried guasca. Stir to combine all the ingredients.
- Simmer the Soup: Bring the mixture to a boil, then reduce the heat to low. Cover the pot and let it simmer for about 30-40 minutes, or until the potatoes are tender and the chicken is fully cooked.
- Shred the Chicken: Once the chicken is cooked, remove it from the pot and shred it using two forks. Return the shredded chicken to the soup and stir well.
- Season and Garnish: Season the soup with salt, pepper, and chopped cilantro to taste. Serve hot with slices of avocado, a drizzle of heavy cream, and a sprinkle of capers on top.
Extra Tips:
When making Ajiaco, feel free to adjust the types of potatoes based on your preference or availability; the combination of potatoes adds depth to the flavor and texture.
Additionally, if you can’t find guasca, using dried oregano is a great alternative, though it may alter the authentic taste slightly. To enhance the richness of the soup, consider adding a splash of white wine while sautéing the onions, or let the soup simmer longer for deeper flavors.
Enjoy this dish with some crusty bread for a complete meal.
Buñuelos – Fried Cheese Balls

Buñuelos are a beloved Colombian treat, often enjoyed during the festive season, particularly around Christmas and the New Year. These delectable fried cheese balls are crispy on the outside and soft on the inside, making them an irresistible snack or dessert. The combination of cheese and dough creates a unique flavor profile that perfectly complements the holiday spirit.
They can be served plain or dusted with powdered sugar, and their delightful texture makes them a favorite among both children and adults.
Making buñuelos at home is easier than you might think. With a few simple ingredients, you can whip up a batch of these savory treats to impress your family and friends. The key to achieving the perfect buñuelo lies in the right balance of ingredients and frying them at the right temperature.
Follow this recipe to bring a taste of Colombian tradition to your holiday table.
Ingredients (Serving Size: 4-6 people)
- 1 cup of queso fresco or other soft cheese, crumbled
- 1 cup of tapioca flour (also known as yuca flour)
- 1/2 cup of milk
- 1 egg
- 1/2 teaspoon of baking powder
- 1/4 teaspoon of salt
- Oil for frying
- Powdered sugar for dusting (optional)
Cooking Instructions
1. Prepare the Dough: In a mixing bowl, combine the crumbled queso fresco, tapioca flour, baking powder, and salt. Mix these dry ingredients thoroughly to guarantee even distribution.
Then, in a separate bowl, whisk together the milk and egg until well combined. Gradually add the wet mixture to the dry ingredients, stirring until a soft dough forms.
2. Knead the Dough: Once the dough is formed, gently knead it with your hands for a few minutes until it becomes smooth and pliable. This process helps to integrate all the ingredients and guarantees a uniform texture in the buñuelos.
3. Shape the Buñuelos: Take small portions of the dough (about the size of a golf ball) and roll them into balls. Make sure they’re smooth and without cracks, as this will help them maintain their shape during frying.
4. Heat the Oil: In a deep frying pan or pot, add enough oil to submerge the buñuelos completely. Heat the Oil over medium heat until it reaches about 350°F (175°C). You can test the oil by dropping a small piece of dough into it; if it sizzles and rises to the surface, the oil is ready.
5. Fry the Buñuelos: Carefully add the buñuelo balls to the hot oil in batches, ensuring not to overcrowd the pan. Fry them for about 4-5 minutes, turning occasionally until they’re golden brown and crispy all over.
Use a slotted spoon to remove them from the oil and place them on a plate lined with paper towels to drain excess oil.
6. Serve: Once the buñuelos have cooled slightly, dust them with powdered sugar if desired. Serve them warm for the best taste and texture. Enjoy your homemade Colombian buñuelos with family and friends!
Extra Tips
For the best results, verify the oil is at the right temperature before frying; too hot, and the buñuelos will burn, too cool, and they’ll become greasy.
If you can’t find queso fresco, you can substitute it with a similar soft cheese, but the flavor may vary slightly. Additionally, feel free to experiment by adding spices or herbs into the dough for a unique twist.
Store any leftovers in an airtight container, but be aware that buñuelos are best enjoyed fresh!
Natilla – Creamy Custard Dessert
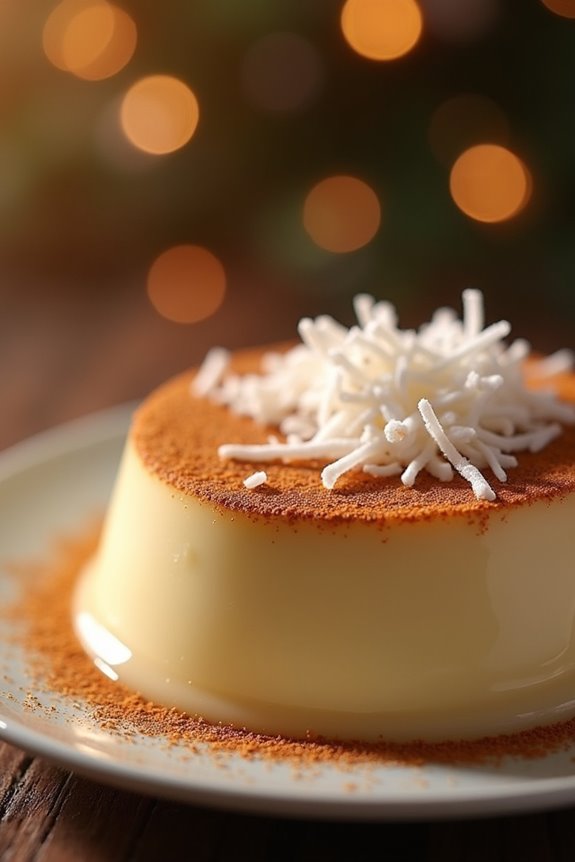
Natilla is a traditional Colombian dessert that often graces the tables during festive occasions, particularly around Christmas and New Year celebrations. This decadent and creamy custard is made with simple ingredients like milk, sugar, and cornstarch, and it’s flavored with cinnamon and vanilla, giving it a distinctive taste that warms the heart.
While it may seem simple to prepare, the texture and consistency are essential to achieving the perfect natilla, which should be smooth and creamy with a delightful hint of spice.
Preparing natilla at home is a wonderful way to connect with Colombian culture and share a piece of it with your loved ones. The dish is typically served cold and can be garnished with coconut, raisins, or a sprinkle of cinnamon on top. This recipe will guide you through making enough natilla to serve 4-6 people, guaranteeing everyone can indulge in this delicious treat.
Ingredients (Serves 4-6):
- 4 cups whole milk
- 1 cup sugar
- 1/2 cup cornstarch
- 1 teaspoon vanilla extract
- 1 cinnamon stick
- 1/4 teaspoon ground cinnamon (for garnish)
- 1/4 cup shredded coconut (optional, for garnish)
- A pinch of salt
Cooking Instructions:
- Combine the Milk and Cinnamon: In a large saucepan, pour in the 4 cups of whole milk and add the cinnamon stick. Heat the mixture over medium heat until it’s warm but not boiling, allowing the flavors of the cinnamon to infuse into the milk. Stir occasionally to prevent the milk from scorching.
- Mix the Dry Ingredients: In a separate bowl, combine the 1 cup of sugar, 1/2 cup of cornstarch, and a pinch of salt. Whisk these dry ingredients together until they’re evenly mixed. This step is vital as it prevents lumps from forming in the custard.
- Create a Slurry: Once the milk is warm, remove the cinnamon stick and take about a cup of the warm milk to the bowl with the dry ingredients. Whisk the mixture vigorously to create a slurry, making sure that the cornstarch and sugar dissolve completely without clumps.
- Combine and Thicken: Gradually pour the slurry back into the saucepan with the remaining warm milk. Continue to cook over medium heat, stirring constantly. As the mixture heats, it will begin to thicken. This process usually takes about 5-10 minutes. Keep stirring until the custard reaches a pudding-like consistency.
- Flavor the Custard: Once thickened, remove the saucepan from the heat and stir in the 1 teaspoon of vanilla extract. This adds a lovely flavor to your natilla. Make sure to mix it well to distribute the vanilla evenly throughout the custard.
- Pour and Chill: Pour the natilla into individual serving dishes or a large serving bowl. Let it cool at room temperature for a while before transferring it to the refrigerator. Chill for at least 2-3 hours or until completely set.
- Garnish and Serve: Before serving, sprinkle the top with 1/4 teaspoon of ground cinnamon and, if desired, add shredded coconut for a delightful texture. Enjoy your natilla chilled!
Extra Tips:
To achieve the best texture for your natilla, make sure to stir constantly while it cooks. This will help prevent any lumps and secure a smooth custard.
If you find that the custard has thickened too much, you can whisk in a little more milk to adjust the consistency before chilling. Additionally, feel free to experiment with flavors by adding a splash of rum or some grated lime zest for a unique twist on this classic dessert.
Tamales – Flavorful Corn Dough Wraps

Tamales are a cherished traditional dish in Colombian cuisine, often prepared during festive occasions and family gatherings. These delightful parcels consist of a seasoned corn dough filled with various ingredients, wrapped in corn husks, and then steamed to perfection.
The versatility of tamales allows for an array of fillings, ranging from meats and vegetables to sweet options, making them a favorite choice for many.
Making tamales requires a bit of preparation, but the process is rewarding and brings the family together in the kitchen. You’ll find that the corn dough, known as masa, is the star of the dish, providing a soft and flavorful exterior that complements the filling inside.
Once assembled and cooked, tamales are typically served with salsa or a side of avocado, enhancing their taste and making them a delightful meal.
Ingredients (Serves 4-6)
- 2 cups of masa harina (corn flour)
- 1 teaspoon baking powder
- 1 teaspoon salt
- 1/2 cup vegetable shortening or lard
- 1 1/2 cups chicken or vegetable broth
- 1 cup cooked and shredded chicken or pork (or desired filling)
- 1/2 cup diced vegetables (e.g., bell peppers, carrots, or corn)
- 1/4 cup salsa or sauce (optional for serving)
- Dried corn husks (soaked in warm water for 30 minutes)
Instructions
- Prepare the Corn Husks: Start by soaking the dried corn husks in warm water for about 30 minutes. This step is vital as it softens the husks and makes them pliable, allowing you to wrap the tamales easily.
- Make the Masa: In a large mixing bowl, combine the masa harina, baking powder, and salt. Mix well. In a separate bowl, cream the vegetable shortening or lard until fluffy. Gradually add the masa mixture to the creamed fat, alternating with the chicken or vegetable broth. Mix until you achieve a smooth and spreadable dough.
- Assemble the Tamales: Take a soaked corn husk and lay it flat on a clean surface. Spread about 2-3 tablespoons of masa dough onto the center of the husk, leaving space at the edges. Add a tablespoon of your chosen filling on top of the masa. Fold the sides of the husk over the masa and filling, then fold up the bottom to secure it. Repeat this process until you have filled all the husks.
- Steam the Tamales: Place a steamer basket in a large pot filled with water (making sure the water doesn’t touch the bottom of the basket). Arrange the tamales upright in the basket, with the open ends facing up. Cover with a damp cloth and steam for about 1 to 1.5 hours, or until the masa easily pulls away from the husk.
- Serve and Enjoy: Once cooked, remove the tamales from the steamer and let them cool for a few minutes. Serve them warm with salsa or any preferred dipping sauce, and enjoy the delicious flavors of Colombian tamales.
Extra Tips
When making tamales, it’s essential to confirm that the masa is well-hydrated and seasoned to your taste, as this will greatly affect the final flavor.
You can experiment with different fillings to suit your preference, including vegan options or variations with cheese and herbs. Additionally, if you’re preparing a large batch, tamales freeze well, allowing you to enjoy them at a later date. Just steam them again from frozen before serving!
Lechona – Roasted Pork With Rice
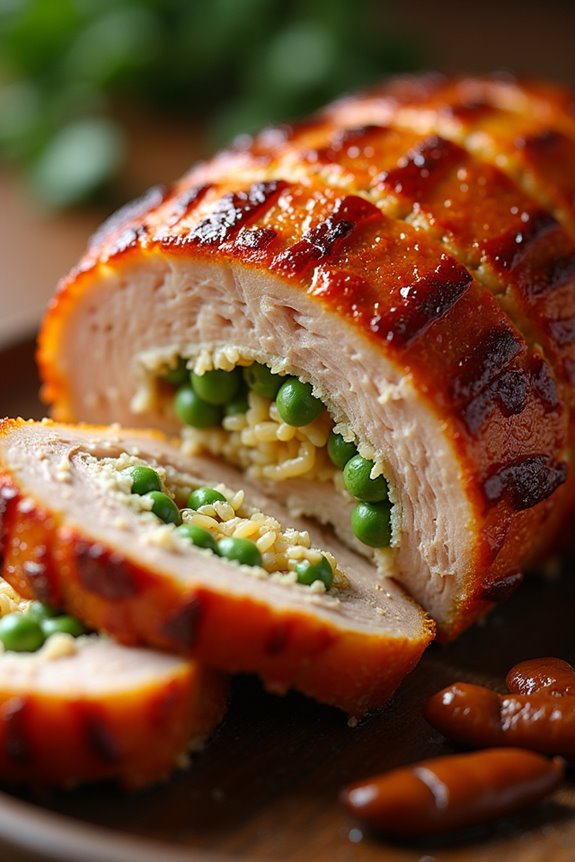
Lechona is a traditional Colombian dish that embodies the vibrant culture and flavors of the country. This hearty meal features a whole roasted pig stuffed with a savory mixture of rice, peas, spices, and aromatic herbs. Often served during special occasions and festive gatherings, lechona is a centerpiece that brings people together to enjoy a delicious feast, making it a beloved recipe in Colombian cuisine. The combination of crispy skin, tender meat, and flavorful stuffing makes every bite a true delight.
Preparing lechona requires some time and patience, but the end result is well worth the effort. The key to a perfect lechona is guaranteeing that the pork is well-seasoned and cooked slowly to achieve that irresistible crispy skin while keeping the meat juicy and flavorful. While traditionally prepared in a whole pig, you can also adapt this recipe using a pork shoulder or belly, making it more accessible for home cooks. Gather your ingredients and get ready to impress your family and friends with this delightful Colombian holiday recipe!
Ingredients (Serves 4-6)
- 4-5 pounds of pork shoulder or pork belly
- 2 cups of white rice
- 1 cup of green peas (fresh or frozen)
- 1 large onion, chopped
- 4 cloves of garlic, minced
- 1 tablespoon of cumin
- 2 teaspoons of paprika
- 1 teaspoon of black pepper
- 1 teaspoon of salt
- 1/4 cup of olive oil
- 2 cups of chicken broth
- 1/2 cup of fresh cilantro, chopped
- 1/4 cup of lime juice
- Banana leaves (optional, for wrapping)
Cooking Instructions
- Prepare the Pork: Begin by patting the pork shoulder or belly dry with paper towels. Using a sharp knife, score the skin in a crisscross pattern, being careful not to cut into the meat. This will help render the fat and create a crispy skin during cooking.
- Make the Filling: In a large saucepan, heat the olive oil over medium heat. Add the chopped onion and minced garlic, sautéing until translucent. Stir in the rice, cumin, paprika, black pepper, and salt, cooking for an additional 2-3 minutes.
- Add Peas and Broth: Add the green peas and chicken broth to the rice mixture. Bring it to a boil, then reduce the heat to low, cover, and simmer for about 15-20 minutes, or until the rice is cooked and has absorbed all the liquid. Remove from heat and stir in the chopped cilantro and lime juice.
- Stuff the Pork: Preheat your oven to 350°F (175°C). Once the rice filling is ready, carefully stuff it into the scored pork, pressing down to pack it tightly. If you have banana leaves, you can wrap the pork in them for added flavor and moisture.
- Roast the Pork: Place the stuffed pork in a roasting pan, skin side up. Roast in the preheated oven for about 3-4 hours, or until the skin has become crispy and the internal temperature reaches at least 195°F (90°C). Baste the pork occasionally with its own juices.
- Rest and Serve: Once cooked, remove the lechona from the oven and let it rest for about 15-20 minutes before carving. This allows the juices to redistribute. Serve the lechona with the rice filling and enjoy!
Extra Tips
When preparing lechona, it’s essential to season the pork well and allow it to marinate for a few hours or overnight if time permits, as this enhances the flavor considerably.
If you’re using a smaller cut of pork, adjust the cooking time accordingly, and keep an eye on the skin to guarantee it gets crispy without burning. Additionally, consider serving lechona with traditional Colombian sides like arepas or avocado to elevate your meal experience further. Enjoy the celebration of flavors that come with this iconic dish!
Arepas – Cornmeal Patties With Fillings
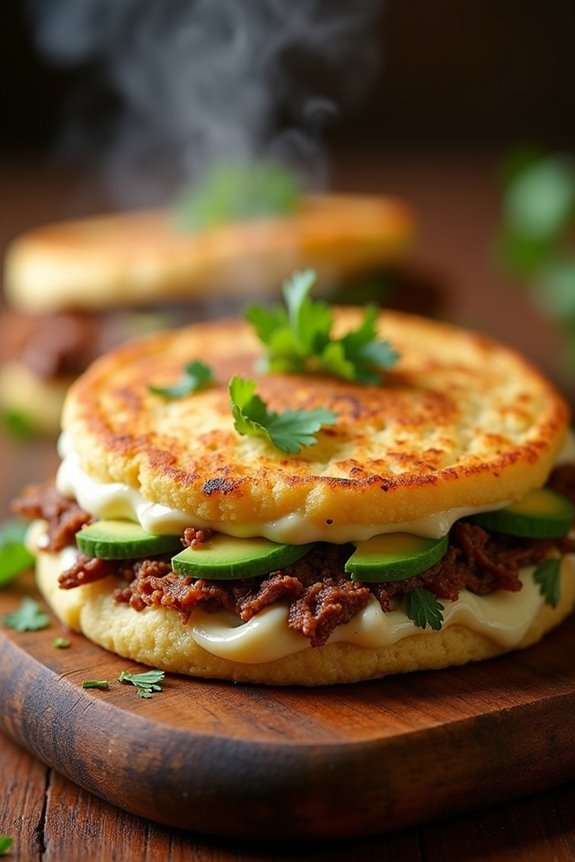
Arepas are a beloved staple in Colombian cuisine, made from ground maize dough and typically served as a versatile base for a variety of fillings. These delightful cornmeal patties can be grilled, baked, or fried, allowing you to achieve the perfect texture whether you prefer a crispy exterior or a soft interior. Common fillings include cheese, meats, and vegetables, making arepas a fantastic dish for both breakfast and dinner, or even as a snack.
Making arepas is a straightforward process that brings the rich flavors of Colombia to your kitchen. With just a few ingredients, you can whip up a batch of these delicious patties and customize them with your favorite fillings. Gather your loved ones around the table to enjoy this traditional dish, which isn’t only delicious but also a great way to explore Colombian culture through its food.
Ingredients (Serves 4-6)
- 2 cups of pre-cooked cornmeal (masarepa)
- 2 ½ cups of warm water
- 1 teaspoon of salt
- 1 tablespoon of vegetable oil (plus more for cooking)
- Optional fillings (cheese, shredded beef, chicken, avocado, etc.)
Cooking Instructions
- Prepare the Dough: In a large mixing bowl, combine the pre-cooked cornmeal and salt. Gradually add warm water to the cornmeal while mixing with your hands or a spoon until the mixture is smooth and holds together. You may need to adjust the water slightly to achieve the right consistency; the dough should be moist but not sticky.
- Shape the Arepas: Divide the dough into equal portions, about the size of a golf ball. Roll each portion into a ball, then flatten it gently with the palms of your hands to form a patty about ½ inch thick. Make sure the edges are smooth to prevent them from cracking while cooking.
- Cook the Arepas: Heat a skillet or griddle over medium heat and add a tablespoon of vegetable oil. Once the oil is hot, place the arepas in the skillet, leaving enough space between them. Cook for about 5-6 minutes on each side, or until they’re golden brown and crispy on the outside. If you prefer a softer texture, you can bake them in a preheated oven at 375°F (190°C) for 10-15 minutes after pan-frying.
- Add Fillings: Once the arepas are cooked, you can either slice them open or cut a pocket to add your desired fillings. Common fillings include cheese (like queso blanco), shredded meats, or even a simple avocado slice. Feel free to get creative with your fillings based on your preferences.
- Serve and Enjoy: Serve the arepas warm, accompanied by your favorite sauces or sides. They can be enjoyed as a meal or a snack, and are perfect for sharing with family and friends.
Extra Tips
When making arepas, it’s crucial to use pre-cooked cornmeal specifically designed for this dish, as it guarantees the right texture and flavor. You can find masarepa in Latin American grocery stores or online.
Additionally, let the dough rest for a few minutes before shaping to enhance its elasticity. If you’re feeling adventurous, experiment with different types of cheese or spices in the dough for added flavor—arepas are incredibly versatile and can adapt to suit any palate!
Empanadas – Savory Stuffed Pastries

Empanadas are a delightful staple in Colombian cuisine, known for their crispy exterior and flavorful fillings. These savory pastries can be filled with a variety of ingredients, including meats, cheeses, or vegetables, making them versatile enough for any palate.
Traditionally enjoyed as a snack or appetizer, empanadas are perfect for gatherings and celebrations, offering a taste of Colombian culture and hospitality in every bite.
Making empanadas at home might seem intimidating, but with a little practice, you can create a batch that rivals those found in local eateries. The dough is typically made with corn flour, which gives empanadas their signature texture, while the filling can be tailored to your preferences.
Whether you choose a classic beef or chicken filling or opt for a vegetarian version, these pastries are sure to impress your family and friends.
Ingredients (Serves 4-6):
- 2 cups corn flour (masa harina)
- 1 cup warm water
- 1 teaspoon salt
- 1 tablespoon vegetable oil
- 1 cup cooked, shredded beef or chicken (or your choice of filling)
- ½ cup diced onions
- 1 tablespoon minced garlic
- 1 teaspoon ground cumin
- 1 teaspoon paprika
- 1 cup shredded cheese (optional)
- Oil for frying
Cooking Instructions:
1. Prepare the Dough:
In a large mixing bowl, combine the corn flour and salt. Gradually add the warm water and vegetable oil, mixing until a soft dough forms. If the dough is too dry, add a little more water, one tablespoon at a time.
Once combined, knead the dough for a few minutes until it’s smooth and pliable. Cover with a damp cloth and let it rest for about 30 minutes.
2. Cook the Filling:
In a skillet over medium heat, add a drizzle of oil and sauté the diced onions until they become translucent, about 3-4 minutes. Add the minced garlic and cook for an additional minute.
Stir in the shredded beef or chicken, ground cumin, and paprika. Cook until the meat is heated through and the spices are well incorporated. If desired, mix in cheese for added flavor. Remove from heat and let the filling cool slightly.
3. Form the Empanadas:
Divide the rested dough into small balls, about the size of a golf ball. On a clean surface, flatten each ball into a thin circle using a rolling pin or your hands.
Place a spoonful of filling in the center of each circle. Be careful not to overfill, as this can make sealing difficult. Fold the dough over to create a half-moon shape and press the edges together to seal. You can crimp the edges with a fork for a decorative touch.
4. Fry the Empanadas:
In a deep skillet or pot, heat vegetable oil over medium-high heat to about 350°F (175°C). Carefully add the filled empanadas in batches, making sure not to overcrowd the pan.
Fry them for about 3-4 minutes on each side, or until they’re golden brown and crispy. Use a slotted spoon to remove the empanadas from the oil and place them on a plate lined with paper towels to drain excess oil.
5. Serve:
Serve the empanadas warm, accompanied by your choice of dipping sauces, such as aji sauce or guacamole. Enjoy them as a delicious appetizer or snack!
Extra Tips:
To guarantee your empanadas have the best texture, make sure the oil is hot enough before frying; otherwise, they can become soggy.
You can also experiment with different fillings, such as spinach and cheese or ground pork, to cater to your taste preferences. If you want to make the empanadas ahead of time, you can freeze them before frying; just fry them straight from the freezer, adding a minute or two to the cooking time.
Pandebono – Cheese Bread Rolls
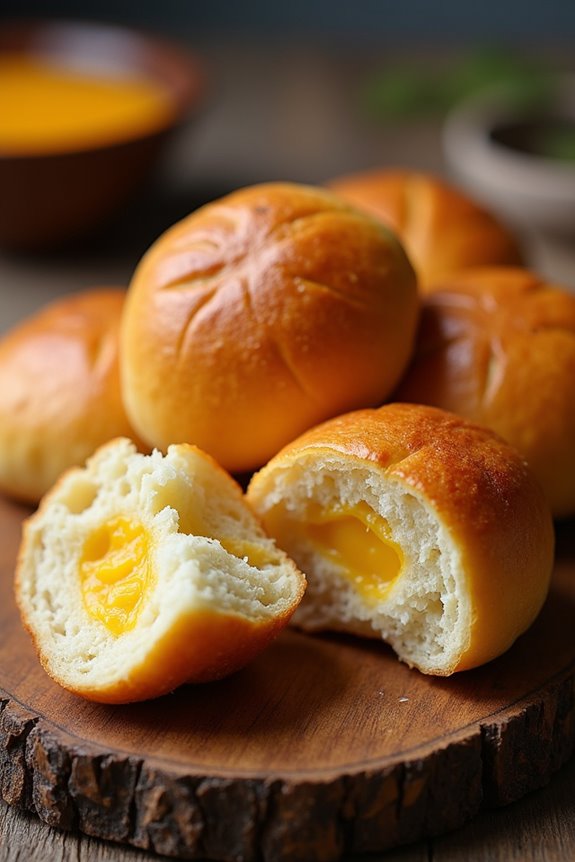
Pandebono is a delightful Colombian cheese bread roll, traditionally enjoyed as a snack or breakfast item. It’s made with cassava flour, cheese, and eggs, resulting in a chewy and cheesy treat that’s perfect for any occasion. This recipe captures the essence of Colombian flavors and offers a taste of the country’s culinary heritage.
Whether you’re hosting a festive gathering or simply craving a cheesy indulgence, pandebono is sure to be a crowd-pleaser.
The beauty of pandebono lies in its simplicity and the comforting combination of ingredients. With a crispy exterior and a soft, cheesy interior, these rolls provide a unique texture that’s both satisfying and delicious. They can be enjoyed warm, straight from the oven, or at room temperature, making them versatile for any meal or snack time.
Let’s explore the recipe and create this Colombian specialty in your kitchen!
Ingredients (Serving Size: 4-6 people)
- 1 cup cassava flour
- 1 cup fresh cheese (such as queso blanco or mozzarella)
- 1 large egg
- 1/2 cup grated Parmesan cheese
- 1/4 cup milk
- 1 teaspoon baking powder
- 1/2 teaspoon salt
Cooking Instructions
- Preheat the Oven: Begin by preheating your oven to 375°F (190°C). This guarantees that the pandebono will cook evenly and develop a beautiful golden-brown crust.
- Prepare the Cheese Mixture: In a large mixing bowl, combine the fresh cheese and grated Parmesan cheese. Use your hands or a fork to mix them together until well blended. This combination of cheeses creates a rich flavor that’s vital for pandebono.
- Mix the Dry Ingredients: In a separate bowl, whisk together the cassava flour, baking powder, and salt. This step is important to confirm that the leavening agent is evenly distributed throughout the dough.
- Combine Ingredients: Add the cheese mixture to the dry ingredients, followed by the egg and milk. Mix everything together until a soft and slightly sticky dough forms. You may need to use your hands for this step to fully incorporate all the ingredients.
- Shape the Rolls: Divide the dough into small portions and roll them into balls or oval shapes, about the size of a golf ball. Place them on a lined baking sheet, leaving some space between each roll to allow for expansion during baking.
- Bake: Place the baking sheet in the preheated oven and bake for approximately 20-25 minutes or until the pandebono are puffed up and golden brown. Keep an eye on them to avoid over-baking.
- Cool and Serve: Once baked, remove the pandebono from the oven and let them cool for a few minutes on a wire rack. Serve warm, and enjoy their cheesy goodness!
Extra Tips
When making pandebono, using fresh cheese is key to achieving the right texture and flavor. If you can’t find fresh cheese, consider using a combination of mozzarella and ricotta for a similar effect.
Additionally, for a twist on the traditional recipe, you can experiment by adding herbs or spices such as oregano or garlic powder to the dough. These small adjustments can elevate the flavor profile while still keeping the essence of this beloved Colombian treat.
Sancocho – Traditional Stew

Sancocho is a beloved traditional stew from Colombia, reflecting the country’s rich culinary heritage. It’s a comforting dish that brings together a harmonious blend of flavors and textures, perfect for family gatherings or festive occasions. This hearty stew is typically made with a variety of meats, root vegetables, and spices, making it a satisfying meal that warms both body and soul. Each region in Colombia has its own variation, often influenced by local ingredients, but the essence of Sancocho remains the same: a deliciously seasoned broth filled with wholesome goodness.
Cooking Sancocho isn’t just about the ingredients; it’s also about the love and care that goes into the process. As the stew simmers, the flavors meld together, creating a rich and aromatic dish that’s best enjoyed with loved ones. In addition to its delightful taste, Sancocho is often served with rice and avocado on the side, enhancing the meal and making it a complete dining experience. Below is a recipe for Sancocho that serves 4-6 people.
Ingredients
- 1 lb (450g) beef (chuck or brisket), cut into chunks
- 1 lb (450g) chicken thighs, bone-in and skinless
- 6 cups water
- 1 large onion, chopped
- 4 cloves garlic, minced
- 2 medium carrots, sliced
- 2 medium potatoes, peeled and cubed
- 1 green plantain, peeled and sliced
- 1 ear of corn, cut into thirds
- 1 cup yuca (cassava), peeled and cut into chunks
- 1/2 cup cilantro, chopped
- 2 tsp ground cumin
- 1 tsp paprika
- Salt and pepper to taste
- Lime wedges for serving
- Cooked white rice for serving
Cooking Instructions
- Prepare the Meat: In a large pot, add the beef chunks and chicken thighs. Pour in the water and bring to a boil over medium-high heat. Skim off any foam that rises to the surface for a clearer broth. This step is important as it helps achieve a clean and flavorful base for the stew.
- Add Aromatics: Once the meat is boiling, reduce the heat to medium-low. Add the chopped onion and minced garlic to the pot. Stir well to combine and let it simmer for about 15 minutes. The aromatics will infuse the broth with flavor, providing a savory foundation for the stew.
- Incorporate Vegetables: After the aromatics have simmered, add the sliced carrots, cubed potatoes, sliced plantain, and corn pieces. Stir everything gently and allow the mixture to simmer for another 20 minutes, until the vegetables start to soften. This step allows the vegetables to soak up the flavors of the broth while adding their own sweetness.
- Add Yuca and Seasonings: Next, add the yuca, cilantro, ground cumin, and paprika to the pot. Season with salt and pepper to taste. Continue to simmer the stew for an additional 30-40 minutes, or until the meat is tender and the yuca is cooked through. This is essential for achieving that melt-in-your-mouth texture.
- Final Touches: Once everything is cooked, taste the broth and adjust the seasoning if needed. Remove the pot from heat and let it sit for a few minutes before serving. This resting period allows the flavors to develop further, making the stew even more delicious.
- Serve: Ladle the Sancocho into bowls and serve with lime wedges and cooked white rice on the side. The acidity from the lime adds a revitalizing contrast to the rich stew, while the rice helps balance the dish.
Extra Tips
When making Sancocho, feel free to customize the ingredients based on your preferences or what you have on hand. Common variations include using different meats such as pork or fish, or adding other vegetables like bell peppers or zucchini.
For an extra kick, you can also include a few slices of jalapeño or a sprinkle of hot sauce. Remember to let the stew simmer low and slow for the best flavor, and don’t hesitate to make it a day ahead; Sancocho often tastes even better the next day as the flavors continue to meld. Enjoy your cooking experience and the wonderful aroma that fills your kitchen!
Arroz Con Coco – Coconut Rice

Arroz Con Coco, or Coconut Rice, is a beloved dish that hails from the Caribbean coast of Colombia. This deliciously creamy and subtly sweet rice dish is infused with coconut milk and pairs wonderfully with both savory and sweet accompaniments. Traditionally served during festive occasions, this dish is a must-try for anyone looking to explore the rich culinary heritage of Colombia.
With its tropical flavors, Arroz Con Coco will transport you straight to the sandy beaches of Colombia with every bite.
Preparing Arroz Con Coco is a simple yet rewarding experience. The combination of aromatic rice, rich coconut milk, and a hint of sugar creates a dish that’s both comforting and indulgent. It’s perfect for serving alongside grilled meats, seafood, or even as a dessert when topped with fresh fruits.
Whether you’re celebrating a special occasion or just want to treat yourself to something delicious, this dish is sure to impress your family and friends.
Ingredients (serves 4-6 people):
- 2 cups of long-grain white rice
- 1 can (13.5 oz) of coconut milk
- 1 cup of water
- 1/2 cup of sugar (adjust to taste)
- 1/2 teaspoon of salt
- 1 teaspoon of vanilla extract (optional)
- 1/2 cup of shredded coconut (unsweetened, for garnish)
- Optional: mint leaves for garnish
Cooking Instructions:
- Rinse the Rice: Begin by rinsing the long-grain white rice under cold water in a fine-mesh strainer. This step helps to remove excess starch, ensuring that the rice cooks up fluffy and separate. Rinse until the water runs clear, then set the rice aside.
- Combine Ingredients: In a large saucepan, combine the rinsed rice, coconut milk, water, sugar, and salt. If you’re using vanilla extract for added flavor, add that as well. Stir the mixture to combine all the ingredients evenly.
- Cook the Rice: Place the saucepan over medium heat and bring the mixture to a gentle boil. Once it reaches a boil, reduce the heat to low, cover the saucepan with a tight-fitting lid, and let it simmer for about 18-20 minutes. This will allow the rice to absorb the coconut milk and water, becoming tender and flavorful.
- Check for Doneness: After the cooking time, carefully remove the lid (beware of steam), and check the rice for doneness. The grains should be tender and have absorbed most of the liquid. If there’s still excess liquid, cover and cook for an additional few minutes until fully absorbed.
- Fluff and Serve: Once the rice is cooked, gently fluff it with a fork to separate the grains. Transfer the Arroz Con Coco to a serving dish and garnish with shredded coconut and mint leaves, if desired. Serve warm as a side dish or dessert.
Extra Tips:
When cooking Arroz Con Coco, feel free to experiment with flavors by adding spices like cinnamon or cardamom for a warm touch. Additionally, using fresh coconut, if available, can enhance the flavor profile.
If you prefer a richer coconut experience, you can adjust the coconut milk and water ratios to suit your taste. Finally, this dish can also be prepared ahead of time and reheated, making it perfect for gatherings or special occasions!
Posta Negra – Braised Beef in Sauce

Posta Negra is a traditional Colombian dish that features a rich and savory braised beef, deeply infused with flavors from spices and a sauce that’s both aromatic and delightful. This dish is often served during special occasions, family gatherings, and festive celebrations, making it a beloved staple in Colombian cuisine. The tender beef is typically served with rice and fried plantains, creating a comforting and hearty meal that warms the soul.
The key to a successful Posta Negra lies in the slow-cooking process, allowing the beef to absorb the flavors of the marinade and sauce fully. While it may take some time to prepare, the result is a dish that’s well worth the effort. The combination of ingredients creates a complex flavor profile that’s both sweet and savory, making it a true representation of Colombian culinary traditions.
Ingredients (Serves 4-6):
- 3 lbs beef brisket or flank steak
- 1 tablespoon vegetable oil
- 1 large onion, finely chopped
- 4 cloves garlic, minced
- 2 cups beef broth
- 1 cup cola (regular soda)
- 1/2 cup soy sauce
- 1/4 cup red wine vinegar
- 2 tablespoons brown sugar
- 1 teaspoon ground cumin
- 1 teaspoon black pepper
- 1 teaspoon paprika
- 1 bay leaf
- Salt to taste
- Fresh cilantro for garnish (optional)
Cooking Instructions:
- Prepare the Marinade: In a large mixing bowl, combine the soy sauce, cola, red wine vinegar, brown sugar, cumin, black pepper, paprika, and salt. Mix well to create a marinade for the beef. Place the beef brisket or flank steak into a resealable plastic bag or a shallow dish, and pour the marinade over the meat. Seal the bag or cover the dish and refrigerate for at least 4 hours, preferably overnight.
- Brown the Meat: Heat the vegetable oil in a large, heavy-bottomed pot or Dutch oven over medium-high heat. Remove the beef from the marinade (reserve the marinade for later) and pat it dry with paper towels. Once the oil is hot, add the beef and sear it on all sides until browned (about 3-4 minutes per side). This step helps to develop a rich flavor and color in the meat.
- Sauté Aromatics: After browning the meat, remove it from the pot and set it aside. In the same pot, add the chopped onion and minced garlic. Sauté for about 5 minutes or until the onion becomes translucent and fragrant, scraping up any browned bits from the bottom of the pot.
- Combine Ingredients: Return the browned beef to the pot, and pour the reserved marinade and beef broth over the meat. Add the bay leaf to the pot. Bring the mixture to a boil, then reduce the heat to low, covering the pot with a lid.
- Slow-Braise the Beef: Allow the beef to braise gently on low heat for about 3-4 hours, or until the meat is tender and easily pulls apart with a fork. Make sure to check occasionally and stir to prevent sticking, adding more broth if necessary.
- Finish the Sauce: Once the beef is tender, remove it from the pot and let it rest for a few minutes. Meanwhile, increase the heat and let the sauce simmer for about 10-15 minutes until it thickens. Slice the beef against the grain and serve it with the thickened sauce over rice or with fried plantains.
Extra Tips:
When preparing Posta Negra, it’s essential to allow ample time for marinating the beef—this not only enhances the flavor but also helps to tenderize the meat.
If you want to add a touch of sweetness, consider including a few slices of orange or a splash of orange juice in the marinade. For an extra depth of flavor, feel free to experiment with additional spices or herbs based on your personal preference.
Finally, serving the dish with a side of avocado or a fresh salad can provide a revitalizing contrast to the rich and savory beef. Enjoy your Colombian culinary journey!
Tres Leches Cake – Moist Milk Cake

Tres Leches Cake is a traditional Latin American dessert that has gained immense popularity for its rich flavor and unique texture. This cake is soaked in a blend of three different types of milk—hence the name “Tres Leches,” which translates to “three milks.” The result is a moist and decadent dessert that’s perfect for any occasion, from family gatherings to festive celebrations.
It’s often topped with whipped cream and fresh fruits, making it not only delicious but also visually appealing.
Making Tres Leches Cake at home is easier than it seems, and with the right ingredients and steps, you can create a delightful treat that will impress your friends and family. This recipe is designed to serve 4-6 people, guaranteeing that everyone gets to enjoy a slice of this delightful cake.
Let’s gather our ingredients and get started on crafting this delightful dessert!
Ingredients (Serves 4-6)
- 1 cup all-purpose flour
- 1 ½ teaspoons baking powder
- ¼ teaspoon salt
- ½ cup unsalted butter, softened
- 1 cup granulated sugar
- 5 large eggs
- 1 teaspoon vanilla extract
- 1 can (12 oz) evaporated milk
- 1 can (14 oz) sweetened condensed milk
- 1 cup whole milk
- 1 cup heavy cream (for topping)
- 2 tablespoons powdered sugar (for topping)
- Fresh fruit (optional, for garnish)
Cooking Instructions
1. Preheat the Oven: Begin by preheating your oven to 350°F (175°C). This guarantees that the cake will bake evenly and rise properly.
2. Prepare the Cake Batter: In a medium-sized bowl, whisk together the flour, baking powder, and salt. In a separate large bowl, cream together the softened butter and granulated sugar until light and fluffy.
Add the eggs one at a time, mixing well after each addition. Stir in the vanilla extract.
3. Combine Ingredients: Gradually add the dry ingredients to the wet mixture, mixing until just combined. Be careful not to overmix, as this can lead to a denser cake.
4. Bake the Cake: Pour the batter into a greased 9×13 inch baking dish. Bake in the preheated oven for 30-35 minutes, or until a toothpick inserted into the center comes out clean.
Once baked, allow the cake to cool in the pan for about 10 minutes.
5. Prepare the Milk Mixture: In a large mixing bowl, combine the evaporated milk, sweetened condensed milk, and whole milk. Mix well to create a smooth milk mixture.
6. Soak the Cake: After the cake has cooled for about 10 minutes, poke holes all over the top using a fork or skewer. Slowly pour the milk mixture over the cake, allowing it to soak in.
Let the cake sit for at least 1 hour, or ideally refrigerate it overnight for maximum absorption.
7. Whip the Cream: In a separate bowl, whip the heavy cream with powdered sugar until it forms soft peaks. This will be used as the topping for your cake.
8. Serve the Cake: Once the cake has soaked up the milk mixture, spread the whipped cream evenly over the top. Optionally, garnish with fresh fruit for extra flavor and decoration.
Cut into squares and serve.
Extra Tips
For an extra touch of flavor, consider adding a splash of rum or coconut extract to the milk mixture before soaking the cake. This will enhance the Tres Leches experience and give it a unique twist.
Additionally, be patient while the cake absorbs the milk—allowing it to soak overnight in the refrigerator will yield the best results. Finally, feel free to experiment with different toppings, such as chocolate shavings or nuts, for added texture and flavor!
Pandequeso – Cheese and Cassava Bread
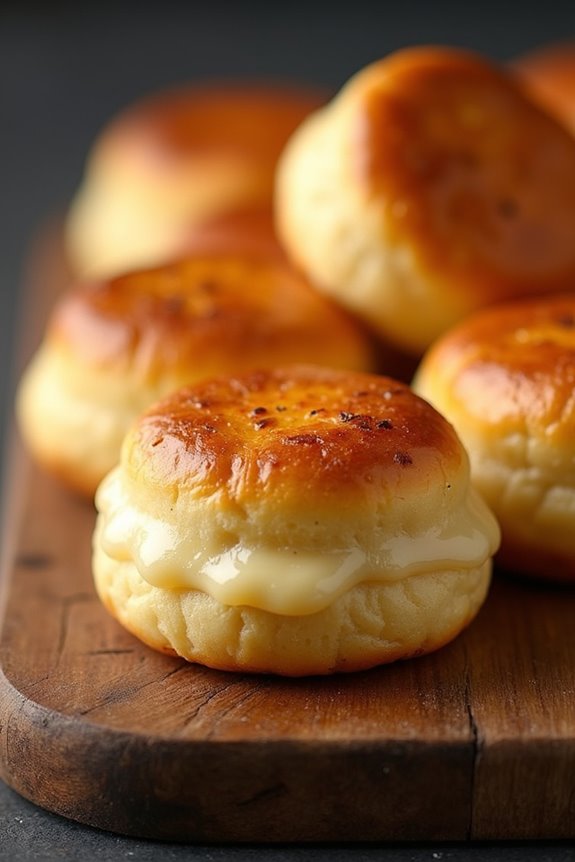
Pandequeso is a delightful Colombian treat that combines the rich flavors of cheese with the unique texture of cassava flour. This gluten-free bread is commonly enjoyed as a snack or a breakfast item, often accompanied by a steaming cup of coffee. The combination of gooey cheese and the slightly chewy yet soft bread makes it a favorite among locals and visitors alike.
Whether you’re hosting a holiday gathering or simply craving a taste of Colombia, pandequeso is certain to impress with its delicious flavor and aroma.
The preparation of pandequeso is relatively simple, making it a perfect dish for both novice and experienced cooks. With only a handful of ingredients, you can create a batch of these cheesy delights that will transport you straight to the heart of Colombia.
Enjoy the process of mixing, shaping, and baking as you bring this traditional recipe to life in your own kitchen.
Ingredients (Serves 4-6):
- 2 cups cassava flour
- 1 cup shredded cheese (preferably queso blanco or mozzarella)
- 1/2 cup milk
- 1/4 cup vegetable oil
- 2 large eggs
- 2 teaspoons baking powder
- 1 teaspoon salt
Cooking Instructions:
- Preheat the Oven: Begin by preheating your oven to 375°F (190°C). This allows the oven to reach the right temperature for a perfect bake, affirming that the pandequeso becomes golden and fluffy.
- Mix Dry Ingredients: In a large mixing bowl, combine the cassava flour, baking powder, and salt. Stir these dry ingredients together until they’re well blended. This step guarantees that the leavening agent is evenly distributed throughout the flour.
- Combine Wet Ingredients: In a separate bowl, whisk together the eggs, milk, and vegetable oil until fully combined. This mixture will help bind the dry ingredients together and contribute to the moisture and richness of the bread.
- Combine Mixtures: Gradually add the wet mixture to the dry ingredients, stirring continuously until a dough forms. It’s important to mix thoroughly to guarantee that there are no lumps and that the ingredients are well incorporated.
- Incorporate Cheese: Fold in the shredded cheese into the dough until it’s evenly distributed. The cheese will melt during baking, creating a wonderfully cheesy interior that’s the hallmark of pandequeso.
- Shape the Dough: Using your hands, take small portions of the dough and shape them into balls or discs, about the size of a golf ball. Place them on a baking sheet lined with parchment paper, leaving some space between each piece to allow for rising.
- Bake: Place the baking sheet in the preheated oven and bake for about 20-25 minutes or until the tops are golden brown. Keep an eye on them to prevent over-baking, as you want them to remain soft inside.
- Cool and Serve: Once baked, remove the pandequeso from the oven and allow them to cool for a few minutes. Serve them warm for the best taste and texture.
Extra Tips:
For an added twist, consider experimenting with different types of cheese to suit your taste preferences. You can also add herbs or spices to the dough for a unique flavor profile.
If you’re looking for a more pronounced cheesy flavor, try using a combination of cheeses. Additionally, pandequeso can be stored in an airtight container for a few days, but they’re best enjoyed fresh out of the oven!
Almojábanas – Sweet Cheese Cornbread

Almojábanas are a delightful traditional Colombian treat that perfectly marries the rich flavors of cheese and the sweetness of corn. These sweet cheese cornbreads are often enjoyed during breakfast or as a snack, and their soft, moist texture, combined with a hint of sweetness, makes them irresistible.
Originating from the Colombian countryside, almojábanas are typically made with fresh cheese, cornmeal, and a touch of sugar, creating a comforting, flavorful bite that evokes the warmth of home-cooked meals.
Making almojábanas isn’t only straightforward but also a fun activity to share with family and friends. The dough comes together quickly, and once baked, these cornbreads will fill your kitchen with a warm, inviting aroma.
Serve them warm with a side of butter or cream, or enjoy them plain for a delicious treat that embodies the spirit of Colombian cuisine.
Ingredients (Serving Size: 4-6 people)
- 1 cup fresh cheese, crumbled (e.g., queso fresco)
- 1 cup cornmeal (preferably precooked)
- 1/2 cup milk
- 1/4 cup sugar
- 1/4 cup unsalted butter, melted
- 1/2 teaspoon baking powder
- 1/4 teaspoon salt
- 2 large eggs
Cooking Instructions
- Preheat the Oven: Begin by preheating your oven to 375°F (190°C). This guarantees that your almojábanas will bake evenly and develop a beautiful golden crust.
- Prepare the Dough: In a large mixing bowl, combine the crumbled cheese, cornmeal, sugar, baking powder, and salt. Mix these dry ingredients together until they’re well combined. The cheese should be evenly distributed throughout the mixture.
- Add Wet Ingredients: In a separate bowl, whisk together the milk, melted butter, and eggs until fully combined. Gradually pour this mixture into the dry ingredients, stirring gently to combine. Be careful not to overmix; you want to maintain a light and airy texture.
- Shape the Mixture: Using your hands or a spoon, take portions of the dough and shape them into small balls or patties, about the size of a golf ball. Place the shaped dough onto a greased baking sheet, leaving some space between each one to allow for expansion.
- Bake: Once all the almojábanas are shaped and placed on the baking sheet, pop them into the preheated oven. Bake for approximately 20-25 minutes or until they’re puffed up and golden brown on top.
- Cool and Serve: After baking, remove the almojábanas from the oven and let them cool for a few minutes on the baking sheet before transferring them to a wire rack. Serve warm or at room temperature, and enjoy!
Extra Tips
For the best results, use fresh cheese for an authentic flavor; queso fresco or a similar soft cheese works beautifully.
If you want to add a twist, consider incorporating herbs like cilantro or chives for a savory variation, or even a sprinkle of cinnamon for a sweeter touch.
Keep an eye on the baking time, as ovens can vary; aim for a golden hue to ascertain they’re perfectly cooked. Enjoy your almojábanas fresh from the oven for the ultimate experience!