

Exploring Brazilian cuisine is like opening a treasure chest of flavors and nourishment. I’ve gathered 15 healthy recipes that blend deliciousness with nutrition perfectly. Each dish features fresh ingredients that are both tasty and beneficial for your health. From refreshing salads to comforting stews, these meals offer a taste of balanced eating. Let’s discover these recipes, and you might just find your new favorite.
Quinoa and Black Bean Salad
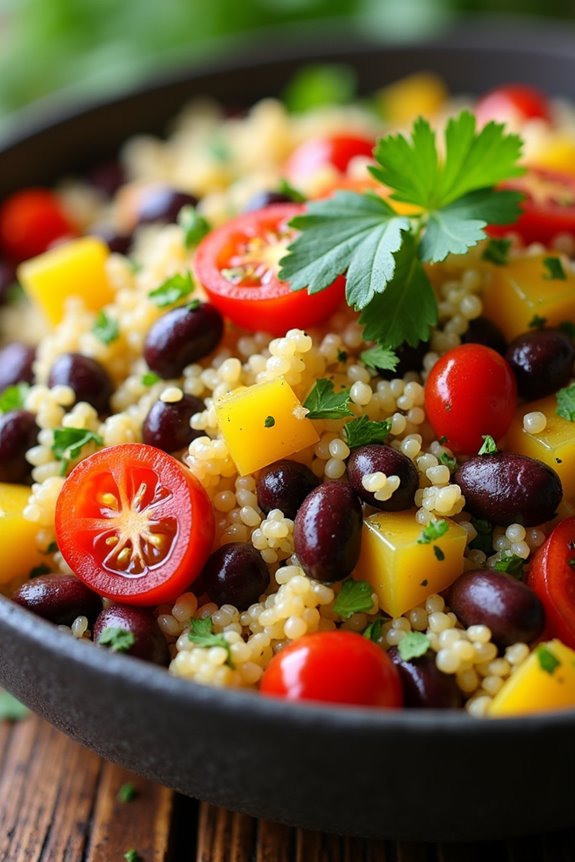
Quinoa and Black Bean Salad is a vibrant and nutritious dish that perfectly embodies the essence of healthy Brazilian cuisine. This salad isn’t only packed with protein and fiber but also bursting with flavors, making it a delicious option for a light lunch or as a side dish at your next gathering.
The combination of quinoa, black beans, fresh vegetables, and a zesty lime dressing creates a revitalizing meal that can be enjoyed year-round. This dish is incredibly versatile, allowing you to customize it based on the seasonal ingredients available or your personal preferences.
You can add diced avocado, corn, or even some grilled chicken for an extra protein boost. The colors and textures of this salad are sure to impress your family and friends, making it a perfect addition to any healthy meal plan.
Ingredients (serves 4-6):
- 1 cup quinoa
- 2 cups water
- 1 can (15 oz) black beans, rinsed and drained
- 1 cup cherry tomatoes, halved
- 1 bell pepper (any color), diced
- 1/2 red onion, finely chopped
- 1/4 cup fresh cilantro, chopped
- 1/4 cup olive oil
- 2 tablespoons lime juice
- 1 teaspoon cumin
- Salt and pepper to taste
Cooking Instructions:
1. Rinse the Quinoa: Begin by rinsing the quinoa under cold water in a fine-mesh strainer. This helps remove any bitterness from the quinoa’s natural coating called saponin. Make sure to drain it well after rinsing.
2. Cook the Quinoa: In a medium saucepan, combine the rinsed quinoa and 2 cups of water. Bring the mixture to a boil over medium-high heat. Once boiling, reduce the heat to low, cover, and let it simmer for about 15 minutes or until the quinoa has absorbed all the water and is fluffy.
Once done, remove it from heat and let it sit covered for 5 minutes before fluffing it with a fork.
3. Prepare the Vegetables: While the quinoa is cooking, chop the cherry tomatoes, bell pepper, and red onion. Place these chopped vegetables in a large mixing bowl along with the rinsed black beans and cilantro.
4. Make the Dressing: In a small bowl, whisk together the olive oil, lime juice, cumin, salt, and pepper. Adjust the seasoning according to your taste preferences. This dressing will add a zesty flavor that complements the ingredients beautifully.
5. Combine Everything: Once the quinoa is cooked and fluffed, add it to the bowl with the vegetables and black beans. Pour the dressing over the mixture and gently toss everything together until well combined.
6. Chill and Serve: Allow the salad to chill in the refrigerator for at least 30 minutes to let the flavors meld together. Serve it cold or at room temperature as a revitalizing dish.
Extra Tips:
To enhance the flavors of your Quinoa and Black Bean Salad, consider adding ingredients like diced avocado or corn for extra creaminess and sweetness.
You can also add a pinch of cayenne pepper or diced jalapeños for a spicy kick. This salad can be made ahead of time and stored in the refrigerator for up to 3 days, making it a convenient option for meal prep. Enjoy this dish as a nutritious side at barbecues or picnics, or as a standalone meal on its own!
Brazilian Vegetable Stew (Moqueca De Legumes)
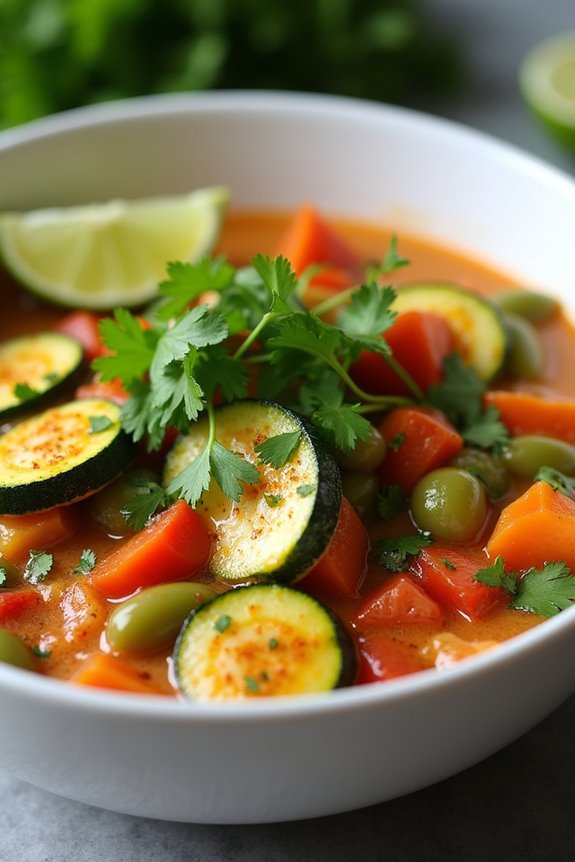
Moqueca de Legumes is a delightful Brazilian vegetable stew that celebrates the vibrant flavors and ingredients of the tropics. This dish isn’t only a feast for the senses but also a healthy option packed with nutrients, thanks to the colorful array of vegetables that are harmoniously combined in a coconut milk base.
Traditionally from the coastal regions of Brazil, this recipe highlights the use of fresh produce and aromatic herbs, making it a perfect option for vegetarians and anyone looking to enjoy a hearty, wholesome meal.
This stew is versatile and can be paired with rice, quinoa, or crusty bread for a complete meal. The combination of spices and fresh herbs brings out the natural flavors of the vegetables, creating a comforting dish that’s both satisfying and invigorating.
Whether you’re hosting a dinner party or simply cooking for yourself, this Moqueca de Legumes is sure to impress with its rich taste and enticing aroma.
Ingredients (Serves 4-6):
- 2 tablespoons olive oil
- 1 large onion, chopped
- 4 cloves garlic, minced
- 1 bell pepper, chopped (any color)
- 2 medium carrots, sliced
- 1 medium zucchini, sliced
- 1 cup green beans, trimmed and cut into 1-inch pieces
- 1 cup diced tomatoes (fresh or canned)
- 1 can (14 oz) coconut milk
- 1 tablespoon tomato paste
- 1 teaspoon paprika
- 1 teaspoon cumin
- Salt and pepper to taste
- 1/4 cup fresh cilantro, chopped (for garnish)
- 1 lime, cut into wedges (for serving)
- Cooked rice or quinoa (for serving)
Cooking Instructions:
- Sauté the Aromatics: In a large pot or Dutch oven, heat the olive oil over medium heat. Add the chopped onion and minced garlic, cooking until the onion becomes translucent and fragrant, about 5 minutes.
- Add the Vegetables: Stir in the bell pepper, carrots, and green beans. Cook for another 5 minutes, allowing the vegetables to soften slightly.
- Incorporate the Zucchini and Tomatoes: Add the zucchini and diced tomatoes to the pot. Mix well to combine all the ingredients. Let them cook for about 3-4 minutes until the tomatoes start to break down.
- Add Coconut Milk and Spices: Pour in the coconut milk and add the tomato paste, paprika, cumin, salt, and pepper. Stir thoroughly to combine all the flavors. Bring the mixture to a gentle simmer.
- Simmer the Stew: Reduce the heat to low and cover the pot. Allow the stew to simmer for 15-20 minutes, stirring occasionally. This will help the flavors meld together and the vegetables to become tender.
- Finish and Serve: Once the vegetables are cooked through, taste and adjust seasoning if necessary. Serve hot, garnished with fresh cilantro and lime wedges, alongside cooked rice or quinoa.
Extra Tips:
For an extra burst of flavor, consider marinating the vegetables in lime juice and spices for about 30 minutes before cooking.
Additionally, feel free to customize the stew by incorporating other seasonal vegetables such as eggplant or squash. If you prefer a spicier kick, add some chopped chili peppers or a sprinkle of red pepper flakes.
This dish can be easily reheated, making it perfect for meal prep or leftovers, and the flavors often deepen after a day in the fridge. Enjoy your flavorful journey to Brazil with this delightful Moqueca de Legumes!
Grilled Chicken With Chimichurri Sauce
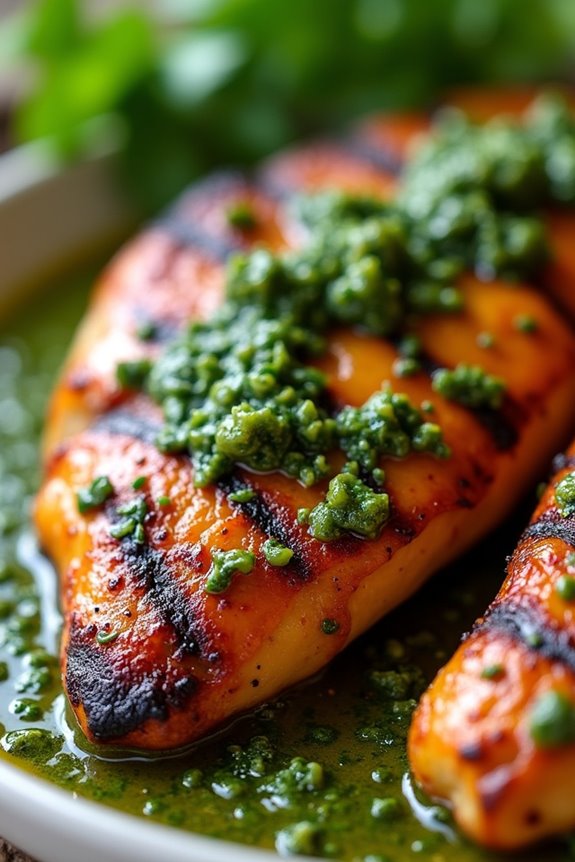
Grilled Chicken with Chimichurri Sauce is a classic Brazilian dish that brings together the vibrant flavors of South American cuisine. The chicken is marinated to perfection, resulting in juicy, tender meat that pairs beautifully with the zesty and herbaceous chimichurri sauce. This dish isn’t only delicious but also healthy, making it a perfect option for a family dinner or a weekend gathering with friends.
Chimichurri sauce, a staple in Argentine cuisine, is a blend of fresh herbs, garlic, vinegar, and olive oil. It adds a burst of flavor to the grilled chicken, making each bite a delightful experience. This recipe is simple to prepare and allows you to enjoy the rich culinary heritage of Brazil while keeping your meals nutritious and wholesome.
Ingredients (Serves 4-6):
- 4 boneless, skinless chicken breasts
- 1/4 cup olive oil
- 2 tablespoons red wine vinegar
- 4 cloves garlic, minced
- 1 teaspoon smoked paprika
- 1 teaspoon salt
- 1/2 teaspoon black pepper
- 1/2 teaspoon crushed red pepper flakes (optional)
- 1 cup fresh parsley, finely chopped
- 1/4 cup fresh oregano, finely chopped
- 1/2 cup olive oil (for chimichurri)
- 2 tablespoons red wine vinegar (for chimichurri)
- Salt and pepper to taste (for chimichurri)
Cooking Instructions:
- Marinate the Chicken: In a large bowl, combine 1/4 cup olive oil, 2 tablespoons red wine vinegar, minced garlic, smoked paprika, salt, black pepper, and crushed red pepper flakes (if using). Add the chicken breasts to the marinade, ensuring they’re well coated. Cover and refrigerate for at least 30 minutes or up to 2 hours for maximum flavor.
- Prepare the Chimichurri Sauce: In a separate bowl, mix together the finely chopped parsley, oregano, 1/2 cup olive oil, 2 tablespoons red wine vinegar, and salt and pepper to taste. Stir until well combined and set aside to allow the flavors to meld.
- Preheat the Grill: Preheat your grill to medium-high heat. If using a grill pan, heat it over medium-high heat on the stovetop.
- Grill the Chicken: Remove the chicken from the marinade and let any excess marinade drip off. Place the chicken on the grill and cook for about 6-7 minutes on each side or until the internal temperature reaches 165°F (75°C) and the chicken is nicely charred.
- Rest the Chicken: Once cooked, remove the chicken from the grill and let it rest for 5 minutes. This allows the juices to redistribute throughout the meat, ensuring each bite is juicy.
- Serve: Slice the grilled chicken and serve it on a platter drizzled generously with chimichurri sauce. You can also serve additional chimichurri on the side for dipping.
Extra Tips:
For an added depth of flavor, you can let the chicken marinate overnight in the refrigerator. Additionally, feel free to customize the chimichurri by adding other herbs such as cilantro or basil for a unique twist. If you don’t have a grill, this dish can also be cooked in a grill pan or baked in the oven at 400°F (200°C) for around 20-25 minutes. Enjoy your delicious and healthy Grilled Chicken with Chimichurri Sauce!
Spinach and Cheese Stuffed Pão De Queijo

Pão de Queijo, or Brazilian cheese bread, is a beloved snack that’s crispy on the outside and chewy on the inside, thanks to its unique ingredient: tapioca flour. This delightful treat is often enjoyed as a snack or appetizer, and it can be easily customized with various fillings. In this recipe, we’ll add a nutritious twist by stuffing these cheese puffs with a flavorful mixture of spinach and cheese, making them a great option for both kids and adults alike.
This dish not only satisfies your taste buds but also adds a healthy dose of greens to your diet.
To make Spinach and Cheese Stuffed Pão De Queijo, you’ll need to gather some specific ingredients and follow the steps carefully to achieve the perfect texture and flavor. This recipe serves 4-6 people, guaranteeing enough for a small gathering or a family meal. The combination of gooey cheese and vibrant spinach creates a delicious filling that pairs perfectly with the light and airy bread exterior.
Ingredients:
- 2 cups tapioca flour
- 1 cup milk
- 1/2 cup vegetable oil
- 1 teaspoon salt
- 1 cup grated Parmesan cheese
- 2 large eggs
- 2 cups fresh spinach, chopped
- 1/2 cup cream cheese, softened
- 1/2 teaspoon garlic powder
- Black pepper, to taste
Cooking Instructions:
- Preheat the Oven: Begin by preheating your oven to 375°F (190°C). This guarantees that your Pão de Queijo will bake evenly and achieve a nice golden color.
- Prepare the Spinach Filling: In a skillet over medium heat, add the chopped spinach and sauté for about 3-4 minutes until wilted. Remove from heat and place in a bowl. Add the softened cream cheese, garlic powder, and black pepper, mixing until well combined. Set aside to cool.
- Make the Dough: In a saucepan, combine the milk, vegetable oil, and salt, bringing it to a simmer over medium heat. Once simmering, remove from heat and immediately add the tapioca flour. Stir vigorously with a wooden spoon until the mixture forms a dough. Allow it to cool slightly for about 5 minutes.
- Incorporate Eggs and Cheese: Add the eggs and grated Parmesan cheese to the dough mixture, mixing well until everything is fully incorporated and the dough is smooth.
- Shape the Dough: Grease your hands with a little oil to prevent sticking. Take a small amount of dough (about the size of a golf ball) and flatten it in your palm. Place a teaspoon of the spinach filling in the center and fold the dough around it to form a ball. Confirm the filling is completely enclosed.
- Arrange and Bake: Place the stuffed Pão de Queijo balls on a baking sheet lined with parchment paper, spaced apart. Bake in the preheated oven for 15-20 minutes, or until they’re puffed up and golden brown.
- Serve and Enjoy: Once baked, remove the Pão de Queijo from the oven and allow them to cool slightly before serving. Enjoy them warm for the best flavor and texture.
Extra Tips:
For an added depth of flavor, consider mixing in herbs like oregano or parsley into the dough or filling.
Additionally, using a combination of cheeses such as mozzarella or cheddar can also enhance the taste. If the dough is too sticky, you can add a bit more tapioca flour until it’s manageable.
These stuffed Pão de Queijo can also be frozen before baking; simply bake them directly from the freezer, adding a few extra minutes to the baking time. Enjoy your healthy and delicious Brazilian treat!
Baked Fish With Mango Salsa
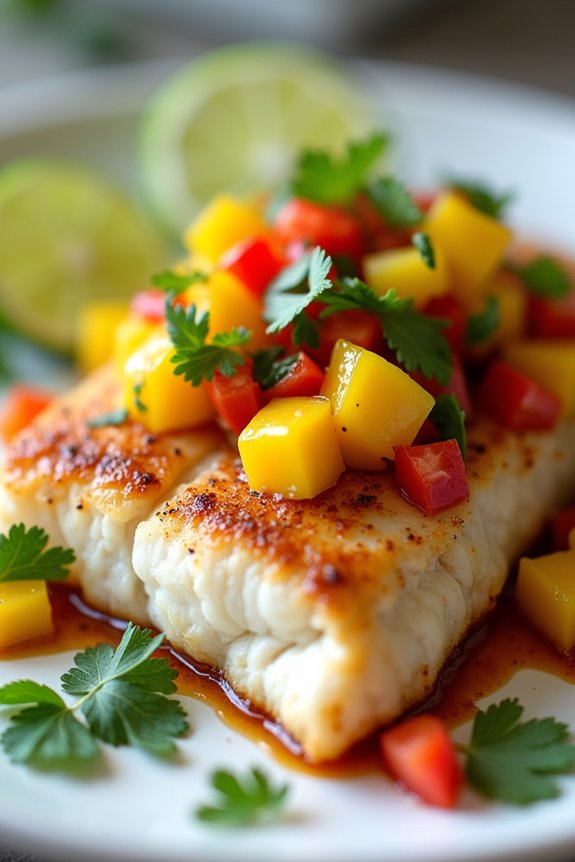
Baked Fish With Mango Salsa is a vibrant and healthy dish that celebrates the flavors of Brazil. This recipe combines the delicate taste of fresh fish with a revitalizing mango salsa, bringing together the perfect balance of savory and sweet. Ideal for a family meal or a dinner party, this dish not only looks stunning on the plate but also offers a burst of tropical flavors that are bound to impress your guests.
This dish is also incredibly easy to prepare, making it a great option for both novice cooks and seasoned chefs. The fish is simply baked to perfection, allowing it to retain its natural moisture and flavor while the mango salsa provides a zesty kick. Serve it alongside some rice or a fresh salad for a complete meal that embodies the essence of Brazilian cuisine.
Ingredients (serving size: 4-6 people)
- 4-6 pieces of firm white fish fillets (such as tilapia, snapper, or cod)
- 2 tablespoons olive oil
- 1 teaspoon garlic powder
- 1 teaspoon paprika
- Salt and pepper to taste
- Juice of 1 lime
- 1 ripe mango, diced
- 1 red bell pepper, diced
- 1/2 red onion, finely chopped
- 1/4 cup fresh cilantro, chopped
- 1 jalapeño, seeded and minced (optional)
- 1 tablespoon honey or agave syrup (optional)
Cooking Instructions
- Preheat the Oven: Start by preheating your oven to 400°F (200°C). This guarantees that the fish will cook evenly and achieve a nice flaky texture while baking.
- Prepare the Fish: Rinse the fish fillets under cold water and pat them dry with paper towels. Place them on a baking sheet lined with parchment paper. Drizzle olive oil over the fillets and season with garlic powder, paprika, salt, and pepper. Make sure to coat both sides of the fish evenly.
- Bake the Fish: Place the baking sheet in the preheated oven and bake the fish for about 15-20 minutes, or until the fish flakes easily with a fork. The cooking time may vary depending on the thickness of your fillets.
- Make the Mango Salsa: While the fish is baking, prepare the mango salsa. In a medium bowl, combine the diced mango, red bell pepper, red onion, cilantro, and jalapeño (if using). Squeeze the lime juice over the mixture and stir gently to combine. For additional sweetness, you can add honey or agave syrup.
- Serve: Once the fish is done baking, remove it from the oven. Plate the fish fillets and top generously with the mango salsa. Serve immediately with lime wedges on the side for an extra citrus kick.
Extra Tips
For the best flavor, choose the freshest fish available, as this will greatly enhance the dish. Additionally, feel free to customize the mango salsa by adding other ingredients such as avocado, black beans, or even a splash of orange juice for a different twist.
If you want to make the dish even more colorful and nutritious, serve it with a side of sautéed vegetables or a light quinoa salad. Enjoy your healthy Brazilian meal!
Lentil Soup With Carrots and Cilantro
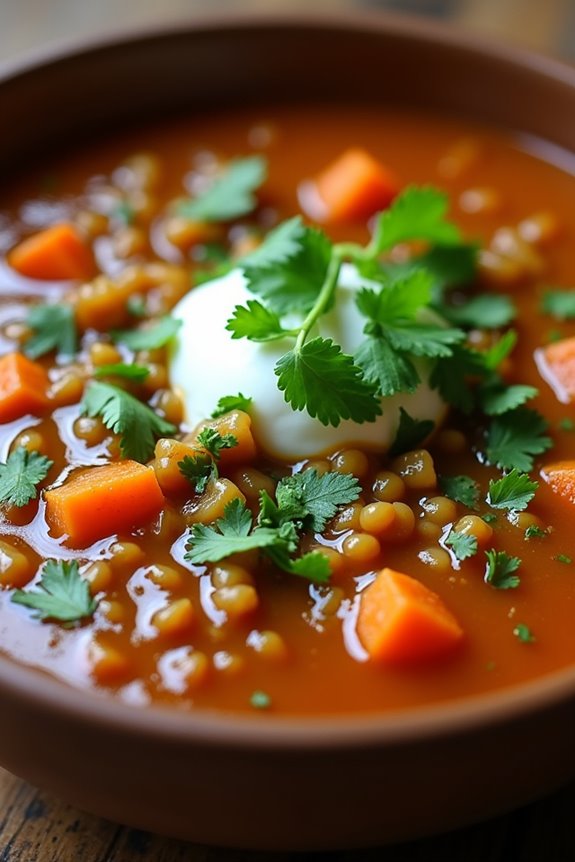
Lentil Soup With Carrots and Cilantro is a vibrant dish that embodies the rich culinary traditions of Brazil while promoting a healthy lifestyle. This hearty soup isn’t only packed with flavor but also loaded with essential nutrients thanks to its main ingredients: lentils, carrots, and fresh cilantro.
The combination of spices and vegetables creates a warm and comforting meal that’s perfect for any occasion. This dish is ideal for family gatherings or as a nourishing weeknight dinner. The lentils provide a great source of protein and fiber, making this soup filling and satisfying.
Carrots add a natural sweetness, while cilantro gives it a fresh, aromatic touch. Whether served as an appetizer or a main course, Lentil Soup With Carrots and Cilantro is sure to please both your taste buds and your health goals.
Ingredients (serves 4-6):
- 1 cup dried green or brown lentils, rinsed and drained
- 4 cups vegetable broth or water
- 2 medium carrots, diced
- 1 medium onion, chopped
- 2 cloves garlic, minced
- 1 teaspoon ground cumin
- 1 teaspoon smoked paprika
- 1 tablespoon olive oil
- Salt and black pepper to taste
- 1 cup fresh cilantro, chopped
- Juice of 1 lime
- Optional: diced avocado or sour cream for garnish
Cooking Instructions:
1. Sauté the Aromatics: In a large pot, heat the olive oil over medium heat. Add the chopped onion and sauté for about 5 minutes, or until it becomes translucent.
Then, add the minced garlic and cook for an additional minute, stirring frequently to prevent burning.
2. Add the Carrots and Spices: Stir in the diced carrots, ground cumin, and smoked paprika. Cook for about 3-4 minutes, allowing the spices to bloom and the carrots to soften slightly.
3. Incorporate the Lentils and Broth: Add the rinsed lentils to the pot along with the vegetable broth (or water). Bring the mixture to a boil, then reduce the heat to low and let it simmer uncovered for about 25-30 minutes, or until the lentils are tender.
4. Season the Soup: Once the lentils are cooked, Season the Soup with salt and black pepper to taste. Stir in the fresh chopped cilantro and lime juice for added flavor.
Allow the soup to simmer for another 5 minutes so the flavors can meld together.
5. Serve and Garnish: Ladle the soup into bowls and, if desired, top with diced avocado or a dollop of sour cream for extra creaminess. Serve hot and enjoy the delightful combination of flavors.
Extra Tips:
For an extra depth of flavor, consider adding a bay leaf while the soup simmers and remove it before serving.
If you prefer a creamier texture, you can blend a portion of the soup using an immersion blender. Additionally, feel free to customize the soup by adding other vegetables such as celery or bell peppers, or by incorporating spices such as chili powder for a bit of heat.
This soup can be stored in the fridge for up to 5 days, making it a perfect make-ahead meal!
Farofa With Vegetables
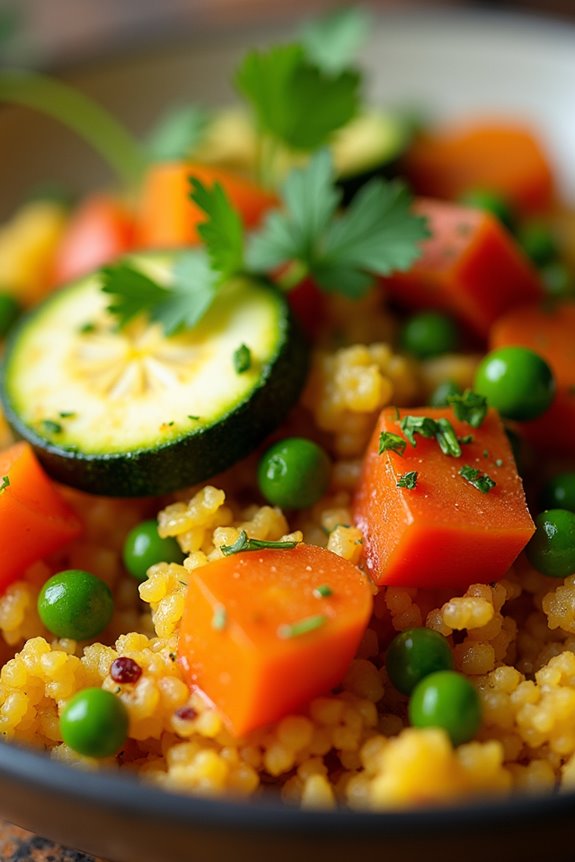
Farofa is a traditional Brazilian dish made from toasted cassava flour that’s often served as a side dish. It’s versatile, and can be customized with various ingredients, making it a staple in Brazilian cuisine. In this version, we’ll add a medley of colorful vegetables to enhance its flavor, texture, and nutritional value. This dish is perfect for gatherings or family meals, bringing a delightful crunch and a rich taste that complements many main dishes, such as grilled meats or stews.
The beauty of Farofa lies in its adaptability – it can be made with simple ingredients you likely already have at home. The addition of vegetables not only elevates the dish but also adds essential vitamins and minerals, making it a healthier option. This recipe is designed to serve 4-6 people and is sure to impress your guests or family members with its deliciousness and vibrant presentation.
Ingredients
- 2 cups cassava flour
- 1 medium onion, chopped
- 2 cloves garlic, minced
- 1 medium carrot, grated
- 1 bell pepper (any color), diced
- 1 zucchini, diced
- 1 cup peas (fresh or frozen)
- 4 tablespoons olive oil or butter
- Salt, to taste
- Fresh parsley, chopped (for garnish)
Cooking Instructions
- Prepare the Ingredients: Begin by chopping the onion, mincing the garlic, grating the carrot, dicing the bell pepper and zucchini, and measuring out the peas. Having all your ingredients prepped and ready will make the cooking process smoother.
- Sauté the Aromatics: In a large skillet, heat the olive oil or butter over medium heat. Add the chopped onion and sauté until it becomes translucent, about 3-4 minutes. Then, add the minced garlic and sauté for an additional minute until fragrant. This step builds a flavorful base for the dish.
- Add the Vegetables: Stir in the grated carrot, diced bell pepper, and zucchini into the skillet. Cook for about 5-7 minutes, stirring occasionally, until the vegetables are tender but still vibrant. Adding the peas at this stage will help them warm through without becoming mushy.
- Incorporate the Cassava Flour: Gradually sprinkle the cassava flour over the sautéed vegetables, stirring constantly to guarantee even distribution. This will take a few minutes as the flour absorbs moisture and begins to toast. Continue to cook for another 5 minutes, allowing the flour to turn golden and gain a nutty aroma.
- Season and Serve: Once the Farofa has reached a desirable texture, season with salt to taste. Remove from heat and transfer to a serving dish. Garnish with freshly chopped parsley for a pop of color and freshness.
Extra Tips
When making Farofa, feel free to customize it with your favorite vegetables or even proteins, such as bacon or sausage, for an extra hearty dish. You can also adjust the amount of cassava flour based on your preference for texture, from a drier, crumbly style to a slightly moister consistency.
If you want a touch of heat, consider adding diced jalapeños or red pepper flakes. Always taste as you go to guarantee the flavors are to your liking!
Cucumber and Tomato Salad With Lime Dressing
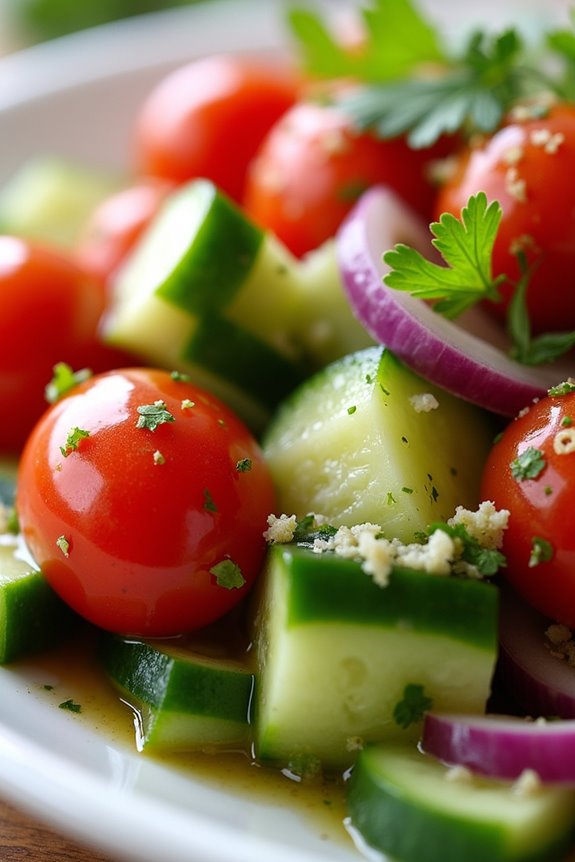
Cucumber and Tomato Salad with Lime Dressing is a revitalizing and vibrant dish that embodies the essence of Brazilian cuisine. This salad is simple to prepare and brings together the crispness of fresh cucumbers and the juiciness of ripe tomatoes, all enhanced by a zesty lime dressing. Perfect for a summer barbecue or as a side dish for any meal, this salad isn’t only delicious but also loaded with nutrients, making it a healthy addition to your table.
The flavors of this salad are bright and tangy, thanks to the lime juice, which adds a delightful twist to the fresh vegetables. Whether you’re serving it alongside grilled meats or enjoying it as a standalone dish, this salad is sure to impress with its vibrant colors and invigorating taste. Plus, it’s a great way to use seasonal produce, guaranteeing that every bite is as fresh as can be.
Ingredients (serving size 4-6 people):
- 2 large cucumbers, diced
- 4 medium tomatoes, diced
- 1 small red onion, finely chopped
- 1/4 cup fresh cilantro, chopped
- 2 limes, juiced
- 3 tablespoons olive oil
- Salt and pepper, to taste
Cooking Instructions:
- Prepare the Vegetables: Start by washing the cucumbers and tomatoes thoroughly. Dice the cucumbers into bite-sized pieces and chop the tomatoes into similar-sized chunks. For the red onion, finely chop it to release its flavors while ensuring it blends well with the other ingredients.
- Combine Ingredients: In a large mixing bowl, combine the diced cucumbers, tomatoes, and chopped red onion. Gently toss them together to guarantee an even distribution of the vegetables.
- Make the Dressing: In a separate small bowl, whisk together the lime juice and olive oil. This will form the base of your dressing. Add salt and pepper to taste, adjusting according to your preference.
- Add Dressing to Salad: Pour the lime dressing over the mixed vegetables in the large bowl. Toss gently to coat all the ingredients evenly with the dressing, ensuring that every piece is flavorful.
- Garnish: Sprinkle the chopped cilantro over the salad for an extra burst of flavor and color. Gently mix it in, being careful not to crush the vegetables.
- Serve: Allow the salad to sit for about 10 minutes before serving. This resting time helps the flavors to meld together beautifully. Serve chilled or at room temperature.
Extra Tips:
For an enhanced flavor profile, consider adding a pinch of red pepper flakes for some heat or a splash of apple cider vinegar for an extra tangy kick. You can also experiment by adding other vegetables, such as bell peppers or avocado, to create your unique twist on this traditional Brazilian salad.
Always taste and adjust the seasoning before serving to guarantee the perfect balance of flavors. Enjoy your cooking!
Sweet Potato and Black Bean Tacos
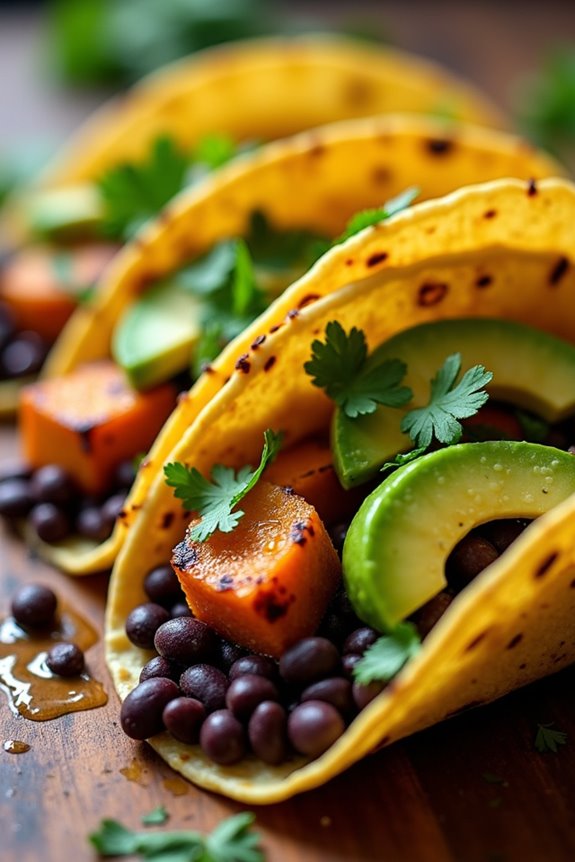
Sweet Potato and Black Bean Tacos are a delicious and nutritious meal option that showcases the vibrant flavors of Brazilian cuisine. These tacos aren’t only easy to prepare but also packed with wholesome ingredients, making them a perfect choice for a healthy weeknight dinner or a festive gathering.
The combination of roasted sweet potatoes and seasoned black beans creates a hearty filling that’s both satisfying and nutritious. Topped with fresh avocado, cilantro, and a zesty lime dressing, these tacos are certain to impress your family and friends.
This dish is vegetarian-friendly and can easily be made vegan by omitting any dairy-based toppings. The sweet potatoes provide a natural sweetness that pairs perfectly with the earthiness of the black beans, while the toppings add a burst of freshness.
Whether served on corn tortillas or your favorite taco shells, Sweet Potato and Black Bean Tacos are a versatile and flavorful addition to your meal repertoire.
Ingredients (Serves 4-6):
- 2 medium sweet potatoes, peeled and diced
- 1 can (15 oz) black beans, rinsed and drained
- 1 tablespoon olive oil
- 1 teaspoon cumin
- 1 teaspoon smoked paprika
- 1/2 teaspoon garlic powder
- Salt and pepper, to taste
- 8 small corn tortillas
- 1 ripe avocado, sliced
- 1/2 cup fresh cilantro, chopped
- 1 lime, juiced
- Optional: hot sauce for serving
Cooking Instructions:
- Preheat the Oven: Begin by preheating your oven to 400°F (200°C). This guarantees that the sweet potatoes roast evenly and develop a nice caramelization.
- Prepare the Sweet Potatoes: In a large bowl, combine the diced sweet potatoes with olive oil, cumin, smoked paprika, garlic powder, salt, and pepper. Toss until the sweet potatoes are well coated with the oil and spices.
- Roast the Sweet Potatoes: Spread the seasoned sweet potatoes out in a single layer on a baking sheet. Roast in the preheated oven for 25-30 minutes, or until they’re tender and golden brown, stirring halfway through for even cooking.
- Heat the Black Beans: While the sweet potatoes are roasting, heat a small saucepan over medium heat. Add the rinsed black beans along with a splash of water, and season with salt and pepper. Cook for about 5-7 minutes until heated through, stirring occasionally.
- Warm the Tortillas: In a dry skillet over medium heat, warm the corn tortillas for about 30 seconds on each side until they’re pliable. You can also wrap them in foil and place them in the oven for a few minutes to warm them up.
- Assemble the Tacos: To assemble, place a generous spoonful of roasted sweet potatoes and black beans onto each tortilla. Top with sliced avocado, chopped cilantro, and a squeeze of fresh lime juice.
- Serve and Enjoy: Serve the tacos warm, with additional lime wedges and hot sauce on the side if desired. Enjoy your healthy Sweet Potato and Black Bean Tacos!
Extra Tips:
When preparing Sweet Potato and Black Bean Tacos, consider customizing the toppings to suit your taste preferences. Adding ingredients like crumbled feta cheese, diced tomatoes, or pickled onions can elevate the flavor profile.
Additionally, feel free to experiment with different spices and herbs to make the dish your own. For a bit of crunch, you can also include shredded cabbage or a sprinkle of pumpkin seeds on top. Enjoy the versatility and freshness of this delightful taco recipe!
Grilled Shrimp Skewers With Garlic and Lime
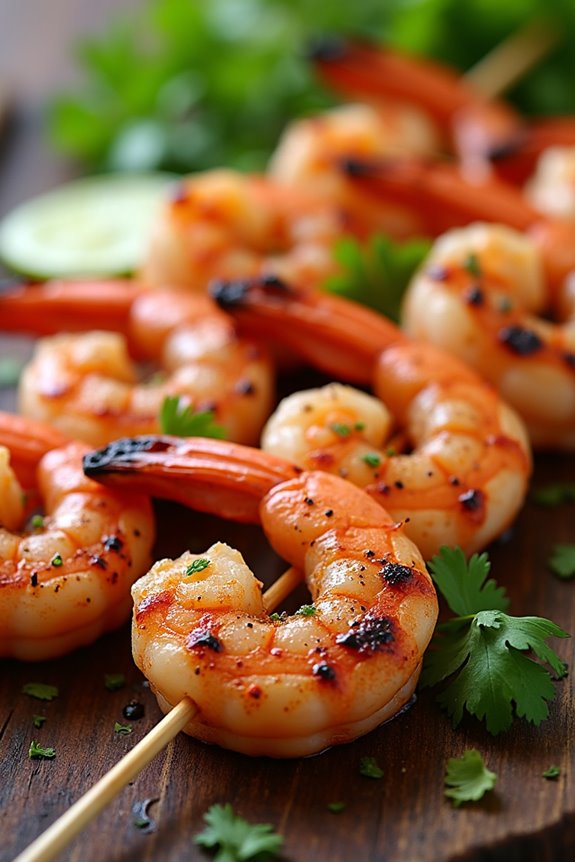
Grilled Shrimp Skewers with Garlic and Lime is a vibrant and healthy dish inspired by the rich culinary traditions of Brazil. This recipe combines the freshness of shrimp with the bold flavors of garlic and zesty lime, making it a perfect choice for a light meal or an enticing appetizer at your next gathering. The simplicity of the ingredients allows the natural flavors to shine through, while the grilling process adds a smoky depth that elevates the dish.
These skewers aren’t only delicious but also quick to prepare, making them ideal for busy weeknights or weekend barbecues. Serve them alongside a rejuvenating salad or some grilled vegetables for a complete meal that’s both satisfying and nutritious. With just a few key ingredients and minimal prep time, you can impress your family and friends with this delightful Brazilian dish.
Ingredients (Serves 4-6)
- 1 pound large shrimp, peeled and deveined
- 4 cloves garlic, minced
- 1/4 cup fresh lime juice
- 1/4 cup olive oil
- 1 teaspoon salt
- 1/2 teaspoon black pepper
- 1 teaspoon paprika
- 1 teaspoon cumin
- 1/4 cup chopped fresh cilantro (optional)
- Lime wedges, for serving
Cooking Instructions
- Prepare the Marinade: In a medium bowl, whisk together the minced garlic, lime juice, olive oil, salt, black pepper, paprika, and cumin. This marinade will infuse the shrimp with flavor and help tenderize them.
- Marinate the Shrimp: Add the peeled and deveined shrimp to the bowl, making sure they’re fully coated in the marinade. Cover the bowl with plastic wrap or transfer the shrimp to a resealable plastic bag. Let them marinate in the refrigerator for at least 30 minutes, but no longer than 2 hours to prevent the shrimp from becoming mushy.
- Preheat the Grill: Heat your grill to medium-high heat. If using wooden skewers, soak them in water for about 30 minutes before grilling to prevent burning. This step is vital for guaranteeing that your skewers hold together during the cooking process.
- Skewer the Shrimp: Once the shrimp have marinated, thread them onto the skewers, about 4-5 shrimp per skewer, leaving a little space between each one. This allows for even cooking and gives the shrimp a nice char.
- Grill the Shrimp: Place the skewers on the preheated grill. Grill the shrimp for about 2-3 minutes on each side, or until they turn pink and opaque. Don’t overcook, as shrimp can become tough if left on the grill for too long.
- Serve: Remove the skewers from the grill and sprinkle with fresh cilantro if desired. Serve immediately with lime wedges on the side for an extra burst of flavor.
Extra Tips
When making Grilled Shrimp Skewers with Garlic and Lime, consider using fresh shrimp for the best flavor and texture. If you can, opt for wild-caught shrimp, as they tend to have a better taste compared to farmed varieties.
Additionally, feel free to customize the marinade by adding spices or herbs that you enjoy. For a twist, try adding a pinch of chili flakes for some heat or swapping lime juice for lemon juice for a different citrus note.
Remember to keep an eye on the shrimp while grilling to make sure they cook evenly and don’t overdo it. Enjoy your delicious and healthy Brazilian treat!
Cauliflower Rice With Herbs
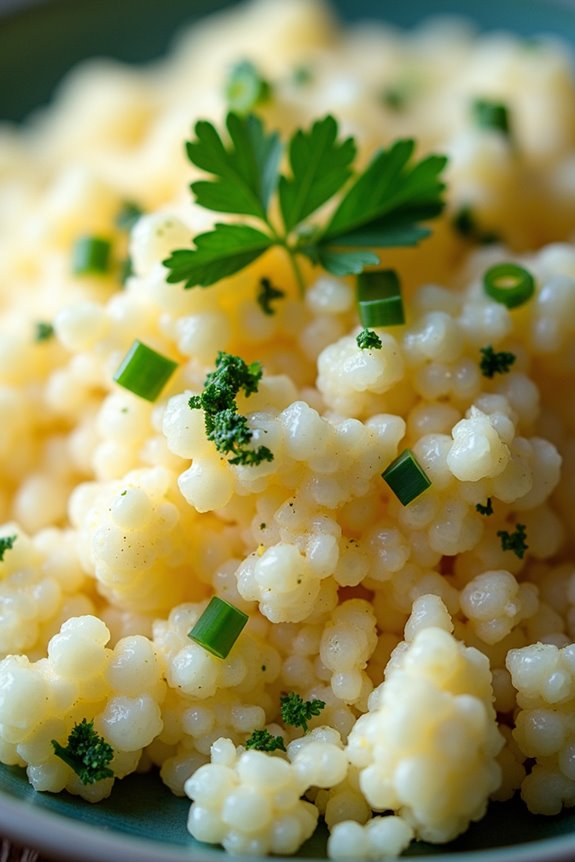
Cauliflower rice is a fantastic, low-carb alternative to traditional rice, and it has gained popularity in various cuisines around the world, including Brazilian dishes. This healthy recipe combines the delicate flavors of cauliflower with fresh herbs, creating a vibrant and aromatic side dish that pairs beautifully with grilled meats, fish, or vegetable dishes.
Not only is it quick and easy to prepare, but it also packs a nutritious punch, making it a great addition to any meal. In this recipe, we’ll show you how to prepare cauliflower rice with a blend of fresh herbs such as parsley, cilantro, and green onions. These herbs not only enhance the flavor but also add a wonderful aroma to the dish.
This recipe serves 4-6 people, making it perfect for family dinners or gatherings with friends. Get ready to impress your guests with this healthy and delicious Brazilian-inspired side dish!
Ingredients
- 1 medium head of cauliflower
- 2 tablespoons olive oil
- 1 small onion, finely chopped
- 3 cloves garlic, minced
- 1/2 cup fresh parsley, chopped
- 1/2 cup fresh cilantro, chopped
- 2 green onions, chopped
- Salt and pepper, to taste
- Juice of 1 lime
Cooking Instructions
- Prepare the Cauliflower: Begin by washing the cauliflower thoroughly. Remove the leaves and stem, and cut the cauliflower into smaller florets. This will make it easier to process into rice-sized pieces.
- Rice the Cauliflower: Using a food processor, pulse the cauliflower florets until they resemble rice grains. Be cautious not to over-process, as you want to maintain a rice-like texture. If you don’t have a food processor, you can also grate the cauliflower using a box grater.
- Sauté the Aromatics: In a large skillet, heat the olive oil over medium heat. Add the chopped onion and sauté for about 3-4 minutes, or until the onion becomes translucent. Then, add the minced garlic and continue to sauté for another minute, until fragrant.
- Cook the Cauliflower Rice: Add the riced cauliflower to the skillet with the sautéed onion and garlic. Stir well to combine and cook for about 5-7 minutes, stirring occasionally, until the cauliflower is tender but not mushy.
- Add the Herbs: Once the cauliflower rice is cooked, remove the skillet from the heat. Stir in the chopped parsley, cilantro, green onions, and lime juice. Season with salt and pepper to taste, making sure all ingredients are well combined.
- Serve: Transfer the cauliflower rice to a serving dish and enjoy warm as a side dish with your favorite Brazilian main courses.
Extra Tips
For added flavor, consider incorporating spices such as cumin or paprika while sautéing the onions. If you want a bit of heat, a pinch of red pepper flakes can also enhance the dish.
Additionally, feel free to customize the herbs based on your preferences or what you have on hand; dill or basil can also work well. Always taste and adjust the seasoning before serving to guarantee the best flavor experience!
Tropical Fruit Salad With Mint
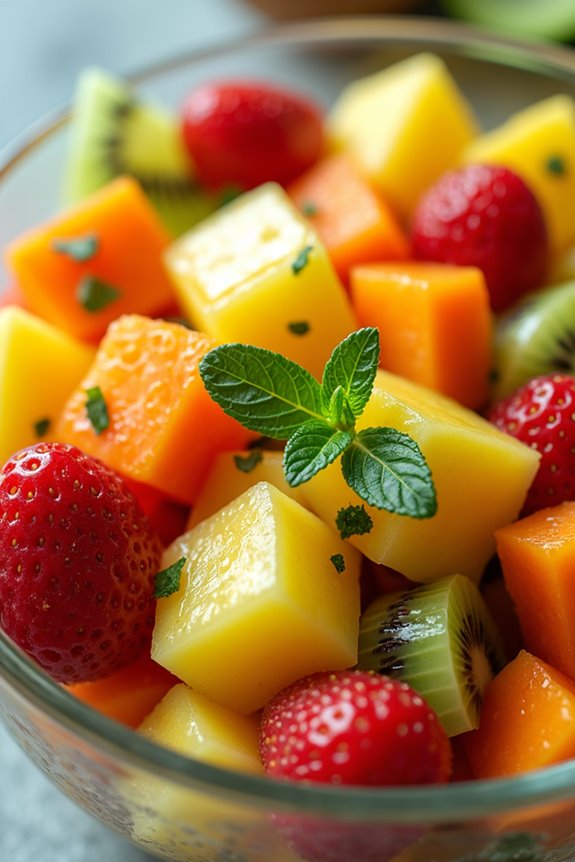
Tropical Fruit Salad With Mint is a vibrant and invigorating dish that showcases the exotic flavors of Brazil’s tropical fruits. Bursting with color and nutrients, this salad is perfect for a light dessert or a revitalizing side dish at any gathering. The combination of juicy fruits, a hint of lime, and aromatic mint creates a delightful medley that’s sure to impress your guests and satisfy your cravings for something sweet and healthy.
This salad isn’t only delicious but also incredibly versatile. You can easily customize it by adding your favorite fruits or adjusting the sweetness to your liking. The addition of fresh mint elevates the dish, giving it a fragrant and cooling element that pairs beautifully with the tropical flavors.
Whether you’re enjoying it on a hot summer day or serving it at a festive gathering, this Tropical Fruit Salad With Mint is a delightful way to celebrate the vibrant tastes of Brazil.
Ingredients (Serves 4-6):
- 1 cup diced pineapple
- 1 cup diced mango
- 1 cup diced papaya
- 1 cup diced kiwi
- 1 cup diced strawberries
- 1 lime, juiced
- 2 tablespoons honey (optional)
- 1/4 cup fresh mint leaves, chopped
Cooking Instructions:
- Prepare the Fruits: Start by washing all the fruits thoroughly under running water. Peel and dice the pineapple, mango, papaya, kiwi, and strawberries into bite-sized pieces. Make sure the pieces are uniform for better presentation and ease of eating.
- Combine the Fruits: In a large mixing bowl, gently combine all the diced fruits. Use a spatula or wooden spoon to mix them together without mashing the fruits, guaranteeing that each type maintains its shape and texture.
- Add Lime Juice: Squeeze the juice of one lime over the mixed fruits. This not only adds a zesty flavor but also helps to prevent the fruits from browning. Toss the fruits gently to evenly distribute the lime juice.
- Sweeten (if desired): If you prefer a sweeter salad, drizzle honey over the fruit mixture. Adjust the amount based on your taste preferences. Mix gently to guarantee that the honey coats the fruits evenly.
- Incorporate Mint: Add the chopped fresh mint leaves to the fruit bowl. The mint will provide a refreshing flavor that complements the sweetness of the fruits. Toss the salad one last time to evenly distribute the mint without bruising the leaves.
- Chill and Serve: For the best flavor, cover the bowl with plastic wrap and refrigerate the salad for about 30 minutes before serving. This allows the flavors to meld together and enhances the overall taste. Serve chilled in individual bowls or on a large platter.
Extra Tips:
When making Tropical Fruit Salad With Mint, feel free to experiment with different fruits based on what’s in season or your personal preferences. Fruits like bananas, blueberries, or even coconut can be excellent additions.
To keep the salad looking vibrant, serve it immediately after making it or store it in the refrigerator for a short time. If preparing in advance, consider adding the mint just before serving to maintain its fresh aroma and color. Enjoy this healthy treat as a great way to boost your fruit intake!
Roasted Vegetable and Quinoa Bowl
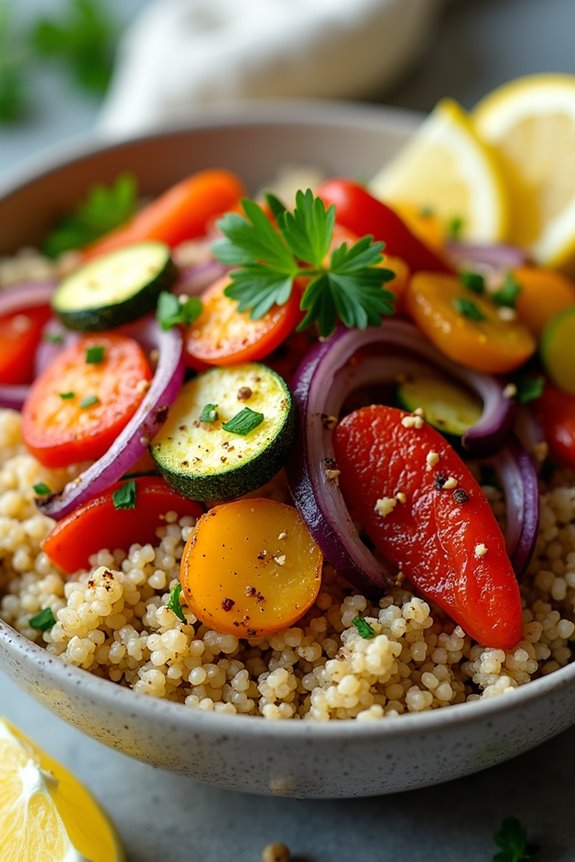
The Roasted Vegetable and Quinoa Bowl is a vibrant and nutritious dish that captures the essence of Brazilian cuisine’s fresh flavors and wholesome ingredients. This hearty meal showcases a colorful array of seasonal vegetables, perfectly roasted to enhance their natural sweetness, paired with fluffy quinoa. This combination not only provides a delightful taste but also packs a nutritional punch, making it an excellent choice for health-conscious eaters.
Quinoa, often referred to as a superfood, is a complete protein and gluten-free grain that serves as a fantastic base for this dish. When combined with roasted vegetables like bell peppers, zucchini, and carrots, it creates a satisfying meal that’s both filling and nourishing. Enjoy this bowl as a standalone dish or as a side to complement grilled meats or fish.
Ingredients (Serves 4-6):
- 1 cup quinoa
- 2 cups vegetable broth or water
- 1 red bell pepper, diced
- 1 yellow bell pepper, diced
- 1 zucchini, sliced
- 1 carrot, sliced
- 1 red onion, chopped
- 3 tablespoons olive oil
- 1 teaspoon garlic powder
- 1 teaspoon smoked paprika
- Salt and pepper to taste
- Fresh parsley, chopped (for garnish)
- Lemon wedges (for serving)
Cooking Instructions:
- Preheat the Oven: Begin by preheating your oven to 425°F (220°C). This high temperature will help in roasting the vegetables, giving them a delicious caramelized flavor.
- Prepare the Quinoa: Rinse the quinoa under cold water using a fine mesh sieve to remove its natural coating, which can be bitter. In a medium saucepan, combine the rinsed quinoa and vegetable broth (or water). Bring it to a boil over medium-high heat, then reduce the heat to low, cover, and let it simmer for about 15 minutes or until all the liquid is absorbed. Once cooked, fluff the quinoa with a fork and set it aside.
- Prepare the Vegetables: While the quinoa is cooking, prepare your vegetables. In a large mixing bowl, combine the diced red and yellow bell peppers, sliced zucchini, sliced carrot, and chopped red onion. Drizzle with olive oil, and sprinkle with garlic powder, smoked paprika, salt, and pepper. Toss everything together until the vegetables are well coated.
- Roast the Vegetables: Spread the seasoned vegetables evenly on a baking sheet lined with parchment paper. Roast in the preheated oven for about 20-25 minutes or until they’re tender and slightly browned, stirring halfway through for even cooking.
- Assemble the Bowl: Once the vegetables are roasted and the quinoa is cooked, it’s time to assemble your bowl. Start with a base of quinoa, then top with a generous portion of the roasted vegetables. Garnish with freshly chopped parsley and serve with lemon wedges on the side for an added zing.
Extra Tips: When preparing this Roasted Vegetable and Quinoa Bowl, feel free to customize the vegetables based on what’s in season or what you have on hand. Other great options include sweet potatoes, asparagus, or broccoli.
Additionally, you can spice up the dish by adding your favorite herbs or a sprinkle of feta cheese for a salty contrast. Enjoy experimenting with flavors to make this dish your own!
Beet and Avocado Salad
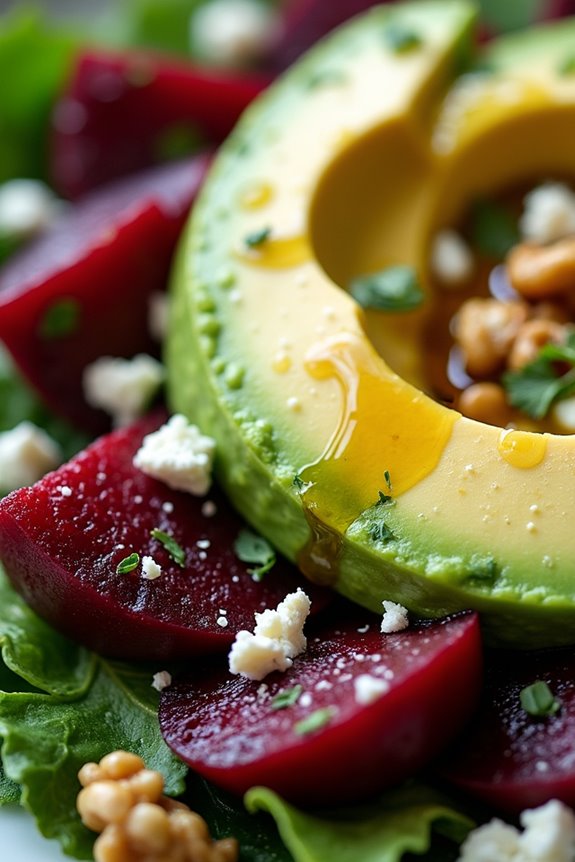
Beet and Avocado Salad is a stunning dish that beautifully combines earthy flavors with creamy textures, making it a perfect addition to any meal. This vibrant salad not only looks appealing with its rich colors but also packs a nutritional punch. Beets are known for their high antioxidant content, while avocados provide healthy fats that are beneficial for heart health.
This dish isn’t only healthy but also easy to prepare, making it a fantastic option for both casual dinners and special occasions. This salad is versatile and can be served as a side dish or a light main course. Pair it with some grilled chicken or fish to create a complete meal.
The combination of fresh herbs and tangy dressing elevates the flavor profile, making it an irresistible choice for salad lovers. Follow the simple recipe below to create this delightful Beet and Avocado Salad that serves 4-6 people.
Ingredients
- 4 medium-sized beets
- 2 ripe avocados
- 1 cup arugula or mixed greens
- 1/2 cup crumbled feta cheese
- 1/4 cup walnuts, chopped
- 2 tablespoons olive oil
- 1 tablespoon balsamic vinegar
- 1 teaspoon Dijon mustard
- Salt and pepper to taste
- Fresh herbs (such as parsley or cilantro) for garnish
Cooking Instructions
1. Prepare the Beets: Start by preheating your oven to 400°F (200°C). Wash the beets thoroughly to remove any dirt. Wrap each beet in aluminum foil and place them on a baking sheet. Roast in the oven for about 45-60 minutes or until tender when pierced with a fork.
Once done, remove from the oven, let them cool, and then peel the skins off. Slice the beets into wedges or rounds as desired.
2. Prepare the Avocados: While the beets are roasting, cut the avocados in half, remove the pit, and scoop the flesh out with a spoon. Slice the avocado into thin wedges or cubes, and drizzle with a little lemon juice to prevent browning.
3. Make the Dressing: In a small bowl, whisk together the olive oil, balsamic vinegar, Dijon mustard, salt, and pepper until well combined. Adjust the seasoning according to your taste.
4. Assemble the Salad: In a large salad bowl, add the arugula or mixed greens as the base. Top with the roasted beet slices, avocado pieces, crumbled feta cheese, and chopped walnuts. Drizzle the dressing over the salad and toss gently to combine.
5. Garnish and Serve: Finally, garnish the salad with fresh herbs for an added touch of flavor and color. Serve immediately while the beets are still slightly warm, or chill it in the refrigerator for a revitalizing cold dish.
Extra Tips
For an added layer of flavor, consider adding some roasted garlic to the dressing or including slices of red onion for a bit of sharpness. You can also experiment with different nuts, such as pecans or almonds, to personalize the dish further.
If you have leftovers, store them in an airtight container in the refrigerator, but be aware that the avocado may brown slightly over time. Enjoy your colorful and nutrient-packed Beet and Avocado Salad!
Coconut Chia Seed Pudding

Coconut Chia Seed Pudding is a delightful and nutritious dessert that captures the essence of Brazilian flavors while offering a healthy twist. This dish isn’t only easy to prepare, but it’s also packed with omega-3 fatty acids, fiber, and protein, making it a perfect choice for breakfast or a sweet treat.
The combination of creamy coconut milk and the unique texture of chia seeds creates a satisfying and indulgent experience that’s both guilt-free and delicious. This pudding is incredibly versatile, allowing you to customize it with your favorite toppings such as fresh fruits, nuts, or granola.
The natural sweetness of coconut milk harmonizes beautifully with the nutty flavor of chia seeds, making it a crowd-pleaser for both adults and children. Whether you’re looking to impress guests or simply treat yourself, Coconut Chia Seed Pudding is sure to become a staple in your kitchen.
Ingredients (serves 4-6):
- 1 cup coconut milk (canned or carton)
- 1/4 cup chia seeds
- 1/4 cup honey or maple syrup (adjust to taste)
- 1 teaspoon vanilla extract
- 1/2 teaspoon salt
- Fresh fruit for topping (e.g., mango, berries, banana)
- Shredded coconut for garnish (optional)
- Nuts or granola for added crunch (optional)
Cooking Instructions:
- Combine the Ingredients: In a medium-sized mixing bowl, whisk together the coconut milk, chia seeds, honey or maple syrup, vanilla extract, and salt until well combined. This mixture will form the base of your pudding and the chia seeds will begin to absorb the liquid.
- Let it Sit: Cover the bowl with plastic wrap or a lid and place it in the refrigerator for at least 4 hours or overnight. This step is essential as it allows the chia seeds to swell and create a gel-like texture, turning the liquid into a pudding consistency.
- Stir and Check Consistency: After the chilling period, remove the pudding from the refrigerator and give it a good stir. If the pudding is too thick, you can add a splash more of coconut milk to achieve your desired consistency. Adjust sweetness if necessary by adding more honey or maple syrup.
- Serve: Spoon the pudding into individual serving bowls or glasses. Top with your choice of fresh fruits, shredded coconut, and nuts or granola for added texture and flavor.
- Enjoy: Enjoy your Coconut Chia Seed Pudding immediately or store leftovers in the refrigerator for up to 5 days.
Extra Tips:
For an extra tropical flair, consider adding a splash of pineapple juice to the coconut milk mixture before refrigerating. Feel free to experiment with different flavorings such as cocoa powder for a chocolate version, or spices like cinnamon for a warm touch.
The pudding can also be made ahead of time, making it a convenient option for meal prep or last-minute guests. Just remember to keep any toppings separate until you’re ready to serve for the freshest taste!