

Brazilian street food is a treasure trove of flavors and traditions. The enticing aromas of coxinha and pastel waft through the air, inviting you to take a delicious journey. With every bite, you experience the cheesy delight of pão de queijo and the spicy thrill of acarajé. These snacks are perfect for satisfying any craving. Ready to explore some mouthwatering recipes that everyone loves?
Coxinha: The Savory Chicken Dumpling

Coxinha is a beloved Brazilian snack that has found its way into the hearts (and stomachs) of food lovers around the world. This delightful treat consists of a savory chicken filling encased in a tender dough, shaped like a chicken drumstick and then deep-fried to golden perfection.
Traditionally served as a street food offering, coxinhas are often enjoyed at parties and gatherings, making them a popular choice for sharing. Making coxinhas at home isn’t only a rewarding experience but also a fantastic way to introduce your friends and family to Brazilian flavors.
While the process may take some time, the end result is well worth the effort. With a crispy exterior and a flavorful chicken filling, these dumplings are sure to impress anyone who takes a bite.
Ingredients (Serves 4-6)
- 2 cups shredded cooked chicken
- 1 cup chicken broth
- 1 small onion, finely chopped
- 2 cloves garlic, minced
- 1 tablespoon olive oil
- 1 teaspoon salt (adjust to taste)
- 1/4 teaspoon black pepper
- 1/4 teaspoon paprika
- 2 cups all-purpose flour
- 1 cup water
- 2 tablespoons butter
- 1 egg, beaten (for egg wash)
- 2 cups breadcrumbs (for coating)
- Oil for frying
Cooking Instructions
1. Prepare the Chicken Filling: In a skillet, heat the olive oil over medium heat. Add the chopped onion and minced garlic, sautéing until the onion becomes translucent.
Stir in the shredded cooked chicken, chicken broth, salt, black pepper, and paprika. Cook for about 10 minutes, allowing the flavors to meld together. Once done, remove from heat and let it cool.
2. Make the Dough: In a saucepan, combine water, butter, and a pinch of salt. Bring to a gentle boil, then add the flour all at once, stirring vigorously.
Continue to cook while stirring until the dough pulls away from the sides of the pan and forms a ball. Remove from heat and let it cool slightly.
3. Shape the Coxinhas: Once the dough is cool enough to handle, take a small piece (about the size of a golf ball) and flatten it in your palm.
Place about a tablespoon of the chicken filling in the center, then fold the dough over the filling and pinch the edges to seal. Shape the dumpling into a teardrop or drumstick shape. Repeat with the remaining dough and filling.
4. Coat the Coxinhas: Set up a breading station with the beaten egg and breadcrumbs in separate bowls. Dip each shaped coxinha into the egg wash, allowing excess to drip off, then coat it in breadcrumbs.
Make sure they’re evenly covered.
5. Fry the Coxinhas: In a deep skillet or pot, heat oil over medium-high heat. Once the oil is hot, carefully add the coxinhas in batches, taking care not to overcrowd the pan.
Fry until they’re golden brown and crispy, about 4-5 minutes per batch. Use a slotted spoon to remove them and drain on paper towels.
Extra Tips
When making coxinhas, it’s important to verify that the filling is well-seasoned to complement the dough. You can customize the filling by adding spices or herbs to your taste.
For a healthier version, consider baking the coxinhas instead of frying; just brush them with oil and bake them at 375°F (190°C) for about 25-30 minutes or until golden brown.
Finally, serve your coxinhas with a side of hot sauce or your favorite dipping sauce for an extra kick!
Pastel: Crispy Fried Pastries

Pastel, a beloved street food in Brazil, is a delightful pastry that features a thin, crispy crust filled with various savory or sweet fillings. Often found at street markets and food fairs, these pastries are a staple snack, perfect for sharing with friends or enjoying solo. With their golden-brown exterior and delicious fillings, pastéis can satisfy any craving, from cheesy to meaty or even sweet.
Making pastéis at home allows you to customize the fillings to your liking, guaranteeing a fresh and flavorful experience. The dough for the pastel is simple yet incredibly satisfying to prepare. Once you’ve mastered the basics, you can experiment with an array of fillings, including cheese, ground meat, or even vegetables. Fried to perfection, these pastries become irresistibly crispy and are often served with a side of hot sauce or vinegar for an extra kick.
Whether you’re hosting a gathering or just want a tasty snack, pastéis are sure to impress and bring a taste of Brazil right to your kitchen.
Ingredients (Serves 4-6)
- 2 cups all-purpose flour
- ½ teaspoon salt
- 1 tablespoon vegetable oil
- ½ cup warm water
- Filling of your choice (e.g., cheese, ground beef, or vegetables)
- Oil for frying
Cooking Instructions
- Prepare the Dough: In a large mixing bowl, combine the all-purpose flour and salt. Create a well in the center and add the vegetable oil. Gradually pour in the warm water while mixing with your hands or a fork until the dough starts to come together. Knead the dough on a floured surface for about 5-7 minutes until it becomes smooth and elastic. Cover the dough with a kitchen towel and let it rest for at least 30 minutes.
- Make the Filling: While the dough is resting, prepare your desired filling. If you’re using meat, cook it in a skillet with onions, garlic, and spices until fully cooked. For cheese, you can simply grate it or cut it into small pieces. Feel free to add herbs or other ingredients to enhance the flavor. Allow the filling to cool before assembling the pastéis.
- Roll Out the Dough: Once the dough has rested, divide it into smaller portions for easier handling. On a floured surface, roll out each portion into a thin sheet, about 1/8 inch thick. Use a round cutter or a glass to cut out circles of dough, approximately 4-5 inches in diameter.
- Fill the Pastéis: Take one dough circle and place a spoonful of your filling in the center. Be careful not to overfill, as this can cause the pastry to burst during frying. Fold the circle in half to create a half-moon shape, and press the edges firmly to seal. You can use a fork to crimp the edges for a decorative touch and to make sure they’re tightly sealed.
- Fry the Pastéis: In a deep frying pan, heat oil over medium heat until it reaches about 350°F (175°C). Carefully lower the filled pastéis into the hot oil, frying a few at a time to avoid overcrowding. Fry for about 3-4 minutes on each side or until they’re golden brown and crispy. Use a slotted spoon to remove them from the oil and place them on paper towels to drain excess oil.
- Serve and Enjoy: Once the pastéis are drained, they’re ready to be served. Enjoy them hot with your favorite dipping sauce, such as hot sauce, chimichurri, or a simple vinegar and onion mix.
Extra Tips
When making pastéis, it’s essential to ascertain the oil is hot enough before frying; otherwise, the dough may absorb too much oil and become greasy. If you’re concerned about the filling leaking out during frying, you can brush a bit of water on the edges of the dough before sealing for a better hold.
Additionally, experimenting with different fillings can lead to exciting flavor combinations; consider using ingredients like spinach and feta or sweetened guava paste for a unique twist!
Pão De Queijo: Cheesy Bread Rolls
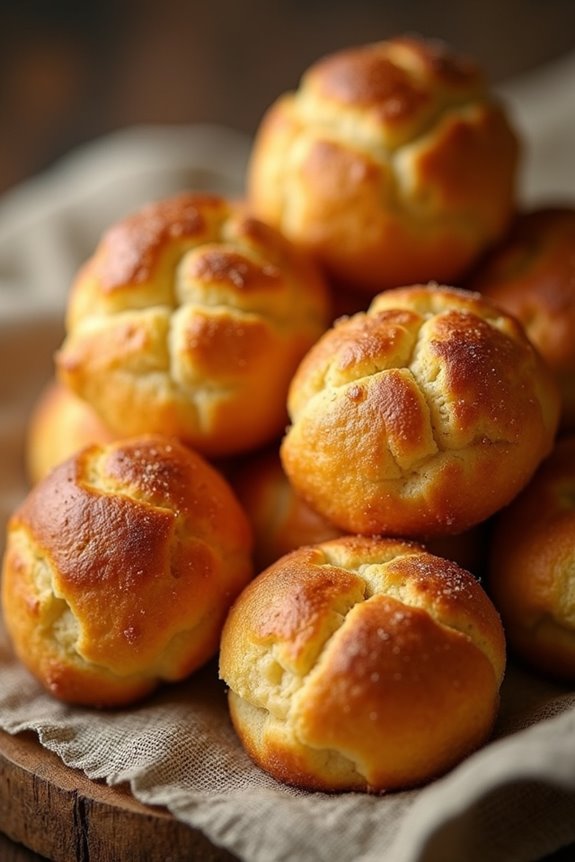
Pão de Queijo, or Brazilian cheese bread, is a delightful snack that has captured the hearts of both locals and visitors alike. These small, chewy rolls are made from tapioca flour, giving them a unique texture that’s both gluten-free and incredibly satisfying.
Traditionally served warm, they’re perfect for breakfast, afternoon tea, or even as a party appetizer. The combination of cheese and a hint of garlic creates a flavor profile that’s irresistibly delicious.
Making Pão de Queijo at home is easier than you might think. With just a few key ingredients, you can whip up a batch that will fill your kitchen with a mouthwatering aroma. These little cheese puffs are best enjoyed fresh out of the oven, but they can also be frozen for later use.
Whether you choose to serve them as a snack or alongside a meal, they’re sure to be a hit!
Ingredients (Serves 4-6)
- 1 cup of tapioca flour
- 1/2 cup of milk
- 1/4 cup of vegetable oil
- 1/2 teaspoon of salt
- 1/2 cup of grated Parmesan cheese
- 2 large eggs
- 1/2 cup of shredded mozzarella cheese
- 1 clove of garlic, minced (optional)
Cooking Instructions
- Preheat the Oven: Begin by preheating your oven to 375°F (190°C). This guarantees that your Pão de Queijo will bake evenly and develop a lovely golden crust.
- Combine Wet Ingredients: In a medium saucepan over medium heat, combine the milk, vegetable oil, and salt. Stir occasionally until the mixture comes to a gentle boil. This step helps to dissolve the salt and infuse the milk with flavor.
- Mix in Tapioca Flour: Remove the saucepan from heat and immediately stir in the tapioca flour using a wooden spoon until the mixture is well combined. The dough will be sticky and slightly elastic.
- Incorporate Eggs and Cheese: Allow the dough to cool for a few minutes, then add the eggs one at a time, mixing well after each addition. Next, fold in the grated Parmesan cheese, shredded mozzarella, and minced garlic (if using) until the mixture is smooth and all ingredients are fully incorporated.
- Shape the Dough: Using your hands (dusted with a bit of tapioca flour to prevent sticking), shape the dough into small balls, about 1 inch in diameter. Place them on a baking sheet lined with parchment paper, leaving space between each ball to allow for expansion.
- Bake: Place the baking sheet in the preheated oven and bake for 15-20 minutes, or until the Pão de Queijo are puffed and golden brown. Keep an eye on them to avoid over-baking.
- Serve Warm: Once baked, remove the rolls from the oven and let them cool for a few minutes. Serve warm and enjoy the cheesy goodness!
Extra Tips
For the best results, use freshly grated cheese instead of pre-packaged cheese, as it melts better and enhances the flavor.
If you’re looking for a variation, try adding herbs or spices to the dough, such as oregano or paprika, for an extra kick. Additionally, these cheese rolls can be frozen before baking; just allow them to thaw and bake them directly from the freezer, adding a few extra minutes to the baking time.
Enjoy your Pão de Queijo with a side of spicy dipping sauce or a revitalizing beverage!
Acarajé: Spicy Black-Eyed Pea Fritters
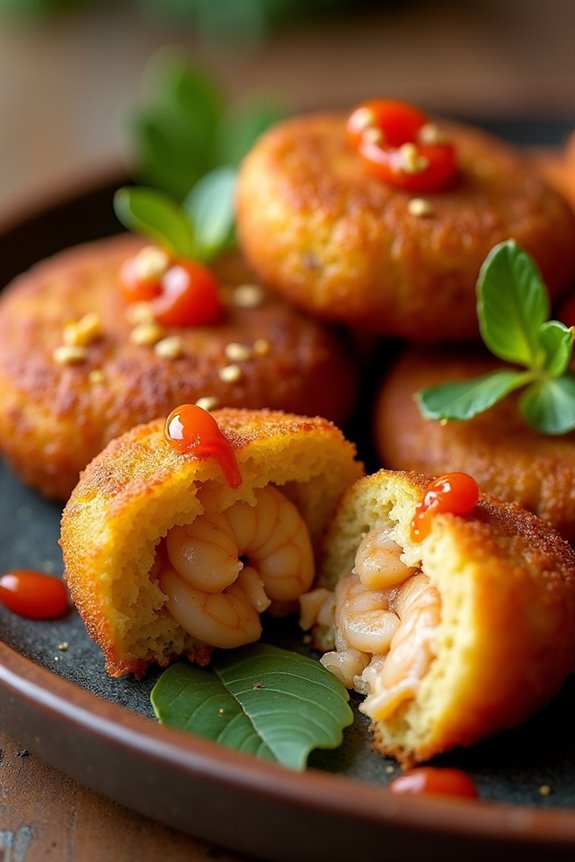
Acarajé is a beloved street food from Brazil, particularly popular in the northeastern state of Bahia. This dish is made from black-eyed peas that are mashed and formed into fritters, then deep-fried until golden and crispy. Traditionally, Acarajé is served with a flavorful filling of vatapá, a creamy mixture made with shrimp, peanuts, and spices, along with a sprinkle of hot pepper sauce. This dish not only tantalizes the taste buds but also showcases the rich culinary heritage of Brazil, influenced by African traditions.
Making Acarajé requires some preparation, as the black-eyed peas need to be soaked and then blended to achieve the right texture. The process of frying is vital; achieving the perfect crispy exterior while maintaining a fluffy interior is what makes this dish so delightful. Acarajé is often enjoyed as a snack or appetizer, and it’s commonly found at street food stalls throughout Brazil, where vendors serve it fresh and hot.
Ingredients (Serves 4-6)
- 2 cups black-eyed peas, dried
- 1 medium onion, finely chopped
- 2 teaspoons salt
- 1 teaspoon cayenne pepper (adjust to taste)
- 1 teaspoon baking powder
- Vegetable oil, for frying
- Vatapá (for filling)
- 1 cup dried shrimp, soaked and chopped
- 1 cup bread crumbs
- 1/2 cup coconut milk
- 1/4 cup peanuts, ground
- 2 cloves garlic, minced
- 1 onion, chopped
- 1 tablespoon palm oil
- Salt to taste
- Hot pepper sauce (optional, for serving)
Cooking Instructions
- Prepare the Black-Eyed Peas: Rinse the black-eyed peas under cold water, then place them in a bowl and cover with water. Allow them to soak for at least 8 hours or overnight. This softens the peas and makes them easier to blend.
- Blend the Peas: Drain the soaked black-eyed peas and place them in a blender or food processor. Add the chopped onion, salt, and cayenne pepper. Pulse until you achieve a smooth, thick batter. Be careful not to over-blend; the mixture should still have some texture.
- Incorporate Baking Powder: In a large bowl, combine the blended pea mixture with the baking powder. Mix well to make certain the baking powder is evenly distributed, which will help the fritters puff up during frying.
- Heat the Oil: In a deep frying pan, pour in enough vegetable oil to submerge the fritters (about 2-3 inches deep). Heat the oil over medium-high heat until it reaches 350°F (175°C), or until a small drop of the batter sizzles when added.
- Fry the Fritters: Using a spoon or small ice cream scoop, carefully drop spoonfuls of the batter into the hot oil. Fry in batches to avoid overcrowding. Cook for about 3-4 minutes on each side, or until golden brown and crispy. Use a slotted spoon to remove the fritters and place them on a paper towel-lined plate to drain excess oil.
- Prepare the Vatapá: In a skillet, heat palm oil over medium heat. Sauté the chopped onion and garlic until translucent. Add the soaked shrimp and cook for a few minutes. Stir in the ground peanuts, bread crumbs, and coconut milk. Season with salt to taste. Let it simmer until it thickens, then remove from heat.
- Assemble the Acarajé: Slice each fritter in half and fill with a generous amount of vatapá. Drizzle with hot pepper sauce if desired, and serve immediately.
Extra Tips
When making Acarajé, it’s important to keep the oil at the right temperature; too low, and the fritters will absorb excess oil and become greasy, too high, and they’ll burn before cooking through.
Experiment with different spices in the vatapá to customize the flavor to your liking. Also, consider serving Acarajé with a side of fresh salad or acarajé sauce for an invigorating contrast to the rich fritters.
Don’t hesitate to double the recipe for a gathering, as these savory bites are sure to be a hit!
Empada: Savory Meat Pies

Empadas are a beloved Brazilian street food that encapsulate the rich flavors and culinary traditions of Brazil. These savory pies are typically filled with a mixture of seasoned meat, often accompanied by vegetables, and encased in a flaky, buttery pastry. The beauty of empadas lies not only in their delicious fillings but also in their versatility; you can use various types of meat or even make vegetarian versions to cater to different tastes.
Perfect for snacks, appetizers, or a light meal, empadas are sure to impress anyone who takes a bite.
Making empadas from scratch might seem intimidating at first, but with a bit of patience and practice, you can create these delicious treats right at home. The process involves making the dough, preparing the filling, and then assembling the pies before baking them to golden perfection.
Whether you’re serving them at a gathering or enjoying them on a cozy night in, empadas are sure to become a favorite in your household.
Ingredients (Serves 4-6)
- For the Dough:
- 4 cups all-purpose flour
- 1 cup unsalted butter, chilled and cubed
- 1 teaspoon salt
- 1 egg yolk
- 1/4 cup cold water (more if needed)
- For the Filling:
- 1 pound ground beef (or chicken)
- 1 medium onion, finely chopped
- 2 cloves garlic, minced
- 1 cup diced tomatoes (canned or fresh)
- 1/2 cup green olives, chopped
- 1/4 cup fresh parsley, chopped
- 1 teaspoon paprika
- Salt and pepper to taste
- 1 egg (for egg wash)
Cooking Instructions
- Prepare the Dough:
- In a large mixing bowl, combine the all-purpose flour and salt. Add the chilled, cubed butter and use your fingers or a pastry cutter to mix until the mixture resembles coarse crumbs. This step is essential for achieving that flaky texture in the dough.
- Combine Wet Ingredients:
- In a small bowl, beat the egg yolk and cold water together. Slowly add this mixture to the flour and butter mixture. Mix until the dough comes together. If the dough is too dry, add more water a tablespoon at a time until it’s just moist enough to hold together.
- Chill the Dough:
- Wrap the dough in plastic wrap and refrigerate for at least 30 minutes. Chilling the dough helps relax the gluten, making it easier to roll out later and contributing to a tender crust.
- Prepare the Filling:
- In a large skillet over medium heat, sauté the chopped onions and minced garlic until they’re soft and translucent. Add the ground beef (or chicken) and cook until browned. Drain any excess fat.
- Add Remaining Filling Ingredients:
- Stir in the diced tomatoes, chopped olives, parsley, paprika, salt, and pepper. Allow the mixture to simmer for about 5-7 minutes until the flavors meld together. Remove from heat and let cool slightly.
- Roll Out the Dough:
- On a lightly floured surface, divide the chilled dough into two portions. Roll out one portion to about 1/8 inch thick. Use a round cutter or a glass to cut out circles that will serve as the bottom crusts of the empadas.
- Assemble the Empadas:
- Place the dough circles into a greased muffin tin or empada molds. Fill each circle with a generous amount of the meat filling. Roll out the second portion of dough and cut out circles to place on top of the filling. Press the edges together to seal, and use a fork to crimp the edges for decoration.
- Brush with Egg Wash:
- Beat the egg and brush it over the tops of the empadas to give them a beautiful golden color when baked.
- Bake:
- Preheat your oven to 375°F (190°C). Place the empadas in the oven and bake for 25-30 minutes, or until the tops are golden brown. Keep an eye on them to avoid over-baking.
- Cool and Serve:
- Once baked, allow the empadas to cool for a few minutes before transferring them to a wire rack. Serve warm or at room temperature.
Extra Tips
When making empadas, feel free to get creative with the fillings by incorporating different meats or even adding cheese for a richer flavor.
You can also prepare the filling in advance, allowing it to cool completely before filling the pastry. This won’t only save time but also enhance the flavors as they meld together.
Additionally, empadas can be frozen before baking; simply thaw and bake when ready to enjoy a delightful homemade treat.
Brigadeiro: Chocolate Truffles

Brigadeiro is a beloved Brazilian treat that has captured the hearts of many with its rich and fudgy texture. Traditionally made for birthdays and festive occasions, these chocolate truffles are simple to prepare and require only a few ingredients. The combination of sweetened condensed milk, cocoa powder, and butter creates a delectable mixture that’s rolled into small balls and coated in chocolate sprinkles. Each bite is a taste of nostalgia, evoking memories of celebrations and gatherings.
Making Brigadeiro isn’t only a fun experience but also a delightful way to introduce those unfamiliar with Brazilian cuisine to its sweet offerings. While the classic version is made with cocoa powder, you can easily customize the flavors by incorporating various toppings or adding a hint of espresso or coconut. These chocolate truffles are sure to impress your family and friends, making them a perfect addition to any dessert table or a sweet treat to enjoy on your own.
Ingredients (Serves 4-6)
- 1 can (14 ounces) sweetened condensed milk
- 2 tablespoons unsweetened cocoa powder
- 2 tablespoons unsalted butter
- A pinch of salt
- Chocolate sprinkles (for rolling)
Cooking Instructions
- Prepare the Mixture: In a medium saucepan, combine the sweetened condensed milk, cocoa powder, unsalted butter, and a pinch of salt. Stir the mixture well until all the ingredients are fully integrated and there are no lumps of cocoa powder.
- Cook the Mixture: Place the saucepan over medium heat. Continuously stir the mixture with a wooden spoon or spatula to prevent it from sticking to the bottom of the pan. Cook for about 10-15 minutes, or until the mixture thickens and pulls away from the sides of the pan. You’ll know it’s done when you can see the bottom of the pan when you drag the spoon through the mixture.
- Cool the Mixture: Once the Brigadeiro mixture has thickened, remove it from the heat and transfer it to a greased plate or bowl. Allow it to cool at room temperature for about 30 minutes or until it’s manageable to handle.
- Shape the Brigadeiros: Once cooled, grease your hands with a little butter to prevent sticking. Use your hands to pinch off small amounts of the mixture and roll them into balls, about the size of a cherry.
- Coat the Brigadeiros: Pour chocolate sprinkles into a shallow dish. Roll each Brigadeiro ball in the sprinkles until fully coated. Place each coated truffle on a plate or in paper cups for serving.
- Chill and Serve: If desired, refrigerate the Brigadeiros for about 15 minutes to firm them up a little more before serving. Enjoy your delicious Brigadeiros and share them with family and friends!
Extra Tips
To enhance the flavor of your Brigadeiros, feel free to experiment by adding a splash of vanilla extract or a tablespoon of brewed espresso to the mixture before cooking.
For a fun twist, try rolling the Brigadeiros in finely shredded coconut, crushed nuts, or even colorful candy sprinkles. Make sure to store any leftovers in an airtight container at room temperature for up to a week, or in the refrigerator for a longer shelf life. Enjoy these delightful treats as a sweet snack or dessert any time!
Biscoito De Polvilho: Tapioca Crackers
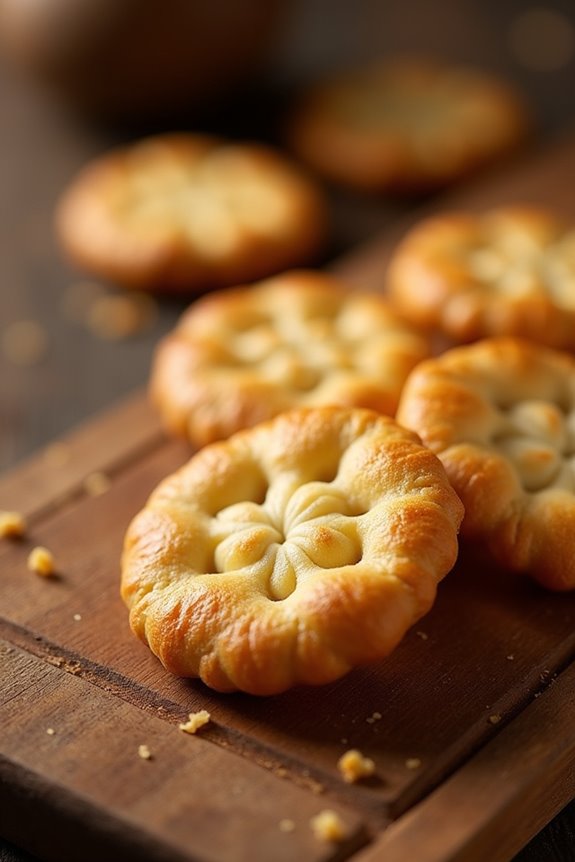
Biscoito De Polvilho, or Tapioca Crackers, is a beloved Brazilian snack that’s both light and crispy, making it an ideal accompaniment for any time of day. Made from tapioca flour, these crackers are naturally gluten-free and carry a delightful crunch with every bite. Traditionally enjoyed with coffee or tea, they can also be served as a snack on their own or with various dips. Their airy texture and subtle flavor make them a versatile treat that can be enjoyed by everyone.
The beauty of Biscoito De Polvilho lies in its simplicity and quick preparation. With just a few ingredients, they can be whipped up in no time, making them a perfect option for unexpected guests or a cozy afternoon snack. Not only are they easy to make, but they also provide a fun opportunity to explore Brazilian culinary traditions right from your own kitchen.
Ingredients (Serves 4-6 people):
- 2 cups of tapioca flour
- 1 cup of milk
- 1/2 cup of vegetable oil
- 2 large eggs
- 1 teaspoon of salt
- 1/2 cup of grated cheese (optional, for a cheesy flavor)
Cooking Instructions:
- Preheat the Oven: Begin by preheating your oven to 375°F (190°C). This guarantees that the Biscoito De Polvilho will bake evenly and achieve that perfect golden brown color.
- Combine Wet Ingredients: In a medium saucepan, combine the milk and vegetable oil. Heat the mixture over medium heat until it begins to simmer. Stir occasionally to prevent the oil from separating from the milk.
- Mix Dry Ingredients: In a large mixing bowl, combine the tapioca flour and salt. If you’re using cheese, add it to the dry mixture as well. This step is essential as it guarantees that the salt and cheese evenly distribute throughout the dough.
- Combine Mixtures: Once the milk-oil mixture is simmering, carefully pour it over the tapioca flour mixture. Be cautious as the mixture will be hot. Stir the mixture vigorously with a spoon or spatula until it forms a homogeneous dough.
- Add Eggs: Allow the dough to cool slightly, then add the eggs one at a time, mixing well after each addition. The dough should become smooth and elastic. If using cheese, make sure it’s well incorporated at this stage.
- Shape the Crackers: Using your hands, take small portions of the dough and roll them into small balls or shape them into thin discs. Place them on a baking sheet lined with parchment paper, making sure they’re spaced apart as they’ll expand while baking.
- Bake: Place the baking sheet in the preheated oven and bake for 15-20 minutes or until the crackers are puffed and golden. Keep an eye on them to avoid over-baking.
- Cool and Serve: Once baked, remove the crackers from the oven and let them cool on a wire rack. They’ll become crispier as they cool. Serve them warm or at room temperature.
Extra Tips:
For added flavor, consider experimenting with different types of cheese or herbs in the dough. If you prefer a spicier kick, adding a pinch of cayenne pepper or paprika can elevate the taste.
Additionally, these crackers can be stored in an airtight container for a few days, though they’re best enjoyed fresh out of the oven for that ultimate crunch!
Quibe: Bulgur and Meat Croquettes

Quibe, a beloved Brazilian street food, is a delicious combination of bulgur wheat and seasoned ground meat, typically beef or lamb. Originating from Middle Eastern cuisine, this dish has been embraced by Brazilian culture and is often found at street fairs and local markets throughout the country. Its crispy exterior and savory filling make quibe a popular snack or appetizer that’s sure to impress your friends and family.
Making quibe involves a few steps, but the results are well worth the effort. The bulgur wheat is soaked to achieve a tender consistency, while the meat is seasoned with an array of spices and herbs that bring depth to the flavor. Once combined, the mixture is shaped into croquettes and fried to golden perfection. Serve them with a side of fresh salad or yogurt sauce for a delightful treat that’s perfect for any occasion.
Ingredients (Serves 4-6):
- 1 cup bulgur wheat
- 1 lb ground beef (or lamb)
- 1 medium onion, finely chopped
- 2 cloves garlic, minced
- 1 tsp ground cumin
- 1 tsp ground coriander
- 1 tsp paprika
- 1/2 tsp cinnamon
- Salt and pepper to taste
- 1/4 cup fresh parsley, chopped
- 1/4 cup fresh mint, chopped
- 1 egg, beaten
- 1/4 cup water (as needed)
- Oil for frying
Cooking Instructions:
- Soak the Bulgur Wheat: Begin by rinsing the bulgur wheat under cold water in a fine sieve. Transfer it to a bowl and cover it with warm water. Let it soak for about 30 minutes until it becomes tender and has absorbed most of the water. After soaking, drain any excess moisture and set it aside.
- Prepare the Filling: In a skillet over medium heat, add a splash of oil and sauté the chopped onion until it becomes translucent, about 5 minutes. Add the minced garlic and cook for another minute. Remove from heat and allow to cool slightly.
- Combine Ingredients: In a large mixing bowl, combine the soaked bulgur wheat, ground meat, sautéed onion and garlic mixture, ground cumin, coriander, paprika, cinnamon, salt, pepper, parsley, and mint. Mix well until all ingredients are evenly incorporated. If the mixture feels too dry, add a little water as needed.
- Shape the Croquettes: With your hands, take small portions of the mixture (about the size of a golf ball) and shape them into oval or cylindrical croquettes. Make sure they’re compact to avoid falling apart during frying.
- Prepare for Frying: In a deep frying pan, heat oil over medium-high heat. You’ll need enough oil to cover the bottom of the pan adequately. To test if the oil is ready, drop a small piece of dough in; if it sizzles, the oil is hot enough.
- Fry the Quibe: Carefully add the croquettes to the hot oil, being careful not to overcrowd the pan. Fry them for about 4-5 minutes on each side or until they’re golden brown and crispy. Use a slotted spoon to remove them from the oil and place on paper towels to drain excess oil.
- Serve: Quibe can be served hot or at room temperature. Pair with a fresh salad, tahini, or yogurt sauce for dipping, and enjoy!
Extra Tips:
To enhance the flavor of your quibe, consider marinating the ground meat for a few hours with spices and herbs before mixing it with the bulgur. Additionally, experimenting with fillings such as cheese or vegetables can add a unique twist to the traditional recipe.
If you prefer baking instead of frying, preheat your oven to 375°F (190°C) and place the shaped quibe on a greased baking sheet; bake for about 25-30 minutes, turning halfway through for even browning.
Vatapá: Creamy Shrimp Stew
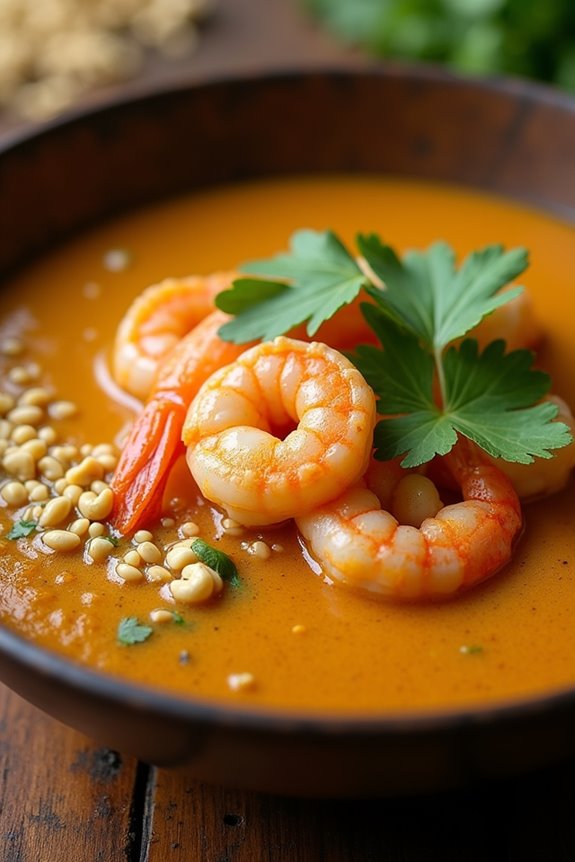
Vatapá is a traditional Brazilian dish that embodies the rich flavors and culinary traditions of the country, especially from the Bahia region. This creamy shrimp stew is a delightful combination of ingredients that results in a comforting meal perfect for any occasion. The dish is characterized by its smooth, velvety texture, which comes from a blend of bread, nuts, and coconut milk, serving as the perfect base for the succulent shrimp.
Often enjoyed with rice, vatapá isn’t only a staple in Brazilian households but also a popular street food item that captures the essence of Brazil’s vibrant culinary scene. Making vatapá allows you to explore the use of various spices and ingredients typical in Brazilian cuisine. The combination of dende oil, coconut milk, and the freshness of shrimp creates a dish that’s both hearty and satisfying.
Although it may seem intimidating with its list of ingredients, the steps are straightforward, and the end result is well worth the effort. Whether you’re hosting a dinner party or simply want to enjoy a taste of Brazil, this creamy shrimp stew will impress your guests and satisfy your cravings.
Ingredients (Serves 4-6)
- 500g of raw shrimp, peeled and deveined
- 200g of stale white bread, crusts removed
- 1 cup of coconut milk
- 1/2 cup of dende oil (palm oil)
- 1 medium onion, chopped
- 4 cloves of garlic, minced
- 1/2 cup of ground peanuts or cashews
- 1/2 teaspoon of cumin
- 1/2 teaspoon of paprika
- 1/4 teaspoon of black pepper
- 1/4 teaspoon of salt (to taste)
- 1/4 cup of fresh cilantro, chopped (for garnish)
- Juice of 1 lime
Cooking Instructions
- Prepare the Bread Mixture: In a bowl, soak the stale bread in coconut milk for about 15 minutes, or until the bread is soft. Once softened, squeeze out excess liquid and crumble the bread into small pieces. This will help create the creamy texture of the stew.
- Cook the Shrimp: In a large pot, heat a tablespoon of dende oil over medium heat. Add the shrimp and season with salt and lime juice. Sauté the shrimp for about 3-4 minutes, or until they turn pink and opaque. Remove the shrimp from the pot and set aside.
- Sauté Aromatics: In the same pot, add the remaining dende oil. Stir in the chopped onion and minced garlic, cooking until the onion is translucent and fragrant, about 5 minutes.
- Combine Ingredients: Stir in the ground peanuts or cashews, cumin, paprika, black pepper, and the crumbled bread mixture. Mix well, allowing the flavors to meld together for about 2 minutes.
- Add Coconut Milk: Gradually pour in the coconut milk while stirring. Bring the mixture to a gentle simmer, allowing it to thicken for about 10 minutes. If the stew is too thick, you can add a little more coconut milk or water.
- Incorporate the Shrimp: Once the stew has thickened to your liking, gently fold in the cooked shrimp. Let it simmer for an additional 5 minutes to heat the shrimp through and allow the flavors to combine.
- Serve: Taste the vatapá and adjust seasoning if necessary. Ladle the stew into bowls and garnish with fresh cilantro. Serve it hot alongside white rice for a complete meal.
Extra Tips
When cooking vatapá, feel free to customize the recipe by adding other seafood like fish or even vegetables for added flavor and texture. Using fresh shrimp will enhance the dish, but if you only have frozen shrimp, make sure they’re thawed thoroughly before cooking.
Additionally, dende oil is a key ingredient that provides the characteristic flavor of vatapá; however, if you can’t find it, substitute with another cooking oil, keeping in mind the flavor will be slightly different. Enjoy experimenting with this delicious dish!
Canjica: Sweet Corn Pudding
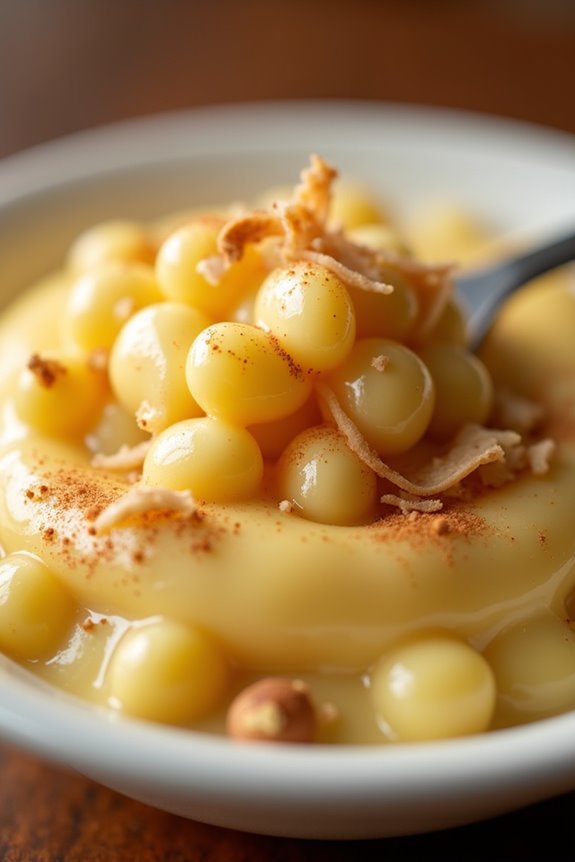
Canjica is a beloved Brazilian street food that brings the sweet flavors of corn to the forefront. Traditionally enjoyed during the Festa Junina celebrations, this dish is made with hominy corn, which is cooked until tender and then mixed with milk, sugar, and spices. The result is a creamy, comforting dessert that’s perfect for sharing with family and friends. Its delightful consistency and the subtle sweetness make it a favorite among both children and adults.
The preparation of Canjica is relatively simple, and the ingredients are easy to find. This dish can be served warm or chilled, depending on your preference, and is often garnished with toppings such as cinnamon, coconut, or peanuts to enhance its flavor. Whether you’re looking to explore Brazilian cuisine or simply satisfy a sweet tooth, Canjica offers a delicious and unique experience that will transport you to the vibrant streets of Brazil.
Ingredients (Serves 4-6)
- 1 cup hominy corn (dried)
- 4 cups water
- 4 cups milk
- 1 cup sugar
- 1 teaspoon salt
- 1 teaspoon vanilla extract
- 1 cinnamon stick
- 1/2 cup grated coconut (optional)
- Ground cinnamon for garnish (optional)
- Chopped peanuts for garnish (optional)
Cooking Instructions
- Soak the Hominy Corn: Begin by rinsing the dried hominy corn under cold water. Place it in a large bowl and cover it with water. Let it soak overnight (or for at least 8 hours). This process helps to soften the corn and reduce the cooking time.
- Cook the Corn: After soaking, drain and rinse the corn. In a large pot, add the soaked corn and 4 cups of fresh water. Bring it to a boil over medium-high heat, then reduce to a simmer. Cover the pot and let it cook for about 1 to 1.5 hours, or until the corn is tender. Stir occasionally to prevent sticking.
- Combine with Milk and Sugar: Once the corn is cooked and softened, add the milk, sugar, salt, and cinnamon stick to the pot. Stir well to combine all the ingredients. Increase the heat to medium and bring the mixture to a gentle boil, then reduce to a simmer.
- Add Flavoring: Stir in the vanilla extract and continue to simmer for another 30 minutes, allowing the flavors to meld together and the mixture to thicken. Stir occasionally to guarantee it doesn’t stick to the bottom of the pot.
- Serve: Once the Canjica has reached your desired thickness, remove it from the heat. Discard the cinnamon stick. You can serve it warm, or allow it to cool and serve it chilled. Top each serving with grated coconut, a sprinkle of ground cinnamon, and chopped peanuts if desired.
Extra Tips
For an even richer flavor, consider using whole milk or adding a splash of coconut milk to the mixture. If you prefer a thicker pudding, let it simmer longer until it reaches your desired consistency.
Canjica can be stored in the refrigerator for up to three days, making it a convenient dessert option that can be prepared in advance. Enjoy experimenting with different toppings to find your perfect combination!