

Growing up, yucca was always a staple in my kitchen, making each meal feel special. I still remember the first time I tasted arepas de yuca—the crispy outside and soft inside felt like a warm hug from home. Each region in South America has its own unique twist on this versatile root. Join me as we explore 12 rustic recipes that celebrate the rich culinary heritage of yucca. These recipes are deeply rooted in tradition and bring a taste of South America right to your kitchen.
Yucca Fries With Spicy Aioli
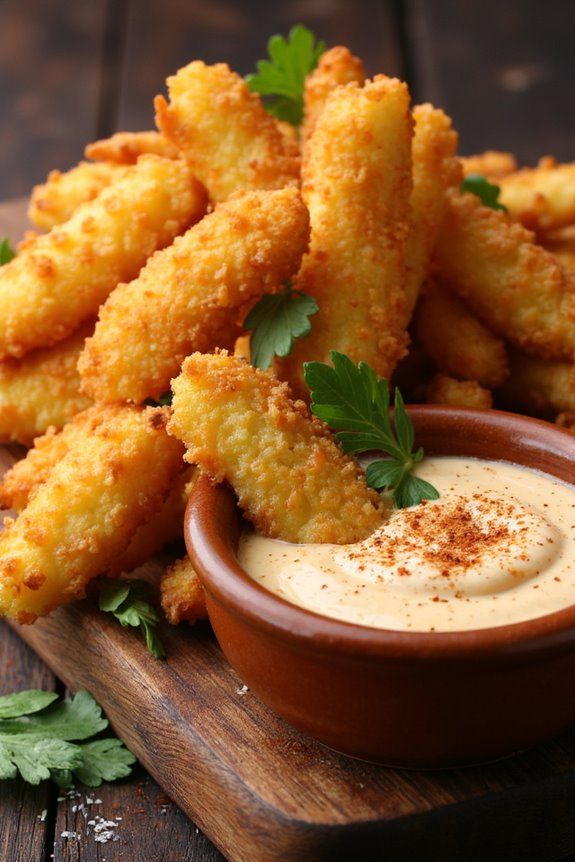
Yucca fries are a delicious and crispy alternative to traditional potato fries, offering a unique flavor and texture that’s sure to please. These golden, crunchy sticks of yucca aren’t only gluten-free but also packed with nutrients. When paired with a zesty spicy aioli, they make for an irresistible appetizer or side dish that can elevate any meal. This recipe will guide you through the process of making yucca fries and a creamy spicy aioli that complements them perfectly.
To prepare yucca fries, you’ll first need to peel and cut the yucca root into fry-shaped pieces. The yucca will then be boiled to soften it before being fried to achieve that perfect crispy exterior. The spicy aioli, made with mayonnaise, garlic, and a kick of heat, adds depth and flavor that beautifully contrasts the mild sweetness of the yucca. This dish is perfect for gatherings and can be enjoyed with friends and family!
Ingredients (Serves 4-6):
- 2 large yucca roots
- 4 cups water (for boiling)
- Vegetable oil (for frying)
- Salt (to taste)
- 1 cup mayonnaise
- 2 cloves garlic, minced
- 1 tablespoon lemon juice
- 1 teaspoon cayenne pepper (adjust to taste)
- 1 teaspoon smoked paprika
- Fresh parsley, chopped (for garnish, optional)
Cooking Instructions:
- Prepare the Yucca: Start by peeling the yucca roots. Use a sharp knife to carefully cut off both ends and then remove the tough outer skin. Cut the yucca into fry-shaped pieces, about 1/4 to 1/2 inch thick. This guarantees even cooking and crispiness.
- Boil the Yucca: In a large pot, bring 4 cups of water to a boil. Add the yucca pieces to the boiling water and let them cook for about 15 minutes or until they’re fork-tender. Be careful not to overcook them, as they should still hold their shape.
- Drain and Cool: Once the yucca is tender, drain the water and let the fries cool for a few minutes. This step is vital as it helps to achieve a crispy texture when frying.
- Heat the Oil: In a deep frying pan or pot, pour in enough vegetable oil to submerge the yucca fries completely, about 2-3 inches deep. Heat the oil over medium-high heat until it reaches 350°F (175°C). You can test the oil by dropping in a small piece of yucca; if it sizzles, the oil is ready.
- Fry the Yucca: Carefully drop the cooled yucca pieces into the hot oil in batches, making sure not to overcrowd the pan. Fry them for about 4-5 minutes or until they’re golden brown and crispy. Remove the fries with a slotted spoon and place them on a paper towel-lined plate to drain excess oil. Season with salt while they’re hot.
- Make the Spicy Aioli: In a medium bowl, combine the mayonnaise, minced garlic, lemon juice, cayenne pepper, and smoked paprika. Mix well until all ingredients are thoroughly combined. Taste and adjust seasoning as needed.
- Serve: Arrange the yucca fries on a serving platter and garnish with chopped parsley if desired. Serve them hot alongside the spicy aioli for dipping.
Extra Tips:
For an extra layer of flavor, consider adding additional spices to the yucca fries before frying, such as garlic powder or onion powder.
If you prefer a healthier version, you can also opt to bake the yucca fries instead of frying them. Simply toss the boiled yucca in olive oil and your favorite seasonings, then bake them in a preheated oven at 425°F (220°C) for about 25-30 minutes, flipping halfway through.
Enjoy your yucca fries fresh for the best taste and texture!
Brazilian Pão De Queijo
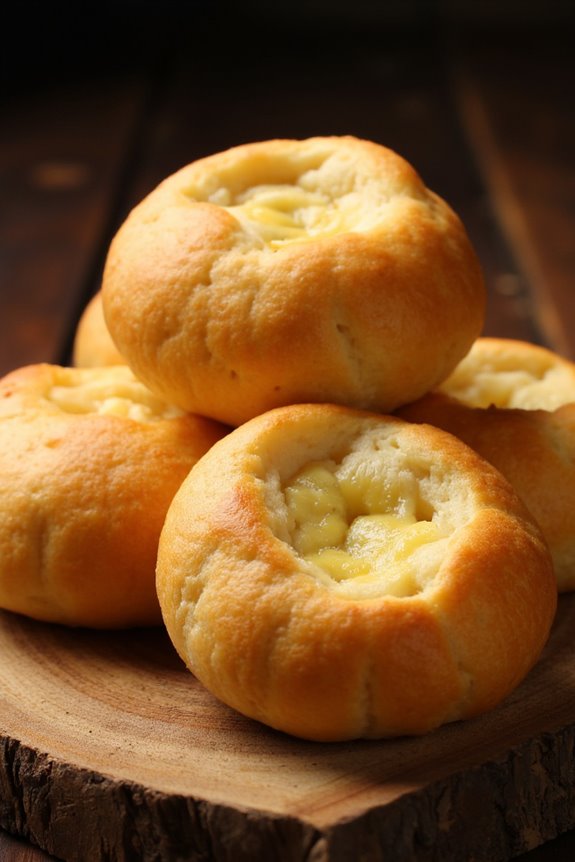
Brazilian Pão De Queijo, or cheese bread, is a delightful snack that originates from Brazil. Made primarily from tapioca flour, these little cheesy balls are naturally gluten-free and are the perfect accompaniment to any meal or a scrumptious treat on their own.
The chewy texture combined with the rich flavors of cheese makes Pão De Queijo a beloved specialty throughout Brazil and beyond. Whether enjoyed fresh out of the oven or at room temperature, these cheesy bites are guaranteed to impress.
Creating Pão De Queijo at home is simpler than you might think. With only a few ingredients, you can whip up a batch that will have your friends and family asking for more. The key to achieving the perfect texture lies in the tapioca flour, which gives the bread its characteristic chewiness.
Once you master this recipe, feel free to experiment with different types of cheese or add herbs for an extra twist.
Ingredients (Serves 4-6):
- 1 cup tapioca flour
- 1/2 cup milk
- 1/4 cup vegetable oil
- 1/2 teaspoon salt
- 1 large egg
- 1 cup grated cheese (such as Parmesan or mozzarella)
- Optional: 1/4 teaspoon garlic powder or herbs for extra flavor
Cooking Instructions:
1. Preheat the Oven: Start by preheating your oven to 375°F (190°C). This guarantees that your Pão De Queijo will bake evenly and develop a nice golden color.
2. Heat the Liquid Mixture: In a small saucepan over medium heat, combine the milk, vegetable oil, and salt. Stir occasionally until the mixture comes to a gentle boil. This step helps to dissolve the salt and allows the tapioca flour to absorb the liquid better.
3. Combine with Tapioca Flour: Once the liquid is boiling, remove the saucepan from heat. Gradually add the tapioca flour to the hot mixture, stirring continuously with a wooden spoon until it forms a sticky dough.
Let it cool for a few minutes until it’s warm but not hot to the touch.
4. Incorporate the Cheese and Egg: Add the grated cheese and the egg into the dough. Mix well until everything is fully incorporated. The dough will be sticky, which is normal. If you’re adding garlic powder or herbs, mix them in at this stage.
5. Shape the Dough: With your hands, Shape the Dough into small balls, about the size of a golf ball. Place them on a baking sheet lined with parchment paper, leaving some space between each ball as they’ll expand while baking.
6. Bake: Place the baking sheet in the preheated oven, and bake for about 15-20 minutes or until the tops are lightly golden and puffed up. Keep an eye on them to prevent over-baking.
7. Serve: Once baked, remove them from the oven and let them cool for a few minutes before serving. Enjoy them warm for the best flavor and texture.
Extra Tips:
For a fun twist, feel free to mix different types of cheese to create unique flavor combinations. Adding spices or herbs like oregano or thyme can also elevate your Pão De Queijo.
These cheesy breads are best enjoyed fresh, but you can store leftovers in an airtight container for a couple of days. To reheat, pop them in the oven for a few minutes to regain their delightful texture.
Colombian Arepas De Yuca

Colombian Arepas De Yuca are a delightful and versatile dish made from yuca (also known as cassava), which is a starchy root vegetable commonly used in Latin American cuisine. These arepas are gluten-free, making them an excellent option for those with dietary restrictions. With their crispy exterior and soft, chewy interior, they’re perfect for serving as a side dish or a base for various toppings, such as cheese, meats, or vegetables. This recipe captures the traditional Colombian flavors while being easy to prepare at home.
Cooking Arepas De Yuca is a simple process that involves boiling, mashing, and shaping the yuca into cakes before frying them to golden perfection. The resulting arepas can be served warm and are often enjoyed with a side of avocado or a dollop of sour cream. Whether you’re looking to impress your family or introduce friends to Colombian cuisine, these arepas are sure to be a hit.
Ingredients (Serves 4-6 people):
- 2 cups yuca, peeled and cut into chunks
- 1 cup grated cheese (mozzarella or queso blanco)
- 1/2 teaspoon salt
- 1/4 teaspoon ground black pepper
- 1 tablespoon vegetable oil (for frying)
- Water (as needed for boiling)
Cooking Instructions:
- Boil the Yuca: Start by placing the peeled yuca chunks in a large pot and cover them with water. Bring the water to a boil over medium-high heat, then reduce to a simmer. Cook the yuca for about 20-25 minutes, or until it’s tender and easily pierced with a fork. Make sure to check occasionally and add more water if necessary to keep the yuca submerged.
- Drain and Mash: Once the yuca is cooked, drain the water and let the chunks cool slightly. When they’re cool enough to handle, use a fork or potato masher to mash the yuca until it’s smooth and free of lumps. Add the grated cheese, salt, and black pepper to the mashed yuca, and mix until well combined.
- Shape the Arepas: Divide the yuca mixture into equal portions, about the size of a golf ball. Roll each portion into a ball and then flatten it gently into a disk about 1/2 inch thick. Confirm that the edges are smooth to prevent them from breaking while cooking.
- Fry the Arepas: Heat the vegetable oil in a large skillet over medium heat. Once the oil is hot, carefully add the shaped arepas to the skillet, cooking in batches if necessary to avoid overcrowding. Fry each arepa for about 4-5 minutes on each side, or until they’re golden brown and crispy. Remove them from the skillet and place them on a paper towel to drain excess oil.
- Serve: Serve the Arepas De Yuca warm, either on their own or with your choice of toppings such as avocado, sour cream, or your favorite protein.
Extra Tips:
When preparing Colombian Arepas De Yuca, it’s essential to choose fresh yuca for the best flavor and texture. Be sure to thoroughly cook the yuca to achieve the right consistency when mashing.
You can also experiment with different cheese types or add herbs and spices to the mixture for additional flavor. If you want to prepare these ahead of time, you can shape the arepas and freeze them before frying; simply cook them directly from frozen when you’re ready to enjoy!
Venezuelan Casabe
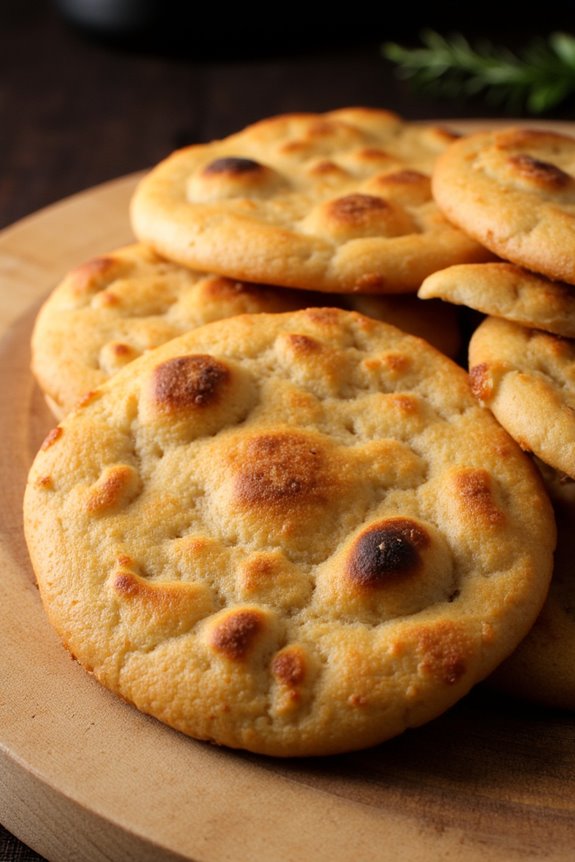
Venezuelan Casabe is a traditional flatbread made from cassava, a starchy root vegetable that’s a staple in many Latin American and Caribbean cuisines. Known for its crispy texture and slightly nutty flavor, Casabe is a versatile accompaniment that can be served alongside a variety of dishes or enjoyed on its own. This gluten-free flatbread isn’t only easy to prepare, but it also highlights the natural properties of cassava, making it a unique addition to any meal.
The preparation of Casabe involves grating fresh cassava, extracting the moisture, and forming the mixture into flat cakes that are then cooked until crispy. While the traditional method often requires a special flat surface or griddle, a regular skillet can be used effectively at home. Whether you enjoy it with savory toppings or simply dipped in your favorite sauce, Venezuelan Casabe is sure to impress your guests and add a touch of authenticity to your culinary repertoire.
Ingredients (Serves 4-6):
- 2 cups of cassava flour (preferably from fresh cassava)
- 1 cup of warm water
- 1 teaspoon of salt
- 1 tablespoon of olive oil (optional, for flavor)
Cooking Instructions:
- Prepare the Cassava: If using fresh cassava, peel the root and cut it into smaller pieces. Rinse under cold water to remove any dirt. Grate the cassava using a box grater or food processor until it reaches a fine consistency.
- Extract the Moisture: Transfer the grated cassava into a clean kitchen towel or cheesecloth. Gather the edges and twist to squeeze out as much moisture as possible. This step is essential to achieving a crispy texture in the finished Casabe.
- Mix the Ingredients: In a mixing bowl, combine the dried cassava with salt and olive oil (if using). Gradually add the warm water while mixing with your hands until the mixture forms a dough-like consistency. It should be moist but not sticky.
- Shape the Casabe: Divide the mixture into small balls (about the size of a golf ball). On a clean surface or parchment paper, flatten each ball into a thin round disc, approximately ¼ inch thick.
- Cook the Casabe: Heat a skillet or griddle over medium heat. Once hot, place one disc of the flattened cassava onto the skillet. Cook for about 5-7 minutes on each side, or until both sides are golden brown and crispy. Repeat the process for the remaining discs.
- Serve: Once cooked, remove from the skillet and allow to cool slightly. Serve warm as a side dish or snack, and enjoy with toppings of your choice or on its own.
Extra Tips:
When making Venezuelan Casabe, make certain that you thoroughly squeeze out the moisture from the grated cassava, as excess water can result in a chewy texture instead of the desired crispiness.
If you want to add a bit more flavor, consider experimenting with spices or herbs mixed into the dough, such as garlic powder or dried oregano.
Storing leftover Casabe in an airtight container will keep it fresh, and you can reheat it in a skillet for a few minutes before serving to regain its crispness.
Peruvian Ocopa Arequipeña
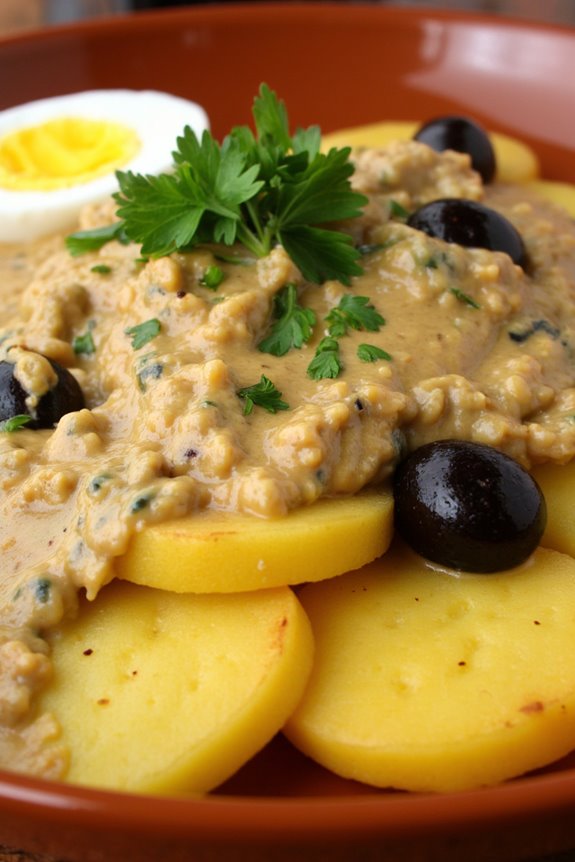
Peruvian Ocopa Arequipeña is a traditional dish that showcases the vibrant flavors of Peru, combining the earthiness of potatoes with a rich, nutty sauce. Originating from the Arequipa region, this dish is known for its unique blend of ingredients, including fresh herbs and spices that create a creamy sauce, perfect for drizzling over boiled potatoes.
The dish is often served as an appetizer or side and is celebrated for its zesty flavors and aromatic profile, making it a standout option for any gathering.
To prepare Ocopa Arequipeña, you’ll need to gather fresh ingredients that are typically accessible in most markets. The sauce is made from the blend of herbs such as huacatay (black mint), peanuts, and cheese, which combine to create a delightful taste. The dish isn’t only satisfying but also showcases the culinary heritage of Peru, making it a must-try for any food enthusiast looking to explore new flavors.
Ingredients (Servings: 4-6)
- 4 medium-sized yellow potatoes
- 1 cup fresh huacatay (black mint) leaves (or 1 tablespoon dried)
- 1/2 cup roasted peanuts
- 1/2 cup queso fresco (fresh cheese)
- 1/2 cup vegetable oil
- 1 medium onion, chopped
- 2 cloves garlic, minced
- 1-2 aji amarillo peppers (or yellow chili peppers)
- 1 cup broth (vegetable or chicken)
- Salt to taste
- Black olives for garnish
- Hard-boiled eggs for garnish
- Fresh parsley for garnish
Cooking Instructions
1. Prepare the Potatoes: Start by washing the yellow potatoes thoroughly. Place them in a pot, cover with water, and add a pinch of salt. Boil the potatoes until they’re fork-tender, which typically takes about 20-25 minutes.
Once cooked, drain and allow them to cool slightly before peeling and slicing them into rounds. Arrange the sliced potatoes on a serving plate.
2. Make the Ocopa Sauce: In a blender, combine the huacatay leaves, roasted peanuts, queso fresco, vegetable oil, chopped onion, minced garlic, and aji amarillo peppers. Blend until you achieve a smooth and creamy consistency.
If the mixture is too thick, gradually add broth until you reach the desired sauce thickness.
3. Adjust the Flavor: Taste the sauce and season with salt according to your preference. If you want to enhance the flavors, you can add a little more aji amarillo or huacatay, depending on your heat tolerance and taste.
4. Assemble the Dish: Pour the prepared Ocopa sauce generously over the sliced potatoes on the serving plate. Confirm that the potatoes are well-coated with the sauce for maximum flavor.
5. Garnish and Serve: For a beautiful presentation, garnish the Ocopa Arequipeña with slices of hard-boiled eggs, black olives, and freshly chopped parsley. Serve the dish at room temperature or slightly chilled, allowing the flavors to meld beautifully.
Extra Tips
When preparing Peruvian Ocopa Arequipeña, using fresh ingredients will greatly enhance the flavor of the dish. If huacatay isn’t available, consider using fresh cilantro as a substitute, though it will change the flavor profile slightly.
Additionally, you can adjust the spice level by varying the amount of aji amarillo used, or even replacing it with milder peppers if you prefer a less spicy dish. Finally, this sauce can be made in advance and stored in the refrigerator for a day or two, making it a convenient option for meal prep.
Yucca and Pork Stew
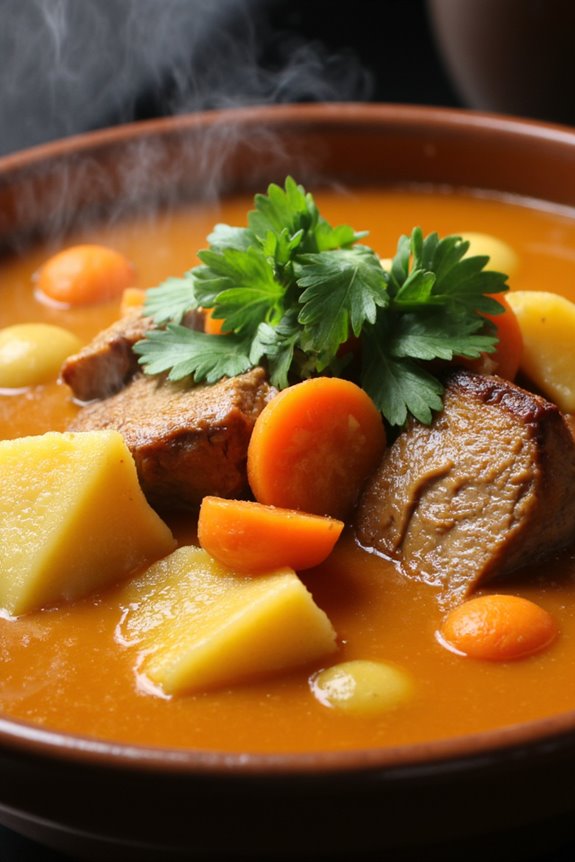
Yucca and Pork Stew is a hearty and flavorful dish that showcases the unique texture and taste of yucca root, combined with tender pork and a medley of spices. This stew is particularly popular in Latin American cuisine, where the rich flavors of the pork complement the starchy, slightly sweet yucca. The dish is perfect for family gatherings or a cozy dinner at home, providing warmth and satisfaction with every bite.
To prepare this delightful stew, you’ll need to take your time to guarantee that the pork is cooked to perfection and that the yucca is tender and absorbs the rich flavors of the broth. The combination of herbs, spices, and vegetables creates a wonderful aroma that will fill your kitchen and entice your guests. Serve this stew with warm crusty bread or rice to soak up the delicious sauce.
Ingredients (Serves 4-6):
- 2 lbs pork shoulder, cut into 1-inch cubes
- 1 large onion, chopped
- 4 cloves garlic, minced
- 2 medium carrots, sliced
- 1 bell pepper, chopped
- 1 tsp cumin
- 1 tsp paprika
- 1/2 tsp black pepper
- 1/2 tsp salt (adjust to taste)
- 4 cups chicken broth
- 2 large yucca roots, peeled and cut into 2-inch pieces
- 1 bay leaf
- 2 tablespoons olive oil
- Fresh cilantro, chopped (for garnish)
Cooking Instructions:
- Prepare the Ingredients: Begin by cutting the pork shoulder into 1-inch cubes and chopping the vegetables. Make sure to peel and cut the yucca roots into 2-inch pieces, as this will guarantee even cooking during the stew preparation.
- Sauté the Vegetables: In a large pot or Dutch oven, heat 2 tablespoons of olive oil over medium heat. Add the chopped onion, garlic, carrots, and bell pepper. Sauté for about 5-7 minutes, or until the onion becomes translucent and the vegetables begin to soften.
- Brown the Pork: Add the cubed pork shoulder to the pot, stirring to combine with the sautéed vegetables. Cook for approximately 8-10 minutes, allowing the pork to brown on all sides. This step adds depth of flavor to the stew.
- Add Spices and Broth: Sprinkle in the cumin, paprika, black pepper, and salt. Stir well to coat the pork and vegetables with the spices. Pour in the chicken broth, making sure to scrape any browned bits from the bottom of the pot for added flavor. Add the bay leaf and bring the mixture to a gentle boil.
- Incorporate the Yucca: Once the stew reaches a boil, carefully add the prepared yucca pieces to the pot. Reduce the heat to low, cover, and let the stew simmer for about 45 minutes to 1 hour, or until the pork is tender and the yucca is cooked through.
- Final Touches: After the cooking time, check the seasoning and adjust with more salt or pepper if needed. Remove the bay leaf and discard it. Serve the stew hot, garnished with fresh chopped cilantro for a burst of color and flavor.
Extra Tips:
When cooking Yucca and Pork Stew, make sure to choose a good quality pork shoulder, as it has enough fat to keep the meat moist and flavorful during the long cooking process.
If you’re looking for a slight kick, consider adding a diced jalapeño or chili pepper to the sautéed vegetables. Additionally, allowing the stew to sit for a few hours or overnight will enhance the flavors even further, making it a great dish to prepare in advance.
Enjoy your hearty meal!
Ecuadorian Fritada De Yuca
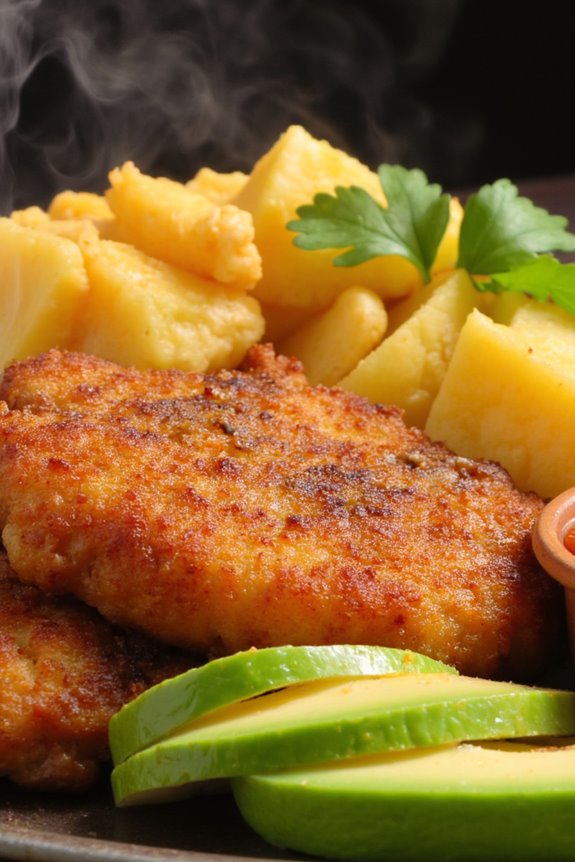
Ecuadorian Fritada De Yuca is a delicious and hearty dish that combines the flavors of yuca (cassava) with tender, crispy pork. This traditional Ecuadorian recipe is a beloved choice for family gatherings and festive occasions, bringing together the savory goodness of slow-cooked pork and the starchy, comforting texture of yuca.
The dish is typically served with a side of spicy salsa and fresh avocado, making it a delightful meal that showcases the rich culinary heritage of Ecuador.
Preparing Fritada De Yuca might seem intimidating, but it’s actually quite straightforward. The key is to guarantee that the pork is cooked until it’s tender and can be easily pulled apart, while the yuca should be boiled until it’s soft and then lightly fried for a crispy exterior.
Both components complement each other perfectly, creating a filling dish that’s sure to impress your guests or family.
Ingredients (Serves 4-6)
- 2 pounds pork shoulder, cut into cubes
- 1 pound yuca, peeled and cut into chunks
- 4 cups water (for boiling yuca)
- 1 large onion, chopped
- 4 cloves garlic, minced
- 1 teaspoon cumin
- 1 teaspoon achiote (annatto) powder
- 2 teaspoons salt, divided
- 1 teaspoon black pepper
- 2 tablespoons vegetable oil
- Fresh cilantro, for garnish
- Avocado and salsa, for serving
Cooking Instructions
1. Prepare the Pork: In a large pot, place the cubed pork shoulder, chopped onion, minced garlic, cumin, achiote powder, 1 teaspoon of salt, and black pepper. Add just enough water to cover the pork.
Bring to a boil over medium heat, then reduce the heat to low, cover, and let it simmer for about 1.5 to 2 hours, or until the pork is tender.
2. Boil the Yuca: While the pork is cooking, fill another pot with 4 cups of water and add the remaining teaspoon of salt.
Bring it to a boil and add the yuca chunks. Boil the yuca for about 20-25 minutes, or until it’s fork-tender. Once cooked, drain the yuca and set it aside.
3. Fry the Pork: Once the pork is tender, remove it from the pot and set it on a plate. Strain the remaining broth and reserve it for later use.
In the same pot, heat 2 tablespoons of vegetable oil over medium-high heat. Add the cooked pork and fry it until it’s crispy and golden brown on all sides, about 5-10 minutes.
4. Fry the Yuca: In a separate skillet, add a little more oil if needed and heat it over medium-high heat.
Add the boiled yuca chunks and fry them until they’re golden and crispy, about 4-5 minutes.
5. Serve: Arrange the crispy pork and fried yuca on a large serving platter.
Garnish with fresh cilantro and serve with slices of avocado and a side of spicy salsa for added flavor.
Extra Tips
When preparing Fritada De Yuca, it’s important to keep an eye on the frying process to avoid overcooking the pork and yuca.
Make sure the oil is hot enough before adding the yuca to achieve that delightful crispy texture. You can also experiment with different seasonings or add other traditional sides like a tangy pickled salad to enhance the dish further.
Additionally, the reserved pork broth can be used to make a comforting soup or sauce to accompany the meal, adding even more depth to your dining experience.
Chilean Pastel De Choclo
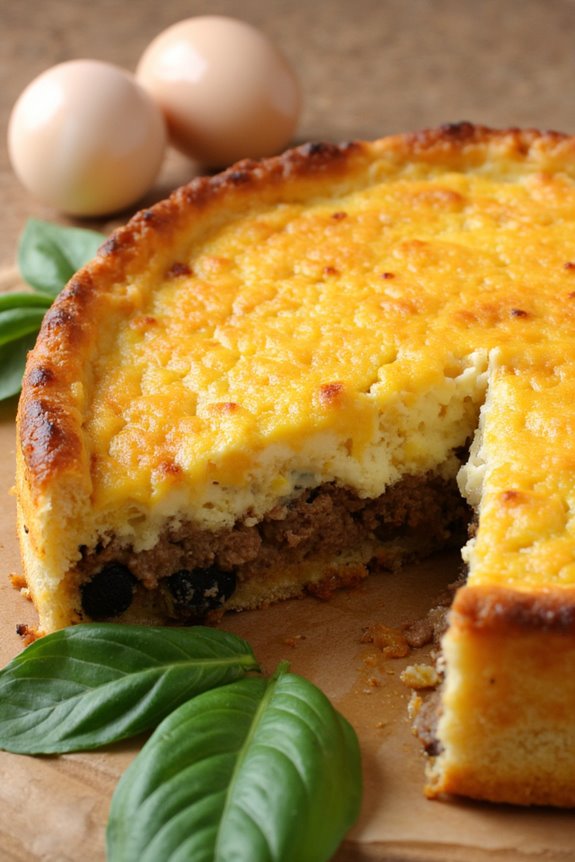
Chilean Pastel De Choclo is a traditional corn pie that’s beloved throughout Chile and often enjoyed during family gatherings and celebrations. This dish combines a hearty filling of meat, olives, and hard-boiled eggs, topped with a creamy corn mixture that’s baked until golden and bubbly. The sweetness of the corn contrasts beautifully with the savory filling, making it a delightful dish for both the eyes and the palate.
To prepare this comforting dish, you’ll need to gather fresh ingredients and set aside some time for assembly and baking. The layers of flavors and textures come together to create a satisfying meal that can be served on its own or accompanied by a simple salad. Whether you’re familiar with Chilean cuisine or trying something new, Pastel De Choclo is sure to impress.
Ingredients (serving size: 4-6 people)
- 2 cups of corn kernels (fresh or frozen)
- 1 cup of milk
- 2 tablespoons of butter
- 1/2 teaspoon of salt
- 1/4 teaspoon of black pepper
- 1/4 teaspoon of paprika
- 1 pound of ground beef or pork
- 1 onion, finely chopped
- 2 cloves of garlic, minced
- 1 cup of black olives, pitted and sliced
- 2 hard-boiled eggs, chopped
- 1/2 teaspoon of cumin
- 1/2 teaspoon of oregano
- 1/4 cup of fresh basil or parsley, chopped (optional)
Cooking Instructions
- Prepare the Corn Mixture: In a blender or food processor, combine the corn kernels, milk, butter, salt, pepper, and paprika. Blend until smooth and creamy. This will form the top layer of your pastel.
- Cook the Meat Filling: In a large skillet over medium heat, add the ground meat and cook until browned, breaking it apart with a spatula. Add the chopped onion and garlic, cooking until the onion is translucent, about 5 minutes. Season with cumin, oregano, and salt to taste.
- Add Additional Ingredients: Stir in the sliced olives and chopped hard-boiled eggs into the meat mixture. Mix well to combine all the flavors and set aside.
- Assemble the Pastel: In a greased baking dish, spread the meat filling evenly across the bottom. Pour the corn mixture over the meat, spreading it out evenly to cover the filling completely.
- Bake the Pastel: Preheat your oven to 375°F (190°C). Place the assembled dish in the oven and bake for about 30-40 minutes, or until the top is golden brown and set. You can broil for an additional 2-3 minutes for a crispy top, but keep a close eye to prevent burning.
- Serve and Enjoy: Remove the pastel from the oven and let it cool for a few minutes before slicing. Serve warm as a main dish, garnished with fresh herbs if desired.
Extra Tips
For an added depth of flavor, consider incorporating a layer of sautéed bell peppers or corn salsa into the meat mixture. Additionally, if you’re looking for a vegetarian option, you can substitute the meat with sautéed mushrooms or lentils.
Finally, using fresh corn in season will enhance the sweetness of the dish, but frozen corn works well year-round. Enjoy your cooking adventure with this delightful Chilean classic!
Bolivian Yucca Salad
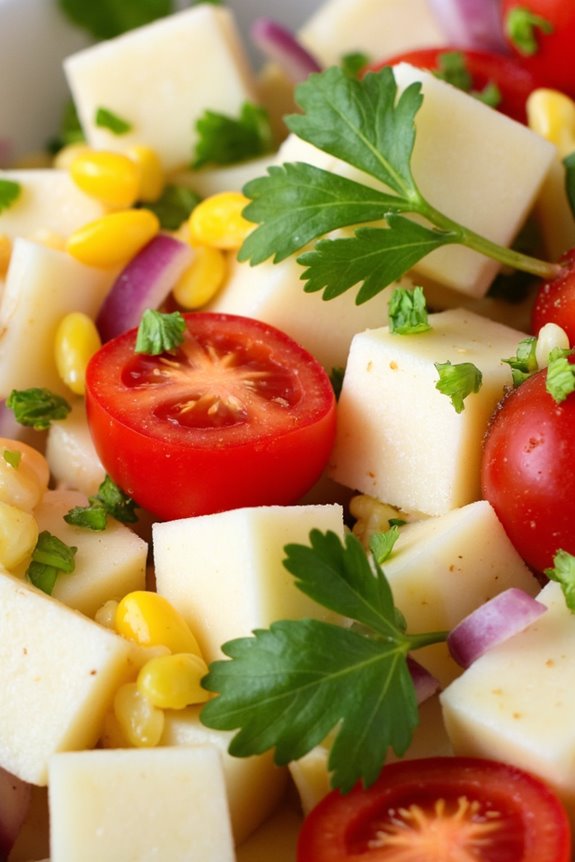
Bolivian Yucca Salad, or “Ensalada de Yuca,” is a vibrant and invigorating dish that highlights the versatile and starchy root vegetable, yucca. This salad isn’t only a staple in Bolivian cuisine but also a favorite among those who enjoy the unique texture and flavor of yucca. The salad is often served cold, making it an excellent choice for summer gatherings or as a side dish for any meal.
The combination of yucca, fresh vegetables, and a zesty dressing creates a dish that’s both satisfying and nutritious. Preparing Bolivian Yucca Salad is relatively simple and requires minimal cooking skills. The yucca is boiled until tender, then combined with diced vegetables such as tomatoes, onions, and bell peppers.
The salad is typically dressed with a mixture of olive oil, vinegar, and lime juice, which adds a delightful tanginess to the dish. This salad not only showcases the delicious flavor of yucca but also provides a colorful presentation that’s sure to impress your guests.
Ingredients (serving size: 4-6 people)
- 2 large yucca roots
- 1 cup cherry tomatoes, halved
- 1 red bell pepper, diced
- 1 small red onion, finely chopped
- 1/2 cup corn kernels (fresh or frozen)
- 1/4 cup fresh cilantro, chopped
- 1/4 cup olive oil
- 2 tablespoons white vinegar
- 1 lime, juiced
- Salt and pepper to taste
Cooking Instructions
- Prepare the Yucca: Start by peeling the yucca roots using a sharp knife. Cut them into 2-3 inch pieces to make them easier to boil. Rinse the pieces under cold water to remove any dirt.
- Boil the Yucca: Place the yucca pieces in a large pot and cover them with water. Add a pinch of salt and bring the water to a boil. Reduce the heat to medium and let the yucca simmer for about 20-30 minutes, or until fork-tender. You should be able to easily pierce the yucca with a fork when it’s done.
- Drain and Cool: Once the yucca is cooked, drain it in a colander and allow it to cool for a few minutes. Once it’s cool enough to handle, chop the yucca into bite-sized cubes.
- Combine the Vegetables: In a large mixing bowl, combine the halved cherry tomatoes, diced bell pepper, chopped red onion, corn kernels, and chopped cilantro. Mix well to evenly distribute the vegetables.
- Make the Dressing: In a small bowl, whisk together the olive oil, white vinegar, lime juice, salt, and pepper until well combined. Adjust the seasoning to taste.
- Mix Everything Together: Add the cubed yucca to the bowl with the vegetables. Pour the dressing over the salad and gently toss everything together until the yucca and vegetables are well coated in the dressing.
- Chill and Serve: Refrigerate the salad for at least 30 minutes to allow the flavors to meld. Serve chilled as an invigorating side dish or light meal.
Extra Tips
When preparing Bolivian Yucca Salad, it’s essential to verify that the yucca is cooked thoroughly, as undercooked yucca can be toxic. If you want to add more flavor, consider incorporating diced avocado or a pinch of cumin to the salad.
For a spicier kick, you can add diced jalapeños or a dash of hot sauce to the dressing. This salad can be made ahead of time and stored in the refrigerator for up to two days, making it a great option for meal prep or potlucks. Enjoy this delightful dish with a side of grilled meats or as a standalone vegetarian option!
Argentinean Yucca Empanadas
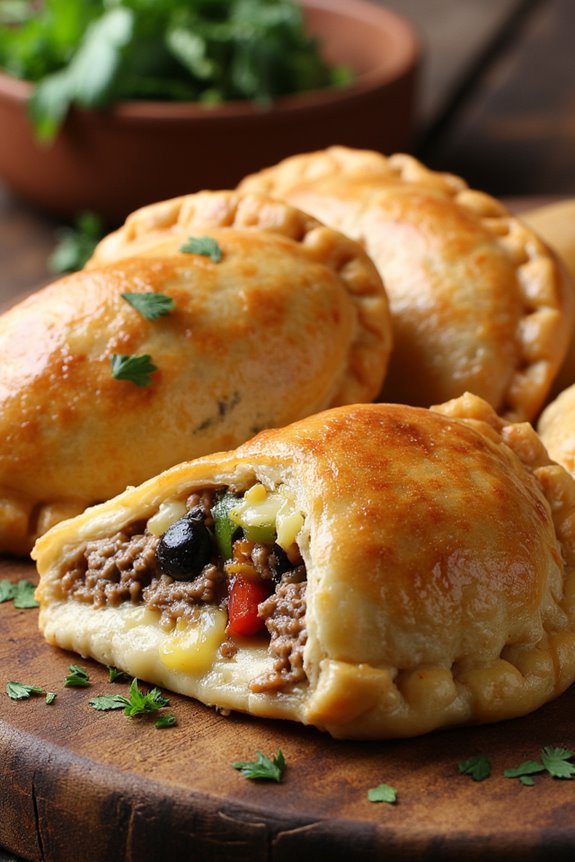
Argentinean Yucca Empanadas are a delightful twist on the traditional empanada, incorporating the unique flavor and texture of yucca (also known as cassava). These savory pastries are filled with a mixture of meats, vegetables, and spices, all encased in a tender yucca dough. The result is a dish that isn’t only satisfying but also rich in cultural heritage, offering a taste of South American cuisine that can be enjoyed by everyone.
Making these empanadas is an enjoyable culinary adventure that can be shared with family and friends. The yucca dough is gluten-free, making it a perfect alternative for those with dietary restrictions. Once you master the filling and the folding techniques, you can experiment with different fillings, making this recipe versatile and endlessly customizable.
Ingredients (Serves 4-6):
- 2 cups yucca, peeled and chopped
- 1/2 cup water
- 1 tablespoon olive oil
- 1 teaspoon salt
- 1/2 teaspoon black pepper
- 1 cup cooked ground beef (or chicken)
- 1/2 cup chopped onions
- 1/2 cup chopped bell peppers
- 1/4 cup chopped olives
- 1/4 cup shredded cheese (optional)
- 1 egg (for egg wash)
- Oil for frying (if frying)
Cooking Instructions:
- Prepare the Yucca: Begin by placing the peeled and chopped yucca in a pot of boiling water. Cook the yucca until tender, which typically takes about 20-25 minutes. Once cooked, drain the water and allow the yucca to cool slightly before mashing it until smooth.
- Make the Dough: In a mixing bowl, combine the mashed yucca, olive oil, salt, and black pepper. Mix well until all ingredients are incorporated. If the dough feels too sticky, you can add a little more yucca flour or a pinch of salt to achieve the desired consistency.
- Prepare the Filling: In a skillet, heat a tablespoon of olive oil over medium heat. Add the chopped onions and bell peppers, sautéing them until they become soft and fragrant, about 5 minutes. Stir in the cooked ground beef, olives, and shredded cheese (if using) and cook for another 2-3 minutes. Remove from heat and let the filling cool.
- Shape the Empanadas: Divide the yucca dough into equal portions, roughly the size of a golf ball. On a lightly floured surface (using yucca flour), flatten each ball into a round disc, approximately 1/4 inch thick. Place a spoonful of filling in the center of each disc.
- Seal the Empanadas: Fold the dough over the filling to create a half-moon shape. Press the edges together firmly to seal, and use a fork to crimp the edges for an extra secure seal. Repeat with the remaining dough and filling.
- Cook the Empanadas: You can either bake or fry the empanadas. For baking, preheat your oven to 375°F (190°C), place the empanadas on a baking sheet, brush them with the beaten egg for a golden finish, and bake for about 25-30 minutes or until they’re golden brown. For frying, heat oil in a deep pan over medium heat and fry the empanadas for about 3-4 minutes on each side until golden and crispy.
Extra Tips:
When preparing Argentinean Yucca Empanadas, feel free to get creative with your fillings! You can substitute the meat with vegetables for a vegetarian option or use a mix of proteins like chicken and chorizo for extra flavor.
Additionally, if you want to make the process quicker, consider using store-bought yucca flour to save time on cooking and mashing the yucca. Always verify the empanadas are sealed well to prevent any filling from leaking during cooking. Enjoy your culinary creation with a side of chimichurri sauce for an authentic Argentinean experience!
Paraguayan Sopa Paraguaya
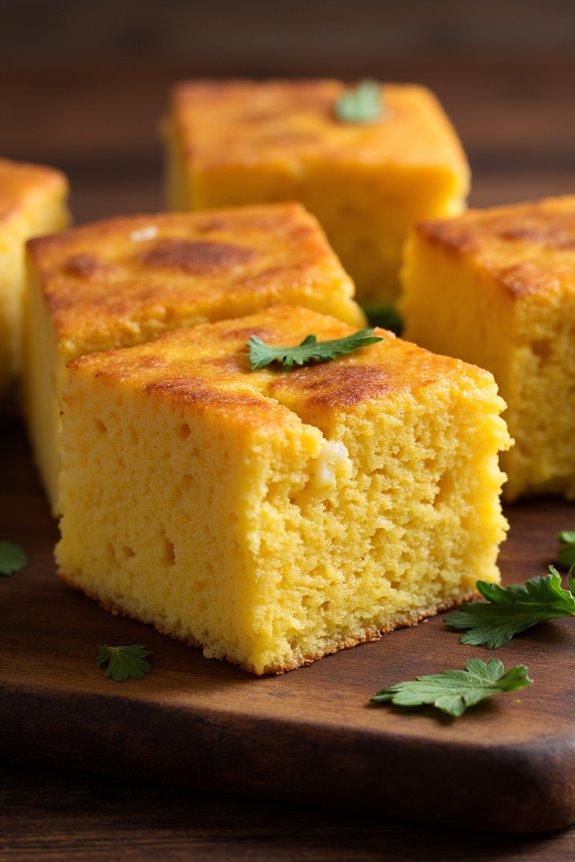
Sopa Paraguaya is a traditional Paraguayan dish that combines the delicious flavors of cornmeal, cheese, and yucca. Despite its name, “sopa” meaning soup in Spanish, Sopa Paraguaya is actually a cornbread-like dish that’s dense and hearty. It’s often enjoyed as a side dish or a main course and is perfect for sharing at family gatherings or celebrations.
The unique texture from the yucca and the rich taste from the cheese make this dish a delightful addition to any meal. This recipe highlights the use of yucca, which adds a distinct flavor and enhances the overall heartiness of the dish. With its origins rooted deeply in Paraguayan culture, Sopa Paraguaya isn’t only a staple food but also a symbol of hospitality and tradition.
Whether served warm from the oven or at room temperature, this dish is bound to please everyone at the table.
Ingredients (serving size of 4-6 people):
- 1 cup cornmeal
- 1 cup grated fresh yucca (or frozen if fresh is unavailable)
- 1 cup milk
- 1 cup shredded cheese (Paraguayan cheese or mozzarella)
- 1 medium onion, finely chopped
- 1/2 cup vegetable oil or melted butter
- 3 large eggs
- 1 teaspoon baking powder
- Salt to taste
Cooking Instructions:
- Prepare the Ingredients: Begin by preparing the onion and yucca. If you’re using fresh yucca, peel it and remove the woody core before grating. Finely chop the onion and set both aside.
- Sauté the Onion: In a medium-sized skillet, heat the vegetable oil or melted butter over medium heat. Add the chopped onion and sauté until it becomes translucent and fragrant, about 5 minutes. This step adds depth to the flavor of the dish.
- Mix the Wet Ingredients: In a large mixing bowl, combine the eggs and milk. Whisk them together until well blended. Then, stir in the sautéed onions along with the grated yucca. This mixture will form the base of your Sopa Paraguaya.
- Combine Dry Ingredients: In another bowl, mix the cornmeal, baking powder, and salt. Gradually add this dry mixture to the wet ingredients, stirring continuously to avoid lumps.
- Incorporate the Cheese: Fold in the shredded cheese into the batter. Make sure that the cheese is evenly distributed throughout the mixture. This will help create a rich and cheesy flavor in every bite.
- Bake the Sopa Paraguaya: Preheat the oven to 350°F (175°C). Grease a baking dish or a cast-iron skillet with a little oil or butter. Pour the batter into the prepared dish and spread it evenly. Bake for about 40-45 minutes, or until the top is golden brown and a toothpick inserted in the center comes out clean.
- Serve and Enjoy: Once baked, remove the Sopa Paraguaya from the oven and let it cool for a few minutes. Cut into squares or wedges and serve warm. It can be enjoyed on its own or as an accompaniment to grilled meats or salads.
Extra Tips: When making Sopa Paraguaya, feel free to experiment with different types of cheese to find your favorite flavor profile. Adding herbs like parsley or cilantro can also elevate the dish, providing freshness and an aromatic touch.
If you prefer a spicier version, consider incorporating diced jalapeños or red pepper flakes into the batter. Always keep an eye on the baking time, as ovens can vary; the top should be a nice golden brown before removing it from the oven. Enjoy your culinary journey into Paraguayan cuisine!
Yucca and Cheese Casserole
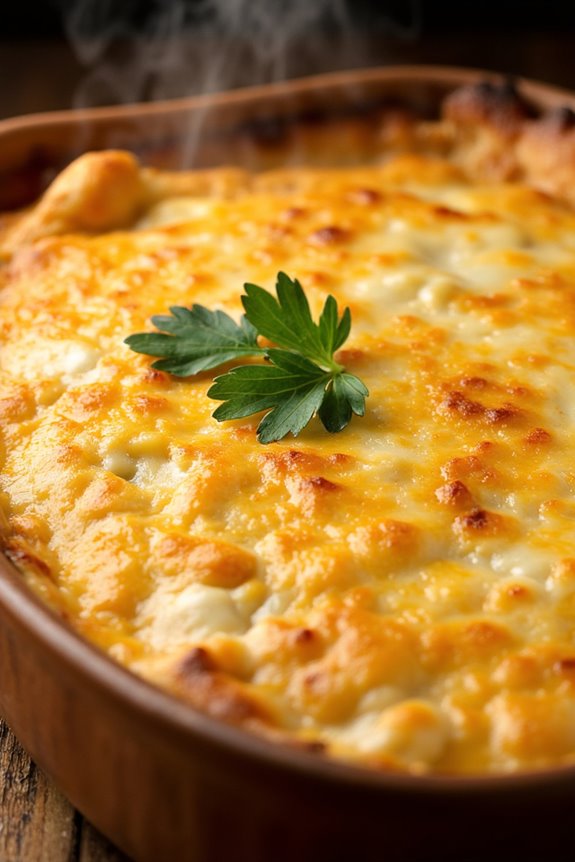
Yucca and Cheese Casserole is a delightful dish that combines the starchy goodness of yucca with the creamy richness of cheese, creating a comfort food that’s certain to please both family and friends.
This casserole is perfect for potlucks or as a hearty side dish for any meal. The yucca provides a unique texture and flavor that pairs wonderfully with the melted cheese, making it a standout option on your dinner table.
To prepare this dish, you’ll need to first cook the yucca until tender, then mix it with a blend of cheeses, eggs, and spices. This mixture is then baked until golden and bubbly, creating a deliciously cheesy crust.
The casserole isn’t only satisfying but also easy to make, guaranteeing that you won’t spend hours in the kitchen. Gather your ingredients and get ready to enjoy this savory yucca dish!
Ingredients (Serves 4-6)
- 2 pounds yucca (cassava), peeled and cut into chunks
- 1 cup shredded cheddar cheese
- 1 cup shredded mozzarella cheese
- 2 large eggs
- 1 cup milk
- 1 teaspoon garlic powder
- 1 teaspoon onion powder
- 1 teaspoon salt
- ½ teaspoon black pepper
- ½ teaspoon paprika (optional)
- 2 tablespoons butter (for greasing the baking dish)
- Fresh parsley (for garnish, optional)
Cooking Instructions
1. Prepare the Yucca: Start by placing the peeled and chopped yucca chunks in a large pot of salted water. Bring the water to a boil and cook the yucca for about 20-25 minutes, or until it’s fork-tender.
Once cooked, drain the yucca and let it cool slightly before mashing it in a mixing bowl.
2. Mix the Ingredients: In the bowl with the mashed yucca, add the shredded cheddar and mozzarella cheeses, eggs, milk, garlic powder, onion powder, salt, black pepper, and paprika.
Mix everything together until well combined. The mixture should be creamy and thick.
3. Prepare the Baking Dish: Preheat your oven to 350°F (175°C). Grease a 9×13-inch baking dish with butter to prevent sticking.
This will guarantee that your casserole comes out easily once baked.
4. Assemble the Casserole: Pour the yucca and cheese mixture into the prepared baking dish, spreading it evenly across the bottom.
Use a spatula to smooth the top, ensuring an even surface for baking.
5. Bake the Casserole: Place the baking dish in the preheated oven and bake for 30-35 minutes, or until the top is golden brown and bubbly.
Keep an eye on it to prevent over-browning.
6. Serve: Once baked, remove the casserole from the oven and let it cool for a few minutes.
Garnish with fresh parsley if desired, then cut into squares and serve warm.
Extra Tips
When cooking Yucca and Cheese Casserole, make sure to thoroughly peel the yucca, as the skin is tough and inedible.
If you’re looking to add more flavor, consider incorporating cooked bacon or sautéed vegetables like bell peppers or spinach into the mixture.
Additionally, you can experiment with different types of cheese to customize the flavor profile to your liking. Enjoy this casserole as a hearty main dish or a satisfying side!