

Gather around, lovely readers, as we embark on a flavorful journey through Colombian cuisine. Picture your dinner table adorned with vibrant dishes that tell stories of tradition and warmth. Each recipe in this list is crafted to transform your evening into something truly special. From the savory layers of bandeja paisa to the comforting bowl of ajiaco, these meals promise more than just satisfying hunger. Let’s explore how these delightful recipes can create cherished connections and memories.
Arepas Rellenas
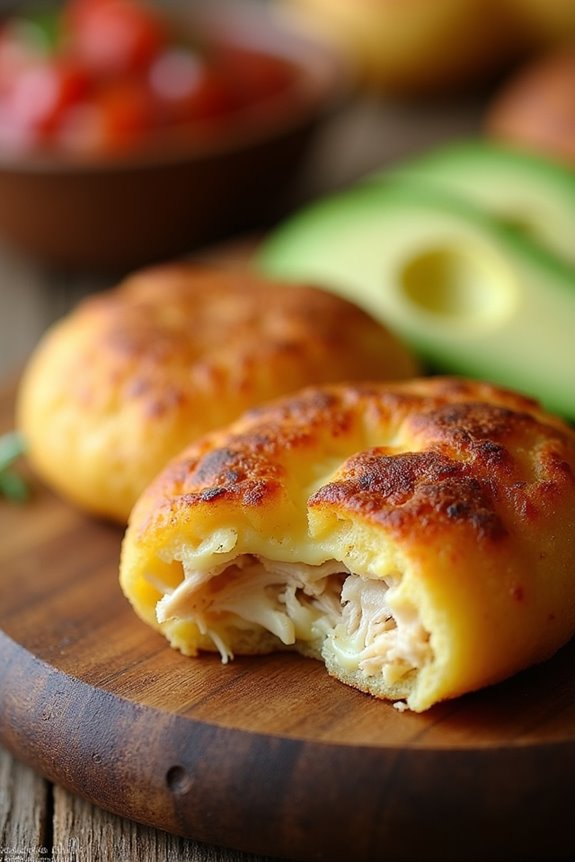
Arepas Rellenas are a popular Colombian dish that showcases the versatility and richness of traditional cornmeal cakes. These stuffed arepas can be filled with a variety of ingredients, making them an ideal meal for any occasion. Whether you choose savory fillings like cheese, meats, or vegetables, the result is always delicious and satisfying.
The crispy exterior combined with the flavorful filling creates a delightful contrast that makes Arepas Rellenas a favorite among families and friends alike. Making Arepas Rellenas isn’t only simple but also allows you to customize your meal according to your tastes. This dish can be served as a main course or as a snack, and it pairs wonderfully with a side of avocado or a fresh salad.
With a few basic ingredients and some creativity, you can bring a taste of Colombia to your dinner table.
Ingredients (Serves 4-6 people):
- 2 cups of pre-cooked cornmeal (arepa flour)
- 2 ½ cups of warm water
- 1 teaspoon of salt
- 1 cup of cheese (mozzarella or queso fresco, shredded)
- 1 cup of cooked and shredded chicken (or any preferred filling)
- ½ cup of avocado, sliced (optional)
- Oil for frying
Cooking Instructions:
- Prepare the Arepa Dough: In a large bowl, combine the pre-cooked cornmeal and salt. Gradually add the warm water while mixing with your hands until a soft, pliable dough forms. Knead the dough for about 2-3 minutes until it’s smooth. If the dough is too sticky, add a little more cornmeal; if it’s too dry, add a splash of water.
- Shape the Arepas: Divide the dough into 8 equal portions and roll each portion into a ball. Flatten each ball between your palms to form a disc that’s about ½ inch thick. Make sure the edges are smooth to avoid cracking during cooking.
- Cook the Arepas: Heat a non-stick skillet or griddle over medium heat and add a little oil. Place the arepas on the skillet and cook for about 5-6 minutes on each side, or until they’re golden brown and have a slightly crispy exterior. You may need to cook them in batches depending on the size of your skillet.
- Stuff the Arepas: Once the arepas are cooked, remove them from the skillet and let them cool for a minute. Using a sharp knife, make a slit or pocket in each arepa. Stuff the pockets generously with cheese and shredded chicken (or your choice of filling).
- Melt the Filling: Return the stuffed arepas to the skillet and cook for an additional 2-3 minutes on each side, allowing the cheese to melt and the filling to heat through.
- Serve: Remove the arepas from the skillet and let them cool slightly. Serve warm with sliced avocado on the side, or your favorite salsa or dipping sauce.
Extra Tips:
When preparing Arepas Rellenas, feel free to get creative with your fillings! You can experiment with different types of cheese, meats, or even vegetables like sautéed peppers and onions.
If you prefer a healthier option, consider baking the arepas instead of frying them for a lighter version. For added flavor, you can also infuse the dough with herbs or spices. Enjoy the process and make this dish your own!
Bandeja Paisa
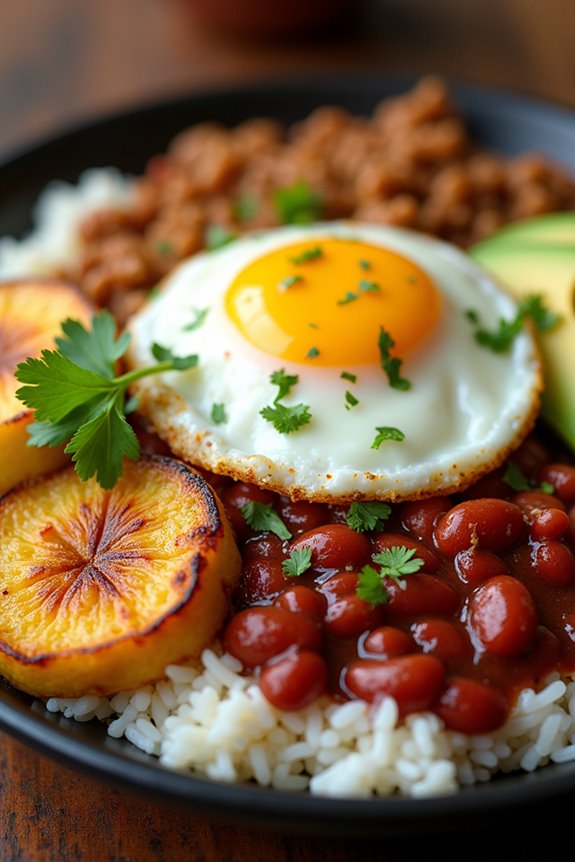
Bandeja Paisa is a traditional Colombian dish that showcases the rich flavors and diverse ingredients of the country’s culinary heritage. Originating from the Antioquia region, this hearty meal is a feast for the senses, combining a variety of textures and tastes in one plate.
The dish typically includes rice, beans, ground beef, chicharrón (crispy pork belly), fried plantains, avocado, and a fried egg, all beautifully arranged to create a vibrant and appetizing presentation. It’s often served with a side of arepas and aji sauce, making it a beloved choice for family gatherings and festive occasions.
Preparing Bandeja Paisa requires a bit of time and patience, but the results are well worth the effort. Each component can be prepared separately, allowing for a delicious assembly that showcases the best of Colombian cuisine.
This dish isn’t only filling but also offers a glimpse into the cultural significance of food in Colombia, where sharing meals with loved ones is an important part of life.
Ingredients (Serves 4-6)
- 2 cups of cooked white rice
- 1 cup of red beans (cooked)
- 1 pound of ground beef
- 1 pound of chicharrón (crispy pork belly)
- 2 ripe plantains
- 4 large eggs
- 1 avocado (sliced)
- 1/2 cup of arepas (optional)
- 1/4 cup of fresh cilantro (chopped, for garnish)
- Salt and pepper (to taste)
- Olive oil (for frying)
- Aji sauce (for serving)
Cooking Instructions
- Prepare the Red Beans: If you’re using dried beans, soak them overnight and cook them until tender. If using canned beans, simply rinse and heat them in a saucepan. Season with salt and set aside.
- Cook the Ground Beef: In a skillet over medium heat, add a splash of olive oil. Once hot, add the ground beef and season with salt and pepper. Cook until browned and fully cooked, stirring occasionally. Break up the beef into small pieces as it cooks, then set aside.
- Fry the Chicharrón: In a separate pan, heat oil over medium heat. Cut the pork belly into bite-sized pieces and fry until golden brown and crispy. Drain on paper towels to remove excess oil.
- Fry the Plantains: Peel the plantains and slice them diagonally into thick pieces. In the same pan used for the chicharrón, add more oil if necessary and fry the plantains until golden yellow and slightly caramelized on both sides. Remove from the pan and drain on paper towels.
- Cook the Eggs: In a clean skillet, add a little oil and fry the eggs sunny-side up or to your preferred doneness. Season with salt and pepper.
- Assemble the Plate: On a large platter, serve a generous mound of rice, then add the beans, ground beef, crispy chicharrón, fried plantains, and sliced avocado. Top with a fried egg. Garnish with chopped cilantro and serve with arepas and aji sauce on the side.
Extra Tips
When preparing Bandeja Paisa, make certain that each component is cooked to perfection before assembling the dish.
For the chicharrón, you can use pork belly or pork rinds, depending on your preference. If you want a healthier twist, consider baking the chicharrón instead of frying.
Finally, the dish is best enjoyed fresh and hot, so try to time everything so that you can serve it immediately after cooking for the best flavors and experience.
Ajiaco
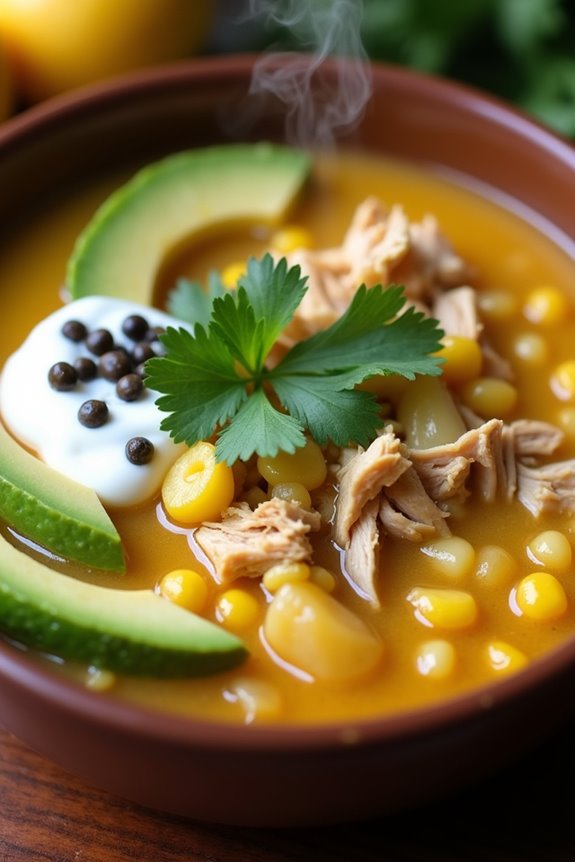
Ajiaco is a traditional Colombian soup that’s as hearty as it’s flavorful. This dish originates from the Andean region and is made with chicken, potatoes, and a unique herb called guasca, which gives the soup its distinctive taste.
Ajiaco is typically served with avocado, capers, and a dollop of sour cream, making it a comforting and satisfying meal that warms hearts and stomachs alike. Whether enjoyed on a chilly evening or as a centerpiece for a family gathering, Ajiaco brings a taste of Colombian culture to your dining table.
The soup isn’t only delicious, but it also offers a wonderful opportunity to experiment with different types of potatoes, as the variety you choose can influence the texture and flavor profile of the dish. Traditionally, Ajiaco is made with three types of potatoes: criolla, pastusa, and sabanera, which provide a creamy consistency and a depth of flavor.
This recipe will guide you through creating a traditional Colombian Ajiaco that serves 4-6 people, allowing you to share this delightful dish with family or friends.
Ingredients (Serves 4-6):
- 1 whole chicken (about 3-4 pounds)
- 12 cups of water
- 2 large white potatoes, peeled and diced
- 2 large yellow potatoes, peeled and diced
- 2-3 medium criolla potatoes, peeled and diced
- 1 medium onion, chopped
- 3 cloves of garlic, minced
- 1 cup of corn (fresh or frozen)
- 1 cup of chopped fresh cilantro
- 1 tablespoon of dried guasca
- Salt and pepper, to taste
- 1 avocado, sliced (for serving)
- ½ cup of sour cream (for serving)
- Capers (for serving)
Cooking Instructions:
- Prepare the Chicken: In a large pot, combine the whole chicken with 12 cups of water. Bring it to a boil over medium-high heat. Once boiling, reduce the heat to medium and skim off any foam that rises to the surface. This will ascertain a clear broth. Cook the chicken for about 30-40 minutes or until it’s fully cooked and tender.
- Remove the Chicken: After the chicken is cooked, carefully remove it from the pot and set it aside to cool. Keep the broth in the pot, as it will be the base for your Ajiaco. Once the chicken is cool enough to handle, shred the meat into bite-sized pieces, discarding the skin and bones.
- Add the Vegetables: In the same pot with the broth, add the diced white, yellow, and criolla potatoes. Stir in the chopped onion and minced garlic. Cook the mixture over medium heat for about 20-25 minutes, or until the potatoes are tender and have started to break down, creating a creamy consistency.
- Incorporate Chicken and Seasonings: Once the potatoes are tender, add the shredded chicken back into the pot along with the corn, chopped cilantro, and dried guasca. Season with salt and pepper to taste. Allow the soup to simmer for another 10-15 minutes, letting all the flavors meld together.
- Serve the Ajiaco: Ladle the Ajiaco into bowls and serve hot. Offer slices of avocado, sour cream, and capers on the side for guests to customize their bowls to their liking.
Extra Tips:
When making Ajiaco, it’s important to use a variety of potatoes for the best texture and flavor. If you can’t find criolla potatoes, you can substitute with other waxy potatoes.
Additionally, if you’re looking for a more robust flavor, consider adding a bay leaf or some whole black peppercorns to the broth while it simmers. Remember to adjust the seasoning according to your taste, and don’t hesitate to experiment with the toppings to make the dish your own!
Sancocho
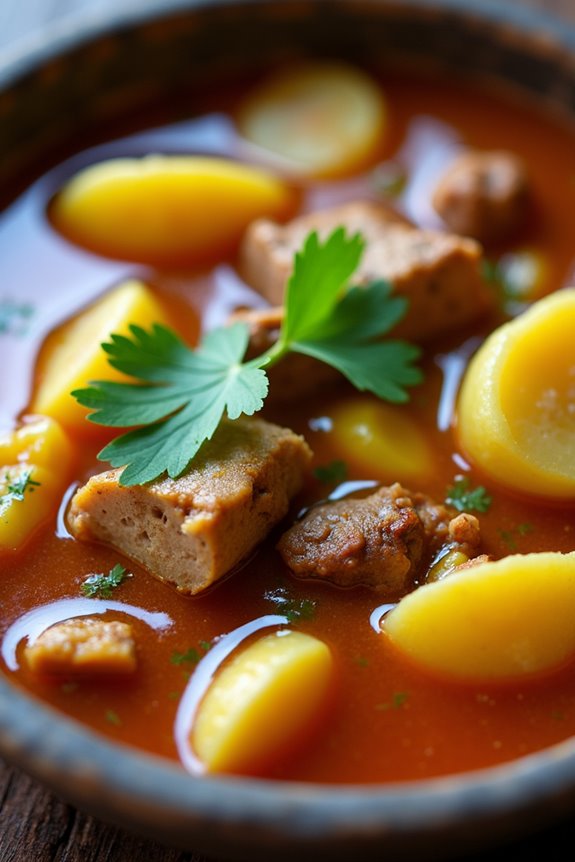
Sancocho is a traditional Colombian stew that embodies the rich flavors and diversity of Colombian cuisine. This hearty dish is often prepared during family gatherings and celebrations, showcasing a delightful combination of meats, vegetables, and aromatic spices. Each region of Colombia has its own version of sancocho, making it a versatile and beloved dish across the country. The base is usually made with a variety of meats, such as chicken, beef, or fish, complemented by root vegetables and plantains, creating a warm and comforting meal.
Cooking sancocho isn’t only about the ingredients but also about the love and care put into its preparation. The slow simmering process allows the flavors to meld together beautifully, resulting in a savory broth that warms the soul. Whether served on a rainy day or at a festive gathering, sancocho is sure to bring everyone together around the table, making it a must-try dish for anyone looking to explore Colombian culinary traditions.
Ingredients (Serving Size: 4-6 people)
- 1 lb chicken pieces (with bone)
- 1 lb beef (brisket or chuck), cut into chunks
- 1 large plantain, peeled and sliced
- 2 medium potatoes, peeled and diced
- 2 ears of corn, cut into thirds
- 1 medium onion, chopped
- 2 cloves garlic, minced
- 1 bell pepper, chopped
- 1 bunch cilantro, chopped
- 8 cups water or chicken broth
- 1 tsp cumin
- 1 tsp salt (to taste)
- 1/2 tsp black pepper
- 1 lime, cut into wedges (for serving)
Cooking Instructions
- Prepare the Ingredients: Begin by chopping the vegetables and cutting the meats into manageable pieces. Verify the plantains are sliced and the potatoes are diced. This step helps streamline the cooking process and guarantees everything cooks evenly.
- Sauté the Aromatics: In a large pot, heat a tablespoon of oil over medium heat. Add the chopped onions, garlic, and bell pepper, and sauté for about 5 minutes or until they soften and become fragrant. This step builds a flavor base that will enhance the overall taste of the soup.
- Brown the Meats: Add the chicken pieces and beef chunks to the pot. Cook for about 5-7 minutes, stirring occasionally, until they’re browned on all sides. Browning the meats adds depth of flavor to the broth.
- Add Liquid and Spices: Pour in the water or chicken broth, then stir in the cumin, salt, and black pepper. Bring the mixture to a boil, then reduce the heat to a simmer. Cover the pot and let it cook for about 30 minutes. This allows the meats to become tender and the flavors to develop.
- Incorporate Vegetables: After 30 minutes, add the diced potatoes, sliced plantain, and corn pieces to the pot. Stir gently, cover, and let it simmer for an additional 20-25 minutes, or until the vegetables are tender. Be careful not to overcook, as you want the plantains to maintain some texture.
- Finish with Cilantro: Once the vegetables are cooked through, stir in the chopped cilantro and adjust the seasoning if necessary. Let it simmer for another 5 minutes before removing it from heat. The cilantro adds a fresh burst of flavor that complements the hearty stew.
- Serve: Ladle the sancocho into bowls and serve hot, accompanied by lime wedges on the side for squeezing over the stew. This adds a revitalizing acidity that balances the richness of the dish.
Extra Tips
When preparing sancocho, feel free to customize it with your favorite meats or vegetables. Some people enjoy adding yucca, carrots, or other root vegetables for extra flavor and nutrition. Additionally, if you prefer a spicier kick, consider adding a chopped jalapeño or a dash of hot sauce to the pot.
Always remember that the key to a great sancocho is allowing it to simmer slowly, so the flavors meld together beautifully, resulting in a truly comforting dish.
Empanadas
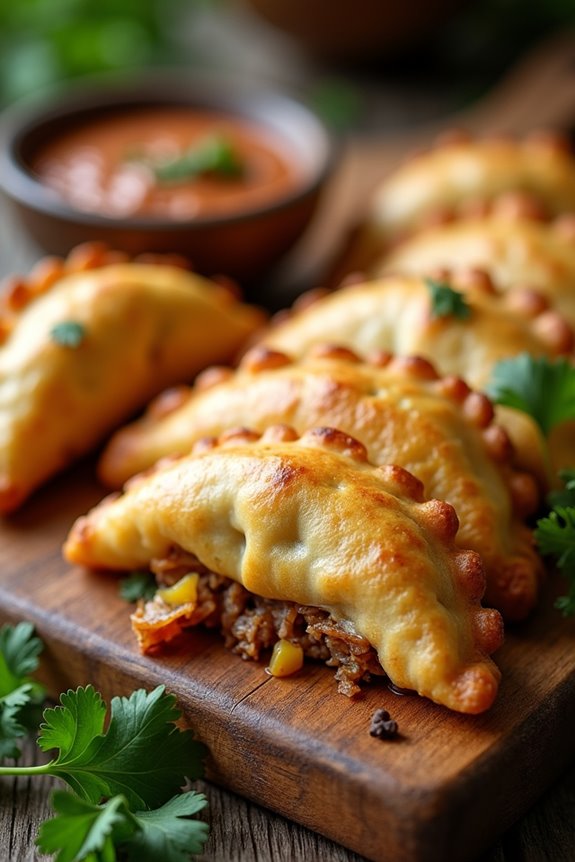
Empanadas are a beloved staple in Colombian cuisine, known for their crispy exterior and savory fillings. These delightful pastries can be found at street vendors, family gatherings, and festive celebrations throughout the country. Traditionally, they’re made with cornmeal dough and filled with a variety of ingredients, but one of the most popular fillings is a mixture of seasoned meat, potatoes, and spices. The combination of textures and flavors in empanadas makes them an irresistible treat for any occasion.
Making Colombian empanadas at home is a rewarding experience that allows you to customize the filling to your taste. They can be served as a snack, appetizer, or even as a main dish when paired with a fresh salad or dipping sauce. Whether you’re hosting a gathering or just craving a taste of Colombia, this recipe will guide you through creating delicious empanadas that are sure to impress your family and friends.
Ingredients (Serves 4-6 people)
- 2 cups cornmeal (masarepa)
- 1 ½ cups warm water
- 1 teaspoon salt
- 1 tablespoon vegetable oil
- 1 cup cooked and shredded beef (or chicken)
- 1 medium potato, peeled and diced
- ½ onion, finely chopped
- 1 clove garlic, minced
- 1 teaspoon ground cumin
- 1 teaspoon paprika
- ½ cup chopped cilantro (optional)
- Vegetable oil for frying
Cooking Instructions
- Prepare the Dough: In a large mixing bowl, combine the cornmeal, warm water, salt, and vegetable oil. Mix until a soft dough forms. Knead the dough gently for a few minutes until it’s smooth and pliable. Cover the dough with a damp cloth and let it rest for about 15-20 minutes.
- Cook the Filling: In a medium saucepan, heat a tablespoon of vegetable oil over medium heat. Add the chopped onion and garlic, and sauté until the onion is translucent, about 3-4 minutes. Add the diced potatoes, shredded meat, cumin, paprika, and salt to taste. Cook for about 10-15 minutes, stirring occasionally, until the potatoes are tender. If desired, stir in the chopped cilantro for added flavor. Remove from heat and let the filling cool.
- Shape the Empanadas: Once the dough has rested, divide it into small balls, about the size of a golf ball. On a clean surface, flatten each ball into a circle, roughly 4-5 inches in diameter. Place a generous spoonful of the filling in the center of each circle. Fold the dough over to create a half-moon shape and press the edges firmly to seal. You can crimp the edges with a fork for a decorative touch.
- Fry the Empanadas: In a deep skillet or frying pan, heat enough vegetable oil to submerge the empanadas over medium-high heat. Once the oil is hot (about 350°F or 175°C), carefully add a few empanadas at a time, being careful not to overcrowd the pan. Fry for about 3-4 minutes on each side, or until golden brown and crispy. Use a slotted spoon to remove them from the oil and drain on paper towels.
- Serve: Serve the empanadas warm with your favorite dipping sauce, such as aji or guacamole. Enjoy!
Extra Tips
For an extra crispy texture, you can refrigerate the empanadas for about 30 minutes before frying them. This helps the dough firm up and prevents them from opening during cooking.
Additionally, feel free to experiment with different fillings like cheese, vegetables, or other meats to suit your taste preferences. Don’t forget to serve them with a revitalizing drink such as aguapanela or a cold beer for a complete Colombian experience!
Lechona
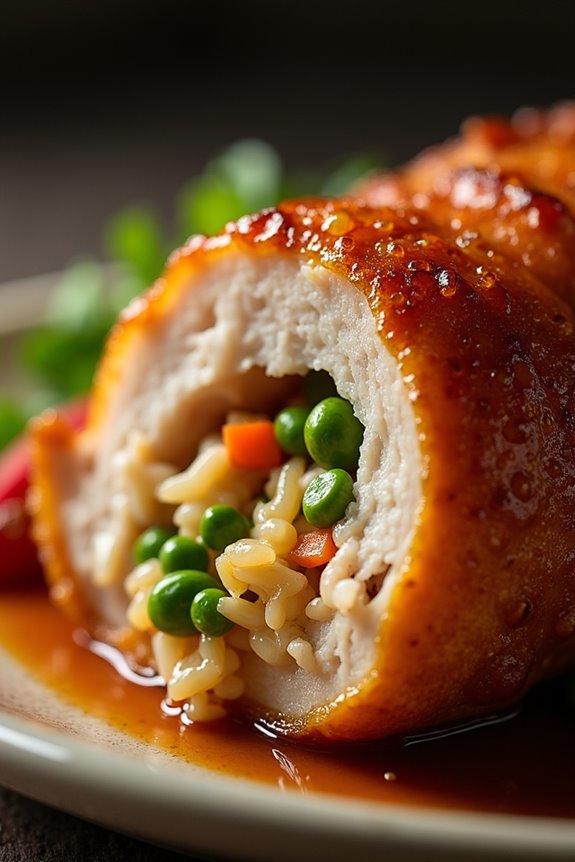
Lechona is a traditional Colombian dish that embodies the rich culinary heritage of the country, particularly from the Tolima region. This savory feast features a whole roasted pig stuffed with a delicious mixture of rice, peas, and spices, creating a flavorful and aromatic experience that’s often enjoyed during festive occasions and family gatherings.
The process of preparing lechona requires patience and a bit of skill, but the result is a show-stopping centerpiece that will delight your guests and leave them craving more.
The origins of lechona date back to colonial times, and it has evolved into a beloved dish that represents Colombian culture. The slow-roasting technique guarantees that the meat is tender and infused with spices, while the crispy skin adds a satisfying crunch.
Whether you’re celebrating a special occasion or simply want to impress your family with an authentic Colombian meal, lechona is sure to be a hit.
Ingredients (Serves 4-6)
- 1 whole pig (approximately 15-20 pounds), cleaned and dressed
- 4 cups of white rice
- 2 cups of green peas
- 1 cup of diced carrots
- 1 cup of diced onions
- 1 cup of diced bell peppers
- 5 cloves of garlic, minced
- 2 tablespoons of cumin
- 2 tablespoons of paprika
- 1 tablespoon of black pepper
- 1 tablespoon of salt (or to taste)
- 1/2 cup of fresh cilantro, chopped
- 1/4 cup of olive oil
- 4 cups of chicken broth
- 1 lemon, juiced
- 2 bay leaves
Cooking Instructions
1. Prepare the Pig: Start by cleaning the pig thoroughly. Remove any hairs and make certain that the cavity is free of any organs. Pat the skin dry with paper towels, making it ready for seasoning.
2. Make the Filling**: In a large pot, heat the olive oil over medium heat. Add the diced onions, bell peppers, and carrots, and sauté** until softened. Stir in the garlic, cumin, paprika, black pepper, and salt. Cook for another 2-3 minutes until fragrant.
3. Cook the Rice: Add the rice to the pot and stir to coat with the spices. Pour in the chicken broth, add the bay leaves, and bring to a boil. Reduce the heat to low, cover, and simmer for about 20 minutes, or until the rice is cooked and has absorbed all the liquid.
Fold in the green peas and chopped cilantro once done.
4. Stuff the Pig: Carefully stuff the cooked rice mixture into the cavity of the pig. Make sure to pack it tightly to promote even cooking. Sew or tie the cavity shut to keep the filling in place.
5. Season the Skin: Rub the outside of the pig with salt, lemon juice, and any remaining spices. This will help create a crispy skin while roasting.
6. Roasting: Preheat your oven to 300°F (150°C). Place the pig on a large roasting tray or spit and roast in the oven for approximately 4-6 hours, depending on the size of the pig.
Make sure to baste it occasionally with its own juices to keep the meat moist.
7. Crisp the Skin: For the last 30 minutes of cooking, increase the oven temperature to 400°F (200°C) to crisp up the skin. Keep an eye on it to prevent burning.
8. Rest and Serve: Once fully cooked, remove the lechona from the oven and let it rest for about 20 minutes before carving. Serve it with additional sides like avocado, arepas, or a fresh salad.
Extra Tips
When preparing lechona, it’s important to plan ahead and give yourself ample time for cooking, as the roasting process can take several hours.
If you’re not able to roast a whole pig, consider using a smaller cut of pork shoulder or belly with the same stuffing method for a more manageable alternative.
Experiment with the stuffing by adding different vegetables or spices to suit your taste, and always verify the pig is cooked to a safe temperature for the best flavor and texture.
Tamales
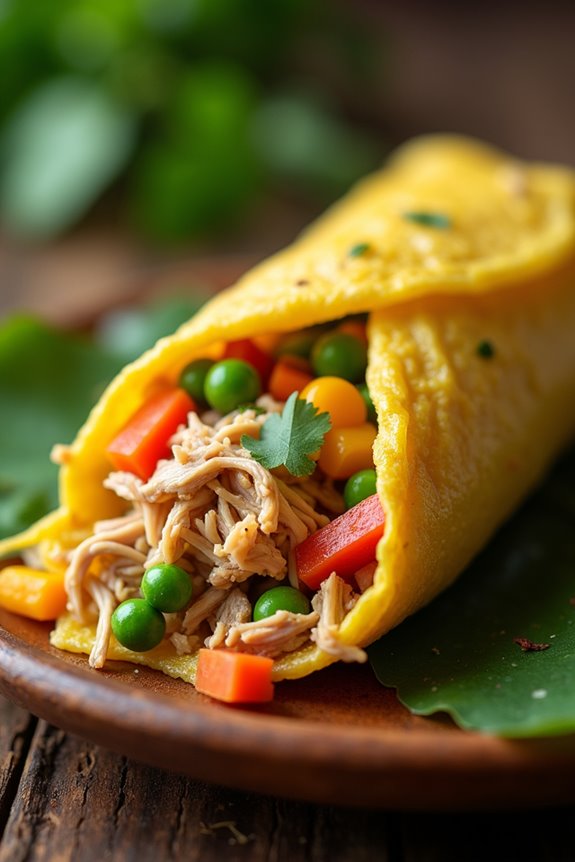
Tamales are a cherished traditional dish in Colombia, often served at family gatherings and special occasions. They’re made from masa (corn dough) that’s filled with various ingredients, wrapped in plantain leaves, and then steamed to perfection. Each region in Colombia has its own unique twist on tamales, but they typically feature a combination of meats, vegetables, and spices, creating a delightful explosion of flavors.
The process may seem a bit labor-intensive, but the end result is well worth the effort, as tamales aren’t only delicious but also a fun dish to share with loved ones. Making Colombian tamales is a wonderful way to bring a taste of Colombia to your kitchen. They can be enjoyed as a main dish or served as a side.
The versatility of tamales allows for a wide range of fillings, so you can customize them according to your preferences. In this recipe, we’ll stick to a classic Colombian tamale filling that includes chicken, pork, and a medley of vegetables, all wrapped in a delicious corn masa. This recipe serves 4-6 people and is perfect for a family meal or a gathering with friends.
Ingredients (Serves 4-6)
- 2 cups masa harina
- 1 cup chicken broth
- 1 cup cooked, shredded chicken
- 1 cup cooked pork, shredded
- 1/2 cup diced carrots
- 1/2 cup diced potatoes
- 1/2 cup green peas
- 1/2 cup diced bell peppers
- 1/4 cup onion, finely chopped
- 2 cloves garlic, minced
- 1 teaspoon cumin
- 1 teaspoon salt
- 1/2 teaspoon black pepper
- 1/4 cup cilantro, chopped
- 10-12 plantain leaves (or aluminum foil as a substitute)
- Kitchen twine (for tying)
Cooking Instructions
1. Prepare the Masa: In a large bowl, combine the masa harina, chicken broth, cumin, salt, and black pepper. Mix until you form a smooth dough. If the dough is too dry, add more broth, a tablespoon at a time, until you reach the desired consistency.
2. Prepare the Filling: In a skillet, heat a tablespoon of oil over medium heat. Add the chopped onions and garlic, and sauté until translucent. Then, add the diced carrots, potatoes, and bell peppers. Cook for about 5-7 minutes until the vegetables are slightly tender.
Stir in the shredded chicken, shredded pork, green peas, and chopped cilantro. Mix well and cook for an additional 2-3 minutes. Remove from heat.
3. Prepare the Plantain Leaves: If using plantain leaves, cut them into rectangular pieces, about 10×12 inches. To make them pliable, briefly heat them over an open flame or in hot water. If using aluminum foil, cut it into the same size.
4. Assemble the Tamales: Take a piece of plantain leaf or foil and spread about 1/4 cup of masa dough in the center, flattening it slightly. Add a generous spoonful of the filling on top of the masa. Fold the sides of the leaf or foil over the filling, then fold up the bottom to enclose the tamale completely.
Use kitchen twine to tie the tamale securely.
5. Steam the Tamales: In a large steamer pot, place a steaming rack at the bottom and add water until it just reaches the bottom of the rack. Arrange the tamales upright in the steamer, making sure they aren’t packed too tightly. Cover the pot and steam over medium heat for about 1-1.5 hours, or until the masa is set and cooked through.
Add more water as needed to maintain steam.
6. Serve: Once cooked, carefully remove the tamales from the steamer. Let them cool slightly before unwrapping. Serve with your favorite hot sauce or a side of avocado for an authentic Colombian experience.
Extra Tips
When making tamales, feel free to experiment with different fillings like beef, cheese, or even vegetables for a vegetarian option. You can also prepare the filling ahead of time and store it in the fridge, making the assembly process quicker.
If you’re using plantain leaves, confirm they’re fresh, as older leaves may be too dry. Finally, tamales can be frozen after steaming, so you can enjoy them later—simply reheat them in a steamer or microwave when you’re ready to eat!
Mote De Queso
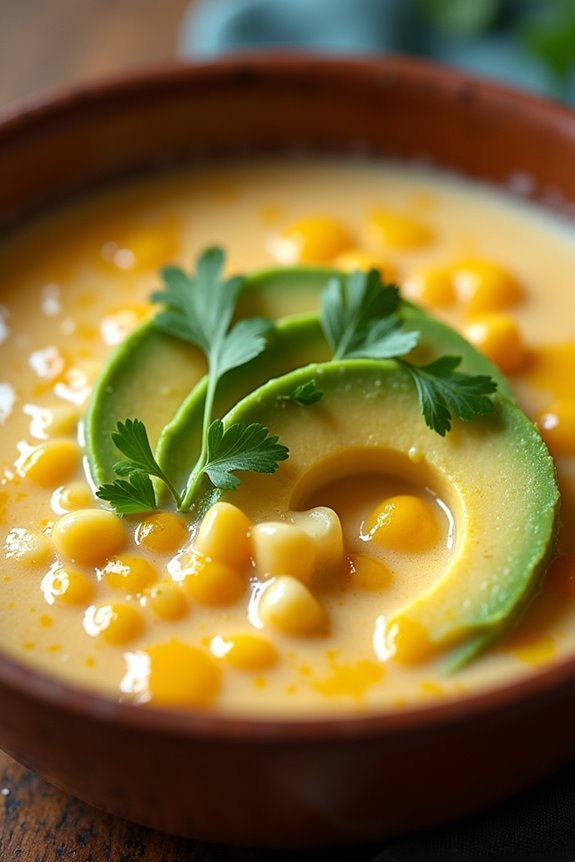
Mote de Queso is a traditional Colombian dish that reflects the country’s rich culinary heritage, particularly from the coastal regions. This comforting dish combines the delightful flavors of fresh cheese and corn, creating a warm and hearty experience that’s perfect for any occasion.
Often enjoyed during breakfast or as a snack, Mote de Queso showcases the simplicity and quality of Colombian ingredients, making it a favorite among locals and visitors alike.
This dish is primarily made with mote, or hominy, which is corn that has been treated with an alkali to remove the hull. When paired with creamy, salty cheese, it becomes a delectable combination that’s bound to please. Serve it with avocado or a side of arepas for a complete meal that captures the essence of Colombian cuisine.
Ingredients (Serves 4-6):
- 2 cups of mote (hominy corn)
- 6 cups of water
- 1 tablespoon of salt
- 1 cup of fresh cheese (preferably queso fresco or similar)
- 1/2 cup of heavy cream
- 1 tablespoon of butter
- 1 avocado (for garnish, optional)
- Fresh cilantro (for garnish, optional)
Cooking Instructions:
1. Prepare the Mote: Rinse the mote under cold water to remove any excess starch. In a large pot, add the mote and 6 cups of water. Bring it to a boil over medium-high heat.
Once boiling, reduce the heat to low, cover the pot, and let it simmer for about 45 minutes to 1 hour, or until the mote is tender and fully cooked. Stir occasionally and check to confirm there’s enough water, adding more if necessary.
2. Add Salt and Cheese: Once the mote is cooked, stir in 1 tablespoon of salt to enhance the flavor. Then, crumble the fresh cheese into the pot.
Mix gently until the cheese is evenly distributed and begins to melt. This will create a creamy texture throughout the dish.
3. Incorporate Cream and Butter: Add 1/2 cup of heavy cream and 1 tablespoon of butter to the pot. Stir well to combine all the ingredients.
Allow the mixture to simmer for an additional 5-10 minutes, letting the flavors meld together. If the mixture appears too thick, you can add a little more water or cream to reach your desired consistency.
4. Adjust Seasoning and Serve: Taste the dish and adjust seasoning if necessary. Once you’re satisfied with the flavor, remove the pot from heat.
Serve the Mote de Queso hot in bowls, garnished with sliced avocado and fresh cilantro if desired.
Extra Tips:
When preparing Mote de Queso, feel free to explore different types of cheese that may suit your taste, as variations can add unique flavors to the dish.
Additionally, you can enhance the dish further by adding sautéed onions or garlic for extra depth. If you prefer a spicier kick, consider incorporating diced jalapeños or a sprinkle of chili powder.
This dish is best enjoyed fresh, but leftovers can be stored in the refrigerator for a couple of days and reheated gently on the stove.
Arroz Con Pollo
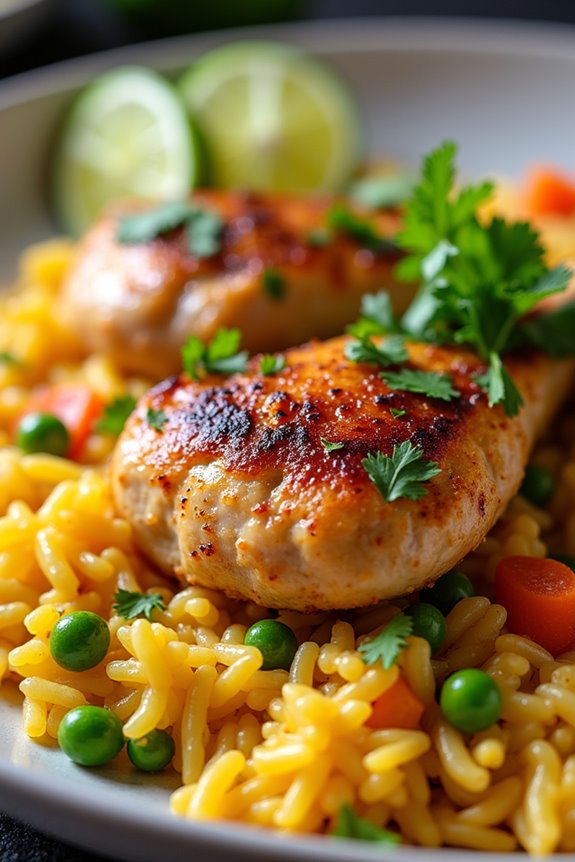
Arroz Con Pollo, which translates to “rice with chicken,” is a beloved dish throughout Latin America, particularly in Colombia. This vibrant and flavorful one-pot meal combines tender chicken pieces with seasoned rice, vegetables, and spices, making it a comforting and satisfying dish perfect for family gatherings or a cozy dinner at home.
Rich in color and taste, Arroz Con Pollo isn’t only a staple of Colombian cuisine but also a dish that evokes nostalgia and warmth in every bite.
The beauty of Arroz Con Pollo lies in its versatility; it can be prepared in various ways depending on regional preferences and personal tastes. The base of the dish typically features a mix of sofrito—a blend of sautéed onions, garlic, and bell peppers—along with spices such as saffron or achiote to give the rice its signature yellow hue.
This recipe will guide you through creating a traditional Colombian Arroz Con Pollo that serves 4-6 people, making sure that you and your loved ones can enjoy this delicious meal together.
Ingredients:
- 4 chicken thighs and drumsticks (bone-in, skin-on)
- 2 cups long-grain rice
- 4 cups chicken broth
- 1 medium onion, chopped
- 1 bell pepper (red or green), chopped
- 4 cloves garlic, minced
- 1 cup frozen peas
- 1 cup carrots, diced
- 1/4 cup olive oil
- 1 teaspoon cumin
- 1 teaspoon turmeric or achiote powder
- Salt and pepper to taste
- Fresh cilantro, chopped (for garnish)
- Lime wedges (for serving)
Cooking Instructions:
- Prepare the Chicken: Begin by seasoning the chicken pieces with salt, pepper, and cumin. Allow the chicken to marinate for about 15-30 minutes if time permits, to enhance the flavor.
- Sear the Chicken: In a large, heavy-bottomed pot or Dutch oven, heat the olive oil over medium-high heat. Add the chicken pieces, skin side down, and sear until golden brown on all sides, about 5-7 minutes per side. Remove the chicken and set aside.
- Sauté the Vegetables: In the same pot, add the chopped onion, bell pepper, and garlic. Sauté for 3-4 minutes until the onions are translucent and fragrant. Stir in the turmeric (or achiote) and cook for another minute.
- Add the Rice: Add the rice to the pot and stir well to coat it with the oil and vegetable mixture. Toast the rice for about 2 minutes, allowing it to absorb the flavors.
- Combine Ingredients: Return the seared chicken to the pot, along with any juices that have collected. Pour in the chicken broth, making sure that all the rice is submerged. Bring the mixture to a boil.
- Cook the Dish: Once boiling, reduce the heat to low, cover the pot, and let it simmer for about 20-25 minutes. Don’t lift the lid during this time to make certain the rice cooks evenly.
- Add Peas and Carrots: After 20-25 minutes, carefully lift the lid and stir in the peas and diced carrots. Cover again and cook for an additional 5-10 minutes, or until the rice is tender and has absorbed all the liquid.
- Rest and Serve: Once cooked, remove the pot from the heat and let it sit, covered, for another 5 minutes. Fluff the rice with a fork before serving. Garnish with fresh cilantro and serve with lime wedges on the side.
Extra Tips:
To elevate your Arroz Con Pollo, consider marinating the chicken overnight for deeper flavor. You can also customize the dish by adding other vegetables like corn or bell peppers, or even incorporating spices like paprika or bay leaves for an added depth of flavor.
Make sure you maintain the proper ratio of rice to liquid for the best texture, and feel free to adjust the seasoning according to your taste preferences. Leftovers can be stored in the refrigerator for up to three days and can be reheated for a quick and delicious meal.
Pescado Frito
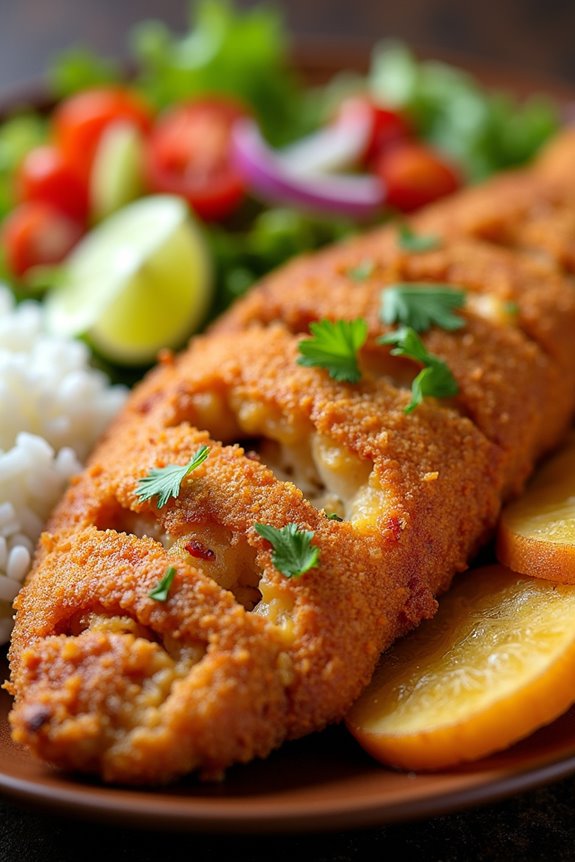
Pescado Frito, or fried fish, is a beloved dish in Colombian cuisine that showcases the vibrant flavors of the coastal regions. This dish typically features whole fish, marinated with a blend of spices, then fried to crispy perfection, resulting in a deliciously moist interior and a crunchy exterior.
Pescado Frito is often served with traditional sides such as coconut rice, patacones (fried green plantains), and a fresh salad, making it a well-rounded meal that captures the essence of Colombian flavors.
To prepare Pescado Frito, it’s crucial to choose fresh fish, as the quality of the fish greatly affects the overall taste of the dish. Common choices include tilapia, snapper, or sea bass, but you can use any firm white fish you prefer.
The key to achieving the perfect Pescado Frito is in the marinating process, which infuses the fish with vibrant flavors from the spices and herbs. Once fried, the fish is often garnished with lime wedges and served hot, making it a delightful centerpiece for any Colombian dinner.
Ingredients (serving size: 4-6 people):
- 4 whole fish (tilapia, snapper, or sea bass), cleaned and scaled
- 4 cloves garlic, minced
- 1 tablespoon ground cumin
- 1 tablespoon paprika
- 1 teaspoon salt
- 1 teaspoon black pepper
- Juice of 2 limes
- 1 cup all-purpose flour (for dredging)
- Vegetable oil (for frying)
- Lime wedges (for serving)
Cooking Instructions:
- Prepare the Fish: Start by cleaning and scaling the fish if not already done by your fishmonger. Pat the fish dry with paper towels to remove excess moisture, which helps achieve a crispy fry. Make three diagonal slashes on each side of the fish to allow the marinade to penetrate deeply and to guarantee even cooking.
- Marinate the Fish: In a bowl, combine the minced garlic, ground cumin, paprika, salt, black pepper, and lime juice. Mix well to form a marinade. Rub the marinade generously over the fish, making sure to get it into the slashes and inside the cavity of the fish. Let the fish marinate for at least 30 minutes, or up to 2 hours in the refrigerator for deeper flavor.
- Dredge the Fish: After marinating, remove the fish from the marinade and let any excess marinade drip off. Spread the all-purpose flour on a plate and dredge each fish in the flour, coating it evenly. Shake off any excess flour to avoid a heavy crust when frying.
- Heat the Oil: In a large skillet or frying pan, pour enough vegetable oil to cover the bottom by about 1/2 inch. Heat the oil over medium-high heat until it shimmers but isn’t smoking. You can test the oil’s readiness by dropping a small piece of the flour into the oil; it should sizzle immediately.
- Fry the Fish: Carefully place the dredged fish into the hot oil, making sure not to overcrowd the pan. Fry each side for about 4-5 minutes or until golden brown and crispy. Use a spatula to gently flip the fish halfway through cooking. Once done, transfer the fried fish to a plate lined with paper towels to absorb excess oil.
- Serve: Serve the Pescado Frito hot with lime wedges on the side, allowing guests to squeeze fresh lime juice over the fish for added flavor. Pair with coconut rice, patacones, and a fresh salad for a complete meal.
Extra Tips: When frying the fish, make sure the oil is hot enough; otherwise, the fish may absorb too much oil and become greasy. If you’re cooking multiple fish, consider frying them in batches to maintain the oil temperature.
Additionally, using a cast-iron skillet can help retain heat, guaranteeing even cooking. For a twist, you can add a touch of beer to the flour for a lighter batter, or experiment with different spices in the marinade to suit your taste. Enjoy your Pescado Frito with friends and family for an authentic Colombian experience!
Patacones
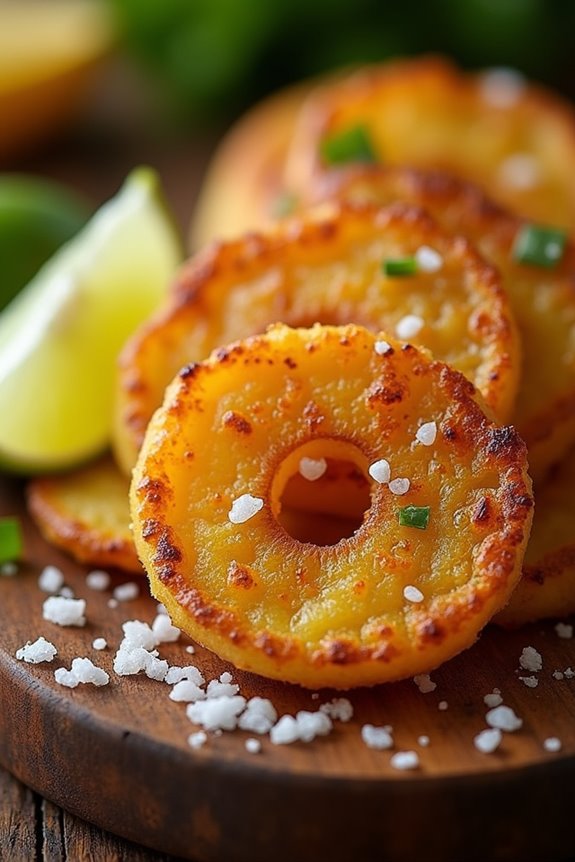
Patacones, also known as tostones, are a delightful Colombian dish made from green plantains that are sliced, fried, smashed, and then fried again. They’re crispy on the outside and tender on the inside, making them a perfect accompaniment to various meals or a tasty snack on their own.
Patacones are often served with a sprinkle of salt and can be enjoyed with a variety of dips, such as guacamole or a tangy salsa, making them a versatile addition to any dining experience.
The preparation of Patacones is quite simple, yet it requires some technique to achieve the perfect texture. The key is to use green plantains, which are starchy and less sweet than ripe ones. When cooked, they develop a unique flavor and crispiness that’s hard to resist.
Whether you’re hosting a dinner party or just looking for a delicious treat to enjoy with your family, Patacones are sure to impress.
Ingredients (serves 4-6):
- 3 large green plantains
- Vegetable oil (for frying)
- Salt (to taste)
- Optional: garlic powder, lime wedges, or dipping sauces (for serving)
Cooking Instructions:
- Peel the Plantains: Start by cutting off the ends of the green plantains. Using a sharp knife, make a lengthwise cut down the peel, being careful not to cut into the flesh of the plantain. Gently pry open the peel and remove it completely. You should have smooth, unblemished plantain sections.
- Slice the Plantains: Cut the peeled plantains into thick slices, about 1-1.5 inches wide. This thickness will help them hold their shape during the frying process and provide the ideal texture when smashed.
- First Frying: In a deep skillet or frying pan, heat about 1-2 inches of vegetable oil over medium heat. Once the oil is hot, carefully add the plantain slices in batches to avoid overcrowding. Fry them for about 3-4 minutes or until they’re a light golden color. Remove them from the oil and place them on a paper towel to drain excess oil.
- Smash the Plantains: Take each fried plantain slice and place it on a cutting board or a flat surface. Using the bottom of a flat object (like a plate or a glass), gently smash each slice until it’s about half an inch thick. Be careful not to smash them too thin, as you want them to retain some structure.
- Second Frying: Return the smashed plantains to the hot oil and fry them again for an additional 2-3 minutes or until they’re golden brown and crispy. Remove them from the oil and drain on paper towels once more.
- Season and Serve: While the patacones are still hot, sprinkle them with salt to taste. You can also add garlic powder for extra flavor. Serve immediately with lime wedges or your favorite dipping sauces.
Extra Tips:
When making Patacones, make certain that the oil is at the right temperature; if it’s not hot enough, the plantains may absorb too much oil and become greasy. Conversely, if the oil is too hot, they can burn before cooking through.
If you want to experiment with flavors, consider adding spices to the oil or toppings after frying, such as crumbled cheese or fresh herbs. Patacones are best enjoyed fresh out of the fryer, so try to serve them right away for the ultimate crunch!
Chicharrón
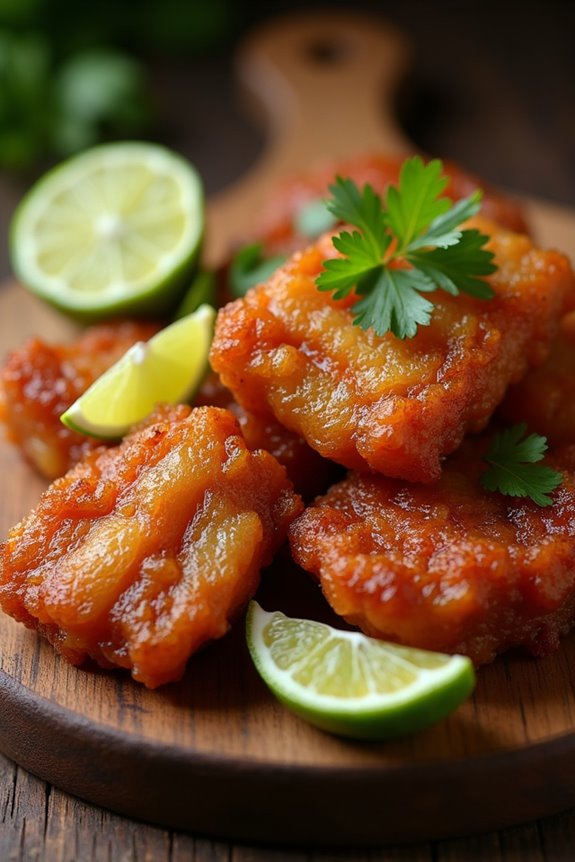
Chicharrón is a beloved Colombian dish that features crispy fried pork belly or fried pork rinds, known for their savory flavor and satisfying crunch. This dish is often served as an appetizer or part of a larger meal and pairs beautifully with sides like arepas, guacamole, or a fresh salad.
The process of making chicharrón requires patience and careful attention to guarantee that the pork is cooked properly, resulting in tender meat beneath a perfectly crisped skin. The key to achieving the ultimate chicharrón lies in the cooking method: a combination of boiling and frying. Boiling the pork initially helps to render some of the fat, resulting in moist meat, while frying at a high temperature gives that desirable crunch.
With its rich flavors and textured layers, chicharrón is sure to be a crowd-pleaser at your dinner table.
Ingredients (Serves 4-6):
- 2 pounds pork belly (with skin)
- 1 tablespoon salt
- 1 teaspoon black pepper
- 1 teaspoon garlic powder
- 1 teaspoon onion powder
- 2 cups water
- Vegetable oil (for frying)
Cooking Instructions:
- Prepare the Pork Belly: Begin by cutting the pork belly into 2-inch squares, guaranteeing that each piece has a good amount of skin and meat. Pat the pieces dry with paper towels to remove any excess moisture, which will help achieve a crispy texture later.
- Season the Pork: In a bowl, mix the salt, black pepper, garlic powder, and onion powder. Rub this seasoning mixture all over the pork pieces, making sure to cover both the skin and meat thoroughly. Allow the pork to marinate for at least 30 minutes, or up to overnight in the refrigerator for more flavor.
- Boil the Pork: Place the seasoned pork pieces into a large pot and add the water. Bring the water to a boil over medium-high heat, then reduce the heat and let it simmer for about 45 minutes. This step helps render some of the fat and tenderizes the pork.
- Drain and Dry: After boiling, carefully remove the pork from the pot and place it on a wire rack or a plate lined with paper towels. Let it cool slightly, and then pat the pieces dry once again to guarantee they’re as dry as possible before frying.
- Heat the Oil: In a large, heavy-bottomed skillet or frying pan, heat vegetable oil over medium-high heat until it shimmers. You want enough oil to cover the bottom of the pan generously.
- Fry the Pork: Carefully add the boiled pork pieces to the hot oil, skin side down. Fry them in batches if necessary to avoid overcrowding the pan. Fry for about 5-8 minutes on each side or until they’re golden brown and crispy. Adjust the heat as needed to prevent burning.
- Drain Excess Oil: Once cooked, remove the chicharrón from the oil and place them on a plate lined with paper towels to remove excess oil. Let them rest for a few minutes before serving.
- Serve: Serve the chicharrón warm with your choice of dipping sauces or sides such as lime wedges, avocado, or a fresh salsa.
Extra Tips:
For the best results, make sure to choose a quality pork belly with a good balance of fat and meat. If you prefer extra crispy skin, you can finish the chicharrón under a broiler for a couple of minutes after frying.
Additionally, keep an eye on the temperature of the oil; if it’s too hot, the skin may burn before the meat is cooked through, while oil that’s not hot enough will result in greasy chicharrón. Enjoy your cooking adventure!
Sudado De Pollo
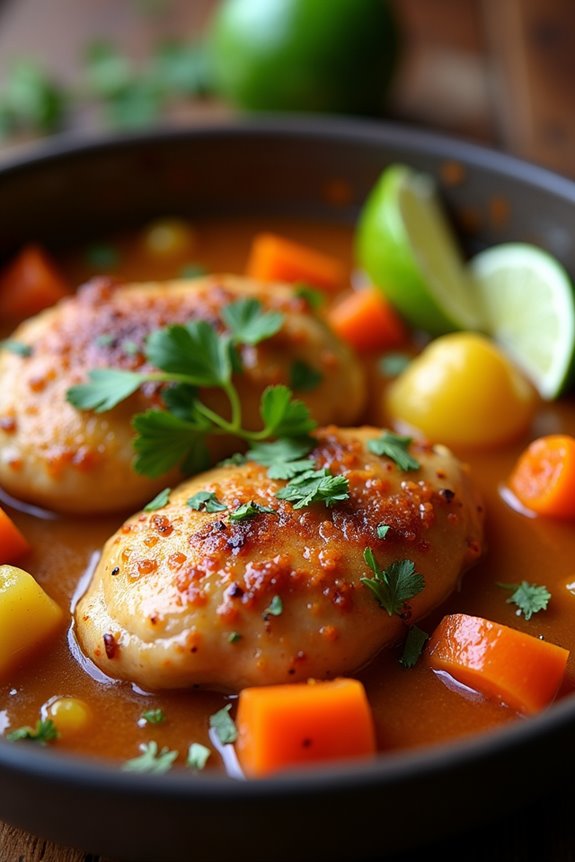
Sudado de Pollo is a traditional Colombian dish that showcases the country’s rich culinary heritage. This comforting chicken stew is characterized by its vibrant flavors, thanks to a mix of fresh ingredients and spices. The dish typically includes chicken cooked with a variety of vegetables, creating a savory broth that’s perfect for serving over rice. The slow-cooking process allows the ingredients to meld together, resulting in a hearty meal that’s both satisfying and nutritious.
This dish not only highlights the simplicity and freshness of Colombian cooking but also brings families together around the dinner table. With its warm and aromatic qualities, Sudado de Pollo is ideal for any occasion, from a casual family dinner to a special gathering with friends. Whether you’re a seasoned chef or a novice in the kitchen, this recipe will guide you through creating an authentic Colombian experience at home.
Ingredients (Serves 4-6)
- 4 chicken thighs (bone-in and skin-on)
- 2 tablespoons vegetable oil
- 1 medium onion, chopped
- 2 cloves garlic, minced
- 1 bell pepper, chopped (red or green)
- 2 medium tomatoes, chopped
- 1 cup chicken broth
- 1 cup water
- 2 medium potatoes, peeled and cubed
- 1 carrot, sliced
- 1 tablespoon ground cumin
- 1 tablespoon paprika
- Salt and pepper to taste
- Fresh cilantro for garnish
- Lime wedges for serving
Cooking Instructions
- Prepare the Chicken: Rinse the chicken thighs under cold water and pat them dry with paper towels. Season both sides of the chicken with salt, pepper, ground cumin, and paprika. This step helps to build flavor and guarantees the chicken is well-seasoned throughout the cooking process.
- Sauté the Aromatics: In a large pot or Dutch oven, heat the vegetable oil over medium heat. Once hot, add the chopped onion and minced garlic, sautéing until the onion becomes translucent and fragrant, about 3-4 minutes. This will create a base of flavor for the stew.
- Add the Chicken: Carefully place the seasoned chicken thighs into the pot, browning them on both sides for about 5 minutes. This step not only adds color to the chicken but also enhances the overall flavor of the dish.
- Incorporate Vegetables: Add the chopped bell pepper, tomatoes, cubed potatoes, and sliced carrot to the pot. Stir to combine the ingredients, allowing them to cook together for about 2-3 minutes. The vegetables will start to release their juices, enriching the stew.
- Pour in the Liquids: Add the chicken broth and water to the pot, making sure that the chicken and vegetables are mostly submerged in the liquid. Bring the mixture to a gentle boil, then reduce the heat to low. Cover the pot and let the stew simmer for 30-40 minutes, or until the chicken is tender and cooked through.
- Final Adjustments: Once the chicken is cooked, taste the stew and adjust the seasoning with more salt and pepper if necessary. If the broth is too thin, you can remove the lid and let it simmer for an additional 10 minutes to thicken.
- Serve: Ladle the Sudado de Pollo into bowls, garnishing with fresh cilantro. Serve with lime wedges on the side for an added burst of flavor. Traditionally, this dish is served with rice to soak up the delicious broth.
Extra Tips
For an added depth of flavor, consider marinating the chicken in the spices and some lime juice for a few hours or overnight before cooking. This will enhance the taste and tenderness of the chicken.
Additionally, feel free to customize the vegetables based on what you have on hand, such as adding peas or corn. Enjoying Sudado de Pollo with a side of avocado or a simple green salad can also elevate the meal, making it even more delightful.
Bunuelo

Bunuelo is a beloved Colombian traditional snack that has made its way into the hearts and homes of many across Latin America. These delicious cheese-filled fritters are crispy on the outside and soft on the inside, making them a perfect treat for any occasion. Often served during Christmas, they can be enjoyed as a breakfast item or as a savory snack throughout the day. The combination of cheese and dough creates a delightful flavor that pairs wonderfully with a hot cup of coffee or hot chocolate.
Making bunuelos is a delightful culinary experience that brings a taste of Colombia to your kitchen. The texture is achieved by balancing the right amount of flour, cheese, and eggs to create a dough that’s easy to shape and fry. In this recipe, you’ll learn how to prepare bunuelos from scratch, guaranteeing that they come out perfectly golden and crispy every time. Gather your ingredients and get ready to indulge in this tasty treat!
Ingredients (Serves 4-6)
- 1 cup of queso fresco (or any fresh cheese)
- 1 cup of tapioca flour (or cassava flour)
- 1/2 cup of all-purpose flour
- 1/2 cup of milk
- 2 large eggs
- 1 tablespoon of baking powder
- 1/4 teaspoon of salt
- Oil for frying (enough for deep frying)
Cooking Instructions
- Prepare the Cheese Mixture: In a large mixing bowl, crumble the queso fresco. You want it to be in small pieces to incorporate easily into the dough. If you can’t find queso fresco, you can use a similar fresh cheese like ricotta or farmer’s cheese.
- Mix the Dry Ingredients: In another bowl, combine the tapioca flour, all-purpose flour, baking powder, and salt. Whisk these dry ingredients together until they’re well combined. This guarantees that the baking powder is evenly distributed throughout the flour mixture.
- Combine Wet Ingredients: In a separate bowl, beat the eggs and then add the milk. Mix until fully combined. This mixture will help bind the ingredients together when combined with the dry mixture.
- Form the Dough: Gradually add the dry mixture to the cheese and wet mixture. Stir with a wooden spoon until a soft dough forms. The dough should be slightly sticky but manageable. If it feels too wet, you can add a little more flour, but be careful not to overwork it.
- Shape the Bunuelos: Dust your hands with a bit of flour to prevent sticking. Take a small portion of dough, about the size of a golf ball, and shape it into a round ball. Repeat with the remaining dough, placing the formed bunuelos on a plate.
- Heat the Oil: In a deep pot or frying pan, heat enough oil to submerge the bunuelos over medium heat. To test if the oil is ready, drop a small piece of dough into the oil; if it sizzles and rises to the surface, the oil is hot enough.
- Fry the Bunuelos: Carefully place the bunuelos in the hot oil, being sure not to overcrowd the pan. Fry them for about 3-4 minutes on each side or until they turn golden brown. Use a slotted spoon to turn them over, guaranteeing even cooking.
- Drain and Serve: Once golden brown, remove the bunuelos from the oil and place them on paper towels to drain any excess oil. Serve warm, dusted with powdered sugar if desired, or enjoy them plain.
Extra Tips
When preparing bunuelos, it’s important to verify that your oil is at the right temperature; too hot can cause them to burn on the outside while remaining raw inside. If you’re new to frying, consider using a deep-fry thermometer to monitor the temperature closely.
Additionally, feel free to experiment with different types of cheese or add herbs for a unique twist on the classic recipe. Enjoy your homemade bunuelos with a side of guava paste or a sweet sauce for an extra layer of flavor!