

Exploring the world of Colombian bread is a journey filled with delightful aromas and comforting flavors. From chewy pandebono to fluffy buñuelos, each recipe offers a taste of tradition that warms the heart. These soft breads not only satisfy cravings but also bring people together. If you’re eager to add these mouthwatering creations to your recipe collection, stay tuned. There’s so much deliciousness awaiting to inspire your next baking adventure.
Pandebono
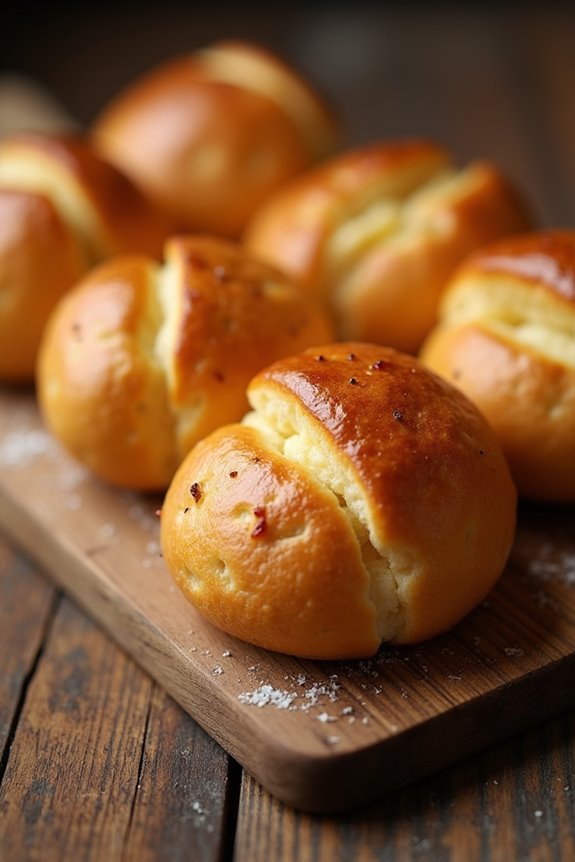
Pandebono is a delightful Colombian bread, known for its soft, chewy texture and slightly cheesy flavor. Traditionally enjoyed during breakfast or as a snack, this bread is made with a combination of cassava flour and cheese, giving it a unique profile that’s both gluten-free and utterly delicious.
The name “pandebono” translates to “good bread,” and it certainly lives up to its name, making it a beloved staple in Colombian households.
The preparation of pandebono is relatively simple and requires minimal ingredients, making it an accessible option for home bakers. The dough comes together quickly and can be shaped into small rolls, perfect for sharing.
Once baked, these golden-brown treats offer a warm, comforting aroma that fills the kitchen and invites everyone to gather around the table.
Ingredients (Serves 4-6 people):
- 2 cups cassava flour
- 1 cup grated cheese (preferably a soft cheese like queso blanco or mozzarella)
- 1/2 cup milk
- 1/4 cup sugar
- 1/4 cup vegetable oil
- 1 teaspoon baking powder
- 1/2 teaspoon salt
- 1 egg
Cooking Instructions:
- Preheat the Oven: Begin by preheating your oven to 375°F (190°C). This guarantees that your pandebono will bake evenly and achieve a perfect golden color.
- Mix Dry Ingredients: In a large mixing bowl, combine the cassava flour, baking powder, and salt. Whisk them together until well blended. This step is essential as it helps to distribute the baking powder evenly throughout the flour.
- Combine Wet Ingredients: In a separate bowl, mix the grated cheese, milk, vegetable oil, sugar, and the egg. Use a fork or whisk to combine these ingredients until smooth. The cheese should be well incorporated into the mixture.
- Form the Dough: Gradually add the wet ingredients to the dry ingredients, stirring with a spoon or your hands until a soft dough forms. If the dough seems too sticky, you can add a little more cassava flour until it’s manageable.
- Shape the Pandebono: Divide the dough into equal portions, about the size of a golf ball. Roll each piece into a ball and then flatten it slightly to form a disc. Place the shaped pandebono on a greased baking sheet, leaving some space in between each.
- Bake the Pandebono: Place the baking sheet in the preheated oven and bake for approximately 20-25 minutes, or until the tops are golden brown and a toothpick inserted into the center comes out clean.
- Cool and Serve: Once baked, remove the pandebono from the oven and let them cool on a wire rack for a few minutes. Serve them warm, and enjoy the delightful cheesy flavor.
Extra Tips:
When making pandebono, you can experiment with different types of cheese to find your perfect flavor combination.
Additionally, if you’re looking for a bit of extra richness, consider adding an extra egg or a splash of cream to the wet mixture.
For added flavor, some bakers like to incorporate herbs or spices, such as oregano or black pepper, into the dough.
Enjoy your pandebono fresh out of the oven for the best taste, but they can also be stored in an airtight container for a couple of days. Reheat them in the oven to restore their delightful texture before serving again.
Arepa De Huevo
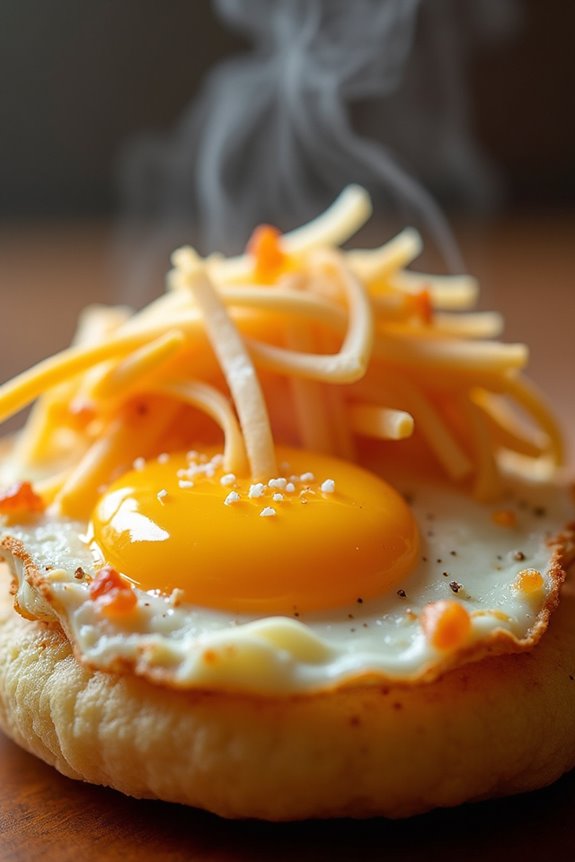
Arepa De Huevo is a delicious Colombian dish that combines the soft and fluffy texture of arepas with the rich, savory taste of fried eggs. This mouthwatering treat makes for a perfect breakfast or snack, and it’s loved by many for its delightful crunch and hearty filling.
The arepas are made from a cornmeal dough, which is then carefully shaped and fried to achieve that golden-brown crust, providing a delightful contrast to the soft, runny egg inside. This dish originated in the Caribbean coastal region of Colombia and has become a staple in many households.
The arepas are typically split open, filled with a fried egg, and sometimes garnished with a bit of sauce or cheese. Arepa De Huevo isn’t only easy to prepare but also customizable, allowing you to experiment with different fillings or spices to suit your taste. It’s a comforting, indulgent dish that captures the spirit of Colombian cuisine.
Ingredients (Serves 4-6):
- 2 cups of precooked cornmeal (masarepa)
- 1 ½ cups of warm water
- 1 teaspoon of salt
- 4-6 large eggs
- Vegetable oil (for frying)
- Optional: cheese or hot sauce for serving
Cooking Instructions:
- Prepare the Arepa Dough: In a mixing bowl, combine the precooked cornmeal, warm water, and salt. Mix well until it forms a soft dough. If the dough is too dry, add a little more water, and if it’s too wet, sprinkle in a bit more cornmeal. Let the dough rest for about 10 minutes.
- Shape the Arepas: Divide the dough into equal portions, about the size of a golf ball. Flatten each portion into a disc that’s approximately ½ inch thick. Make sure the edges are smooth to prevent cracking during frying.
- Fry the Arepas: Heat about 1 inch of vegetable oil in a large skillet over medium heat. Once the oil is hot, carefully place the arepas into the skillet, frying them for about 3-4 minutes on each side, or until they’re golden brown and crispy. Remove them from the oil and place them on paper towels to drain excess oil.
- Prepare the Eggs: Once the arepas are done frying, carefully slice the top off each arepa to create a pocket for the egg. In the same skillet, crack the eggs directly into the arepa pockets, ensuring not to break the yolk. Fry the filled arepas for an additional 2-3 minutes until the eggs are cooked to your liking.
- Serve: Remove the arepas from the skillet and place them on a serving platter. If desired, sprinkle some cheese on top or drizzle with hot sauce before serving. Enjoy your Arepa De Huevo warm!
Extra Tips: When making Arepa De Huevo, it’s crucial to control the oil temperature while frying. If the oil is too hot, the arepas may burn before the inside cooks. Conversely, if the oil isn’t hot enough, they may absorb too much oil and become greasy.
Additionally, feel free to get creative with your fillings; consider adding cooked chorizo or vegetables for an extra burst of flavor.
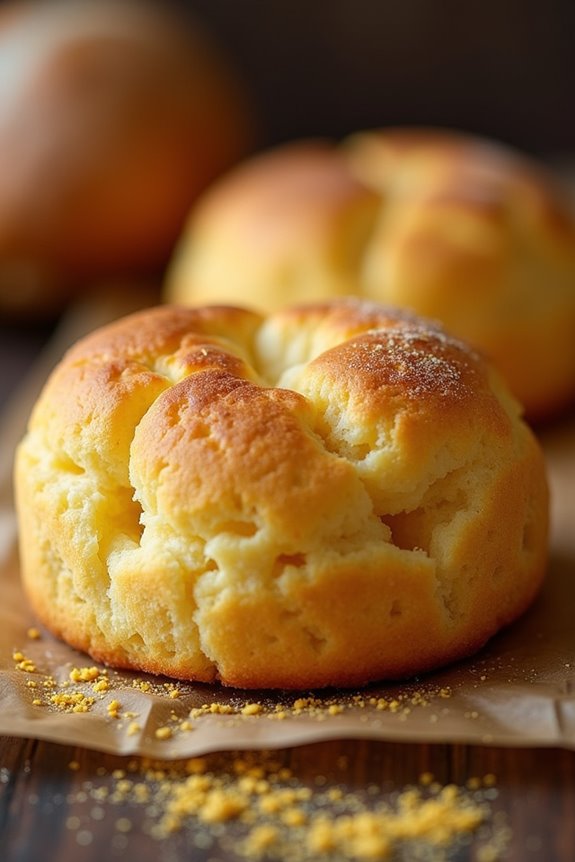
Almojábanas
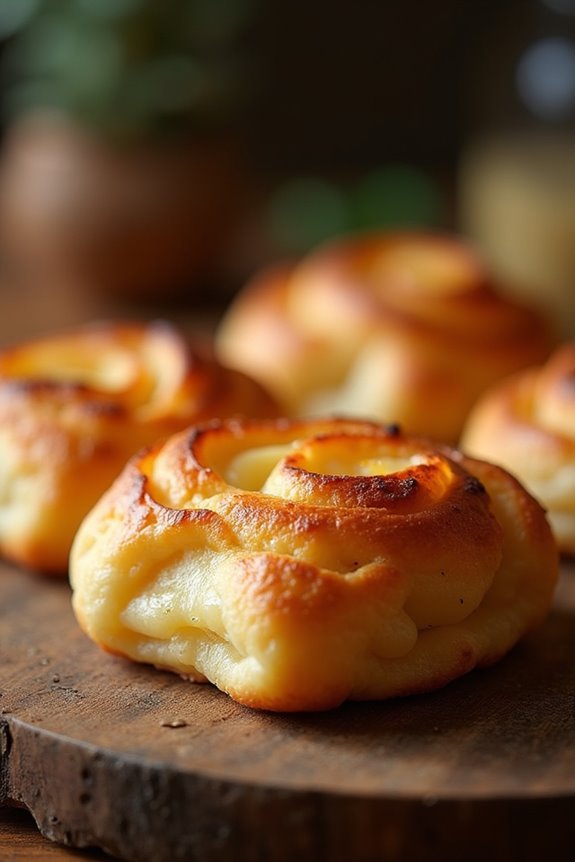
Almojábanas are a delightful Colombian bread made primarily from cheese and cornmeal, resulting in a soft and chewy texture that’s simply irresistible. These traditional snacks are popular for breakfast or as a delightful treat any time of the day. The combination of ingredients creates a slightly sweet and savory flavor, making them the perfect accompaniment to coffee or hot chocolate.
Easy to prepare, almojábanas can be enjoyed fresh out of the oven or even reheated later for a delicious snack. The origin of almojábanas can be traced back to the indigenous people of Colombia, who used local ingredients to create this unique bread. Over the years, it has evolved, but the core of the recipe remains the same, focusing on the simplicity and quality of the ingredients.
With a crispy outer layer and a soft, cheesy center, almojábanas aren’t only a staple in Colombian households but also a must-try for anyone seeking to explore Latin American cuisine.
Ingredients (Servings: 4-6)
- 1 cup of cornmeal (arepa flour)
- 1 cup of fresh cheese (crumbled, such as queso blanco)
- 1/2 cup of milk
- 1/4 cup of unsalted butter (melted)
- 2 large eggs
- 1 teaspoon of baking powder
- 1/2 teaspoon of salt
- 2 tablespoons of sugar (optional, for a slightly sweeter taste)
Cooking Instructions
- Preheat the Oven: Start by preheating your oven to 375°F (190°C). This guarantees that your almojábanas will bake evenly and achieve a golden brown color.
- Mix the Dry Ingredients: In a large mixing bowl, combine the cornmeal, baking powder, and salt. If you prefer a sweeter bread, add the sugar as well. Mix these dry ingredients thoroughly until they’re well incorporated.
- Combine the Wet Ingredients: In a separate bowl, whisk together the milk, melted butter, and eggs until the mixture is smooth and well combined.
- Incorporate Cheese: Gradually add the crumbled cheese into the wet mixture, stirring gently to distribute the cheese evenly throughout.
- Combine Wet and Dry Mixtures: Pour the wet mixture into the bowl with the dry ingredients. Stir until just combined; be careful not to overmix, as this can result in tough almojábanas.
- Shape the Dough: Using your hands, take small portions of the dough and shape them into small balls or discs, about the size of a golf ball. Place them on a greased baking sheet, leaving some space in between each piece.
- Bake: Place the baking sheet in the preheated oven and bake for 20-25 minutes, or until the almojábanas are puffed up and have a golden-brown color on top.
- Cool and Serve: Once baked, remove the almojábanas from the oven and let them cool slightly on a wire rack. Serve warm or at room temperature.
Extra Tips
To enhance the flavor of your almojábanas, consider experimenting with different types of cheese, such as mozzarella or even a blend of cheeses for a more complex taste.
Additionally, for a unique twist, you can add herbs or spices like oregano or black pepper to the dough. Make sure to enjoy them fresh, as they taste best when warm, but if you have leftovers, they can be stored in an airtight container and reheated in the oven for a delicious snack at a later time.
Pandeyuca
Pandeyuca is a delightful Colombian bread that’s both soft and chewy, making it a beloved snack or accompaniment to meals. This traditional bread is made from yuca (cassava), which gives it a unique texture and flavor that’s different from typical bread. The combination of yuca flour and cheese creates a savory delight that can be enjoyed at any time of the day, whether for breakfast, as a snack, or alongside a hearty meal.
This recipe is simple and requires only a few ingredients to create a batch of 4-6 servings of Pandeyuca. The process is straightforward, allowing you to enjoy the comforting aroma of freshly baked bread wafting through your kitchen. With the right technique, you can achieve that perfect balance of a crispy exterior and a soft, chewy interior, making it a hit with family and friends.
Ingredients:
- 2 cups yuca flour (also known as cassava flour)
- 1 cup grated cheese (mozzarella or queso blanco)
- 1 cup warm water
- 1 teaspoon baking powder
- 1/2 teaspoon salt
- 1 tablespoon olive oil (optional)
Cooking Instructions:
- Preheat the Oven: Begin by preheating your oven to 400°F (200°C). This guarantees that your Pandeyuca will bake evenly and achieve a nice golden color.
- Mix Dry Ingredients: In a large mixing bowl, combine the yuca flour, baking powder, and salt. Stir well to ensure that the baking powder is evenly distributed throughout the flour, which will help your bread rise properly.
- Add Cheese: Next, add the grated cheese to the dry mixture. Use your hands or a spatula to mix the cheese thoroughly with the flour until well incorporated. The cheese will add flavor and a wonderful texture to the Pandeyuca.
- Incorporate Wet Ingredients: Gradually add the warm water to the mixture while stirring. If using, also add the olive oil at this stage. Mix until the dough comes together and is slightly sticky but manageable. If the dough is too dry, add a little more water, a tablespoon at a time.
- Shape the Dough: Once the dough is well combined, take small portions and roll them into balls or small oval shapes, about the size of a golf ball. The dough should be soft and pliable, not overly sticky.
- Arrange on Baking Sheet: Place the shaped dough on a baking sheet lined with parchment paper, leaving some space between each piece to allow for expansion during baking.
- Bake: Place the baking sheet in the preheated oven and bake for about 20-25 minutes, or until the tops of the Pandeyuca are golden brown and the edges sound hollow when tapped.
- Cool and Serve: Once baked, remove the Pandeyuca from the oven and allow them to cool on a wire rack for a few minutes. Serve warm, and enjoy the delightful aroma and flavor.
Extra Tips:
For an added twist, you can experiment with different types of cheese or even mix in herbs and spices to enhance the flavor of your Pandeyuca.
Additionally, make sure to use warm water as it helps bind the ingredients better, resulting in a softer texture. If you have leftovers, they can be stored in an airtight container and reheated in the oven to maintain their soft texture.
Enjoy your homemade Pandeyuca with a side of guava paste or your favorite dipping sauce for an authentic Colombian experience!
Buñuelos
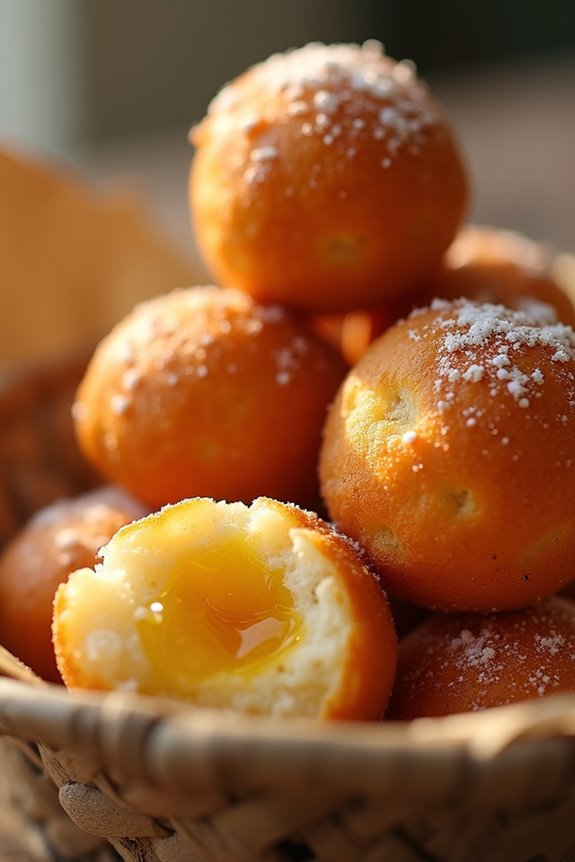
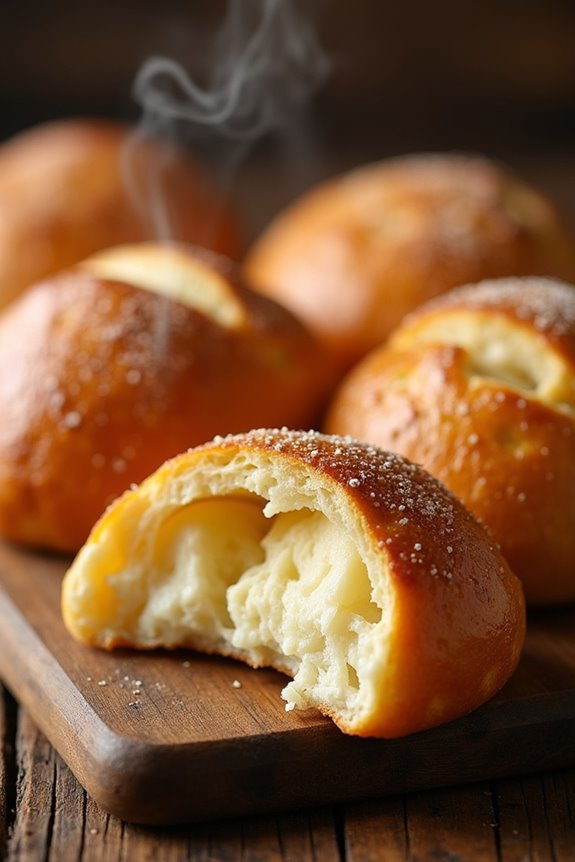
Buñuelos are a beloved Colombian treat, often enjoyed during the festive season or as a delicious snack any time of the year. These round, fried dough balls are made from a combination of cheese and dough, resulting in a crispy exterior and a soft, cheesy interior that melts in your mouth. Traditionally, buñuelos are made with a special type of cheese called “queso fresco,” which provides the perfect flavor and texture.
Making buñuelos is a delightful experience that combines simple ingredients to create a dish that’s certain to impress your family and friends. They’re best served warm and can be enjoyed on their own or with a sprinkle of sugar, a drizzle of honey, or even a savory dipping sauce. Follow the recipe below to make a batch of buñuelos that will have everyone coming back for more.
Ingredients (Serves 4-6 people):
- 2 cups of tapioca flour (also known as yuca flour)
- 1 cup of queso fresco, crumbled or shredded
- 1/2 cup of milk
- 1 large egg
- 1 teaspoon of baking powder
- 1/4 teaspoon of salt
- Vegetable oil (for frying)
Cooking Instructions:
- Prepare the dough: In a large mixing bowl, combine the tapioca flour, baking powder, and salt. Mix the dry ingredients well to make sure that the baking powder is evenly distributed throughout the flour.
- Add the cheese: Incorporate the crumbled queso fresco into the flour mixture, making sure that the cheese is evenly dispersed. This will help create that delicious cheesy flavor in every bite.
- Mix wet ingredients: In a separate bowl, whisk together the milk and the egg until well combined. This mixture will add moisture and richness to the dough.
- Combine wet and dry: Gradually pour the milk and egg mixture into the flour and cheese mixture. Stir with a spoon or your hands until a soft and slightly sticky dough forms. If the dough is too dry, add a little more milk a tablespoon at a time until the desired consistency is achieved.
- Shape the buñuelos: Once the dough is ready, take small portions of the dough and roll them into balls about the size of a golf ball. Make sure to keep the balls uniform in size for even cooking.
- Heat the oil: In a deep frying pan or pot, heat about 2-3 inches of vegetable oil over medium heat. You can test the oil by dropping in a small piece of dough; if it sizzles and rises to the surface, the oil is ready for frying.
- Fry the buñuelos: Carefully drop the buñuelo balls into the hot oil, making sure not to overcrowd the pan. Fry them for about 4-5 minutes or until they’re golden brown and puffed up. Turn them occasionally to make sure of even cooking.
- Drain and serve: Once cooked, remove the buñuelos from the oil using a slotted spoon and place them on a plate lined with paper towels to drain any excess oil. Serve warm, optionally sprinkled with powdered sugar or drizzled with honey.
Extra Tips:
When making buñuelos, it’s vital to use fresh queso fresco, as it greatly influences the flavor and texture of the final product. If you can’t find queso fresco, you can substitute it with other soft cheeses like queso blanco or even mozzarella.
Additionally, make sure the oil is at the right temperature before frying – if it’s too cold, the buñuelos will absorb too much oil, and if it’s too hot, they may burn. Enjoy experimenting with different toppings, such as sugar or fruit preserves, to personalize your buñuelos!
Pan De Coco
Pan De Coco, or coconut bread, is a delightful Colombian treat that embodies the essence of tropical flavors. This soft and slightly sweet bread is typically infused with coconut and often enjoyed as a snack or breakfast item. Traditionally, it’s made with simple ingredients that come together to create a fluffy, rich texture that pairs beautifully with coffee or hot chocolate.
The use of fresh coconut gives this bread an authentic taste that transports you to the beaches of Colombia, where it’s often sold by street vendors.
To make Pan De Coco, you’ll need to gather your ingredients and prepare for a delightful baking experience. The dough is easy to handle, and with some patience, you can create a batch of these delicious rolls that will impress your family and friends.
Whether you choose to enjoy them plain or with toppings like butter or jam, Pan De Coco is bound to become a favorite in your household.
Ingredients (Serves 4-6 people)
- 3 cups all-purpose flour
- 1 cup coconut milk
- 1/2 cup sugar
- 1/4 cup unsweetened shredded coconut
- 1/4 cup unsalted butter, melted
- 2 teaspoons active dry yeast
- 1/2 teaspoon salt
- 1 large egg
- 1 teaspoon vanilla extract
Cooking Instructions
- Activate Yeast: In a small bowl, combine the coconut milk and sugar, then sprinkle the active dry yeast on top. Let it sit for about 5-10 minutes until it becomes frothy. This step guarantees that the yeast is active and will help your bread rise.
- Mix Dry Ingredients: In a large mixing bowl, whisk together the all-purpose flour, shredded coconut, and salt. This will help evenly distribute the coconut throughout the dough and enhance the flavor.
- Combine Wet Ingredients: In a separate bowl, beat the egg and add the melted butter and vanilla extract. Mix well to combine all the wet ingredients.
- Form the Dough: Once the yeast mixture is frothy, pour it into the bowl with the dry ingredients, followed by the egg mixture. Stir with a wooden spoon until the dough begins to come together. It should be slightly sticky but manageable.
- Knead the Dough: Transfer the dough to a floured surface and knead for about 5-7 minutes until it’s smooth and elastic. If the dough is too sticky, add a little more flour as needed.
- First Rise: Place the kneaded dough in a lightly greased bowl, cover it with a clean kitchen towel or plastic wrap, and let it rise in a warm place for about 1-2 hours, or until it has doubled in size.
- Shape the Rolls: Once the dough has risen, punch it down to release the air. Divide the dough into 12 equal pieces and shape each piece into a ball. Place the balls onto a baking sheet lined with parchment paper, leaving space between them.
- Second Rise: Cover the shaped rolls with a towel and let them rise again for about 30-45 minutes until they’ve puffed up.
- Preheat the Oven: While the rolls are rising, preheat your oven to 350°F (175°C).
- Bake: Once the rolls have risen, bake them in the preheated oven for 20-25 minutes or until they’re golden brown on top.
- Cool and Serve: Remove the rolls from the oven and let them cool on a wire rack. Enjoy warm or at room temperature, plain or with your favorite spread.
Extra Tips
For an extra touch of flavor, consider adding a pinch of cinnamon to the dough or brushing the tops of the rolls with melted butter right after they come out of the oven.
You can also experiment by replacing some of the all-purpose flour with whole wheat flour for a healthier option. If you want a more pronounced coconut flavor, use coconut extract in place of vanilla.
Store any leftovers in an airtight container at room temperature to keep them soft and fresh for a few days!
Pan De Maíz
Pan de Maíz, a traditional Colombian cornbread, is a delightful treat that’s both soft and flavorful. Made primarily from cornmeal, this bread has a rich history and is often enjoyed at breakfast or as a side dish to accompany meals. Its sweet and savory notes make it a versatile option that pairs wonderfully with butter, cheese, or even a drizzle of honey.
The texture is light and fluffy, making it perfect for soaking up soups or stews, or simply enjoying on its own.
Creating Pan de Maíz is a straightforward process, and with the right ingredients, you can bring a taste of Colombia to your kitchen. This recipe yields 4-6 servings, making it an excellent choice for family gatherings or intimate meals. The combination of cornmeal and buttermilk gives this bread its characteristic softness, while the addition of cheese adds a delightful savory touch that enhances the overall flavor.
Ingredients:
- 2 cups cornmeal
- 1 cup buttermilk
- 1/2 cup water
- 1/2 cup shredded cheese (such as queso blanco or mozzarella)
- 1/4 cup sugar
- 2 large eggs
- 1/4 cup vegetable oil
- 1 tablespoon baking powder
- 1 teaspoon salt
Cooking Instructions:
- Preheat the Oven: Begin by preheating your oven to 400°F (200°C). This will guarantee that the Pan de Maíz bakes evenly and rises beautifully when placed in the oven.
- Mix Dry Ingredients: In a large mixing bowl, combine the cornmeal, baking powder, sugar, and salt. Whisk these dry ingredients together until they’re well blended. This step is essential as it helps distribute the leavening agent evenly throughout the batter.
- Combine Wet Ingredients: In another bowl, whisk together the buttermilk, water, eggs, and vegetable oil until fully combined. This mixture will provide moisture and richness to the bread.
- Combine Mixtures: Pour the wet ingredient mixture into the bowl with the dry ingredients. Gently fold them together using a spatula or wooden spoon until just combined. Be careful not to overmix; a few lumps are okay.
- Add Cheese: Fold in the shredded cheese, distributing it evenly throughout the batter. The cheese will melt during baking, creating delightful pockets of flavor within the bread.
- Prepare the Baking Dish: Grease a baking dish or cast-iron skillet with a little oil or butter to prevent the bread from sticking. You can also line it with parchment paper for easier removal.
- Pour and Bake: Pour the batter into the prepared baking dish. Use a spatula to spread it evenly. Place it in the preheated oven and bake for about 25-30 minutes, or until the top is golden brown and a toothpick inserted into the center comes out clean.
- Cool and Serve: Once baked, allow the Pan de Maíz to cool in the dish for about 10 minutes. Then, transfer it to a wire rack to cool slightly before slicing. Serve warm, either on its own or with your favorite toppings.
Extra Tips:
For the best texture, confirm that your ingredients are at room temperature before mixing. This will help the batter come together more smoothly and create a lighter bread.
Additionally, feel free to experiment with different types of cheese or add herbs and spices to customize the flavor to your liking. If you prefer a slightly sweeter bread, you can increase the sugar content a bit, or even add corn kernels for added sweetness and texture.
Enjoy your homemade Pan de Maíz fresh out of the oven!
Pan De Tres Leches
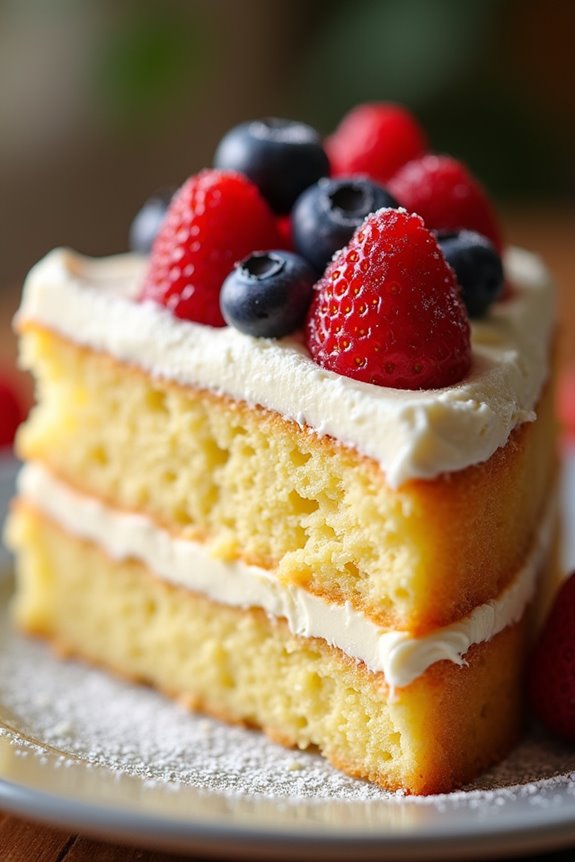
Pan De Tres Leches, or “Three Milk Cake,” is a delightful Colombian dessert that’s famous for its rich and moist texture. This cake is a favorite at celebrations and gatherings, as its sweetness and creaminess make it a perfect ending to any meal. The cake is soaked in a mixture of three different types of milk: evaporated milk, condensed milk, and heavy cream, which gives it a unique and delicious flavor that’s hard to resist.
The origins of Tres Leches cake can be traced back to Latin America, where it has become a staple in many households. The cake is often topped with whipped cream and fresh fruit, making it not only a treat for the taste buds but also a feast for the eyes. Whether you’re celebrating a special occasion or simply satisfying a sweet craving, Pan De Tres Leches is sure to impress.
Ingredients (Serves 4-6):
- 1 cup all-purpose flour
- 1 ½ teaspoons baking powder
- ½ cup unsalted butter, softened
- 1 cup granulated sugar
- 4 large eggs
- 1 teaspoon vanilla extract
- 1 cup whole milk
- 1 can (12 oz) evaporated milk
- 1 can (14 oz) sweetened condensed milk
- 1 cup heavy cream
- 1 teaspoon cinnamon (optional)
- Whipped cream and fruit for topping (optional)
Cooking Instructions:
- Preheat the Oven: Begin by preheating your oven to 350°F (175°C). This guarantees that the cake will bake evenly and rise properly.
- Prepare the Cake Batter: In a medium bowl, whisk together the all-purpose flour and baking powder. In a separate large bowl, cream the softened butter and granulated sugar until light and fluffy. This may take about 3-5 minutes. Beat in the eggs, one at a time, followed by the vanilla extract. Gradually add the dry ingredients to the wet mixture, alternating with the whole milk, and mix until just combined.
- Bake the Cake: Pour the batter into a greased 9×13 inch baking dish and spread it evenly. Bake in the preheated oven for 25-30 minutes, or until a toothpick inserted into the center comes out clean. Allow the cake to cool in the pan for about 15 minutes before inverting it onto a wire rack to cool completely.
- Prepare the Milk Mixture: While the cake cools, combine the evaporated milk, sweetened condensed milk, and heavy cream in a mixing bowl. Whisk until well blended. You can also add cinnamon to the mixture for extra flavor if desired.
- Soak the Cake: Once the cake is completely cool, use a fork or toothpick to poke holes all over the surface. This allows the milk mixture to soak in better. Slowly pour the milk mixture over the cake, making sure it absorbs evenly. Let it sit for at least 1 hour, or overnight in the refrigerator for maximum flavor.
- Serve the Cake: Before serving, top the cake with whipped cream and fresh fruit if desired. Slice into squares and enjoy!
Extra Tips:
To achieve the best flavor and texture, consider letting the cake soak in the milk mixture overnight. This allows the cake to absorb more moisture, making it incredibly soft and rich.
Additionally, feel free to get creative with toppings; berries, mango slices, or chocolate shavings can enhance the cake’s presentation and add an extra layer of flavor. Enjoy your homemade Pan De Tres Leches!
Pan De Plátano
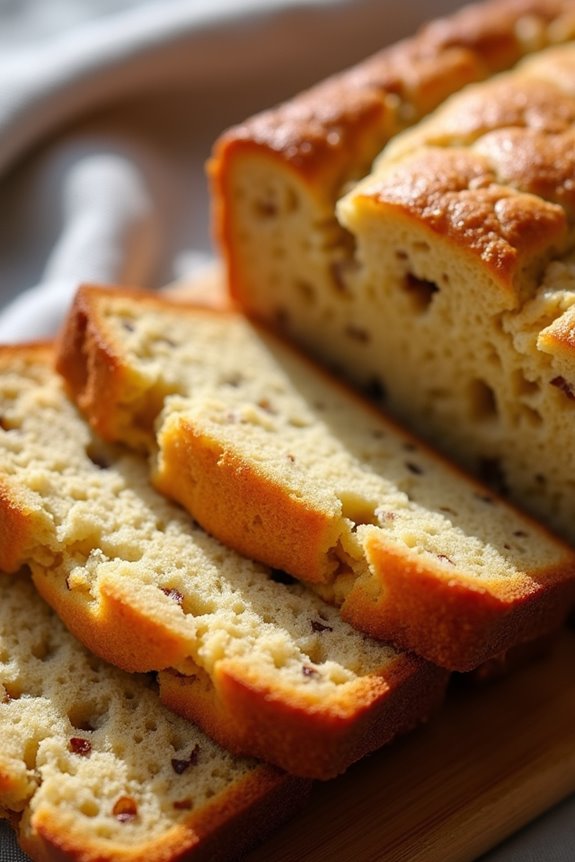
Pan de Plátano, or banana bread, is a beloved treat in Colombia, known for its soft and moist texture, delightful sweetness, and the rich taste of ripe bananas. This traditional recipe captures the essence of Colombian home baking, making it a perfect accompaniment for breakfast or an afternoon snack.
The bread isn’t only easy to make, but it’s also a fantastic way to utilize overripe bananas, transforming them into something delicious and comforting.
The recipe for Pan de Plátano is incredibly versatile, allowing for various additions such as nuts, chocolate chips, or even a hint of cinnamon for an extra flavor boost. This delightful bread is best enjoyed warm and can be served plain or with a spread of butter.
Whether you’re sharing it with family and friends or savoring it by yourself, Pan de Plátano is sure to bring a taste of Colombia to your table.
Ingredients (serving size: 4-6 people)
- 3 ripe bananas, mashed
- 1/3 cup melted butter
- 1 teaspoon baking soda
- Pinch of salt
- 3/4 cup sugar
- 1 large egg, beaten
- 1 teaspoon vanilla extract
- 1 cup all-purpose flour
Cooking Instructions
- Preheat the Oven: Begin by preheating your oven to 350°F (175°C). This guarantees that your bread bakes evenly once you place it in the oven.
- Prepare the Baking Pan: Grease a 9×5 inch loaf pan with butter or cooking spray to prevent the bread from sticking. This step is essential for easy removal after baking.
- Mix the Bananas and Butter: In a large mixing bowl, combine the mashed bananas with the melted butter. Stir them together until well combined, creating a smooth mixture that will serve as the base for your bread.
- Add Sugar and Egg: Next, add the sugar and beaten egg to the banana mixture. Mix thoroughly until the ingredients are well combined, making sure that the sugar dissolves properly in the moist mixture.
- Incorporate Dry Ingredients: Sprinkle the baking soda and salt into the mixture, followed by the vanilla extract. Stir gently to combine, being careful not to overmix.
- Add the Flour: Gradually fold in the all-purpose flour until just combined. Again, avoid overmixing; a few lumps are perfectly fine as they contribute to the softness of the bread.
- Pour into the Pan: Transfer the batter into the prepared loaf pan, smoothing the top with a spatula to guarantee even baking.
- Bake: Place the loaf pan in the preheated oven and bake for about 60 minutes, or until a toothpick inserted into the center comes out clean. Keep an eye on it towards the end to prevent overbaking.
- Cool: Once baked, remove the bread from the oven and allow it to cool in the pan for about 10 minutes. Afterward, carefully transfer it to a wire rack to cool completely before slicing.
Extra Tips
For the best flavor and texture, use very ripe bananas that are speckled or even blackened, as they’ll add natural sweetness to your bread.
Consider adding chopped walnuts or chocolate chips for an extra layer of flavor and texture. If you want to experiment, you can also try adding a teaspoon of cinnamon or nutmeg to the batter for a warm spice note.
Enjoy your homemade Pan de Plátano fresh out of the oven or toasted for a delightful treat!
Perico
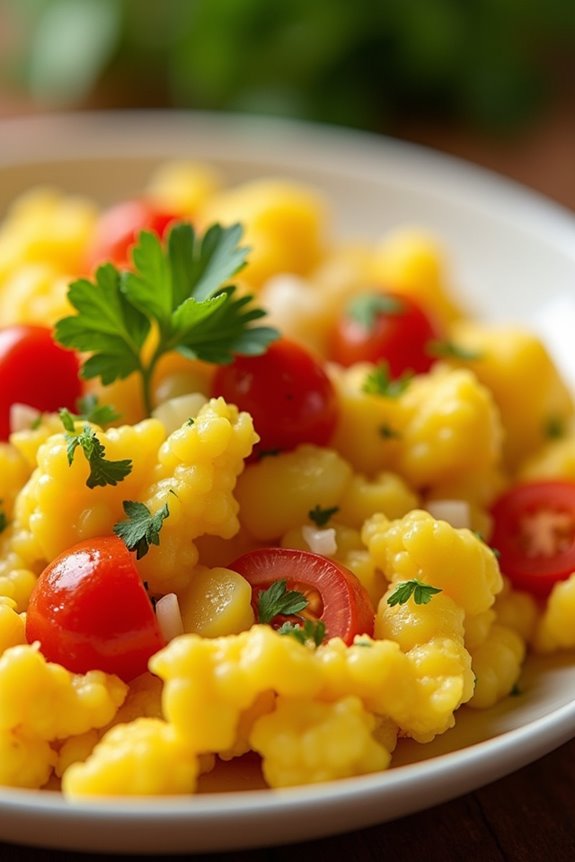
Perico is a delightful Colombian dish that brings vibrancy to breakfast tables with its colorful medley of ingredients. This simple yet flavorful dish consists of scrambled eggs mixed with finely chopped tomatoes, onions, and sometimes peppers, creating a nutrient-rich meal that’s both satisfying and easy to prepare.
Traditionally served with arepas or soft Colombian bread, Perico isn’t only a staple in Colombian households but also a popular choice among those looking to enjoy a taste of Colombian culture.
Making Perico is a quick process, allowing the fresh ingredients to shine through without overwhelming the palate. It’s a versatile dish that can be customized to your liking; you can add herbs like cilantro for added freshness or even cheese for creaminess. Perfect for a family breakfast or a brunch gathering, Perico is sure to impress with its vibrant colors and delicious flavors.
Ingredients (Serves 4-6)
- 6 large eggs
- 2 medium tomatoes, diced
- 1 small onion, finely chopped
- 1 green bell pepper, diced (optional)
- 2 tablespoons of vegetable oil or butter
- Salt and pepper to taste
- Fresh cilantro, chopped (optional for garnish)
Cooking Instructions
- Prepare the Ingredients: Start by washing and chopping the tomatoes, onion, and bell pepper (if using). Make sure they’re diced into small pieces to guarantee even cooking. This step helps to release their natural flavors when cooked with the eggs.
- Beat the Eggs: In a bowl, crack the 6 large eggs and beat them using a whisk or fork. Add a pinch of salt and pepper to taste. Beating the eggs well will help incorporate air, resulting in fluffier scrambled eggs when cooked.
- Cook the Vegetables: In a large skillet, heat the vegetable oil or butter over medium heat. Once hot, add the chopped onions and green bell pepper. Sauté for about 2-3 minutes until the onions become translucent. This step builds the base flavor for your Perico.
- Add the Tomatoes: Stir in the diced tomatoes and cook for an additional 2-3 minutes until they soften and start to release their juices. The tomatoes will provide a nice acidity that balances the richness of the eggs.
- Combine with Eggs: Pour the beaten eggs into the skillet with the sautéed vegetables. Gently stir the mixture with a spatula, allowing the eggs to cook evenly. Continue to cook for about 3-5 minutes, stirring occasionally, until the eggs are just set but still moist. Avoid overcooking to keep the eggs soft and tender.
- Serve: Once the eggs are cooked to your desired consistency, remove the skillet from heat. Taste and adjust salt and pepper if necessary. Serve the Perico hot, garnished with fresh cilantro if desired, alongside soft Colombian bread or arepas.
Extra Tips
When making Perico, feel free to experiment with additional ingredients like cheese or spices to enhance the flavor. If you prefer a creamier texture, consider adding a splash of milk or cream to the eggs before beating them.
Additionally, for a heartier version, you can incorporate cooked meats such as ham or bacon. Remember to adjust the cooking time slightly if you add extra ingredients to guarantee everything is cooked through properly. Enjoy your Colombian breakfast!
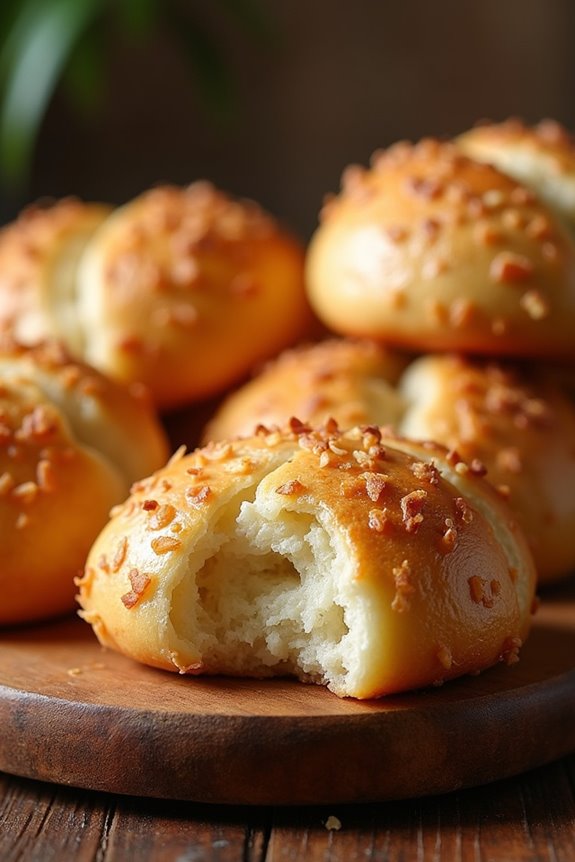
Pan De Sal

Pan De Sal, a beloved bread roll hailing from Colombia, is a delightful treat that brings a touch of sweetness and soft texture to any meal. Traditionally served in the morning or as an afternoon snack, these rolls are perfect for pairing with a variety of spreads, such as butter, cheese, or jam. The name “Pan De Sal” translates to “bread of salt,” which may seem misleading as the rolls are mildly sweet, creating an enjoyable contrast with savory toppings.
Making Pan De Sal is a straightforward process that requires simple ingredients and a bit of patience while the dough rises. The key to achieving the perfect soft and fluffy texture lies in proper kneading and allowing the dough sufficient time to proof. Once baked, these golden-brown rolls will be irresistible, making them a favorite among families and friends alike.
Ingredients (serving size: 4-6 people)
- 3 cups all-purpose flour
- 1/4 cup granulated sugar
- 1 teaspoon salt
- 2 1/4 teaspoons active dry yeast (1 packet)
- 1 cup warm milk (about 110°F or 43°C)
- 1/4 cup unsalted butter, melted
- 1 large egg
- 1/2 cup breadcrumbs (for coating)
Cooking Instructions
- Activate the Yeast: In a small bowl, combine the warm milk and active dry yeast. Allow it to sit for about 5-10 minutes until it becomes frothy. This step is vital as it guarantees that the yeast is alive and will help the dough rise.
- Mix Dry Ingredients: In a large mixing bowl, whisk together the all-purpose flour, granulated sugar, and salt. This step blends the dry ingredients uniformly, which is essential for even flavor distribution.
- Combine Wet Ingredients: In a separate bowl, whisk together the melted butter and egg. Once the yeast mixture is frothy, add it to the butter and egg mixture. Stir to combine thoroughly.
- Form the Dough: Gradually add the wet mixture to the dry ingredients, mixing with a wooden spoon until a shaggy dough forms. Once combined, knead the dough on a lightly floured surface for about 8-10 minutes until it becomes smooth and elastic.
- First Rise: Place the kneaded dough in a greased bowl, cover it with a clean kitchen towel or plastic wrap, and let it rise in a warm place for about 1-2 hours, or until it has doubled in size. This rising time allows the gluten to develop, resulting in a soft bread.
- Shape the Rolls: Once the dough has risen, punch it down to release the air. Divide the dough into 12 equal pieces and shape each piece into a ball. Roll each ball in breadcrumbs for a delightful texture.
- Second Rise: Place the shaped rolls on a lined baking sheet, leaving space between each. Cover them again and let them rise for another 30-45 minutes until they puff up.
- Bake: Preheat your oven to 350°F (175°C). Bake the rolls for 15-20 minutes or until they turn golden brown on top. Keep an eye on them to prevent over-baking.
- Cool and Serve: Once baked, remove the rolls from the oven and let them cool on a wire rack. Serve warm with your favorite spreads.
Extra Tips
For the best results, make sure your ingredients are at room temperature before mixing, as this helps with the dough’s rise and texture. If you’re in a cooler environment, you can create a warm proofing area by placing the dough in an oven turned off but with the light on.
Additionally, feel free to experiment with different fillings, such as cheese or herbs, to give these rolls a unique twist!
Pan De Queso

Pan de Queso, or Colombian cheese bread, is a delightful treat that captures the essence of traditional Colombian cuisine. This savory bread boasts a soft and chewy texture, thanks to the combination of cheese and cassava flour, making it a favorite among locals and visitors alike.
Often enjoyed for breakfast or as a snack, Pan de Queso pairs perfectly with a cup of coffee or hot chocolate, making it a perfect start to your day or a comforting afternoon indulgence.
The recipe for Pan de Queso is simple and requires only a few ingredients, making it an accessible option for anyone looking to explore Colombian flavors. With its rich cheese flavor and crispy exterior, this bread is sure to impress your family and friends.
Whether served warm straight from the oven or at room temperature, Pan de Queso is a warm hug in bread form that’s sure to bring a smile to everyone’s face.
Ingredients (Serves 4-6 people)
- 2 cups of cassava flour (yuca flour)
- 1 cup of grated cheese (preferably queso fresco or mozzarella)
- 1/2 cup of milk
- 1/4 cup of vegetable oil
- 1 large egg
- 1 teaspoon of baking powder
- 1/2 teaspoon of salt
Cooking Instructions
- Preheat the Oven: Start by preheating your oven to 375°F (190°C). This guarantees that the bread will cook evenly and achieve a nice golden-brown crust.
- Mix Dry Ingredients: In a large mixing bowl, combine the cassava flour, baking powder, and salt. Whisk these dry ingredients together until they’re well mixed. This step helps to confirm that the baking powder is evenly distributed, which is essential for the bread to rise properly.
- Mix Wet Ingredients: In a separate bowl, whisk together the milk, vegetable oil, and egg until well combined. Adding the egg will help bind the ingredients together and provide richness to the flavor.
- Combine Ingredients: Gradually pour the wet mixture into the bowl of dry ingredients, stirring continuously with a spatula or spoon. Once combined, add the grated cheese and mix until everything is incorporated into a sticky dough. Avoid overmixing to keep the bread tender.
- Shape the Dough: With your hands, form small balls of dough, about the size of a golf ball, and place them on a baking sheet lined with parchment paper. Make sure to leave some space between each ball, as they’ll expand while baking.
- Bake: Place the baking sheet in the preheated oven and bake for 20-25 minutes, or until the tops are golden brown and the cheese is bubbling slightly. Keep an eye on them to avoid over-baking.
- Cool and Serve: Once baked, remove the Pan de Queso from the oven and let them cool for a few minutes on a wire rack. Serve warm and enjoy the deliciousness!
Extra Tips
For an extra cheesy flavor, consider adding more cheese into the dough or sprinkling some on top before baking. You can also experiment with different types of cheese to suit your taste.
If the dough feels too dry, add a splash more milk, but remember that it should be sticky. Finally, Pan de Queso is best enjoyed fresh, but you can store leftovers in an airtight container at room temperature for up to two days. Reheat them in the oven for a few minutes to restore their delightful texture. Enjoy your baking adventure!
Pan De Chocolate
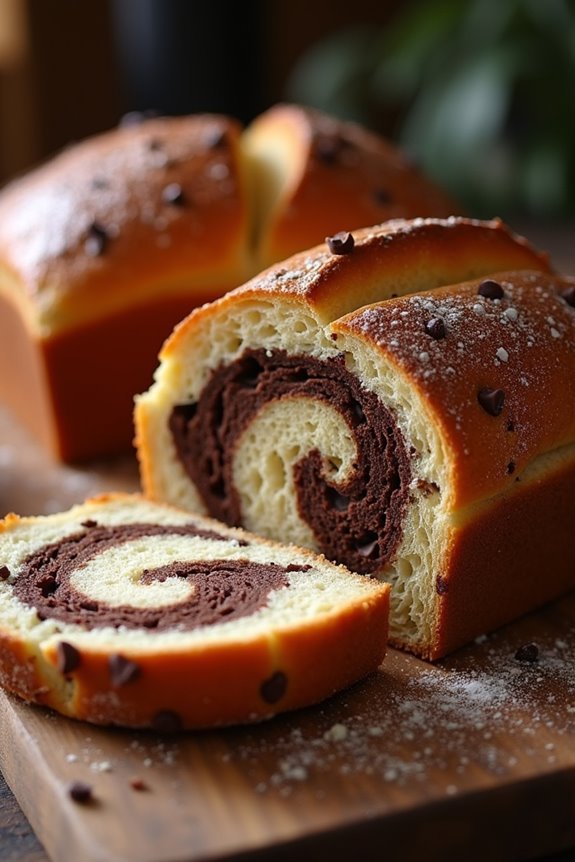
Pan de Chocolate, or chocolate bread, is a delightful Colombian treat that combines the soft and fluffy texture of traditional bread with the rich, indulgent flavor of chocolate. This sweet bread is typically enjoyed for breakfast or as a snack, perfect for dipping in coffee or hot chocolate. Made with simple ingredients, this recipe guarantees that anyone can experience the joy of this Colombian classic right from their kitchen.
The beauty of Pan de Chocolate lies not only in its taste but also in its aroma, which fills the kitchen as it bakes. The warm, inviting scent of chocolate mingles with the buttery notes of the bread, making it an irresistible option for any gathering or a cozy family meal. Whether you’re a seasoned baker or a novice in the kitchen, this recipe will guide you in creating a delightful treat that will leave everyone asking for more.
Ingredients (Serves 4-6)
- 3 cups all-purpose flour
- 1 cup warm milk (about 110°F)
- 1/4 cup granulated sugar
- 1/4 cup unsalted butter, melted
- 1 packet (2 1/4 teaspoons) active dry yeast
- 1/2 teaspoon salt
- 1/2 cup cocoa powder
- 1/2 cup chocolate chips
- 1 large egg
- 1 teaspoon vanilla extract
Cooking Instructions
- Activate the Yeast: In a small bowl, combine the warm milk and granulated sugar. Sprinkle the yeast over the milk and let it sit for about 5-10 minutes, or until it becomes foamy. This step is essential as it activates the yeast, making sure your bread rises properly.
- Mix the Dry Ingredients: In a large mixing bowl, whisk together the all-purpose flour, cocoa powder, and salt. Make certain to mix them well to evenly distribute the cocoa and salt throughout the flour.
- Combine Wet Ingredients: In another bowl, mix the melted butter, egg, and vanilla extract. Once the yeast mixture is foamy, add it to this bowl and stir until well combined.
- Form the Dough: Gradually add the wet mixture to the dry ingredients, stirring until a soft dough begins to form. You can use your hands to knead the mixture gently in the bowl until it comes together.
- Knead the Dough: Transfer the dough to a lightly floured surface and knead for about 5-7 minutes, or until it becomes smooth and elastic. If the dough is sticky, add a little more flour as needed.
- First Rise: Place the kneaded dough in a greased bowl, cover it with a clean kitchen towel, and let it rise in a warm place for about 1-2 hours, or until it has doubled in size.
- Shape the Bread: Once risen, punch down the dough to release the air. Knead in the chocolate chips, then shape the dough into a loaf or individual rolls, depending on your preference. Place the shaped dough onto a parchment-lined baking sheet or into a greased loaf pan.
- Second Rise: Cover the dough again with a towel and let it rise for another 30-45 minutes, until it puffs up once more.
- Bake the Bread: Preheat your oven to 350°F (175°C). Bake the bread for 25-30 minutes, or until it’s golden brown and sounds hollow when tapped on the bottom.
- Cool and Serve: Remove the bread from the oven and let it cool on a wire rack. Once cooled, slice and serve with your favorite hot beverage.
Extra Tips
When making Pan de Chocolate, make sure your milk is warm but not too hot, as excessive heat can kill the yeast. If you want to enhance the chocolate flavor, consider adding a sprinkle of chocolate chips on top before baking.
Also, for a delightful twist, you can substitute some of the flour with whole wheat flour for added nutritional benefits. Enjoy your homemade Pan de Chocolate fresh out of the oven for the best taste!
Pan De Auyama
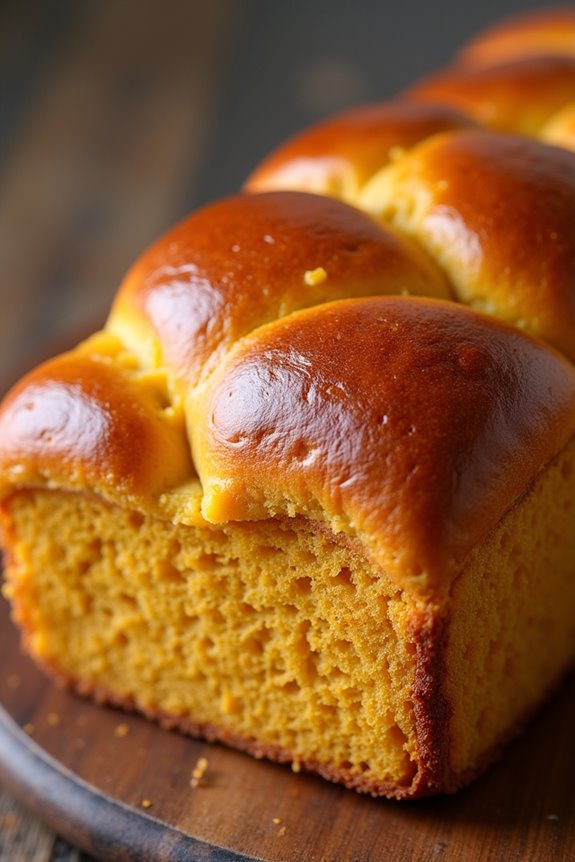
Pan de Auyama, also known as pumpkin bread, is a traditional Colombian dish that’s both delicious and comforting. This soft bread is made with ripe auyama (a type of pumpkin), which gives it a unique flavor and vibrant color. The combination of sweet and savory in this bread makes it a perfect accompaniment to a hearty meal or as a snack on its own.
With its moist texture and subtle sweetness, Pan de Auyama is a delightful treat that embodies the spirit of Colombian cuisine. Making Pan de Auyama at home is a rewarding experience that allows you to create an authentic taste of Colombia in your own kitchen. The process is straightforward, involving simple ingredients that blend together to form a rich, fragrant dough.
Once baked, the bread emerges golden and soft, inviting you to indulge in its warm, inviting aroma. Whether you serve it at a family gathering or enjoy it as a personal snack, Pan de Auyama is sure to please everyone.
Ingredients (Serves 4-6):
- 2 cups of cooked and mashed auyama (pumpkin)
- 1 cup of all-purpose flour
- 1 cup of cornmeal
- 1/2 cup of sugar
- 1/2 cup of milk
- 2 large eggs
- 1/4 cup of unsalted butter, melted
- 1 tablespoon of baking powder
- 1/2 teaspoon of salt
- 1 teaspoon of ground cinnamon (optional)
- 1 teaspoon of vanilla extract
Cooking Instructions:
- Prepare the Auyama: Begin by peeling and cubing the auyama. Boil the cubes in water until tender, approximately 15-20 minutes. Drain the water and mash the auyama until smooth. Set aside to cool slightly.
- Preheat the Oven: Preheat your oven to 350°F (175°C). This guarantees that the bread bakes evenly and achieves a nice golden crust.
- Mix Wet Ingredients: In a large mixing bowl, whisk together the mashed auyama, milk, eggs, melted butter, and vanilla extract. Make sure to combine these ingredients thoroughly to create a uniform mixture.
- Combine Dry Ingredients: In another bowl, sift together the all-purpose flour, cornmeal, sugar, baking powder, salt, and ground cinnamon (if using). Sifting helps to aerate the dry ingredients and prevent lumps.
- Combine Wet and Dry Mixtures: Gradually add the dry ingredients to the wet mixture, stirring gently until just combined. Be careful not to overmix, as this can lead to a dense bread.
- Prepare the Baking Pan: Grease a loaf pan or line it with parchment paper to prevent sticking. Pour the batter into the prepared pan, smoothing the top with a spatula.
- Bake the Bread: Place the loaf pan in the preheated oven and bake for 45-55 minutes, or until a toothpick inserted into the center comes out clean. The bread should be golden brown on top.
- Cool and Serve: Once baked, remove the pan from the oven and let it cool for about 10 minutes. Then, transfer the bread to a wire rack to cool completely before slicing. Serve it warm or at room temperature.
Extra Tips:
For the best results, always use ripe auyama for a sweeter and richer flavor. You can also customize your Pan de Auyama by adding nuts or dried fruits for added texture and taste.
If you prefer a denser bread, reduce the amount of milk slightly. Finally, it’s important to let the bread cool completely before slicing to avoid a gummy texture. Enjoy your homemade Pan de Auyama with butter or as a side with your favorite dishes!
Pan De Frutas
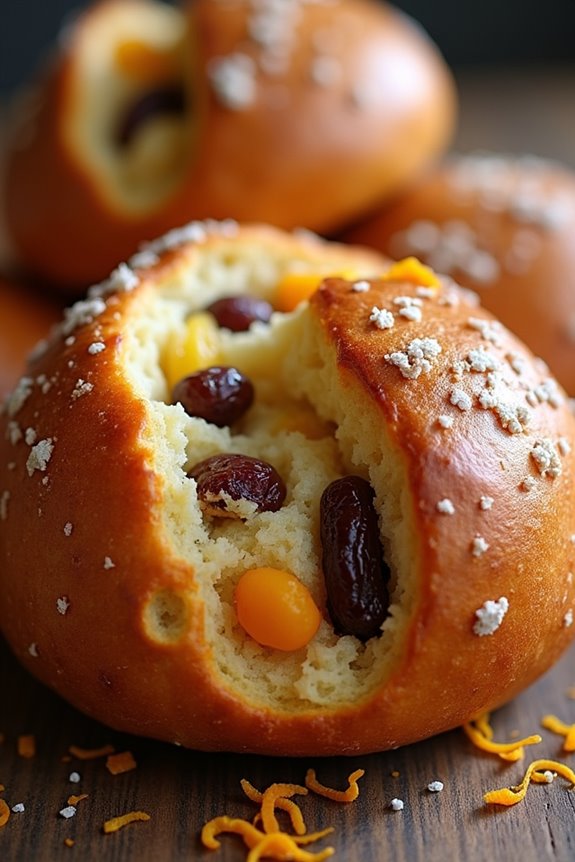
Pan De Frutas is a delightful Colombian bread that combines a soft, sweet dough with an array of dried fruits, creating a unique treat perfect for breakfast or as a snack. This bread isn’t only a feast for the taste buds but also a visual delight with its colorful fruit pieces peeking through the golden crust. The combination of flavors from the fruits, along with the tender crumb of the bread, makes this a beloved recipe in many Colombian households.
Making Pan De Frutas is a straightforward process that brings together simple ingredients to create something truly special. The preparation requires a bit of time for the dough to rise, but the result is well worth the wait. Whether you enjoy it fresh out of the oven or toasted with a bit of butter, this sweet bread is sure to become a favorite in your home.
Ingredients (Serves 4-6):
- 3 cups all-purpose flour
- 1 cup warm milk (about 110°F)
- 1/4 cup sugar
- 2 teaspoons active dry yeast
- 1/2 teaspoon salt
- 1/4 cup unsalted butter, melted
- 2 large eggs
- 1 cup mixed dried fruits (raisins, apricots, figs, or dates)
- Zest of 1 orange (optional)
- 1 teaspoon vanilla extract
Cooking Instructions:
- Activate the Yeast: In a small bowl, combine the warm milk, sugar, and active dry yeast. Stir gently and let it sit for about 5-10 minutes until it becomes frothy. This step guarantees that the yeast is active and will help the bread rise.
- Prepare the Dough: In a large mixing bowl, combine the flour and salt. Create a well in the center and add the melted butter, eggs, the activated yeast mixture, vanilla extract, and orange zest (if using). Mix until a rough dough forms.
- Knead the Dough: Transfer the dough onto a lightly floured surface. Knead the dough for about 8-10 minutes until it becomes smooth and elastic. This process develops the gluten, giving the bread its soft texture.
- First Rise: Place the kneaded dough in a greased bowl, cover it with a clean kitchen towel or plastic wrap, and let it rise in a warm place for about 1 hour or until it doubles in size.
- Incorporate Dried Fruits: Once the dough has risen, gently punch it down to release the air. Fold in the mixed dried fruits evenly throughout the dough. This is where the delicious fruit flavors will integrate into the bread.
- Shape and Second Rise: Shape the dough into a loaf or divide it into smaller portions for individual rolls. Place the shaped dough on a greased baking sheet or in a loaf pan. Cover and let it rise for another 30-45 minutes until puffed up.
- Preheat the Oven: About 15 minutes before baking, preheat your oven to 350°F (175°C). This guarantees that the bread bakes evenly and achieves a nice golden color.
- Bake the Bread: Once the dough has risen again, place it in the preheated oven and bake for about 25-30 minutes or until the top is golden brown and the bread sounds hollow when tapped on the bottom.
- Cool and Serve: Remove the bread from the oven and let it cool in the pan for about 10 minutes. Then transfer it to a wire rack to cool completely before slicing. Serve with butter or enjoy it plain!
Extra Tips:
To enhance the flavor of Pan De Frutas, consider soaking the dried fruits in warm water or rum for about 30 minutes before adding them to the dough. This will plump them up and intensify their sweetness.
Additionally, you can experiment with different types of dried fruits based on your personal preference or what you have on hand. For added texture, sprinkle some chopped nuts into the dough along with the fruits. Enjoy your baking adventure!