

Argentinian desserts hold a special place in my heart. They’re a delightful mix of flavors and traditions, each one an experience in itself. From the melt-in-your-mouth alfajores to the luscious tarta de tres leches, these treats are all about indulgence. Let’s explore these sweet Argentinian confections that are sure to leave a lasting impression. Each recipe in this list is a celebration of taste and culture.
Dulce De Leche
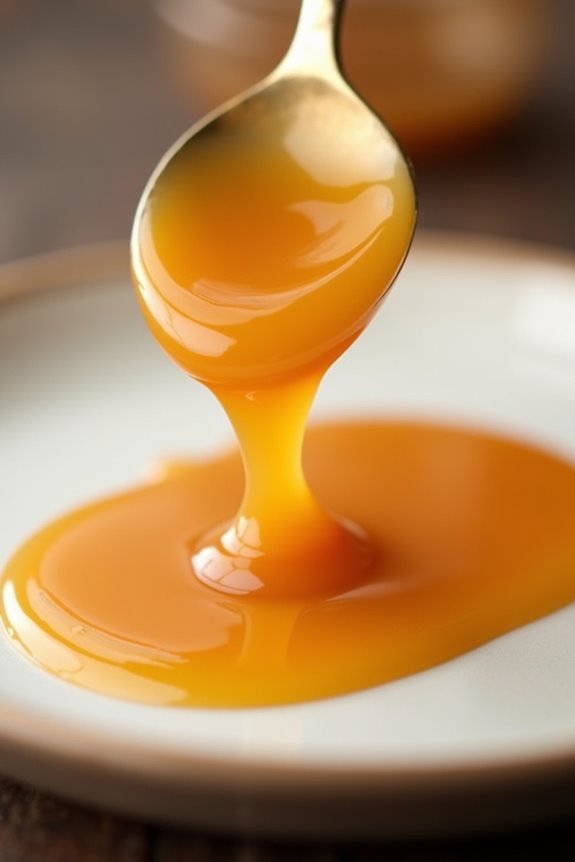
Dulce de leche is a beloved Argentinian dessert that embodies the rich, sweet flavors of caramelized milk. This creamy treat has become a staple in many Latin American countries and is a popular ingredient in various desserts, pastries, and even enjoyed on its own.
The name translates to “sweet milk,” and the process of making it involves slowly heating sweetened milk until it transforms into a luscious, golden caramel-like consistency. The result is a dessert that’s both indulgent and versatile, perfect for drizzling over cakes, filling pastries, or simply spreading on toast.
Making dulce de leche at home is a straightforward process, requiring just a few basic ingredients and some patience. The key to achieving the perfect texture and flavor lies in the slow cooking method, which allows the natural sugars in the milk to caramelize gently.
With a little effort and attention, you can create a batch of this delightful sweet that will elevate any dish or stand out on its own as a delectable treat.
Ingredients (Serves 4-6):
- 4 cups whole milk
- 1 1/4 cups granulated sugar
- 1/4 teaspoon baking soda
- 1 teaspoon vanilla extract (optional)
- Pinch of salt
Cooking Instructions:
- Combine Ingredients: In a large, heavy-bottomed saucepan, combine the whole milk, granulated sugar, baking soda, and a pinch of salt. Stir the mixture gently until the sugar is fully dissolved. The baking soda helps to prevent the milk from curdling and contributes to the smooth texture of the final product.
- Heat the Mixture: Place the saucepan over medium heat and bring the mixture to a gentle simmer. Keep an eye on it to prevent it from boiling over. Stir occasionally to guarantee that the sugars dissolve completely and that nothing sticks to the bottom of the pan.
- Cook Slowly: Once the mixture begins to simmer, reduce the heat to low. From this point, you’ll need to stir the mixture frequently to prevent it from scorching. Continue to cook for approximately 1 to 1.5 hours. As it cooks, the mixture will gradually thicken and darken in color, turning into a rich caramel hue.
- Check for Doneness: To check if the dulce de leche is ready, dip a spoon into the mixture. It should coat the back of the spoon and leave a trail when you run your finger through it. If it’s still too runny, continue cooking for a little longer, stirring regularly.
- Add Vanilla: Once the desired consistency is achieved, remove the saucepan from heat. If using, stir in the vanilla extract for an extra layer of flavor. Allow the dulce de leche to cool slightly before transferring it to a clean jar or container.
- Cool and Store: Let the dulce de leche cool to room temperature before sealing the jar. You can store it in the refrigerator for up to two weeks.
Extra Tips:
When making dulce de leche, patience is key. Avoid increasing the heat to speed up the process, as this can result in uneven cooking and a burnt flavor.
If you find the mixture is thickening too quickly, you can add a splash of milk to adjust the consistency. Additionally, experimenting with different flavorings such as cinnamon or a hint of coffee can add a delightful twist to your dulce de leche.
Enjoy it straight from the jar, or use it to enhance your favorite desserts!
Alfajores
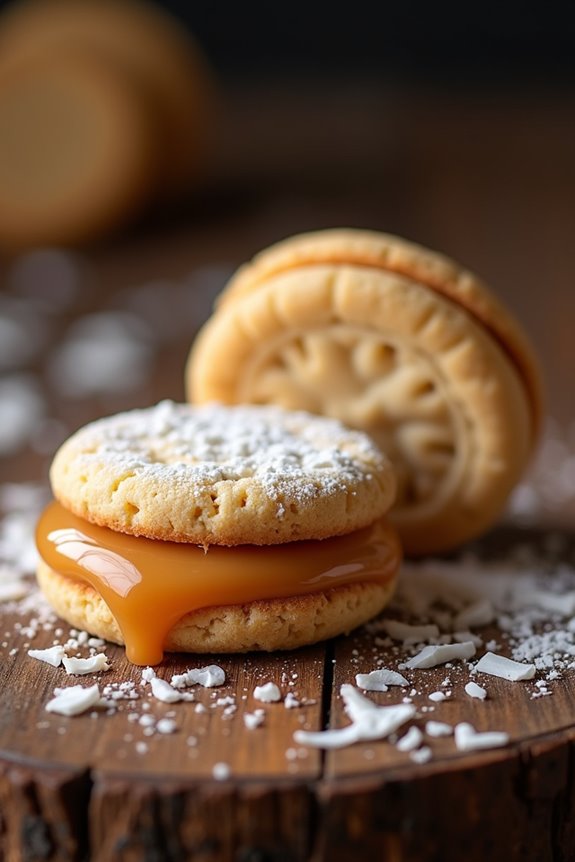
Alfajores are a beloved Argentine dessert that brings together the delightful flavors of dulce de leche and a crumbly, melt-in-your-mouth cookie. These sweet treats have their origins in the Middle East and were brought to South America by Spanish colonizers. Over the years, they’ve evolved into a favorite snack in Argentina, where they’re often enjoyed with a cup of coffee or mate.
The classic version features two soft cookies filled with rich dulce de leche and rolled in grated coconut or dusted with powdered sugar, making them not only delicious but also visually appealing.
Making alfajores at home can be a fun and rewarding experience. While the process may seem intricate, the result is a batch of cookies that will impress family and friends. Whether you choose to stick to the traditional recipe or add your own twist, alfajores are sure to be a hit. Here’s a straightforward recipe to guide you through creating these delightful Argentine treats for a serving size of 4-6 people.
Ingredients
- 1 cup unsalted butter, softened
- 1 cup granulated sugar
- 2 large egg yolks
- 1 large egg
- 2 cups all-purpose flour
- 1 cup cornstarch
- 1 teaspoon baking powder
- 1 teaspoon vanilla extract
- 1 cup dulce de leche
- 1/2 cup grated coconut (optional)
- Powdered sugar for dusting (optional)
Cooking Instructions
- Prepare the Dough: In a large mixing bowl, cream together the softened butter and granulated sugar until light and fluffy. This usually takes about 3-5 minutes with an electric mixer. Once combined, add the egg yolks, egg, and vanilla extract, mixing until fully incorporated.
- Combine Dry Ingredients: In a separate bowl, whisk together the all-purpose flour, cornstarch, and baking powder. Gradually add this dry mixture to the wet ingredients, mixing until a soft dough forms. Be careful not to overmix, as this can lead to tougher cookies.
- Chill the Dough: Divide the dough into two equal parts and shape each into a disk. Wrap them in plastic wrap and refrigerate for at least one hour. Chilling the dough helps the cookies maintain their shape during baking and enhances the flavor.
- Roll and Cut the Cookies: Preheat your oven to 350°F (175°C). On a lightly floured surface, roll out one disk of dough to about 1/4 inch thick. Use a round cookie cutter (about 2 inches in diameter) to cut out cookies and place them on a baking sheet lined with parchment paper. Repeat with the other disk of dough.
- Bake the Cookies: Bake the cookies in the preheated oven for 10-12 minutes, or until the edges are lightly golden. Allow them to cool on the baking sheet for a few minutes before transferring to a wire rack to cool completely.
- Assemble the Alfajores: Once the cookies are cool, spread a generous amount of dulce de leche on the flat side of one cookie, then top with another cookie to create a sandwich. You can roll the edges in grated coconut or dust with powdered sugar for added flavor and decoration.
Extra Tips
When making alfajores, it’s crucial to use high-quality dulce de leche, as it greatly impacts the overall taste of the dessert. If you’re feeling adventurous, experiment with different fillings like chocolate ganache or fruit preserves.
Additionally, you can personalize your alfajores by adding a hint of cocoa powder to the dough or incorporating citrus zest for a revitalizing twist. Don’t forget to store any leftovers in an airtight container; they can last for several days at room temperature!
Chocotorta

Chocotorta is a beloved Argentinian dessert that combines the rich flavors of chocolate and cream cheese, making it a favorite among both children and adults. This no-bake cake is easy to prepare and is perfect for warm weather, as it requires no oven.
Layered with chocolate cookies and a creamy filling, Chocotorta isn’t only delicious but also visually impressive, making it an ideal choice for birthdays or other special occasions. The simplicity of the recipe, along with the delightful combination of textures, is what makes Chocotorta so appealing.
The dessert is traditionally made using “Chocolinas,” a popular Argentinian chocolate cookie, but you can substitute them with similar chocolate wafer cookies if needed. The layers of soaked cookies and creamy filling come together to create a delightful treat that will surely satisfy any sweet tooth.
Ingredients (Serves 4-6)
- 2 packages (200g each) of chocolate cookies (Chocolinas or similar)
- 500g cream cheese, softened
- 400g dulce de leche
- 1 cup milk (for dipping cookies)
- Cocoa powder (for dusting, optional)
Cooking Instructions
- Prepare the Cream Filling: In a large mixing bowl, combine the softened cream cheese and dulce de leche. Use an electric mixer or a whisk to blend them together until the mixture is smooth and creamy. This combination will create a rich and sweet filling that complements the chocolate cookies.
- Dip the Cookies: Pour the milk into a shallow dish. Take each chocolate cookie and quickly dip it into the milk, ensuring it’s moistened but not soggy. This step is essential as it softens the cookies, allowing them to absorb the flavors and become part of the creamy layers.
- Layer the Ingredients: In a rectangular or square dish, start layering the dessert. Begin with a layer of the dipped cookies at the bottom of the dish. Spread a layer of the cream filling over the cookies. Repeat this process until you run out of cookies and filling, finishing with a layer of the cream filling on top.
- Chill the Chocotorta: Once all layers are assembled, cover the dish with plastic wrap and refrigerate for at least 4 hours, preferably overnight. This chilling time allows the flavors to meld together and helps the dessert set properly.
- Serve: Before serving, you can dust the top with cocoa powder for added flavor and decoration. Cut the Chocotorta into squares, and serve chilled. Enjoy the rich layers of chocolate and creamy filling with your family and friends!
Extra Tips
To enhance the flavor of your Chocotorta, consider adding a splash of vanilla extract to the cream cheese and dulce de leche mixture. You can also experiment with different toppings, such as chocolate shavings or fresh fruit, to give your dessert a personal touch.
If you have any leftovers, store them in an airtight container in the refrigerator for up to three days to maintain their freshness.
Flan

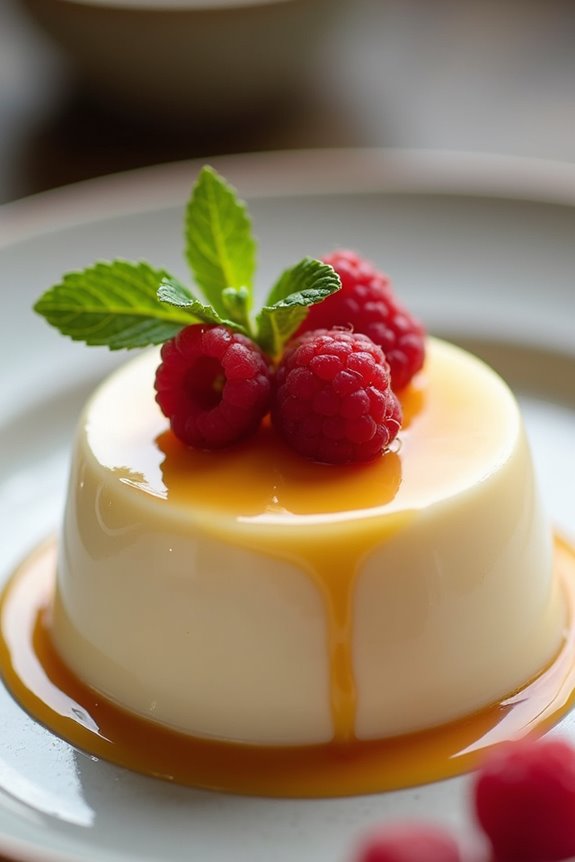
Flan is a quintessential Argentinian dessert, beloved for its smooth texture and rich flavor. This creamy caramel custard has its roots in Spanish cuisine but has become a staple in many Latin American countries, including Argentina. Flan is typically served chilled, making it a revitalizing treat after a hearty meal. The combination of sweet caramel and silky custard creates a delightful contrast that’s hard to resist.
Making flan is relatively simple, requiring just a few ingredients, but the method is essential to achieving the perfect consistency. The caramel is made first, followed by the custard mixture, which is baked in a water bath to guarantee even cooking. The result is a beautifully presented dessert that can be garnished with fresh fruit or a drizzle of caramel sauce for added flair.
Ingredients (Serves 4-6)
- 1 cup granulated sugar (for caramel)
- 6 large eggs
- 1 can (14 oz) sweetened condensed milk
- 1 can (12 oz) evaporated milk
- 1 tablespoon vanilla extract
- 1/4 cup granulated sugar (for custard)
Cooking Instructions
- Prepare the Caramel: In a medium saucepan over medium heat, add 1 cup of granulated sugar. Stir continuously until the sugar melts and turns a golden amber color. Be careful not to let it burn. Once melted, quickly pour the caramel into a round baking dish, tilting the dish to coat the bottom evenly. Set aside to cool and harden.
- Prepare the Custard Mixture: In a large mixing bowl, crack the 6 eggs and whisk them until well combined. Add the sweetened condensed milk, evaporated milk, and vanilla extract to the eggs. Gradually whisk in the 1/4 cup of granulated sugar until all ingredients are fully incorporated and smooth.
- Combine and Pour: Once the custard mixture is smooth, carefully pour it over the hardened caramel in the baking dish. Take care not to disturb the caramel layer.
- Bake in a Water Bath: Preheat your oven to 350°F (175°C). Place the baking dish inside a larger roasting pan. Fill the roasting pan with hot water until it reaches halfway up the sides of the flan dish. This water bath will help cook the flan gently and evenly. Bake for about 60-70 minutes, or until the custard is set and a knife inserted in the center comes out clean.
- Cool and Refrigerate: Once baked, remove the flan from the oven and the water bath. Allow it to cool at room temperature for about 30 minutes, then cover it with plastic wrap and refrigerate for at least 4 hours, or overnight for best results.
- Serve: To serve, run a knife around the edge of the flan to loosen it. Place a large plate over the dish and quickly invert it, allowing the flan to fall onto the plate. The caramel will flow over the top. Slice into wedges and enjoy!
Extra Tips
For the best flan, verify that you don’t overcook it, as this can lead to a rubbery texture. If you’re concerned about the flan sticking to the dish, you can lightly grease it before adding the caramel.
Additionally, experimenting with flavor variations such as adding orange or lemon zest to the custard mixture can add a delightful twist to this classic dessert.
Tarta De Tres Leches
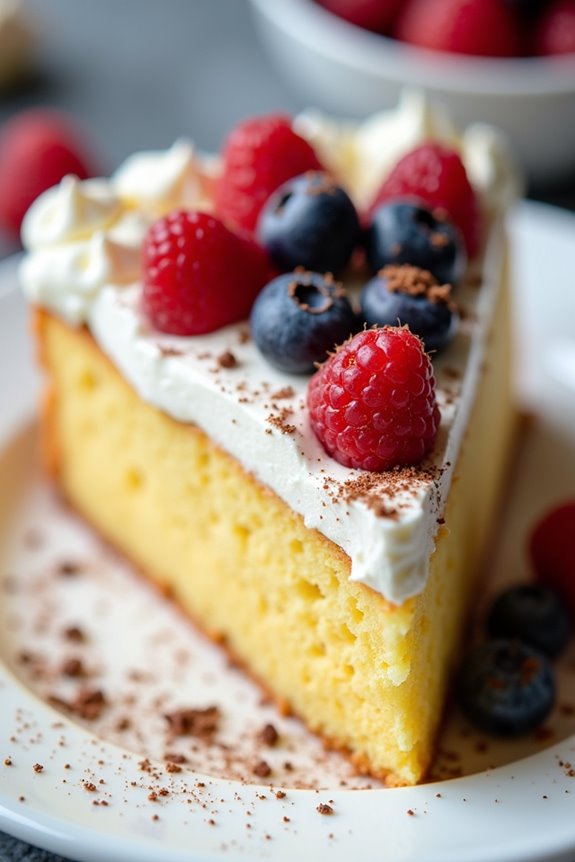
Tarta De Tres Leches is a quintessential Argentinian dessert that’s both indulgent and comforting. This cake is soaked in a blend of three types of milk: evaporated milk, condensed milk, and heavy cream, which gives it a rich, moist texture** that melts in your mouth. The dessert is often topped with a fluffy layer of whipped cream and can be garnished** with fruits or chocolate shavings, making it visually appealing as well as delicious.
The name “Tres Leches” translates to “three milks,” and this cake is a popular choice at celebrations and family gatherings in Argentina. The preparation involves baking a light sponge cake, soaking it in a sweet milk mixture, and then finishing it off with a luscious whipped cream topping. It’s a delightful treat that balances sweetness with a hint of creaminess, perfect for those who’ve a sweet tooth.
Ingredients (Serves 4-6)
- 1 cup all-purpose flour
- 1 ½ teaspoons baking powder
- ½ teaspoon salt
- 3 large eggs
- 1 cup granulated sugar
- 1 teaspoon vanilla extract
- ½ cup whole milk
- 1 can (12 oz) evaporated milk
- 1 can (14 oz) sweetened condensed milk
- 1 cup heavy cream
- 1 teaspoon vanilla extract (for whipped cream)
- 2 tablespoons powdered sugar (for whipped cream)
Cooking Instructions
- Preheat the Oven: Preheat your oven to 350°F (175°C). This guarantees that the oven is at the right temperature when you put the cake in, allowing it to bake evenly.
- Prepare the Cake Batter: In a mixing bowl, combine the flour, baking powder, and salt. In another bowl, beat the eggs and sugar together until light and fluffy. Stir in the vanilla extract and then gradually add the dry ingredients to the egg mixture, alternating with whole milk until combined.
- Bake the Cake: Pour the batter into a greased 9-inch round cake pan. Bake in the preheated oven for about 25-30 minutes, or until a toothpick inserted in the center comes out clean. Allow the cake to cool in the pan for about 10 minutes, then transfer it to a wire rack to cool completely.
- Prepare the Milk Mixture: In a separate bowl, combine the evaporated milk, sweetened condensed milk, and heavy cream. Mix well until fully combined. This mixture will soak into the cooled cake, adding moisture and sweetness.
- Soak the Cake: Once the cake has cooled completely, poke holes all over the surface with a fork or skewer. Slowly pour the milk mixture evenly over the cake, allowing it to absorb the liquid. Cover the cake with plastic wrap and refrigerate for at least 4 hours, or overnight for best results.
- Make the Whipped Cream Topping: In a mixing bowl, whip the heavy cream and add vanilla extract and powdered sugar. Beat until soft peaks form. Spread the whipped cream evenly over the chilled cake.
- Serve and Enjoy: Slice the cake into pieces and serve chilled. You can garnish with fresh fruits, chocolate shavings, or a sprinkle of cinnamon if desired.
Extra Tips
For the best flavor and texture, allow the cake to soak in the milk mixture overnight. This will enhance the creaminess and make sure that every bite is rich and moist.
Also, feel free to experiment with the toppings; adding fresh berries or a drizzle of chocolate sauce can elevate the dessert even further. If you want a lighter version, consider using low-fat milk alternatives in the soaking mixture, but keep in mind that this may slightly alter the traditional flavor and texture of the Tarta De Tres Leches.
Enjoy your baking!
Factura

Factura is a delightful Argentinian pastry that captures the essence of traditional baking in Argentina. These sweet, flaky pastries are often enjoyed with coffee or tea, making them a popular choice for breakfast or as an afternoon snack.
With their buttery layers and sweet fillings, facturas come in various shapes and sizes, often filled with dulce de leche, custard, or even cheese. They’re a staple in bakeries across Argentina and carry with them the warmth of home-cooked comfort.
Making facturas at home allows you to customize fillings and shapes, bringing a personal touch to this beloved dessert. The process involves creating a rich, flaky dough, allowing it to rest and rise, and then shaping it into beautiful pastries.
While the process may seem intricate, it’s incredibly rewarding to see your homemade facturas puff up beautifully in the oven, filling your kitchen with a heavenly aroma.
Ingredients (Serves 4-6)
- 4 cups all-purpose flour
- 1 cup unsalted butter, softened
- 1 cup milk
- 1/2 cup sugar
- 2 large eggs
- 2 1/4 teaspoons (1 packet) active dry yeast
- 1 teaspoon salt
- 1 teaspoon vanilla extract
- 1/2 cup dulce de leche (for filling)
- 1 egg (for egg wash)
- Powdered sugar (for dusting)
Cooking Instructions
- Prepare the Yeast Mixture: In a small bowl, combine the warm milk (make sure it’s not too hot) with the active dry yeast and a teaspoon of sugar. Let it sit for about 5-10 minutes until it becomes frothy. This activates the yeast, which is essential for the dough to rise.
- Make the Dough: In a large mixing bowl, whisk together the flour, sugar, and salt. Create a well in the center and add the softened butter, eggs, vanilla extract, and the activated yeast mixture. Mix until a dough begins to form.
- Knead the Dough: Transfer the dough to a lightly floured surface and knead it for about 10 minutes until it’s smooth and elastic. You can also use a stand mixer with a dough hook attachment for this step.
- First Rise: Place the kneaded dough in a lightly greased bowl, cover it with a clean kitchen towel or plastic wrap, and let it rise in a warm area for about 1-2 hours or until it has doubled in size.
- Shape the Facturas: Once risen, punch down the dough to release air, then roll it out on a floured surface to about 1/4 inch thickness. Cut shapes using a pastry cutter or a knife, and fill each with a spoonful of dulce de leche. Fold or twist the dough as desired to create different shapes.
- Second Rise: Place the shaped facturas onto baking sheets lined with parchment paper. Cover them with a towel and let them rise for another 30-45 minutes until they puff up slightly.
- Preheat the Oven: While the facturas are rising, preheat your oven to 375°F (190°C).
- Egg Wash and Bake: Beat the remaining egg in a small bowl and brush it over the facturas for a golden finish. Bake in the preheated oven for about 15-20 minutes or until they’re golden brown.
- Cool and Serve: Allow the facturas to cool slightly on a wire rack, then dust with powdered sugar before serving. Enjoy them warm or at room temperature.
Extra Tips
When making facturas, verify that all your ingredients are at room temperature to achieve a better consistency in the dough.
If you want to experiment with fillings, consider using fruit jams, chocolate spread, or even savory options like cheese.
Don’t rush the rising times; they’re essential for achieving the perfect flaky texture, so be patient and let the dough do its magic!
Panna Cotta
Panna Cotta is a classic Italian dessert that has found its way into the hearts of many in Argentina. This creamy, custard-like treat is perfect for those who appreciate the delicate balance of sweetness and texture. Traditionally made with cream, sugar, and gelatin, it can be flavored with various ingredients, making it a versatile dessert that can be tailored to your preferences.
Whether served plain or paired with a fruit coulis, Panna Cotta is a delightful way to end a meal. In Argentina, Panna Cotta is often infused with local flavors such as dulce de leche or fresh fruits like berries or mango. Its smooth and silky consistency makes it an elegant choice for dinner parties or family gatherings.
With a few simple ingredients, you can create this luscious dessert that’s sure to impress your guests and satisfy your sweet tooth.
Ingredients (Serves 4-6)
- 2 cups heavy cream
- 1 cup whole milk
- 3/4 cup granulated sugar
- 2 1/2 teaspoons unflavored gelatin powder
- 1 teaspoon vanilla extract
- Pinch of salt
Cooking Instructions
- Bloom the Gelatin: In a small bowl, sprinkle the gelatin powder over 3 tablespoons of cold water. Allow it to sit for about 5-10 minutes until it becomes spongy and absorbs the water. This process is called blooming and helps the gelatin dissolve smoothly in the mixture.
- Combine Cream and Sugar: In a medium saucepan, combine the heavy cream, whole milk, and granulated sugar. Heat the mixture over medium heat while stirring continuously until the sugar has completely dissolved and the mixture is warm but not boiling.
- Add the Gelatin: Once the cream mixture is warm, remove it from heat. Add the bloomed gelatin to the warm cream mixture, stirring until the gelatin is fully dissolved. This step is vital as undissolved gelatin can leave lumps in your panna cotta.
- Flavor the Mixture: Stir in the vanilla extract and a pinch of salt to enhance the flavors. If you wish to add any additional flavorings, such as citrus zest or a splash of liqueur, now is the time to do so.
- Pour into Molds: Pour the mixture into individual serving glasses or molds. If you prefer a firmer panna cotta, you can use smaller molds. Leave a little space at the top, as the mixture may expand slightly when set.
- Chill: Cover the molds with plastic wrap and refrigerate for at least 4 hours, or until the panna cotta is set and firm to the touch. If you’re preparing it the day before, you can leave it in the fridge overnight.
- Serve: Once set, carefully unmold the panna cotta if using molds. If using glasses, you can serve directly. Top with your choice of fruit coulis, fresh berries, or a drizzle of dulce de leche for an Argentine twist.
Extra Tips
When making Panna Cotta, make certain that you use high-quality ingredients for the best flavor. Fresh cream and whole milk will yield the creamiest texture.
If you’re looking to add a unique twist to your Panna Cotta, consider infusing the cream with herbs like mint or basil during the heating process, then strain before adding the gelatin. Always remember to chill the dessert for ample time; the longer it sets, the better the texture. Enjoy experimenting with different toppings to complement the creamy base!
Helado
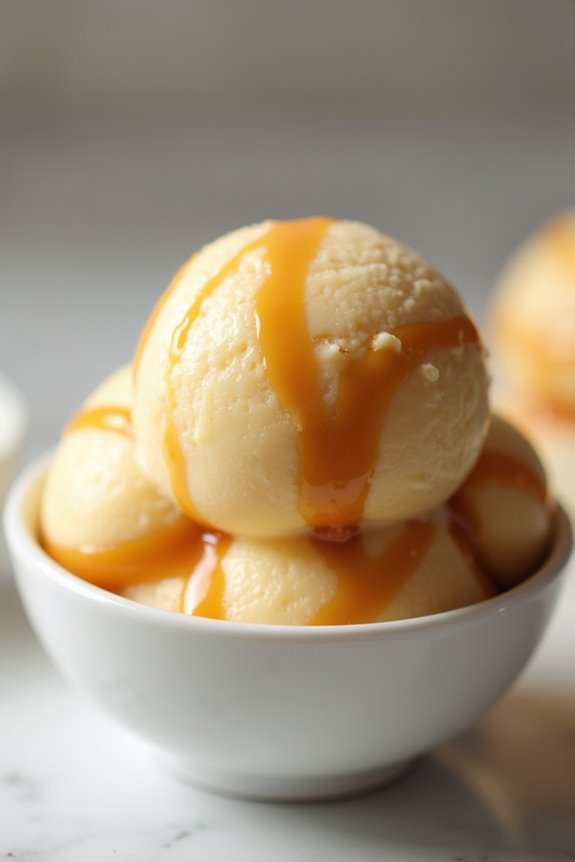
Helado, the beloved Argentinian ice cream, is a delightful treat that showcases the country’s passion for rich and creamy desserts. Unlike traditional ice creams that often have a lighter texture, helado is known for its dense consistency and intense flavors, making it a favorite among locals and tourists alike.
With a wide variety of flavors ranging from dulce de leche to chocolate amargo (bitter chocolate), this dessert is perfect for any occasion or simply as a way to cool down on a hot day.
Making helado at home may seem challenging, but with the right ingredients and a bit of patience, you can create a delicious homemade version that rivals those found in the best ice cream parlors in Argentina. This recipe will guide you through the process of making a classic dulce de leche helado, a flavor that truly embodies the essence of Argentine desserts.
Gather your ingredients, and let’s get started on this sweet journey!
Ingredients (Serves 4-6)
- 2 cups whole milk
- 1 cup heavy cream
- 1 cup dulce de leche
- 3/4 cup granulated sugar
- 1 teaspoon pure vanilla extract
- 1/2 teaspoon salt
- 1/2 cup whole milk (for mixing with dulce de leche)
Cooking Instructions
- Prepare the Base: In a medium saucepan, combine 2 cups of whole milk, 1 cup of heavy cream, and 3/4 cup of granulated sugar over medium heat. Stir continuously until the sugar is fully dissolved and the mixture is heated through but not boiling. This will create the creamy base for your helado.
- Incorporate Flavors: Once the milk and cream mixture is warm, remove it from the heat and add 1 teaspoon of pure vanilla extract and 1/2 teaspoon of salt. Stir well to combine. The salt will enhance the flavor of the dulce de leche, making your helado even more delicious.
- Prepare the Dulce de Leche: In a separate bowl, take 1/2 cup of whole milk and whisk in 1 cup of dulce de leche until smooth and well combined. This will create a rich caramel flavor that will be swirled into the ice cream base.
- Combine Mixtures: Pour the dulce de leche mixture into the warm milk and cream base, stirring gently to combine. Make sure the dulce de leche is well incorporated for an even distribution of flavor throughout the helado.
- Chill the Mixture: Cover the bowl with plastic wrap and refrigerate the mixture for at least 4 hours, or until it’s completely chilled. This step is essential for achieving a creamy texture when churning the ice cream.
- Churn the Helado: Once chilled, pour the mixture into an ice cream maker and churn according to the manufacturer’s instructions until it reaches a thick and creamy consistency. This usually takes about 20-25 minutes.
- Freeze the Helado: Transfer the churned helado to an airtight container and freeze for at least 4 hours, or until it’s firm enough to scoop. This final freezing step is necessary to achieve the perfect texture.
- Serve: When ready to serve, scoop the helado into bowls or cones and enjoy! You may also drizzle some additional dulce de leche on top for an extra indulgent treat.
Extra Tips
When making helado, the quality of your ingredients matters greatly. Opt for high-quality dulce de leche and fresh cream for the best results.
Additionally, if you don’t have an ice cream maker, you can still make helado by placing the mixture in a shallow dish and freezing it, stirring every 30 minutes until it reaches the desired consistency. This method will require a bit more time and effort, but the result will still be delicious!
Budín De Pan
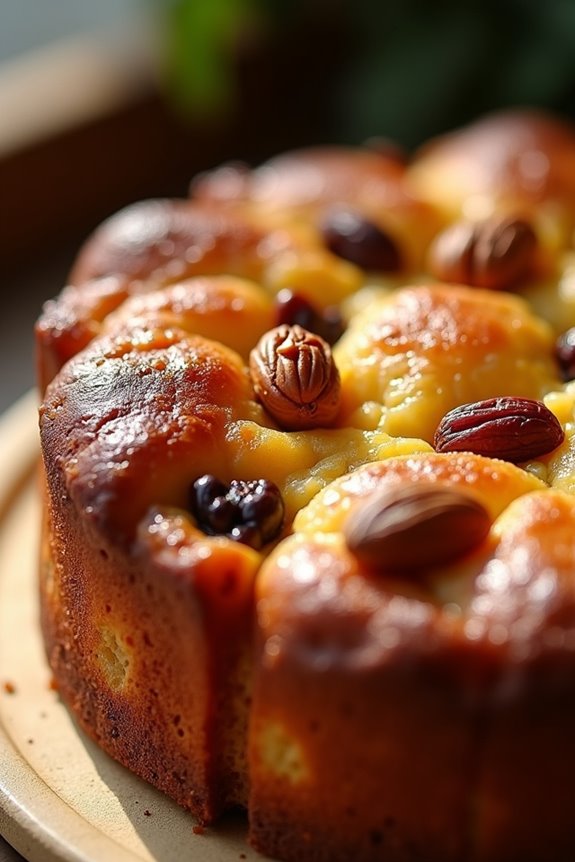
Budín De Pan, or bread pudding, is a beloved traditional Argentinian dessert that transforms leftover bread into a delightful and comforting treat. This dish is a wonderful way to utilize stale bread, giving it new life with the addition of sweet ingredients like sugar, milk, and eggs.
Often flavored with vanilla, cinnamon, and sometimes even a hint of citrus, Budín De Pan isn’t only economical but also incredibly satisfying, making it a staple in many Argentinian households.
The origins of Budín De Pan can be traced back to European influences, particularly from Spain and Italy, where bread puddings have long been part of culinary traditions. In Argentina, this dessert often features variations that include nuts, raisins, or dulce de leche, enhancing its rich flavor profile.
Whether served warm or chilled, Budín De Pan is perfect for any occasion, from family gatherings to holiday celebrations.
Ingredients (Serves 4-6):
- 4 cups stale bread, torn into pieces
- 2 cups milk
- 1 cup sugar
- 3 large eggs
- 1 teaspoon vanilla extract
- 1 teaspoon ground cinnamon
- 1/2 cup raisins (optional)
- 1/4 cup chopped nuts (optional)
- Butter (for greasing the baking dish)
Cooking Instructions:
- Preheat the Oven: Begin by preheating your oven to 350°F (175°C). This guarantees that your Budín De Pan will bake evenly and develop a nice golden crust.
- Prepare the Bread: In a large mixing bowl, combine the torn pieces of stale bread with the milk. Let the bread soak for about 10-15 minutes, allowing it to absorb the milk and soften.
- Mix the Wet Ingredients: In a separate bowl, whisk together the eggs, sugar, vanilla extract, and ground cinnamon until well combined. This mixture will add sweetness and flavor to your pudding.
- Combine Mixtures: Once the bread has soaked, gently fold in the egg mixture into the bread and milk mixture. If you’re using raisins or nuts, add them at this stage and mix until everything is well combined.
- Prepare the Baking Dish: Grease a baking dish with butter to prevent the pudding from sticking. You can use a 9×9 inch square dish or similar size.
- Pour and Bake: Pour the bread mixture into the prepared baking dish, spreading it evenly. Bake in the preheated oven for 40-50 minutes, or until the top is golden brown and a knife inserted into the center comes out clean.
- Cool and Serve: Once baked, remove the Budín De Pan from the oven and let it cool for at least 10 minutes before serving. It can be enjoyed warm or at room temperature, and it pairs wonderfully with a drizzle of dulce de leche or a scoop of vanilla ice cream.
Extra Tips:
For an added depth of flavor, consider soaking the bread in a mixture of milk and a splash of rum or whiskey.
You can also experiment with different spices such as nutmeg or cardamom for a unique twist. If you prefer a creamier texture, feel free to add a bit more milk or even a touch of cream.
Finally, Budín De Pan can be stored in the refrigerator for a few days, making it a convenient make-ahead dessert!
Rogel
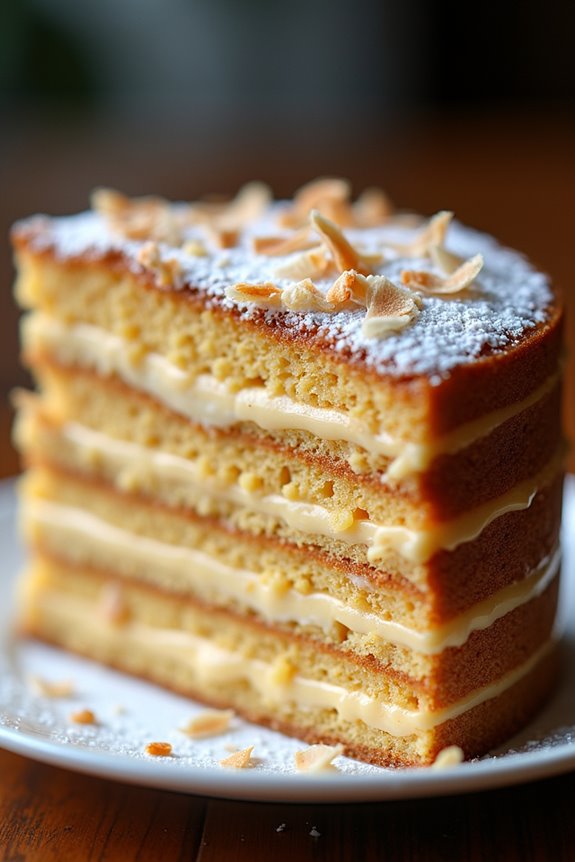
Rogel is a classic Argentinian dessert that features a unique combination of thin, layered cakes and a rich dulce de leche filling. Traditionally served during celebrations and special occasions, this dessert is both simple and elegant, making it a favorite among those who enjoy traditional Argentine cuisine.
The cake layers are baked until golden and then stacked, generously filled with creamy dulce de leche, and often topped with a light dusting of powdered sugar or coconut flakes for added flavor and texture.
The beauty of Rogel lies not only in its taste but also in its presentation. The layers create a stunning visual effect, making it a showstopper at any gathering. Whether you’re celebrating a birthday, a holiday, or just looking to indulge in a sweet treat, Rogel is a delightful choice that captures the heart of Argentinian dessert culture.
Ingredients (Serves 4-6)
- 2 cups all-purpose flour
- 1/2 cup unsalted butter, softened
- 1/2 cup granulated sugar
- 3 large eggs
- 1/2 cup milk
- 1/4 teaspoon baking powder
- 1/4 teaspoon salt
- 2 cups dulce de leche
- Powdered sugar or shredded coconut (for topping)
Cooking Instructions
- Preheat the Oven: Begin by preheating your oven to 350°F (175°C). This guarantees that the oven reaches the right temperature for baking the cake layers.
- Prepare the Batter: In a large mixing bowl, cream together the softened butter and granulated sugar until light and fluffy. Add the eggs one at a time, mixing well after each addition. Then, gradually add the milk to the mixture.
- Combine Dry Ingredients: In a separate bowl, whisk together the flour, baking powder, and salt. This step is vital as it helps to evenly distribute the baking powder throughout the flour.
- Mix Wet and Dry Ingredients: Gradually incorporate the dry ingredients into the wet mixture, stirring until just combined. Be careful not to overmix, as this can lead to a denser cake texture.
- Bake the Layers: Divide the batter evenly into three or four greased and floured round cake pans. Bake in the preheated oven for about 15-20 minutes, or until the tops are golden and a toothpick inserted in the center comes out clean.
- Cool the Cake Layers: Once baked, remove the cake layers from the oven and allow them to cool in the pans for 5 minutes. Then, carefully transfer them to wire racks to cool completely.
- Assemble the Rogel: Once the cake layers are completely cool, start assembling your Rogel. Place one layer on a serving platter and spread a generous layer of dulce de leche on top. Repeat this process with the remaining layers, stacking them one by one.
- Finish and Serve: Once all layers are stacked and filled, dust the top with powdered sugar or sprinkle with shredded coconut. Slice into wedges and serve to your guests.
Extra Tips
To elevate your Rogel, consider adding a hint of vanilla extract to the batter for extra depth of flavor. Additionally, if you want to create a more decadent version, you can add a layer of whipped cream between the cake layers for a richer texture.
Finally, allow the assembled Rogel to chill in the refrigerator for a few hours before serving to let the flavors meld together beautifully.
Pastelito
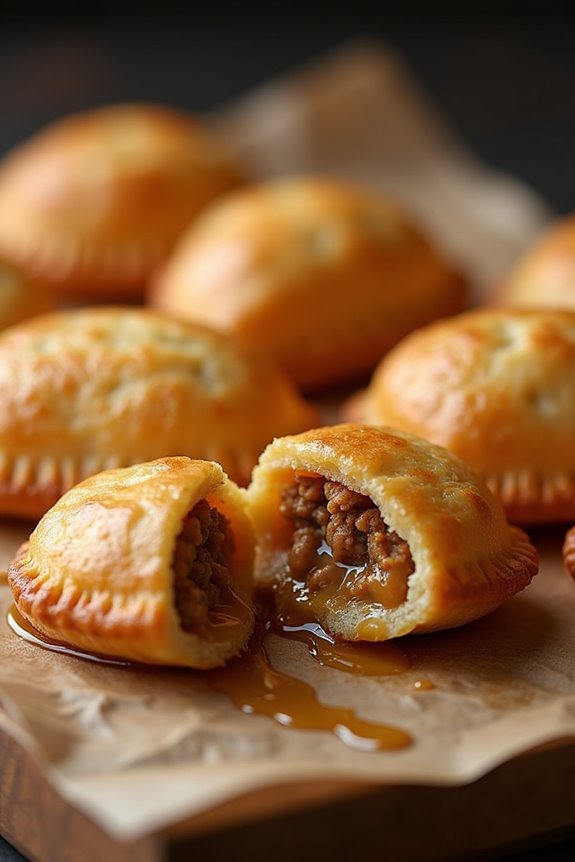
Pastelitos are a beloved Argentinian pastry that are often enjoyed during celebrations, particularly on holidays and special occasions. These delightful treats are typically filled with a mix of sweet or savory fillings, such as dulce de leche or spiced meats, and are characterized by their flaky, golden-brown exterior.
Whether you’re indulging in the sweet version for dessert or the savory one as an appetizer, pastelitos are a delicious way to experience traditional Argentinian flavors.
Making pastelitos at home can be a fun and rewarding experience. The combination of a perfectly flaky dough and a delectable filling is sure to impress family and friends. While the process may seem intricate, with a bit of patience and practice, you can master this classic dish.
So, roll up your sleeves and get ready to create these scrumptious Argentinian pastries that will certainly become a favorite in your household.
Ingredients (Serves 4-6)
- 2 cups all-purpose flour
- 1/2 cup unsalted butter, cold and cubed
- 1/4 cup cold water
- 1/4 teaspoon salt
- 1 cup dulce de leche (for sweet pastelitos) or 1 cup seasoned ground beef (for savory pastelitos)
- 1 egg (for egg wash)
- Sugar (for sprinkling on sweet pastelitos)
- Oil (for frying)
Cooking Instructions
- Prepare the Dough: In a large mixing bowl, combine the all-purpose flour and salt. Add the cold, cubed butter to the flour mixture. Using a pastry cutter or your fingers, work the butter into the flour until the mixture resembles coarse crumbs. Gradually add cold water, mixing until a dough forms. Avoid overworking the dough to keep it flaky.
- Chill the Dough: Wrap the dough in plastic wrap and refrigerate for at least 30 minutes. Chilling allows the butter to firm up and helps achieve a flaky texture when baked or fried.
- Roll Out the Dough: After chilling, lightly flour a clean surface and roll out the dough to about 1/8-inch thickness. Use a round cutter or the rim of a glass to cut out circles (around 4-5 inches in diameter).
- Add the Filling: Place a spoonful of dulce de leche or seasoned ground beef in the center of each dough circle, being careful not to overfill. Fold the dough over to create a half-moon shape and press the edges to seal. You can crimp the edges with a fork for a decorative touch.
- Prepare for Cooking: In a small bowl, whisk the egg and set aside. If making sweet pastelitos, sprinkle some sugar on top of the sealed pastries. If making savory pastelitos, you can skip this step.
- Fry the Pastelitos: Heat oil in a deep skillet or fryer over medium heat. When the oil is hot, carefully add the pastelitos in batches. Fry them until they’re golden brown and crispy, about 2-3 minutes on each side. Use a slotted spoon to remove them and place them on paper towels to drain excess oil.
- Serve: Serve the pastelitos warm. For sweet versions, you can dust them with powdered sugar or drizzle with more dulce de leche. For savory versions, serve with chimichurri or your favorite dipping sauce.
Extra Tips
When making pastelitos, it’s essential to keep the dough cold to maintain a flaky texture. If you find the dough is getting too warm while you’re working with it, return it to the refrigerator for a few minutes.
Additionally, you can experiment with different fillings, such as cheese, spinach, or even chocolate for sweet variations. Finally, if you prefer baking over frying, brush the pastelitos with egg wash and bake them in a preheated oven at 375°F (190°C) for about 20 minutes, or until golden brown.
Enjoy your homemade pastelitos!
Churros
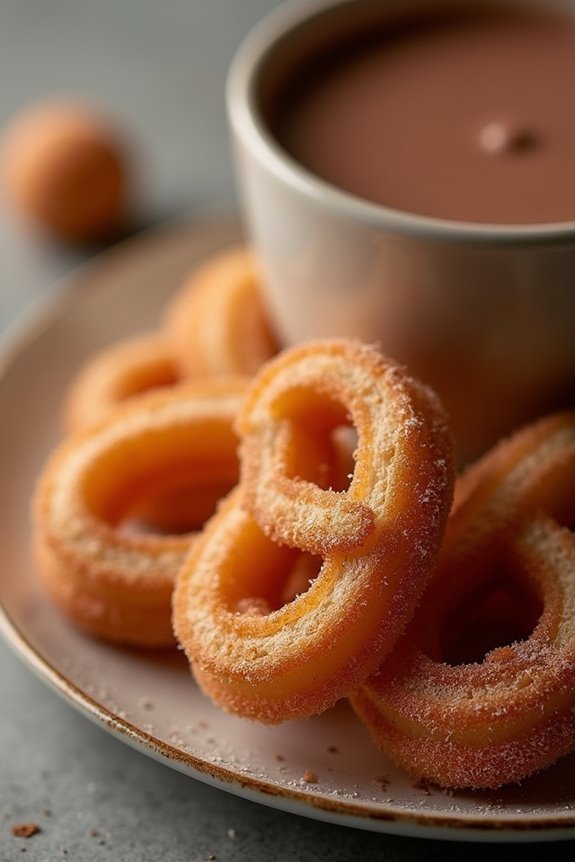
Churros are a beloved Argentinian dessert that combines the delightful crunch of fried pastry with a soft, fluffy interior. Originating from Spain, these sweet treats have become a staple in Argentina, often enjoyed with a cup of thick hot chocolate or a sprinkle of sugar and cinnamon. The charm of churros lies in their simplicity, yet they offer a delightful indulgence that can brighten anyone’s day.
The process of making churros is straightforward, making it a fun and rewarding experience for both novice and seasoned bakers alike.
The key to perfect churros is in the dough, known as choux pastry, which is made from just a few basic ingredients. Once fried, they can be dusted with sugar, drizzled with chocolate, or served with a dipping sauce. Whether you’re preparing them for a family gathering or a cozy night in, churros are sure to impress with their delicious taste and satisfying texture.
Ingredients (Serves 4-6)
- 1 cup water
- 2 tablespoons granulated sugar
- 1/2 teaspoon salt
- 1 cup all-purpose flour
- 2 large eggs
- 1 teaspoon vanilla extract
- Oil for frying (such as vegetable or canola oil)
- 1/2 cup granulated sugar (for coating)
- 1 teaspoon ground cinnamon (for coating)
Cooking Instructions
- Prepare the Dough: In a medium saucepan, combine the water, 2 tablespoons of granulated sugar, and 1/2 teaspoon of salt. Bring the mixture to a boil over medium-high heat. Once boiling, remove the saucepan from the heat and add the 1 cup of all-purpose flour, stirring vigorously with a wooden spoon until a smooth dough forms.
- Incorporate Eggs and Vanilla: Allow the dough to cool for about 5 minutes. Then, add the 2 large eggs, one at a time, mixing well after each addition. Finally, stir in the 1 teaspoon of vanilla extract until fully combined. The dough should be thick and smooth.
- Prepare for Frying: In a deep skillet or heavy pot, pour enough oil to reach a depth of about 2 inches. Heat the oil over medium heat until it reaches 350°F (175°C). While the oil heats, line a baking sheet with paper towels to drain the fried churros.
- Pipe the Churros: Transfer the dough into a piping bag fitted with a large star-shaped tip. Once the oil is hot, carefully pipe strips of dough (about 4-5 inches long) directly into the hot oil. Fry a few churros at a time, making sure not to overcrowd the pan.
- Fry Until Golden: Fry the churros for about 2-3 minutes on each side or until they’re golden brown and crispy. Use a slotted spoon to remove the churros from the oil and transfer them to the prepared baking sheet to drain excess oil.
- Coat in Sugar and Cinnamon: In a shallow bowl, combine the 1/2 cup of granulated sugar with 1 teaspoon of ground cinnamon. While the churros are still warm, roll them in the sugar mixture until fully coated.
- Serve and Enjoy: Serve the churros immediately while they’re warm, alongside a cup of thick hot chocolate for dipping, or enjoy them plain.
Extra Tips
For extra flavor, you can experiment by adding a pinch of nutmeg or lemon zest to the sugar coating. If you want to take your churros to the next level, try filling them with dulce de leche or chocolate ganache using a piping bag.
Additionally, make certain the oil temperature remains consistent during frying for even cooking; if the oil is too hot, the churros may burn, and if too cool, they may become greasy. Enjoy your homemade churros, and don’t hesitate to share them with friends and family!
Panqueque Con Dulce De Leche
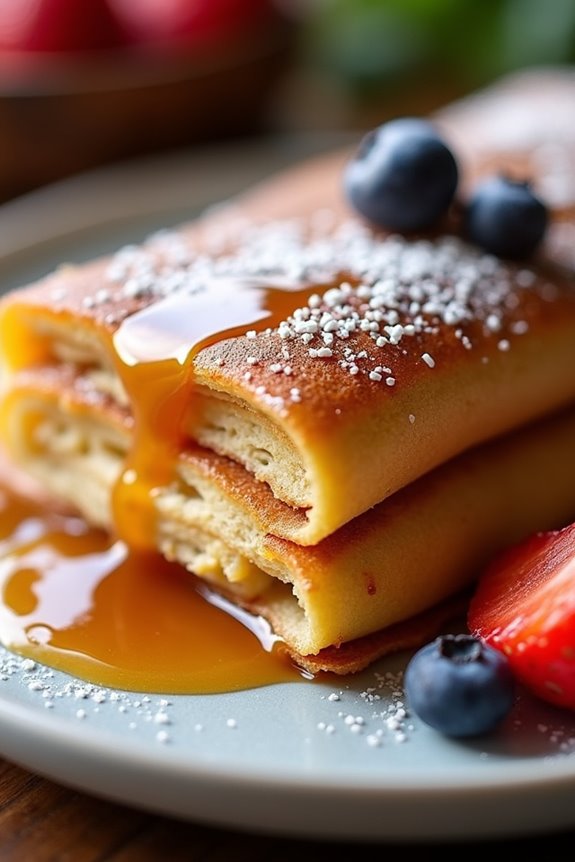
Panqueque Con Dulce De Leche is a beloved Argentinian dessert that combines the delicate texture of thin pancakes with the rich, caramel-like sweetness of dulce de leche. This delightful dish is often enjoyed as a dessert or a sweet snack, making it a versatile addition to any meal. The preparation of panqueques is simple, yet the result is a melt-in-your-mouth experience that’s sure to impress family and friends.
Traditionally, these pancakes are filled generously with dulce de leche and can be served rolled or folded. They can also be topped with whipped cream, fruits, or a sprinkle of powdered sugar for added flair. Making panqueques isn’t only a fun cooking experience but also a perfect way to introduce a taste of Argentina into your home. Whether you’re celebrating a special occasion or just looking for a sweet treat, Panqueque Con Dulce De Leche is a delightful choice.
Ingredients (serving size: 4-6 people):
- 1 cup all-purpose flour
- 1 1/2 cups milk
- 2 large eggs
- 2 tablespoons sugar
- 1/4 teaspoon salt
- 2 tablespoons unsalted butter (melted)
- 1 cup dulce de leche
- Optional toppings: whipped cream, fresh fruit, powdered sugar
Cooking Instructions:
- Prepare the Batter: In a mixing bowl, combine the flour, milk, eggs, sugar, and salt. Whisk the ingredients together until smooth and free of lumps. The consistency should be similar to heavy cream. If you have a blender, you can also blend the mixture for a couple of seconds to achieve a smoother texture.
- Add Melted Butter: Once the batter is well-mixed, gently fold in the melted butter. This addition helps make the pancakes tender and adds richness. Allow the batter to rest for about 15-20 minutes; this helps the flour absorb the liquid and improves the texture of the pancakes.
- Heat the Pan: Place a non-stick skillet or frying pan over medium heat. Allow it to heat for a couple of minutes. To test if the pan is ready, sprinkle a few drops of water onto the surface; they should sizzle and evaporate quickly.
- Cook the Pancakes: Pour a ladleful of batter into the heated pan, tilting it to spread the batter evenly into a circle. Cook for about 1-2 minutes, or until the edges start to lift and the bottom is lightly golden. Carefully flip the pancake using a spatula and cook for an additional 1-2 minutes on the other side. Repeat this process with the remaining batter, adding more butter to the pan as needed.
- Assemble the Pancakes: Once all pancakes are cooked, take one pancake and spread a generous layer of dulce de leche on one half. Fold the pancake over to cover the filling, or roll it up if you prefer. Repeat this for all pancakes.
- Serve: Arrange the filled pancakes on a serving plate. You can serve them with additional dulce de leche drizzled on top, along with optional toppings like whipped cream, fresh fruit, or a dusting of powdered sugar.
Extra Tips: For the best flavor and texture, use high-quality dulce de leche. You can find it in Latin markets or make your own by slowly simmering sweetened condensed milk until it thickens and turns caramel in color. If you want to add a twist, consider incorporating flavors like vanilla or orange zest into the batter.
And remember, the pancakes can be made in advance and stored in the refrigerator, making them perfect for quick desserts or snacks!