

When it comes to ending a meal on a sweet note, Chilean desserts have a special place in my heart. Each dessert not only delights the taste buds but also gives a glimpse into Chilean culture. From the creamy goodness of Tres Leches Cake to the refreshing Mote Con Huesillos, there’s a lot to discover. These sweet treats can truly elevate any dining experience. Get ready to explore some mouthwatering options!
Tres Leches Cake

Tres Leches Cake, or “Pastel de Tres Leches,” is a beloved dessert in Latin American cuisine, particularly in Chile. This moist and indulgent cake is soaked in a mixture of three types of milk—evaporated milk, sweetened condensed milk, and heavy cream—which gives it its name and unique flavor profile. The result is a rich, creamy dessert that’s both light and satisfying, perfect for any celebration or gathering.
This cake is often topped with a fluffy layer of whipped cream and sometimes garnished with fresh fruit or chocolate shavings. Its origins can be traced back to Central America, but it has become popular across the continent, with each region adding its own twist. Making Tres Leches Cake requires a bit of patience, but the outcome is well worth the effort, as the cake is sure to impress your family and friends.
Ingredients (Servings: 4-6)
- 1 cup all-purpose flour
- 1 ½ tsp baking powder
- ¼ tsp salt
- 5 large eggs, separated
- 1 cup granulated sugar, divided
- ½ cup whole milk
- 1 tsp vanilla extract
- 1 can (12 oz) evaporated milk
- 1 can (14 oz) sweetened condensed milk
- 1 cup heavy cream
- 1 cup heavy cream (for topping)
- 2 tbsp powdered sugar (for topping)
- Fresh fruit or chocolate shavings (optional, for garnish)
Cooking Instructions
- Preheat the Oven: Start by preheating your oven to 350°F (175°C). This guarantees that your cake will bake evenly and rise properly.
- Prepare the Cake Batter: In a medium bowl, whisk together the flour, baking powder, and salt. In a separate large bowl, beat the egg yolks with ¾ cup of granulated sugar until the mixture is thick and pale. Stir in the whole milk and vanilla extract until well combined. Gradually add the dry ingredients to the wet mixture, mixing until just combined.
- Whip the Egg Whites: In a clean bowl, beat the egg whites until soft peaks form. Gradually add the remaining ¼ cup of granulated sugar and continue to beat until stiff peaks form. Gently fold the beaten egg whites into the cake batter, being careful not to deflate the mixture.
- Bake the Cake: Pour the batter into a greased 9×13 inch baking dish and smooth the top. Bake in the preheated oven for about 30 minutes or until a toothpick inserted in the center comes out clean. Allow the cake to cool in the pan for 10 minutes before inverting it onto a plate to cool completely.
- Soak the Cake: In a large bowl, whisk together the evaporated milk, sweetened condensed milk, and heavy cream. Once the cake is cool, poke holes all over the top of the cake with a fork and pour the milk mixture evenly over the cake. Allow it to absorb the liquid for at least 1 hour (or overnight in the refrigerator for best results).
- Prepare the Topping: In a separate bowl, whip the heavy cream with powdered sugar until soft peaks form. Spread the whipped cream over the soaked cake. If desired, garnish with fresh fruit or chocolate shavings for an extra touch.
- Serve: Slice the Tres Leches Cake into squares and serve chilled or at room temperature. Enjoy the rich, creamy goodness!
Extra Tips
For the best Tres Leches Cake experience, allow the cake to soak overnight in the refrigerator. This gives it ample time to absorb the milk mixture, resulting in a moist and flavorful dessert.
Additionally, feel free to experiment with flavors by adding a splash of rum or cinnamon to the milk mixture for a unique twist. Finally, serving it with fresh fruit like strawberries or mango can add a rejuvenating contrast to the creamy cake.
Mote Con Huesillos
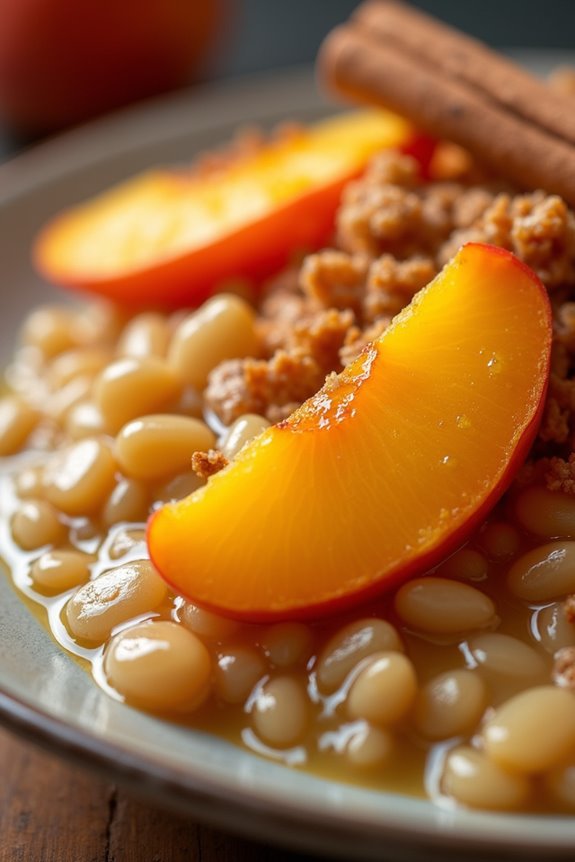
Mote Con Huesillos is a traditional Chilean dessert that captures the essence of summer with its invigorating, fruity flavors and satisfying texture. This delightful dish combines cooked wheat (mote) with dried peaches (huesillos) that are rehydrated and served in a sweet, spiced syrup.
It’s often enjoyed as a snack or dessert and is a popular choice during the hot summer months, particularly at fairs and festivals in Chile. The combination of chewy wheat and sweet peaches creates a perfect balance, making it a beloved treat for both locals and visitors alike.
Preparing Mote Con Huesillos is an enjoyable process that allows you to experience the rich culture of Chilean cuisine. The dish isn’t only delicious but also visually appealing, with its vibrant yellow hues from the peaches and the golden syrup.
While it may seem complex, the recipe is straightforward and can be made with a few simple ingredients. Follow this guide to create your own Mote Con Huesillos and bring a taste of Chile into your home.
Ingredients (Serves 4-6)
- 1 cup wheat grains (mote)
- 5 dried peaches (huesillos)
- 4 cups water (for cooking the wheat)
- 4 cups water (for soaking the peaches)
- 1 cup sugar
- 1 cinnamon stick
- 1 teaspoon vanilla extract
- 1 pinch of salt
Cooking Instructions
- Soak the Wheat: Start by rinsing the wheat grains under cold water. Then, soak them in a bowl with enough water to cover them completely. Let the wheat soak for at least 8 hours or overnight. This will help soften the grains and reduce cooking time.
- Cook the Wheat: After soaking, drain the wheat and transfer it to a pot. Add 4 cups of fresh water and a pinch of salt. Bring to a boil over medium heat, then reduce to low heat and simmer for about 30-40 minutes, or until the grains are tender but still chewy. Stir occasionally and add more water if necessary to prevent sticking. Once cooked, drain any excess water and set aside.
- Prepare the Peaches: While the wheat is cooking, rinse the dried peaches under cold water. In a separate pot, combine the 4 cups of water, sugar, cinnamon stick, and vanilla extract. Bring to a gentle simmer, then add the rinsed peaches. Let them simmer for about 30-40 minutes, or until they’re plump and tender. Remove the pot from heat and allow the peaches to cool in the syrup.
- Assemble the Dish: In serving bowls, portion out the cooked wheat. Then, place one or two peaches on top of the wheat and ladle the warm syrup over the entire dish. Make sure to include some of the cinnamon stick for extra flavor.
- Serve and Enjoy: Mote Con Huesillos can be served warm or chilled, depending on your preference. It’s best enjoyed on a hot day, making it an invigorating treat for any occasion.
Extra Tips
When preparing Mote Con Huesillos, make sure to plan ahead as the wheat needs to soak for several hours, ideally overnight. You can adjust the sweetness of the syrup by adding more or less sugar according to your taste.
Additionally, feel free to experiment with the spices; some people like to add cloves or ginger for an extra layer of flavor. For a more colorful presentation, you can serve the dish with a sprinkle of cinnamon on top or some fresh fruit slices. Enjoy this delightful Chilean dessert with friends and family!
Alfajores

Alfajores are a delightful and traditional Chilean dessert that features two crumbly cookies sandwiched together with a rich filling, often dulce de leche. Originating from Spain, these sweet treats have been embraced by many Latin American countries, each adding their unique twist.
In Chile, alfajores are typically dusted with powdered sugar or coated in chocolate, making them a perfect treat for any occasion. Their melt-in-your-mouth texture and sweet flavor make them irresistible, whether enjoyed alongside a cup of coffee or as a dessert after a meal.
Making alfajores at home isn’t only rewarding but also allows you to customize them to your liking. You can experiment with various fillings, such as chocolate ganache or fruit preserves, and even enhance the cookie dough with spices like cinnamon or a hint of lemon zest.
This recipe will guide you through creating classic alfajores that serve 4-6 people, guaranteeing that you can share these delightful cookies with family and friends.
Ingredients (Serves 4-6 people):
- 2 cups all-purpose flour
- 1 cup cornstarch
- 1/2 cup powdered sugar
- 1 cup unsalted butter, softened
- 1/2 cup granulated sugar
- 1 large egg yolk
- 1 teaspoon vanilla extract
- 1/2 teaspoon baking powder
- 1 cup dulce de leche
- Powdered sugar, for dusting
Instructions:
- Prepare the Dough: In a mixing bowl, cream together the softened butter and granulated sugar until light and fluffy. This process usually takes about 3-5 minutes. Next, add the egg yolk and vanilla extract, mixing until combined.
- Combine Dry Ingredients: In a separate bowl, sift together the all-purpose flour, cornstarch, powdered sugar, and baking powder. This step guarantees that there are no lumps and that the dry ingredients are evenly mixed.
- Mix the Dough: Gradually add the dry ingredients to the butter mixture, mixing until a soft dough forms. Be careful not to overwork the dough, as this can lead to tough cookies. The dough should be smooth and slightly sticky.
- Chill the Dough: Wrap the dough in plastic wrap and refrigerate for at least 30 minutes. Chilling helps to firm up the dough, making it easier to roll out and cut into shapes.
- Roll and Cut: Preheat your oven to 350°F (175°C). On a lightly floured surface, roll out the chilled dough to about 1/4 inch thickness. Use a round cookie cutter (about 2 inches in diameter) to cut out circles. Place the circles on a baking sheet lined with parchment paper.
- Bake: Bake the cookies in the preheated oven for 10-12 minutes, or until the edges are lightly golden. Be careful not to overbake them, as they should remain soft and tender. Once baked, remove them from the oven and allow them to cool completely on a wire rack.
- Assemble the Alfajores: Once the cookies are cool, spread a generous amount of dulce de leche on the flat side of one cookie and sandwich it with another cookie. Repeat this process for all cookies.
- Dust with Powdered Sugar: Finally, dust each assembled alfajor with powdered sugar for an elegant finish.
Extra Tips:
When making alfajores, consider adding flavor variations to the dulce de leche, such as a splash of rum or a sprinkle of sea salt for a delightful contrast.
You can also try dipping the assembled cookies in melted chocolate for a richer taste. If you find that the dough is too sticky to handle, you can chill it for a little longer or sprinkle some cornstarch on your work surface.
Always store your alfajores in an airtight container to maintain their freshness and soft texture. Enjoy your homemade Chilean treat!
Chilenito

Chilenito is a beloved Chilean dessert that features a delightful combination of sweet and creamy flavors, making it a perfect treat for any occasion. This dessert consists of layers of buttery, crumbly dough and a rich, caramel-like filling known as “manjar,” which is similar to dulce de leche.
Often enjoyed with a cup of coffee or tea, Chilenito is a comforting dessert that brings back memories of home for many Chileans. It’s not only delicious but also visually appealing, making it a great addition to any dessert table.
Preparing Chilenito is a rewarding experience that allows you to indulge in the rich culinary traditions of Chile. The delicate layers of cookie-like dough contrast beautifully with the smooth and sweet filling, creating a delightful texture with every bite.
This dessert is perfect for gatherings, celebrations, or simply to satisfy your sweet tooth. With a few simple ingredients and steps, you can recreate this classic Chilean dessert right in your kitchen.
Ingredients (Serves 4-6):
- 2 cups all-purpose flour
- 1 cup unsalted butter, softened
- 1 cup granulated sugar
- 1 egg
- 1 teaspoon vanilla extract
- 1/2 teaspoon baking powder
- 1 can (14 oz) sweetened condensed milk (for manjar)
- 1/2 cup ground walnuts (optional for topping)
Cooking Instructions:
- Prepare the Manjar: In a saucepan, heat the sweetened condensed milk over medium heat. Stir continuously for about 20-30 minutes until it thickens and turns a caramel color. Once achieved, remove from heat and let it cool completely.
- Make the Dough: In a large mixing bowl, cream together the softened butter and granulated sugar until light and fluffy. This process incorporates air into the mixture, resulting in a lighter texture for your dough.
- Combine Ingredients: Add the egg and vanilla extract to the creamed butter mixture. Mix well until fully combined. In a separate bowl, whisk together the flour and baking powder, then gradually incorporate this dry mixture into the wet ingredients, stirring until a dough forms.
- Chill the Dough: Once the dough is combined, wrap it in plastic wrap and refrigerate for about 30 minutes. Chilling the dough makes it easier to handle and helps it maintain its shape while baking.
- Roll Out the Dough: Preheat your oven to 350°F (175°C). Divide the chilled dough into two halves. On a floured surface, roll out each half to about 1/8 inch thick. Use a knife or a pizza cutter to cut the dough into rectangles or squares.
- Bake the Dough: Place the cut pieces of dough on a baking sheet lined with parchment paper. Bake in the preheated oven for about 10-12 minutes, or until they’re lightly golden. Keep an eye on them to prevent overbaking.
- Assemble the Chilenito: Allow the baked dough to cool completely. Spread a generous layer of the cooled manjar on top of one piece of dough. Place another piece of dough on top to create a sandwich. Repeat this process until all layers are assembled.
- Garnish and Serve: If desired, sprinkle ground walnuts on top of the assembled Chilenito for added flavor and texture. Cut into squares or rectangles for serving. Enjoy your Chilenito with coffee or tea!
Extra Tips:
When making Chilenito, be sure to watch the manjar closely as it cooks, as it can easily burn if left unattended.
Adjust the thickness of the dough layers to suit your preference; thinner layers create a more delicate dessert, while thicker layers give a heartier bite. You can also experiment with different fillings, such as chocolate or fruit preserves, to put a creative twist on this classic dish.
Enjoy the process, and don’t hesitate to share this delicious dessert with friends and family!
Pastel De Choclo

Pastel de Choclo, a beloved Chilean dish, is a delicious corn pie that beautifully combines the sweetness of corn with savory ingredients. Traditionally prepared during the summer months when corn is at its peak, this dish is often enjoyed at family gatherings and festive occasions. The base of the dish features a creamy layer of corn blended with cheese, while the filling typically consists of sautéed meat, olives, and hard-boiled eggs, creating a rich and satisfying meal that’s sure to please any palate.
Making Pastel de Choclo is a delightful endeavor, allowing you to explore the vibrant flavors of Chilean cuisine. This dish isn’t only comforting but also flexible, as you can adjust the fillings according to your preferences. Whether you’re a fan of spice or prefer a milder flavor, Pastel de Choclo can be tailored to suit your taste.
Once baked, the golden crust gives way to a hearty filling that’s a feast for both the eyes and the stomach.
Ingredients (Serves 4-6):
- 4 cups corn kernels (fresh or frozen)
- 1 cup milk
- 1/4 cup butter
- 1/2 cup grated cheese (preferably a Chilean cheese like Queso Fresco)
- 1 lb ground beef or shredded chicken
- 1 onion, finely chopped
- 2 hard-boiled eggs, sliced
- 1/2 cup black olives, pitted and sliced
- 1 teaspoon paprika
- 1 teaspoon cumin
- Salt and pepper to taste
- Fresh basil or cilantro for garnish (optional)
Cooking Instructions:
- Prepare the Corn Mixture: In a blender or food processor, combine the corn kernels with the milk and blend until smooth. In a saucepan, melt the butter over medium heat, then add the blended corn mixture. Stir in the grated cheese and cook for about 5-7 minutes until it thickens slightly. Set aside.
- Cook the Meat Filling: In a large skillet, heat a tablespoon of oil over medium heat. Add the chopped onion and sauté until translucent, about 3-4 minutes. Add the ground beef (or shredded chicken) and cook until browned, breaking it up with a spatula. Stir in the paprika, cumin, salt, and pepper, and cook for an additional 5 minutes. Remove from heat.
- Assemble the Dish: Preheat your oven to 375°F (190°C). In a baking dish, spread the meat mixture evenly on the bottom. Layer the sliced hard-boiled eggs and black olives over the meat. Pour the corn mixture on top, spreading it evenly to cover the filling completely.
- Bake: Place the assembled dish in the preheated oven and bake for about 30-35 minutes, or until the top is golden and slightly crisp.
- Serve: Once baked, remove from the oven and let it cool for a few minutes. Garnish with fresh basil or cilantro if desired, then serve warm.
Extra Tips:
When preparing Pastel de Choclo, feel free to experiment with the filling by adding vegetables such as bell peppers or carrots for extra flavor and nutrition.
If you prefer a spicy kick, consider adding diced jalapeños or a dash of hot sauce to the meat mixture. Additionally, using homemade corn puree instead of canned or frozen corn can elevate the dish and enhance its flavor.
Enjoy your cooking experience and don’t hesitate to share this delightful dish with family and friends!
Torta De Mil Hojas

Torta de Mil Hojas, or “Thousand Layer Cake,” is a traditional Chilean dessert that’s as delightful to behold as it’s to eat. This dessert consists of multiple layers of thin, crispy pastry filled with a rich and creamy filling, usually made from dulce de leche or a similar caramel-like spread. The layers are meticulously stacked to create a beautiful presentation and a delightful combination of textures.
Whether served at a celebration or as a sweet treat after a meal, Torta de Mil Hojas is sure to impress your family and friends.
Making Torta de Mil Hojas may seem like an intimidating task, but with a little patience and practice, you can create this stunning dessert in your own kitchen. The key to a successful Torta de Mil Hojas lies in the preparation of the pastry layers and the filling, as well as the careful assembly of the cake.
Once you master the technique, you’ll be rewarded with a delicious dessert that captures the essence of Chilean culinary tradition.
Ingredients (Serves 4-6):
- 2 cups all-purpose flour
- 1/2 cup unsalted butter, softened
- 1/4 cup sugar
- 1/4 teaspoon salt
- 1 large egg
- 1/4 cup cold water
- 2 cups dulce de leche (or caramel sauce)
- 1 cup heavy cream (for topping)
- 1 tablespoon powdered sugar (for topping)
- Fresh fruit or chocolate shavings (for garnish, optional)
Cooking Instructions:
1. Prepare the Dough: In a mixing bowl, combine the flour, softened butter, sugar, and salt. Use your fingers or a pastry cutter to blend the mixture until it resembles coarse crumbs.
Add the egg and cold water, mixing until the dough comes together. Knead briefly on a floured surface until smooth, then wrap in plastic wrap and refrigerate for about 30 minutes.
2. Roll Out the Dough: Preheat your oven to 375°F (190°C). Once the dough has chilled, divide it into small balls (about the size of a golf ball).
On a floured surface, roll each ball out into a very thin circle, about 1/16 inch thick. Use a round cookie cutter or a knife to trim the edges to make perfect circles.
3. Bake the Pastry Layers: Place the rolled-out dough circles on a baking sheet lined with parchment paper. Bake in the preheated oven for about 10-12 minutes, or until the edges are lightly golden.
Remove from the oven and allow to cool completely on a wire rack.
4. Layer the Cake: Once the pastry layers are cool, begin assembling the cake. Place one layer on a serving plate and spread a generous amount of dulce de leche on top.
Continue stacking the layers, spreading dulce de leche between each layer until all the layers are used (you can save some dulce de leche for the top).
5. Whip the Cream: In a mixing bowl, whip the heavy cream with the powdered sugar until soft peaks form. Spread the whipped cream over the top layer of the cake.
You can also pipe it for a decorative touch.
6. Garnish and Serve****: For an added touch, garnish the top of the cake with fresh fruit or chocolate shavings if desired. Allow the Torta de Mil Hojas to set for at least 1 hour in the refrigerator before serving, which will help the layers meld together.
Extra Tips:
When preparing Torta de Mil Hojas, confirm that your pastry layers are as thin as possible for the best texture.
If you’re short on time, you can use store-bought puff pastry instead of making your own dough, although it mightn’t have the same authentic flavor. Additionally, allowing the cake to chill will enhance the flavors and make it easier to slice.
Enjoy this delectable dessert with a cup of coffee or tea for a truly memorable experience!
Berlines
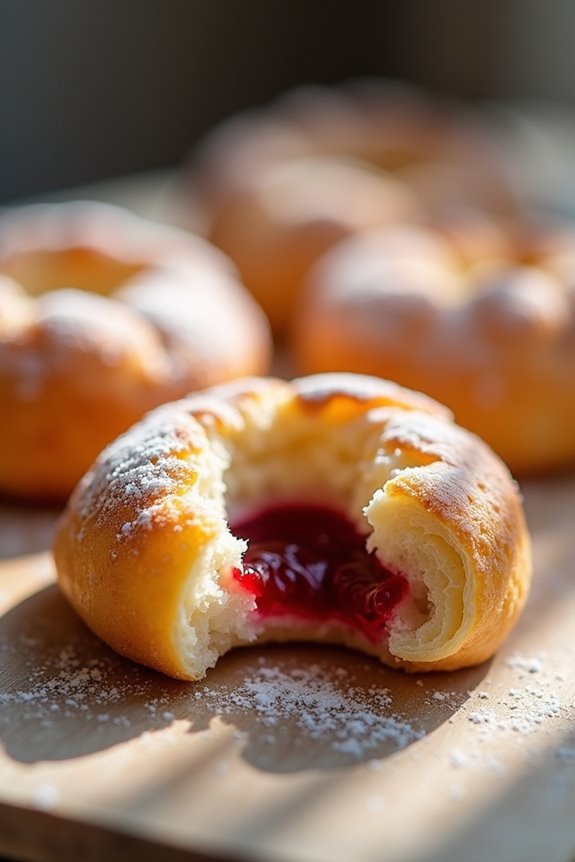
Berlines are a delightful Chilean dessert that resembles doughnuts, but with a unique twist that sets them apart. These sweet treats are filled with a luscious fruit jam—traditionally raspberry or strawberry—and are dusted with powdered sugar, offering a perfect balance of sweetness and richness.
Whether enjoyed as a midday snack, dessert, or during festive occasions, Berlines are loved by many for their fluffy texture and irresistible filling. Making Berlines isn’t only a rewarding experience but also a chance to bring a taste of Chile to your kitchen. This recipe will guide you through the process of creating these delectable pastries from scratch, guaranteeing that you can impress your family and friends with your culinary skills.
With a little patience and attention to detail, you can create a batch of Berlines that will have everyone asking for more.
Ingredients (Serves 4-6)
- 2 cups all-purpose flour
- ½ cup granulated sugar
- 2 teaspoons instant yeast
- ½ teaspoon salt
- ¾ cup whole milk (warm)
- 2 large eggs
- 4 tablespoons unsalted butter (melted)
- 1 cup fruit jam (raspberry or strawberry)
- Powdered sugar (for dusting)
- Vegetable oil (for frying)
Cooking Instructions
- Prepare the Dough: In a large mixing bowl, combine the warm milk, instant yeast, and granulated sugar. Stir gently and let it sit for about 5 minutes until the mixture becomes frothy. This step activates the yeast, guaranteeing your Berlines will rise properly.
- Mix the Ingredients: Add the eggs, melted butter, and salt to the yeast mixture. Gradually add the all-purpose flour, mixing with a wooden spoon or your hands until a soft dough forms. The dough should be slightly sticky but manageable.
- Knead the Dough: Transfer the dough to a lightly floured surface and knead it for about 8-10 minutes until it becomes smooth and elastic. This step develops the gluten in the flour, giving your Berlines a fluffy texture.
- First Rise: Place the kneaded dough in a greased bowl, cover it with a clean kitchen towel, and let it rise in a warm place for about 1 to 1.5 hours, or until it has doubled in size. This step is vital for achieving the light and airy texture of the Berlines.
- Shape the Berlines: Once the dough has risen, punch it down to release the air. Roll it out on a lightly floured surface to about ½ inch thickness. Cut out circles using a round cutter (about 3 inches in diameter). Gather the scraps, re-knead, and cut more circles until all the dough is used.
- Second Rise: Place the cut-out circles on a baking sheet lined with parchment paper. Cover them with a towel and let them rise for another 30 minutes. This second rise allows the Berlines to puff up even more.
- Heat the Oil: In a large, deep pot, heat vegetable oil over medium heat until it reaches 350°F (175°C). Use a thermometer to verify the oil is at the right temperature for frying.
- Fry the Berlines: Carefully add a few dough circles to the hot oil, making sure not to overcrowd the pot. Fry them for about 2-3 minutes on each side, or until they’re golden brown. Use a slotted spoon to transfer them to a paper towel-lined plate to drain excess oil.
- Fill with Jam: Once the Berlines have cooled slightly, use a pastry bag fitted with a small round tip to fill each Berlin with your chosen fruit jam. Gently insert the tip into the side of the pastry and squeeze the jam inside.
- Dust with Powdered Sugar: Finally, dust the filled Berlines generously with powdered sugar before serving. This adds a touch of sweetness and enhances their appearance.
Extra Tips
When making Berlines, verify that your oil is at the right temperature for frying; too hot, and they’ll burn on the outside without cooking through, too cold, and they’ll absorb too much oil.
If you don’t have a thermometer, you can test the oil by dropping a small piece of dough into it—if it sizzles and rises to the surface, the oil is ready. Additionally, feel free to experiment with different jam fillings or even chocolate ganache for a richer flavor. Enjoy your homemade Berlines!
Empanadas De Manzana

Empanadas de Manzana are a delightful Chilean dessert that combines the flaky goodness of pastry with the sweet, aromatic filling of apples and spices. These pastries are often enjoyed as a snack or dessert and are perfect for sharing with family and friends. The combination of cinnamon and sugar with fresh apples creates a warm and inviting flavor that’s perfect for any occasion.
Making empanadas de manzana is a simple yet rewarding process that fills your kitchen with delightful aromas. While they might seem intricate, the steps are straightforward, allowing even novice bakers to achieve a delicious result. Once you master this recipe, you can experiment with various fillings, making it a versatile treat that can be tailored to your taste.
Ingredients (Serves 4-6)
- 2 cups all-purpose flour
- 1/2 cup unsalted butter, cold and cubed
- 1/4 cup sugar
- 1/4 teaspoon salt
- 1/4 cup ice water
- 3 medium apples, peeled, cored, and diced (preferably Granny Smith)
- 1 tablespoon lemon juice
- 1 teaspoon ground cinnamon
- 1/4 cup brown sugar
- 1 egg, beaten (for egg wash)
Cooking Instructions
- Make the Dough: In a mixing bowl, combine the all-purpose flour, sugar, and salt. Add the cold, cubed butter and use a pastry cutter or your fingers to blend until the mixture resembles coarse crumbs. Gradually add the ice water, mixing until the dough comes together. Form it into a ball, wrap it in plastic wrap, and refrigerate for at least 30 minutes.
- Prepare the Filling: In a separate bowl, mix the diced apples with the lemon juice, ground cinnamon, and brown sugar. Confirm the apples are well-coated with the mixture. Set this aside to let the flavors meld while the dough chills.
- Roll Out the Dough: Once the dough is chilled, flour a clean surface and roll it out to about 1/8 inch thick. Use a round cutter or a glass to cut out circles, approximately 4-5 inches in diameter.
- Assemble the Empanadas: Take each dough circle and place a generous spoonful of the apple filling in the center. Fold the dough over to create a half-moon shape. Press the edges together, sealing them tightly. You can use a fork to crimp the edges for an added decorative touch.
- Prepare for Baking: Preheat your oven to 375°F (190°C). Place the assembled empanadas on a baking sheet lined with parchment paper. Brush the tops with the beaten egg to give them a golden finish when baked.
- Bake: Bake the empanadas in the preheated oven for 20-25 minutes or until they’re golden brown. Keep an eye on them to avoid over-baking.
- Cool and Serve: Once baked, remove the empanadas from the oven and let them cool slightly on a wire rack. Serve warm or at room temperature.
Extra Tips
When making empanadas de manzana, feel free to experiment with different types of apples for varying sweetness and tartness. You can also add raisins or nuts to the filling for extra texture.
If you want a sweeter treat, sprinkle some powdered sugar over the empanadas once they’ve cooled. Make certain not to overfill the empanadas, as this can cause them to burst while baking.
Enjoy your delicious creation with a scoop of vanilla ice cream or a dollop of whipped cream for an extra indulgent dessert experience!
Tarta De Frutilla

Tarta de Frutilla is a delightful Chilean dessert that perfectly showcases the vibrant flavors of fresh strawberries. This sweet and creamy tart is a favorite among many, often served during family gatherings and special occasions. The combination of a buttery crust, rich custard filling, and juicy strawberries creates a harmonious balance that’s both invigorating and indulgent.
Making Tarta de Frutilla is easier than it sounds, and with a little patience, you can impress your friends and family with this stunning dessert. The tart can be prepared ahead of time, allowing the flavors to meld beautifully, making it a great option for entertaining. Once you take a bite, you’ll understand why this dessert holds a special place in Chilean cuisine.
Ingredients (Serves 4-6):
- 1 pre-made pie crust
- 2 cups fresh strawberries, hulled and sliced
- 1 cup heavy cream
- 1 cup milk
- 3/4 cup granulated sugar
- 3 large egg yolks
- 2 tablespoons cornstarch
- 1 teaspoon vanilla extract
- 1 tablespoon lemon juice
- Optional: powdered sugar for dusting
Cooking Instructions:
- Prepare the Pie Crust: If using a store-bought pie crust, follow the package instructions for baking it. Preheat your oven to 350°F (175°C). Place the pie crust in a tart pan and prick the bottom with a fork to prevent bubbling. Bake for about 10-12 minutes until golden brown. Once baked, set aside to cool completely.
- Make the Custard Filling: In a medium saucepan, combine the milk, heavy cream, and half of the sugar (3/8 cup). Heat over medium heat until the mixture is warm but not boiling, stirring occasionally. In a separate bowl, whisk together the egg yolks, cornstarch, remaining sugar, vanilla extract, and lemon juice until smooth.
- Combine and Thicken: Once the cream mixture is warm, gradually pour a small amount into the egg mixture while whisking continuously to temper the eggs. Slowly add the tempered egg mixture back into the saucepan, whisking constantly. Continue to cook over medium heat, stirring, until the mixture thickens and coats the back of a spoon, about 5-7 minutes. Remove from heat and let it cool slightly.
- Assemble the Tart: Pour the custard filling into the cooled pie crust, spreading it evenly. Arrange the sliced strawberries on top of the custard, ensuring they’re nicely distributed.
- Chill the Tart: Cover the tart with plastic wrap and refrigerate for at least 2-3 hours, or until set. This will help the flavors meld together and the custard to firm up.
- Serve: Once chilled, remove the tart from the refrigerator. If desired, dust the top with powdered sugar before slicing and serving.
Extra Tips:
When making Tarta de Frutilla, it’s important to use fresh strawberries for the best flavor. If strawberries aren’t in season, you can substitute with other berries such as raspberries or blueberries.
Additionally, you can enhance the custard flavor by adding a pinch of salt or a splash of almond extract for a unique twist. Serve this dessert chilled for an invigorating treat, especially during warm weather.
Sopaipillas

Sopaipillas are a beloved Chilean dessert that combines the delight of fried dough with a hint of sweetness. These golden-brown pastries are typically served with a drizzle of chancaca, a syrup made from raw cane sugar, or with a sprinkle of sugar and cinnamon for a delightful treat.
The dough is wonderfully fluffy and slightly crisp on the outside, making them a perfect indulgence for any occasion. Sopaipillas aren’t only enjoyed as a dessert but can also be served as a snack or a side dish in various meals throughout Chile.
Making sopaipillas at home is a simple process that can be a fun activity for the whole family. With just a few ingredients and some easy steps, you can create these delicious pastries that are bound to impress. Serve them warm and watch as everyone enjoys this traditional Chilean delight, and don’t forget to experiment with different toppings to find your favorite combination!
Ingredients (Serves 4-6 people)
- 2 cups all-purpose flour
- 2 teaspoons baking powder
- 1/2 teaspoon salt
- 1/4 cup unsalted butter, softened
- 1/2 cup warm water
- 1 tablespoon sugar
- Oil for frying
- Chancaca syrup or sugar and cinnamon for serving
Cooking Instructions
- Prepare the Dough: In a large mixing bowl, combine the all-purpose flour, baking powder, and salt. Mix well, then add the softened butter, and use your fingers or a fork to incorporate it into the flour mixture until it resembles coarse crumbs.
- Mix in Liquid Ingredients: In a separate bowl, mix the warm water with the sugar until dissolved. Gradually add this mixture into the flour mixture. Stir until the dough starts to come together. If the dough is too dry, add a little more warm water, one tablespoon at a time.
- Knead the Dough: Transfer the dough onto a lightly floured surface and knead it for about 5 minutes until it’s smooth and elastic. Make certain it’s not too sticky; if it is, add a bit more flour as needed.
- Roll Out the Dough: Divide the dough into smaller portions for easier handling. Roll out each portion to about 1/4 inch thick on a floured surface. Using a knife or a round cutter, cut the dough into circles or squares, about 3-4 inches in size.
- Heat the Oil: In a large, deep skillet or pot, heat about 2 inches of oil over medium heat until it reaches 350°F (175°C). You can test the oil by dropping a small piece of dough into it; if it bubbles and rises to the surface, it’s ready.
- Fry the Sopaipillas: Carefully drop a few pieces of dough into the hot oil, making sure not to overcrowd the pan. Fry them until they puff up and turn golden brown, about 2-3 minutes per side. Use a slotted spoon to remove them from the oil and transfer them to a paper towel-lined plate to drain excess oil.
- Serve and Enjoy: Serve the sopaipillas warm with a drizzle of chancaca syrup or a dusting of sugar and cinnamon. Enjoy them fresh for the best taste and texture.
Extra Tips
When preparing sopaipillas, verify that the oil is at the correct temperature for frying; if it’s too hot, the outside will brown quickly while the inside remains doughy. Conversely, if the oil is too cool, the sopaipillas will absorb too much oil and become greasy.
For added flavor, consider infusing the dough with spices like cinnamon or nutmeg. Experiment with different toppings such as honey, fruit preserves, or even savory fillings for a unique twist on this traditional dish!
Leche Asada
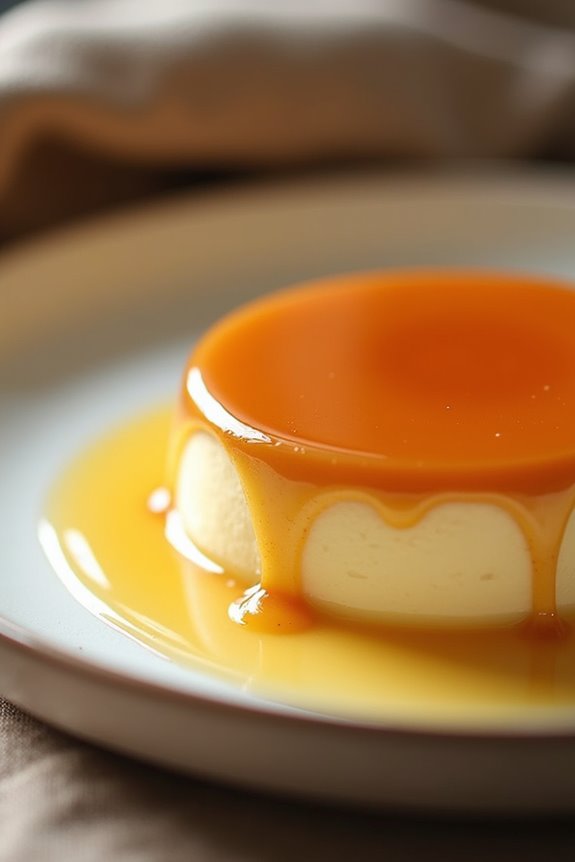
Leche Asada is a traditional Chilean dessert that translates to “roasted milk.” It’s a delightful custard that combines the creamy richness of milk, eggs, and sugar with a caramelized topping that gives it a unique flavor and texture. This dessert is often served chilled, making it a rejuvenating treat after a hearty meal.
Its simplicity and comfort make it a beloved choice among Chileans, and it’s perfect for family gatherings or special occasions.
The preparation of Leche Asada involves a few basic ingredients, but the method of cooking gives it its distinct flavor. The dessert is baked in the oven, which allows the milk and eggs to cook gently, creating a smooth and velvety custard. The caramelized sugar adds a layer of sweetness and a touch of elegance to this classic dish.
Whether you’re a novice in the kitchen or an experienced cook, this recipe will guide you through making a delicious Leche Asada that everyone will love.
Ingredients (Serves 4-6):
- 2 cups of whole milk
- 1 cup of sugar (divided: 3/4 cup for custard, 1/4 cup for caramel)
- 4 large eggs
- 1 teaspoon of vanilla extract
- A pinch of salt
Cooking Instructions:
- Prepare the Caramel: In a medium saucepan over low heat, combine 1/4 cup of sugar with 2 tablespoons of water. Stir gently until the sugar dissolves, then stop stirring and allow it to cook until it turns a golden brown color. This may take about 5-7 minutes. Be careful not to burn the caramel as it can turn bitter.
- Pour the Caramel: Once the caramel is ready, quickly pour it into a baking dish (approximately 9×5 inches), tilting the dish to coat the bottom evenly. Set aside to cool and harden.
- Make the Custard Mixture: In a mixing bowl, whisk together the remaining 3/4 cup of sugar, eggs, whole milk, vanilla extract, and a pinch of salt until well combined. Make sure the mixture is smooth and there are no lumps from the eggs.
- Combine and Bake: Pour the custard mixture over the cooled caramel in the baking dish. Place the baking dish in a larger baking pan and fill the outer pan with hot water until it reaches halfway up the sides of the custard dish (this is a water bath method that helps cook the custard evenly).
- Bake: Preheat your oven to 350°F (175°C) and bake for about 45-55 minutes, or until the custard is set and a knife inserted in the center comes out clean.
- Cool and Serve: Once baked, remove the dish from the water bath and let it cool to room temperature. Refrigerate for at least 2 hours before serving. To serve, invert the leche asada onto a plate, allowing the caramel to drizzle over the top.
Extra Tips:
When making Leche Asada, it’s important to not rush the caramel process; take your time and watch it closely to achieve the perfect golden color.
If you prefer a richer flavor, you can substitute half of the milk with heavy cream. Additionally, feel free to experiment with flavors by adding a splash of orange or lemon zest to the custard mixture for a rejuvenating twist.
Enjoy your Leche Asada chilled for the best taste!