

Exploring the delightful world of Roscones Colombianos is like unwrapping a gift filled with history and flavor. Each recipe is a blend of cherished traditions and modern twists, perfect for adding a personal touch. From the comforting aroma of orange blossom to the fun addition of chocolate chips, these sweet treats offer endless kitchen creativity. I’m thrilled to share this collection of recipes that turn every Roscone into a celebration. Let’s get started on this tasty journey!
Classic Roscone Colombiano

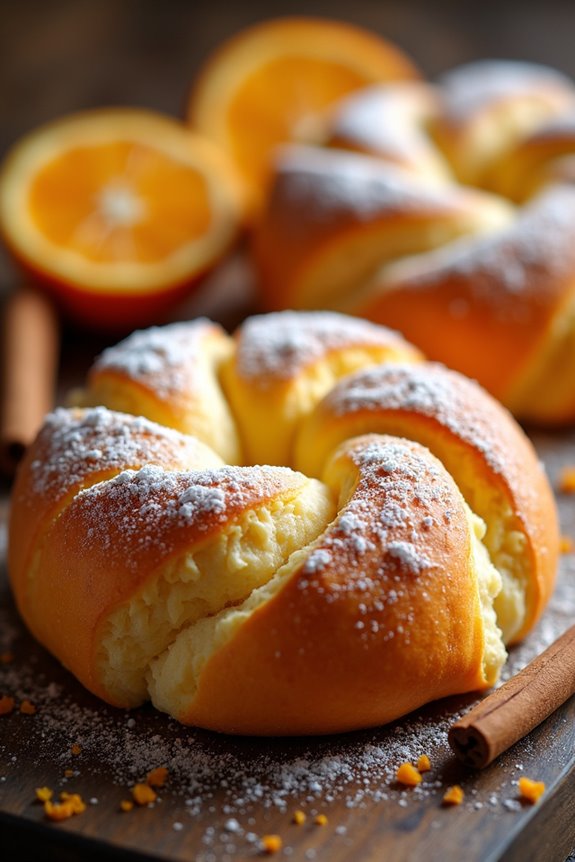
Classic Roscone Colombiano is a traditional Colombian bread that’s often enjoyed during the festivities of Epiphany, known as “Día de Reyes.” This sweet, ring-shaped bread is typically flavored with various ingredients, including orange zest, and is often adorned with colorful fruits and nuts. The dough is enriched with eggs and milk, resulting in a soft and fluffy texture that makes it irresistible.
Whether you’re celebrating a special occasion or simply indulging in a delightful treat, this classic recipe is sure to bring warmth and joy to your table.
Making Roscone Colombiano is a labor of love, but the reward is well worth the effort. The process involves creating a rich dough that requires some kneading and rising time, allowing the flavors to develop beautifully.
Once baked, the bread is often decorated with candied fruits and a dusting of powdered sugar, giving it a festive and eye-catching appearance. Gather your ingredients, roll up your sleeves, and let’s plunge into this delightful baking adventure!
Ingredients (Serves 4-6)
- 4 cups all-purpose flour
- 1 cup milk, warmed
- 1/2 cup sugar
- 1/2 cup unsalted butter, softened
- 3 large eggs
- 1 packet (2 1/4 tsp) instant yeast
- 1 tsp salt
- Zest of 1 orange
- 1 tsp vanilla extract
- 1/2 cup candied fruits (for decoration)
- Powdered sugar (for dusting)
Cooking Instructions
- Prepare the Yeast Mixture: In a small bowl, combine the warmed milk and sugar. Sprinkle the instant yeast over the milk mixture and let it sit for about 5-10 minutes until it becomes foamy. This step activates the yeast and guarantees your dough will rise properly.
- Mix the Dough: In a large mixing bowl, combine the flour and salt. Make a well in the center and add the yeast mixture, eggs, orange zest, and vanilla extract. Use a wooden spoon or your hands to mix the ingredients together until they start to form a dough.
- Knead the Dough: Transfer the dough onto a floured surface and knead for about 10 minutes until it becomes smooth and elastic. If the dough is too sticky, add a little more flour as needed. This step is essential for developing the gluten structure, which gives the bread its soft texture.
- First Rise: Form the dough into a ball and place it in a greased bowl, covering it with a damp cloth or plastic wrap. Let it rise in a warm place for about 1-2 hours, or until it has doubled in size. This proves the yeast is working and the dough is ready for shaping.
- Shape the Roscone: Once the dough has risen, gently punch it down to release any air. Roll the dough into a long rope (about 24 inches) and shape it into a ring, pinching the ends together to seal. Place the ring on a baking sheet lined with parchment paper.
- Second Rise: Cover the shaped Roscone with a damp cloth and let it rise again for about 30-45 minutes, or until it has puffed up noticeably. This second rise is important for achieving a light and airy texture.
- Preheat the Oven: While the Roscone is rising, preheat your oven to 350°F (175°C). This ensures the bread bakes evenly and develops a beautiful golden crust.
- Bake the Roscone: Once the second rise is complete, bake the Roscone in the preheated oven for about 25-30 minutes, or until it’s golden brown and sounds hollow when tapped on the bottom. Keep an eye on it to prevent over-browning.
- Decorate and Serve: After baking, let the Roscone cool on a wire rack. Once cool, decorate with candied fruits and dust with powdered sugar before serving. This adds a festive touch that makes the bread visually stunning.
Extra Tips
When making Classic Roscone Colombiano, patience is key. Confirm your ingredients are at room temperature for better mixing and rising.
If you want to experiment with flavors, consider adding spices like cinnamon or nutmeg to the dough. For a more pronounced orange flavor, you can also add a splash of orange juice.
Finally, for a traditional touch, hide a small figurine or a dry bean inside the Roscone before baking; whoever finds it in their slice is said to have good luck for the year! Enjoy your baking experience and the delicious results!
Orange Blossom Roscone
The Orange Blossom Roscone is a delightful twist on the traditional Colombian Roscone, infused with the fragrant essence of orange blossom water. This sweet bread is often enjoyed during festive occasions and gatherings, making it a beloved treat in Colombian culture. The combination of rich dough, citrus flavor, and a hint of sweetness creates a delectable dessert that pairs perfectly with hot beverages or as a stand-alone snack.
Creating the perfect Orange Blossom Roscone requires patience and care, but the result is a beautifully golden, fluffy bread that’s bound to impress your family and friends. Whether served on New Year’s Day or during a family gathering, this aromatic treat is bound to bring joy and celebration to any table.
Ingredients (Serves 4-6):
- 4 cups all-purpose flour
- 1/2 cup granulated sugar
- 1 teaspoon salt
- 1 tablespoon instant yeast
- 1/2 cup milk, warmed
- 1/2 cup unsalted butter, softened
- 3 large eggs
- 1/4 cup orange blossom water
- Zest of 1 orange
- 1/2 teaspoon ground cinnamon
- 1 egg (for egg wash)
- Optional: powdered sugar (for dusting)
Cooking Instructions:
- Prepare the Dough: In a large mixing bowl, combine the all-purpose flour, sugar, salt, and instant yeast. Mix well to guarantee that the yeast and salt are evenly distributed throughout the dry ingredients.
- Combine Wet Ingredients: In a separate bowl, whisk together the warmed milk, softened butter, eggs, orange blossom water, and orange zest until well combined.
- Mix the Dough: Gradually add the wet ingredients to the dry ingredients, mixing with a wooden spoon or dough hook attachment until a shaggy dough forms.
- Knead the Dough: Turn the dough out onto a lightly floured surface and knead for about 8-10 minutes until the dough is smooth and elastic. If using a stand mixer, knead on medium speed for approximately 5 minutes.
- First Rise: Place the kneaded dough in a greased bowl, cover with a clean kitchen towel, and let it rise in a warm place for about 1-2 hours, or until it has doubled in size.
- Shape the Roscone: Once the dough has risen, punch it down to release any air bubbles. Divide the dough into two equal portions. Shape each portion into a long rope, then form a circle by connecting the ends and pinching them together to create a ring.
- Second Rise: Place the formed rings onto a baking sheet lined with parchment paper. Cover with the kitchen towel again and allow them to rise for another 30-45 minutes until puffed.
- Preheat the Oven: While the dough is rising, preheat your oven to 350°F (175°C).
- Prepare for Baking: Beat the remaining egg and brush the egg wash over the top of each Roscone for a shiny finish. If desired, sprinkle with a little ground cinnamon for additional flavor.
- Bake: Bake the Roscones in the preheated oven for 25-30 minutes, or until they’re golden brown on top and sound hollow when tapped on the bottom.
- Cool and Serve: Remove the Roscones from the oven and let them cool on a wire rack. Once cooled, you can dust them with powdered sugar before serving.
Extra Tips:
When making Orange Blossom Roscone, it’s crucial to monitor the rising times closely, as factors like room temperature can affect dough behavior. If your kitchen is cool, you may want to find a warmer spot or extend the rising time.
Additionally, feel free to get creative by adding dried fruits or nuts into the dough for added texture and flavor. Enjoy your homemade Roscones with a cup of hot chocolate or coffee for a delightful treat!
Chocolate Chip Roscone

Chocolate Chip Roscone is a delightful twist on the traditional Colombian Roscone, a sweet bread traditionally enjoyed during the holiday season. This variation combines the classic flavors of the Roscone with rich chocolate chips, making it a perfect treat for any occasion. The dough is soft and fluffy, infused with a hint of citrus and vanilla, while the melted chocolate adds a decadent touch that will satisfy any sweet tooth.
Whether you’re serving it for breakfast, dessert, or a cozy afternoon snack, this Chocolate Chip Roscone is bound to impress your family and friends.
Making Chocolate Chip Roscone is a wonderful way to bring the joy of baking into your home. The process may take a bit of time due to rising and cooling, but the end result is a beautifully golden, aromatic bread that’s both visually stunning and utterly delicious.
With a few simple ingredients and some patience, you can create a delightful treat that will be cherished by everyone who tastes it.
Ingredients (Serves 4-6)
- 4 cups all-purpose flour
- 1 cup whole milk, warmed
- 1/2 cup granulated sugar
- 1/2 cup unsalted butter, melted
- 3 large eggs
- 2 1/4 teaspoons active dry yeast (1 packet)
- 1 teaspoon vanilla extract
- Zest of 1 orange
- 1/2 teaspoon salt
- 1 cup semi-sweet chocolate chips
- 1 egg (for egg wash)
- Optional: powdered sugar for dusting
Cooking Instructions
- Prepare Yeast Mixture: In a small bowl, combine the warm milk (not hot) with the active dry yeast and 1 tablespoon of sugar. Stir gently and let it sit for about 5-10 minutes until foamy. This activates the yeast, guaranteeing your bread will rise properly.
- Mix Wet Ingredients: In a large mixing bowl, whisk together the melted butter, remaining sugar, eggs, vanilla extract, and the zest of the orange. Make sure the butter isn’t too hot when you add the eggs to prevent them from cooking.
- Combine Dry Ingredients: In another bowl, mix the all-purpose flour and salt. Gradually add this dry mixture to the wet ingredients, alternating with the yeast mixture, stirring until a shaggy dough begins to form.
- Knead the Dough: Transfer the dough onto a floured surface and knead for about 8-10 minutes until smooth and elastic. This step is essential for developing the gluten, which gives the bread its structure.
- First Rise: Place the kneaded dough in a lightly greased bowl, cover it with a damp cloth, and let it rise in a warm place for about 1-2 hours or until it has doubled in size.
- Incorporate Chocolate Chips: Once the dough has risen, gently punch it down to release air. Fold in the chocolate chips evenly throughout the dough.
- Shape the Roscone: Divide the dough into two equal parts. Shape each part into a ring, sealing the ends together. Place the rings on a baking sheet lined with parchment paper, allowing enough space for rising.
- Second Rise: Cover the shaped Roscones with a towel and let them rise for another 30-45 minutes until puffed.
- Preheat Oven: While the dough is rising, preheat your oven to 350°F (175°C).
- Egg Wash: Beat the egg and brush it over the surface of each Roscone for a golden finish.
- Bake: Bake in the preheated oven for about 25-30 minutes or until golden brown. You can check for doneness by tapping the bottom of the bread; it should sound hollow.
- Cool and Serve: Allow the Chocolate Chip Roscones to cool on a wire rack for at least 15 minutes before serving. You can dust them with powdered sugar for an extra touch!
Extra Tips
When making Chocolate Chip Roscone, it’s important to allow ample time for the dough to rise, as this will greatly affect the texture of the final product.
If you want to enhance the flavor, consider adding a pinch of cinnamon or a splash of flavored liqueur to the dough. Additionally, verify your chocolate chips are of good quality for the best results.
Store any leftovers in an airtight container to keep them fresh for longer!
Coconut Roscone Delight
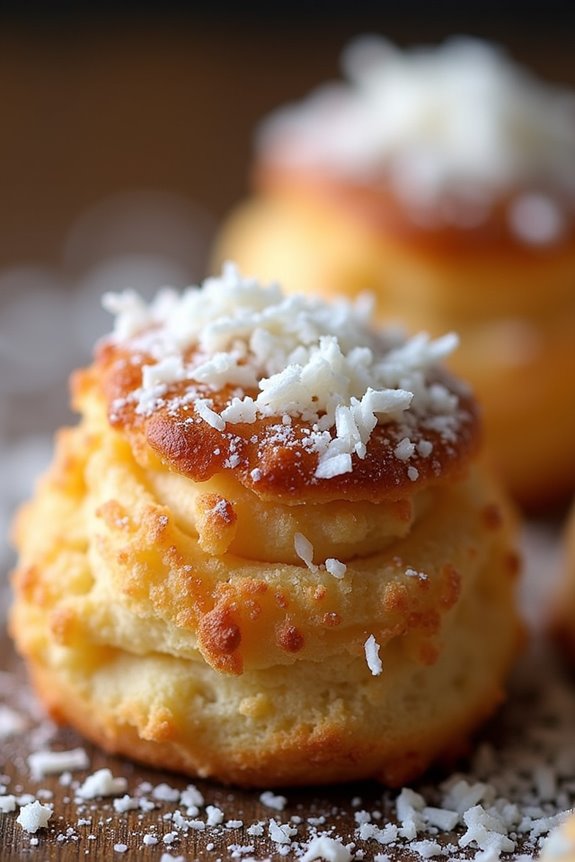
Coconut Roscone Delight is a delightful twist on the traditional Colombian Roscones, which are typically enjoyed during festive occasions, especially the Christmas season. This version incorporates the sweet, tropical flavor of coconut, creating a unique and sumptuous treat that can brighten up any gathering.
The combination of fluffy dough, rich coconut filling, and a sprinkle of coconut flakes on top makes this dessert irresistibly delicious and visually appealing. Making Coconut Roscone Delight isn’t only about achieving a wonderful taste but also about enjoying the process of creating something special.
The dough is soft and easy to handle, while the filling is a perfect blend of sweetness and coconut flavor, giving each bite a satisfying texture. This treat can be served warm or at room temperature, making it a versatile option for various occasions.
Ingredients (Serves 4-6)
- 500g all-purpose flour
- 200ml warm milk
- 100g sugar
- 100g unsalted butter, softened
- 3 large eggs
- 7g active dry yeast
- 1 teaspoon vanilla extract
- ½ teaspoon salt
- 200g shredded coconut
- 50g powdered sugar (for dusting)
- 1 egg (for egg wash)
Cooking Instructions
- Prepare the Dough: In a large mixing bowl, combine the warm milk and sugar, then sprinkle the active dry yeast on top. Let it sit for about 10 minutes until it becomes frothy. This step activates the yeast, which is vital for making the dough rise.
- Mix the Ingredients: Add the softened butter, eggs, vanilla extract, and salt to the yeast mixture. Gradually add the flour, mixing until a dough forms. The dough should be slightly sticky but manageable. Knead the dough on a floured surface for about 10 minutes until it becomes smooth and elastic.
- First Rise: Place the dough in a greased bowl, cover it with a clean kitchen towel, and let it rise in a warm place for about 1 hour or until it doubles in size. This rise is essential for achieving a light and airy texture in the final product.
- Prepare the Coconut Filling: In a separate bowl, mix the shredded coconut with a bit of sugar (to taste) and set aside. This filling will be added later to enhance the flavor.
- Shape the Roscones: Once the dough has risen, punch it down to release the air and divide it into two equal parts. Roll each part into a long rope, then form a circle by joining the ends together, pinching them to seal. Place the formed roscones on a baking sheet lined with parchment paper.
- Second Rise: Cover the formed roscones with a towel and allow them to rise again for about 30 minutes. This additional rise will guarantee that they’re fluffy and light.
- Preheat the Oven: While the roscones are rising, preheat your oven to 180°C (350°F). This ensures that the oven is at the right temperature when you’re ready to bake the roscones.
- Egg Wash and Bake: Brush the top of the roscones with the beaten egg for a beautiful golden finish. Bake in the preheated oven for 20-25 minutes or until they’re golden brown. Keep an eye on them to prevent over-baking.
- Cool and Serve: Once baked, remove the roscones from the oven and let them cool on a wire rack. After they’ve cooled, dust with powdered sugar and sprinkle with additional shredded coconut before serving.
Extra Tips
For an extra burst of flavor, consider adding a touch of coconut extract to the dough or incorporating chopped nuts into the coconut filling.
If you want to make the roscones more festive, you can also decorate them with candied fruits or a drizzle of icing. Always verify your ingredients are at room temperature for the best results, and don’t rush the rising process; giving the dough time to rise properly is key to achieving a fluffy texture.
Enjoy your Coconut Roscone Delight as a perfect treat with coffee or tea!
Raspberry Jam-filled Roscone
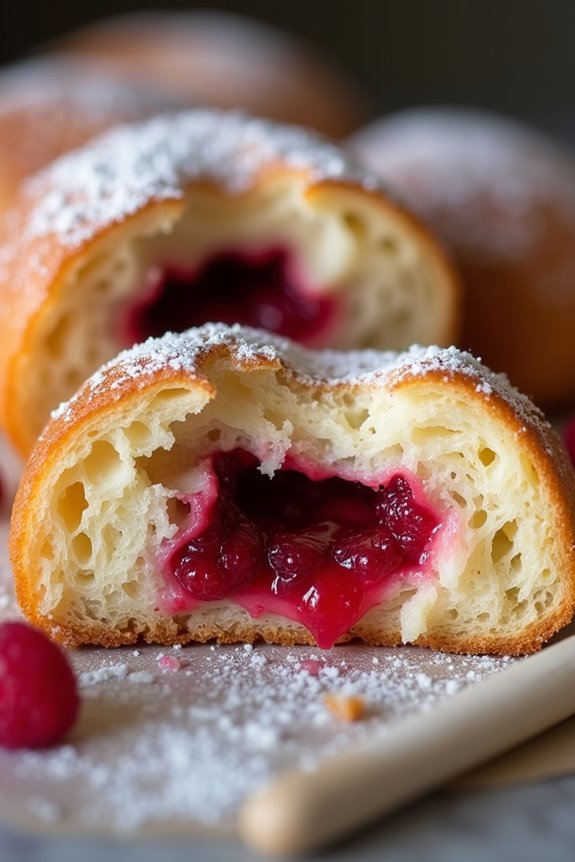
Raspberry Jam-filled Roscone is a delightful twist on the traditional Colombian Roscone, a sweet and fluffy bread typically enjoyed during festive occasions. This recipe infuses the classic flavors with a burst of tangy raspberry jam, making it perfect for breakfast, brunch, or an afternoon treat. The combination of soft, airy dough and the fruity filling creates a mouthwatering experience that’s sure to please everyone at the table.
Making Raspberry Jam-filled Roscone can be a fun and rewarding process. The dough is enriched with eggs and butter, giving it a rich texture, while the raspberry jam adds a delightful sweetness and vibrant color to the filling. This recipe serves 4-6 people, making it an ideal choice for small gatherings or family celebrations. With a little patience and love, you can create a beautiful and delicious Roscone that will impress your guests.
Ingredients:
- 4 cups all-purpose flour
- 1/2 cup granulated sugar
- 1 packet (2 1/4 teaspoons) active dry yeast
- 1 teaspoon salt
- 1/2 cup whole milk, warmed
- 1/2 cup unsalted butter, melted
- 3 large eggs
- 1 teaspoon vanilla extract
- 1/2 cup raspberry jam
- Optional: powdered sugar for dusting
Cooking Instructions:
- Prepare the Dough: In a large mixing bowl, combine the warm milk and sugar, then sprinkle the yeast on top. Let it sit for about 5-10 minutes until the mixture becomes frothy. This indicates that the yeast is active.
- Mix Ingredients: Add the melted butter, eggs, and vanilla extract to the yeast mixture. In a separate bowl, whisk together the flour and salt. Gradually add the flour mixture to the wet ingredients, stirring until a shaggy dough forms.
- Knead the Dough: Transfer the dough to a lightly floured surface. Knead the dough for about 8-10 minutes until it becomes smooth and elastic. If the dough is too sticky, sprinkle a little more flour as needed.
- First Rise: Place the kneaded dough in a lightly greased bowl, cover it with a clean kitchen towel or plastic wrap, and let it rise in a warm place for about 1-2 hours, or until it has doubled in size.
- Shape the Roscone: Once the dough has risen, punch it down to release the air. Divide the dough into two equal portions. Roll each portion into a round shape and poke a hole in the center to form a ring. Place the rings on a parchment-lined baking sheet.
- Second Rise: Cover the shaped dough with a towel and let it rise for another 30-45 minutes until puffy.
- Preheat the Oven: While the dough is rising, preheat your oven to 350°F (175°C).
- Fill with Jam: Once the dough has risen, carefully make a small indentation in the center of each ring and fill it with raspberry jam.
- Bake the Roscones: Bake in the preheated oven for about 20-25 minutes or until golden brown. Once done, remove from the oven and allow to cool slightly.
- Serve: Optionally, dust with powdered sugar before serving. Slice and enjoy your Raspberry Jam-filled Roscone warm or at room temperature.
Extra Tips: When making Raspberry Jam-filled Roscone, feel free to experiment with different types of jam or fruit fillings, like strawberry or apricot, to suit your taste.
Additionally, ensuring all your ingredients are at room temperature can help create a smoother dough. For a more festive touch, you can add a glaze made from powdered sugar and milk drizzled over the warm Roscone before serving. Enjoy your baking adventure!
Almond and Honey Roscone
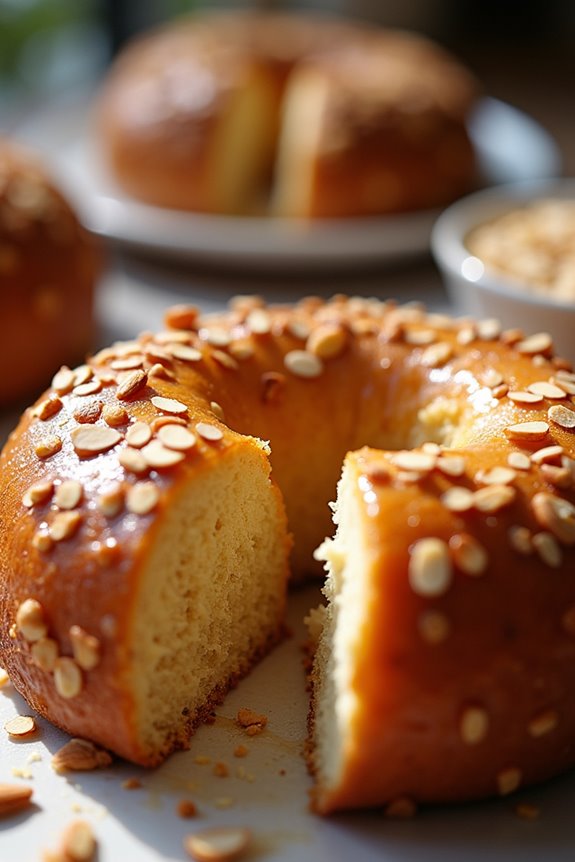
The Almond and Honey Roscone is a delightful variation of the traditional Colombian Roscone, commonly enjoyed during festive occasions. This sweet bread is characterized by its rich, nutty flavor and is often adorned with a luscious honey glaze that adds a touch of sweetness. The combination of ground almonds and honey creates a moist and flavorful cake-like bread that’s perfect for sharing with family and friends.
Making this Roscone is a delightful experience that fills your kitchen with an aromatic blend of spices and nutty fragrances. This recipe is simple enough for novice bakers, yet impressive enough to wow your guests. Whether you’re serving it for breakfast, dessert, or as part of a festive feast, the Almond and Honey Roscone is sure to become a beloved staple in your home.
Ingredients (Serves 4-6):
- 3 cups all-purpose flour
- 1 cup ground almonds
- 1/2 cup granulated sugar
- 1/2 cup unsalted butter, softened
- 1 cup milk, warm
- 2 large eggs
- 1 packet (2 1/4 teaspoons) instant yeast
- 1 teaspoon vanilla extract
- 1/2 teaspoon salt
- 1/4 teaspoon ground cinnamon
- 1/4 cup honey (for glazing)
- Sliced almonds (for topping)
Cooking Instructions:
- Prepare the Dough: In a large bowl, combine the warm milk, sugar, and instant yeast. Allow it to sit for about 5-10 minutes until it becomes frothy. This step activates the yeast, guaranteeing your Roscone rises properly.
- Mix Wet Ingredients: In another bowl, whisk together the softened butter, eggs, and vanilla extract. Once the yeast mixture is frothy, add this wet mixture to the yeast mix and stir until well combined.
- Combine Dry Ingredients: In a separate bowl, mix the all-purpose flour, ground almonds, salt, and cinnamon. Gradually add the dry ingredients to the wet mixture, stirring until a soft dough forms.
- Knead the Dough: Transfer the dough onto a lightly floured surface and knead for about 5-7 minutes until it becomes smooth and elastic. This process develops the gluten, giving the Roscone its structure.
- First Rise: Place the kneaded dough into a lightly greased bowl, cover it with a damp cloth, and let it rise in a warm place for about 1-2 hours, or until it doubles in size.
- Shape the Roscone: Once risen, punch down the dough to release any air bubbles. Shape the dough into a round disc and then form a hole in the center to create a wreath shape. Place it on a baking tray lined with parchment paper.
- Second Rise: Cover the shaped Roscone with a cloth and let it rise again for about 30-45 minutes until it’s puffy.
- Preheat the Oven: While the dough is rising, preheat your oven to 350°F (175°C).
- Bake the Roscone: Once the dough has risen, brush the top with a bit of milk or beaten egg for a golden finish. Sprinkle sliced almonds on top. Bake in the preheated oven for about 25-30 minutes or until golden brown.
- Prepare the Honey Glaze: While the Roscone is baking, gently heat the honey in a small saucepan until it becomes slightly runny.
- Glaze the Roscone: Once the Roscone is out of the oven, brush the warm honey glaze over the top while it’s still warm. Allow it to cool slightly before serving.
Extra Tips:
For the best flavor, verify your ingredients are at room temperature before beginning the recipe. You can also experiment by incorporating different types of nuts or dried fruits into the dough for added texture and flavor.
This Roscone can be stored in an airtight container for a few days, and it also freezes well, so you can enjoy it anytime! Enjoy your baking!
Spiced Rum Roscone
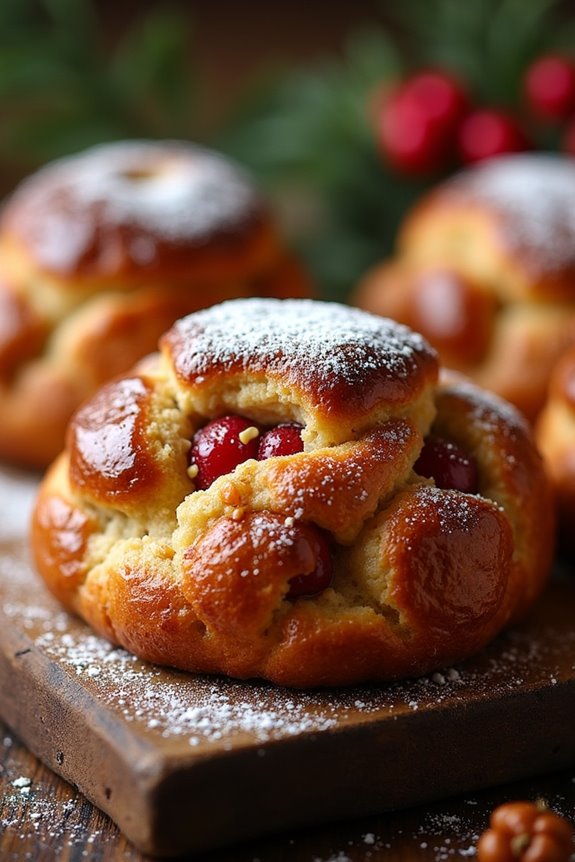
Spiced Rum Roscone is a delightful twist on the traditional Colombian sweet bread, known as “Roscon.” This festive treat is typically enjoyed during the Christmas season, but its rich flavors make it a perfect choice for any celebration or family gathering. The addition of spiced rum not only enhances the aroma but also adds a depth of flavor that pairs beautifully with the sweet dough and various fillings. Perfect for sharing, this indulgent bread is sure to impress your guests and family alike.
Making Spiced Rum Roscone is a labor of love that requires patience and attention to detail. The dough is enriched with warm spices, such as cinnamon and nutmeg, and is often adorned with candied fruits and nuts, giving it a vibrant appearance.
Once baked, it’s typically dusted with powdered sugar or glazed for an extra touch of sweetness. The combination of flavors and textures in this Roscone will transport you to the festive streets of Colombia, making it a delightful centerpiece for any holiday table.
Ingredients (Serves 4-6):
- 4 cups all-purpose flour
- 1/2 cup granulated sugar
- 1/2 teaspoon salt
- 1 tablespoon active dry yeast
- 1/2 cup whole milk, warmed
- 1/4 cup spiced rum
- 1/2 cup unsalted butter, softened
- 3 large eggs
- 1 teaspoon ground cinnamon
- 1/2 teaspoon ground nutmeg
- 1/2 cup candied fruits (such as cherries, orange peel, and lemon peel)
- 1/2 cup chopped nuts (such as almonds or walnuts)
- Powdered sugar for dusting
Cooking Instructions:
- Prepare the Yeast Mixture: In a small bowl, combine the warm milk and active dry yeast. Allow it to sit for about 5-10 minutes until it becomes frothy. This indicates that the yeast is active and ready to use.
- Mix Dry Ingredients: In a large mixing bowl, combine the all-purpose flour, granulated sugar, salt, cinnamon, and nutmeg. Whisk these dry ingredients together until they’re well mixed.
- Combine Wet Ingredients: In another bowl, beat the eggs, softened butter, and spiced rum together until smooth. Once the yeast mixture is frothy, add it to the wet ingredients. Mix well.
- Make the Dough: Gradually add the wet mixture to the dry ingredients, mixing until a dough forms. You might need to use your hands to bring it together completely. If the dough is too sticky, add a little more flour until it becomes pliable.
- Knead the Dough: Turn the dough out onto a lightly floured surface and knead for about 8-10 minutes until it’s smooth and elastic. This step is essential for developing the gluten, which gives the Roscone its structure.
- First Rise: Place the kneaded dough in a greased bowl, cover it with a damp cloth, and let it rise in a warm place for about 1-2 hours, or until it doubles in size.
- Add Fruits and Nuts: Once the dough has risen, punch it down gently to release the air. Fold in the candied fruits and chopped nuts, ensuring they’re evenly distributed throughout the dough.
- Shape the Roscone: Divide the dough into two equal portions. Shape each portion into a ring by rolling it into a long log and then forming it into a circle, pinching the ends together to seal.
- Second Rise: Place the rings on a baking sheet lined with parchment paper. Cover them with a kitchen towel and let them rise again for about 30-45 minutes until puffed.
- Bake the Roscone: Preheat your oven to 350°F (175°C). Bake the Roscones for 25-30 minutes, or until they’re golden brown and sound hollow when tapped.
- Cool and Serve: Let the Roscones cool on a wire rack. Once cooled, dust with powdered sugar before serving.
Extra Tips:
For the best flavor, let your Spiced Rum Roscone sit for a few hours or overnight before serving, as this allows the flavors to meld beautifully.
Additionally, feel free to experiment with different fillings, such as chocolate chips or dried fruits, to customize your Roscone. When storing leftovers, keep them in an airtight container at room temperature for up to 3 days. Enjoy your delightful creation with a cup of hot cocoa or coffee for a truly festive experience!
Lemon Zest Roscone

The Lemon Zest Roscone is a delightful twist on the traditional Colombian roscón, a sweet, round bread typically enjoyed during festive occasions. Infused with the bright and zesty flavor of fresh lemons, this version adds a revitalizing touch that perfectly complements the soft, pillowy texture of the dough.
Perfectly suited for breakfast or as a sweet treat with afternoon tea, this roscón is sure to impress both family and friends.
To make this recipe, you’ll need to set aside some time to allow the dough to rise properly, which is essential for achieving that light and airy quality. The addition of lemon zest not only enhances the flavor but also adds a lovely aroma to the baking process.
Once baked, the Lemon Zest Roscone can be served plain or topped with a glaze for an extra touch of sweetness.
Ingredients (serving size: 4-6 people):
- 4 cups all-purpose flour
- 1 cup warm milk
- 1/2 cup granulated sugar
- 1/4 cup unsalted butter, softened
- 3 large eggs
- 2 1/4 teaspoons active dry yeast (1 packet)
- Zest of 2 lemons
- 1/2 teaspoon salt
- 1 teaspoon vanilla extract
- 1 egg wash (1 egg beaten with 1 tablespoon water)
- Optional: powdered sugar for dusting
Cooking Instructions:
- Activate the Yeast: In a small bowl, combine the warm milk (about 110°F) with the sugar and yeast. Allow it to sit for about 5-10 minutes until it becomes frothy. This indicates that the yeast is active and ready to be used.
- Mix the Dough: In a large mixing bowl, combine the flour and salt. Create a well in the center and add the frothy yeast mixture, softened butter, eggs, lemon zest, and vanilla extract. Mix the ingredients together until they form a sticky dough.
- Knead the Dough: Transfer the dough onto a lightly floured surface and knead for about 10 minutes, until it becomes smooth and elastic. If the dough is too sticky, sprinkle a little more flour as needed.
- First Rise: Place the kneaded dough in a lightly greased bowl, cover it with a clean kitchen towel or plastic wrap, and let it rise in a warm area for about 1-2 hours, or until it has doubled in size.
- Shape the Roscone: Once the dough has risen, punch it down to release the air. Divide the dough into two equal pieces and shape each piece into a round ring, connecting the ends to form a circle. Place the shaped rings on a baking sheet lined with parchment paper.
- Second Rise: Cover the shaped rings with a kitchen towel and let them rise again for about 30-45 minutes, until they puff up.
- Preheat the Oven: While the dough is rising, preheat your oven to 350°F (175°C).
- Egg Wash and Bake: Brush the tops of the risen roscónes with the egg wash for a shiny finish. Bake in the preheated oven for 20-25 minutes, or until they’re golden brown and sound hollow when tapped on the bottom.
- Cool and Serve: Remove the roscónes from the oven and allow them to cool on a wire rack. Once cooled, you can dust them with powdered sugar if desired before serving.
Extra Tips: When making the Lemon Zest Roscone, be sure to use fresh lemons for the zest to maximize flavor. Additionally, if you want a richer taste, consider adding a bit of cream cheese to the glaze for a creamy finish.
Experimenting with different citrus zests, such as orange or lime, can also create unique variations of this delightful dish. Enjoy your baking!
Dulce De Leche Roscone

The Dulce De Leche Roscone is a delightful variation of the traditional Colombian Roscone, often enjoyed during festive occasions and celebrations. This sweet bread, characterized by its soft and fluffy texture, is infused with the rich, caramel-like flavor of dulce de leche. The combination of the soft dough and the creamy filling creates a mouthwatering treat that’s perfect for sharing with family and friends.
To prepare this delicious Roscone, you’ll need to allow some time for the dough to rise, which is vital for achieving that perfect light and airy bread. While the main ingredient is dulce de leche, you can also experiment with adding nuts or a sprinkle of cinnamon for an extra layer of flavor. This recipe serves 4-6 people, making it ideal for gatherings or special occasions.
Ingredients
- 4 cups all-purpose flour
- 1/2 cup sugar
- 2 teaspoons instant yeast
- 1/2 teaspoon salt
- 1 cup warm milk
- 1/4 cup unsalted butter, melted
- 2 large eggs
- 1 teaspoon vanilla extract
- 1 cup dulce de leche (for filling)
- 1 egg (for egg wash)
- Powdered sugar (for dusting, optional)
Cooking Instructions
- Prepare the Dough: In a large mixing bowl, combine the warm milk, sugar, and instant yeast. Let it sit for about 5-10 minutes until foamy. This step activates the yeast, which is essential for the dough to rise.
- Mix the Dry Ingredients: In a separate bowl, whisk together the flour and salt. Once the yeast mixture is ready, add the melted butter, eggs, and vanilla extract to it. Mix until combined.
- Combine Wet and Dry Ingredients: Gradually add the dry mixture to the wet ingredients, stirring until a dough forms. If the dough is too sticky, add a little more flour, one tablespoon at a time, until it comes together.
- Knead the Dough: Transfer the dough to a lightly floured surface and knead for about 8-10 minutes until it becomes smooth and elastic. This step helps develop the gluten, ensuring a fluffy texture.
- First Rise: Place the kneaded dough in a greased bowl, cover it with a clean cloth, and let it rise in a warm place for about 1-2 hours or until it doubles in size.
- Shape the Roscone: After the dough has risen, punch it down to release the air. Roll it out into a long rectangle (about 12×24 inches). Spread the dulce de leche evenly over the surface, then roll the dough tightly from one end to the other to form a log.
- Form the Ring: Shape the rolled dough into a circle, pinching the ends together to seal. Place the ring on a baking sheet lined with parchment paper.
- Second Rise: Cover the ring with a cloth and let it rise again for about 30-45 minutes until it puffs up.
- Preheat the Oven: While the dough is rising, preheat your oven to 350°F (175°C).
- Egg Wash and Bake: Beat the egg and brush it over the surface of the dough for a shiny finish. Bake the roscone in the preheated oven for 25-30 minutes or until golden brown.
- Cool and Serve: Once baked, remove the roscone from the oven and allow it to cool slightly. Dust with powdered sugar before serving, if desired.
Extra Tips
For a twist on the traditional flavor, consider adding chopped nuts or chocolate chips to the dulce de leche filling for added texture.
If you’re making the roscone ahead of time, you can prepare the dough and let it rise in the refrigerator overnight, allowing for a deeper flavor development. Just remember to bring it back to room temperature before the second rise and baking.
Enjoy your Dulce De Leche Roscone with a cup of coffee or hot chocolate for a truly indulgent treat!
Pistachio and Rosewater Roscone
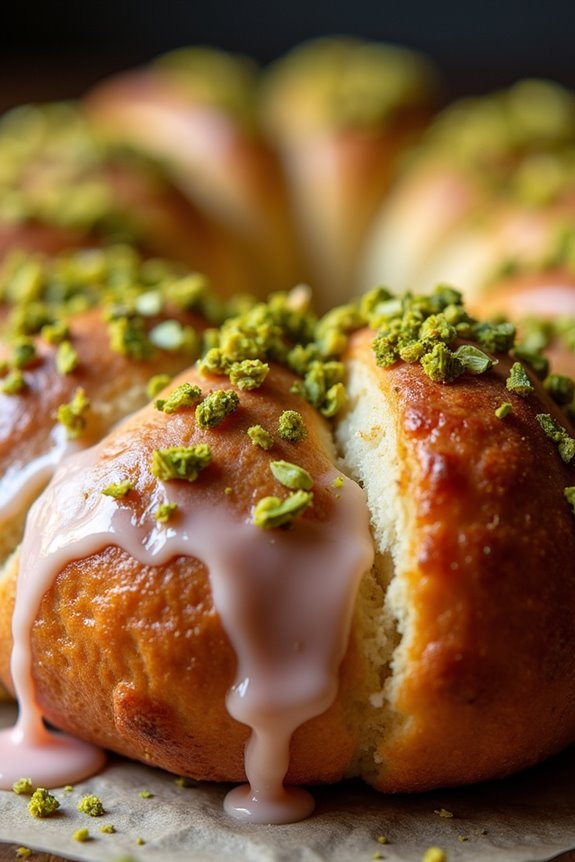
Pistachio and Rosewater Roscone is a delightful twist on the traditional Colombian roscón, infusing the rich, nutty flavor of pistachios with the subtle floral notes of rosewater. This enchanting dessert is perfect for celebrations or simply to enjoy with a cup of tea. The luxurious combination of flavors makes it a unique and memorable treat that will impress your family and friends.
To prepare this exquisite dish, you’ll create a soft, sweet dough enriched with ground pistachios and flavored with rosewater. The dough is then shaped into a ring and baked to golden perfection. Once it cools, a simple glaze adds an extra layer of sweetness, and a sprinkle of crushed pistachios on top provides a delightful crunch. This recipe serves 4-6 people and is sure to be a favorite at any gathering.
Ingredients:
- 3 cups all-purpose flour
- 1 cup ground pistachios
- 1/2 cup granulated sugar
- 1 teaspoon salt
- 1 tablespoon instant yeast
- 1/2 cup milk, warmed
- 1/4 cup unsalted butter, melted
- 2 large eggs
- 1 teaspoon rosewater
- 1/2 teaspoon vanilla extract
- 1/2 cup powdered sugar (for glaze)
- 2 tablespoons rosewater (for glaze)
- Additional crushed pistachios (for topping)
Cooking Instructions:
- Prepare the Dough: In a large mixing bowl, combine the flour, ground pistachios, granulated sugar, salt, and instant yeast. Mix these dry ingredients well to guarantee even distribution.
- In a separate bowl, whisk together the warm milk, melted butter, eggs, rosewater, and vanilla extract.
- Combine Wet and Dry Ingredients: Pour the wet mixture into the dry ingredients. Stir with a wooden spoon or spatula until a shaggy dough forms. It may be a bit sticky at this point; that’s okay.
- Knead the Dough: Transfer the dough to a lightly floured surface. Knead the dough for about 8-10 minutes until it becomes smooth and elastic. If the dough is too sticky, sprinkle a little more flour as needed.
- First Rise: Shape the kneaded dough into a ball and place it in a lightly greased bowl. Cover the bowl with a damp cloth or plastic wrap and let it rise in a warm place for about 1-2 hours, or until it has doubled in size.
- Shape the Roscone: Once the dough has risen, punch it down to release the air. On a floured surface, shape the dough into a long log. Join the ends together to form a ring and place it on a baking sheet lined with parchment paper.
- Second Rise: Cover the shaped roscone with a cloth and allow it to rise again for about 30-45 minutes until it expands.
- Preheat the Oven: While the dough is rising, preheat your oven to 350°F (175°C).
- Bake the Roscone: Once the roscone has risen, place it in the preheated oven and bake for 25-30 minutes, or until it’s golden brown and sounds hollow when tapped on the bottom.
- Prepare the Glaze: While the roscone is baking, mix the powdered sugar and rosewater in a small bowl until smooth. This will be your glaze.
- Cool and Glaze: After baking, remove the roscone from the oven and let it cool on a wire rack for about 10 minutes. Once slightly cooled, drizzle the glaze over the top and sprinkle with crushed pistachios.
- Serve and Enjoy: Allow the glaze to set for a few minutes before slicing the roscone. Serve warm or at room temperature.
Extra Tips:
For an even more intense flavor, consider toasting the ground pistachios lightly before adding them to the dough. This will enhance their nuttiness and add a deeper layer of richness to the roscón.
Additionally, feel free to adjust the amount of rosewater based on your personal preference; a little goes a long way! Enjoy pairing your Pistachio and Rosewater Roscone with a cup of tea or coffee for a delightful afternoon treat.
Vanilla Bean Roscone
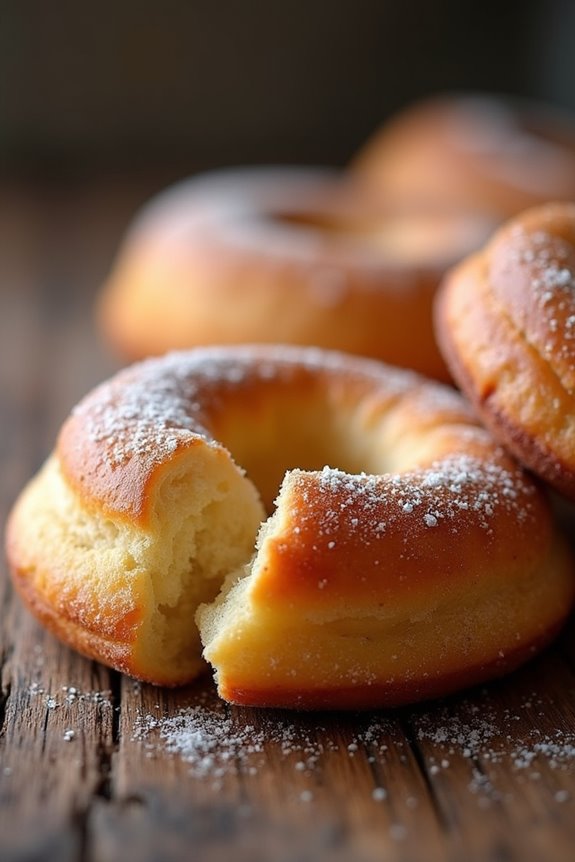
The Vanilla Bean Roscone is a delightful Colombian pastry that beautifully combines the richness of butter with the aromatic essence of vanilla. Traditionally prepared during festive occasions, this sweet bread is often enjoyed with hot chocolate or coffee. The dough is soft and fluffy, making it a perfect treat to share with family and friends. This version infuses real vanilla bean, elevating the flavor profile and creating an irresistible aroma as it bakes.
Preparing this Vanilla Bean Roscone is an enjoyable experience that fills your kitchen with warmth and enticing scents. The process involves mixing the dough, allowing it to rise, and finally shaping it into the iconic ring form. With a glossy glaze and a sprinkle of sugar, this dessert is as pleasing to the eye as it’s to the palate. Prepare yourself for a delightful baking adventure that results in a sweet, tender bread that everyone will love.
Ingredients (Serving Size: 4-6 People)
- 4 cups all-purpose flour
- 1/2 cup granulated sugar
- 1/2 cup unsalted butter, softened
- 1 cup whole milk, warmed
- 2 large eggs
- 1 packet active dry yeast (2 1/4 teaspoons)
- 1 vanilla bean, seeds scraped
- 1/2 teaspoon salt
- 1 egg (for egg wash)
- 2 tablespoons coarse sugar (for topping)
Cooking Instructions
- Prepare the Yeast: In a small bowl, combine the warm milk with the active dry yeast and 1 tablespoon of sugar. Let it sit for about 5-10 minutes until it becomes frothy, indicating that the yeast is active.
- Mix the Dough: In a large mixing bowl, combine the all-purpose flour, remaining sugar, and salt. Make a well in the center and add the softened butter, eggs, scraped vanilla bean seeds, and the frothy yeast mixture. Stir until a dough begins to form.
- Knead the Dough: Transfer the dough to a floured surface and knead it for about 8-10 minutes until it becomes smooth and elastic. If the dough is too sticky, add a little more flour as needed.
- First Rise: Place the kneaded dough into a greased bowl, cover it with a clean kitchen towel, and let it rise in a warm place for about 1-2 hours, or until it doubles in size.
- Shape the Roscone: Once the dough has risen, punch it down to release the air. Divide the dough into two equal portions. Roll each portion into a long rope and then shape it into a ring, pinching the ends together securely. Place the rings on a baking sheet lined with parchment paper.
- Second Rise: Cover the shaped rings with a towel and allow them to rise again for about 30-45 minutes until they puff up.
- Preheat the Oven: While the dough is rising, preheat your oven to 350°F (175°C).
- Egg Wash: Beat the remaining egg in a small bowl and brush it over the surface of each ring. Sprinkle coarse sugar on top for added sweetness and texture.
- Bake: Bake in the preheated oven for about 20-25 minutes or until the roscones are golden brown and sound hollow when tapped on the bottom.
- Cool and Serve: Remove from the oven and let them cool on a wire rack. Serve warm or at room temperature with your favorite hot beverage.
Extra Tips
When making Vanilla Bean Roscone, make certain that your ingredients are at room temperature for better incorporation and texture. If you want an extra touch of flavor, consider adding a bit of orange or lemon zest to the dough.
For a festive look, you can decorate the roscones with candied fruits or nuts on top before baking. Enjoy experimenting with this recipe and feel free to adapt it to your taste preferences!
Pumpkin Spice Roscone

Pumpkin Spice Roscones are a delightful twist on the traditional Colombian Roscone, which is typically enjoyed during the holiday season. This version incorporates the warm, inviting flavors of pumpkin spice, making it perfect for autumn gatherings or any cozy occasion. The combination of tender dough, aromatic spices, and a hint of sweetness creates a delicious pastry that will leave everyone wanting more.
This recipe isn’t only simple to follow but also brings a touch of seasonal charm to your table. As you prepare to make these Pumpkin Spice Roscones, consider the joy of sharing this treat with loved ones. Whether served for breakfast, dessert, or as a snack with coffee, these delightful pastries are sure to be a hit.
The fluffy, slightly sweet, and spiced dough pairs beautifully with a warm cup of tea or coffee, offering a comforting experience that can be enjoyed any time of day.
Ingredients (Serves 4-6)
- 3 cups all-purpose flour
- 1/2 cup pumpkin puree
- 1/2 cup sugar
- 1/4 cup unsalted butter, softened
- 2 large eggs
- 1/2 cup milk
- 1 tablespoon baking powder
- 1 teaspoon pumpkin spice
- 1/2 teaspoon salt
- 1 teaspoon vanilla extract
- 1 egg (for egg wash)
- Optional: powdered sugar for dusting
Cooking Instructions
- Preheat the Oven: Begin by preheating your oven to 375°F (190°C) to guarantee it’s hot and ready for baking the Roscones. This step is essential as it helps in achieving a nice golden color on the pastries.
- Mix Dry Ingredients: In a large mixing bowl, combine the all-purpose flour, baking powder, pumpkin spice, and salt. Whisk these dry ingredients together until they’re evenly mixed. This helps distribute the leavening agent and spices throughout the flour, making sure every bite is flavorful.
- Combine Wet Ingredients: In another bowl, whisk together the pumpkin puree, sugar, softened butter, eggs, milk, and vanilla extract until the mixture is smooth and well combined. The butter should be softened to make it easier to mix, which will lead to a better texture in the final product.
- Combine Mixtures: Gradually fold the wet ingredients into the dry ingredients using a spatula or wooden spoon. Mix until just combined; be careful not to overwork the dough, as this can lead to tough Roscones. The dough should be slightly sticky but manageable.
- Shape the Roscones: Lightly flour a clean surface and turn the dough out onto it. Gently knead the dough a few times until it comes together, then shape it into a round disc about 1-inch thick. Using a round cutter or a glass, cut out circles from the dough. You can also use a smaller cutter to make a hole in the center for a classic Roscone shape.
- Prepare for Baking: Place the shaped Roscones on a baking sheet lined with parchment paper. In a small bowl, beat the additional egg and brush it over the tops of the Roscones to give them a beautiful golden finish when baked.
- Bake: Place the baking sheet in the preheated oven and bake for about 20-25 minutes, or until the Roscones are golden brown and cooked through. You can check for doneness by inserting a toothpick into the center; it should come out clean.
- Cool and Serve: Once baked, remove the Roscones from the oven and allow them to cool on a wire rack for a few minutes. Dust with powdered sugar if desired before serving, and enjoy them warm or at room temperature.
Extra Tips
When making Pumpkin Spice Roscones, make sure that your ingredients are at room temperature for better mixing and a smoother dough. You can also experiment with additional spices, such as nutmeg or allspice, to enhance the flavor.
If you have leftover Roscones, store them in an airtight container to maintain their freshness, and reheat them in the oven for a few minutes before serving to restore their warmth and softness. Enjoy your baking adventure!
Berry Medley Roscone

The Berry Medley Roscone is a delightful twist on the traditional Colombian Roscone, perfect for any festive occasion or as a sweet treat to enjoy with family and friends. This recipe combines the rich, fluffy texture of the classic roscone with a vibrant mix of berries, creating a visually stunning and delicious dessert that’s sure to impress.
The combination of fresh berries adds a burst of flavor and a touch of elegance, making it a wonderful centerpiece for brunches or holiday gatherings. Making a Berry Medley Roscone isn’t only a rewarding culinary experience but also a chance to get creative with your presentation.
The dough is lightly flavored with citrus zest and sweetened to perfection, while the berry topping provides a revitalizing contrast. Whether you choose strawberries, blueberries, or raspberries, the medley of colors and tastes will make this dish a favorite among both adults and children alike. Follow the instructions carefully to guarantee your roscone turns out fluffy and delicious!
Ingredients (Serves 4-6):
- 500g all-purpose flour
- 100g granulated sugar
- 10g salt
- 10g instant yeast
- 3 large eggs
- 200ml whole milk
- 100g unsalted butter, softened
- Zest of 1 lemon
- Zest of 1 orange
- 200g mixed fresh berries (strawberries, blueberries, raspberries)
- 50g powdered sugar (for dusting)
- 1 egg (for egg wash)
Cooking Instructions:
- Prepare the Dough: In a large mixing bowl, combine the all-purpose flour, granulated sugar, salt, and instant yeast. Mix well to guarantee even distribution of the dry ingredients. In a separate bowl, whisk together the eggs, whole milk, lemon zest, and orange zest. Gradually add the wet mixture to the dry ingredients and mix until a dough starts to form.
- Knead the Dough: Transfer the dough onto a lightly floured surface and knead for about 10 minutes until it becomes smooth and elastic. If the dough is too sticky, add a little more flour as needed. Kneading is essential to develop the gluten, which will give the roscone its fluffy texture.
- Incorporate Butter: Once the dough is smooth, incorporate the softened butter into the dough. Knead for an additional 5 minutes until the butter is fully absorbed and the dough is glossy and elastic.
- First Rise: Place the dough in a lightly greased bowl, cover it with a damp cloth or plastic wrap, and let it rise in a warm place for about 1-2 hours, or until doubled in size. This step is vital for achieving the light and airy texture of the roscone.
- Shape the Roscone: After the dough has risen, punch it down to release the air. Shape the dough into a large ring, ensuring that the center has an opening. Place the shaped dough on a baking sheet lined with parchment paper.
- Second Rise: Cover the shaped dough with a damp cloth and let it rise again for another 30-45 minutes until it puffs up slightly. This final rise will help create a light and fluffy texture once baked.
- Prepare for Baking: Preheat your oven to 180°C (350°F). In a small bowl, beat the remaining egg and brush it over the roscone for a golden finish.
- Bake the Roscone: Bake the roscone in the preheated oven for about 25-30 minutes or until golden brown and cooked through. You can check for doneness by tapping the bottom of the bread; it should sound hollow.
- Cool and Assemble: Once baked, remove the roscone from the oven and let it cool on a wire rack. Once cooled, top it with the mixed fresh berries and dust with powdered sugar for a beautiful presentation.
Extra Tips:
For the best results, guarantee that all your ingredients are at room temperature before you start. This helps in achieving a better rise and texture for your roscone.
You can also experiment with different types of berries or even add a touch of vanilla extract to the dough for an extra layer of flavor. If you want to prepare the dough in advance, you can refrigerate the shaped roscone overnight and bake it fresh in the morning for a delicious breakfast treat!
Matcha Green Tea Roscone

Matcha Green Tea Roscone is a delightful twist on the traditional Colombian Roscone, infusing the classic sweet bread with the vibrant flavors of matcha green tea. This unique recipe marries the rich, earthy taste of matcha with the soft, fluffy texture of the roscone, making it a perfect treat for breakfast or dessert.
The beautiful green hue not only makes it visually appealing but also adds a hint of healthiness to your indulgence. The result is a deliciously fragrant bread that can be enjoyed plain, with butter, or adorned with your favorite toppings such as fruit or cream.
Creating Matcha Green Tea Roscone is a great way to experiment with flavors while still keeping the essence of a beloved Colombian dish. As you gather your ingredients, you’ll notice the blend of traditional and modern elements that make this recipe stand out.
Whether you’re a fan of matcha or just looking to try something new, this roscone will impress your family and friends with its unique taste and beautiful presentation.
Ingredients (serving size: 4-6 people)
- 3 cups all-purpose flour
- 1/4 cup granulated sugar
- 1 tablespoon matcha green tea powder
- 1 packet (2 1/4 teaspoons) active dry yeast
- 1/2 teaspoon salt
- 1/2 cup whole milk, warmed
- 1/4 cup unsalted butter, melted
- 2 large eggs
- 1 teaspoon vanilla extract
- 1 egg (for egg wash)
- Powdered sugar (for dusting, optional)
Cooking Instructions
- Prepare the Yeast Mixture: In a small bowl, combine the warm milk and active dry yeast. Let it sit for about 5-10 minutes until it becomes frothy. This step activates the yeast, which is vital for the dough to rise.
- Mix the Dry Ingredients: In a large mixing bowl, whisk together the all-purpose flour, granulated sugar, matcha green tea powder, and salt. This guarantees that the matcha is evenly distributed throughout the flour, giving your roscone a consistent flavor.
- Combine Wet Ingredients: In another bowl, whisk together the melted butter, eggs, and vanilla extract. Once the yeast mixture is ready, add it to the wet ingredients and mix until well combined.
- Form the Dough: Gradually add the wet mixture to the dry ingredients, stirring with a wooden spoon until a dough begins to form. Once the dough is too difficult to mix, use your hands to knead it gently in the bowl.
- Knead the Dough: Transfer the dough onto a lightly floured surface and knead for about 5-7 minutes until it becomes smooth and elastic. This process helps develop the gluten, which is essential for the texture of the roscone.
- First Rise: Place the kneaded dough into a lightly greased bowl and cover it with a clean kitchen towel. Let it rise in a warm place for about 1 hour or until it has doubled in size.
- Shape the Roscone: Once risen, punch down the dough to release the air. Shape it into a round disk about 1 inch thick, then use a sharp knife to cut a cross in the center, creating a ring.
- Second Rise: Transfer the shaped dough onto a baking sheet lined with parchment paper. Cover it again with the kitchen towel and let it rise for another 30-45 minutes.
- Prepare for Baking: Preheat your oven to 350°F (175°C). Beat the additional egg and brush it over the top of the risen dough for a beautiful golden color when baked.
- Bake the Roscone: Bake in the preheated oven for about 25-30 minutes, or until the roscone is golden brown and sounds hollow when tapped on the bottom.
- Cool and Serve: Allow the roscone to cool on a wire rack before dusting it with powdered sugar if desired. Slice and serve with butter, fruit, or your favorite spread.
Extra Tips
When making Matcha Green Tea Roscone, be sure to use high-quality matcha for the best flavor and color. If you’re new to working with yeast, take care to verify your milk isn’t too hot, as it can kill the yeast.
Additionally, you can experiment with adding ingredients like chocolate chips or nuts for added texture and flavor. Finally, serving the roscone fresh is ideal, but it can be stored in an airtight container for a couple of days, maintaining its soft texture. Enjoy your baking adventure!