

Lunch should be anything but boring, right?
Brazilian cuisine is all about vibrant flavors and fun twists, making it perfect for spicing up our midday meals.
From the comforting Feijoada to the cheesy goodness of Pão de Queijo, each dish has its own unique story to tell.
If you’re ready to add some excitement to your lunch routine, I’ve got 12 irresistible recipes that are sure to keep things fresh and delicious.
Let’s explore these tasty options together!
Feijoada: A Hearty Black Bean Stew
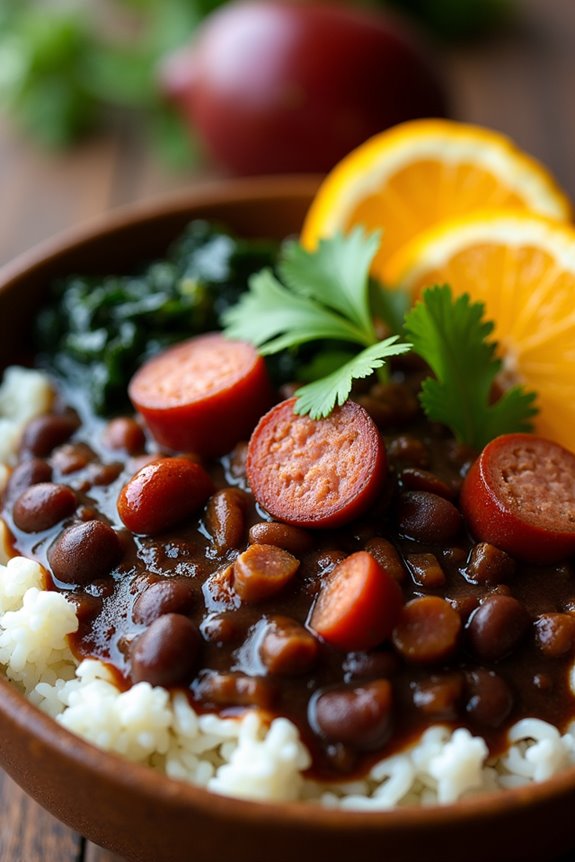
Feijoada is a traditional Brazilian dish that embodies the heart and soul of Brazilian cuisine. This robust black bean stew is typically made with a variety of meats and is often served with rice, collard greens, and orange slices.
Originating from the Portuguese settlers, it was adapted by African slaves who added their unique flavors and ingredients, resulting in a dish that has become a national favorite. Feijoada is perfect for gatherings and celebrations, bringing friends and family together over a warm, comforting meal.
The preparation of Feijoada may take some time, but the process is worth the effort for the rich, savory flavors that develop as it simmers. The slow-cooked black beans meld beautifully with a selection of meats, creating a hearty stew that’s both filling and satisfying.
Traditionally, the dish is served with farofa (toasted cassava flour) and spicy sauce, adding another layer of texture and flavor to the meal.
Ingredients (Serves 4-6):
- 1 pound black beans, soaked overnight
- 1 tablespoon olive oil
- 1 onion, chopped
- 4 cloves garlic, minced
- 1 pound pork shoulder, cut into cubes
- 1/2 pound chorizo sausage, sliced
- 1/2 pound smoked sausage, sliced
- 1/2 pound beef brisket, cut into cubes
- 2 bay leaves
- 1 teaspoon black pepper
- 1 teaspoon paprika
- 1 teaspoon cumin
- Salt to taste
- 4 cups chicken broth
- 2 oranges, cut into wedges (for serving)
- Fresh cilantro, chopped (for garnish)
- Cooked white rice (for serving)
- Collard greens, sautéed (for serving)
Cooking Instructions:
- Prepare the Beans: After soaking the black beans overnight, drain and rinse them. This will help remove any excess sodium and impurities. Set them aside as you prepare the rest of the ingredients.
- Sauté Aromatics: In a large, heavy-bottomed pot or Dutch oven, heat the olive oil over medium heat. Add the chopped onion and sauté for about 5 minutes until it becomes translucent. Stir in the minced garlic and cook for an additional minute until fragrant.
- Brown the Meats: Add the pork shoulder, beef brisket, chorizo, and smoked sausage to the pot. Cook for about 8-10 minutes, browning the meats on all sides for added flavor. This step is essential as it enhances the overall taste of the Feijoada.
- Combine Ingredients: Once the meats are browned, add the soaked black beans, bay leaves, black pepper, paprika, cumin, and salt to the pot. Stir everything together to guarantee the spices evenly coat the ingredients.
- Add Broth: Pour in the chicken broth, ensuring that all the ingredients are submerged. Bring the mixture to a boil, then reduce the heat to low. Cover the pot and let it simmer for about 2 to 3 hours, stirring occasionally, until the beans are tender and the meats are falling apart.
- Adjust Seasoning: After the cooking time has elapsed, taste the stew and adjust the seasoning with more salt and pepper if needed. Remove the bay leaves before serving.
- Serve: Ladle the Feijoada into bowls and serve it hot, garnished with chopped cilantro. Accompany the dish with white rice, sautéed collard greens, and orange wedges on the side.
Extra Tips: When making Feijoada, feel free to customize the types of meat you use based on your preference or availability. Some recipes include additional meats like bacon or smoked ribs.
Additionally, the dish can be made a day in advance; in fact, it often tastes even better the next day as the flavors continue to meld. Just reheat it gently before serving. Enjoy the experience of Feijoada as a communal dish, inviting friends and family to share in the rich flavors and cultural heritage of Brazil!
Pão De Queijo: Cheesy Bread Rolls

Pão de Queijo, or Brazilian cheese bread, is a delightful snack that hails from the state of Minas Gerais in Brazil. These small, fluffy rolls are made with tapioca flour, which gives them a unique texture that’s both chewy and airy. The addition of cheese, typically a soft cheese such as Minas cheese or Parmesan, provides a rich and savory flavor that makes them irresistible.
Pão de Queijo is often enjoyed as a snack or appetizer, perfect for gatherings or simply as a treat for yourself. The beauty of Pão de Queijo lies in its simplicity and the ease with which it can be prepared. This recipe allows you to whip up a batch of these cheesy delights in no time, making them a fantastic option for lunch or anytime you crave a taste of Brazil.
Whether paired with a cup of coffee or served alongside a savory meal, these cheesy bread rolls are sure to become a favorite in your home.
Ingredients (Serves 4-6)
- 1 cup of tapioca flour
- 1/2 cup of milk
- 1/4 cup of vegetable oil
- 1 teaspoon of salt
- 1 cup of grated cheese (such as Parmesan or Minas cheese)
- 2 large eggs
- 1/2 teaspoon of baking powder
Cooking Instructions
- Preheat the Oven: Begin by preheating your oven to 375°F (190°C). This guarantees that your Pão de Queijo will bake evenly and achieve that perfect golden-brown color.
- Combine Wet Ingredients: In a medium saucepan, combine the milk, vegetable oil, and salt. Heat the mixture over medium heat until it comes to a gentle boil. This step is vital as it helps to hydrate the tapioca flour properly.
- Combine Dry Ingredients: In a large mixing bowl, place the tapioca flour. Once the milk mixture has boiled, pour it over the tapioca flour. Stir well with a wooden spoon until the mixture is smooth and combined, which will create a thick, doughy consistency.
- Incorporate Cheese and Eggs: Allow the mixture to cool for a few minutes, then add the grated cheese and eggs to the dough. Mix well until everything is fully incorporated. The dough should be slightly sticky but manageable.
- Add Baking Powder: Sprinkle the baking powder into the dough and mix until evenly distributed. This will help the rolls rise and become fluffy when baked.
- Shape the Dough: Using your hands, form small balls of dough (about 1 inch in diameter). Place them on a baking sheet lined with parchment paper, spacing them about 1 inch apart to allow for expansion.
- Bake the Rolls: Place the baking sheet in the preheated oven and bake for about 20-25 minutes or until the rolls are puffed and lightly golden on top.
- Cool and Serve: Once baked, remove the Pão de Queijo from the oven and let them cool slightly before serving. Enjoy them warm for the best flavor and texture.
Extra Tips
For an even richer flavor, you can experiment with different types of cheese or add herbs and spices such as garlic powder or rosemary to the dough. Additionally, if you find the dough too sticky, wet your hands slightly while forming the balls for easier handling.
Pão de Queijo is best enjoyed fresh but can also be frozen before baking; just bake them straight from the freezer, adding a few extra minutes to the baking time.
Moqueca: Brazilian Fish Stew
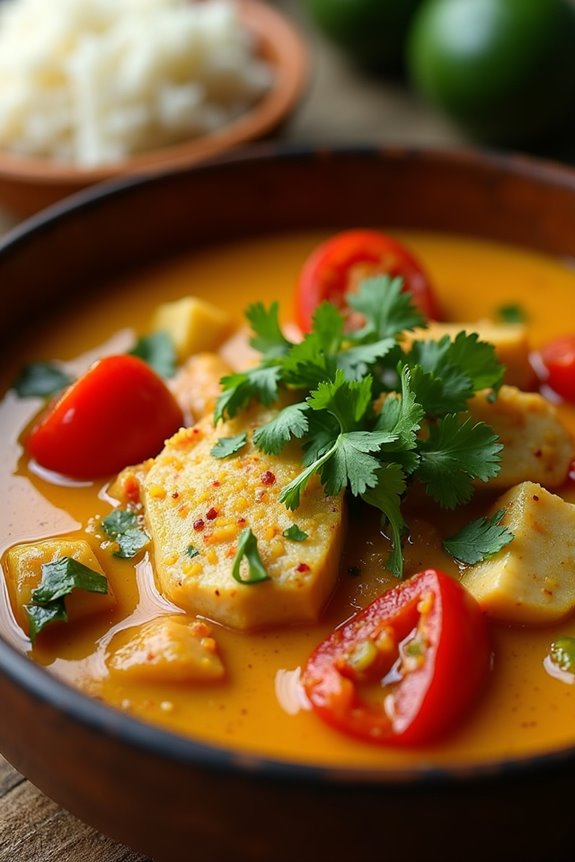
Moqueca is a traditional Brazilian fish stew that hails from the coastal regions of Bahia and Espírito Santo. This vibrant dish is celebrated for its rich flavors, combining fresh fish with aromatic spices, coconut milk, and a colorful array of vegetables. The stew is typically served with fluffy white rice and farofa, a toasted cassava flour mixture that adds a delightful crunch.
Whether you’re hosting a festive gathering or simply looking to spice up your weeknight dinner, Moqueca is sure to impress with its tropical flair and hearty ingredients.
The secret to a great Moqueca lies in its marinated fish and the layering of flavors. Using fresh, firm white fish like snapper or cod is ideal, as it holds up well during cooking and absorbs the delicious seasonings. In Bahia, palm oil is often used, which lends a distinctive taste and color to the stew. However, if you prefer a lighter version, you can substitute it with olive oil.
This dish not only showcases the diversity of Brazilian cuisine but also offers a comforting, satisfying meal perfect for sharing with family and friends.
Ingredients (serves 4-6):
- 2 lbs of firm white fish fillets (such as snapper, cod, or tilapia)
- 2 limes, juiced
- 4 cloves of garlic, minced
- 1 medium onion, chopped
- 1 red bell pepper, sliced
- 1 green bell pepper, sliced
- 1 can (14 oz) of coconut milk
- 3 tablespoons of palm oil (or olive oil)
- 1 cup of diced tomatoes (fresh or canned)
- 1 tablespoon of paprika
- 1 teaspoon of cayenne pepper (adjust to taste)
- Salt and black pepper, to taste
- Fresh cilantro, chopped (for garnish)
- Cooked white rice (for serving)
- Farofa (toasted cassava flour) (for serving)
Cooking Instructions:
- Marinate the Fish: In a large bowl, combine the fish fillets, lime juice, minced garlic, paprika, salt, and black pepper. Gently toss to coat the fish evenly. Cover the bowl and let it marinate in the refrigerator for at least 30 minutes to allow the flavors to meld.
- Sauté the Vegetables: In a large, deep skillet or Dutch oven, heat the palm oil over medium heat. Once hot, add the chopped onion and sauté for about 3-4 minutes, or until it becomes translucent. Then, add the sliced red and green bell peppers, cooking for an additional 5 minutes until they soften.
- Add Tomatoes and Coconut Milk: Stir in the diced tomatoes and cook for another 2 minutes. Then, pour in the coconut milk, stirring to combine all the ingredients. Bring the mixture to a gentle simmer.
- Cook the Fish: Carefully place the marinated fish fillets into the coconut milk mixture, ensuring they’re submerged. Cover the skillet and let it cook on low heat for about 15-20 minutes, or until the fish is cooked through and flakes easily with a fork.
- Finish and Serve: Once the fish is cooked, taste the stew and adjust the seasoning with more salt, black pepper, or cayenne if desired. Remove from heat and garnish with fresh chopped cilantro. Serve the Moqueca hot over cooked white rice, along with a side of farofa for added texture.
Extra Tips:
For an extra layer of flavor, consider adding a few chopped fresh herbs like parsley or green onions along with the cilantro as a garnish. Additionally, you can include other seafood such as shrimp or squid for a mixed seafood version of Moqueca.
If you enjoy a bit of spice, feel free to increase the amount of cayenne or even add some chopped fresh chili peppers to the stew. Ultimately, this dish is best enjoyed fresh but can be stored in the refrigerator for up to 2 days, making it a great option for meal prep!
Coxinha: Chicken Croquettes

Coxinha is a beloved Brazilian snack that has been enjoyed for generations. These delicious chicken croquettes are made with shredded chicken enveloped in a creamy dough, shaped like little teardrops, and then deep-fried to golden perfection. They’re often served at parties, family gatherings, and as a tasty street food option, capturing the hearts and taste buds of everyone who tries them.
Making coxinha may seem intimidating at first, but with the right ingredients and steps, you’ll be able to create this iconic dish in your own kitchen.
The key to a successful coxinha lies in the flavorful filling and the smooth dough. Typically, the chicken filling is seasoned with onions, garlic, and spices, providing a savory taste that pairs beautifully with the crispy exterior. Once you master the technique of shaping the coxinhas, you can experiment with various fillings, such as cheese or vegetables, to suit your preferences. The end result is a crispy and delectable treat that’s sure to impress your family and friends.
Ingredients (Serves 4-6)
- 2 cups cooked shredded chicken
- 1 medium onion, finely chopped
- 2 cloves garlic, minced
- 1 tablespoon olive oil
- 1 cup chicken broth
- 2 cups all-purpose flour
- 1 cup milk
- 1 large egg
- 1 teaspoon salt
- ½ teaspoon black pepper
- ½ teaspoon paprika
- 1 cup breadcrumbs
- Oil for frying
Cooking Instructions
1. Prepare the Chicken Filling: In a medium skillet, heat the olive oil over medium heat. Add the chopped onion and minced garlic, sautéing until the onion becomes translucent (about 3-4 minutes).
Stir in the shredded chicken, chicken broth, salt, black pepper, and paprika, cooking for an additional 5-7 minutes until the mixture is well combined and the liquid is mostly evaporated. Remove from heat and let it cool.
2. Make the Dough: In a large saucepan, combine the milk and chicken broth, bringing it to a gentle boil. Gradually add the flour, stirring continuously with a wooden spoon until the dough begins to pull away from the sides of the pan and forms a ball.
Remove the dough from the heat and let it cool slightly.
3. Shape the Coxinhas: Once the dough is cool enough to handle, divide it into small balls (about the size of a golf ball). Flatten each ball in your hand, place a spoonful of the chicken filling in the center, and then carefully fold the edges over the filling, pinching to seal and shape it into a teardrop form.
Repeat this process until all the dough and filling are used.
4. Bread the Coxinhas: Set up a breading station with one bowl containing beaten egg and another with breadcrumbs. Dip each shaped coxinha first into the egg, allowing any excess to drip off, and then coat it with breadcrumbs, pressing gently to adhere.
Place the breaded coxinhas on a plate.
5. Fry the Coxinhas: In a deep skillet or frying pan, heat enough oil over medium-high heat for frying (about 2-3 inches deep). Once the oil is hot, carefully add the coxinhas in batches, frying until they’re golden brown and crispy (approximately 3-4 minutes per side).
Use a slotted spoon to remove them and place them on a plate lined with paper towels to drain excess oil.
Extra Tips
When making coxinhas, verify that the dough isn’t too sticky by adding flour gradually.
It’s also important to let the filling cool down before assembling to prevent the dough from becoming too soft. For an extra touch of flavor, consider adding spices or herbs to the chicken filling.
If you’re looking for a healthier option, try baking the coxinhas instead of frying them; just spray them lightly with cooking oil before placing them in the oven.
Enjoy your homemade coxinhas with a side of spicy sauce or your favorite dipping sauce!
Farofa: Toasted Cassava Flour Mixture
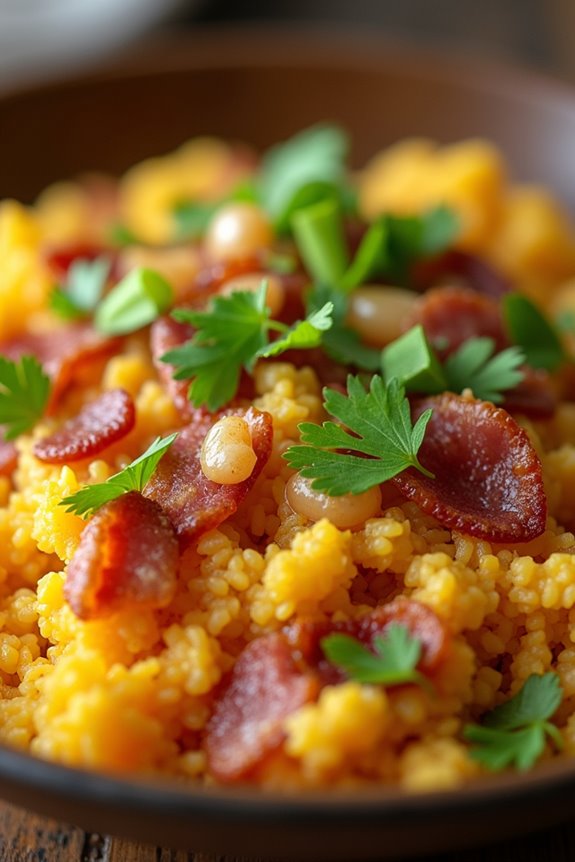
Farofa is a traditional Brazilian dish made from toasted cassava flour, which serves as a flavorful side that complements a variety of meals, particularly grilled meats and feijoada. Its texture is slightly crunchy, and it can be customized with various ingredients such as onions, garlic, bacon, and herbs.
This simple yet versatile dish can elevate any lunch or dinner, providing both taste and a unique texture that enhances the overall meal experience.
Making farofa is a straightforward process that requires only a few ingredients but offers a delightful depth of flavor. The key to a great farofa lies in the toasting of the cassava flour, which brings out its nutty aroma.
This dish isn’t only easy to prepare but also a wonderful opportunity to explore Brazilian cuisine at home.
Ingredients (Serves 4-6)
- 2 cups cassava flour
- 4 tablespoons unsalted butter
- 1 medium onion, finely chopped
- 2 cloves garlic, minced
- 1 cup cooked bacon, chopped (optional)
- 1/2 cup chopped green onions
- 1/2 cup chopped parsley
- Salt and pepper to taste
Cooking Instructions
- Prepare the Ingredients: Start by gathering all your ingredients and chopping the onion, garlic, bacon, and herbs. This will make the cooking process smoother and quicker.
- Cook the Bacon (if using): In a large skillet over medium heat, add the chopped bacon. Fry until crispy, about 5-7 minutes. Remove the bacon from the skillet and set aside, leaving the rendered fat in the pan.
- Sauté the Aromatics: In the same skillet with the bacon fat, add the butter. Once melted, add the chopped onion and sauté until translucent, about 3-4 minutes. Then, add the minced garlic and cook for an additional 1-2 minutes, being careful not to burn the garlic.
- Toast the Cassava Flour: Gradually add the cassava flour to the skillet, stirring continuously to guarantee it toasts evenly. Continue to cook for about 5-7 minutes until the flour turns a light golden brown and develops a nutty aroma.
- Combine Ingredients: Stir in the cooked bacon (if using), green onions, and parsley. Mix everything well and season with salt and pepper to taste. Cook for an additional 2-3 minutes, allowing the flavors to meld.
- Serve: Remove the skillet from heat and transfer the farofa to a serving bowl. It can be served warm or at room temperature alongside your favorite Brazilian dishes.
Extra Tips
When making farofa, feel free to experiment with additional ingredients to suit your taste preferences. Some variations include adding sautéed vegetables, like bell peppers or carrots, or even nuts for added crunch.
Keep an eye on the cassava flour while toasting, as it can burn quickly if not stirred frequently. For a more intense flavor, consider using bacon grease or adding spices such as smoked paprika or cumin to the mixture.
Farofa can be stored in an airtight container for a few days, making it a great make-ahead side dish.
Vatapá: Creamy Shrimp Dish
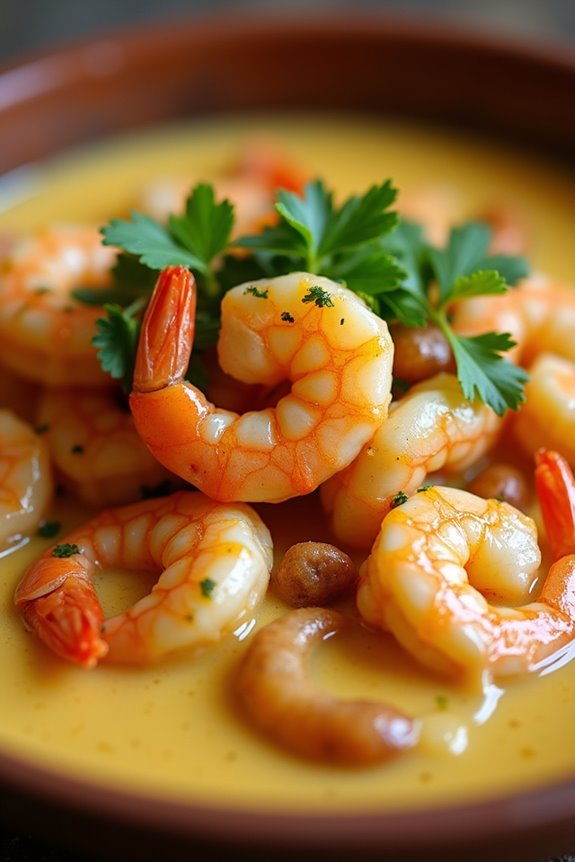
Vatapá is a traditional Brazilian dish that showcases the rich culinary influences of African, Portuguese, and indigenous Brazilian flavors. This creamy shrimp dish is a staple in Bahian cuisine, known for its vibrant blend of spices, coconut milk, and the unique texture provided by ground nuts and bread. With its savory and slightly spicy profile, Vatapá is perfect for serving at family gatherings or special occasions, allowing you to share a taste of Brazil with your loved ones.
The dish isn’t only delicious but also visually appealing, with its golden hue and fragrant aroma drawing people in. The combination of shrimp, peanuts, and dendê oil (palm oil) creates an indulgent sauce that pairs wonderfully with white rice or farofa (toasted cassava flour). Making Vatapá may seem intimidating at first, but with a little preparation and the right ingredients, you can create a mouthwatering meal that will impress everyone at the table.
Ingredients (serving size: 4-6 people):
- 1 pound shrimp, peeled and deveined
- 1 cup coconut milk
- 1/2 cup peanuts, toasted and ground
- 1/2 cup stale bread, torn into pieces
- 1 medium onion, chopped
- 3 cloves garlic, minced
- 1/2 cup diced tomatoes (fresh or canned)
- 1/4 cup dendê oil (palm oil)
- 1/2 teaspoon cayenne pepper (adjust to taste)
- 1 teaspoon salt
- 1 tablespoon lime juice
- Fresh cilantro for garnish
Cooking Instructions:
- Prepare the Shrimp: Start by cleaning the shrimp thoroughly. Rinse them under cold water and pat them dry with a paper towel. Season the shrimp with salt and lime juice, and set aside to marinate while you prepare the other ingredients.
- Make the Base: In a large skillet, heat the dendê oil over medium heat. Add the chopped onion and sauté until translucent, about 5 minutes. Then, add the minced garlic and cook for an additional 1-2 minutes until fragrant.
- Add Tomatoes and Spices: Stir in the diced tomatoes and cayenne pepper, cooking for another 3-4 minutes until the tomatoes soften. This step will help develop a flavor base for the sauce.
- Blend the Sauce: In a blender or food processor, combine the sautéed mixture with the ground peanuts and stale bread. Pour in the coconut milk and blend until smooth. This will create a creamy texture that’s essential for Vatapá.
- Cook the Shrimp: Return the blended sauce to the skillet and bring it to a gentle simmer over low heat. Add the marinated shrimp and cook for about 5-7 minutes, or until the shrimp are pink and cooked through. Stir occasionally to guarantee even cooking and prevent sticking.
- Adjust Seasoning and Serve: Taste the Vatapá and adjust the salt and cayenne pepper to your preference. Once everything is well combined and heated through, remove from heat. Serve the Vatapá hot, garnished with fresh cilantro, alongside rice or farofa.
Extra Tips:
When preparing Vatapá, using fresh ingredients will enhance the dish’s flavor notably. If you can’t find dendê oil, you can substitute with a blend of olive oil and a little bit of turmeric for color, although the flavor will differ slightly.
Additionally, feel free to modify the heat level by adjusting the amount of cayenne pepper or adding a touch of fresh chili if you enjoy a spicier dish. Finally, letting the dish sit for a few minutes after cooking allows the flavors to meld beautifully, making each bite even more delicious.
Salad With Grilled Chicken and Mango
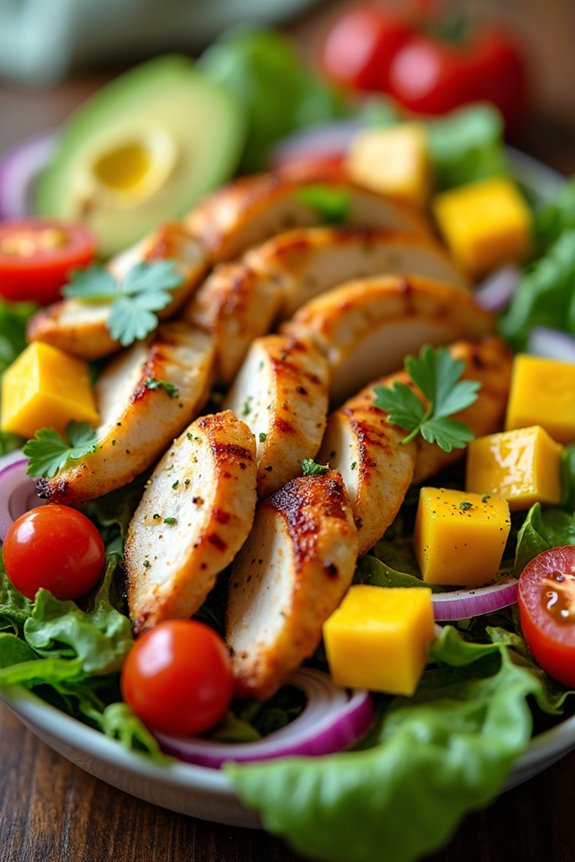
This vibrant Salad with Grilled Chicken and Mango is a delightful and invigorating dish that captures the essence of Brazilian culinary flavors. The combination of tender, marinated chicken grilled to perfection and succulent, sweet mango creates a harmonious balance of savory and sweet notes. Tossed with crisp greens and a zesty dressing, this salad is perfect for a light lunch or as a side dish for a larger meal.
It’s not only delicious but also packed with nutrients, making it a wholesome choice for any occasion. The beauty of this salad lies in its simplicity and versatility. You can easily adapt it by adding your favorite vegetables or swapping the mango for another fruit, depending on what’s in season.
This dish can be prepared ahead of time, making it an excellent option for meal prep or a quick weeknight dinner. Get ready to enjoy a tropical escape on your plate with this Brazilian-inspired salad!
Ingredients (serves 4-6 people):
- 2 boneless, skinless chicken breasts
- 2 ripe mangoes, peeled and diced
- 6 cups mixed salad greens (such as arugula, spinach, or romaine)
- 1 red bell pepper, sliced
- 1 small red onion, thinly sliced
- 1 avocado, diced
- 1/2 cup cherry tomatoes, halved
- 1/4 cup fresh cilantro, chopped
- 1/4 cup olive oil
- 2 tablespoons lime juice
- 1 teaspoon honey
- Salt and pepper to taste
- Optional: Crumbled feta cheese for topping
Cooking Instructions:
- Marinate the Chicken: In a bowl, combine olive oil, lime juice, honey, salt, and pepper to create a marinade. Add the chicken breasts, making sure they’re well coated. Let them marinate for at least 30 minutes (or up to 2 hours) in the refrigerator to enhance the flavor and tenderness.
- Grill the Chicken: Preheat a grill or grill pan over medium-high heat. Remove the chicken from the marinade and place it on the grill. Cook for about 6-7 minutes on each side or until the chicken is cooked through and has nice grill marks. The internal temperature should reach 165°F (75°C). Once cooked, remove from the grill and let it rest for a few minutes before slicing.
- Prepare the Salad Base: While the chicken is grilling, wash and dry the mixed salad greens. In a large bowl, combine the salad greens, sliced red bell pepper, red onion, diced avocado, and cherry tomatoes. Toss gently to mix the ingredients.
- Add the Mango and Chicken: After slicing the grilled chicken, add it to the salad bowl along with the diced mango and chopped cilantro. Toss everything together to combine the flavors.
- Make the Dressing: In a small bowl, whisk together any remaining olive oil, lime juice, and a pinch of salt and pepper. Drizzle the dressing over the salad and toss lightly to coat all ingredients evenly.
- Serve: Transfer the salad to a serving platter or individual plates. If desired, sprinkle crumbled feta cheese on top for an extra burst of flavor. Enjoy your Salad with Grilled Chicken and Mango while fresh!
Extra Tips: When grilling the chicken, make sure your grill is properly preheated to achieve nice grill marks and avoid sticking. If you’re short on time, you can use store-bought rotisserie chicken as a convenient alternative.
Additionally, feel free to customize the salad with seasonal vegetables or nuts for added crunch. The salad can also be made ahead of time; just keep the dressing separate until you’re ready to serve to keep the greens crisp!
Acarajé: Black-Eyed Pea Fritters

Acarajé is a traditional Brazilian street food that hails from the state of Bahia, where it’s deeply rooted in Afro-Brazilian culture. These delightful fritters are made primarily from black-eyed peas, which are soaked, ground, and then deep-fried to a golden crisp.
Acarajé is typically served with a spicy paste made from shrimp and peppers, providing an explosion of flavors that can tantalize anyone’s taste buds. It’s often accompanied by a revitalizing salad or topped with a variety of fillings, making it a versatile dish perfect for lunch or a snack.
Making Acarajé at home may seem intimidating at first, but with the right ingredients and a little patience, you can create this delicious treat that will transport your taste buds straight to Brazil. This recipe serves 4-6 people, so gather your friends or family and enjoy an authentic Brazilian culinary experience together.
Ingredients:
- 2 cups black-eyed peas, dried
- 1 medium onion, finely chopped
- 1 teaspoon salt
- 1/2 teaspoon cayenne pepper (adjust to taste)
- 1/4 teaspoon black pepper
- 1/2 teaspoon garlic powder
- 1/4 cup palm oil (or vegetable oil for frying)
- 1 cup cooked shrimp, peeled and deveined
- 2 tablespoons dende oil (palm oil)
- 1 teaspoon chili powder
- 1/2 cup chopped fresh cilantro
- 1/2 cup diced tomatoes
- 1/2 cup diced cucumber
- Lime wedges, for serving
Cooking Instructions:
- Prepare the Black-Eyed Peas: Rinse the black-eyed peas thoroughly and then soak them in water for at least 8 hours or overnight. This will soften the peas and make them easier to grind.
- Make the Acarajé Batter: After soaking, drain the black-eyed peas and place them in a food processor. Add the chopped onion, salt, cayenne pepper, black pepper, and garlic powder. Blend until you achieve a smooth, thick paste. If necessary, add a small amount of water to help with blending.
- Heat the Oil: In a deep frying pan or pot, heat the palm oil over medium heat until it’s hot but not smoking. You can test the oil’s readiness by dropping a small amount of batter into it; if it sizzles immediately, the oil is ready.
- Fry the Acarajé: Using a spoon, scoop portions of the batter (about the size of a golf ball) and carefully drop them into the hot oil. Fry in batches to avoid overcrowding. Cook each fritter for about 3-4 minutes on one side until golden brown, then gently flip and fry for another 3-4 minutes on the other side. Remove them and place them on a paper towel to drain excess oil.
- Prepare the Shrimp Filling: In a skillet, heat the dende oil over medium heat. Add the cooked shrimp, chili powder, cilantro, diced tomatoes, and cucumber. Sauté for about 5 minutes until everything is well combined and heated through. Set aside.
- Assemble and Serve: To serve, split each Acarajé fritter in half and stuff them with the shrimp filling. Serve with lime wedges on the side for an extra burst of flavor.
Extra Tips: For a truly authentic Acarajé experience, try to find dende oil, which is a key ingredient in many Brazilian dishes. Remember to keep the oil at the right temperature while frying; if it’s too hot, the fritters will burn, and if it’s too cool, they’ll be greasy.
You can also experiment with different fillings such as vatapá (a spicy shrimp paste) or a mix of vegetables for a vegetarian option. Enjoy your homemade Acarajé with friends and family, as they’re best enjoyed fresh and shared!
Quibe: Baked Bulgur and Meat Dish

Quibe, also known as kibbeh, is a traditional Brazilian dish that showcases the rich culinary influences of Middle Eastern cuisine. This baked bulgur and meat dish is made with a combination of finely ground bulgur wheat, minced meat, and a blend of spices, making it a hearty and flavorful meal perfect for lunch.
The dish is typically served with a side of yogurt or a fresh salad, making it a wholesome option for family gatherings or casual get-togethers.
The preparation of quibe involves a few key steps, including soaking the bulgur wheat, mixing in the meat and spices, and baking the mixture until golden brown. This dish not only offers a delightful taste but also presents beautifully when sliced into squares or diamond shapes.
Once you master this recipe, you can easily adjust the spices or add additional ingredients to suit your taste.
Ingredients (Serves 4-6):
- 1 cup bulgur wheat
- 1 lb ground beef (or lamb)
- 1 large onion, finely chopped
- 1/4 cup fresh parsley, chopped
- 1/4 cup fresh mint, chopped
- 2 teaspoons ground cumin
- 1 teaspoon ground cinnamon
- 1/2 teaspoon allspice
- 1/4 teaspoon salt
- 1/4 teaspoon black pepper
- 1/3 cup olive oil (divided)
- 1/4 cup pine nuts (optional)
- 1/2 cup water (if needed)
Cooking Instructions:
1. Soak the Bulgur: Start by rinsing the bulgur wheat under cold water in a fine-mesh strainer. Then, place it in a bowl and cover it with water. Let it soak for about 30 minutes until the bulgur is softened and has absorbed most of the water.
Drain any excess liquid if necessary.
2. Prepare the Meat Mixture: In a large mixing bowl, combine the soaked bulgur, ground beef (or lamb), chopped onion, parsley, mint, cumin, cinnamon, allspice, salt, and black pepper. Mix everything together thoroughly with your hands or a spoon until well combined.
If the mixture feels too dry, you can add a little water to help bind it together.
3. Preheat the Oven: While you prepare the quibe mixture, preheat your oven to 375°F (190°C). This guarantees that the quibe cooks evenly and develops a nice crispy top.
4. Prepare the Baking Dish****: Drizzle a bit of olive oil into a rectangular or square baking dish (about 9×13 inches). Use a brush or your hands to spread the oil evenly across the bottom of the dish.
This will help prevent sticking and add flavor to the quibe.
5. Layer the Mixture: Transfer half of the quibe mixture into the prepared baking dish and press it down firmly to create an even layer. If using pine nuts, sprinkle them evenly over this layer before adding the second half of the mixture on top.
6. Top Layer and Score: Spread the remaining quibe mixture over the first layer, pressing it down gently to compact it. Using a sharp knife, score the surface into diamond or square shapes to make it easier to cut after baking.
Drizzle the remaining olive oil over the top for added flavor and moisture.
7. Bake: Place the baking dish in the preheated oven and bake for about 30-40 minutes, or until the top is lightly golden and crispy. Depending on your oven, you may need to adjust the cooking time slightly.
8. Cool and Serve: Once baked, remove the quibe from the oven and let it cool for about 10 minutes. Cut along the scored lines and serve warm, accompanied by yogurt or a fresh salad.
Extra Tips:
When making quibe, feel free to experiment with different meats or even create a vegetarian version using lentils or mushrooms.
Make sure to let the bulgur soak properly for the best texture, and don’t hesitate to add your favorite spices or herbs to personalize the flavor.
For an extra touch, you can also top the dish with sliced tomatoes or a drizzle of tahini before serving. Enjoy your homemade quibe as a delicious and filling meal!
Bobo De Camarão: Shrimp in Cassava Cream

Bobo De Camarão is a traditional Brazilian dish that beautifully showcases the flavors of the sea combined with the richness of cassava. This dish hails from the northeastern region of Brazil, particularly Bahia, where the blend of African, Portuguese, and indigenous influences creates a unique culinary experience. The creamy texture of the cassava, also known as manioc, pairs perfectly with succulent shrimp and a medley of spices, making it both comforting and flavorful.
Preparing Bobo De Camarão is an enjoyable experience that allows you to immerse yourself in the vibrant flavors of Brazilian cuisine. While it may seem complex at first, the steps are straightforward and lead to a delightful dish that can be enjoyed for lunch or dinner. Serve it with white rice to soak up the creamy sauce, and you’ll have a meal that transports you straight to the beaches of Brazil.
Ingredients (serves 4-6):
- 1 lb (450g) large shrimp, peeled and deveined
- 1 lb (450g) cassava (manioc), peeled and cut into chunks
- 1 medium onion, chopped
- 2 cloves garlic, minced
- 1 bell pepper, chopped (preferably red or yellow)
- 1 can (14 oz) coconut milk
- 1 cup fish or seafood stock
- 2 tablespoons olive oil
- 1 teaspoon paprika
- 1 teaspoon cumin
- Salt and pepper to taste
- 2 tablespoons fresh cilantro, chopped, for garnish
- Lime wedges, for serving
Cooking Instructions:
- Prepare the Cassava: In a large pot, bring salted water to a boil. Add the cassava chunks and cook for about 20-25 minutes, or until tender. Once cooked, drain and let it cool slightly before blending into a smooth cream. If you prefer, you can also mash it manually.
- Sauté the Vegetables: In a large skillet or saucepan, heat the olive oil over medium heat. Add the chopped onion and garlic, sautéing until the onion becomes translucent. This step builds a flavorful base for your dish.
- Cook the Bell Pepper: Add the chopped bell pepper to the skillet and continue to cook for an additional 5 minutes, stirring occasionally. The peppers will soften and add sweetness to the dish.
- Add the Shrimp and Spices: Stir in the shrimp, paprika, and cumin, cooking until the shrimp turn pink, which should take about 3-4 minutes. Be careful not to overcook the shrimp, as they can become rubbery.
- Combine with Coconut Milk and Stock: Pour in the coconut milk and seafood stock, stirring to combine. Bring the mixture to a gentle simmer, allowing the flavors to meld for about 5 minutes.
- Incorporate the Cassava Cream: Gradually add the cassava cream to the skillet, stirring well to combine with the shrimp and sauce. Allow everything to simmer for another 5-10 minutes until heated through and thickened slightly. Season with salt and pepper to taste.
- Serve and Garnish: Remove from heat and serve the Bobo De Camarão hot, garnished with fresh cilantro and lime wedges on the side. Enjoy it with a bowl of white rice.
Extra Tips:
When preparing Bobo De Camarão, be sure to choose fresh, high-quality shrimp for the best flavor. If cassava is difficult to find, you can substitute it with mashed potatoes, although the taste will differ slightly.
Additionally, feel free to adjust the spices according to your preference; a dash of chili powder can add a nice kick if you enjoy heat. Finally, allowing the dish to sit for a few minutes before serving can help enhance the flavors even further. Enjoy your culinary journey into Brazilian cuisine!
Brazilian Rice and Beans
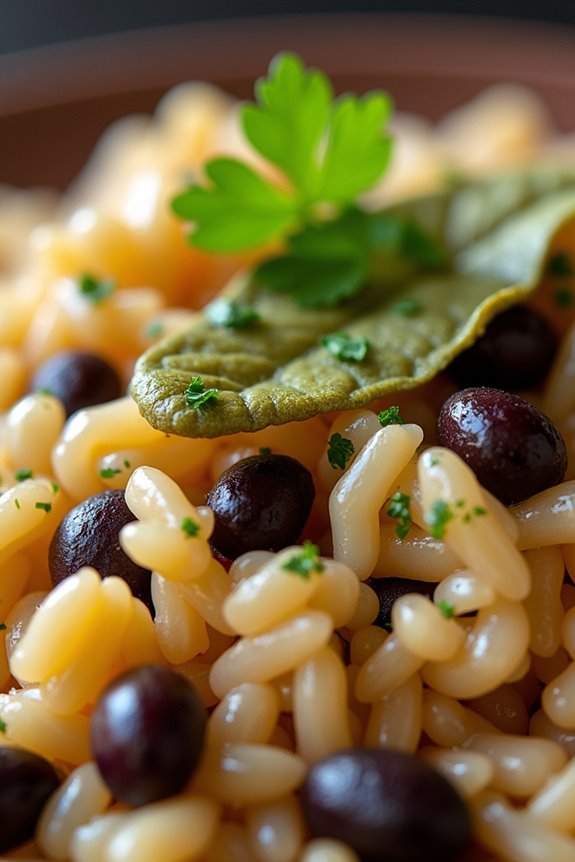
Brazilian Rice and Beans, or “Arroz e Feijão,” is a staple dish in Brazilian cuisine, beloved for its simplicity, heartiness, and comforting flavors. This dish is often served alongside meats or vegetables, making it a versatile choice for any meal.
The combination of rice and beans not only provides a complete protein but also offers a delightful balance of textures and tastes. Whether you’re enjoying it as part of a festive family gathering or a quick weeknight dinner, this classic dish will transport you straight to the vibrant streets of Brazil.
Making Brazilian Rice and Beans involves a few essential ingredients and a straightforward cooking process. The key to achieving that authentic flavor lies in the use of traditional seasonings and cooking techniques. By preparing the rice and beans together, you guarantee that they absorb each other’s flavors, creating a deliciously cohesive meal.
This recipe serves 4-6 people, making it perfect for sharing with family or friends.
Ingredients
- 2 cups of white rice
- 1 can (15 oz) of black beans (or 2 cups cooked black beans)
- 1 medium onion, finely chopped
- 4 cloves of garlic, minced
- 1 tablespoon of olive oil
- 2 cups of vegetable broth or water
- 1 bay leaf
- Salt and pepper to taste
- Fresh cilantro for garnish (optional)
Cooking Instructions
- Rinse the Rice: Place the white rice in a fine mesh strainer and rinse it under cold water until the water runs clear. This step removes excess starch, which helps prevent the rice from becoming gummy during cooking.
- Sauté the Aromatics: In a large pot, heat the olive oil over medium heat. Add the chopped onion and sauté for about 3-4 minutes, or until it becomes translucent. Then, add the minced garlic and sauté for an additional minute until fragrant, being careful not to burn the garlic.
- Combine Rice and Beans: Add the rinsed rice to the pot and stir well to combine with the onion and garlic mixture. Then, add the canned black beans (drained and rinsed) and mix thoroughly, making sure the rice and beans are evenly distributed.
- Add Liquid and Seasoning: Pour in the vegetable broth (or water) and add the bay leaf. Season with salt and pepper to taste. Stir everything together, making sure that the rice is submerged in the liquid.
- Cook the Mixture: Bring the pot to a boil over high heat. Once boiling, reduce the heat to low, cover the pot with a lid, and let the mixture simmer for about 20 minutes, or until the rice is tender and has absorbed most of the liquid. Avoid lifting the lid during cooking, as this can disrupt the steam needed for proper cooking.
- Fluff and Serve: Once the rice is cooked, remove the pot from heat and let it sit, covered, for an additional 5 minutes. Afterward, remove the bay leaf, fluff the rice and beans gently with a fork, and garnish with fresh cilantro if desired. Serve warm as a side dish or a main course.
Extra Tips
For an even more authentic flavor, consider adding smoked sausage or bacon to the sautéed onions and garlic at the beginning of the cooking process.
Additionally, you can experiment with different types of beans, such as pinto or kidney beans, to create your own twist on this classic Brazilian dish. Always make sure to adjust the seasoning to your taste, and feel free to add a squeeze of lime juice before serving for an invigorating zing!
Brigadeiro: Chocolate Truffle Treat

Brigadeiro is a beloved Brazilian chocolate truffle that has become a staple at birthdays and celebrations throughout the country. This sweet treat isn’t only easy to make but also requires just a few simple ingredients, making it a favorite for both kids and adults alike.
The delightful combination of condensed milk, cocoa powder, and butter creates a rich, fudgy texture that melts in your mouth. Coated with chocolate sprinkles, Brigadeiros are as visually appealing as they’re delicious, bringing a touch of joy to any gathering.
Making Brigadeiros is a fun and rewarding experience that can be enjoyed as a family activity. The process involves cooking the ingredients on the stovetop until they reach the right consistency and then rolling them into small balls before coating them with sprinkles.
Whether you’re planning a party or simply craving something sweet, these chocolate truffles will surely satisfy your sweet tooth and impress your guests.
Ingredients (serving size: 4-6 people)
- 1 can (14 ounces) sweetened condensed milk
- 2 tablespoons unsweetened cocoa powder
- 1 tablespoon unsalted butter
- Chocolate sprinkles (to roll the truffles in)
- Additional butter (for greasing your hands)
Cooking Instructions
- Prepare the Mixture: In a medium saucepan, combine the sweetened condensed milk, unsweetened cocoa powder, and 1 tablespoon of unsalted butter. Place the saucepan over medium heat and stir continuously until the mixture is well combined.
- Cook the Mixture: Continue to cook the mixture, stirring constantly, for about 10-15 minutes. You’ll know it’s ready when it thickens, pulls away from the sides of the pan, and forms a mass that holds its shape. The mixture should be slightly glossy.
- Cool the Mixture: Once the mixture is ready, remove it from the heat and transfer it to a greased plate or bowl. Allow it to cool to room temperature. This will make it easier to handle when rolling into balls.
- Shape the Brigadeiros: Once the mixture has cooled, grease your hands with a little butter to prevent sticking. Take small amounts of the mixture and roll them into small balls, about the size of a cherry.
- Coat the Brigadeiros: Pour chocolate sprinkles onto a plate. Roll each ball in the sprinkles until fully coated. Make sure to cover them evenly for that delightful crunch and aesthetic appeal.
- Chill and Serve: Place the finished Brigadeiros in mini paper cups for serving. You can either enjoy them right away or refrigerate them for about 30 minutes to firm up before serving.
Extra Tips
When making Brigadeiros, it’s important to stir continuously to prevent the mixture from burning or sticking to the bottom of the pan.
If you want to get creative, consider experimenting with different coatings such as crushed nuts, coconut flakes, or even colored sprinkles for special occasions. Brigadeiros can also be stored in an airtight container in the refrigerator for up to a week, making them a convenient treat to prepare in advance.
Enjoy your homemade Brigadeiros with family and friends!