

There’s something truly enchanting about the warm, sweet spices in Pao De Mel. These delightful Brazilian treats add a cozy touch to any gathering. From the classic honey and spice version to creative twists like Nutty Pao De Mel and Spiced Pumpkin Pao De Mel, there’s a recipe to suit every taste. Each bite offers a comforting journey through flavors. Curious to explore these scrumptious desserts? Let’s discover the delicious possibilities together!
Classic Pao De Mel With Honey and Spices
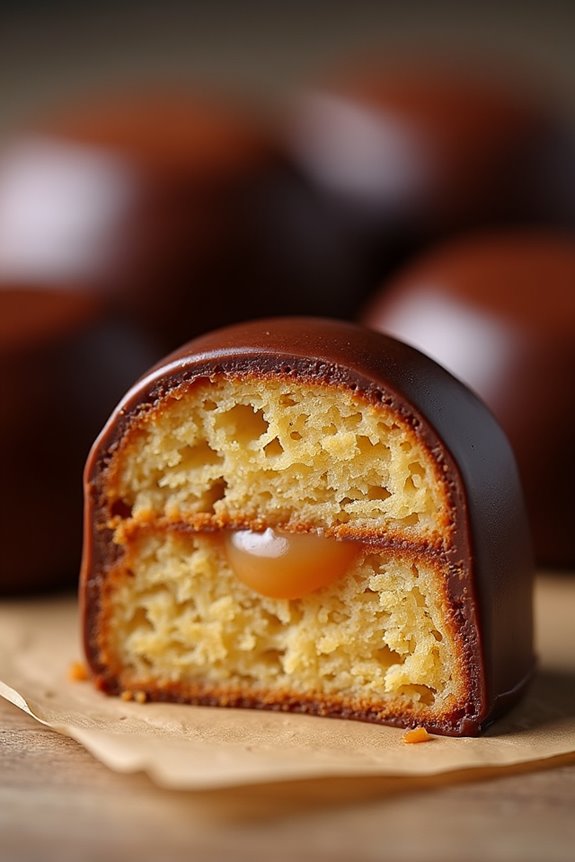
Pao De Mel, or Honey Bread, is a traditional Brazilian dessert that combines the warm flavors of honey and spices into a moist, cake-like treat. This delightful dessert is often filled with dulce de leche and coated in rich chocolate, making it an irresistible treat for any occasion.
The combination of sweet and spicy flavors creates a comforting and aromatic experience that’s perfect for sharing with family and friends.
Making Classic Pao De Mel is relatively simple and requires a few key ingredients that are typically found in most kitchens. The process involves mixing the wet and dry ingredients separately before combining them to create a rich batter. After baking, the individual cakes are cooled and filled, providing a wonderful contrast of flavors and textures.
Enjoy this delectable dessert with a cup of tea or coffee for a delightful afternoon treat.
Ingredients (Serving size: 4-6 people):
- 1 ½ cups all-purpose flour
- 1 teaspoon baking powder
- 1 teaspoon baking soda
- 1 teaspoon ground cinnamon
- ½ teaspoon ground ginger
- ½ teaspoon ground cloves
- ½ teaspoon salt
- ½ cup honey
- ½ cup brown sugar
- 1 large egg
- ½ cup milk
- ½ cup unsalted butter, melted
- 1 teaspoon vanilla extract
- 1 cup dulce de leche (for filling)
- 8 ounces dark chocolate (for coating)
Cooking Instructions:
- Preheat the Oven: Begin by preheating your oven to 350°F (175°C). This guarantees that the Pao De Mel bakes evenly and rises properly.
- Mix Dry Ingredients: In a large mixing bowl, combine the all-purpose flour, baking powder, baking soda, ground cinnamon, ground ginger, ground cloves, and salt. Whisk the dry ingredients together until they’re well combined, guaranteeing even distribution of the spices.
- Combine Wet Ingredients: In another mixing bowl, whisk together the honey, brown sugar, egg, milk, melted butter, and vanilla extract until smooth. This mixture should be homogeneous and creamy, which will help to create a moist cake.
- Combine Wet and Dry Mixtures: Gradually add the wet mixture to the dry ingredients, stirring gently until just combined. Be careful not to overmix, as this can lead to a dense texture in the final product.
- Prepare the Baking Pan: Grease a rectangular baking dish (approximately 9×13 inches) with butter or line it with parchment paper for easy removal later. Pour the batter into the prepared dish and spread it evenly.
- Bake: Place the baking dish in the preheated oven and bake for 30-35 minutes, or until a toothpick inserted in the center comes out clean. Keep an eye on the cake towards the end of the baking time to prevent overbaking.
- Cool the Cake: Once baked, remove the cake from the oven and allow it to cool in the pan for about 10 minutes. Then, transfer it to a wire rack to cool completely.
- Fill with Dulce de Leche: Once the cake is completely cooled, slice it into squares or rectangles. Spread a layer of dulce de leche between two pieces to create sandwiches.
- Chocolate Coating: Melt the dark chocolate in a double boiler or microwave in short bursts, stirring until smooth. Dip each filled Pao De Mel into the melted chocolate, ensuring they’re fully coated. Let any excess chocolate drip off before placing them on a parchment-lined tray to set.
- Let Set and Serve: Allow the chocolate coating to harden completely before serving. Enjoy your Classic Pao De Mel with a warm beverage or as a delightful treat on its own!
Extra Tips: For added flavor, consider sprinkling a pinch of sea salt on top of the chocolate coating before it sets, as this will enhance the sweetness of the honey and the richness of the chocolate.
Additionally, you can experiment with different fillings, such as chocolate ganache or fruit preserves, to give your Pao De Mel a unique twist. When storing, keep them in an airtight container to maintain freshness.
Chocolate-Dipped Pao De Mel
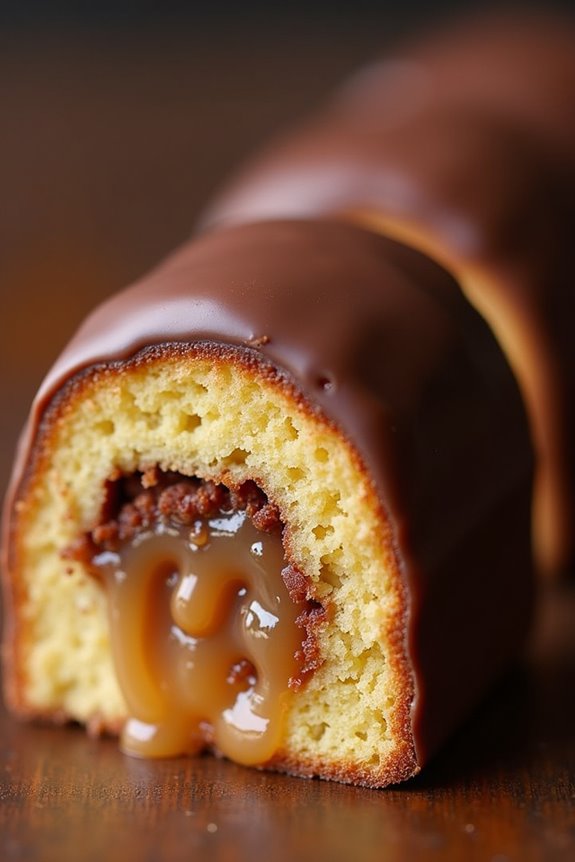
Chocolate-Dipped Pao De Mel is a delightful Brazilian treat that combines the warmth of honey cake with the rich decadence of chocolate. This popular dessert is made from a spiced honey cake filled with dulce de leche and coated in a smooth layer of chocolate. It’s perfect for special occasions or simply to satisfy your sweet cravings. The combination of flavors and textures will leave you wanting more with each bite.
Making Chocolate-Dipped Pao De Mel isn’t only easy but also a fun process that can be enjoyed with family and friends. The recipe allows for creativity, as you can adjust the spices or even the type of chocolate used for dipping. Whether you’re serving them at a party, giving them as gifts, or simply enjoying them with a cup of coffee, these treats are sure to impress everyone.
Ingredients (Serves 4-6)
- 2 cups all-purpose flour
- 1 cup honey
- 1 cup brown sugar
- 1/2 cup milk
- 1/2 cup unsalted butter, softened
- 2 large eggs
- 1 tablespoon baking powder
- 1 teaspoon ground cinnamon
- 1/2 teaspoon ground ginger
- 1/4 teaspoon ground cloves
- 1/4 teaspoon salt
- 1 cup dulce de leche
- 8 ounces semisweet or dark chocolate, chopped
- 1 tablespoon vegetable oil (for melting chocolate)
Cooking Instructions
- Preheat the Oven: Begin by preheating your oven to 350°F (175°C). This guarantees that the Pao De Mel will bake evenly and rise properly once placed in the oven.
- Prepare the Baking Pan: Line a rectangular baking pan (about 9×13 inches) with parchment paper or grease it lightly with butter. This will prevent the cake from sticking and make it easier to remove after baking.
- Mix Dry Ingredients: In a medium bowl, whisk together the all-purpose flour, baking powder, ground cinnamon, ground ginger, ground cloves, and salt. This step guarantees that the spices and leavening agent are evenly distributed throughout the cake.
- Combine Wet Ingredients: In a large mixing bowl, combine the honey, brown sugar, milk, and softened butter. Mix well until the sugar dissolves and the mixture is smooth. Then, add the eggs one at a time, mixing thoroughly after each addition.
- Combine Wet and Dry Ingredients: Gradually add the dry ingredient mixture to the wet mixture, stirring until just combined. Be careful not to overmix, as this can lead to a denser cake.
- Bake the Cake: Pour the batter into the prepared baking pan and spread it evenly. Bake in the preheated oven for about 25-30 minutes, or until a toothpick inserted in the center comes out clean. Allow the cake to cool completely in the pan.
- Cut and Fill: Once cooled, remove the cake from the pan and peel off the parchment paper. Cut it into squares or rectangles. Take a piece of cake and slice it in half horizontally. Spread a generous layer of dulce de leche on the bottom half, then replace the top half.
- Melt the Chocolate: In a microwave-safe bowl, combine the chopped chocolate and vegetable oil. Microwave in 30-second intervals, stirring in between, until the chocolate is completely melted and smooth.
- Dip the Pao De Mel: Carefully dip each filled cake into the melted chocolate, ensuring it’s fully coated. Allow any excess chocolate to drip off before placing the dipped cakes on a wire rack or parchment paper to set.
- Let Set: Allow the chocolate to set completely at room temperature, or you can speed up the process by placing them in the refrigerator for about 15-20 minutes.
Extra Tips
When making Chocolate-Dipped Pao De Mel, consider letting the filled cakes sit for a few hours or overnight before dipping in chocolate. This allows the flavors to meld beautifully and the cake to absorb the dulce de leche.
Additionally, feel free to experiment with different types of chocolate, such as milk or white chocolate, or even add a sprinkle of sea salt on top of the chocolate coating for an added flavor contrast. Enjoy your homemade treats!
Nutty Pao De Mel With Walnuts and Almonds

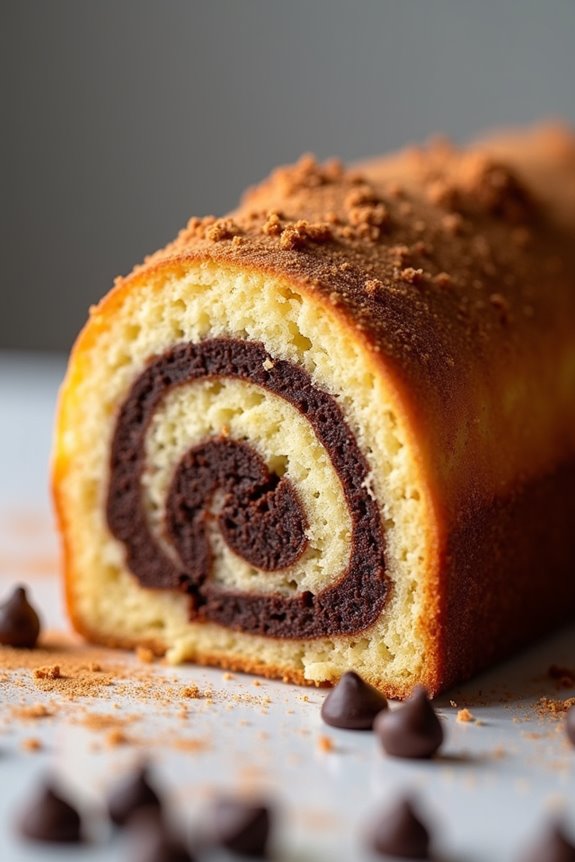
Pao De Mel, or honey bread, is a delightful Brazilian treat that combines the rich flavors of honey, spices, and nuts, creating a moist and fragrant cake. The addition of walnuts and almonds not only enhances the texture but also adds a delightful nutty flavor that pairs beautifully with the sweetness of the honey.
This recipe for Nutty Pao De Mel is perfect for those looking to experience a unique dessert that’s both indulgent and comforting, making it a favorite for gatherings or simply as a treat at home.
To prepare this scrumptious Nutty Pao De Mel, you’ll need a variety of ingredients that contribute to its rich flavor profile. The process involves mixing the dry ingredients, combining them with the wet ones, and finally folding in the nuts to create a deliciously moist cake.
Whether you’re serving it at a special occasion or enjoying it with a cup of tea, this recipe is sure to impress your guests and satisfy your sweet tooth.
Ingredients (Serves 4-6):
- 2 cups all-purpose flour
- 1 cup honey
- 1/2 cup milk
- 1/4 cup vegetable oil
- 1/2 cup brown sugar
- 2 teaspoons baking powder
- 1 teaspoon ground cinnamon
- 1/2 teaspoon ground ginger
- 1/2 teaspoon salt
- 1 cup walnuts, chopped
- 1 cup almonds, chopped
- 3 large eggs
Cooking Instructions:
- Preheat the Oven: Begin by preheating your oven to 350°F (175°C). This guarantees that your Pao De Mel bakes evenly and perfectly.
- Prepare the Baking Pan: Grease and flour a 9×5-inch loaf pan. This step is essential to prevent the cake from sticking to the sides once it’s baked.
- Mix Dry Ingredients: In a large mixing bowl, combine the all-purpose flour, baking powder, ground cinnamon, ground ginger, and salt. Whisk them together until well blended to guarantee an even distribution of the leavening agents and spices.
- Combine Wet Ingredients: In another bowl, mix the honey, milk, vegetable oil, brown sugar, and eggs. Whisk the mixture until smooth and the sugar is dissolved. This will create a rich base for your cake.
- Combine Wet and Dry Mixtures: Gradually add the wet mixture to the dry ingredients, stirring gently until just combined. Take care not to over-mix; a few lumps are okay, as this will keep the cake tender.
- Fold in the Nuts: Gently fold in the chopped walnuts and almonds. This adds a delightful crunch and nutty flavor to your Pao De Mel.
- Pour into the Pan: Transfer the batter into the prepared loaf pan, smoothing the top with a spatula to guarantee an even bake.
- Bake: Place the pan in the preheated oven and bake for approximately 40-50 minutes, or until a toothpick inserted in the center comes out clean. Keep an eye on it to avoid over-baking.
- Cool: Once baked, remove the Pao De Mel from the oven and let it cool in the pan for about 10 minutes. Then, turn it out onto a wire rack to cool completely.
- Serve: Slice and serve your Nutty Pao De Mel warm or at room temperature. It pairs wonderfully with a cup of coffee or tea.
Extra Tips:
For an extra layer of flavor, consider adding a pinch of nutmeg or a splash of vanilla extract to your wet ingredients. If you’d like a sweeter touch, you can drizzle some honey over the top before serving.
This cake keeps well for several days when stored in an airtight container, and the flavors tend to deepen, making it even more delicious on the second or third day. Enjoy your baking!
Coconut Pao De Mel
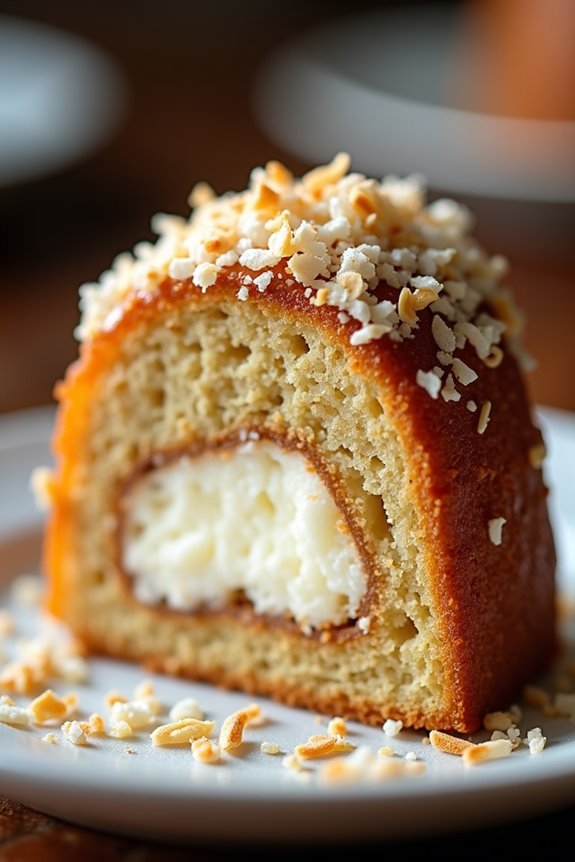
Coconut Pao De Mel is a delightful variation of the traditional Brazilian honey cake. This recipe incorporates the rich and tropical flavor of coconut, making it a perfect treat for those who love the sweetness and creaminess that coconut brings to desserts. The cake is typically layered with a luscious coconut filling and can be enjoyed on its own or with additional toppings such as whipped cream or shredded coconut.
Whether you’re serving it at a special occasion or enjoying it as an afternoon snack, Coconut Pao De Mel is bound to be a crowd-pleaser.
The preparation of Coconut Pao De Mel requires a little patience, but the end result is well worth the effort. The combination of honey, spices, and coconut creates a moist and flavorful cake that’s both satisfying and indulgent.
As you bake and layer the cake, your kitchen will be filled with the inviting scents of cinnamon and honey, making it nearly impossible to resist diving in as soon as it’s ready to serve.
Ingredients (Serves 4-6):
- 2 cups all-purpose flour
- 1 cup honey
- 1 cup coconut milk
- 1/2 cup granulated sugar
- 1/4 cup unsweetened shredded coconut
- 2 large eggs
- 1 teaspoon baking soda
- 1 teaspoon ground cinnamon
- 1/2 teaspoon ground ginger
- 1/4 teaspoon salt
- 1/2 cup unsweetened coconut cream (for filling)
- 1/4 cup shredded coconut (for topping)
Cooking Instructions:
- Preheat the Oven: Start by preheating your oven to 350°F (175°C). This guarantees that the cake will bake evenly and rise properly.
- Prepare the Baking Pan: Grease and flour a 9×13 inch baking pan or line it with parchment paper. This will prevent the cake from sticking and make it easier to remove once baked.
- Mix Dry Ingredients: In a large bowl, whisk together the all-purpose flour, baking soda, ground cinnamon, ground ginger, and salt. This process helps to evenly distribute the leavening agents and spices throughout the flour.
- Combine Wet Ingredients: In a separate bowl, combine the honey, granulated sugar, coconut milk, and eggs. Whisk until the mixture is smooth and well combined, making sure that the sugar starts to dissolve.
- Combine Mixtures: Gradually add the dry ingredients into the wet ingredients, mixing gently until just combined. Be careful not to overmix, as this can lead to a dense cake.
- Add Coconut: Fold in the unsweetened shredded coconut into the batter, making sure it’s evenly distributed throughout.
- Bake the Cake: Pour the batter into the prepared baking pan and smooth the top with a spatula. Bake in the preheated oven for 30-35 minutes or until a toothpick inserted into the center comes out clean.
- Cool the Cake: Once baked, remove the cake from the oven and let it cool in the pan for about 10 minutes. Then, transfer it to a wire rack to cool completely.
- Prepare the Filling: While the cake is cooling, mix the coconut cream with a little sugar if desired for sweetness. This will be used as the filling between the layers of the cake.
- Layer the Cake: Once the cake is completely cooled, cut it in half horizontally, creating two layers. Spread the coconut cream filling evenly on the bottom layer before placing the top layer back on.
- Add Topping: Finally, sprinkle shredded coconut on top of the cake for decoration and added flavor.
Extra Tips:
For an extra burst of coconut flavor, consider toasting the shredded coconut before sprinkling it on top of the cake. This will enhance its nuttiness and provide a lovely crunch.
Additionally, feel free to experiment with the spices; you can add a pinch of nutmeg or even a splash of vanilla extract to the cake batter for a unique twist.
If you want to make the cake even more decadent, serve it with whipped cream or a scoop of coconut ice cream on the side!
Spiced Pumpkin Pao De Mel
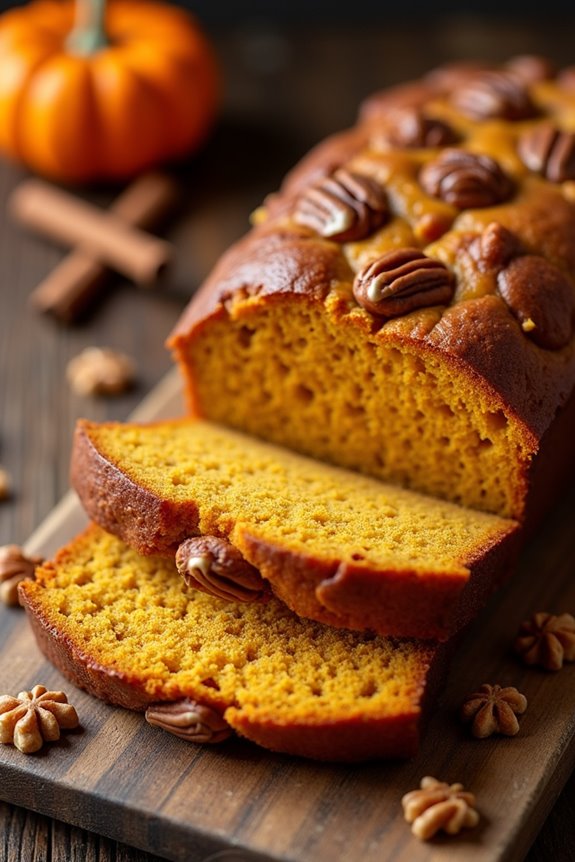
Spiced Pumpkin Pao De Mel is a delightful twist on the traditional Brazilian honey cake, incorporating the rich flavors of pumpkin and spices that evoke the warmth of autumn. This cake isn’t only moist and flavorful but also brings a festive touch to any gathering or holiday celebration.
With its layers of spiced pumpkin and honey, this dessert will surely impress your family and friends with its unique taste and appealing presentation. The combination of pumpkin puree, aromatic spices, and honey creates a comforting flavor profile that’s perfect for fall.
Whether enjoyed on its own or paired with a dollop of whipped cream, Spiced Pumpkin Pao De Mel is a must-try recipe that showcases the versatility of pao de mel while adding a seasonal twist. Follow these steps to create a deliciously spiced pumpkin cake that your loved ones will enthusiastically devour.
Ingredients (serving size: 4-6 people)
- 1 cup pumpkin puree
- 1/2 cup honey
- 1/2 cup brown sugar
- 1/2 cup vegetable oil
- 2 large eggs
- 1 1/2 cups all-purpose flour
- 1 teaspoon baking powder
- 1 teaspoon baking soda
- 1 teaspoon ground cinnamon
- 1/2 teaspoon ground nutmeg
- 1/2 teaspoon ground ginger
- 1/4 teaspoon salt
- 1/2 cup chopped walnuts or pecans (optional)
Cooking Instructions
- Preheat the Oven: Start by preheating your oven to 350°F (175°C). This is essential as it guarantees that your cake bakes evenly and rises properly.
- Prepare Baking Pan: Grease and flour a 9-inch round cake pan or line it with parchment paper. This will prevent the cake from sticking and make it easier to remove once baked.
- Mix Wet Ingredients: In a large mixing bowl, combine the pumpkin puree, honey, brown sugar, and vegetable oil. Whisk them together until the mixture is smooth and well-blended. Adding the wet ingredients first helps to create a moist cake.
- Add Eggs: Crack the eggs into the mixture and whisk until fully incorporated. Eggs provide structure and moisture to the cake, enhancing its texture.
- Combine Dry Ingredients: In a separate bowl, sift together the flour, baking powder, baking soda, cinnamon, nutmeg, ginger, and salt. Sifting helps to aerate the flour, resulting in a lighter cake.
- Mix Dry and Wet Ingredients: Gradually add the dry ingredient mixture to the wet ingredients, stirring gently until just combined. Be careful not to overmix, as this can lead to a dense cake.
- Fold in Nuts: If you’re using nuts, fold them into the batter at this stage. This adds a delightful crunch and additional flavor to your cake.
- Pour Batter into Pan: Pour the batter into the prepared cake pan, smoothing the top with a spatula for an even bake.
- Bake: Place the cake in the preheated oven and bake for 30-35 minutes, or until a toothpick inserted into the center comes out clean. Keep an eye on it to avoid overbaking.
- Cool and Serve: Once baked, allow the cake to cool in the pan for about 10 minutes before transferring it to a wire rack to cool completely. Serve it plain or with whipped cream for an extra treat.
Extra Tips
To enhance the flavor of your Spiced Pumpkin Pao De Mel, consider adding a splash of vanilla extract to the wet ingredients for a richer taste.
You can also experiment with the spices by adjusting the quantities or adding others like allspice or cloves for a more complex flavor profile. For an additional festive touch, consider drizzling a simple glaze made from powdered sugar and milk over the cooled cake before serving. Enjoy your baking!
Pao De Mel With Dulce De Leche Filling
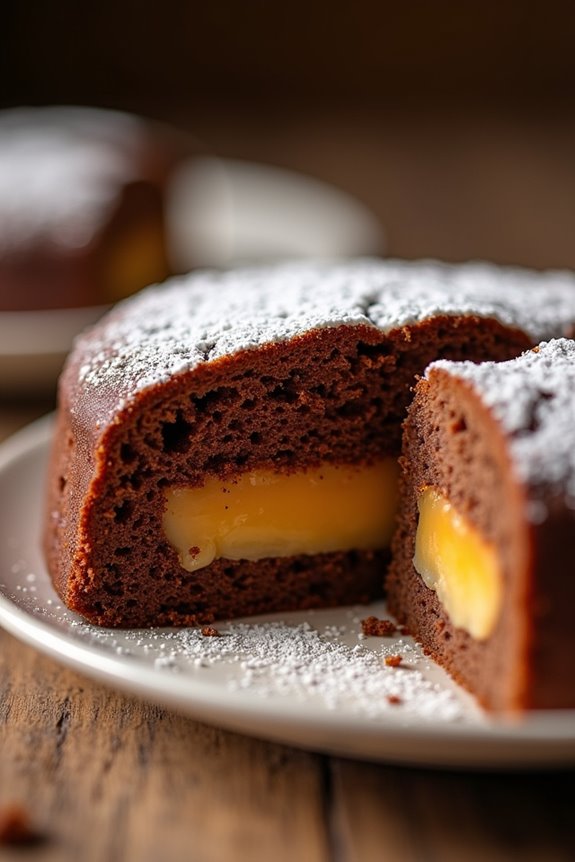
Pao De Mel, or “honey bread,” is a traditional Brazilian treat that combines the flavors of honey and spices. This delicious cake is typically layered or filled with various sweet fillings, and one of the most beloved variations is the Pao De Mel with Dulce De Leche filling. The rich, creamy dulce de leche adds a luscious sweetness that perfectly complements the spiced cake, making it a delightful dessert for any occasion.
Whether you’re celebrating a special event or simply indulging in a sweet craving, this recipe will guide you through creating this delectable treat.
Making Pao De Mel with Dulce De Leche filling is an enjoyable process that will fill your kitchen with warm, inviting aromas. The combination of honey, cocoa, and spices creates a moist and flavorful cake, while the velvety dulce de leche filling takes it to another level of indulgence. This recipe yields approximately 4-6 servings, making it perfect for sharing with friends and family or enjoying as a sweet treat throughout the week.
Ingredients (Serves 4-6):
- 2 cups all-purpose flour
- 1 cup sugar
- 1/2 cup honey
- 1/2 cup milk
- 1/2 cup unsweetened cocoa powder
- 1/4 cup unsalted butter, melted
- 1 tablespoon baking powder
- 1 teaspoon ground cinnamon
- 1/2 teaspoon ground ginger
- 1/4 teaspoon ground cloves
- 1/4 teaspoon salt
- 1 cup dulce de leche (store-bought or homemade)
- Optional: powdered sugar for dusting
Cooking Instructions:
- Preheat the Oven: Begin by preheating your oven to 350°F (175°C). This guarantees that the cake will bake evenly and rise properly once it’s placed in the oven.
- Prepare the Baking Pan: Grease and flour an 8-inch round cake pan (or two 8-inch pans if you prefer layers) to prevent the cake from sticking. You can also line the bottom with parchment paper for easier removal.
- Mix Dry Ingredients: In a large mixing bowl, whisk together the all-purpose flour, sugar, cocoa powder, baking powder, ground cinnamon, ground ginger, ground cloves, and salt until well combined. This step guarantees that the leavening agents and spices are evenly distributed throughout the flour.
- Combine Wet Ingredients: In a separate bowl, mix the honey, milk, and melted butter until smooth. Gradually add the wet ingredients to the dry ingredients, stirring gently until just combined. Be careful not to overmix, as this can lead to a denser cake.
- Bake the Cake: Pour the batter into the prepared baking pan. Bake in the preheated oven for 25-30 minutes, or until a toothpick inserted into the center of the cake comes out clean. Allow the cake to cool in the pan for about 10 minutes before transferring it to a wire rack to cool completely.
- Fill with Dulce De Leche: Once the cake has completely cooled, slice it in half horizontally (if using two layers) or cut it into squares. Spread a generous layer of dulce de leche on one half of the cake, then place the other half on top. If you’ve made a single-layer cake, simply spread the dulce de leche on top.
- Dust with Powdered Sugar: For a finishing touch, you can dust the top of the cake with powdered sugar if desired. This adds an elegant presentation and a hint of sweetness.
Extra Tips:
When making Pao De Mel with Dulce De Leche filling, consider using homemade dulce de leche for an even more authentic and rich flavor. You can easily make it by simmering sweetened condensed milk until it caramelizes.
Additionally, feel free to adjust the spices to your liking; some people enjoy adding a pinch of nutmeg or even a splash of vanilla to enhance the flavor profile.
Store any leftovers in an airtight container to keep the cake moist for several days. Enjoy your delicious creation!
Gingerbread Pao De Mel
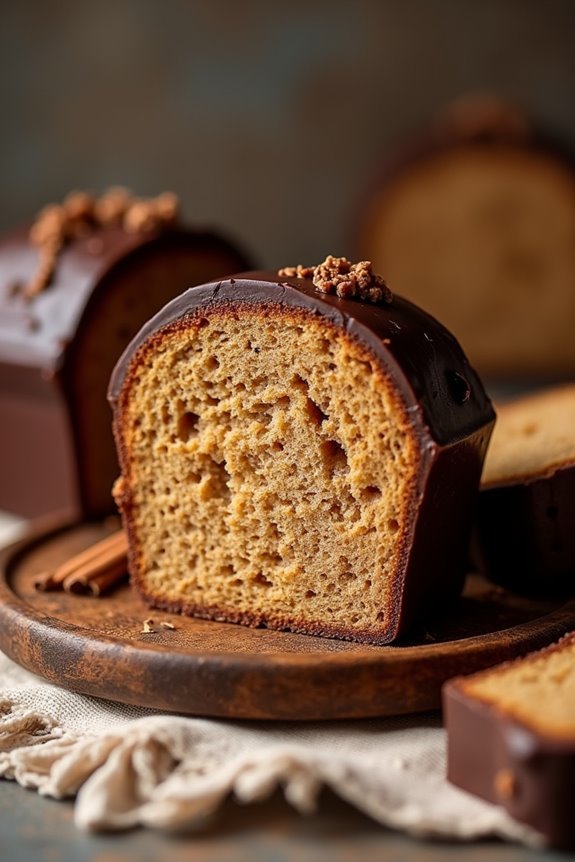
Gingerbread Pao De Mel is a delightful twist on the traditional Brazilian honey cake, infusing the warm spices of gingerbread into a soft, moist treat. This cake, known for its rich flavor and comforting aroma, is perfect for holiday gatherings or cozy afternoons with a cup of tea.
The combination of honey, spices, and a hint of chocolate creates a beautifully layered dessert that’s sure to impress your family and friends.
To make Gingerbread Pao De Mel, you’ll need to prepare the cake and the filling separately, then assemble and coat the layers for a stunning presentation. The result is a cake that not only looks beautiful but also bursts with flavor in every bite. This recipe serves 4-6 people, making it a great option for small gatherings or family celebrations.
Ingredients:
- 2 cups all-purpose flour
- 1 teaspoon baking soda
- 1 tablespoon ground ginger
- 1 tablespoon ground cinnamon
- 1 teaspoon ground cloves
- ½ teaspoon salt
- ½ cup brown sugar
- ½ cup honey
- ½ cup unsalted butter, softened
- 3 large eggs
- 1 cup milk
- 1 cup dark chocolate, melted (for coating)
- 1 cup dulce de leche (for filling)
Cooking Instructions:
- Preheat the Oven: Begin by preheating your oven to 350°F (175°C). This guarantees that the cake bakes evenly and achieves a lovely golden color.
- Prepare the Dry Ingredients: In a large mixing bowl, whisk together the all-purpose flour, baking soda, ground ginger, cinnamon, cloves, and salt. This step is essential as it guarantees that the spices are evenly distributed throughout the cake.
- Cream Butter and Sugar: In another bowl, cream together the softened butter and brown sugar until light and fluffy. This process incorporates air into the mixture, resulting in a lighter cake texture.
- Add Honey and Eggs: Mix in the honey until combined, then add the eggs one at a time, beating well after each addition. This helps to create a rich flavor and a smooth batter.
- Combine Wet and Dry Ingredients: Gradually add the dry ingredient mixture to the wet ingredients, alternating with the milk. Start and end with the dry ingredients, mixing just until combined to avoid overworking the batter.
- Bake the Cake: Pour the batter into a greased 9×5 inch loaf pan. Bake in the preheated oven for 30-35 minutes or until a toothpick inserted into the center comes out clean. Allow the cake to cool in the pan for 10 minutes before transferring it to a wire rack to cool completely.
- Assemble the Cake: Once the cake is completely cool, slice it horizontally into two equal layers. Spread a generous layer of dulce de leche on the bottom layer, then place the top layer back on.
- Coat with Chocolate: Melt the dark chocolate and pour it over the assembled cake, guaranteeing it’s evenly coated. Let it set at room temperature or in the fridge until the chocolate hardens.
- Serve: Slice the Gingerbread Pao De Mel into pieces and serve. Enjoy the rich flavors and moist texture with your favorite beverage.
Extra Tips: For an added touch, consider sprinkling some crushed nuts or a dusting of powdered sugar on top of the finished cake for decoration.
Additionally, you can customize the filling by using flavored jams or creams, depending on your preference. Remember to store any leftovers in an airtight container to keep the cake moist for up to a week.
Matcha Pao De Mel
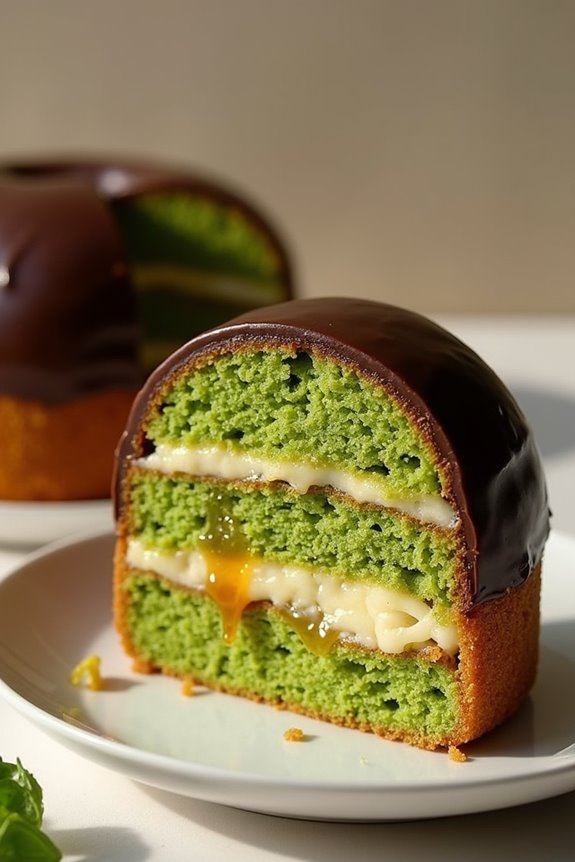
Matcha Pao De Mel is a delightful twist on the traditional Brazilian dessert, Pao De Mel, which translates to “honey bread.” By infusing matcha, a finely ground green tea powder, into the recipe, you not only add a unique flavor but also a vibrant green color that’s visually appealing.
This dessert is perfect for those who love the earthiness of matcha and want to enjoy a sweet treat that’s both satisfying and refined. The combination of matcha and honey creates a harmonious balance of flavors, making it a must-try for both matcha enthusiasts and anyone looking to experiment with traditional recipes.
The preparation of Matcha Pao De Mel involves creating a spiced honey cake that’s layered with a luscious filling, typically made from caramel or chocolate. Each layer is then coated in chocolate, locking in the flavors and adding a rich finish.
This dessert isn’t only great for gatherings but also makes for an impressive homemade gift. So gather your ingredients and let’s get started on crafting this scrumptious treat that will leave your guests asking for seconds!
Ingredients (Serves 4-6):
- 2 cups all-purpose flour
- 1 tablespoon matcha powder
- 1 teaspoon baking powder
- 1 teaspoon baking soda
- 1/2 teaspoon salt
- 1/2 cup unsalted butter, softened
- 1/2 cup brown sugar
- 1/2 cup honey
- 2 large eggs
- 1 teaspoon vanilla extract
- 1/2 cup milk
- 1 cup chocolate chips (for coating)
- 1/2 cup caramel sauce (for filling)
Cooking Instructions:
- Prepare the Oven and Baking Pan: Preheat your oven to 350°F (175°C). Grease and line a rectangular baking pan (about 9×13 inches) with parchment paper to guarantee easy removal of the cake once baked.
- Mix Dry Ingredients: In a mixing bowl, sift together the all-purpose flour, matcha powder, baking powder, baking soda, and salt. This step guarantees that the matcha is well combined and prevents clumping.
- Cream Butter and Sugar: In a separate large mixing bowl, cream the softened butter and brown sugar together until light and fluffy, about 3-5 minutes. This process incorporates air into the mixture, giving your cake a lighter texture.
- Add Wet Ingredients: Beat in the honey, eggs, and vanilla extract to the butter-sugar mixture until well combined. Gradually add the milk, mixing until the batter is smooth and homogenous.
- Combine Mixtures: Gradually fold the dry ingredients into the wet mixture, being careful not to overmix. Mix until just combined; this will guarantee a tender cake.
- Bake the Cake: Pour the batter into the prepared baking pan and spread it evenly. Bake in the preheated oven for 25-30 minutes, or until a toothpick inserted into the center comes out clean.
- Cool and Slice: Once baked, remove the cake from the oven and let it cool in the pan for about 10 minutes. Then, transfer to a wire rack to cool completely. Once cooled, slice the cake into rectangular pieces.
- Assemble the Layers: Take one piece of cake and spread a layer of caramel sauce on top. Place another piece of cake on top to create a sandwich. Repeat this process with the remaining pieces.
- Coat with Chocolate: Melt the chocolate chips in a microwave-safe bowl or using a double boiler. Once melted, dip each layered cake sandwich into the chocolate, ensuring it’s fully coated. Place on a wire rack to allow the chocolate to set.
- Serve and Enjoy: Once the chocolate has hardened, your Matcha Pao De Mel is ready to be enjoyed! Serve as a delightful dessert or snack.
Extra Tips:
When making Matcha Pao De Mel, it’s essential to use high-quality matcha powder for the best flavor and color. Adjust the amount of honey and caramel sauce according to your sweetness preference, as matcha has a naturally earthy taste that can be complemented with varying levels of sweetness.
Additionally, allowing the cake to rest for a few hours or overnight after assembly enhances the flavors, making it even more delicious when served the next day!
Pao De Mel Cake With Cream Cheese Frosting
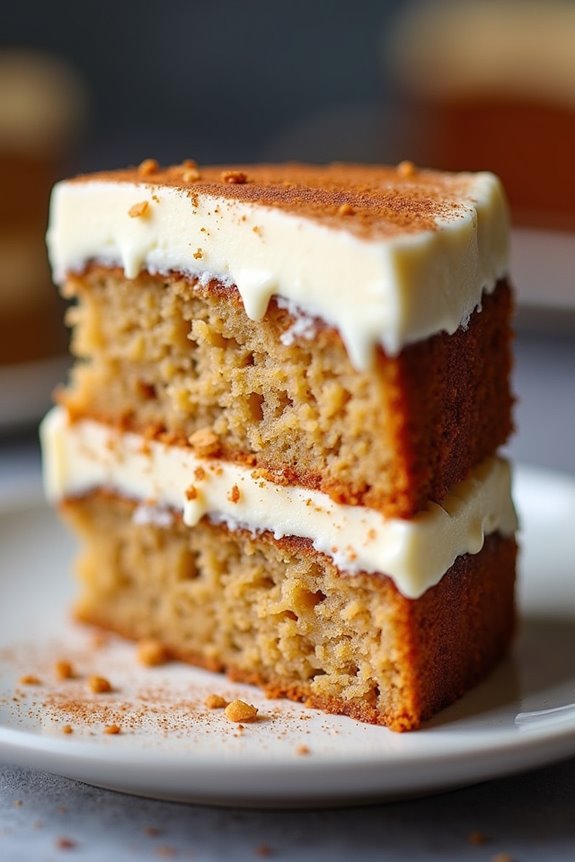
Pao De Mel, or Honey Bread, is a traditional Brazilian dessert that combines a rich, spiced cake with a luscious cream cheese frosting. The cake is known for its moist texture and deep flavors, typically derived from honey, spices, and sometimes even chocolate. This delightful treat is perfect for special occasions or simply as a sweet indulgence. The cream cheese frosting adds a tangy contrast, making each bite a harmonious blend of sweetness and richness.
Making Pao De Mel Cake With Cream Cheese Frosting isn’t only rewarding but also a fantastic way to impress your family and friends. The cake is layered for added depth and flavor, while the frosting gives it a beautiful finish. Once baked, the cake can be enjoyed immediately or allowed to sit for a day, as the flavors develop beautifully over time. Get ready to bake a slice of heaven!
Ingredients (serving size: 4-6 people):
- 1 ½ cups all-purpose flour
- 1 tsp baking powder
- ½ tsp baking soda
- ½ tsp ground cinnamon
- ½ tsp ground ginger
- ¼ tsp ground cloves
- ¼ tsp salt
- ½ cup honey
- ½ cup sugar
- ½ cup milk
- 1 large egg
- ¼ cup unsalted butter, melted
- 1 tsp vanilla extract
Cream Cheese Frosting:
- 8 oz cream cheese, softened
- ½ cup unsalted butter, softened
- 3 cups powdered sugar
- 1 tsp vanilla extract
- 2-3 tbsp milk (as needed for consistency)
Instructions:
- Preheat the Oven: Begin by preheating your oven to 350°F (175°C). This guarantees that your cake will bake evenly and rise properly.
- Prepare the Cake Batter: In a large mixing bowl, sift together the all-purpose flour, baking powder, baking soda, ground cinnamon, ground ginger, ground cloves, and salt. In another bowl, whisk together the honey, sugar, milk, egg, melted butter, and vanilla extract until well combined. Gradually add the wet ingredients to the dry ingredients, mixing until just combined. Be careful not to overmix, as this could lead to a dense cake.
- Bake the Cake: Grease and flour a round cake pan (8 or 9 inches) and pour the batter into the pan. Smooth the top with a spatula to guarantee even baking. Bake in the preheated oven for 25-30 minutes or until a toothpick inserted into the center comes out clean. Once baked, allow the cake to cool in the pan for about 10 minutes before transferring it to a wire rack to cool completely.
- Make the Cream Cheese Frosting: While the cake is cooling, prepare the cream cheese frosting. In a mixing bowl, beat the softened cream cheese and butter together until smooth and creamy. Gradually add the powdered sugar, mixing well after each addition. Finally, add the vanilla extract and mix until combined. If the frosting is too thick, add milk one tablespoon at a time until you reach the desired consistency.
- Frost the Cake: Once the cake has completely cooled, place it on a serving plate. Spread a generous layer of cream cheese frosting on top of the cake, allowing some to drizzle down the sides. For a decorative touch, you can add additional frosting on the sides or sprinkle with a dash of cinnamon.
Extra Tips: To enhance the flavor of your Pao De Mel Cake, consider letting it sit for a day before serving—this allows the spices to meld beautifully. If you want to add a chocolate twist, you can incorporate cocoa powder into the batter or drizzle melted chocolate on top of the frosting. Additionally, feel free to experiment with different spices or add nuts for an extra crunch. Enjoy this delightful dessert with a cup of tea or coffee for the perfect pairing!
Vegan Pao De Mel
Vegan Pao De Mel is a delightful twist on the traditional Brazilian honey cake that’s both plant-based and delicious. This version maintains the rich flavors and moist texture of the classic dish while replacing honey with natural sweeteners suitable for a vegan diet. The cake is infused with spices like cinnamon and ginger, then layered with a creamy filling that complements the cake perfectly.
Whether for a special occasion or simply to satisfy a sweet craving, this Vegan Pao De Mel is bound to impress both vegans and non-vegans alike. The cake is typically served as a dessert but can also be enjoyed as a sweet snack or with a cup of tea. It’s layered with a luscious filling of vegan chocolate or coconut cream, making each bite a heavenly experience.
With simple ingredients and straightforward steps, you can create this delightful treat in the comfort of your own kitchen.
Ingredients (serving size: 4-6 people):
- 1 ½ cups all-purpose flour
- 1 cup brown sugar
- ½ cup almond milk (or any plant-based milk)
- ½ cup maple syrup
- ½ cup coconut oil, melted
- 1 tablespoon baking powder
- 1 teaspoon ground cinnamon
- 1 teaspoon ground ginger
- ½ teaspoon ground nutmeg
- ½ teaspoon salt
- 1 teaspoon vanilla extract
- 1 cup vegan dark chocolate chips (for filling)
- ½ cup coconut cream (for filling)
Cooking Instructions:
- Preheat the Oven: Start by preheating your oven to 350°F (175°C). This guarantees that your cake bakes evenly and rises perfectly.
- Prepare the Baking Pan: Grease and line a round cake pan (9-inch) with parchment paper. This prevents the cake from sticking and makes it easier to remove after baking.
- Mix Dry Ingredients: In a large mixing bowl, combine the all-purpose flour, baking powder, ground cinnamon, ground ginger, ground nutmeg, and salt. Whisk these together until evenly mixed.
- Combine Wet Ingredients: In another bowl, whisk together the almond milk, brown sugar, maple syrup, melted coconut oil, and vanilla extract until smooth and well combined.
- Combine Wet and Dry Mixtures: Gradually pour the wet mixture into the bowl with the dry ingredients. Stir with a wooden spoon or spatula until just combined. Be careful not to overmix, as this can lead to a dense cake.
- Pour into the Pan: Carefully pour the batter into the prepared cake pan, spreading it evenly. Tap the pan gently on the counter to remove any air bubbles.
- Bake the Cake: Place the cake in the preheated oven and bake for 25-30 minutes, or until a toothpick inserted into the center comes out clean.
- Cool the Cake: Once baked, remove the cake from the oven and let it cool in the pan for about 10 minutes. Then, transfer it to a wire rack to cool completely.
- Prepare the Filling: While the cake cools, melt the vegan dark chocolate chips in a microwave or double boiler. Once melted, mix in the coconut cream until smooth and creamy.
- Assemble the Cake: Once the cake is completely cool, slice it horizontally into two layers. Spread the chocolate-coconut filling evenly between the layers and on top of the cake.
- Serve: Slice the assembled cake into wedges and serve. Enjoy your Vegan Pao De Mel with a cup of tea or coffee!
Extra Tips: For added flavor, consider incorporating chopped nuts or dried fruits into the batter for a unique twist. You can also substitute the coconut cream filling with a vegan buttercream for a different taste and texture.
Make sure to store any leftovers in an airtight container in the fridge, where they’ll stay fresh for several days.
Mini Pao De Mel Bites
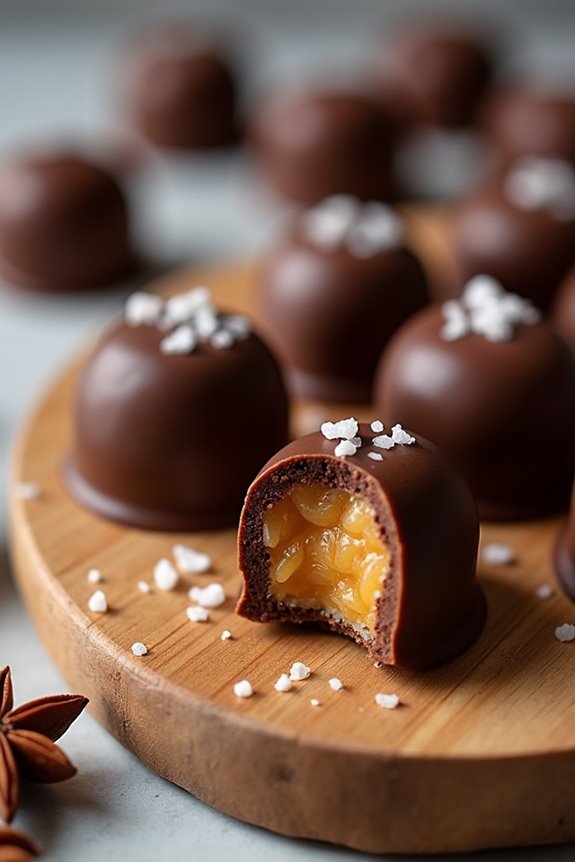
Mini Pao De Mel Bites are a delightful twist on the traditional Brazilian honey cakes. These bite-sized treats are filled with a luscious caramel or chocolate filling and are coated in a rich chocolate glaze, making them perfect for parties or as a sweet snack. The combination of honey, spices, and a creamy filling creates a luxurious flavor profile that will have everyone coming back for more.
They aren’t only visually appealing but also incredibly easy to make, allowing you to impress your guests without spending hours in the kitchen.
In addition to their irresistible taste, Mini Pao De Mel Bites are incredibly versatile. You can customize them with different fillings such as dulce de leche, chocolate ganache, or even fruit jams to suit your taste. This recipe is designed to serve 4-6 people, making it a perfect dessert for small gatherings or family celebrations. Gather your ingredients and let’s get started on creating these delightful mini treats!
Ingredients:
- 1 cup all-purpose flour
- 1/2 cup honey
- 1/4 cup brown sugar
- 1/2 cup milk
- 1/4 cup unsweetened cocoa powder
- 1/2 teaspoon baking powder
- 1/2 teaspoon baking soda
- 1/2 teaspoon ground cinnamon
- 1/4 teaspoon ground ginger
- 1/4 teaspoon ground cloves
- 1/4 cup unsalted butter, softened
- 1/2 cup chocolate (for coating)
- 1/4 cup caramel filling or dulce de leche (for filling)
Cooking Instructions:
- Prepare the Batter: In a large mixing bowl, combine the all-purpose flour, cocoa powder, baking powder, baking soda, cinnamon, ginger, and cloves. Mix thoroughly to guarantee that all dry ingredients are evenly distributed.
- Mix Wet Ingredients: In another bowl, beat together the softened butter, honey, and brown sugar until smooth. Gradually add the milk to the mixture while continuing to mix to create a creamy consistency.
- Combine Wet and Dry Ingredients: Slowly pour the wet mixture into the dry ingredients, stirring gently until just combined. Be careful not to overmix; a few lumps are perfectly fine.
- Bake the Bites: Preheat your oven to 350°F (175°C). Grease a mini muffin pan or line it with mini cupcake liners. Spoon the batter into each cup, filling them about 2/3 full. Bake for 12-15 minutes or until a toothpick inserted into the center comes out clean.
- Cool and Fill: Once baked, allow the mini cakes to cool in the pan for about 5 minutes, then transfer them to a wire rack to cool completely. Once cooled, carefully slice the tops off if they’ve domed, and use a piping bag or small spoon to fill each bite with caramel or dulce de leche.
- Chocolate Coating: Melt the chocolate in a microwave-safe bowl or over a double boiler until smooth. Dip each filled mini cake into the melted chocolate, ensuring it’s fully coated. Place them back on the wire rack to allow the chocolate to set.
Extra Tips: For an extra touch, consider adding a sprinkle of sea salt on top of the chocolate-coated Mini Pao De Mel Bites before the chocolate sets, as it enhances the flavor profile beautifully.
Additionally, you can experiment with different spices or fillings to make these bites uniquely yours. Enjoy these treats fresh or store them in an airtight container for a few days to maintain their softness and flavor.
Pao De Mel Sandwiches With Fruit Jam
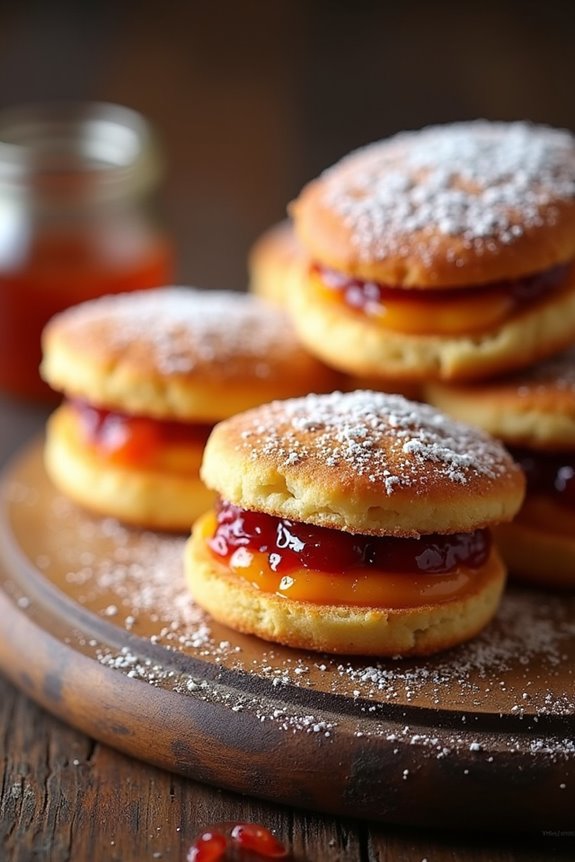
Pao de Mel, a traditional Brazilian treat, translates to “honey bread” and is known for its rich flavors and moist texture. These delightful sandwiches elevate the classic recipe by incorporating fruit jams, which add a burst of sweetness and a fruity twist to the already delicious honey bread.
The combination of soft, spiced cake and the vibrant jam makes for a perfect dessert or snack that can be enjoyed by all ages.
Making Pao de Mel Sandwiches with Fruit Jam is a simple yet rewarding endeavor. This recipe guarantees that you can create a batch of these exquisite sandwiches, perfect for gatherings, parties, or simply enjoying at home. With layers of flavor and texture, your tastebuds are in for a treat!
Ingredients (Serves 4-6 People)
- 2 cups all-purpose flour
- 1 cup honey
- 1/2 cup brown sugar
- 1/2 cup milk
- 1/4 cup unsweetened cocoa powder
- 1/4 cup vegetable oil
- 1 tablespoon baking powder
- 1 teaspoon ground cinnamon
- 1/2 teaspoon ground ginger
- 1/2 teaspoon ground nutmeg
- 1/4 teaspoon salt
- 1 cup fruit jam (such as strawberry, apricot, or mixed berry)
- Powdered sugar (for dusting, optional)
Cooking Instructions
- Preheat the Oven: Begin by preheating your oven to 350°F (175°C). This guarantees that the Pao de Mel bakes evenly and rises properly.
- Prepare the Batter: In a large mixing bowl, combine the honey, brown sugar, and vegetable oil. Whisk together until the mixture is smooth and well combined. Then, add the milk and continue whisking until everything is fully incorporated.
- Mix Dry Ingredients: In a separate bowl, whisk together the all-purpose flour, cocoa powder, baking powder, ground cinnamon, ground ginger, ground nutmeg, and salt. Make sure there are no lumps in the dry ingredients.
- Combine Wet and Dry Ingredients: Gradually add the dry ingredients to the wet mixture, stirring gently until just combined. Be careful not to overmix, as this can result in a denser cake.
- Bake the Cake: Pour the batter into a greased 9×12 inch baking dish or a similar-sized cake pan. Smooth the top with a spatula and place it in the preheated oven. Bake for 25-30 minutes or until a toothpick inserted in the center comes out clean.
- Cool the Cake: Once baked, remove the cake from the oven and let it cool in the pan for about 10 minutes. Then, transfer it to a wire rack to cool completely.
- Slice and Assemble: Once the cake is completely cooled, cut it into squares or rectangles. Spread a generous layer of your chosen fruit jam on one piece of cake, then place another piece on top to create a sandwich. Repeat this process for the remaining pieces.
- Optional Dusting: For an extra touch of sweetness, dust the assembled sandwiches with powdered sugar before serving.
Extra Tips
For the best flavor, let the Pao de Mel sandwiches sit for a few hours or overnight after assembling; this allows the flavors to meld beautifully.
Additionally, feel free to experiment with different types of fruit jams or even homemade versions to suit your palate. If you prefer a more decadent treat, consider adding a layer of whipped cream or mascarpone cheese inside the sandwiches.
Enjoy your Pao de Mel Sandwiches with a cup of tea or coffee for a delightful afternoon treat!