

Isn’t there something just irresistible about the crunchy goodness of Brazilian farofa? This toasted cassava flour has the power to elevate any meal with its delightful texture. From the traditional bacon-infused version to the more adventurous banana farofa, each recipe brings its own unique flair. If you’re eager to add an extra layer of flavor and crunch to your dishes, these 13 farofa recipes are a must-try. Let’s explore the tasty possibilities that will surely inspire your next culinary creation.
Classic Brazilian Farofa

Classic Brazilian Farofa is a beloved side dish that adds a delightful crunch and a rich, nutty flavor to any meal. Traditionally made with toasted cassava flour, this dish often features a variety of ingredients such as onions, garlic, and bacon, which contribute to its savory profile.
Farofa is typically served alongside feijoada, grilled meats, or even just as a topping for rice, making it an essential part of Brazilian cuisine. The beauty of farofa lies in its versatility; it can be customized with different ingredients based on personal preferences or regional variations.
Whether you prefer a simple version with just onions and butter or a heartier recipe with additional vegetables and proteins, farofa is sure to impress your guests and family alike.
Ingredients (serving size: 4-6 people):
- 2 cups cassava flour (farinha de mandioca)
- 4 tablespoons unsalted butter
- 1 medium onion, finely chopped
- 2 cloves garlic, minced
- 4 slices of bacon, diced
- 1/2 cup green onions, chopped
- 1/2 cup cooked peas
- Salt, to taste
- Black pepper, to taste
Cooking Instructions:
- Cook the Bacon: In a large skillet over medium heat, add the diced bacon. Cook until the bacon is crispy and has rendered its fat, about 5-7 minutes. Use a slotted spoon to remove the bacon and set it aside on a paper towel, leaving the rendered fat in the skillet.
- Sauté the Aromatics: In the same skillet with the bacon fat, add the chopped onion and sauté for about 3-4 minutes until it becomes translucent. Add the minced garlic and cook for an additional minute, stirring frequently to prevent burning.
- Toast the Cassava Flour: Gradually add the cassava flour to the skillet, stirring well to combine with the onion and garlic mixture. Toast the flour for about 5-7 minutes, stirring continuously until it turns a light golden brown. This step is vital for developing the farofa’s flavor.
- Combine Ingredients: Once the cassava flour is toasted, add the cooked bacon, chopped green onions, and cooked peas to the skillet. Mix everything together thoroughly, ensuring that the ingredients are evenly distributed throughout the farofa.
- Season and Serve: Season the farofa with salt and black pepper to taste. Remove from heat and transfer to a serving dish. Serve warm as a side dish alongside your favorite Brazilian meals.
Extra Tips:
For an extra dimension of flavor, consider adding chopped hard-boiled eggs, diced bell peppers, or even a handful of raisins for sweetness.
Adjust the ingredients to match your taste preferences, and feel free to experiment with different herbs and spices. Finally, farofa can be made ahead of time and reheated; however, it’s best served fresh for ideal texture and taste. Enjoy your culinary adventure into Brazilian cuisine!
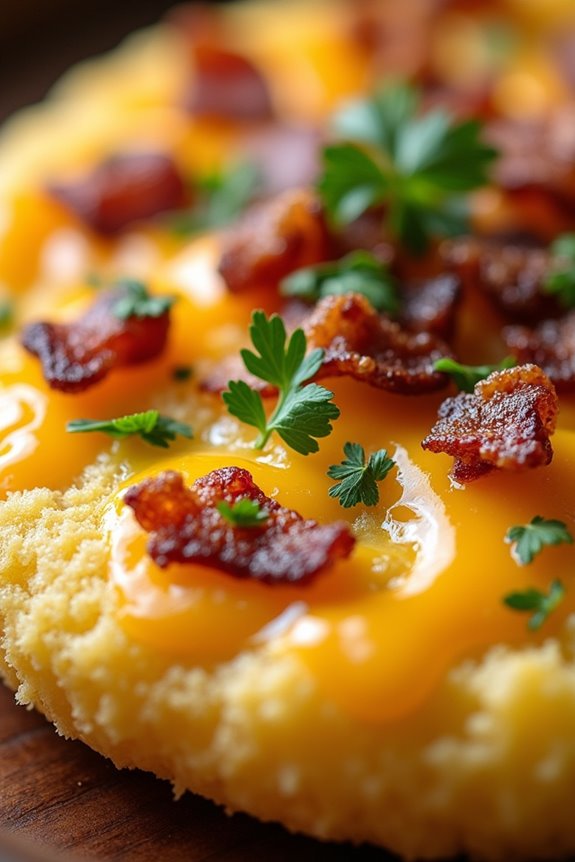
Farofa With Bacon and Eggs
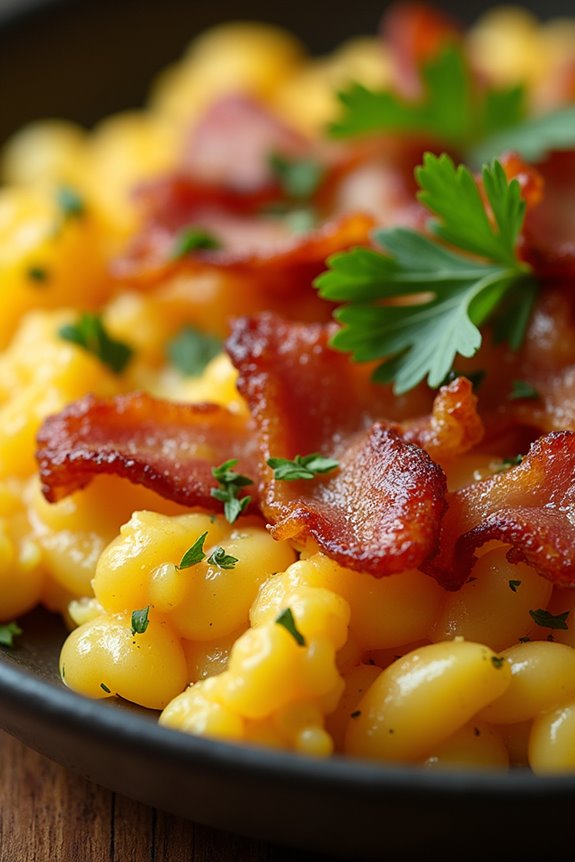
Farofa is a traditional Brazilian side dish made from toasted cassava flour, often served alongside meats, stews, or feijoada. This particular recipe for Farofa With Bacon and Eggs combines the rich flavors of crispy bacon and scrambled eggs, creating a deliciously savory accompaniment that elevates any meal.
The combination of textures and flavors makes it a favorite at family gatherings and festive occasions. In making Farofa With Bacon and Eggs, you’ll experience the delightful aroma of bacon sizzling in the pan, which pairs beautifully with the nuttiness of the toasted cassava flour.
This dish isn’t only versatile but also quick to prepare, making it an ideal choice for both casual weeknight dinners and special celebrations. With just a few simple ingredients, you can whip up a batch that your friends and family will love.
Ingredients (Serving Size: 4-6 people)
- 1 cup cassava flour (farinha de mandioca)
- 4 slices of bacon, chopped
- 3 large eggs, beaten
- 1 small onion, finely chopped
- 2 tablespoons unsalted butter
- Salt and pepper to taste
- Fresh parsley, chopped (for garnish)
Cooking Instructions
- Cook the Bacon: In a large skillet over medium heat, add the chopped bacon. Cook for about 5-7 minutes, stirring occasionally, until the bacon is crispy and the fat has rendered. This step not only provides flavor but also creates a base for the rest of the ingredients.
- Sauté the Onion: Once the bacon is crispy, add the finely chopped onion to the skillet. Sauté for 3-4 minutes until the onion becomes translucent and soft. The onion will absorb some of the bacon fat and add sweetness to the dish.
- Add the Eggs: Push the bacon and onion mixture to one side of the skillet. In the empty space, add the beaten eggs. Scramble the eggs gently, mixing them with the bacon and onion once they begin to set. Cook until the eggs are fully cooked but still soft, about 2-3 minutes.
- Incorporate the Cassava Flour: Lower the heat and sprinkle the cassava flour over the egg, bacon, and onion mixture. Stir well to combine all the ingredients, allowing the flour to toast slightly and absorb the flavors, about 2-3 minutes. Season with salt and pepper to taste during this step.
- Finish and Serve: Remove the skillet from heat. If desired, add the unsalted butter to the mixture for extra richness and stir until melted. Garnish with chopped fresh parsley before serving.
Extra Tips
When making Farofa With Bacon and Eggs, feel free to customize the recipe by adding other ingredients like green peppers, peas, or even grated cheese for extra flavor.
Keep an eye on the heat while toasting the cassava flour; it should be golden and fragrant, not burnt. This dish can also be made ahead of time and reheated, making it a great option for meal prepping or entertaining. Enjoy your farofa alongside grilled meats or as a standalone dish!
Vegetable Farofa
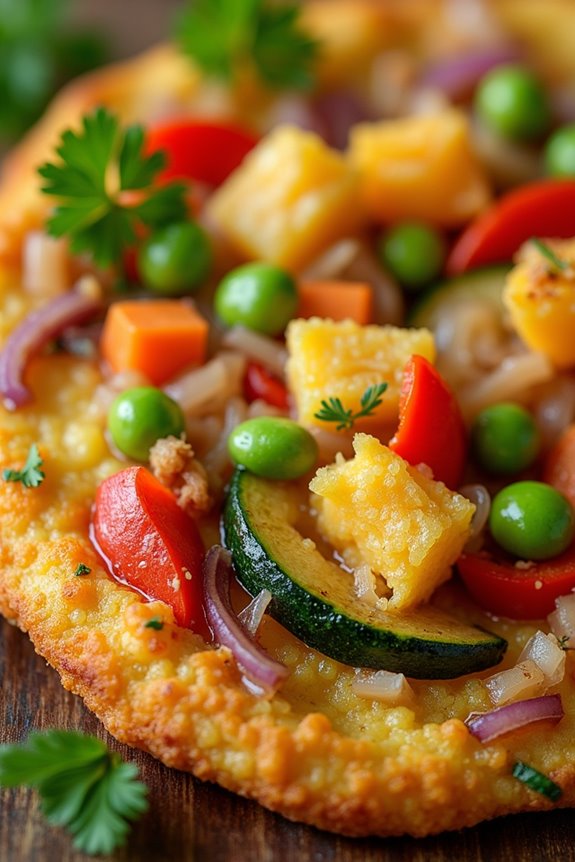
Vegetable Farofa is a delightful Brazilian dish that brings together the crunchy and nutty flavor of toasted cassava flour with a medley of colorful vegetables. This dish serves as a fantastic accompaniment to grilled meats or can be enjoyed on its own as a vegetarian option.
Rich in flavor and texture, Vegetable Farofa can easily be customized to include your favorite seasonal vegetables, making it a versatile and nutritious addition to any meal.
The base of this farofa is the cassava flour, which is toasted to perfection, providing a unique taste and texture that elevates the dish. Adding a variety of vegetables not only enhances the nutritional profile but also adds vibrant colors, making it visually appealing.
Whether you’re hosting a barbecue or simply looking for a comforting side dish, Vegetable Farofa is sure to please every palate.
Ingredients (Serves 4-6):
- 2 cups cassava flour
- 1 medium onion, finely chopped
- 2 cloves garlic, minced
- 1 bell pepper (any color), chopped
- 1 medium carrot, grated
- 1 zucchini, grated
- 1 cup green peas (fresh or frozen)
- 4 tablespoons olive oil or butter
- Salt and pepper to taste
- Fresh parsley or cilantro, chopped (for garnish)
Cooking Instructions:
- Prepare the Vegetables: Begin by washing and chopping your vegetables. Finely chop the onion, garlic, and bell pepper. Grate the carrot and zucchini. This preparation allows the vegetables to cook evenly and enhances their flavors when added to the farofa.
- Sauté the Aromatics: In a large skillet, heat the olive oil or butter over medium heat. Add the chopped onion and garlic, cooking until the onion becomes translucent and fragrant, about 3-5 minutes. This step builds the foundational flavors of the dish.
- Add the Vegetables: Stir in the bell pepper, grated carrot, grated zucchini, and green peas into the skillet. Cook for an additional 5-7 minutes, stirring occasionally, until the vegetables are tender but still vibrant in color. This helps to meld their flavors together while retaining some crunch.
- Toast the Cassava Flour: Push the sautéed vegetables to one side of the skillet and add the cassava flour to the empty side. Toast the flour for about 3-4 minutes, stirring frequently, until it turns a light golden brown. This step is essential as it enhances the nutty flavor of the cassava flour.
- Combine and Season: Once the flour is toasted, mix it in with the sautéed vegetables. Season with salt and pepper to taste. Stir everything together thoroughly, ensuring the flour evenly coats the vegetables. Cook for an additional 2-3 minutes to allow the flavors to blend.
- Garnish and Serve: Remove the skillet from heat and transfer the Vegetable Farofa to a serving dish. Garnish with freshly chopped parsley or cilantro for a pop of color. Serve warm as a side dish or enjoy it on its own.
Extra Tips:
For added flavor, consider incorporating other ingredients such as olives, nuts, or bacon bits if you aren’t strictly vegetarian.
You can also adjust the types of vegetables based on what you have available or in season. Experimenting with different herbs and spices, such as cumin or smoked paprika, can also elevate the taste of your Vegetable Farofa, making it a unique dish every time you prepare it.
Farofa De Banana (Banana Farofa)
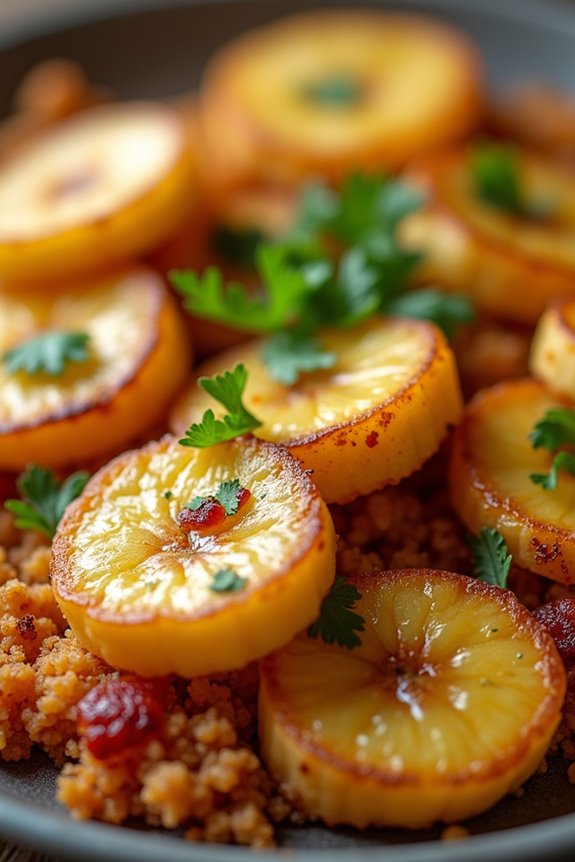
Farofa de Banana is a delightful Brazilian dish that combines the savory flavors of traditional farofa with the sweet and creamy taste of bananas. This unique blend results in a delicious side dish that pairs beautifully with grilled meats, barbecues, or can even be enjoyed on its own.
The use of bananas adds a natural sweetness that balances the nuttiness of the toasted manioc flour, making it a favorite among families and at festive gatherings. The dish isn’t only easy to prepare but also offers a wonderful opportunity to introduce new flavors to your dinner table.
Farofa de Banana is often made as a comfort food, showcasing the versatility of farofa. Whether you’re looking to impress guests or simply enjoy a hearty meal, this recipe will leave everyone asking for seconds.
Ingredients (Serves 4-6):
- 2 large ripe bananas (preferably sweet varieties)
- 2 tablespoons of butter or oil
- 1 small onion, finely chopped
- 2 cloves of garlic, minced
- 1 cup of manioc flour (farinha de mandioca)
- 1/4 cup of chopped fresh parsley
- 1/4 cup of cooked bacon, chopped (optional)
- Salt and pepper to taste
Cooking Instructions:
- Prepare the Ingredients: Start by peeling and slicing the bananas into small rounds. Chop the onion, mince the garlic, and, if using, chop the cooked bacon into small pieces. Having everything prepped will make the cooking process smoother.
- Sauté the Aromatics: In a large skillet, heat the butter or oil over medium heat. Add the chopped onion and sauté until they become translucent, about 3-4 minutes. Stir in the minced garlic and continue to cook for another minute until fragrant.
- Add the Bananas: Gently add the banana slices to the skillet. Cook for about 2-3 minutes, allowing the bananas to caramelize slightly and soften. Be careful not to stir too vigorously as you want to keep the banana slices intact.
- Incorporate Bacon (Optional): If you’re using bacon, add the chopped bacon to the skillet at this point. Stir well to combine and cook for an additional 2 minutes, allowing the flavors to meld together.
- Add Manioc Flour: Gradually sprinkle the manioc flour over the banana mixture, stirring continuously to guarantee even coating. Cook for about 5 minutes, allowing the flour to toast slightly and absorb the flavors. The mixture should be warm, crumbly, and fragrant.
- Season and Garnish: Season the farofa with salt and pepper to taste. Remove from heat and fold in the chopped parsley for a fresh touch. Let it sit for a minute before serving.
Extra Tips:
For an extra layer of flavor, consider adding a pinch of chili flakes for some heat or a squeeze of lime juice for brightness. You can also experiment with different types of nuts or dried fruits for added texture and flavor.
Farofa de Banana can be stored in an airtight container in the refrigerator for up to three days, making it a great make-ahead option for busy days. Enjoy your farofa warm or at room temperature, and don’t hesitate to serve it alongside your favorite dishes!
Farofa With Sausage
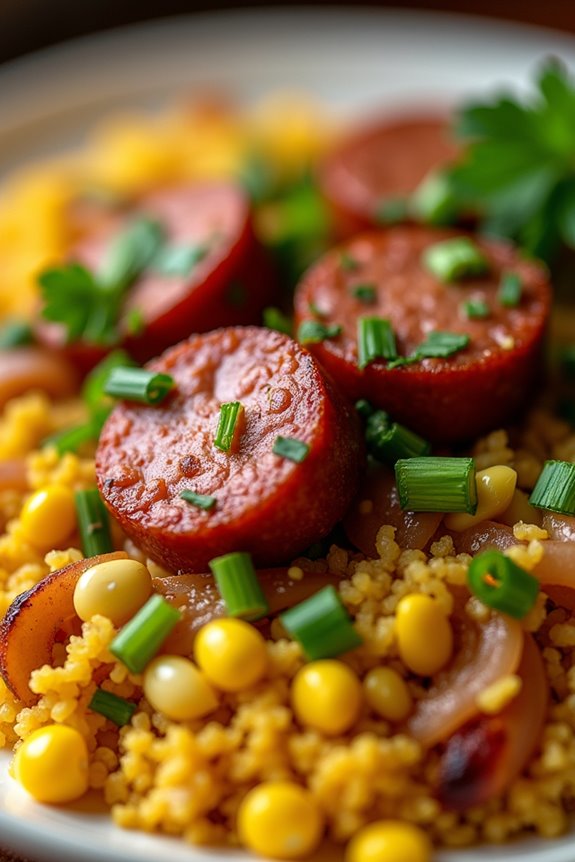
Farofa is a quintessential Brazilian dish that adds a crunchy and savory element to any meal, particularly during festive occasions. This delightful side dish is made primarily from toasted cassava flour and can be customized with various ingredients.
In this recipe, we’ll enhance the traditional farofa with savory sausage, which adds a rich flavor and hearty texture, making it a perfect accompaniment to grilled meats or a main dish on its own.
To prepare Farofa with Sausage, you’ll be combining the nutty flavor of toasted cassava flour with the smokiness of sausage, along with onions, garlic, and a touch of seasoning. This dish isn’t only delicious but also easy to make, allowing you to impress your family and friends with your culinary skills.
Whether you’re celebrating a special occasion or simply want to elevate your weeknight dinner, this farofa recipe is sure to be a hit.
Ingredients (Serves 4-6)
- 2 cups cassava flour (farinha de mandioca)
- 1 tablespoon olive oil
- 1 tablespoon butter
- 1 medium onion, finely chopped
- 2 cloves garlic, minced
- 4 sausages (such as linguiça or chorizo), diced
- 1/2 cup cooked bacon, chopped (optional)
- 1/4 cup green onions, chopped
- 1/2 cup corn kernels (optional)
- Salt and pepper to taste
- Fresh parsley for garnish (optional)
Cooking Instructions
- Prepare the Ingredients: Start by gathering and preparing all your ingredients. Chop the onion, garlic, and sausages, and, if using, chop the bacon. Having everything ready will streamline the cooking process.
- Cook the Sausages: In a large skillet over medium heat, add the olive oil and butter. Once melted, add the diced sausages and cook until browned and cooked through, about 5-7 minutes. Stir occasionally to guarantee even cooking.
- Sauté the Aromatics: Add the chopped onion and minced garlic to the skillet with the sausages. Sauté for about 3-4 minutes until the onion is translucent and fragrant. This will add depth of flavor to the dish.
- Incorporate the Bacon: If you’re using bacon, add the chopped cooked bacon to the skillet at this stage, mixing it well with the sausage and vegetables. Allow it to heat through for another 2 minutes.
- Add the Cassava Flour: Gradually sprinkle the cassava flour into the skillet while continuously stirring. This helps to evenly distribute the flour and prevents clumping. Cook for about 5 minutes, stirring frequently until the flour is toasted and golden brown.
- Season and Add Extras: Season the mixture with salt and pepper to taste. If you’re adding corn kernels, fold them in now, allowing them to heat through for another couple of minutes. Finally, stir in the chopped green onions.
- Garnish and Serve: Remove the skillet from heat. Transfer the farofa to a serving dish and garnish with fresh parsley if desired. Serve warm alongside your favorite proteins or as a standalone dish.
Extra Tips
When making Farofa with Sausage, feel free to customize the recipe based on your preferences. You can add other ingredients such as diced bell peppers, carrots, or even raisins for a touch of sweetness.
Toasting the cassava flour is essential, as it enhances the nutty flavor and texture of the dish. Make sure to keep stirring while cooking to achieve an even toast without burning the flour.
This recipe is versatile and can be adjusted to suit any meal, so don’t hesitate to experiment!
Spicy Farofa With Chili
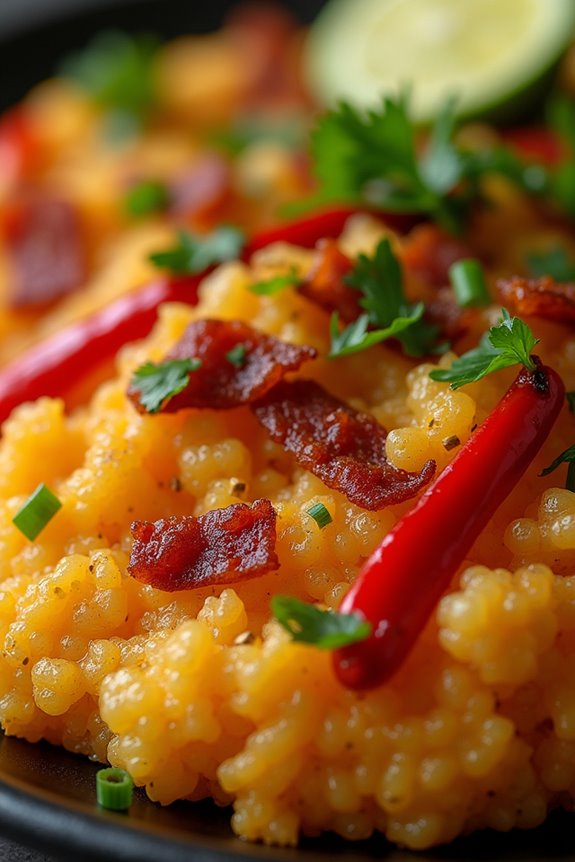
Spicy Farofa with Chili is a vibrant and flavorful Brazilian dish that adds a delicious twist to the traditional farofa. Farofa is a toasted cassava flour mixture that’s commonly served as a side dish in Brazil, often accompanying meats, especially feijoada, or used as a topping for other dishes. The addition of chili not only offers a delightful kick but also enhances the overall texture and taste, making it an excellent choice for those who enjoy a bit of heat in their meals.
This recipe is perfect for gatherings or family dinners, serving 4-6 people. The combination of ingredients creates a crunchy, savory dish that can easily steal the spotlight on your dining table. Whether you’re an experienced cook or a novice in the kitchen, this Spicy Farofa with Chili recipe is simple to follow and certain to impress your guests or family.
Ingredients:
- 2 cups cassava flour
- 4 tablespoons unsalted butter
- 1 medium onion, finely chopped
- 2 cloves garlic, minced
- 1-2 fresh red chili peppers, finely chopped (adjust to taste)
- 1/2 cup cooked bacon, chopped
- 1/4 cup green onions, chopped
- Salt and black pepper to taste
- 1/4 cup chopped parsley (for garnish)
Cooking Instructions:
- Prepare the ingredients: Begin by gathering all your ingredients. Chop the onion, garlic, chili peppers, and bacon beforehand to make the cooking process smoother. Confirm that the bacon is cooked and crispy, as this will add a nice texture to your farofa.
- Sauté the aromatics: In a large skillet, melt the butter over medium heat. Add the chopped onion and sauté until it becomes translucent, about 3-4 minutes. Then, add the minced garlic and chopped chili peppers, cooking for another 1-2 minutes until fragrant. Be careful not to burn the garlic.
- Add the bacon: Stir in the cooked bacon and mix it well with the sautéed onions and garlic. Allow it to cook for an additional 2 minutes, making sure the flavors meld together.
- Incorporate the cassava flour: Gradually add the cassava flour to the skillet, stirring continuously to combine all the ingredients. Cook for about 5-7 minutes, stirring frequently, until the mixture becomes golden brown and toasted. This step is essential to achieving the perfect texture for your farofa.
- Season and finish: Once the farofa is nicely toasted, season it with salt and black pepper to taste. Remove the skillet from the heat and stir in the chopped green onions.
- Serve and garnish: Transfer the Spicy Farofa to a serving dish and garnish with chopped parsley. Serve warm as a side dish alongside your favorite meats or enjoy it on its own.
Extra Tips:
When preparing Spicy Farofa with Chili, feel free to customize the recipe according to your taste preferences. Experiment with different types of chili peppers for varying heat levels, or add other ingredients like diced bell peppers, carrots, or even nuts for added crunch and flavor.
Always toast the cassava flour thoroughly, as this is key to achieving that signature farofa texture. Enjoy the dish fresh, as it can lose some of its crunchiness if stored for too long!
Farofa With Nuts and Dried Fruits
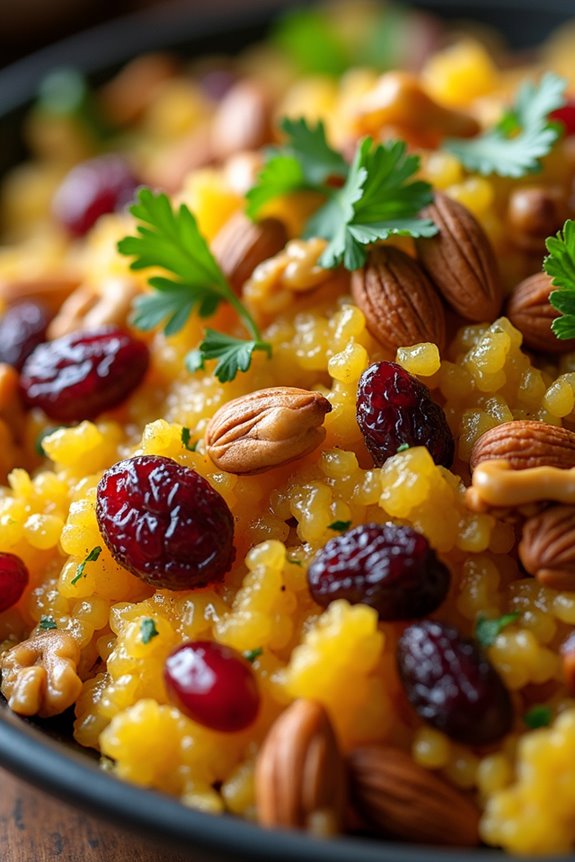
Farofa is a traditional Brazilian dish made from toasted cassava flour, often served as a side dish to accompany meats and feijoada. The combination of textures and flavors in this Farofa with Nuts and Dried Fruits elevates the dish, making it a delightful addition to any meal. The nutty crunch from the mixed nuts combined with the sweetness of dried fruits creates a balanced and delicious contrast that’s guaranteed to please your palate.
This variation of farofa isn’t only easy to make but also allows for personalization based on your preferences. You can experiment with different types of nuts and dried fruits to achieve your desired flavor profile. Whether you’re serving it at a festive gathering or simply enjoying a family dinner, this Farofa with Nuts and Dried Fruits is sure to become a favorite.
Ingredients (Serves 4-6)
- 2 cups cassava flour
- 1/4 cup unsalted butter
- 1 medium onion, finely chopped
- 2 cloves garlic, minced
- 1/2 cup mixed nuts (such as walnuts, almonds, and cashews), roughly chopped
- 1/2 cup dried fruits (such as raisins, cranberries, or apricots), chopped
- 1/4 cup fresh parsley, chopped
- Salt and pepper to taste
Cooking Instructions
- Melt the Butter: In a large skillet, melt the unsalted butter over medium heat. This will serve as the base for your farofa, adding richness and flavor to the dish.
- Sauté Onions and Garlic: Add the finely chopped onion to the skillet and sauté for about 5 minutes, or until it becomes translucent. Then, add the minced garlic and sauté for an additional 1-2 minutes until fragrant. Be careful not to let the garlic brown, as it can become bitter.
- Toast the Cassava Flour: Gradually add the cassava flour to the skillet, stirring continuously to combine it with the onion and garlic mixture. Toast the flour for about 5-7 minutes, or until it turns a light golden brown. This step is essential as it enhances the nutty flavor of the farofa.
- Incorporate Nuts and Dried Fruits: Stir in the chopped mixed nuts and dried fruits into the toasted cassava flour. Cook for another 2-3 minutes, allowing the nuts to warm up and the fruits to soften slightly, which will release their natural sweetness.
- Season and Garnish: Remove the skillet from heat, and fold in the chopped parsley. Season with salt and pepper to taste, mixing well to guarantee the flavors are evenly distributed.
- Serve: Transfer the farofa to a serving dish, and enjoy it warm alongside your favorite meats or as part of a festive meal.
Extra Tips
When preparing Farofa with Nuts and Dried Fruits, feel free to adjust the proportions of nuts and dried fruits based on your taste preferences. You can also add spices such as cumin or paprika for an additional flavor kick.
For a more aromatic touch, consider adding a splash of lime juice or zest before serving. This dish can be made ahead of time and reheated, making it a convenient option for gatherings. Enjoy your culinary adventure with this flavorful Brazilian classic!
Farofa De Cenoura (Carrot Farofa)
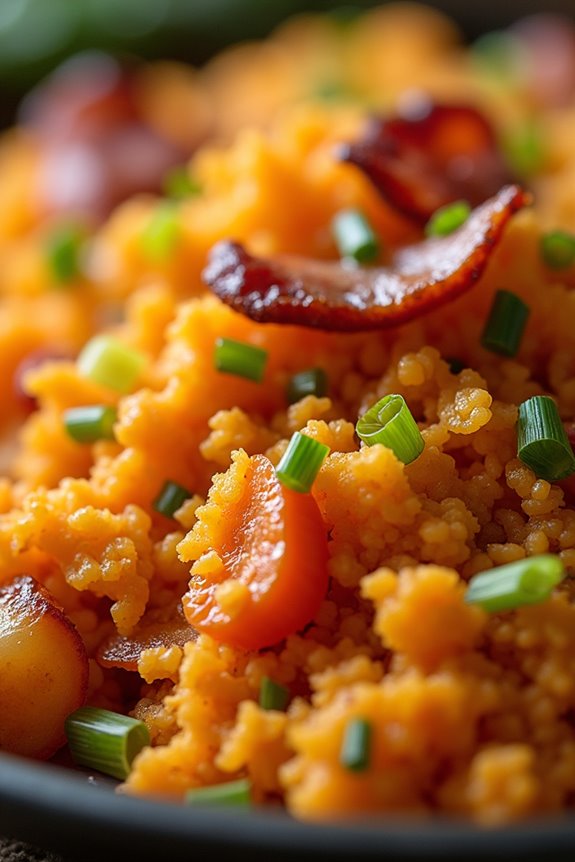
Farofa de Cenoura is a delightful Brazilian dish that combines the rich texture of toasted manioc flour with the natural sweetness of carrots. This dish is often served as a side to accompany various meats, beans, or stews, adding both flavor and crunch to the meal. The vibrant color of the carrots not only enhances the visual appeal of the dish but also contributes a healthy dose of vitamins to your plate.
Making Farofa de Cenoura is a straightforward process, and it can be whipped up quickly, making it a perfect complement to any family gathering or festive occasion. The key to achieving the perfect Farofa lies in the careful toasting of the manioc flour and the balance of flavors from the sautéed onions and carrots.
This dish is versatile and can be customized according to personal tastes by adding ingredients like bacon, olives, or even nuts for extra crunch. With its simple preparation and delicious outcome, Farofa de Cenoura is a must-try for anyone looking to explore Brazilian cuisine.
Ingredients (Serves 4-6):
- 2 cups of manioc flour (farinha de mandioca)
- 2 medium carrots, grated
- 1 medium onion, finely chopped
- 2 tablespoons of olive oil or butter
- 1/2 cup of chopped green onions (scallions)
- Salt, to taste
- Black pepper, to taste
- Optional: 1/2 cup of cooked bacon, chopped (for added flavor)
Cooking Instructions:
- Sauté the Onions: In a large skillet, heat the olive oil or butter over medium heat. Add the finely chopped onion and sauté for about 5 minutes, or until the onions are translucent and slightly golden. This step builds the foundation of flavor for the Farofa.
- Add the Carrots: Once the onions are ready, add the grated carrots to the skillet. Stir well and cook for an additional 5-7 minutes, or until the carrots are tender. This enhances the sweetness and guarantees that the carrots blend well with the onions.
- Incorporate the Manioc Flour: Gradually add the manioc flour to the skillet, stirring constantly to combine it with the sautéed onions and carrots. Cook for about 10 minutes, stirring frequently, until the flour is lightly toasted and golden brown. This step is essential as toasting the flour brings out its nutty flavor and improves the overall texture of the dish.
- Season and Finish: Add salt and black pepper to taste. If using, stir in the chopped green onions and cooked bacon at this point for an extra touch of flavor. Cook for another 2-3 minutes, allowing the ingredients to meld together.
- Serve: Remove from heat and transfer the Farofa de Cenoura to a serving dish. It can be served warm or at room temperature and is best enjoyed alongside your favorite meats or stews.
Extra Tips:
To elevate your Farofa de Cenoura, consider experimenting with additional ingredients like chopped olives, nuts, or dried fruits for a unique twist.
You can also adjust the texture of the Farofa by varying the amount of manioc flour to suit your preference. For a spicier version, feel free to add a pinch of chili powder or finely chopped jalapeños. Remember, Farofa is all about personal taste, so don’t hesitate to get creative!
Farofa With Cheese
Farofa is a beloved Brazilian side dish made primarily from toasted cassava flour, which creates a delightful texture and flavor. When combined with cheese, this dish takes on a rich and creamy dimension that pairs beautifully with grilled meats, stews, or even as a standalone dish. The addition of cheese not only enhances the taste but also contributes a wonderful creaminess that makes farofa even more irresistible.
This Farofa With Cheese is perfect for gatherings or family dinners, providing a comforting and satisfying accompaniment to your meal. It’s simple to make and requires only a handful of ingredients, making it an ideal choice for both novice and experienced cooks. With its savory flavor and delightful crunch, this dish is sure to impress your guests and become a staple in your kitchen.
Ingredients (Serves 4-6):
- 2 cups cassava flour (farinha de mandioca)
- 1 cup grated cheese (such as cheddar, mozzarella, or a Brazilian cheese like queijo coalho)
- 4 tablespoons butter
- 1 medium onion, finely chopped
- 2 cloves garlic, minced
- 1/2 cup cooked bacon, chopped (optional)
- 1/4 cup chopped parsley or cilantro
- Salt and pepper to taste
Cooking Instructions:
- Prepare the Ingredients: Start by gathering all your ingredients. Chop the onion, mince the garlic, and if you’re using bacon, cook it until crispy and chop it into small pieces. This preparation will guarantee a smooth cooking process.
- Sauté the Aromatics: In a large skillet, melt the butter over medium heat. Once the butter is melted, add the chopped onion and sauté for about 5 minutes or until it becomes translucent. Then add the minced garlic and cook for an additional minute until fragrant, but be careful not to let it brown.
- Add the Bacon (if using): If you’ve decided to include bacon, add the chopped cooked bacon to the skillet now. Stir it in and let it cook for another minute to combine the flavors.
- Incorporate the Cassava Flour: Gradually add the cassava flour to the skillet, stirring continuously to mix it well with the onion, garlic, and bacon. Toast the flour for about 5-7 minutes, stirring frequently, until it turns a light golden color and has a nutty aroma.
- Add the Cheese: Once the cassava flour is toasted, reduce the heat to low and mix in the grated cheese. Stir well until the cheese melts and is evenly distributed throughout the farofa.
- Season and Garnish: Season the farofa with salt and pepper to taste. Finally, remove it from heat and stir in the chopped parsley or cilantro for a fresh flavor boost.
- Serve: Transfer the farofa to a serving dish and enjoy it warm, either as a side or as a main dish.
Extra Tips:
When making Farofa With Cheese, feel free to customize the dish by adding other ingredients such as diced bell peppers, peas, or even nuts for added texture.
Experimenting with different types of cheese can also yield delightful variations in flavor. Keep an eye on the cassava flour while toasting to prevent burning, and adjust the level of seasoning according to your taste preferences.
This dish can be made ahead of time; simply reheat it before serving for the best results.
Farofa With Shrimp
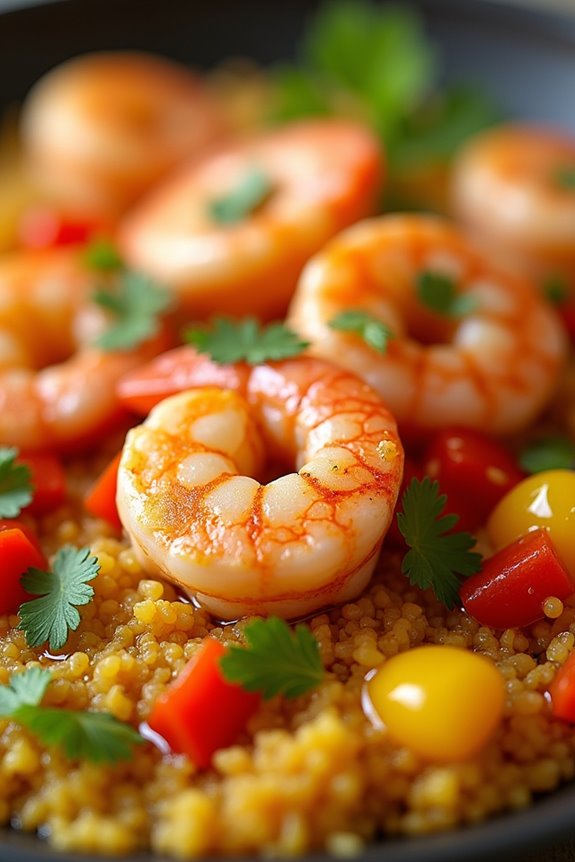
Farofa, a traditional Brazilian dish made from toasted cassava flour, is versatile and can be paired with various ingredients. Among its many delightful variations, Farofa with Shrimp stands out as a deliciously savory option, perfect for elevating any meal. The combination of crunchy farofa and succulent shrimp creates a dish that isn’t only flavorful but also has a wonderful texture.
This dish is often served as a side, complementing grilled meats, roasted chicken, or even as a topping for rice and beans.
In this recipe, the shrimp are sautéed with aromatic ingredients such as garlic and onions, which infuse the dish with rich flavors. The addition of fresh herbs and a touch of lime juice adds brightness, while the toasted cassava flour brings everything together into a delightful mixture. Whether you’re preparing a festive gathering or a cozy dinner at home, this Farofa with Shrimp is sure to impress your guests and family alike!
Ingredients (Serves 4-6):
- 1 cup cassava flour (farinha de mandioca)
- 1 lb (450g) shrimp, peeled and deveined
- 2 tablespoons olive oil
- 1 medium onion, finely chopped
- 3 cloves garlic, minced
- 1 bell pepper (red or yellow), diced
- 2 tablespoons fresh parsley, chopped
- 1 tablespoon fresh cilantro, chopped
- 1 lime, juiced
- Salt and pepper to taste
- 1/2 teaspoon paprika (optional)
- 1/4 cup bacon bits (optional, for added flavor)
Cooking Instructions:
- Prepare the Shrimp: In a large skillet, heat 1 tablespoon of olive oil over medium heat. Add the peeled and deveined shrimp. Season them with salt, pepper, and paprika (if using). Sauté the shrimp for about 2-3 minutes, or until they turn pink and are cooked through. Remove the shrimp from the skillet and set them aside.
- Sauté Aromatics: In the same skillet, add the remaining tablespoon of olive oil. Add the chopped onion and diced bell pepper. Cook for about 4-5 minutes, stirring occasionally, until the onion becomes translucent and soft.
- Add Garlic: Once the onions and peppers are cooked, add the minced garlic to the skillet. Sauté for an additional 1-2 minutes, being careful not to burn the garlic.
- Incorporate the Cassava Flour: Gradually add the cassava flour to the skillet, stirring constantly to mix it with the sautéed vegetables. Allow the flour to toast for about 5-7 minutes, until it turns a light golden color and develops a nutty aroma.
- Combine with Shrimp and Herbs: Return the cooked shrimp to the skillet, along with the chopped parsley and cilantro. Drizzle the lime juice over the mixture and stir well to combine all ingredients. Taste and adjust seasoning with additional salt and pepper, if needed.
- Finish and Serve: Once everything is thoroughly mixed and heated through, remove the skillet from the heat. Transfer the Farofa with Shrimp to a serving dish and garnish with additional herbs if desired. Serve warm as a side or topping.
Extra Tips:
For an extra layer of flavor, consider adding crispy bacon bits to the dish after sautéing the aromatics. This addition not only enhances the taste but also provides a delightful crunch.
Additionally, you can customize your farofa by incorporating other ingredients like diced tomatoes, green onions, or even spices such as cumin for a unique twist. Enjoy experimenting with different flavors to make this dish your own!
Farofa De Milho (Corn Farofa)
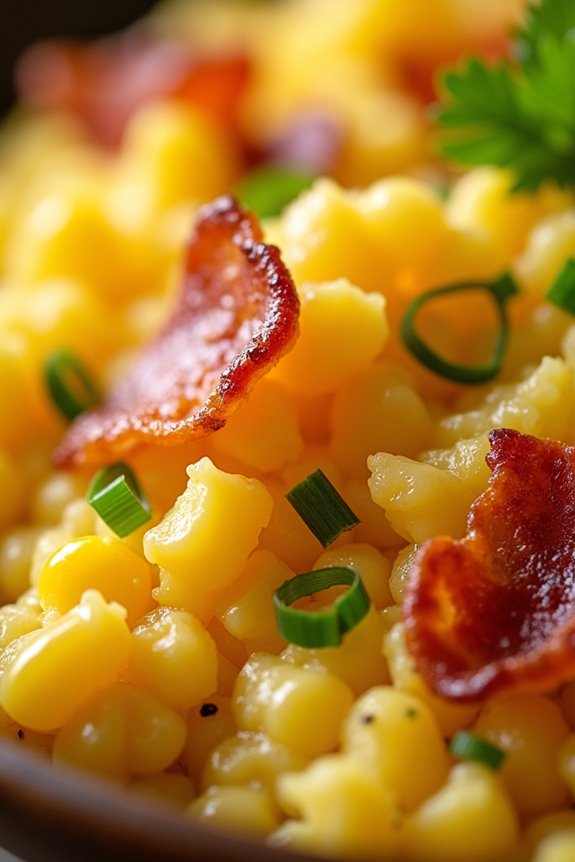
Farofa De Milho, or Corn Farofa, is a delightful Brazilian dish that brings together the nutty flavor of toasted manioc flour with the sweetness of corn. This traditional side dish is commonly served with grilled meats, stews, and even barbecues, making it a versatile accompaniment in Brazilian cuisine.
The combination of textures—crunchy, crumbly, and slightly creamy—makes it a favorite among many. Often, Farofa De Milho is enriched with ingredients like eggs, onions, and spices, creating a robust flavor profile that complements any meal.
Making Farofa De Milho isn’t only simple but also allows for creativity in the kitchen. While the base recipe calls for corn and manioc flour, you can add other ingredients like bacon or vegetables to elevate the dish further.
The process involves toasting the flour to develop its flavor, and the result is a warm, comforting dish that perfectly balances the richness of your main course. Whether you’re hosting a gathering or enjoying a family meal, this dish is sure to impress everyone at the table.
Ingredients (serving size: 4-6 people):
- 2 cups cornmeal (or manioc flour)
- 1 cup corn kernels (fresh, frozen, or canned)
- 4 tablespoons unsalted butter
- 1 medium onion, finely chopped
- 2 cloves garlic, minced
- 2 large eggs, beaten
- 1/2 cup cooked bacon, chopped (optional)
- 1/4 cup green onions, chopped
- Salt and pepper to taste
- Fresh parsley for garnish (optional)
Cooking Instructions:
- Prepare the Ingredients: Start by gathering all your ingredients. If using fresh corn, cut the kernels off the cob. For frozen corn, verify it’s thawed. If you opted for bacon, chop it into small pieces. This preparation will make the cooking process smoother.
- Cook the Bacon (if using): In a large skillet over medium heat, add the bacon pieces. Cook until they’re crispy and golden brown. This will render some fat, which adds flavor to the dish. Remove the bacon from the skillet and set it aside, leaving the fat in the pan.
- Sauté Onion and Garlic: In the same skillet with the bacon fat, add the chopped onion and sauté for about 3-4 minutes until they become translucent. Then, add the minced garlic and cook for an additional minute, making sure not to let it burn, as burnt garlic can become bitter.
- Add Corn and Eggs: Stir in the corn kernels and cook for another 2-3 minutes until they’re heated through. Next, pour in the beaten eggs, stirring continuously until they’re scrambled and cooked completely.
- Toast the Cornmeal: Gradually add the cornmeal (or manioc flour) to the skillet, stirring constantly to combine all the ingredients. Continue to cook for about 5-7 minutes, allowing the cornmeal to toast slightly. This step is essential, as it enhances the flavor and texture of the farofa.
- Season and Finish: Once the cornmeal is toasted, return the cooked bacon (if using) to the skillet. Add salt and pepper to taste, and fold in the chopped green onions. Mix everything well, cooking for another minute to incorporate the flavors.
- Serve and Garnish: Transfer the Farofa De Milho to a serving dish. If desired, garnish with fresh parsley for a pop of color. Serve warm alongside your favorite Brazilian dishes.
Extra Tips:
When making Farofa De Milho, feel free to experiment with additional ingredients to suit your taste. You can incorporate diced bell peppers, carrots, or even nuts for added crunch.
Adjust the seasoning to match your preference, and keep an eye on the cornmeal while toasting to prevent it from burning. Farofa can be made ahead of time and reheated, making it a perfect dish for meal prep or entertaining guests. Enjoy the rich flavors and textures of this beloved Brazilian staple!
Farofa With Herbs

Farofa is a traditional Brazilian dish made from toasted cassava flour, often served as a side dish to accompany meats, beans, or rice. It’s versatile and can be customized with various ingredients to enhance its flavor and texture.
In this recipe, we’ll explore a delightful version of farofa that incorporates fresh herbs, adding a fragrant and vibrant touch to this beloved staple. The combination of herbs not only elevates the taste but also brings a burst of color to your plate.
This Farofa with Herbs is perfect for gatherings or family dinners, easily serving 4-6 people. The preparation is straightforward, making it an excellent dish for both novice and experienced cooks. With a blend of savory herbs and the nutty flavor of toasted cassava flour, this farofa will surely become a favorite addition to your culinary repertoire.
Ingredients:
- 2 cups of cassava flour (farinha de mandioca)
- 4 tablespoons of unsalted butter
- 1 medium onion, finely chopped
- 2 cloves of garlic, minced
- 1 cup of cooked bacon, chopped (optional)
- 1 cup of fresh parsley, chopped
- 1/2 cup of fresh chives, chopped
- 1/4 cup of fresh cilantro, chopped
- Salt and pepper, to taste
Cooking Instructions:
- Prepare the Ingredients: Begin by gathering all your ingredients. Chop the onion, garlic, and herbs, and if you’re using bacon, cook it in advance until crispy. This step guarantees that everything is ready for a seamless cooking process.
- Melt the Butter: In a large skillet or frying pan, melt the unsalted butter over medium heat. Allow it to foam slightly, which indicates that it’s hot enough for cooking. This will be the base for sautéing the vegetables and infusing the farofa with flavor.
- Sauté the Vegetables: Add the chopped onion to the pan and sauté for about 3-4 minutes until it becomes translucent. Then, add the minced garlic and cook for another minute until fragrant, being careful not to burn it. This step builds the aromatic foundation of the dish.
- Add Bacon (Optional): If you’re using bacon, add the cooked and chopped bacon to the skillet, stirring to combine it with the onions and garlic. Allow it to heat through for about 2 minutes. The bacon adds a savory crunch that complements the texture of the farofa.
- Incorporate the Cassava Flour: Gradually add the cassava flour to the skillet, stirring constantly to guarantee it’s evenly coated with the butter and mixed with the other ingredients. Toast the flour for about 5-7 minutes, or until it turns golden brown. This step is essential as it enhances the nutty flavor of the farofa.
- Mix in the Herbs: Once the cassava flour is toasted, remove the skillet from heat and stir in the chopped parsley, chives, and cilantro. Season with salt and pepper to taste. The residual heat will wilt the herbs slightly, releasing their aromatic oils and flavors into the dish.
- Serve: Transfer the farofa to a serving dish and enjoy it warm. It pairs wonderfully with grilled meats, beans, or as a topping for rice.
Extra Tips: For an extra layer of flavor, consider adding a squeeze of lemon juice or a sprinkle of citrus zest before serving. This can brighten the dish and enhance the freshness of the herbs.
Additionally, feel free to experiment with other herbs such as basil or thyme, depending on your personal preference. Always taste and adjust the seasoning before serving to guarantee the best flavor.
Sweet Farofa With Coconut
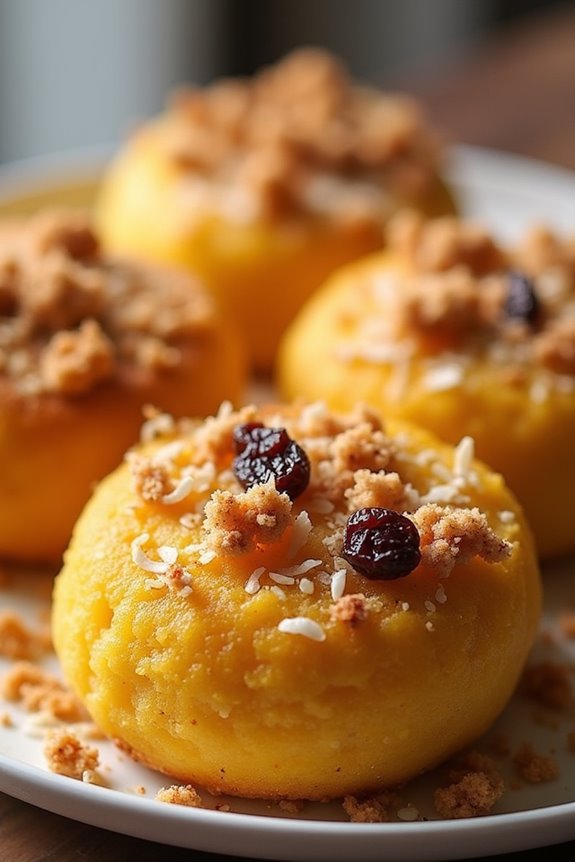
Sweet Farofa With Coconut is a delightful twist on the traditional Brazilian side dish known as farofa. This recipe combines the nuttiness of toasted cassava flour with the natural sweetness of coconut, creating a unique blend of flavors and textures that perfectly complements savory dishes.
Whether served alongside grilled meats, stews, or even as a standalone snack, this sweet farofa is sure to be a crowd-pleaser at any meal.
The preparation of Sweet Farofa With Coconut is quite simple, making it an ideal dish for both experienced cooks and beginners alike. As you toast the cassava flour, the aroma will fill your kitchen, inviting everyone to come and share in the deliciousness.
This recipe serves 4-6 people, making it perfect for family gatherings or friendly get-togethers.
Ingredients
- 2 cups of cassava flour
- 1 cup of shredded coconut (unsweetened)
- 4 tablespoons of unsalted butter
- 1/2 cup of brown sugar
- 1 teaspoon of cinnamon
- 1/2 cup of chopped nuts (such as almonds or walnuts)
- A pinch of salt
- Optional: 1/4 cup of raisins or dried fruits
Cooking Instructions
- Toast the Cassava Flour: In a large skillet, melt the butter over medium heat. Once the butter is melted and bubbling, add the cassava flour. Stir frequently for about 5-7 minutes until the flour is lightly golden and fragrant. This step is vital as it enhances the flavor of the farofa.
- Add Coconut: Once the cassava flour is toasted, add the shredded coconut to the skillet. Continue to cook for another 3-4 minutes, stirring constantly to prevent burning. The coconut will add a chewy texture and a delightful sweetness to the dish.
- Incorporate Sugar and Spices: Sprinkle the brown sugar, cinnamon, and a pinch of salt over the mixture. Stir well to combine all ingredients. Allow it to cook for an additional 2-3 minutes until the sugar dissolves and the mixture becomes slightly caramelized.
- Add Nuts and Optional Ingredients: Gently fold in the chopped nuts and any optional dried fruits like raisins. Cook for another minute, ensuring everything is well distributed and heated through.
- Serve: Remove the farofa from the heat and transfer it to a serving dish. This sweet farofa can be served warm or at room temperature, making it versatile for any meal.
Extra Tips
When preparing Sweet Farofa With Coconut, it’s important to keep an eye on the heat to avoid burning the flour and coconut.
If you prefer a more intense coconut flavor, feel free to use toasted coconut instead of raw. Additionally, feel free to customize the nuts and dried fruits based on your preferences; cashews, walnuts, or even dried apricots could work beautifully.
This dish can be made ahead of time and reheated, making it a convenient option for busy days. Enjoy your sweet and savory creation!